Tips and Tricks

composite deck

How to Clean Composite Decking: The Safe Cleaning Method

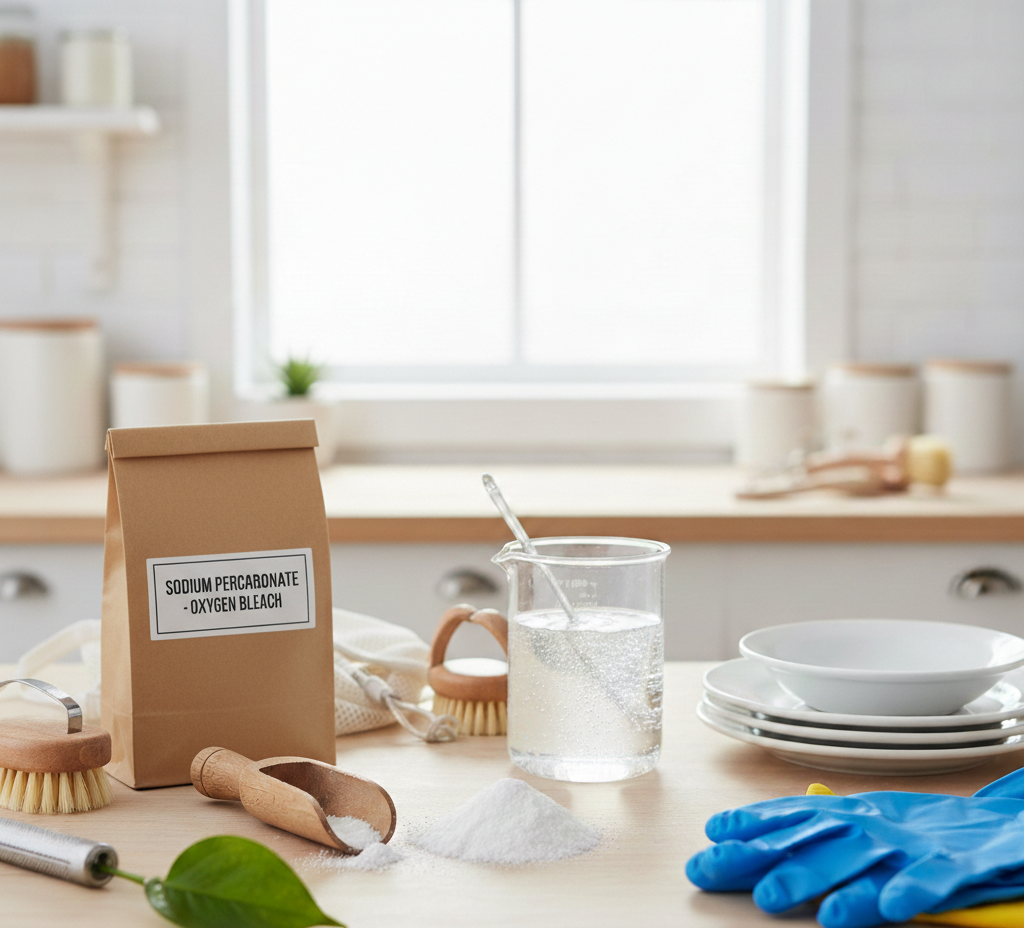
Composite decking has become a dominant force in the world of outdoor living, and for good reason. It offers a compelling alternative to traditional wood, promising a low-maintenance, splinter-free, and rot-resistant surface that withstands the harsh cycles of the seasons. However, the term “low-maintenance” has been widely misinterpreted as “no-maintenance.” While composite decking does not require the annual sanding, staining, and sealing that wood demands, it is far from impervious to the biological and environmental assaults of the outdoors. Dirt, pollen, algae, and grease can all accumulate on its surface, leading to a dull, stained, and sometimes dangerously slippery deck. To preserve the beauty and longevity of this significant investment, homeowners must adopt a cleaning protocol that respects the specific chemistry and structure of the material. Cleaning composite decking is not just about aesthetics; it is about preventing the growth of organic matter that can compromise the surface and create a hygiene issue. What is a Composite Deck? To understand how to clean composite decking effectively, one must first understand what it is. Composite decking is an engineered product, typically made from a mixture of recycled wood fibers (like sawdust) and plastic polymers (like polyethylene). This slurry is heated and extruded into boards. The earliest generations of composite decking were “uncapped,” meaning the wood fibers were exposed to the elements. This made them highly susceptible to staining and mold growth, as the organic wood material served as a food source. Modern, higher-quality composites are “capped,” which means the core of the board is wrapped in a durable, non-porous PVC shell. This cap is the protective layer that resists stains, scratches, and fading. The cleaning method you choose must be aggressive enough to remove the dirt but gentle enough not to damage this critical outer shell. The most common enemy of a composite deck is biological growth. In shaded, damp areas, particularly on north-facing decks or under heavy tree cover, green algae or black mold can form on the surface. This is not just unsightly; it is incredibly slippery when wet, creating a serious fall hazard. The instinct is often to blast this growth away with a pressure washer set to its highest setting. This is a critical error. The intense, focused jet of a pressure washer, especially with a zero-degree nozzle, can etch the plastic cap, permanently scarring the surface and creating a rough texture that will trap dirt even more readily in the future. Furthermore, it can strip away the embossed wood grain pattern that gives the decking its aesthetic appeal. A pressure washer can be used, but it must be used with caution and finesse. The pressure should be set no higher than 1500 PSI, and a fan-tip nozzle must be used to distribute the force over a wider area. Keep the nozzle at least a foot away from the surface and move in the direction of the grain, not against it. However, for most biological growth, a chemical approach is often safer and more effective than pure force. A solution of one part oxygen bleach (sodium percarbonate) to three parts water is an excellent fungicidal cleaner that is safe for composite decking and surrounding plants. Unlike chlorine bleach, which can discolor the composite material, oxygen bleach works by releasing oxygen bubbles that lift the algae and mold from the surface without harsh chemicals. This solution should be applied with a pump sprayer, allowed to dwell for about fifteen minutes, and then gently scrubbed with a soft-bristled deck brush before being rinsed away with a standard garden hose. Susceptible to Everyday Stains 1.Grease Beyond biological growth, composite decks are susceptible to staining from everyday life. Grease from the barbecue is a common offender. When hot grease drips onto the plastic cap, it can cool and solidify, creating a dark, oily spot. To remove a grease stain, you must act quickly. The longer the oil sits, the deeper it penetrates. First, absorb the excess grease with an absorbent material like kitty litter or baking soda. Let it sit for twenty minutes to draw the oil out of the pores of the material. Once the absorbent is swept away, scrub the area with a commercial degreaser or a strong solution of dish soap and hot water. It is crucial to rinse the area thoroughly, as any soap residue left behind will create a slippery film. 2.Tannins Another frequent stain source is tannins from fallen leaves and debris. When leaves sit on a wet deck, they release tannic acid, which can leave behind brown, tea-like stains. These are often immune to soap and water. An oxalic acid-based deck brightener, often sold for wood decks, is effective at removing tannin stains from composite as well. It works by chemically bleaching the organic pigment without harming the plastic. As with any chemical, a spot test in an inconspicuous area is essential to ensure it does not affect the color of your specific decking brand. 3.Rust Rust stains are another common issue, often caused by metal patio furniture, planters with steel bottoms, or stray nails from a construction project. These orange stains are iron oxide and require a specific chemical reaction to remove. Like with tannin stains, an oxalic acid-based cleaner is the most effective solution. The acid reacts with the iron oxide, dissolving it and allowing it to be rinsed away. Scrubbing rust with a standard brush often just smears the orange color over a larger area. Maintenance The general maintenance clean, which should be performed at least twice a year-once in the spring to remove winter grime and once in the fall to remove leaf debris-is a simpler process. For a deck that is not heavily stained, a bucket of warm soapy water and a soft-bristled deck brush are all that is needed. The key is the brush. A stiff brush, while effective on concrete, can dull the finish of the composite cap. A soft brush provides enough friction to dislodge pollen and dirt without abrading the surface. The sweeping motion

How to Clean Composite Decking: The Safe Cleaning Method Read More »

garage

The Garage Swap: How to Organize Your Space for the New Season

Why Your Garage Needs a Seasonal Swap By the end of winter, most garages quietly turn into organized chaos: shovels lean in dusty corners, half-empty salt bags leave a gritty film on the floor, and the snowblower waits for storms that have passed. Spring demands more than a quick tidy; it calls for a strategic reset that turns the garage from a winter service station into a launchpad for the warmer months. The classic swap follows four phases: empty everything out, deep clean the space, sort what you own, and store each season’s gear where it belongs. Phase 1: Empty Out the Garage Completely The most effective, and admittedly most daunting, first step is a total empty-out. On a clear, dry day, pull every tool, bin and bicycle out onto the driveway. It may feel extreme, but it is the only way to get an honest count of what you own and a clear look at the true condition of the garage. An empty room also gives you a blank canvas to re-envision the layout from the ground up. Phase 2: Deep Clean the Salt and Grit Winter leaves behind road salt, gravel and sand that dripped off your vehicle or was tracked in on boots. That grit is not just unsightly; it is abrasive, can slowly damage a concrete floor, and gets tracked inside where it scratches hardwood. Start with a heavy-duty push broom, sweeping from the back wall toward the main garage door; a leaf blower makes short work of that pass. Then hose down the floor with a firm spray, working back to front and pushing the dirty water out onto the driveway, with a large floor squeegee speeding up the job. While the floor dries, knock down cobwebs and wipe down shelves, workbenches and cabinets. If the rest of your home needs the same reset, a professional deep cleaning service can erase winter’s last traces indoors while you work on the garage. Phase 3: Sort Everything Into Keep, Donate or Discard With a clean, empty space behind you, turn to the collection on the driveway and make three zones: keep, donate or sell, and discard. Be practical and honest as you decide: Broken tools beyond repair: get rid of them. Duplicates, such as owning five identical screwdrivers: keep the best two and donate the rest. Old paint cans, expired chemicals and hardware you have not touched in years: dispose of them properly. Anything unused for a full season: sell or donate. Paint, thinners and automotive fluids are hazardous, so check with your local municipality before you toss them. Health Canada explains how to use household chemicals safely, and many communities schedule special collection days for toxic household waste such as paint and car fluids. Cutting down the sheer volume of items is the single most effective way to make the rest of the project manageable. Phase 4: Put Winter Gear Into Deep Storage Winter tools will not be needed for months, so clean them first and relegate them to the least accessible areas. Wipe salt residue off shovels and ice scrapers so it cannot cause corrosion, and do the same for the snowblower to protect its metal and plastic from rust. Finish the season by running the engine until the tank is empty or by adding fuel stabilizer, so the gas cannot gum up the engine over the summer. Store the snowblower in a back corner, and hang long-handled tools on wall hooks or a dedicated rack so they stay off the floor. Finally, pour leftover salt and sand into a heavy-duty bin with an airtight lid so it stays dry, clump-free and ready for the first frost. Phase 5: Organize Spring Gear for Easy Access Now the satisfying part: arrange warm-weather gear by zone and frequency of use. Weekly items such as the lawnmower and primary gardening tools belong in the easiest-to-reach spots, and wall space is your most valuable asset, so get as much as possible off the floor: Spring item Storage method Best location Lawnmower Clear, unobstructed floor spot Close to the garage door Rakes, hoes, shovels Wall-mounted rack Side wall, off the floor Small hand tools Pegboard with hooks Above the workbench Bicycles Vertical hooks, wall rack or ceiling hoist High wall or ceiling Balls and sports gear Open-topped bins and hooks Dedicated recreation zone Patio cushions High, hard-to-reach shelves Out of the way until first use Wall racks keep rakes and hoes visible instead of tangled in a corner, and a pegboard gives trowels and pruners a designated home. Park the lawnmower near the door for easy weekly access, and use this moment for preseason maintenance: sharpen the blade, change the oil and check the spark plug. Bicycles eat floor space fast, so hang them vertically with screw-in hooks, wall-mounted racks or a pulley hoist in high-ceiling garages. Finish with a recreation zone of open bins for balls and hooks for helmets and gloves. Garage Organization FAQ How long does a full garage swap take? Most homeowners finish the four phases in one weekend. The empty-out and deep clean take the better part of a day, while sorting and re-storing usually take another half day once you have made the keep, donate and discard calls. Do I really need to empty the whole garage? Yes, and it is the step people skip most often. Pulling everything onto the driveway forces you to see what you own, makes the floor easy to clean, and lets you plan a layout from a blank canvas. Partial cleanouts tend to rearrange clutter instead of removing it. What should I do with old paint and automotive fluids? Never put them in the regular garbage. Contact your local municipality about hazardous waste drop-off days, or check with nearby retailers that run take-back programs. Store anything you keep in labeled, sealed containers away from heat sources and children. When is the best time to do the garage swap? Aim for a clear, dry weekend in early spring,

The Garage Swap: How to Organize Your Space for the New Season Read More »

Remove Nail Polish from Any Surface

6 Tips How to Remove Nail Polish from Any Surface

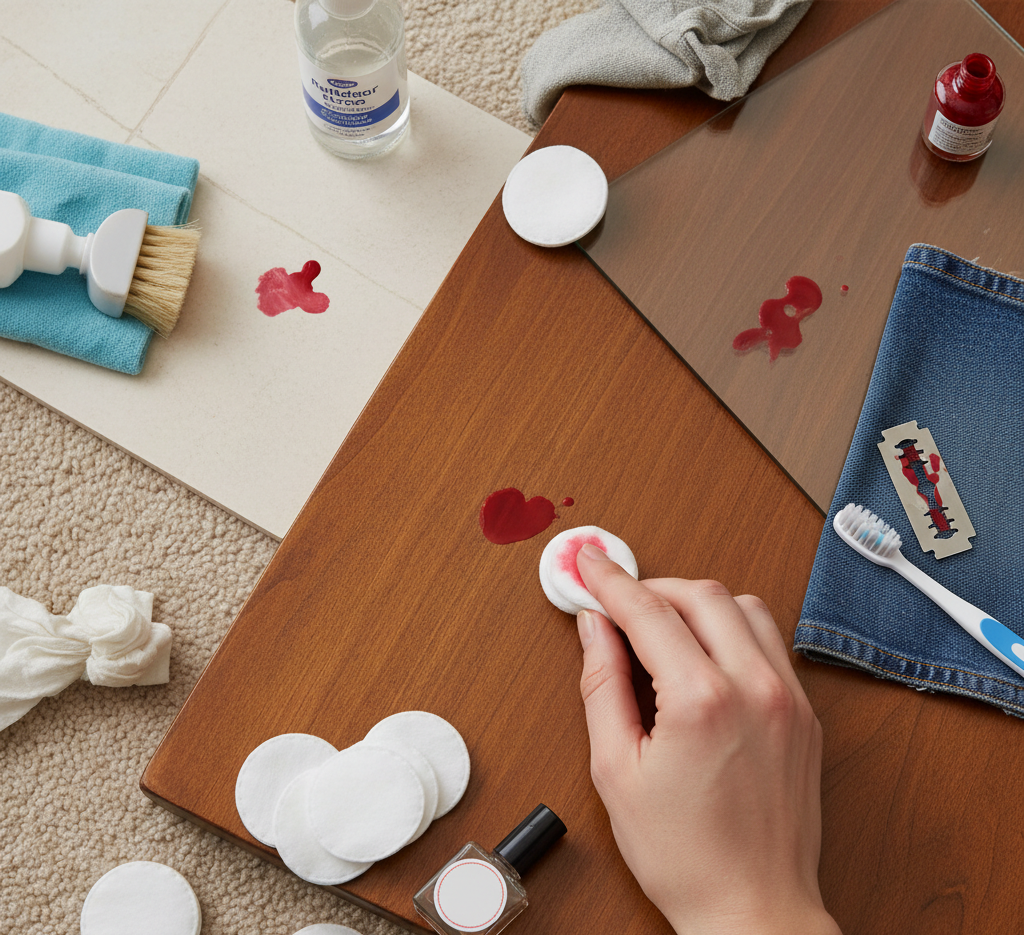
How to Remove Nail Polish Stains Before They Set A spilled bottle of nail polish is a panic moment for good reason: that small bottle holds a durable, intensely pigmented lacquer that becomes a formidable opponent on carpet, wood floors or clothing. Treating the stain is not like handling a food spill; it is a delicate chemical operation. The wrong product or technique can spread the stain, dissolve the surface underneath and turn an accident into permanent damage. These tips cover the safest removal method for every surface in your home. Golden Rules Before You Touch the Stain Whatever the surface, four rules apply before you start: Act fast: wet polish lifts far more easily than dried polish bonded to fibres or finish. Blot, never rub: rubbing smears the spill over a wider area and pushes it deeper into the material. Spot test first: solvents strong enough to dissolve polish can also dissolve dyes and finishes, so test on a hidden hem, closet carpet or the underside of furniture. Ventilate: removers, especially acetone-based ones, give off irritating, flammable fumes, so open a window. Health Canada’s guidance on using household chemicals safely covers storing solvents out of reach, while its page on volatile organic compounds explains why ventilation matters when you work with polish remover. Choose Your Weapon: Acetone or Non-Acetone Nail polish remover comes in two forms, and choosing correctly is half the battle. Acetone dissolves polish fast but destroys many surfaces, including certain plastics, acetate and virtually all wood finishes. Non-acetone removers are gentler and safe for far more materials, though they work more slowly and may struggle with set-in stains. Start with the gentlest product and escalate to acetone only after a successful spot test. The quick-reference table below summarizes the safest approach for each surface: Surface Go-to method Never do this Wood floors and furniture Denatured alcohol or hairspray, dabbing from the edges inward Use acetone or scrape with metal Carpet Non-acetone remover on a white cloth, blotting outside in Pour remover directly on the carpet Upholstery Match the cleaning code tag, blot with solvent on cloth Clean an “X” coded piece yourself Washable clothing Work remover through from the back over paper towels Use acetone on acetate blends Tile, glass and laminate Let polish dry, chip with a plastic scraper, wipe with acetone Scrub the wet spill wider Wood Floors and Furniture: Keep Acetone Far Away On wood, your first instinct must be to keep acetone in the bottle. It strips varnish and polyurethane finishes almost instantly, leaving a permanent cloudy scar that needs professional refinishing. If the polish is wet, gently dab the centre of the spill using a paper towel to soak up the excess without spreading the puddle. For dried polish, skip metal scrapers, which scratch the wood, and reach for a gentler solvent such as denatured alcohol: apply a small amount to a cotton swab and dab from the outside edges inward, and the polish dissolves onto the swab. Aerosol hairspray is a surprising backup: spray lightly, wait 20 to 30 seconds, then wipe with a soft cloth. After any solvent, clean the area with a cloth dampened in mild soap and water, then wipe completely dry. Carpet and Upholstery: Blot, Repeat, Rinse Carpet needs patience. If the spill is wet, scoop up the excess with a spoon or the dull edge of a butter knife, then blot with a dry paper towel. Never pour remover directly on the carpet: it soaks to the backing and can dissolve the latex holding it together. Apply non-acetone remover to a clean white cloth and dab from the outside in, moving to a fresh section of cloth as polish transfers so you never redeposit the stain. If the stain resists, escalate to acetone only after testing a hidden patch for discoloration. Finish by blotting with a cool-water-dampened cloth, cleaning the spot with a few drops of clear, non-bleach dish soap in a cup of water, rinsing again, then weighing down a thick stack of dry paper towels on the spot for several hours to wick moisture from the padding. Upholstery follows the same logic with one extra step: check the furniture’s cleaning code tag first. An “S” means solvent cleaners are safe, “W” or “W/S” means proceed with caution, and “X” means call a professional. For delicate fabrics like silk, suede and velvet, a spill is almost always a job for professional cleaners; the trained team at Toronto Shine Cleaning can treat upholstery safely as part of a deep home cleaning. Clothing, Hard Surfaces and Skin For washable clothing, check the fabric content label first: on acetate or acetate blends, acetone melts the fibres and creates a hole. For other fabrics, lay the stain face down over thick paper towels and dab from the back with a cotton ball soaked in remover, pushing the polish out onto the towels below; shift to a clean section as the stain transfers. Rinse with cool water, launder normally, and confirm every trace is gone before using the dryer, since heat permanently sets any residue. Hard surfaces such as tile, glass and laminate are the easiest case: let the polish dry, chip away the bulk with a plastic scraper or credit card edge, wipe the film with an acetone-soaked cotton ball, then clean with your usual all-purpose cleaner. For polish on skin, remover works best, with rubbing alcohol as a backup. A gentler route for sensitive skin is rubbing the area with olive, coconut or baby oil to loosen the polish, then washing with soap and water. Solvents are extremely drying, so moisturize your hands afterward. Nail Polish Removal FAQ Will nail polish remover ruin wood furniture? Acetone will, almost instantly, by stripping the protective finish and leaving a cloudy scar. Use denatured alcohol or aerosol hairspray on wood instead, dabbing gently, and never scrape with metal tools that can scratch the surface. Can I pour nail polish remover directly on carpet? No. It soaks through to the

6 Tips How to Remove Nail Polish from Any Surface Read More »

hot water for cleaning

A Water Temperature Guide: Never Wash These 7 Things in Hot Water

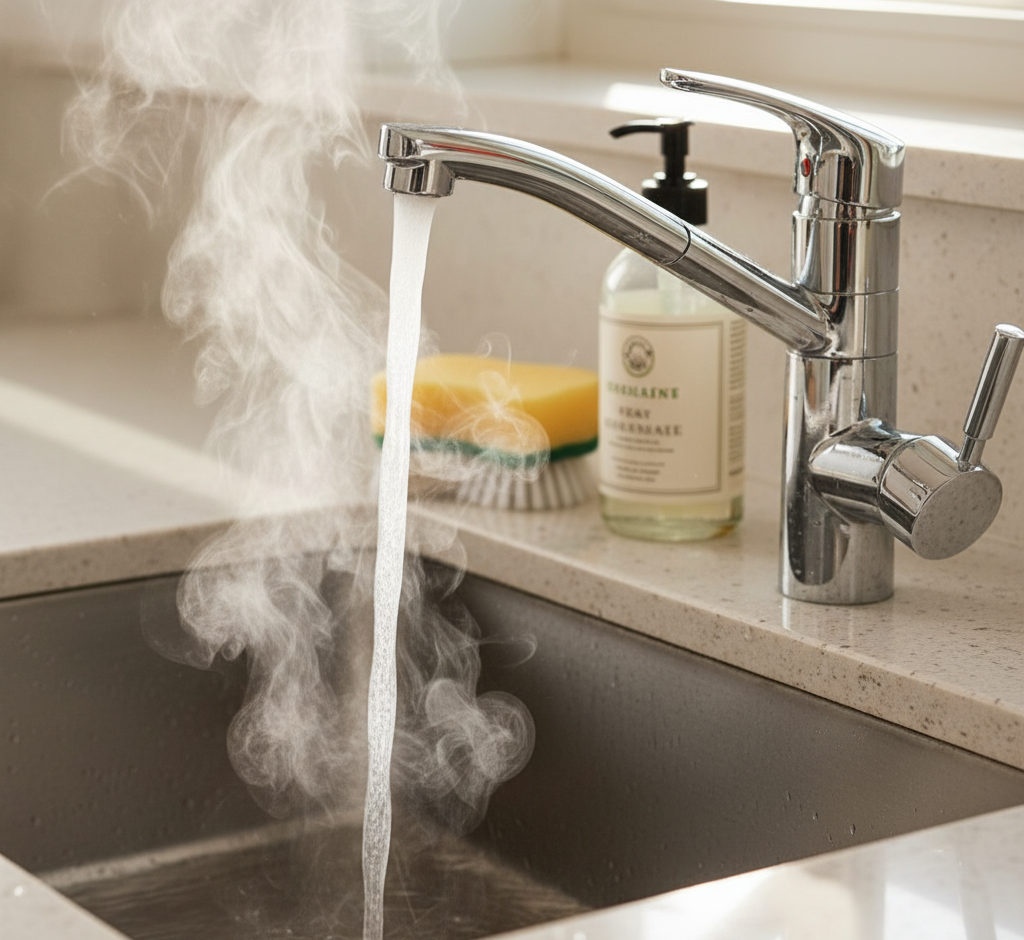
Why Water Temperature Is a Cleaning Superpower and a Hidden Risk Water temperature ranks among the most powerful variables in any cleaning routine, yet in laundry and housecleaning the choice between hot, warm and cold is usually habit rather than science. Hot water dissolves grease, kills bacteria and blasts stubborn grime, but heat is also a destructive force that can lock stains in permanently, shrink delicate fabrics, warp plastics and wreck expensive flooring. The physics is simple: hot water carries more kinetic energy, so its fast-moving molecules break the bonds holding dirt and oil to a surface and speed up detergent chemistry. That same energy destroys materials with weaker structures, which is why knowing what must never touch hot water protects your belongings. When Hot Water Is the Right Call Hot water earns its place in the laundry room for a specific group: heavily soiled whites in durable natural fibres such as cotton and linen. Bed sheets, bath towels, kitchen dishcloths and white undergarments absorb sweat, body oils and food grease, and water at about 60 degrees Celsius (140 degrees Fahrenheit) is what actually melts those heavy organic oils away. That temperature matters for hygiene too. It is the only practical laundry heat that kills dust mites, which thrive in bedding, and neutralizes many common bacteria and viruses, so washing bedding and towels in hot water after an illness helps stop germs spreading through the house. Health Canada’s dust and dust mites guidance explains why regular hot washing of bedding controls them, and the CDC’s advice on when and how to clean and disinfect your home covers laundry hygiene when someone is sick. Never Wash These 7 Things in Hot Water The list of items hot water ruins is long, and most of the damage is irreversible. This table covers the seven most common casualties and what to do instead: Item What hot water does The right approach Wool, cashmere and mohair Opens fibre scales, causing felting and shrinking Cold water, gentle cycle, minimal agitation Silk Dulls the sheen and weakens the threads Hand wash in cold water with a gentle detergent Activewear and anything with spandex Breaks down elastic so garments lose their stretch Cold water, and skip high-heat drying Polyester and nylon brights Opens fibres so dyes escape and colours bleed Cold water keeps dyes locked inside Protein stains (blood, milk, egg, mud) Cooks the proteins, setting them permanently Cold water for pre-treating and washing Hardwood floors Heat and moisture damage the finish and warp boards pH-neutral cleaner, barely damp mop, cool water Laminate floors Softens the glue, making plank edges peel and swell Minimal moisture and cool water only Wool and Silk: Delicate Protein Fibres Wool fibres carry overlapping microscopic scales. In hot water and machine agitation those scales open and interlock, felting the fabric into a dense, stiff shell that nothing can reverse; cashmere and mohair deserve the same cold-water respect. Silk is equally heat-sensitive, so hand wash it in cold water with a specialized gentle detergent to protect its sheen, strength and softness. Stretch Fabrics and Synthetics Elastic fibres such as spandex appear in athletic wear, leggings and sock and underwear waistbands, and heat makes their polymer chains brittle, so garments lose their stretch and wear out early. Polyester and nylon survive heat better but still wrinkle, weaken and build static. More importantly, heat causes colour bleeding by opening the fibres and letting dyes escape into the wash water, so cold water, which keeps fibres closed and colours locked in, is the best strategy for both brights and darks. Protein Stains Need Cold, Oil Stains Love Heat The stain type matters as much as the fabric. Hot water is catastrophic for protein-based stains such as blood, milk, eggs, dairy and mud: heat cooks the proteins and bonds them permanently to the fibres, turning what cold water and soap would lift into a permanent mark. Always pre-treat and wash protein stains in cold water. Oil-based stains are the opposite: grease, butter, cooking oils, heavy lotions and makeup melt in heat so detergent can surround and wash them away, while cold water makes grease solidify and smear. Hot Water Rules Beyond the Laundry Room The same logic carries into the rest of the house. In the kitchen, hot water is a master degreaser for pots, pans and dishes, and dishwashers rely on very hot water to dissolve food residue and sanitize. But a number of kitchen items must never face high heat: Plastics not labelled dishwasher safe, which can warp or leach chemicals like BPA. Fine crystal, which heat can crack. Hand-painted ceramics, whose paint hot water dulls. Wooden cutting boards and utensils, which can swell, warp and split. Floors demand the most caution. Hardwood, solid or engineered, is highly sensitive to moisture and temperature, and hot-water mopping damages the finish while moisture penetrates the boards and makes them swell and buckle. Laminate is even more vulnerable: heat and moisture soften the glue between layers, so plank edges peel. Even luxury vinyl planks can soften under very hot water. For nearly every modern floor type, the safest route is a specialized cleaner and a damp, not wet, mop with cool or lukewarm water. Prefer to leave floor care to the experts? Toronto Shine Cleaning uses the correct products and temperatures on every surface as part of its professional deep cleaning service. Water Temperature FAQ What temperature should I use to sanitize bedding? Water at about 60 degrees Celsius (140 degrees Fahrenheit) is the practical laundry temperature that kills dust mites and neutralizes many common bacteria and viruses. After an illness in the house, wash bedding, towels and pyjamas in the hottest setting the fabric allows. Why does a blood stain set permanently in hot water? Blood is a protein stain, and heat coagulates proteins the way cooking does. The cooked protein binds to the fabric fibres and can never be washed out. Cold water keeps the protein dissolved so detergent can lift it. Can I mop

A Water Temperature Guide: Never Wash These 7 Things in Hot Water Read More »

Cleaning Tea Kettle: 3 Simple Steps to a Perfectly Clean Tea Kettle

The tea kettle is one of the most constant and comforting appliances in the kitchen. Whether it is a sleek electric model on the countertop or a classic stovetop version, its daily task is simple and essential: to bring water to a boil. Yet, this constant exposure to water, especially in areas with hard water, inevitably leads to a persistent and frustrating problem: the buildup of a chalky, crusty residue on the interior. This is limescale, and it is more than just an unsightly film. It can flake off into your cup, affect the taste of your water, and even reduce the kettle’s heating efficiency. Keeping your tea kettle in pristine condition is a matter of both hygiene and performance, a simple process that restores this daily workhorse to its best. Vinegar The most common and most stubborn issue is the interior limescale. These mineral deposits, primarily calcium and magnesium carbonate, are left behind as water evaporates during the boiling process. Over time, they form a hard, layered crust on the heating element and the bottom of the kettle. Attacking this with a scrub brush is an exhausting and often futile effort. The solution is not physical, but chemical, and the most effective tool is a simple, inexpensive household staple: plain white vinegar. The mild acetic acid in vinegar is perfect for dissolving the alkaline mineral deposits. The descaling process is a study in letting chemistry do the work for you. First, ensure the kettle is unplugged or removed from its stovetop burner. Fill the kettle with a solution of equal parts white vinegar and water. You should use enough of the solution to completely submerge all the visible scale, which typically means filling it about halfway to three-quarters full. For an electric kettle, plug it in and bring the solution to a full boil. For a stovetop kettle, place it on the burner and do the same. Once it has boiled, turn off the heat and unplug the kettle. Now, the most crucial step is to let it sit. This is where the principle of dwell time is paramount. The acid needs time to react with and break down the hardened minerals. Let the hot vinegar solution soak in the kettle for at least thirty minutes, but for a kettle with very heavy buildup, letting it sit for several hours, or even overnight, will yield the best results. You will often be able to see the scale fizzing and dissolving. After the soak, pour the solution down the sink. The vast majority of the scale should be gone, revealing the clean metal underneath. Use a long-handled, non-abrasive brush to gently scrub away any remaining softened particles. The final, critical step is to rinse the kettle thoroughly with fresh, clean water several times to remove any lingering vinegar taste or smell. To be absolutely certain, you can boil a full kettle of plain water and discard it before its next use. Citric Acid For those who are sensitive to the strong smell of vinegar, citric acid is an excellent, odorless alternative. This food-safe powder, often found in the canning or baking aisle of the grocery store, is a powerful descaler. The process is very similar. Fill the kettle with water to cover the scale, add one to two tablespoons of citric acid powder, and stir to dissolve. Bring the water to a boil, then unplug the kettle and let the solution sit for twenty to thirty minutes. Pour it out, give it a light scrub if needed, and rinse it thoroughly. The result is a perfectly clean interior with no residual odor. In a pinch, fresh lemon juice can also be used, following the same boil-and-soak method. With the interior restored to its original brilliance, attention can now turn to the exterior, which requires different techniques based on its material. For the vast majority of modern kettles made of stainless steel, the main challenges are fingerprints, water spots, and smudges. For daily cleaning, a soft cloth dampened with warm, soapy water is all that is needed. The key to a perfect, streak-free finish is in the drying. After wiping it clean, immediately buff the entire surface with a completely dry, clean microfiber cloth. Microfiber is exceptional at trapping moisture and oils, leaving the steel gleaming. For more stubborn water spots, you can dampen a cloth with your 50/50 vinegar and water solution, wipe the affected area, and then buff dry. A crucial tip for cleaning stainless steel is to always wipe in the direction of the metal’s grain. Look closely at the surface and you will see fine lines; following these lines will prevent microscopic scratches and ensure a uniform, professional-looking finish. Baking Soda 1.Colored or Enameled For kettles with a colored or enameled exterior, gentleness is key. These surfaces can be scratched by abrasive cleaners. Stick to a soft cloth and mild dish soap. For stubborn, stuck-on grime or grease splatters, you can create a gentle scrubbing paste with baking soda and a little water. Apply the paste to the spot, let it sit for a few minutes, and then gently scrub with a non-scratch sponge before wiping it clean. 2.Glass kettles Glass kettles are beautiful for their transparency, but this also means they show every single water spot and mineral film. The interior can be descaled using the same vinegar method as a metal kettle. For the exterior, treat it as you would a window. A spray of your vinegar and water solution, wiped away with a clean microfiber cloth, will leave the glass crystal clear. 3.Copper kettles Copper kettles require the most specialized care to maintain their fiery luster. Copper naturally tarnishes over time, developing a dull patina. To restore its shine, you can use the classic combination of lemon and salt. The acid in the lemon dissolves the tarnish, while the salt acts as a gentle abrasive. Simply cut a lemon in half, dip it in salt, and scrub the exterior of the kettle. Rinse

Cleaning Tea Kettle: 3 Simple Steps to a Perfectly Clean Tea Kettle Read More »

different types of erasers

Erasers in Cleaning: 7 Genius Tricks for Cleaning Your Home with an Eraser

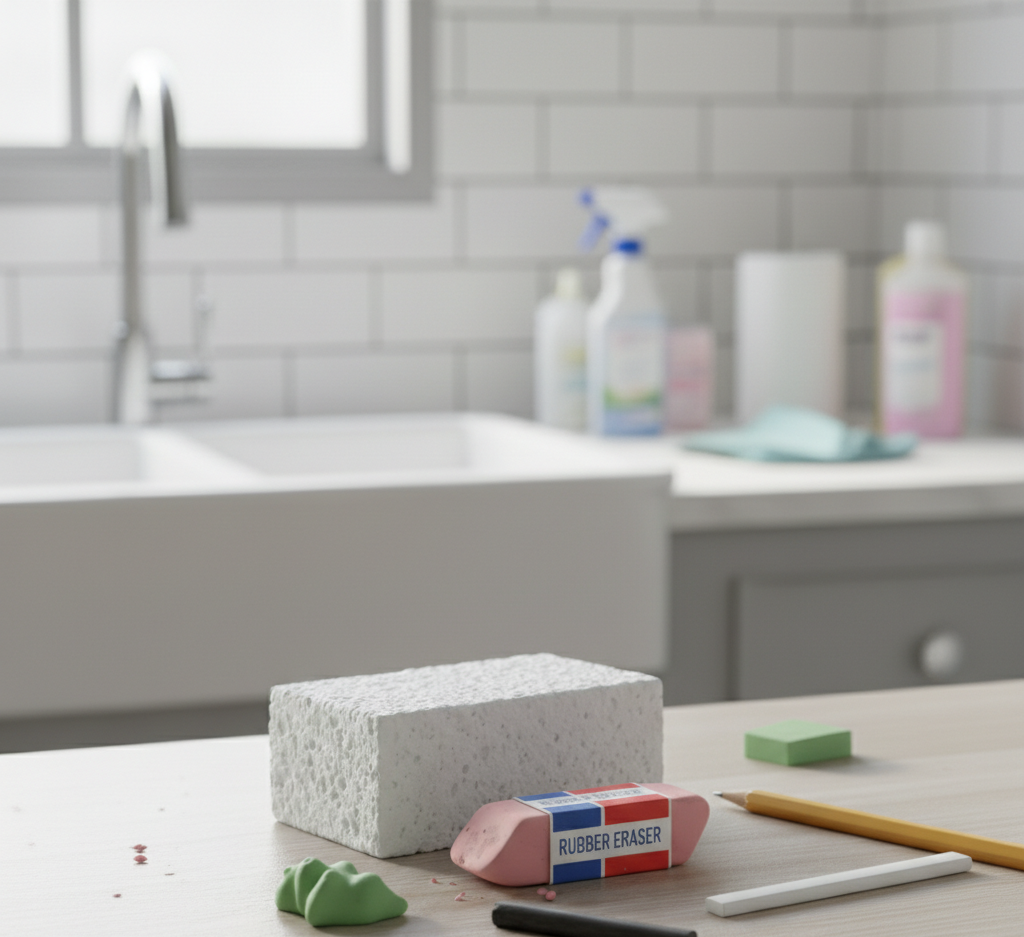
Where does eraser fit into this? In the vast world of cleaning materials, filled with specialized sprays, powerful scrubs, and high-tech gadgets, one of the most effective and precise tools is often overlooked, relegated to the pencil case or a dusty desk drawer: the simple eraser. This humble instrument, designed to lift graphite from paper, possesses a unique set of properties that make it a surprisingly versatile and powerful secret weapon for tackling some of the most frustratingly stubborn messes around the home. The wonder of the eraser lies not in brute force, but in its gentle, targeted friction, allowing for a level of control and precision that larger tools simply cannot match. Melamine Foam Eraser The most famous and transformative of these tools is, of course, the melamine foam eraser, more commonly known by its brand name, the Magic Eraser. While it shares a name and function with its rubber counterparts, it is a completely different entity. A melamine foam eraser is not a chemical cleaner; it is a micro-abrasive. The foam itself is a unique, open-cell structure that, when wet, becomes as hard as glass on a microscopic level. It acts like an incredibly fine-grained sandpaper, gently abrading and lifting away surface-level grime and stains. This is the secret to its seemingly magical ability to remove marks that soaps and sprays cannot touch. Its most celebrated use is on painted walls and baseboards. The inevitable scuff marks from shoes, furniture, and daily traffic can make an otherwise clean room look tired and worn. Instead of resorting to touch-up paint, a dampened melamine foam eraser can lift these marks with astonishing ease. The process is simple: lightly wet the eraser and squeeze out all the excess water. The eraser should be damp, not dripping. Then, with very gentle pressure, rub the scuff mark. The mark will literally disappear as the micro-abrasive action lifts the transferred color from the surface of the paint. It is crucial to use light pressure, as scrubbing too hard can begin to remove the paint finish itself, leaving a burnished or dulled patch, especially on glossy or satin paints. This tool is also a parent’s best friend, capable of removing crayon, pencil, and some types of ink marker from walls with the same gentle rubbing motion. The power of melamine foam extends far beyond walls. In the kitchen, it can cut through the thin, sticky film of aerosolized cooking grease that builds up on stovetops and range hoods. It is incredibly effective at removing stubborn, baked-on tea and coffee stains from the inside of ceramic mugs, restoring them to their original pristine white. It can even be used to lift burnt-on food residue from glass bakeware and oven doors. In the bathroom, it is a champion against soap scum, scrubbing away the waxy, cloudy buildup from glass shower doors, tile, and fiberglass tubs where other cleaners have failed. It can even be used to restore the white grout between tiles, lifting the embedded grime with targeted scrubbing. The eraser’s ability to conform to surfaces and get into corners makes it a more effective tool than a simple cloth or sponge for these specific tasks. However, because it is an abrasive, it is critical to know where not to use a melamine foam eraser. You should never use it on delicate, high-gloss surfaces like a car’s paint finish, polished wood furniture, or natural stone countertops like marble and granite, as it can create microscopic scratches that will permanently dull the finish. Always test it on a small, inconspicuous area first if you are unsure. Traditional Rubber While melamine foam is the superstar, the traditional rubber or vinyl eraser-specifically a high-quality white vinyl one-has its own unique and surprising set of cleaning superpowers. Its magic lies not in abrasion, but in its “grippy,” slightly tacky texture. This property makes it the perfect tool for removing one of the most annoying household messes: sticky adhesive residue. After peeling a price tag or label off a new piece of glassware, a book cover, or a plastic item, you are often left with a stubborn, gummy residue that smears when you try to wipe it. A white vinyl eraser works wonders here. By rubbing the eraser over the adhesive, its rubbery texture grabs onto the sticky residue, causing it to ball up and lift cleanly from the surface. Keep rubbing, and the adhesive will roll itself into little clumps that can be brushed away, leaving a clean, non-sticky surface behind without the need for oily solvents. This same principle allows a classic eraser to clean other delicate surfaces. It can be used to lift dirt and scuffs from patent leather shoes and handbags without scratching the high-gloss finish. For suede and nubuck, a special suede eraser or a clean art gum eraser is a classic shoe care tool. Its crumbly texture gently lifts dirt out of the fine nap of the material without the use of water, which would stain and flatten the suede. An eraser can even be used for light cleaning on non-precious metals, lifting grime from the surface of hardware or decorative items. The friction and the grabbing power of the rubber can remove surface-level dirt and smudges from things like brass doorknobs or silver-plated picture frames. The Small Eraser At the end, we must not forget the most precise tool of all: the small eraser on the end of a pencil. Its tiny size makes it perfect for detailed cleaning in areas that are otherwise impossible to reach. It can be used to clean the accumulated grime from the crevices of intricate jewelry or around the clasps of a watch band. It is the perfect shape for getting into the tight corners of window tracks or for cleaning the gunk that builds up around the base of a kitchen or bathroom faucet. The pencil tip provides a level of targeted control that allows you to apply pressure to a very specific, small point, lifting a

Erasers in Cleaning: 7 Genius Tricks for Cleaning Your Home with an Eraser Read More »

Effervescent Toilet

Effervescent Toilet Bowl Cleaner: 5 Facts About the Solution for Tough Toilet Stains

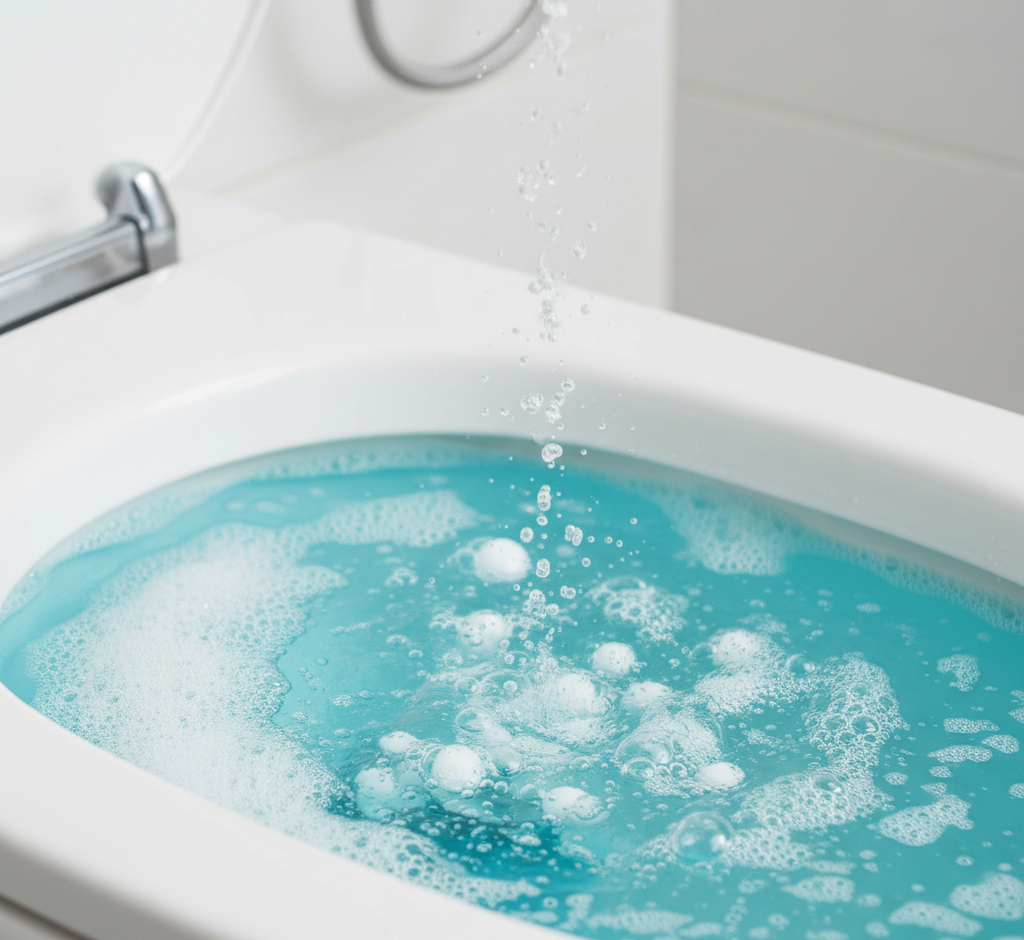
What Is an Effervescent Toilet Bowl Cleaner? The toilet bowl is one of the least pleasant cleaning tasks in any home. For decades it meant drippy bottles of harsh liquid cleaner, aggressive scrubbing and getting uncomfortably close to the fixture. Effervescent toilet bowl cleaner offers a smarter, hands-off path: a solid tablet or puck that uses chemistry and time to do the heavy lifting. Drop it in the water, walk away, and the fizzing action cleans submerged porcelain while you do something else. Understanding the five facts behind the fizz explains why these tablets handle tough toilet stains so effectively. Fact 1: The Fizz Comes From an Acid-Base Reaction The magic lies in the satisfying fizz. These tablets pair a dry acid, most commonly citric acid, with a dry alkali base, typically sodium bicarbonate, the chemical name for baking soda. In solid form the two compounds stay inert and stable. The moment the tablet hits the water in the bowl, water acts as a catalyst: it dissolves both compounds, lets their molecules mix, and triggers a reaction that rapidly produces a large volume of carbon dioxide gas. That gas appears as vigorous bubbling that spreads through the bowl and creeps up the porcelain sides. Fact 2: Micro-Scrubbing Reaches What a Brush Misses The fizz is not a visual spectacle; it is a mechanical cleaning force. Millions of tiny active bubbles deliver a gentle but persistent scrubbing motion across every submerged surface, especially the spots a brush struggles to reach, such as the bottom of the bowl and the opening of the P-trap, or S-bend. As the bubbles climb, they carry the cleaning agents up the sides of the bowl and deliver better coverage than a liquid cleaner that streaks straight into the water. Fact 3: Surfactants and Chelating Agents Break Down Grime and Hard Water Beyond the core fizzing ingredients, the tablets carry a supporting cast of cleaning chemistry. Surfactants, the compounds behind soaps and detergents, reduce the water’s surface tension so it penetrates and lifts grime from the porcelain while emulsifying greasy residues. Many high-quality formulas add chelating agents, which target one of the most stubborn toilet problems: hard water stains. The chalky rings and rust-coloured streaks at the waterline are calcium, magnesium and iron deposits left behind as water evaporates. Chelating agents bind to those minerals and hold them in suspension so the next flush carries them away, a chemical solution that beats scrubbing scale by brute force. Fact 4: Built-In Deodorizers and Sanitizers Freshen the Whole Room These tablets double as deodorizers and sanitizers. They typically include disinfecting agents that kill the germs and odour-causing bacteria that thrive in a toilet bowl. As the tablet dissolves it releases those sanitizers along with a fresh fragrance, attacking both the source of the smell and its symptoms at once, which is why a treated bathroom smells cleaner even between full cleans. The CDC’s guidance on when and how to clean and disinfect your home is a useful reminder that cleaning removes germs while disinfecting kills them, and a toilet bowl benefits from both steps. Fact 5: Dwell Time Does the Work, So You Only Polish Start with a pre-flush to wet the interior surfaces, then unwrap and drop the tablet in. The instructions tell you to do the most important part: walk away. Dwell time is the whole principle. Fizzing, stain lifting and disinfecting take time, so let the tablet sit for at least 20 to 30 minutes; heavily stained bowls benefit from several hours or overnight. When you return, the water is often tinted by the cleaning agents, and a brief light scrub with a toilet brush is all that remains, a polishing pass that wipes away grime the fizz already loosened. One flush leaves the bowl clean, sanitized and deodorized. Use the steps in order: Pre-flush the toilet so the bowl has fresh water. Drop one tablet into the water, away from the drain for slower dissolving. Wait at least 20 to 30 minutes; go longer or overnight for heavy stains. Lightly scrub with a toilet brush to lift loosened residue. Flush and enjoy a sanitized, fresher bowl. What Effervescent Cleaners Can and Cannot Do Tablets also win on portion control: each one is pre-measured for a single effective dose, making them economical and easier on the environment than liquid cleaners that invite overuse, which is wasteful and hard on septic systems. The solid form eliminates drips and spills entirely. Keep expectations realistic, though. These cleaners excel at regular maintenance and moderate staining but are not a miracle cure for years of neglect. A bowl with a thick crust of limescale may need an initial deep clean with a pumice stone or a stronger acidic cleaner before tablets can take over for easy upkeep: Bowl condition What the tablet does Extra step Regular maintenance Cleans, deodorizes and sanitizes with each use None needed Moderate staining Lifts most stains with its fizzing action A light brush pass before flushing Hard water rings Chelating agents dissolve calcium and iron deposits Longer dwell time or repeat treatment Heavy limescale crust Limited effect on thick, years-old buildup Pumice stone or acidic cleaner first For any cleaner you use, Health Canada’s advice on using household chemicals safely applies, including reading labels, never mixing products and keeping them away from children, and its household products safety hub covers the hazards to watch for around the home. Effervescent Toilet Cleaner FAQ How long should I leave an effervescent tablet in the toilet? At least 20 to 30 minutes so the fizzing, stain lifting and disinfecting chemistry can work. For heavily stained bowls, several hours or overnight produces much better results, then a light scrub and flush finish the job. Do I still need to scrub the bowl? Yes, but barely. The tablet loosens the grime, so the brush becomes a polishing tool: one light pass over the bowl and under the rim lifts everything the fizz released. Why is the water in my

Effervescent Toilet Bowl Cleaner: 5 Facts About the Solution for Tough Toilet Stains Read More »

The Best Mop for Every Floor Type: A Complete Guide

How to Choose the Best Mop for Every Floor Type in Your Home Mopping seems like the simplest job in the house, yet the mop you pick decides whether your floors end up truly clean or quietly damaged. Dragging one string mop across every surface leaves streaks, spreads grime and can even ruin a finish. The smarter approach is to match the mop to the floor so each material gets the treatment it was designed for. This guide breaks down the best mop for ceramic tile, porcelain, vinyl, linoleum, hardwood, laminate and concrete. Spin Mop: The Best Mop for Ceramic, Porcelain, Vinyl and Linoleum Kitchen and bathroom floors take a beating: greasy splatters, sticky spills, soap scum and hard water spots. For these durable, water-resistant surfaces, the spin mop is the standout choice. Its two-part bucket spins the head dry with a foot pedal, so you control exactly how wet it stays. Leave the microfiber head wetter to dissolve a sticky mess, then spin it almost dry for the final pass so excess water never sits in grout lines. The fluffy, absorbent microfiber heads trap grease and dirt well, and the round shape reaches corners and slides around the base of a toilet with ease. For everyday hygiene on these floors, follow the CDC guidance on when and how to clean and disinfect your home. Steam Mop: Deep Sanitation for Sealed Hard Floors Only When a kitchen or bathroom needs more than a wipe-down, a steam mop adds a chemical-free layer of sanitation. High-temperature steam can kill 99.9% of germs and bacteria, including E. coli and Salmonella, and it loosens caked-on grime and textured tile buildup without harsh chemicals. That power comes with a strict warning: use steam only on completely sealed, durable hard floors. Never steam natural stone, unsealed grout, wood or laminate, because the heat and moisture can warp boards, swell seams and permanently damage the finish. Hardwood Floors: Flat Microfiber and Spray Mops Win Wood is a natural, porous material and its biggest enemy is water. Excess moisture swells boards and ruins finishes, so hardwood cleaning means minimal moisture and gentle tools. The flat microfiber mop is the ideal partner. Used dry, its static charge works like a magnet for dust, pet hair and allergens, capturing more of them than a broom. For wet cleaning, damp is the keyword, never wet. Keep two pads on hand: lightly mist one with a pH-neutral wood floor cleaner, spritzing the pad rather than the floor, then mop a small section and follow immediately with the second, completely dry pad to buff away residual moisture. This damp-then-dry method leaves hardwood gleaming. A spray mop is the convenient cousin of the flat mop and another excellent hardwood choice. Its built-in reservoir and handle trigger release a fine, controlled mist ahead of the mop head, so you use the smallest possible amount of liquid. It is perfect for quick spills and routine touch-ups. Laminate and Luxury Vinyl: Keep Water Out of the Seams Laminate and luxury vinyl tile share hardwood’s sensitivity to moisture. Laminate’s weak point is its seams: water that seeps between planks can swell the fiberboard core and peel the edges, causing irreversible damage. Luxury vinyl tolerates water better but shows streaks when too much cleaner is left behind. The flat microfiber mop and the spray mop are again the ideal tools, because both clean with minimal liquid. A clean, slightly damp pad lifts dirt without flooding the joints and delivers the streak-free finish these floors are known for. The Flat Mop Doubles as a Dusting and Baseboard Tool With a telescoping handle, the flat microfiber mop earns its place beyond floors. Used dry, it dusts walls and sweeps cobwebs out of high corners. Used slightly damp, it washes baseboards and door frames while you stand upright, instead of crouching with a rag. String and Sponge Mops: Heavy-Duty Tools for Tough Jobs String and sponge mops still have a role, though a narrow one. A cotton string mop is an absorbent workhorse for huge spills and heavy scrubbing on very durable, non-porous surfaces like concrete or commercial tile. For most homes, however, it holds too much water and is hard to wring dry enough for wood, laminate or delicate grout. The sponge mop’s flat head tends to push dirt around rather than lift it. Floor Type Best Mop Why It Works Ceramic, porcelain, vinyl, linoleum Spin mop; steam mop on sealed floors Moisture control plus scrubbing power for grease and grime Hardwood Flat microfiber or spray mop Near-dry cleaning protects the finish from water damage Laminate and luxury vinyl Flat microfiber or spray mop Minimal moisture keeps seams dry and surfaces streak-free Concrete or commercial tile Cotton string mop High absorbency for big spills and tough scrubbing Build a Small Toolkit Instead of Buying One Universal Mop No single mop does everything well. A spin or steam mop for high-grime zones plus a flat microfiber or spray mop for delicate surfaces covers nearly every challenge in a modern home. Choose floor cleaners that suit each material and follow the label, and when you shop, review Health Canada’s guidance on using household products safely. Keep two microfiber flat mop pads: one damp for cleaning, one dry for buffing. Wash mop heads after each use and replace them when they fray or hold odors. Use a separate mop head for kitchen and bathroom floors to avoid cross-contamination. Reserve the string mop for concrete, garage and other truly tough surfaces. Toronto Shine Cleaning brings this same care to every room, from a deep clean of kitchen and bathroom tile to gentle hardwood maintenance with our regular cleaning service. Check our transparent pricing and our locations page, then call (647) 424-0355 to book your visit. Frequently Asked Questions About Choosing the Right Mop What is the best mop for tile floors? A spin mop with microfiber heads is the best all-around choice for ceramic, porcelain, vinyl and linoleum. It lets you control moisture levels,

The Best Mop for Every Floor Type: A Complete Guide Read More »

dwell time

Why Dwell Time is the Secret to a Truly Clean Kitchen

Why Dwell Time Is the Secret to a Truly Clean Kitchen Most of us clean the wrong way: spray a surface, wipe it dry within seconds and call the job done. The problem is that cleaning products need time to work. Dwell time, also called contact time, is how long a cleaner or disinfectant must stay wet on a surface to break down grime or kill germs. Wipe it away too soon and the chemistry never engages: you scrub harder, waste product and, with disinfectants, leave a surface that looks clean but is not sanitized. Understanding dwell time turns kitchen cleaning from a battle of elbow grease into a simple sequence of apply, wait and wipe. Here is how it works and where to use it in your kitchen. Disinfectants Need Time to Kill Bacteria Kitchen counters host plenty of unseen passengers, including bacteria such as E. coli and Salmonella, especially after raw meat touches the surface. Disinfectants kill by chemically breaking down the cell walls of bacteria and viruses, and that process is not instant. Every registered disinfectant label carries a kill claim stating how long the surface must stay wet, often anywhere from thirty seconds to ten minutes or more. When you spray and wipe dry right away, you remove the active ingredients before they finish the job: wiping lifts some germs but does not disinfect. For a genuinely hygienic kitchen, follow the two-step method the CDC recommends for cleaning and disinfecting your home: clean with soap and water first, then apply the disinfectant, let it sit for the time on the label and only then wipe or rinse it away. Degreasers and Descalers Rely on the Same Chemistry Dwell time matters just as much for everyday grime. Kitchen grease is a complex mix of polymerized fats, a boiled-over sauce hardens into a blackened crust, and the chalky film around a faucet is mineral deposit from hard water. The surfactants in a degreaser need minutes to penetrate and emulsify grease into droplets you can wipe away, and the mild acids in a descaling product need time to dissolve alkaline scale. Given those minutes, the product does the heavy lifting and a gentle wipe replaces frantic scrubbing. Where to Apply Dwell Time in Your Kitchen Routine Countertops: Clean First, Disinfect Second After meal prep, wipe away loose crumbs and food residue with warm, soapy water, since debris shields germs from the disinfectant. Then spray the counter until visibly wet, check the label for its required dwell time and walk away for the full three, five or ten minutes before wiping dry. If you use a bleach-based sanitizer, prepare and handle it according to CDC guidance on cleaning and disinfecting with bleach, and never mix it with other cleaners, since combining products can release dangerous vapors. The Sink and Faucet The kitchen sink is a prime spot for bacteria, so after scrubbing the basin clean, apply your disinfectant and let it dwell before rinsing. For mineral buildup around the faucet, soak paper towels in white vinegar, wrap them around the base and nozzle, and leave them for at least thirty minutes. The extended dwell time lets the acid dissolve the chalky deposits so an old toothbrush can finish the job. The Stovetop and Range Hood Do not attack a boil-over with a scraper. Spray the area with a quality degreaser or all-purpose cleaner and give it five to ten minutes; you will see the crust soften and liquefy as the product penetrates. The range hood filter responds to the same logic: soak it in hot water with a strong degreasing solution for at least thirty minutes, and years of accumulated grease will rinse away on its own. The Oven: Overnight Dwell Time The most dramatic proof of dwell time is a dirty oven. Scrubbing carbonized grease is nearly useless, so spread a thick paste of baking soda and water over the interior surfaces and leave it overnight. After eight to twelve hours of dwell time, the rock-hard buildup turns soft and sludgy, and a morning wipe removes it with ease. Sticky Floor Spills When jam or sauce dries onto the kitchen floor, spray the spot lightly and lay a damp cloth over it for about five minutes. The moisture rehydrates and dissolves the sugars, so you can wipe the mess away cleanly instead of smearing it across the floor. What You Lose by Skipping Dwell Time Wasted effort: you scrub harder to compensate for cleaner that never activated. Wasted product: you spray, wipe and respray in a frustrating cycle. False security: a wiped-dry disinfectant leaves bacteria behind while looking clean. Surface Product Dwell Time Result Countertops Disinfectant per label 30 seconds to 10+ minutes Pathogens killed, food-safe surface Faucet base White vinegar soak 30 minutes Mineral scale dissolves Stovetop Degreaser 5-10 minutes Burnt-on food softens Range hood filter Hot water plus degreaser 30+ minutes Grease rinses free Oven interior Baking soda paste 8-12 hours Carbonized grime wipes away Floor spills Cleaner under a damp cloth 5 minutes Sticky residue lifts cleanly Store and Handle Kitchen Cleaners Safely Remember that kitchen cleaners are household chemicals: read each label, keep products in their original containers, store them out of children’s reach and ventilate the room while you work, per the household chemical safety guidance from Health Canada. Never mix bleach with vinegar, ammonia or other products. Work Smarter, Not Harder Cleaning is a partnership between your hands and the product’s chemistry. Give every spray, soak and paste the dwell time printed on its label, and your kitchen will be cleaner, more sanitary and easier to maintain with a fraction of the effort. When you would rather hand the job to a team that already works this way, Toronto Shine Cleaning brings methodical, dwell-time-aware techniques to every kitchen deep clean and regular cleaning visit. See our pricing and what Toronto homeowners say about us, then call (647) 424-0355 to book your clean. Frequently Asked Questions About Dwell Time What is dwell time

Why Dwell Time is the Secret to a Truly Clean Kitchen Read More »

Deep Cleaning of Your Patio and Deck

Deep Cleaning of Your Patio and Deck: A Small-Space Guide to Spring Preparation

Deep Cleaning Your Patio and Deck for Spring Pre-season cleaning of a patio and outdoor deck is a revitalization ritual. As winter recedes and days grow longer, we want to throw open the doors, step outside, and feel the first warm sun. But the space we step into often shows winter’s aftermath: a grey film of grime on the deck, patio furniture veiled in pollen and dust, and corners filled with desiccated leaves. The transition from a winter-battered outdoor area to a welcoming spring sanctuary takes a strategic pre-season clean-up designed to reverse months of neglect. This guide covers small spaces such as balconies and compact patios as well as full decks. Start With a Thorough Sweep The first order of business is an uncompromising sweep. Even a covered patio accumulates surprising debris: wind blows leaves, twigs, and dirt into corners, where they decompose into dense, muddy sludge. A stiff outdoor broom dislodges this compacted organic matter. This is not just aesthetic. Rotting leaves against the house foundation or the base of wooden deck posts trap moisture and invite insects such as carpenter ants. For decks with gaps between boards, use a putty knife or painter’s tool to clear debris from the gaps, promoting airflow and preventing rot underneath. Washing Wooden Decks: Gentle Is Paramount After months of precipitation and freeze-thaw cycles, deck surfaces are stained and discolored, and the cleaning method must match the material. For wooden decks, resist the urge to blast the wood with a high-pressure power washer. The intense force splinters wood, raises the grain, and strips protective sealant, leaving raw timber exposed to the elements. Instead, apply a commercial deck cleaner, often an oxygenated bleach formula that kills mildew without the harshness of chlorine, using a pump sprayer. Let the cleaner dwell to lift the grime, then scrub lightly with a deck brush and rinse gently with a garden hose. This restores the wood’s colour without structural damage. Cleaning Concrete, Stone Pavers, and Balconies Concrete patios, stone pavers, and balconies are porous and can harbor green algae or black mold in shaded, damp areas. Here a power washer can be effective, provided it is used with a fan-tip nozzle to avoid etching the surface. A solution of water and vinegar helps kill biological growth, and stubborn stains may need a specialized masonry cleaner. Pay close attention to the grout or sand lines between pavers: blasting them too aggressively washes away the jointing material and leads to wobbly stones. Refresh Furniture and Outdoor Fabrics Patio chairs, tables, and loungers have spent months under covers or stacked in corners, accumulating dust and spider webs. Drag them into the sun and clean before use: Plastic or resin furniture: warm, soapy water and a sponge Wrought iron or metal: inspect for rust, sand chipped spots, and apply rust-inhibiting spray paint Cushions and outdoor fabrics: launder if machine-washable, or spray with fabric cleaner, scrub with a soft brush, and air dry in the sun Railings and planters: wipe down, and inspect planters for cracks caused by freezing soil Catching rust early prevents it from spreading through the metal, and cleaning cushions removes mildew and stale odors before the first use of the season. Deep Clean the Barbecue Grill The grill, the centerpiece of many outdoor gatherings, needs a deep clean after winter hibernation. If it was not cleaned in the fall, you may open the lid to find rancid grease and possibly mold. Remove the grates and scour them with a grill brush, empty and clean the grease trap to prevent a dangerous flare-up during the first cookout, and wipe down the exterior to remove dust and pollen. A clean grill makes the whole patio feel intentional and cared for. Finish With Doors, Tracks, and Vertical Surfaces Finally, consider the vertical elements. Patio door glass is likely streaked with water spots and dirt from winter storms. Clean both the interior and exterior so the glass visually connects your clean indoor space with the revitalized outdoor one. Vacuum the window and door tracks, which collect the same debris as the deck, to ensure a smooth glide. Surface Cleaning method Tools What to avoid Wooden deck Deck cleaner, dwell, light scrub Pump sprayer, deck brush, garden hose Power washer, chlorine bleach Concrete and pavers Power wash or vinegar solution Fan-tip nozzle, masonry cleaner Blasting paver joints Plastic furniture Warm, soapy water Sponge and bucket Abrasive pads Metal furniture Rust inspection and touch-up Sandpaper, rust-inhibiting spray Skipping primer on bare metal Grill Scour grates, empty grease trap Grill brush, warm soapy cloth Leaving old grease in place The pre-season clean is a ritual of reclamation that transforms a neglected patch of ground into a functional, beautiful extension of the home. It can also be a full weekend of hard, dirty work. Toronto Shine Cleaning provides professional deep cleaning services with professional-grade equipment and the expertise to treat different materials with care, plus regular maid service for the indoor spaces your outdoor living connects to. The bonded and insured team carries a $1,000,000 insurance policy; see our pricing page and the areas we cover on our locations page. Call (647) 424-0355 to book, and step out onto a patio that is already pristine on the first warm day. For guidance on mold and moisture outdoors, see the Government of Canada page on air contaminants and mold, and follow the CDC handwashing guidance after handling dirty gear and cleaning solutions. Patio and Deck Cleaning FAQ Can I power wash my wooden deck? It is not recommended. The intense force splinters wood, raises the grain, and strips protective sealant. Use an oxygenated bleach deck cleaner applied with a pump sprayer, a light scrub with a deck brush, and a gentle garden hose rinse instead. How do I remove algae from concrete pavers? Apply a solution of water and vinegar to kill biological growth, or use a power washer with a fan-tip nozzle to avoid etching. For stubborn stains, use a specialized masonry cleaner, and avoid

Deep Cleaning of Your Patio and Deck: A Small-Space Guide to Spring Preparation Read More »