Tips and Tricks

The Solution to Your Mother’s Day Gift Dilemma: A Professional Clean

The annual search for the perfect Mother’s Day gift is a familiar ritual, a quest to find something that adequately expresses a lifetime of gratitude and love. We often gravitate towards the traditional tokens of appreciation: a beautiful bouquet of flowers, a decadent box of chocolates, a piece of jewelry, or a gift certificate for a spa day. These are wonderful gestures, thoughtful and well-intentioned, but they share a common trait: they are fleeting. The flowers wilt, the chocolates are consumed, and the spa day, while lovely, is a brief escape that ends with a return to the realities and responsibilities of daily life. For the woman who has given so much of her time and energy to creating a comfortable and orderly home, there is a gift that transcends the temporary, a gift that offers something she can never have enough of, something more precious than any object: the gift of time. Time Machine A professional house cleaning service is, at its core, a time machine. It is the tangible act of buying back the hours that would otherwise be spent on the physically demanding and often thankless tasks of deep cleaning. Consider the typical weekend. For many mothers, it is not a period of pure rest and recreation, but a race to catch up on the household chores that accumulate during a busy week. It is the Saturday morning spent scrubbing floors on hands and knees, the Sunday afternoon dedicated to deep cleaning bathrooms, the constant, low-level hum of a to-do list that never seems to get any shorter. A professional cleaning service intercepts this relentless cycle. It takes the five, six, or even more hours of intensive labor required for a true deep clean and removes them from her schedule completely, handing them back as a block of pure, unencumbered free time. This reclaimed time is the true substance and beauty of the gift. It is a Saturday morning she can spend reading a book in the garden with a cup of coffee, a Sunday afternoon she can use to visit with friends she has not seen in months, a weekend she can dedicate to a long-neglected hobby, or simply a day she can enjoy with her family without the nagging, ever-present feeling that she should be cleaning. It is a gift that says, “Your time is the most valuable thing you have, and you deserve to spend it on yourself, not on scrubbing grout.” In a world where so many mothers feel time-poor, constantly juggling the demands of family, work, and the endless logistics of household management, giving back a significant portion of that time is one of the most practical and profound expressions of love and appreciation imaginable. It acknowledges the sheer volume of her labor and provides a real, tangible respite from it. Beyond the quantifiable gift of hours, there is the invaluable and often overlooked gift of reduced mental load. The responsibility of maintaining a home is not just about the physical labor; it is about the constant, invisible work of management. It is the mental checklist of what needs to be cleaned, the planning of when it will get done, the worry about the state of the guest bathroom before visitors arrive, and the low-grade, persistent stress that comes from living in a space that feels perpetually in need of attention. A professional deep clean is a powerful circuit-breaker for this heavy mental burden. It is a full reset, a moment where the entire home is brought to a baseline of pristine cleanliness all at once. This single act can wipe the slate clean, quieting the constant internal monologue about chores and replacing it with a sense of peace, completion, and order. It allows her to simply exist in her home, to enjoy it as a sanctuary rather than viewing it as a project that is never quite finished. Luxury Service Furthermore, it is crucial to reframe this gift as what it truly is: a luxury service, not a critique. Presenting a cleaning service is not an insinuation that her home is not clean enough; it is an acknowledgment that she deserves a break from the hard work required to keep it that way. It should be positioned as a “spa day for the home,” an experience of being pampered and cared for within her own environment. A professional cleaning is fundamentally different from a routine weekly tidy-up. Professionals arrive with a systematic approach, specialized tools, and an expert understanding of how to tackle the most stubborn and neglected areas of a home. They have the knowledge and equipment to perform tasks that are often put off indefinitely due to their difficulty or unpleasantness. They are the ones who will pull the refrigerator out from the wall to clean the floor and vacuum the dusty condenser coils that impact its efficiency. They will meticulously wash the baseboards throughout the house, erasing the scuffs and dust of an entire season. They will clean the sticky, greasy film from the tops of the kitchen cabinets and wash the light fixtures and ceiling fan blades that are just out of reach. They will scrub the soap scum and hard water stains from the shower doors until they are crystal clear. The result is a level of deep, foundational cleanliness that is difficult for a single person to achieve on their own without dedicating an entire weekend to the exhaustive task. The feeling of walking into a home that has been professionally cleaned is a unique and wonderful experience. The air feels lighter, every surface gleams, and there is a sense of order and freshness that permeates every room. It is a gift of environment, a transformation of her daily space into a place of true rest and relaxation. In an age where many people are actively trying to reduce the amount of “stuff” in their lives, an experiential gift is often far more meaningful than a physical one. A professional cleaning does not add to the

The Solution to Your Mother’s Day Gift Dilemma: A Professional Clean Read More »

Refrigerator

Refrigerator Cleaning: The Professional Way to Clean a Refrigerator

Refrigerator Cleaning: The Professional Way to Clean a Refrigerator A clean refrigerator is essential for food safety, efficient operation, and a fresh-smelling kitchen. Over time, spills, crumbs, and sticky residues accumulate on shelves, drawers, and door bins. Hidden grime can harbour bacteria, cause unpleasant odours, and reduce cooling efficiency. A thorough refrigerator deep clean resets your appliance and keeps your food stored in a sanitary environment. Toronto Shine Cleaning offers professional kitchen cleaning services that include detailed refrigerator cleaning to ensure your appliance is spotless inside and out. Signs Your Refrigerator Needs a Deep Clean Unpleasant odours: Lingering smells from spoiled food or spills indicate bacteria growth that requires a full interior clean to eliminate. Visible spills and sticky residue: Dried food spills on shelves and drawers attract pests and can transfer bacteria to fresh food items. Ice build-up in the freezer: Excess frost reduces cooling efficiency and takes up valuable freezer storage space. Warm spots or uneven cooling: Dust on condenser coils forces the compressor to work harder, leading to inconsistent temperatures and higher energy bills. Step 1: Empty and Sort Everything Remove every item from the refrigerator and freezer compartments. Place perishables such as meat, dairy, eggs, and leftovers in a cooler with ice packs to keep them at a safe temperature below 4 degrees Celsius. As you remove each item, check expiration dates and discard anything past its prime, along with any containers that show signs of spoilage or freezer burn. This is also the ideal time to wipe down jars, bottles, and containers with a damp cloth so you do not reintroduce sticky residue into your clean fridge. Sorting as you go creates a natural opportunity to reorganize your food storage system and reduce future food waste. Step 2: Remove Shelves and Drawers Take out all removable components: glass shelves, crisper drawers, meat drawers, door bins, and any other detachable parts. Allow them to come to room temperature before washing to prevent thermal shock, which can crack glass or warp plastic. Wash each piece in warm, soapy water using a mild dish soap and a non-abrasive sponge to avoid scratching. For stubborn, dried-on spills, let the component soak for ten to fifteen minutes before scrubbing. Rinse each piece thoroughly with warm water and allow them to air dry completely or dry by hand with a clean towel. Reinstalling damp components can trap moisture and promote mildew growth in crevices. Step 3: Wipe Down the Interior With the fridge empty and unplugged for safety, wipe down all interior surfaces using a mixture of equal parts white vinegar and warm water in a spray bottle. Vinegar is a natural, food-safe disinfectant that effectively cuts through sticky residues without leaving harmful chemical residues. Work from the top down so drips fall onto already-cleaned areas. Pay special attention to corners, drainage channels, and rubber door gaskets where crumbs and mould tend to accumulate. An old toothbrush or small detailing brush helps reach grooves and tight spots. Once clean, wipe the entire interior with a cloth dampened with plain water to rinse away any vinegar residue, then dry thoroughly with a clean microfiber towel. Refrigerator Area Cleaning Method Key Tips Glass shelves Warm soapy water, air dry completely Let warm to room temperature first to prevent cracking from thermal shock Crisper drawers Soapy water soak, rinse, towel dry Remove entirely; food debris hides under drawer tracks and in corners Door gaskets Vinegar-water solution with soft toothbrush Mould and bacteria commonly hide in gasket crevices; dry thoroughly after cleaning Condenser coils Coil brush plus vacuum brush attachment Clean coils improve energy efficiency and can extend appliance lifespan significantly Step 4: Clean the Exterior and Condenser Coils For stainless steel fronts, wipe in the direction of the grain using a microfiber cloth and either stainless steel cleaner or your vinegar-water solution. Spray onto the cloth not directly onto the surface, then buff with a second dry cloth for a streak-free shine. Clean door handles and the water or ice dispenser area thoroughly, as these high-touch surfaces harbour the most bacteria. Gently pull the refrigerator away from the wall to access the back and floor area. Vacuum the condenser coils using a coil brush and vacuum brush attachment to remove the dust and lint that accumulates over time. Clogged coils force the compressor to work harder, increasing energy consumption by up to 15 percent and shortening the appliance’s lifespan. Sweep and mop the area behind the fridge before pushing it back into place. Step 5: Reassemble and Reorganize Strategically Once all components are clean and dry, place them back in the refrigerator in a logical arrangement. Group similar items together: dairy products on one shelf, condiments and sauces in the door bins, produce in designated crisper drawers, and meats in the coldest section. Adopt a first-in, first-out system by placing newer items behind older ones so older items get used before they expire. Using clear storage bins helps corral small items like yogurt cups, cheese sticks, and condiment packets, making them easy to find and reducing the time you spend with the door open. This thoughtful reorganization saves energy, reduces food waste, and makes future cleaning easier. Frequently Asked Questions How often should I deep clean my refrigerator? Every three to four months, or immediately after a spill that could cause odours or cross-contamination between raw and ready-to-eat foods. Can I use bleach inside the fridge? No. Bleach can damage interior plastic and rubber seals while leaving harmful residues. White vinegar and water or mild dish soap provide safe, effective cleaning. Should I unplug the fridge before cleaning? Yes. Unplugging is a safety precaution when using water near electrical components and allows the interior to reach room temperature for comfortable cleaning. What if my fridge still smells after cleaning? Place an open box of baking soda on a middle shelf to absorb lingering odours. Replace it every three months for best results. Do you clean the freezer too? Yes. A professional refrigerator clean

Refrigerator Cleaning: The Professional Way to Clean a Refrigerator Read More »

dishwasher pods

How Dishwasher Pods Work and Why They’re So Effective

The dishwasher pod is a marvel of modern convenience, a small, self-contained packet that has transformed a daily chore. It represents the pinnacle of a long evolution, from messy powders and goopy liquids to a single, pre-measured dose that promises a perfect clean every time. This tiny pod is a masterful piece of chemical engineering, containing a complex, multi-part cleaning system designed to work in perfect sequence with the cycles of your dishwasher. However, to truly unlock the power of this convenience, one must understand how it works and, more importantly, how to use it correctly. A simple mistake in placement or preparation can be the difference between sparkling dishes and a frustrating, residue-covered mess. Cleaning System 1.Polyvinyl Alcohol At the heart of the dishwasher pod is a transparent, water-soluble film, typically made from a polymer called polyvinyl alcohol (PVA). This film is the pod’s magic trick, a stable barrier that keeps the potent cleaning agents safely contained until the precise moment they are needed. When the main wash cycle begins and the pod is hit with hot water, this film dissolves completely, releasing its contents into the machine. This is why it is absolutely essential to handle the pods with completely dry hands; even a small amount of moisture can begin to break down the PVA prematurely, causing the pods to stick together in their container or dissolve before they even make it into the machine. 2.Enzymatic Cleaners Inside this dissolvable skin lies a carefully formulated, multi-chambered cleaning system. The largest component is usually a powder. This is the heavy-lifting detergent, containing powerful enzymes that target specific types of food waste. Lipase enzymes are included to break down fats and oils, while amylase enzymes are designed to tackle starches from foods like potatoes, rice, and pasta. The powder also contains builders, which are chemicals that soften the water by binding to mineral ions like calcium and magnesium. This is crucial because hard water can interfere with the detergent’s effectiveness and leave behind a chalky, white film on glassware. 3.Rinse Aid The other chambers of the pod, often containing brightly colored liquids or gels, hold different agents that are released at the same time. These typically include surfactants, which are the same types of compounds found in dish soap. They work on a molecular level to break the surface tension of water and surround grease particles, allowing them to be washed away. This liquid portion also frequently contains a pre-measured dose of rinse aid. Rinse aid is essential for achieving a spot-free and streak-free finish, especially on glass and silverware. It works by reducing the surface tension of the water during the final rinse cycle, causing the water to sheet off the dishes in a thin layer rather than forming individual droplets that would otherwise evaporate and leave mineral spots behind. The multi-chamber design is a clever way to keep these different components stable and separate until they are all released together into the wash cycle. The Correct Use The proper use of a dishwasher pod is a simple process, yet it is where most mistakes are made. The most common and most critical error is placing the pod in the main detergent dispenser cup-the small, covered compartment on the inside of the dishwasher door. This seems like the logical place, but it is fundamentally wrong for how a dishwasher cycle operates. Most dishwashers begin with a pre-wash or pre-rinse cycle. During this brief cycle, the machine sprays the dishes with water to remove loose food particles, and then the dispenser cup pops open to release the detergent. If your pod is in that cup, it will be released and washed away with the pre-rinse water before the main, hot-water wash cycle even begins. This leaves your machine to complete its longest and most important cycle with no detergent at all, resulting in dirty, greasy dishes. The correct placement for a dishwasher pod is directly on the bottom of the dishwasher tub, usually near the filter or tucked into a corner of the silverware basket. Placing it here ensures that it remains safely in place during the pre-rinse cycle and will be dissolved by the hot water at the start of the main wash, allowing the detergent to be distributed effectively throughout the entire cycle. To ensure the pod dissolves completely and works at its peak performance, several other conditions must be met. First, do not overload the dishwasher. This is a cardinal rule of dishwashing in general, but it is especially important when using pods. The spray arms inside the machine must be able to spin freely to distribute water and detergent to every dish. If a large pot, pan, or cutting board is blocking a spray arm, it can prevent hot water from reaching and dissolving the pod, leaving you with a partially dissolved, goopy mess at the end of the cycle. Water temperature is another critical factor. While some modern pods are formulated to work in lower temperatures, most perform best with hot water, typically at least one hundred and twenty degrees Fahrenheit or fifty degrees Celsius. The heat is what activates the enzymes and ensures the PVA film dissolves quickly and completely. If your dishes are consistently coming out with a residue, it may be because your home’s hot water heater is set too low. Running the hot water at your kitchen sink for a minute before starting the dishwasher is a good practice, as it ensures that hot water, not cold water from the pipes, is the first thing to enter the machine. Even with perfect technique, you may occasionally encounter issues. If you find your pod has not fully dissolved, the first thing to check is the spray arms. Make sure they are not clogged with food debris and can spin without obstruction. Another common issue is a white, chalky film on glassware and cutlery. This is almost always a sign of very hard water. While pods contain water-softening agents, extremely hard water

How Dishwasher Pods Work and Why They’re So Effective Read More »

clothes different types of fabrics

Warning: Are You Washing These 5 Fabrics Completely Wrong?

Do you know how to wash different types of fabrics? The laundry room is a constant and cyclical workspace, a place where the science of cleaning is put to the test every day. The simple act of washing clothes, however, is far from simple. It is a nuanced process where a few small choices-water temperature, detergent type, and cycle selection-can mean the difference between a perfectly restored garment and a shrunken, faded, or permanently damaged one. The key to mastering the laundry is to move beyond a one-size-fits-all approach and to develop an understanding of the fabrics themselves. Each material, from durable cotton to delicate silk, possesses a unique set of properties that dictates exactly how it should be treated. Washing Labels Before delving into specific fabrics, the foundational skill for any laundry-doer is the ability to read and understand the care label. These small tags, with their cryptic collection of symbols, are the manufacturer’s direct instructions for preserving the garment. The wash tub symbol indicates the recommended water temperature and cycle, a triangle dictates whether bleach is safe, a square provides drying instructions, and a circle gives information for professional dry cleaning. Learning to decipher these symbols is the most important first step, as it removes the guesswork and provides a clear roadmap for proper care. When a label is missing or unreadable, a knowledge of fabric types becomes your essential guide. Cotton Let us begin with the most common and forgiving of all fabrics: cotton. Found in everything from t-shirts and jeans to bed sheets and bath towels, cotton is a natural plant fiber known for its durability, breathability, and absorbency. For most cotton items, especially whites and light-colored basics that are heavily soiled, warm or even hot water is the ideal choice. The heat helps to effectively dissolve and remove body oils, sweat, and heavy soil. For items like sheets and towels, hot water is essential for sanitization, as it is the only temperature high enough to effectively kill bacteria and dust mites, which thrive in bedding. A standard detergent and a regular wash cycle are perfectly sufficient for these durable items. However, the rules change for brightly colored or dark cotton garments. For these, cold water is the far superior choice. Hot water can cause the dyes in cotton to bleed, leading to a faded appearance and potential color transfer onto other items in the load. Cotton is also prone to shrinking, especially on its first wash and when exposed to high heat. To minimize shrinkage, it is always best to dry cotton items on a medium or low heat setting, or better yet, to hang them to dry or tumble dry until they are just slightly damp and then hang them. Linen Another durable natural fiber is linen, prized for its exceptional breathability, strength, and relaxed, elegant drape. Like cotton, linen is made from a plant fiber (flax) and can generally withstand a fair amount of agitation. However, linen is also famously prone to wrinkling and can lose its shape if treated too harshly. For this reason, linen garments should be washed on a gentle cycle with cool or lukewarm water to minimize stress on the fibers. Using a mild detergent will help to preserve the fabric’s integrity. The most critical step in caring for linen is the drying process. Linen should never be put in a dryer on a high heat setting, as this can cause it to shrink and can set in deep, stubborn wrinkles that are difficult to iron out. The best method is to either tumble dry on a very low, gentle setting and remove the garment while it is still slightly damp, or to hang it to dry on a padded hanger. This minimizes wrinkling and preserves the natural, slightly crisp texture of the fabric. Wool Moving from plant fibers to animal fibers, we encounter a category of textiles that demands a significant increase in care and gentleness. Wool is the most famous and most frequently mishandled of these. Wool fibers are made of protein and possess a microscopic structure of overlapping scales. When wool is subjected to the combination of hot water and aggressive agitation, these scales open up and become permanently interlocked with one another. This process, known as felting, causes the fabric to shrink dramatically, becoming dense, stiff, and coarse. Once a wool garment has been felted and shrunk in hot water, the damage is irreversible. For this reason, wool garments must always be washed in cold water, either by hand or on a designated “wool” or “delicate” cycle in the washing machine that uses minimal agitation. You must use a specialized, pH-neutral wool-safe detergent, as standard detergents can be too alkaline and can strip the natural lanolin from the fibers, making them brittle. After washing, never wring or twist a wool garment. Instead, gently squeeze out the excess water and lay the item flat on a clean, dry towel. Roll the towel up with the garment inside to absorb more moisture, then unroll it and lay the sweater flat on a fresh towel or a mesh drying rack, reshaping it as needed. Never hang a wet wool sweater, as the weight of the water will stretch it out of shape permanently. Silk Silk, another protein-based fiber, is the epitome of luxury and delicacy. Its long, smooth fibers give it its characteristic sheen and softness, but they are also incredibly vulnerable to damage. Hot water can dull the sheen, weaken the fibers, and cause the fabric to lose its beautiful drape. Silk should always be hand-washed in cool water with a very gentle, specialized silk detergent. Submerge the garment, gently swish it around for a few minutes, and then rinse it thoroughly in cool, clean water. Like wool, you must never wring out silk. Gently squeeze out the excess water and either roll it in a towel or hang it on a padded, non-slip hanger to air dry. Silk should always be dried away from direct

Warning: Are You Washing These 5 Fabrics Completely Wrong? Read More »

Get a Perfect Spring Clean Without Sacrificing Your Weekends

A Perfect Spring Clean Without Losing Your Weekends to It The first warm weekend in Toronto empties the parks and fills the patios, and it is a bad trade to spend those days on a ladder wiping blinds. Spring cleaning still has to happen: a winter of closed windows leaves dust, grease, and odours that a weekly tidy never touches. The fix is to stop treating the project as one enormous Saturday and instead work through a short list of zones in a fixed order. That structure lets a busy household finish in two days, and it is the same sequence our crews follow on a deep clean. Where the Time Actually Goes A spring clean is deeply uneven. A handful of neglected zones swallow most of the hours, and the rest of the house moves quickly once the heavy work is done. Zone The heavy tasks Realistic DIY time Kitchen Range hood, cupboard interiors, the fridge 4 to 6 hours Bathrooms Soap scum, grout, the toilet inside and out 2 to 3 hours each Living room Curtains, upholstery, blinds, lamps 2 to 3 hours Bedrooms Under the bed, fan blades, fresh linens 1 to 2 hours each Outdoor areas Patio furniture, deck, windows, garden tools 3 to 4 hours Kitchen: Degrease From Handles to Range Hood The kitchen is the greasiest room in the house and it gets the deepest attention. Wipe the cupboard handles and fronts, then pull everything out and wash the shelving inside. Appliances need the same two-layer treatment: scrub the stove, dishwasher, and fridge exteriors, where grime cakes onto the handles, then the inside of the fridge, where spills sit in places a sponge never reaches. A soft sponge and an old toothbrush cover most of it, with the toothbrush working the corners, the tracks, and the interior door seals. Three tasks homeowners skip The range hood: degrease the filter and the housing, since cooking oil settles there and re-deposits on every surface below. Inside the cupboards: empty them, wash the shelves, and restock while everything is out anyway. Sink and faucets: clear the buildup at the faucet base and the drain collar, then dry the basin so water spots do not return. Bathrooms: The Scrub You Keep Postponing Bathrooms hide germs in plain sight, so a true clean goes well past the bowl. Scrub the toilet inside and out, including the hinges and the handle, and lift the lid to wipe the tank as well. Then the bathtub or shower, where soap scum dulls the surface and the grout lines and mouldy caulk need real attention; that damp fungal buildup is exactly what the CDC’s guidance on mould and health tells you to control early, before it spreads. A mirror cabinet gets cleaned inside and out, and the toiletries go back inside it so the counter stays clear. Finish with the sinks, faucets, and showerheads, which hold a hard-water film no splash rinse removes. Living Room: Dust Traps and Light Fixtures The living room shows dust faster than anywhere else because it holds more fabric than any other room. Vacuum the curtains before the warm weather returns, spot clean the carpet where the kids and pets sit, and vacuum the sofa to pull embedded dust out of the cushions. Blinds respond to a damp microfiber cloth wiped one slat at a time. Then the fixtures: lamps collect a grey coat on the bulbs and inside the shades, and the switch panels and plates go dull from being handled all winter. Settled dust is also the main carrier of indoor allergens, and Health Canada’s advice on indoor air contaminants starts with removing it from soft surfaces. Bedrooms: Under the Bed and the Mattress Bedrooms are where dust bunnies go to breed, so get under the bed with the vacuum rather than a broom. The ceiling fan is the other hidden source: every blade carries a ridge of dust that the airflow throws into the room, so wipe the blades with microfiber or a duster built for the job. Then strip the bed, wash the blankets that have been storing body odour all winter, and flip or rotate the mattress while it is bare. Curtains, rugs, and upholstered chairs all take their turn in the wash or under the vacuum. Outdoor Areas: Patios, Decks, and Garden Tools The outdoor spaces are the parts of the home you actually live in all summer, so they belong on the list. Patio furniture wipes down with dish soap and a sponge, then rinses with a hose or a pressure washer. Sweep and wash the patio floor, the porch, the deck, and the balcony, scrub the outdoor carpet, and clean the windows that winter left streaked with rain marks. Garden tools are the item nobody thinks of: wipe the sap and soil off the blades and handles before it hardens. Two Days, Or the Whole Project Handed Over A schedule beats a heroic day. Kitchen and bathrooms on the first morning, when drying time helps, then living room and bedrooms in the afternoon, and the outdoor zone on day two while the weather holds. Work top to bottom and back to front in every room so you never cross a surface you just finished. If those two days are the ones you refuse to give up, our deep cleaning service covers exactly these zones with a bonded and insured crew. Rates sit on our pricing page before HST, including $393.75 for a two-bedroom deep clean and $441 for a three-bedroom, and a seasonal regular house cleaning visit holds the result. Confirm your borough on our locations page, and when cleaners are part of the plan, follow Health Canada’s household chemical safety rules on ventilation and storage. Frequently Asked Questions How long does a full spring clean take? A homeowner doing the whole house usually needs two full weekends. Working zone by zone in the order above is what stops it becoming a third, and handing the kitchen and bathrooms

Get a Perfect Spring Clean Without Sacrificing Your Weekends Read More »

cleaning basket

7 Key Areas to Focus on for a True Deep Clean

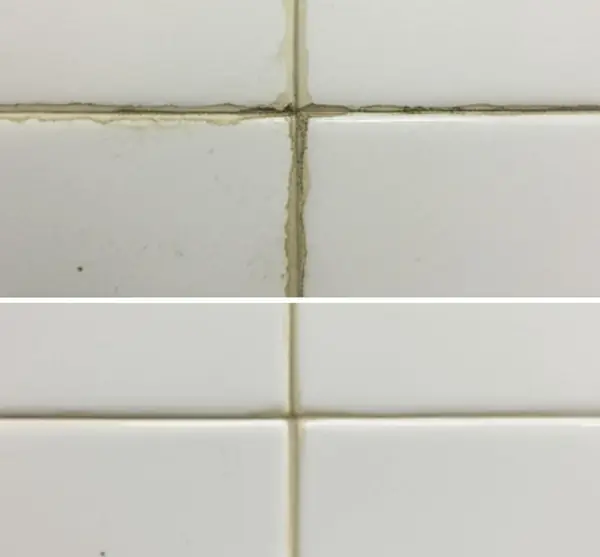
7 Key Areas That Separate a Deep Clean From a Tidying A routine clean wipes what is visible. A deep clean goes after the built-up grime you only find on your hands and knees with a flashlight. After years of working Toronto homes we can point to seven areas that decide whether a house is genuinely clean or merely tidy: the oven, the appliances, the grout lines, the toilet, the walls and baseboards, the hidden zones behind furniture, and the bathroom exhaust fan. Deep Clean Priorities at a Glance Area Why a wipe is not enough How often Oven Grease carbonizes and hardens each time you cook Every 1 to 3 months Appliances Interiors harbour odours and mould Every 1 to 3 months Grout lines Porous, so it absorbs dirt and stains Every 1 to 3 months Toilet Highest germ counts in the home Weekly, deep monthly Walls and baseboards Scuffs plus dust, hair, and pet fur Every 3 to 6 months Hidden areas Untouched for years behind furniture Every 3 to 6 months Exhaust fan Dust and mould coat the blades and motor Every 6 months Start in the Kitchen The oven The oven is one of the most overlooked spots in the house and rarely gets more than a quick wipe of the stovetop. Inside, spills bake onto the metal and carbonize into a grimy crust that ordinary cleaners barely touch. Wearing rubber gloves, apply a dedicated oven cleaner and let it dwell for the time the label states before wiping and rinsing with a damp cloth. A paste of baking soda and white vinegar handles mild buildup: spread it on, leave it several hours, then rinse. Appliances inside and out Appliances collect dust, crumbs, and grime on their surfaces and deep inside them. Scrub the stovetop and burners and clean the microwave and toaster, then the big three. Empty the fridge, wipe the shelves and interior door, toss expired food before restocking, and set an open box of baking soda inside to absorb odours. The dishwasher filter at the bottom of the tub traps food and grows a hard-water film; pull it out and wash it under hot running water with a brush and dish soap. In the laundry room, wipe the door gasket and detergent dispenser, where moisture and leftover detergent invite mould and a musty smell, then run a cleaning cycle with a machine cleaner or a cup of white vinegar. Keep the label and ventilation rules from Health Canada’s household chemical safety guidance in mind with these products. Work Through the Bathroom Grout lines Tile floors and shower walls need attention in two ways: the surface, and the grout holding the tiles together. Grout is porous and usually left unfinished, so it absorbs dirt and shows discolouration long before the tile does. Apply an alkaline cleaner or an oxygen bleach solution and scrub the lines with a stiff brush or an old toothbrush. Once it is clean and fully dry, apply a grout sealer so water and stains stop grabbing the lines, and reseal once a year. The toilet The toilet carries more germs than anywhere else in the home, and a superficial swipe misses the important parts. Use a toilet brush and a disinfectant made for toilets and work the whole interior, under the rim and down inside the drain hole where the worst buildup lives. Then the exterior: the seat, hinges, bolts, the base at the floor, and the flush handle, one of the most touched and most missed surfaces in the house. Wear gloves, ventilate, and never mix bleach with another cleaner; the CDC’s cleaning and disinfecting guidance is explicit about reading labels and allowing the contact time a product needs. Finish on the Vertical and the Invisible Walls and baseboards Walls hold scuffs, fingerprints, and dust, especially in hallways and behind doors. A lightly dampened magic eraser lifts most scuffs, and a baking soda paste handles stubborn ones. Then wipe the surface with a clean, barely damp microfiber cloth, working from the ceiling line down and saving the worst marks for last so the cloth is not smearing dirt across the paint. Baseboards catch dust, hair, and pet fur, so knock the debris off with the vacuum’s brush head and follow with the cloth. Hidden areas A deep clean goes where nobody looks. Dust, hair, crumbs, and forgotten objects pile up behind and under furniture, so pull the pieces away from the walls and vacuum there before wiping the floor. Then the quiet zones: closet and wardrobe floors, which collect lint, and the tops of shelves and cabinet fronts, where a thick layer builds up unseen. The bathroom exhaust fan The fan quietly pulls moist, dusty air out of the bathroom, and its blades and motor end up coated in dust and even mould. That slows the fan, spreads odours, and lets humidity linger, the same moisture problem the CDC’s guidance on mould and health tells you to control at the source. Switch the fan off at the breaker, remove the cover, vacuum the housing and blades, and wipe the blades with a damp cloth every six months. The Order That Makes It Stick Apply the oven cleaner first so it dwells while you work elsewhere. Vacuum loose debris from the ceiling line down in every room. Do the wet work next: appliances, then grout, then the toilet last. Walls and baseboards before the floor, so drips never re-mark clean paint. End with the fan cover and a final vacuum where furniture stood. Have the List Done for You Sequence matters more than effort, but seven areas still add up to a long day. Our crews carry this exact checklist, and a whole home deep cleaning service covers it in one visit. Rates before HST start at $270.38 for a studio or one-bedroom and $393.75 for a two-bedroom, listed on the pricing page. Renters can clear all of it at once with our end of tenancy move out cleaning.

7 Key Areas to Focus on for a True Deep Clean Read More »

How to Clean a Glass Stovetop: Your Secret Weapon for a Spotless Glass Stovetop

The glass stovetop, also known as the ceramic or glass-ceramic cooktop, is the epitome of modern kitchen design. Its sleek, black, uninterrupted surface offers a minimalist aesthetic that is both beautiful and, in theory, easy to clean. Unlike the coils and grates of traditional electric or gas ranges, which create a complex geography of hard-to-reach crevices, the flat plane of a glass stovetop promises a simple wipe-and-go experience. However, any owner of this appliance knows that this promise is conditional. While a brand-new glass stovetop is a joy to behold, a neglected one can quickly become a landscape of stubborn, baked-on messes, hazy white films, and microscopic scratches that permanently dull its shine. The key to maintaining that factory-new gleam lies in understanding the specific chemistry of the material and the physics of the soil that adheres to it. Cleaning a glass stovenol is not a battle of brute force; it is a science of solvency and precise mechanical leverage. Vitroceramic To clean a glass stovetop effectively, one must first appreciate the nature of the material. It is not ordinary window glass. It is a specialized ceramic glass engineered to withstand extreme and rapid temperature fluctuations without shattering. This “vitroceramic” material is incredibly hard and durable, but it is not impervious to damage. Its greatest vulnerability is scratching. The mistake that ruins most cooktops is the use of abrasive cleaners or scrubbing pads. A green scouring pad, a steel wool ball, or a powdered abrasive cleanser will act like sandpaper on the surface. While they may successfully remove the burnt-on food, they will leave behind a network of fine scratches. These micro-abrasions scatter the light, creating a dull, hazy appearance that can never be polished out. Furthermore, these scratches create microscopic valleys where future spills can get trapped, making the glass stovetop even harder to clean next time. The most common enemy of a glass stovetop is the boil-over. When a pot of starchy pasta water or sugary sauce bubbles over and hits the hot surface, the liquid evaporates instantly, leaving behind a carbonized crust that fuses to the glass. To the touch, this crust can feel as hard as concrete. The instinct is to scrub it, but the correct approach is a two-step process that combines chemical softening with mechanical shearing. The chemical softening phase involves using a specialized cleaner formulated for a glass stovetop. These are usually creamy, non-abrasive polishes that contain mild solvents and conditioners. The cream should be applied generously to the cool cooktop and spread over the burnt areas. The active ingredients need “dwell time” to work. They must sit on the stain for at least fifteen minutes to penetrate the carbon and begin to break down its molecular structure. Simply wiping the cleaner on and off immediately does nothing. Homemade Solution For those who prefer a pantry solution, a paste of baking soda and water is an excellent non-toxic alternative. The baking soda is alkaline, which helps to dissolve the acidic components of the burnt food, and its fine crystalline structure provides a gentle abrasion that is safe for the glass. This paste should also be allowed to sit and soften the debris. Some users enhance this method by spraying a light mist of white vinegar over the baking soda paste, creating a fizzing reaction that helps to lift the stain. However, the true power of the baking soda lies in its alkalinity and gentle scrubbing action. Once the chemical agents have had time to work, the mechanical shearing phase begins. This is where the single most important tool for glass stovetop maintenance comes into play: the razor blade scraper. While the idea of taking a metal razor to a glass surface sounds terrifying, it is the method recommended by almost every manufacturer. The key is that the steel of the razor blade is softer than the ceramic glass. When held at a shallow, forty-five-degree angle, the blade slides underneath the softened, burnt-on food, lifting it off the surface in a single sheet or flake. It does not scratch because it is not grinding; it is shearing. Using a scraper requires lubrication. It should never be used on a dry surface. The cleaning cream or the baking soda paste acts as a lubricant, allowing the blade to glide smoothly. The motion should be a firm, forward push. Never drag the blade backward, as this can cause the edge to chip, and a chipped blade will scratch the glass. After each pass, wipe the debris from the blade. This process removes the physical mass of the burn that no amount of scrubbing could touch. Sugar There is, however, a specific type of spill that requires immediate, urgent attention: sugar. If a sugary liquid, such as syrup, jam, or the juice from a fruit pie, spills onto a hot glass stovetop, you must act while it is still hot. As sugar cools, it can form a bond with the glass that is so strong it can actually cause the surface to pit or crack upon contraction. Keeping a razor blade scraper handy and, while wearing an oven mitt, carefully scraping the hot sugar off the surface immediately is the only way to prevent this permanent damage. Beyond the dramatic spills, a glass stovetop is often plagued by a subtle, hazy white film. This is usually caused by two things: mineral deposits from hard water or the use of aluminum or copper-bottomed pans. When water boils over, the calcium and magnesium in the water are left behind, creating a cloudy residue. This mineral scale is alkaline, so it requires an acid to dissolve it. A wipe-down with a cloth soaked in white vinegar will usually cut through this haze instantly. Metal Deposits The marks left by aluminum or copper pans are different. They are not stains; they are microscopic metal deposits. When the soft metal of the pan rubs against the hard glass, it leaves a trace of itself behind, much like a pencil leaves graphite on paper. These silvery or coppery streaks cannot be removed with standard cleaners. They require a mild abrasive polish, such as the

How to Clean a Glass Stovetop: Your Secret Weapon for a Spotless Glass Stovetop Read More »

Stain Remover Powder

7 Amazing Uses for Stain Remover Powder You Need to Know

One Powder, Dozens of Jobs Shopping aisles overflow with sprays, gels, and liquids that each promise to fix one specific mess. Meanwhile, an unassuming granulated powder often sits overlooked, even though it can whiten laundry, erase food stains, and scrub away grime across the whole house. Stain remover powder, usually sold as oxygen bleach, is a sodium percarbonate compound that releases the cleaning power of oxygen in hot water, without the harsh, corrosive effects of traditional chlorine bleach. It is color-safe on most washable fabrics, which makes it one of the most versatile tools in any cleaning cupboard. How Stain Remover Powder Works Sodium percarbonate is a stable combination of sodium carbonate and hydrogen peroxide. The moment it meets water, especially hot water, it splits into those two components. The sodium carbonate, also known as washing soda, softens water and helps break down grease and oils. The hydrogen peroxide then goes to work as an oxidizer: it breaks apart the molecules that give organic stains their color, turning them colorless so they rinse away easily. Heat starts the reaction, and time lets it finish, which is why the two golden rules are always hot water and patience. In the Laundry Room: Whitening and Rescue Soaks 1. Brighten a whole load. Add one to two scoops of powder to the washing machine drum along with your regular detergent, and run a warm or hot cycle. The heat fully activates the compound so dingy white shirts, bed sheets, and bath towels come out noticeably brighter. 2. Pre-soak set-in stains. Dissolve two to four tablespoons of powder per gallon of the hottest water the fabric can safely tolerate, making sure every grain dissolves before you add the garment. Submerge the item and let it soak for one hour for light stains, up to eight hours or overnight for coffee, tea, red wine, grass, juice, or yellowed vintage linens. You will often see the water change color as the stain lifts out of the fibers, then launder as usual. In the Kitchen: From Mugs to Bakeware 3. Restore mugs, teacups, and carafes. The brown tannin film that builds up inside ceramic vessels vanishes without scrubbing. Put one to two teaspoons of powder in the bottom of the stained item, carefully fill it with boiling water, and let it sit for at least 30 minutes while the gentle fizz releases oxygen. Pour it out to reveal a sparkling interior. 4. Revive stained cutting boards. Make a thick paste with the powder and a little hot water, scrub it into a plastic cutting board, wait 20 minutes, and rinse. The paste lifts berry and tomato stains while deodorizing the board. 5. Soak away burnt-on food. For stainless steel or ceramic bakeware, place the dish in a sink, sprinkle it liberally with powder, and carefully fill it with boiling water. After several hours, carbonized food that once demanded intense scraping softens and lifts away with ease. In the Bathroom: Grout That Looks New Again 6. Whiten grout lines. Porous grout soaks up soap scum, dirt, and mildew, turning dingy over time. Mix the powder with hot water into a thick paste and apply it along the grout lines using an old toothbrush or a similar small brush. Let it work for at least 30 minutes, spritzing with water occasionally to keep the paste moist, then scrub and rinse thoroughly. The oxidizing action pulls the grime out of the pores and leaves the grout visibly lighter. Outside: Decks, Patios, and Outdoor Furniture 7. Clear mildew, moss, and algae. Dissolve about one cup of powder in a gallon of hot water, apply it to wooden decks, patios, and outdoor furniture with a deck brush or mop, and keep the surface wet for about 30 minutes. Scrub and rinse with a garden hose. The oxygen bleach kills organic growth and lifts grime without the damage chlorine bleach can cause to wood fibers. Where mold and mildew keep returning, the CDC’s mold cleanup guidance is a useful reference for treating the growth and the moisture behind it. Using Stain Remover Powder Safely Oxygen bleach is gentler than chlorine bleach, but it still deserves respect. Do not use it on delicate protein fibers such as wool or silk, on aluminum, or on finished, painted, or varnished wood. Always spot test vibrant or delicate fabrics on a hidden seam first. Never mix the powder with other chemicals, particularly chlorine bleach or acids, because the combination can create hazardous reactions; the CDC’s bleach safety guidance stresses that bleach and other cleaners should never be combined. Keep all cleaning products out of children’s reach and follow the household chemical safety advice from Health Canada when buying, using, and storing them. Wear gloves for long soaks, since concentrated solutions can irritate skin. Dissolve the powder completely in hot water before adding fabric or submerging items. Rinse every surface that touches food thoroughly after cleaning. Use Amount Dwell Time Laundry brightener 1-2 scoops per load Full wash cycle Stain pre-soak 2-4 tbsp per gallon 1 hour to overnight Mugs and carafes 1-2 tsp plus boiling water 30 minutes Cutting boards Thick paste 20 minutes Burnt-on bakeware Liberal sprinkle plus boiling water Several hours Grout Thick paste 30 minutes Decks and patios 1 cup per gallon 30 minutes Frequently Asked Questions Is stain remover powder the same as chlorine bleach? No. Chlorine bleach whitens through a harsh chemical reaction and is only safe for whites, while oxygen bleach releases hydrogen peroxide in water and is color-safe on most washable fabrics. Both are powerful, but they work very differently. Why do instructions always call for hot water? Heat is the catalyst that activates sodium percarbonate. In cold water the reaction is sluggish and far less effective, so always use the hottest water your fabric or surface can safely handle. Can I use it on wool or silk? No. Oxygen bleach can damage delicate protein-based fibers. Reserve it for cotton, linen, and other durable fabrics, and always spot test

7 Amazing Uses for Stain Remover Powder You Need to Know Read More »

White Sneakers, Suede and Leather Shoes

White Sneakers, Suede and Leather Shoes: A Comprehensive Cleaning Guide

Shoes Deserve Material-Specific Care A favorite pair of shoes takes a beating: road dust, mud splatters, scuffs, and the daily wear of city life. Cleaning them is not just about looks. Regular care preserves the material, extends the shoe’s life, and keeps it hygienic to wear. The catch is that shoes are built from very different materials, and a method that restores one pair can ruin another. Warm soapy water is wonderful for canvas, disastrous for suede, and only half the story for leather. White Sneakers: Skip the Washing Machine The biggest mistake people make with white sneakers is tossing them into the washing machine. The tumbling deforms the shoe’s structure, weakens the uppers, and damages the foam midsoles and adhesives that hold everything together. Instead, use a patient hands-on routine. Gather a few basics first: A soft-bristled brush plus mild dish soap and warm water for canvas uppers, insoles, and laces. A melamine foam eraser for scuff marks on rubber and foam midsoles. Newspaper or paper towels to stuff the shoes while they air dry. Start by removing the laces and insoles, then brush the whole shoe with a dry, soft-bristled brush to lift loose, caked-on dirt. Scrub the insoles on both sides with warm water and a few drops of gentle dish soap, rinse them well, and set them aside to air dry. Soak the laces in the same soapy solution, rub them between your hands, and rinse. For the uppers, match the tool to the material. Canvas takes a soft brush or cloth dipped in the soapy solution, worked in small circular motions. Synthetic leather prefers a soft cloth so the surface does not scratch. A lightly dampened melamine foam eraser lifts scuff marks and grass stains from smooth parts of the upper and from white rubber or foam midsoles, which is often the secret to brilliant white soles. Use a stiffer brush on the durable rubber outsoles to dig dirt out of the treads. The CDC’s home cleaning guidance notes that plain soap and water removes most dirt and germs from soft surfaces, and shoes respond to the same principle. For very dirty white canvas, mix equal parts baking soda and gentle detergent with a little water into a thick paste, scrub it in with a toothbrush, and leave it for about 20 minutes before blotting it clean with a damp cloth. An even stronger whitening trick: a paste of baking soda and hydrogen peroxide on the canvas, then a few hours in direct sunlight; the peroxide and UV rays work together as a natural bleach. Drying is the most critical phase. Never use a clothes dryer or park sneakers beside a radiator; heat warps the shoe, shrinks materials, and melts glue. Air dry them slowly in a well-ventilated spot, out of direct sunlight, which can yellow some materials. Stuff the shoes tightly with crumpled newspaper or absorbent paper towels to hold their shape and wick moisture from the inside, replacing the paper every few hours until fully dry, which can take up to 24 hours. Suede and Nubuck: Dry Care Only Suede and nubuck have a soft, velvety nap that water flattens, leaving permanent dark spots. Treat these materials almost entirely dry. Keep a dedicated suede brush, one with soft nylon or brass bristles on one face and a rubber crepe strip on the other, plus a suede eraser for marks. Brush the whole surface in one consistent direction to lift surface dirt and restore the nap. For scuffs, rub the suede eraser firmly over the mark to pull dirt out of the fibers, then brush again to remove residue. For grease or oil spots, skip water entirely and cover the fresh stain with an absorbent powder such as cornstarch or talcum powder. Leave it for several hours or overnight while it draws the oil out of the suede, then brush the powder away. If rain leaves water spots, treat the whole shoe with a barely damp cloth so the moisture is uniform, let it dry completely, then brush vigorously to bring the nap back to life. Always store footwear completely dry; damp shoes left in a closet can grow mildew, as the CDC’s mold resources explain. Smooth Leather: Clean, Then Condition Leather needs cleaning and conditioning, because leather is skin and it dries out and cracks without moisture. Remove the laces and dust the shoes with a horsehair brush. Wipe with a lightly dampened, not wet, cloth and a mild pH-neutral soap such as saddle soap. Use a toothbrush on the welt, the seam between upper and sole, to reach crevices. Wipe away any soap residue with a clean dry cloth, then apply a small amount of quality leather conditioner with a soft cloth, rubbing in small circular motions. Let it soak in, then buff to a soft shine. Conditioning restores flexibility and prevents cracks. When working with any soap or conditioner, follow the household chemical safety practices from Health Canada and keep products away from children. Colored Canvas: Protect the Dye Colored canvas cleans like white canvas with one extra rule: protect the dye. Use cold water only, because hot water makes dyes bleed and fade, and spot test your soap solution on the inside of the tongue first. Dry colored canvas out of direct sunlight, which fades vibrant colors quickly. Material Clean With Never Do White canvas Soft brush, soapy water, baking soda paste Washing machine, dryer heat Synthetic leather Soft cloth and mild soap Scrubbing brushes on the upper Suede and nubuck Suede brush, eraser, cornstarch for oil Water, soap, washing machine Smooth leather Damp cloth, saddle soap, conditioner Soaking, harsh detergents Colored canvas Cold water and mild soap Hot water, direct sun while drying Frequently Asked Questions Can I put white sneakers in the washing machine? It is not recommended. The machine can deform the shoe, weaken the upper, and damage foam midsoles and glue. Hand cleaning with a brush, mild soap, and a melamine eraser protects the shoe

White Sneakers, Suede and Leather Shoes: A Comprehensive Cleaning Guide Read More »

Sodium Percarbonate

6 Genius Ways to Use Sodium Percarbonate in Your Cleaning Routine

The White Powder That Cleans With Oxygen Most people know chlorine bleach and its drawbacks: harsh fumes, damaged fabrics, and whites that yellow over time. Far fewer know its gentler cousin, sodium percarbonate, the ingredient behind products sold as oxygen bleach. This unassuming white powder is a dry, granulated compound of hydrogen peroxide held in a stable form with sodium carbonate, also known as washing soda or soda ash. Dry, it is completely inert. Dissolved in hot water, it splits into hydrogen peroxide, a powerful oxidizer, and sodium carbonate, a water softener that cuts through grease. The peroxide attacks the molecules that give organic stains their color, breaking them into colorless compounds that wash away. The result is a cleaner that is tough on coffee, tea, red wine, grass, and blood, yet far gentler on most fabrics than chlorine bleach. Six Ways to Put Sodium Percarbonate to Work 1. Brighten laundry. Add two to three tablespoons of powder to the machine drum with your regular detergent and wash on a warm or hot cycle. The heat fully activates the compound and releases the maximum amount of oxygen, restoring dingy whites and reviving dull, light-colored fabrics. 2. Pre-soak stubborn stains. Dissolve one to two tablespoons of sodium percarbonate per gallon of the hottest water the fabric can safely tolerate, making sure the powder dissolves completely before adding the garment. Soak for one hour on lighter stains, up to eight hours or overnight for deeply set-in marks. You will often see the water change color as the stain lifts from the fabric, and a soak rescues stained baby clothes, yellowed pillowcases, and grimy dish towels that regular washing cannot save. 3. Restore mugs and teacups. Years of coffee and tea leave a brown film inside ceramic that scrubbing barely touches. Drop one to two teaspoons of powder into the stained vessel, carefully fill it with boiling water, and wait at least 30 minutes while the solution fizzes gently. Pour it out and the interior is sparkling clean with zero scrubbing. 4. Clean cutting boards, bakeware, and thermoses. A thick paste of powder and hot water scrubbed into a stained plastic cutting board lifts berry and tomato marks in about 20 minutes and deodorizes the board at the same time. For burnt-on food on stainless steel or ceramic bakeware, sprinkle the powder liberally over the dish, fill it with boiling water, and soak for several hours; carbonized food softens and lifts away without scraping. A stained thermos or coffee carafe cleans up with the same soak-and-rinse method used for mugs. 5. Whiten grout and shower curtains. Porous grout absorbs soap scum, dirt, and mildew until it looks permanently gray. Make a thick paste of sodium percarbonate and hot water, work it into the grout lines with an old toothbrush, and keep it moist for at least 30 minutes before scrubbing and rinsing; the oxidizing action pulls grime out of the pores. Plastic shower curtains with mildew spots come clean with a long soak in a hot sodium percarbonate solution in the tub or a large basin. 6. Clear mildew, moss, and algae outdoors. Dissolve about one cup of powder in a gallon of hot water, spread it over wooden decks, patios, and outdoor furniture with a deck brush or mop, and keep the surface wet for about 30 minutes before scrubbing and rinsing with a garden hose. It eliminates organic growth and lifts grime without chlorine bleach’s harshness, which can harm wood fibers. For persistent mildew problems indoors and out, Health Canada’s mould guidance explains how to remove growth and prevent it from returning by controlling moisture. Heat and Dwell Time Rule Everything Sodium percarbonate has two non-negotiables. First, heat: hot water is the catalyst that triggers the release of oxygen, and in cold water the reaction is sluggish and nearly useless. Second, time: the cleaning action is not instant. Whether it is 15 minutes for a mug or an overnight soak for a stained shirt, dwell time is what lets oxidation fully break down stain molecules, which is why every method above pairs hot water with patience. Hot water activates the powder; cold water leaves the reaction sluggish. Dwell time does the cleaning, from 15 minutes for mugs to overnight for stains. Rinse cleaned surfaces thoroughly before using them again. Handle It With Care Sodium percarbonate is significantly safer than chlorine bleach, but it is still a powerful oxidizer. Wear gloves for long soaks, because concentrated solutions can irritate skin. Keep it away from delicate protein fibers such as wool and silk, which it can damage, and skip aluminum and finished, painted, or varnished wood. Never mix it with other chemicals, especially chlorine bleach or acids like vinegar; the CDC’s bleach safety guidance warns that combining cleaners can release dangerous vapors. Follow the household chemical safety advice from Health Canada for buying, storing, and disposing of all cleaning products. Job Amount Water Dwell Time Laundry brightener 2-3 tbsp Warm or hot cycle Full cycle Stain pre-soak 1-2 tbsp per gallon Hottest safe for fabric 1 hour to overnight Mugs and teacups 1-2 tsp Boiling 30 minutes Bakeware and thermoses Liberal sprinkle Boiling Several hours Grout and shower curtains Thick paste or full soak Hot 30 minutes or longer Decks and patios 1 cup per gallon Hot 30 minutes Frequently Asked Questions What exactly is sodium percarbonate? It is a granulated compound of sodium carbonate and hydrogen peroxide. In water, especially hot water, it releases hydrogen peroxide, which oxidizes and breaks down the molecules that give organic stains their color. How is it different from chlorine bleach? Chlorine bleach whitens through a harsher reaction, can damage fabric fibers, and is unsafe on many colors. Sodium percarbonate releases oxygen gently and is color-safe on most washable fabrics, making it far more versatile. Can I mix sodium percarbonate with vinegar? Never. Mixing it with acids or chlorine bleach can create unpredictable and potentially hazardous reactions. Use it on its own, dissolved in water, and

6 Genius Ways to Use Sodium Percarbonate in Your Cleaning Routine Read More »