Begin by ensuring your safety. Basements often have poor ventilation. Open any available windows and doors. Utilize fans to circulate air. Adequate lighting is crucial; if built-in lighting is insufficient, bring in portable work lights. Equip yourself with heavy-duty gloves, an N95 respirator mask to protect against dust, mold spores, and other airborne particles, and safety glasses. Wear sturdy, closed-toe shoes to protect your feet. Be mindful of potential pests like spiders, insects, or signs of rodents. Exercise caution around electrical outlets and wiring, especially in damp conditions.
1.Cleaning Tools
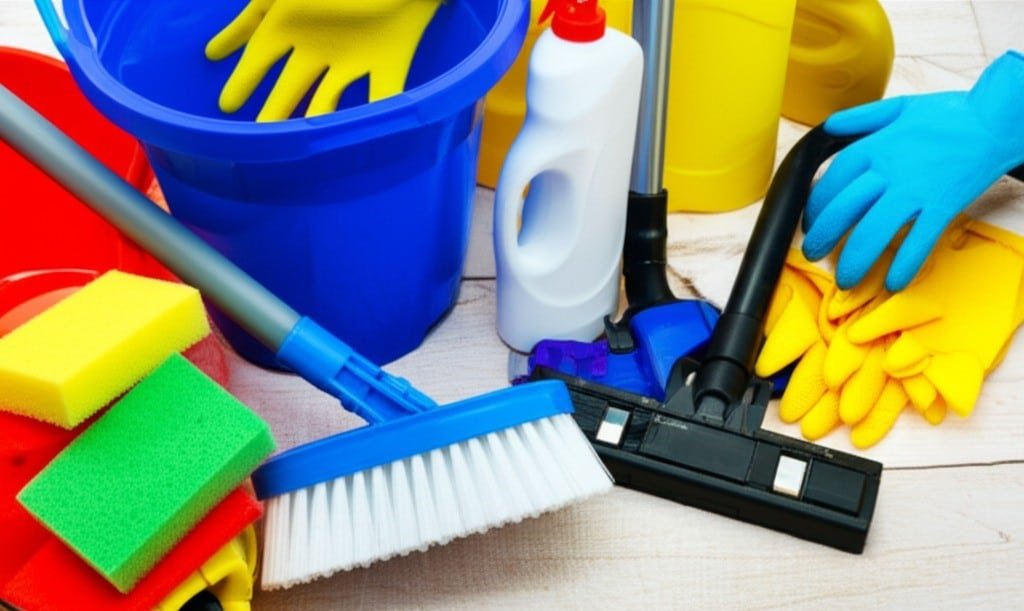
Gather your cleaning supplies. You will need heavy-duty trash bags, sorting boxes or bins, labels, and markers. For cleaning, assemble an all-purpose cleaner, a disinfectant, a specific mold and mildew remover, a degreaser if you have oily stains, and a concrete cleaner for unsealed floors. If you have basement windows, glass cleaner will be necessary. For any wooden elements, have wood polish on hand. Tools should include a vacuum cleaner with crevice and brush attachments, a shop vac for larger debris or potential water, a mop and bucket, a selection of scrub brushes (various sizes and stiffness levels), plenty of rags or microfiber cloths, sponges, and a squeegee. A step ladder will be essential for reaching high areas. A utility knife can be useful for breaking down boxes. A broom and dustpan are standard. Consider having a dehumidifier ready to run after cleaning and an air purifier to improve air quality.
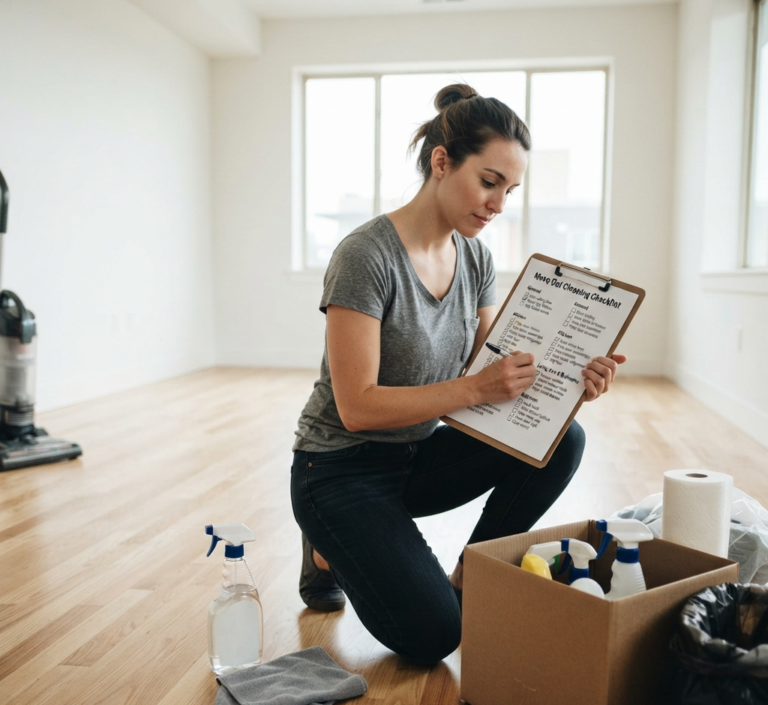
Before diving in, clear a workspace. Move items to create a pathway and an area to sort. Walk through the basement to identify problem areas visible mold, signs of pests, water stains, or areas of extreme clutter. Define what you want to achieve with this cleaning: is it primarily decluttering, a deep sanitizing clean, or preparing the space for organization? To make the task less daunting, divide the basement into manageable zones, such as a storage section, laundry area, and any recreational or workshop spaces.
2.Boxes Method
The first major phase is decluttering. Employ a systematic approach, such as the four-container method. Designate areas or use large boxes for: “Keep” (items that will remain in the basement or be stored properly), “Donate/Sell” (items in good, usable condition that you no longer need), “Trash/Recycle” (items that are broken, expired, damaged beyond repair, or no longer serve a purpose), and “Relocate” (items that belong in other parts of your home).
Address categories of items methodically. Go through old furniture. Assess its condition and usefulness. If it’s structurally sound but unwanted, consider donation or selling. If damaged, arrange for disposal. Tackle boxes of stored items one by one. This is often the most time-consuming part. Be honest with yourself about whether you truly need each item. For clothing, sort through anything stored in the basement. Remove items that are outgrown, no longer in style, damaged, or haven’t been worn in years. Donate usable clothing and discard the rest. The same applies to children’s toys; broken or unused toys can be discarded or donated.
Sift through any paperwork. Old bills, manuals for discarded appliances, and outdated documents can often be recycled. Ensure you shred any documents containing sensitive personal information. Hobby supplies and sports equipment should be evaluated. If hobbies are no longer pursued or equipment is broken or outdated, decide whether to keep, sell, donate, or discard. Holiday decorations are a common basement inhabitant. Inspect them for damage. Discard broken ornaments or lights. Consolidate decorations into well-sealed containers. Go through tools and hardware. Organize what you keep and dispose of broken or rusted tools. Be cautious with old paints, solvents, and chemicals. Check your local municipality’s guidelines for hazardous waste disposal; never pour these items down the drain or put them in regular trash.
Dealing with sentimental items requires a gentle but firm approach. Acknowledge the emotional attachment, but also recognize that keeping everything can lead to overwhelming clutter. Set a limit, perhaps one or two clearly labeled boxes for true keepsakes. For items you feel nostalgic about but don’t have space for, consider taking photographs as a memento before letting them go.
Once sorting is complete, focus on removing the unwanted items. Schedule a bulk trash pickup with your municipality for large items if necessary. Make trips to local donation centers with items designated for donation. For very large decluttering projects, renting a small dumpster for a weekend might be a practical solution.

3.Accessories
With the clutter removed, you can begin the deep cleaning of all surfaces. Start from the top down.
Use a long-handled duster or a vacuum cleaner with a brush attachment to remove cobwebs and dust from the ceiling, corners, and along the tops of walls. Pay attention to light fixtures and any exposed ductwork or pipes. For general wall dusting, a microfiber mop with a clean, dry pad works well, or use a large microfiber cloth. If walls are visibly grimy or stained (and are painted with washable paint), you may need to wash them. Mix a mild solution of all-purpose cleaner or a few drops of dish soap in a bucket of warm water. Always spot-test in an inconspicuous area first to ensure the paint or surface isn’t damaged. Use one sponge or cloth to wash and another rinsed in clean water to wipe away any detergent residue. Work in sections.
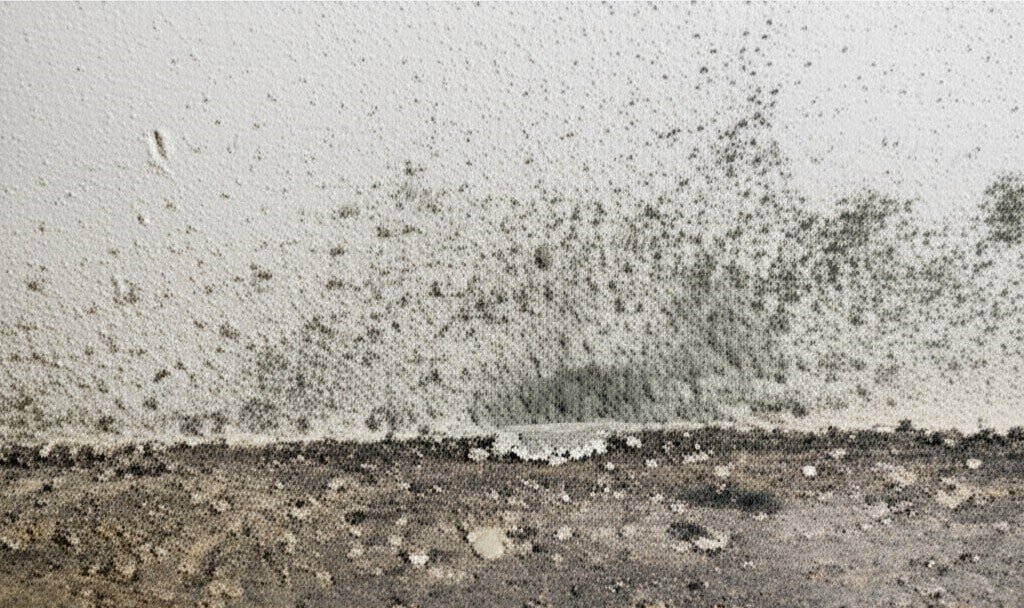
If you encounter mold or mildew on ceilings or walls, address this carefully. For small, contained areas, use a dedicated mold and mildew remover. Ensure the area is well-ventilated, and you are wearing your PPE (gloves, mask, eye protection). Spray the cleaner onto the affected area, let it sit according to the product instructions, and then wipe or scrub clean. For extensive mold growth (larger than a few square feet), it is advisable to consult a professional mold remediation service.
The type of flooring will dictate your cleaning method.
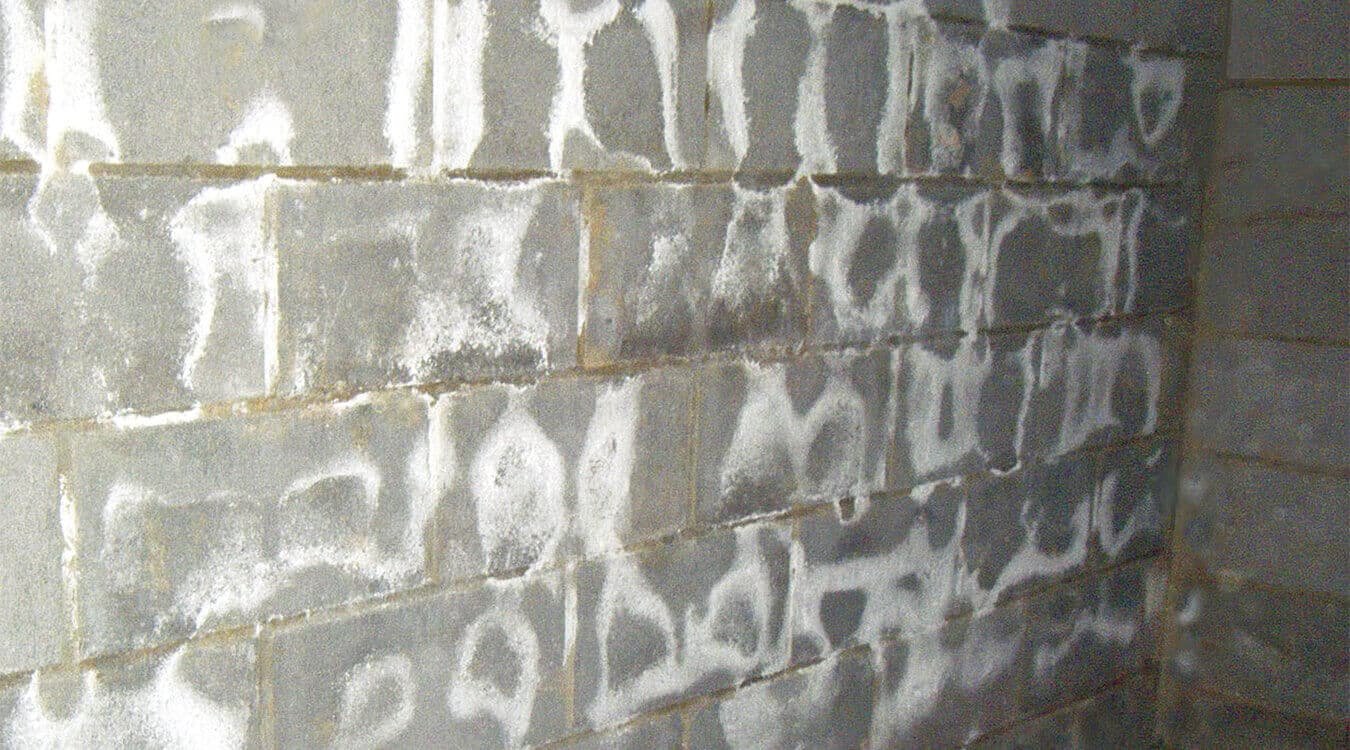
For concrete floors, which are common in basements, begin with a thorough sweeping to remove loose dirt and debris. Follow up with a shop vac, using the crevice tool along edges and in corners, to pick up fine dust particles that sweeping might miss. To clean stains, especially oily ones, a degreaser or a heavy-duty concrete cleaner will be necessary. Apply the cleaner to the stained area, let it penetrate for the recommended time, and then scrub vigorously with a stiff-bristled brush. For general cleaning, you can mop the concrete floor with a solution of all-purpose cleaner or a disinfectant. If you notice a white, powdery residue (efflorescence), this is caused by salts leaching from the concrete due to moisture. It can often be removed by scrubbing with a stiff brush and water, or a specialized efflorescence remover. After cleaning and allowing the concrete to dry completely, consider applying a concrete sealer. This will help protect against future stains, reduce dust, and make cleaning easier.
For vinyl or linoleum floors, sweep or vacuum to remove all loose debris. Then, mop with a cleaning solution appropriate for vinyl flooring. Avoid using overly abrasive cleaners or excessive water, which can seep into seams.
For tiled floors, sweep or vacuum first. Pay special attention to grout lines, which can trap dirt. Use a grout brush and a specialized grout cleaner, or a paste of baking soda and water, to scrub these lines. Once the grout is clean, mop the entire tiled surface with an appropriate tile cleaner.
If you have carpeted areas in your basement, begin with a thorough vacuuming. Pass over the carpet multiple times, in different directions, to extract as much dirt and dust as possible. Use the vacuum’s attachments to clean edges and any crevices. Treat any spots or stains with a suitable carpet spot cleaner, following the product instructions carefully. For a deeper clean, especially if the carpet is old or heavily soiled, consider renting a carpet cleaning machine or hiring a professional carpet cleaning service. Basements can be prone to dampness, so ensure any cleaned carpet dries thoroughly to prevent mildew growth; use fans and a dehumidifier to speed up drying.
4.Window
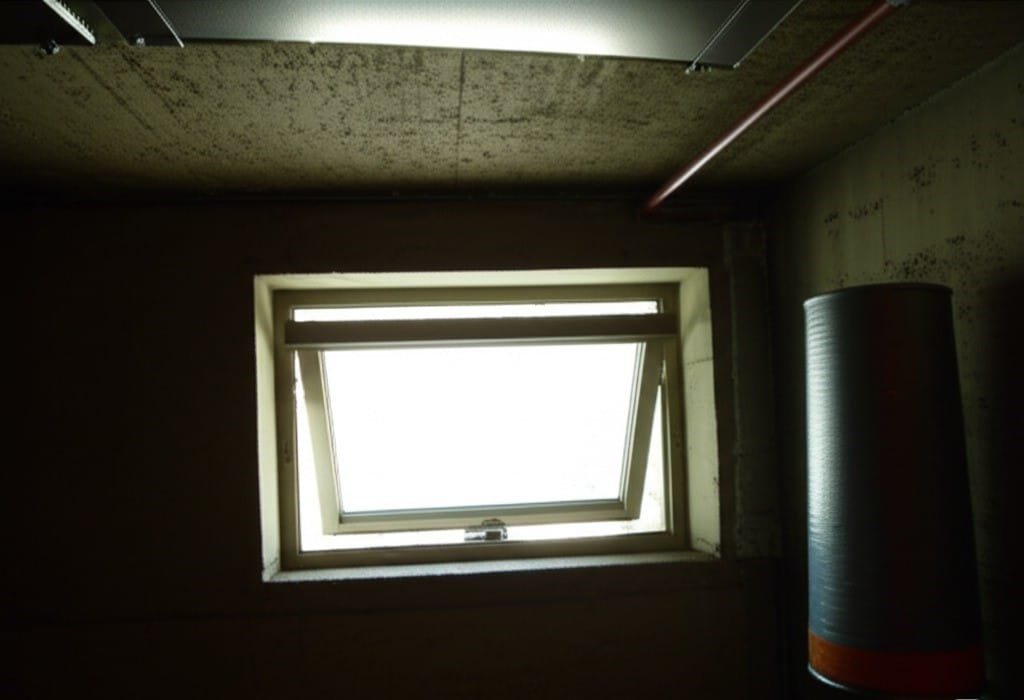
If your basement has windows, clean the sills and tracks first. Vacuum out any loose dirt, dust, and dead insects. Wipe down the sills and tracks with a damp cloth and all-purpose cleaner. Then, clean the window glass. Spray a glass cleaner onto the panes and wipe clean with a lint-free microfiber cloth or use a squeegee for a streak-free finish. Don’t forget to check and clean window wells on the exterior if accessible; remove leaves, debris, and ensure they are draining properly to prevent water from seeping into the basement.
Dust and wipe down all light fixtures. Ensure the power to the lights is turned off before cleaning. If the fixtures have covers, remove them carefully and wash them if they are dirty. Empty any shelving units completely. Dust the shelves thoroughly and then wipe them down with an appropriate cleaner. Before returning items to the shelves, ensure the items themselves are clean. Dust any exposed support beams, posts, or pillars. Clean the basement staircase. Sweep or vacuum the treads and risers. Wipe down the handrails and banisters with a disinfectant cleaner. Inspect the area around your sump pump. Clean away any debris that may have accumulated in or around the pit. Test the sump pump (if you know how) to ensure it is functioning correctly, especially before rainy seasons. Carefully dust the exterior of your furnace and water heater. Do not attempt to clean the internal components unless you are qualified to do so. Ensure the area around these appliances is clear of clutter, as flammable materials stored too close can be a fire hazard.
If your laundry area is in the basement, this requires special attention. Pull out the washer and dryer, if possible, to clean behind and underneath them. This area often accumulates a lot of lint, dust, and lost socks. Clean the washing machine itself according to the manufacturer’s instructions (many have self-clean cycles or require specific cleaners). Wipe down the exterior of both the washer and dryer. Critically, clean the dryer’s lint trap thoroughly after every load, and at least annually, clean the entire dryer vent hose that leads to the outside. A clogged dryer vent is a significant fire hazard. If you have a utility sink, scrub it clean with an all-purpose cleaner or a more abrasive cleaner if it’s heavily stained.
5.Mold and Mildew
Basements are prone to certain issues that need to be addressed during cleaning.
As mentioned, identify any mold or mildew. Small areas can be cleaned with appropriate products and PPE. Remember that mold feeds on organic material and moisture. Simply cleaning visible mold is not enough; you must also address the moisture source that allowed it to grow. If you find large areas of mold, or if it returns quickly after cleaning, it’s best to call a professional mold remediation service as there might be a more significant underlying issue. Prevention is key: control humidity levels (ideally between 30-50%) with a dehumidifier, ensure adequate ventilation, and promptly fix any leaks from pipes, foundations, or windows.
Look for signs of pests such as droppings, gnaw marks, nests, or an abundance of webs. Clean these areas thoroughly, wearing gloves. Dispose of droppings and nesting materials in a sealed bag. After cleaning, try to identify and seal any potential entry points for pests, such as cracks in the foundation, gaps around pipes or windows, or openings in vents. Use caulk or steel wool for smaller gaps. For persistent pest problems, you may need to use traps or baits (follow instructions carefully, especially if you have pets or children) or call a professional pest control service.
6.Odors
Musty odors in basements are typically caused by mold, mildew, or general dampness. The cleaning process itself, especially addressing any mold, will help significantly. After cleaning, ensure the basement is well-ventilated. Run a dehumidifier consistently to maintain low humidity. You can also use natural odor absorbers like open boxes of baking soda, activated charcoal bags, or bowls of white vinegar (remove after a day or two) to help neutralize lingering smells. An air purifier with a HEPA filter can also improve air quality and reduce odors.
Controlling moisture is the most critical factor in maintaining a clean and healthy basement. Identify sources of dampness. These can include interior leaks (plumbing), exterior leaks (cracks in foundation, poor grading), condensation (on cold pipes or walls), or high ambient humidity. Repair any plumbing leaks immediately. Ensure the ground outside slopes away from your foundation. Gutters and downspouts should be clear of debris and direct water at least six feet away from the house. Use a dehumidifier to control humidity. In some cases, more extensive solutions like installing an interior drainage system or exterior waterproofing may be necessary if dampness is a persistent problem.

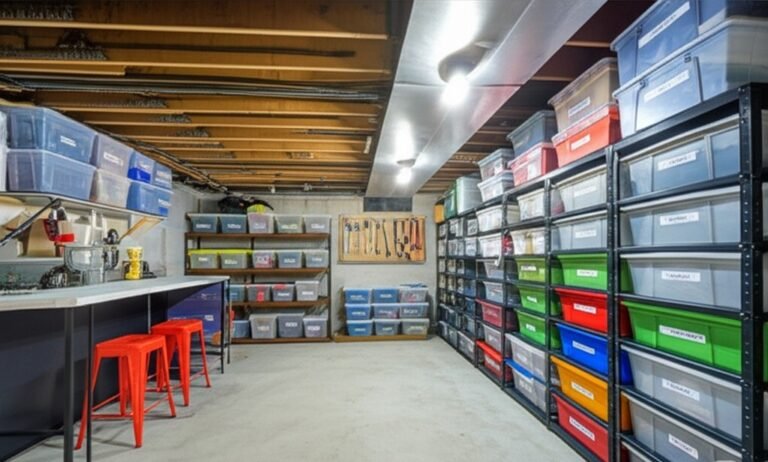
7.Organization
Once the basement is thoroughly cleaned, implement an organization system to keep it that way.
Invest in good quality storage containers. Clear plastic bins with tight-fitting lids are preferable to cardboard boxes, as they protect contents from moisture, pests, and dust, and allow you to see what’s inside. Install sturdy shelving units to get items off the floor. Metal or heavy-duty plastic shelving is better than wood in potentially damp environments. Label every bin and box clearly with its contents. Utilize vertical space as much as possible with tall shelving units or wall-mounted storage.
If you haven’t already, formally designate zones in your basement for different purposes – a clear storage area, a utility area around the furnace and water heater, a workshop space, or a recreational zone. Keeping items for specific functions grouped together makes them easier to find and use.
A clean basement requires ongoing attention.
Weekly: Perform a quick sweep or vacuum of high-traffic areas. Empty dehumidifier collection tray if not set to drain continuously. Do a quick visual check for any new signs of leaks, pests, or mold.
Monthly: Do a more thorough dusting of surfaces and shelves. Check the dehumidifier filter and clean if necessary.
Seasonally (e.g., every 3-4 months): Briefly go through stored items to see if anything can be decluttered. Check window wells for debris. Inspect more closely for signs of pests or mold growth, especially in corners or less accessible areas.
Annually: Perform a deeper clean, similar to this initial major clean, though it should be much quicker if regular maintenance has been done. Reassess your organization system and make any necessary adjustments. Check and clean dryer vents.

After all the cleaning and organizing, allow the basement to air out thoroughly. If you have an air purifier, run it for a day or two to capture any remaining airborne particles. Do one final walk-through to ensure everything is in its place and looks clean.
Cleaning a basement is a significant undertaking, involving thorough decluttering, meticulous cleaning of surfaces like floors, walls, and fixtures, addressing specific issues such as mold, pests, and dampness, and finally, organizing the space for ongoing usability and maintenance. For a professional, comprehensive basement cleaning, Toronto Shine Cleaning offers services to tackle this extensive job, ensuring your basement is thoroughly cleaned and revitalized.