Bathroom Cleaning

Bathroom Cleaning

getting ready for fall cleaning

September Cleaning: 7 Quick And Easy Steps To Get Ready For Fall

Why September Is the Month to Reset Your Home In Canada, September closes out summer and opens the long indoor season. The house needs more than a dust-off: it needs a cleanout that removes the clutter and grime of the warm months and readies every room for the weeks when windows stay shut and family time moves inside. A systematic September cleaning pays off twice, once in a healthier, calmer home right away and again in easier living all winter. Work in order, from planning and decluttering through room-by-room detail, and the whole project becomes manageable instead of overwhelming. Plan the Project Before You Spray Anything Start by scheduling time blocks for each area or task type, which turns a mountain into a list of afternoon-sized steps. Then take inventory of your supplies so you are never hunting for a bottle mid-task. Microfiber cloths, a vacuum with attachments, a mop, buckets, and protective gloves All-purpose cleaner, disinfectant, glass cleaner, bathroom cleaner, and floor cleaner Eco-friendly, non-toxic products if children, pets, or allergy sufferers live in the house Declutter First With the Three-Box Method Every room gets sorted before any cleaning starts, using three boxes: keep and organize, donate or sell, and trash or recycling. Begin with summer gear, so beach equipment, garden decorations, and warm-weather clothes get packed away. Work through clothing, toys, books, and stationery; clear the pantry and refrigerator of expired food and regroup what stays; gather papers and magazines into categories; and rotate the wardrobe so autumn layers sit at the front. Fewer objects means less dust to chase and fewer surfaces to wipe. When you finish, deliver the donation box the same week so it does not become clutter again. Kitchen Deep Clean for the Season The kitchen earns the most attention because it feeds everyone. Clean the oven interior and its grease and residue, wash the microwave inside and out, and empty the refrigerator fully, wiping shelves and drawers with mild soap and water. Run the dishwasher on a vinegar cycle to clear deposits and odours. Wipe cabinets and drawers inside and out, scrub countertops and backsplashes, disinfect the sink and faucets, and freshen the garbage disposal. Finish by mopping or steaming the floor. Bathrooms, Bedrooms, and Living Areas Bathrooms Scrub toilets, showers, and tubs, and attack the tile grout where mold and mildew settle. Wash or replace the shower curtain and liner, clean mirrors and light fixtures, disinfect every contact point from faucets to doorknobs and switches, then wash and disinfect the floor. Toss expired products from the medicine cabinet while you are in there. Excess moisture is what invites bathroom mold in the first place, and Health Canada’s advice on reducing humidity, moisture, and mould is worth applying to every damp room before winter closes the house up. Bedrooms Launder all sheets, duvets, and blankets along with the curtains. Vacuum the mattress and flip or rotate it to extend its life. Dust furniture, light fixtures, and ceiling fans, vacuum or mop including under the bed, and rebuild the closets with the seasonal clothing swap you prepped during decluttering. Living spaces Dust every piece of furniture, electronic, and decorative item, vacuum or shampoo the upholstery, clean the windows and the blinds or curtains covering them, and refresh the floors. Give extra passes to remote controls, light switches, and doorknobs, the surfaces everyone touches and nobody cleans. Entryways, Laundry Room, and the Spots Everyone Forgets Hallways and entryways take the first hit from outdoors, so clear shoe racks and coat hooks, wipe scuff marks off the walls, and vacuum or mop deeply to lift tracked-in mud and debris. In the laundry room, wipe the washer and dryer exteriors, scrub the dryer lint trap thoroughly for efficiency and fire safety, wash the utility sink, and organize detergents. Then walk the house for the overlooked list: Area September task Why it matters before winter Windows Clean inside and out Maximizes the weak natural light of the darker months HVAC filters Clean or replace Indoor air quality suffers once windows stay closed, and Health Canada’s overview of indoor air contaminants explains the health stakes Walls, baseboards, doors, and frames Wash away marks and dust Trapped grime ages fast under winter heating Light fixtures and ceiling fans Dust and wash Dull fixtures dim every room Trash cans and small appliances Disinfect bins; wash toaster, coffee maker, kettle Odours build quickly in closed-up houses Patio furniture, barbecue, bikes, garden tools Clean, then store Protects equipment through freeze-thaw weather Carpets and rugs Deep clean Removes summer grit before winter traffic grinds it in Maintenance: Keep the Reset From Slipping The September clean buys you a fresh baseline; daily habits defend it. Reinforce quick mini-cleaning sessions after dinner, hold a weekly schedule that rotates deeper tasks room by room, and do a seasonal check-in each quarter to adjust for what the new weather demands. Smart storage solutions protect your organization gains, and delegating tasks among household members keeps the workload shared instead of dumped on one person. September Cleaning FAQ How long does a full September cleanup take? Most homes need several sessions across one or two weekends once you plan, declutter, and clean room by room. Time-blocking the rooms in advance keeps any single day from feeling impossible. Should carpets really be cleaned in the fall? Yes. Summer drags in dirt and allergens that settle deep into pile, and a clean carpet improves indoor air for the months when windows barely open and foot traffic moves indoors. What is the one step people skip most? Replacing heating and air conditioning filters. It is quick, cheap, and it does more for winter air quality than any surface scrub. When should I outsource the whole project? If the season’s cleanout lands in one packed weekend, a professional deep clean handles the rooms and details while you handle everything else. Pair it with a move-in or move-out service if the fall also brings a lease change. Treat the September reset as an investment

September Cleaning: 7 Quick And Easy Steps To Get Ready For Fall Read More »

Home Clean and Organized

Home Clean and Organized: 5 Tips From Cleaning Experts For a Stunning Home

A Clean, Organized Home Is a Habit, Not an Event Keeping a home clean and organized takes more than heroic weekend sessions. It works best as a set of small habits wired into daily life, because the physical environment shapes how the mind feels: an orderly space lowers stress, sharpens focus, and builds a sense of control that carries into everything else. When surfaces are clear and objects have homes, there are fewer distractions and less to clean later. The strategies below turn upkeep into an automatic routine instead of a recurring crisis. Build the Daily Habits That Do the Heavy Lifting The one-minute rule: if a task takes under a minute, do it on the spot. Hang the book, wipe the spill, put the mug away. Tiny actions stop small messes from combining into an overwhelming one. The daily reset: spend 10-15 minutes at day’s end tidying the kitchen and living room. Wash dishes, wipe counters, straighten cushions. Waking up to a tidy space sets the tone for the next day. Shared responsibility: assign roles to every household member. When the load is distributed, upkeep stops being one person’s burden. A place for everything: give each item a designated spot, and the habit of returning it removes the drift that forces giant tidying sessions. Room-by-Room Routines That Actually Stick Room Daily habit Weekly habit Kitchen Wash dishes or load the dishwasher after each meal, wipe countertops, quick sweep of the floor Clean the microwave inside and out, scrub the stovetop and oven front, freshen the sink and faucets, wipe appliance exteriors including the fridge, empty and scrub the trash can Bathrooms Wipe sink, mirror, and counter; quick scrub of the toilet bowl Disinfect the toilet inside and out, clean shower or tub before mold and mildew take hold, wash the floor, launder towels and the shower curtain Living room and bedrooms Arrange cushions, fold blankets, return remotes and magazines; make the bed every morning; clothes into hamper or drawers Vacuum or sweep all floors, dust furniture, shelves, and electronics with a microfiber cloth, clean mirrors and glass Entryway and hallways Shoes, coats, and bags go to their designated spot on arrival Sweep or vacuum frequently, since these paths carry the outdoors inside Decluttering Rules That Keep the Clutter Out Organization is the other half of cleanliness, and it starts with honest culling. The “one in, one out” principle keeps volume constant: every new item bought means a similar old one gets donated, sold, or recycled. Inside the cupboards, group similar objects together and contain them with boxes, baskets, drawer dividers, and organizers. Think vertically with shelves, wall racks, and hooks to free up surfaces. Labels look trivial but work: everyone in the house can see where each thing belongs, so things go back without negotiation. Do not ignore the digital clutter either, because a clear inbox, organized files, and deleted apps lighten the mind the same way a clear counter does. The CDC’s basics on when and how to clean and disinfect your home make a good pairing with these habits: clean visibly dirty surfaces first, then disinfect the high-touch ones. Use the Right Tools, Top to Bottom Technique decides how much effort a clean costs. Always dust from the highest surfaces downward so falling dirt gets collected in the final pass instead of landing on freshly wiped shelves. Microfiber cloths trap dust and polish without lint; a vacuum with attachments, a proper mop, brushes, and sponges round out the kit. Stock the five essential products (all-purpose cleaner, glass cleaner, disinfectant, floor cleaner, bathroom cleaner) and check labels carefully, since the surface dictates what is safe. Never put abrasive products on marble or sealed wood. Wear gloves and open a window whenever chemicals are out; Health Canada’s tips for using household chemicals safely are worth a skim before stocking a cleaning caddy. If children, pets, or allergies share the house, lean toward eco-friendly, non-toxic formulas. Adapting to Real Life Every household has its own friction points, and each has a workaround. Pets: vacuum often for hair, keep lint rollers and upholstery tools handy, store supplies neatly, and wash food and water bowls daily. Children: define play zones, use toy boxes and low shelves kids can reach, and invite them to tidy early so responsibility becomes normal. Packed schedules: never try to clean everything at once. A focused 15-20 minute block per day in one area prevents buildup and keeps cleaning un-intimidating. Dust and allergies: dust with microfiber, vacuum with a HEPA filter, and change heating and air conditioning filters on schedule. Staying Motivated, and Knowing When to Delegate Motivation is a system too. Set realistic goals, since no home is perfect daily; celebrate small wins; break large tasks into steps; reward yourself after big jobs; and take before-and-after photos for proof of progress. Music or a podcast makes the time pass differently. A steady routine eventually runs on autopilot, which is the point. For the heavy categories, professionals are the smart shortcut: steam carpet cleaning, exterior window washing, and post-renovation dust demand equipment most homes lack, and life events such as moving, a big party, or a newborn make outside help an investment in sanity rather than a luxury. A scheduled regular cleaning visit locks in the maintenance, and a periodic deep clean resets whatever winter piled up. Home Organization FAQ What is the fastest way to start if my home feels chaotic? Stop trying to fix everything at once. Pick the kitchen counter and the entryway first, apply the one-minute rule for one week, and add a 10-minute daily reset once those stick. How often should a whole house be really cleaned? Daily habits handle surfaces, weekly sessions handle floors and bathrooms, and a thorough room-by-room deep clean belongs on the calendar a few times a year or whenever the reset is due. Does decluttering really reduce cleaning time? Directly. Every object on a surface is a pause while dusting, every pile is a place dirt hides.

Home Clean and Organized: 5 Tips From Cleaning Experts For a Stunning Home Read More »

House Cleaning Services Calgary

House Cleaning Services Calgary: Have a Spotless Home Today

Why Calgary Households Are Delegating the Dirty Work Modern life in Calgary, with its demands and opportunities, leaves little room for household chores. Busy professionals, parents with packed schedules, and outdoor enthusiasts all hunt for ways to buy back time, and house cleaning services Calgary residents rely on have become the practical, increasingly popular answer. A clean, organized home is fundamental to well-being, a tranquil and healthy refuge from the daily grind. For many Calgarians, delegating that work is not a luxury but a necessity, freeing attention for what matters and more of what the city offers. What Professional Cleaning Services Actually Cover The scope of professional cleaning extends far beyond a tidy-up, and specialized companies offer distinct services for distinct moments. Regular maintenance cleaning is the foundation: dusting surfaces, vacuuming carpets and floors, mopping, and wiping countertops and mirrors. The focus is consistency, keeping the home pleasant and hygienic so grime never reaches overwhelming levels. Deep cleaning is the intensive option when dirt accumulates: appliance interiors like ovens and refrigerators, scrubbed bathroom and kitchen grout, thorough disinfection of toilets and showers, and meticulous work on baseboards and corners. That same detail is what our deep cleaning service brings to every visit. Move-in and move-out cleaning covers transitions top to bottom. Moving out, it returns the property in impeccable condition, which can be crucial for recovering a security deposit. Moving in, it readies the new home for fresh, hygienic occupancy. See how a move-out clean is scoped. Post-renovation cleaning tackles the considerable dust and debris that renovations leave behind, which demands specific equipment and techniques for safe removal. Specialized add-ons such as window washing, steam carpet cleaning, and upholstery cleaning can be booked alone or folded into packages. The Benefits Go Beyond a Sparkling Counter The most obvious gain is recovered time: instead of surrendering weekends to scrubbing, Calgarians can spend those hours on work, family, hobbies, or rest. Less visible is consistency. Professionals hold high standards with products and methods that remove dust, allergens, bacteria, and viruses, improving indoor air quality, which matters greatly for anyone with allergies or respiratory problems; regular dusting and sanitizing is exactly what the CDC recommends for a healthy home. A messy home also generates anxiety and guilt; delegating that burden restores calm. Finally, regular professional cleaning is preventive property maintenance. Removing dirt before it ingrains extends the life of floors, furniture, carpets, and finishes, and consistent bathroom and kitchen care prevents the mold and limescale buildup that causes costly damage, echoed by the CDC’s resources on mold health. Why the City Itself Makes Services Relevant Calgary’s character amplifies the case. Demanding careers limit hours for chores; a family-oriented culture means work, school, and activities compete for every evening, and cleaning time is usually the first casualty. Proximity to the Rocky Mountains and countless parks fuels an outdoor passion that tracks mud, dust, and snow indoors, demanding more frequent, robust cleaning. Each season brings its own mess: winter salt and slush underfoot, spring pollen and thawed grime, summer foot traffic, autumn leaves and debris. Good services tailor solutions to each season. How to Choose a Cleaning Service in Calgary Reputation and reliability. Check Google and Yelp reviews and ask for local testimonials; a track record of punctual visits is the starting point. Licensing, insurance, and bonding. Non-negotiables that protect you against property damage, theft, or accidents during service. Customization. Each home is unique; the provider should adapt frequency, rooms, and task lists to your priorities, budget, and schedule. Products and methods. Ask what they use, especially if you want eco-friendly or non-toxic options around children, pets, or chemical-sensitive family members. Pricing transparency. Request a detailed written quote spelling out what is included and what costs extra; avoid vague models and hidden fees. Trained, screened team. Background checks and experience are what make it comfortable to hand someone your house keys. Communication and guarantees. Responsive scheduling channels matter, and a satisfaction guarantee or redo promise shows confidence in the work. Pick the Frequency That Fits Your Household Frequency Best suited to What it delivers Weekly High-traffic homes, families with children and pets, larger houses A consistently high standard with no accumulation cycles Bi-weekly Most households balancing budget and upkeep Enough rhythm to stop dirt building, without daily intervention Monthly Smaller homes, low-traffic households, or residents who maintain between visits Deep periodic work on top of light self-care One-time Before an event, after a party, spring cleaning, or a move Targeted intensity exactly when life demands it The Misconceptions Holding People Back The most common objection is cost. In practice, prices vary considerably and are often more affordable than imagined once recovered time is counted, and flexible packages and personalized quotes make professional cleaning viable across income levels. Others fear losing control of how the house is cleaned; reputable teams work from your preferences and checklists, even using products of your choice. Trust is a third barrier, answered by established companies’ background checks, insurance, and bonds. The oldest objection, that help is only for the wealthy, has aged out: as personal time grows more valuable, cleaning help is now a practical home-management tool for a wide spectrum of families. What the Process Looks Like Engaging a service is straightforward. An initial consultation covers home size, cleaning type, focus areas, and special requirements like eco-friendly products. A detailed, transparent quote follows, and once approved, scheduling flexes around you, weekly, bi-weekly, or monthly. Preparation is minimal: most companies simply ask that significant clutter, toys on the floor, dishes in the sink, be tidied so the team can clean rather than organize. Afterward, expect feedback requests, the habit of a partnership that intends to stay good. Bring the Professional Standard Home Think of a cleaning service as an investment in quality of life, health, and your property’s longevity, not a line-item expense. If you are weighing a regular plan, a seasonal reset, or a move-out blitz, Toronto Shine Cleaning is bonded, insured, and obsessive about checklists, from regular

House Cleaning Services Calgary: Have a Spotless Home Today Read More »

The Dirtiest Places In Your Home

The Dirtiest Places In Your Home Can Be Harmful To Your Health

The Dirt You Cannot See Is the Dirt That Counts A house becomes a home through use, and use leaves residue: garden soil, road dust, fingerprints, and an entire invisible ecosystem of bacteria, viruses, mold, and fungi thriving exactly where routine cleaning never reaches. Most people scrub what looks dirty and ignore what actually is, yet the biggest hygiene threats are microscopic and prefer damp corners, dark crevices, and the surfaces touched most often. Mapping that hidden microbial landscape changes cleaning from a cosmetic chore into genuine health protection. Here are the dirtiest spots and why each earns the title. Kitchen Hotspots Where Germs Breed The food-prep room is paradoxically the germiest in most houses: raw food, moisture, and constant touching combine perfectly there. The sink: ground zero for contamination. Food rinsed off plates and boards settles into a sticky biofilm on the basin and drain that can host E. coli and Salmonella, and every faucet turn splashes those germs onto hands, counters, and clean dishes. A running disposal aerosolizes bacteria-laden droplets into the air, and the faucet handles plus the damp aerator cap collect their own film of grime. Sponges and dishcloths: the cleaning tools are often filthier than what they wipe. A sponge stays damp for hours, and its porous body lets bacteria multiply exponentially, including Campylobacter, a leading cause of foodborne illness. Wiping a counter with a contaminated sponge is microbial transfer, not cleaning. Cutting boards: knife grooves trap bacteria from raw meat and poultry below the reach of vigorous washing, ready to contaminate the next salad. Separate, color-coded boards for raw meat and produce are a critical food-safety habit. Appliance handles: refrigerator, microwave, oven, and dishwasher knobs get touched after handling raw food and before washing hands. Influenza viruses can survive up to 48 hours on stainless steel, making these grips a primary transmission route inside a family. Coffee maker reservoir and knife block: one is dark and perpetually damp, breeding mold and yeast you end up brewing into coffee; the other’s narrow slots keep moisture and debris on supposedly clean blades. Bathroom Hotspots Beyond the Bowl The toilet bowl gets scrubbed while everything around it is ignored. Every flush with the lid up launches a toilet plume, an aerosol mist of microscopic droplets carrying fecal bacteria that can travel up to six feet onto floors, counters, and toothbrushes. The flush handle itself ranks among the most contaminated touchpoints in the house, and toothbrush holders collect dripping water and toothpaste into a murky sludge where Staphylococcus and mold flourish inches from the brush that goes in your mouth. The tub and shower fight a running battle against mold and mildew, and the fuel is soap scum: soap fats hardened by calcium and magnesium from hard water into a waxy, water-resistant layer that feeds fungi and shelters them underneath. That film is where the common pink growth lives, actually a bacterium called Serratia marcescens, alongside more dangerous black molds. Showerhead nozzles can harbor biofilms containing bacteria such as Mycobacterium avium, a pulmonary risk especially for people with weakened immune systems, aerosolized into the warm mist you breathe. Damp bath mats that never fully dry complete the circuit and track growth onto the floor. Objects, Soft Surfaces, and the Bedroom Around the rest of the house, the filth source is us. Fomites, the technical name for inanimate surfaces that carry infectious agents, means the remote controls, light switches, doorknobs, and game controllers everyone handles but nobody disinfects, under a sticky film of skin oils and sweat that helps germs cling. Personal electronics are worse: the average mobile phone has been shown to carry more bacteria than a toilet seat, and keyboards are crumb-and-skin buffets between the keys. Soft surfaces act like giant filters, holding dust, pet dander, pollen, tracked-in dirt, and food scraps, plus colonies of dust mites. Mites do not bite, but they feast on roughly 1.5 grams of dead skin the average person sheds each day, and their waste and decaying bodies are potent allergens kicked up by footsteps and vacuuming, linked to asthma and respiratory problems. Bedrooms are no sanctuary either. Pillows and mattresses soak up sweat, oil, and shed skin so steadily that a two-year-old pillow can be one-third dead skin, mites, and allergenic waste by weight, feeding nighttime congestion and restless sleep. The laundry hamper, loaded with damp towels and gym clothes, becomes a humid incubator of mold and odor bacteria that cross-contaminates whole loads. Finally, the mobile contaminants: purse and backpack bottoms touch restroom, restaurant, and transit floors, pick up everything from E. coli to MRSA, then ride onto kitchen counters. Reusable grocery bags, unwashed, carry leakage from meat packages. Pet bowls grow a slimy biofilm that can contain Salmonella and Listeria without daily scrubbing. A Quick Reference for the Worst Offenders Hotspot What lives there What to do Kitchen sink and drain Biofilm with E. coli and Salmonella Scrub the basin daily; sanitize handles and the aerator Sponge and dishcloths Billions of bacteria including Campylobacter Replace often; never wipe with a damp, sour sponge Touchpoints: remotes, switches, knobs, phone Germs from every hand, viruses on steel for up to 48 hours Disinfect on a schedule; the CDC’s home cleaning and disinfecting guidance backs up high-touch routines Shower, tub, mat Soap scum, Serratia marcescens, mold, damp-mat growth Wipe after use, wash mats hot, treat grout monthly Pillows, mattress, carpet Dust mites and their allergenic waste Vacuum deep, rotate mattresses, wash bedding hot Bags, grocery totes, pet bowls Transit-floor bacteria, meat-drip pathogens, bowl biofilm Wipe bag bottoms, launder totes, scrub bowls daily Dirtiest Places FAQ Which single spot should I attack first? The kitchen sponge and the sink. They feed each other: a soaked sponge dragged across a biofilm sink just moves germs around. Start with a fresh sponge and a scrubbed basin, then build the rest of the routine outward. Are toilet plumes really a health issue? Flushing unlidded toilets aerosolizes particles that settle across the room, including on toothbrushes. Close

The Dirtiest Places In Your Home Can Be Harmful To Your Health Read More »

Clean-Looking House vs. Sanitized House

Clean-Looking House vs. Sanitized House: Why It’s More Important Than You Think

Clean-Looking House vs. Sanitized House: Why the Difference Matters A tidy home can be a deceptive space. Countertops gleam, cushions are fluffed, and floors show no visible debris, which is exactly the picture most of us aim for during a weekly clean. Yet this visual order has little to do with the true hygienic condition of the home. That tidy look is an aesthetic victory built for optics: damp cloth swipes over counters, one fast vacuum pass, clutter hurried into closets before guests arrive. A sanitized house, by contrast, is defined by science rather than looks, with germs, bacteria, viruses, and fungi reduced to levels considered safe for human health. Understanding the gap between the two is the first step toward a home that genuinely protects your family. The Limits of a Clean-Looking Home Chasing a visibly tidy space is not pointless. Living in cluttered, visibly dirty surroundings contributes to stress, while tidying and organizing have real psychological benefits and create a calmer, more restful home. The problem is that the very tools used to create that look can spread the unseen world. A damp sponge that has been used for days removes crumbs while spreading millions of bacteria across the counter it is meant to clean. A dust cloth moves particles around, some of which float into the air and settle again later. A vacuum without a HEPA filter can suck allergens from the carpet and blast them back out of the exhaust. Appearance-based cleaning manages the macro while the micro is left to thrive. Cleaning, Sanitizing, and Disinfecting Are Not the Same These three words are often used as synonyms, but they describe different levels of action, and each has its place. Process What It Does Where It Matters Cleaning Removes visible soil, dirt, and organic matter with soap, water, and friction Everywhere; it is the required first step before any chemical treatment Sanitizing Lowers germs to a safe public-health level, killing 99.9% of specified bacteria in a short time Kitchen counters and sinks after food prep, and bathrooms Disinfecting Kills virtually all microorganisms, including hardy viruses and fungi Doorknobs, light switches, and remotes after illness; toilet bowls You cannot sanitize a dirty surface: soil gives germs a place to hide and can neutralize the chemicals, which is why the CDC’s home cleaning guidance says to clean first and disinfect when needed. Sanitizing a counter after wiping away crumbs actively targets bacteria like E. coli and Salmonella that cause foodborne illness, and sanitizing the sink where raw meat juices splashed is just as critical. Disinfection is more of a targeted intervention, such as treating surfaces after a family member has had the flu. The most overlooked ingredient in both is dwell time: the product must stay wet on the surface for the minutes listed on its label. Spraying and immediately wiping is often ineffective. Hotspots Where Appearance Hides Risk High-touch surfaces can look perfectly clean while carrying germs transferred from unwashed hands. Give regular attention to: Doorknobs, cabinet pulls, faucet handles, and the refrigerator door. Remote controls, keyboards, and cell phones. Kitchen details: the sink drain, faucet aerator, microwave handle, coffee maker buttons, and stove knobs. Bathroom details: the toilet base, toothbrush holder, and shower curtain or door. A polished stainless sink still hides biofilm in the drain, and a rinsed wooden cutting board can harbor bacteria in its knife grooves, risking cross-contamination between raw meat and fresh vegetables. In the bathroom, moisture at the toilet base and in the toothbrush holder fosters bacterial growth, while shower curtains and doors are prime spots for mold and mildew, which release spores that can affect respiratory health. Soft Surfaces and the Air You Breathe A truly sanitized home also includes what you cannot see: carpets, upholstery, and curtains act as giant filters that trap dust, pollen, pet dander, and microscopic organisms. A standard vacuum may lack the filtration to remove deep-down grit, so choose a HEPA-filtered model whose trapped particles are never recirculated, and every so often bring in professionals for hot water extraction or steam cleaning, whose heat kills dust mites, bacteria, and other deeply embedded allergens. Cleaning methods affect air quality too: harsh chemical cleaners release volatile organic compounds, while dry dusting sends allergens airborne. The healthier approach is damp-wiping with microfiber cloths, ventilating during and after cleaning, and using a HEPA air purifier where needed. For safe handling of any product you do use, Health Canada’s household chemical safety advice covers buying, storing, and disposing of cleaners correctly. Building a Sanitized Home Without Going Overboard Moving from a clean-looking house to a sanitized one is a shift in perspective: from reactive and appearance-based to proactive and health-based. It means reading labels, respecting dwell times, and focusing on hotspots rather than broad visible surfaces. A germ-free bubble is not the goal: full sterility is neither achievable nor desirable in a family home. The aim is smart management of the microbial world so your living space actively supports your well-being. Toronto Shine Cleaning specializes in exactly this gap between tidy and truly clean, with a deep cleaning service that reaches the hotspots above and regular maintenance cleanings that keep them that way. See our pricing, browse client reviews, or call (647) 424-0355 to book a healthier home. Frequently Asked Questions About Sanitizing Your Home What is the difference between cleaning and sanitizing? Cleaning removes visible dirt and organic matter with soap, water, and friction. Sanitizing is a chemical step that lowers remaining germs to a safe public-health level, killing 99.9% of specified bacteria in a short contact time. How long should a disinfectant stay on a surface? Long enough to stay wet for the dwell time printed on the product label, often several minutes. Wiping it away immediately defeats the purpose, so let the product sit before you dry the surface. Which surfaces should I sanitize most often? Food preparation areas, sinks, and bathrooms carry the highest risk, and high-touch spots like doorknobs, light switches, remotes, and phones

Clean-Looking House vs. Sanitized House: Why It’s More Important Than You Think Read More »

cleaning product mint with mint branch

Mint Cleaning Products: Discover the 6 Benefits of Mint in Cleaning

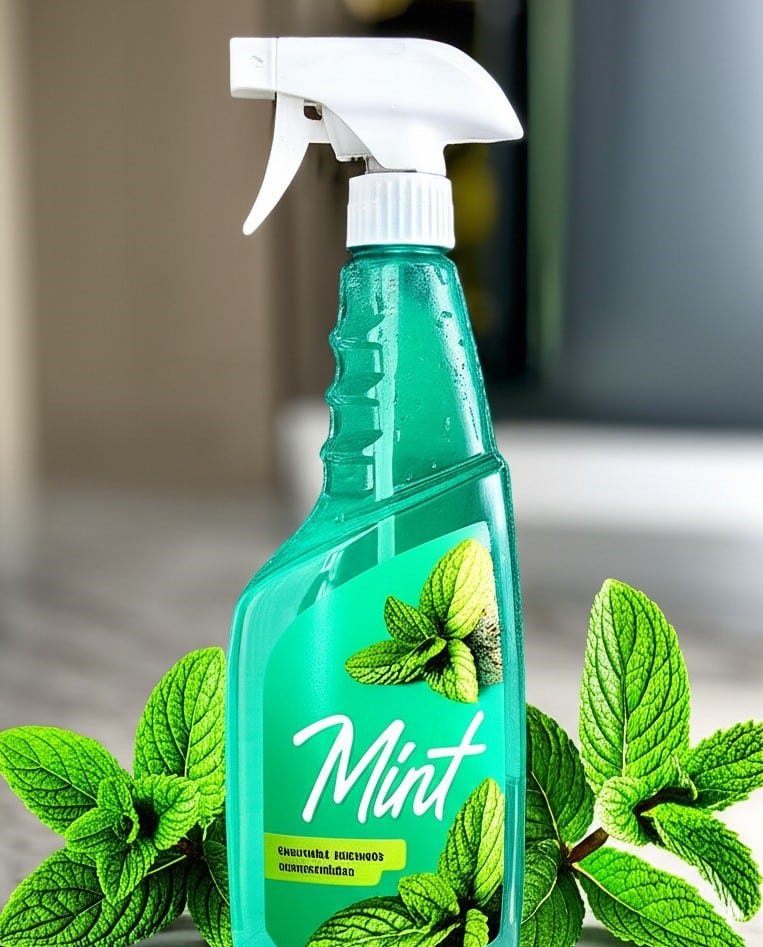
The Scent That Makes Clean Feel Real The smell of a clean home matters as much as the visual sparkle. Citrus is zesty and energizing, lavender is calming, and mint occupies a unique, powerful space in the cleaning world: crisp, cool, and unmistakably fresh. Mint cleaning products cut through stale air and lingering cooking odors with a sharp aroma that does not just mask smells but seems to eradicate them, leaving an aura of hygienic purity you can still detect long after the cloths are put away. Here are six reasons this green ingredient earns a permanent spot under your sink, plus the recipes to make it yourself. 1. It Turns the Chore Into an Experience Cleaning with mint is invigorating in a way that neutral sprays are not. The piercing, cool scent signals a truly refreshed environment and makes the work itself more rewarding, transforming a mundane routine into a small ritual with an unmistakable finish line. When every surface smells crisp, the whole house registers as done. 2. It Is a Kitchen Odor and Grease Fighter In the kitchen, where grease and food smells are a constant battle, mint punches above its weight. Its natural compounds, menthol above all, carry an oil-cutting quality that dissolves the greasy film left on ranges, backsplash tiles, and counters. After a fragrant meal, a quick wipe-down with a mint-based spray removes splatters and neutralizes stubborn garlic, onion, and fish odors rather than layering perfume over them. The sink, a habitually unpleasant spot, benefits from a scrub with a mint-infused cleaner that tackles food particles and stays cool and clean for hours, and running mint products through the garbage disposal sends a plume of invigorating scent up the drain instead of yesterday’s waste. Mopping with a mint solution lifts dirt and revitalizes the entire room from the floor up. 3. It Keeps the Bathroom Smelling Genuinely Sanitized Bathrooms demand serious hygiene, and mint smells sterile in the best possible way, which is why it dominates toilet bowl cleaners, where it powers through the clean and deodorizes the whole fixture. In showers and tubs, a quality mint product cuts the chalky film of soap scum and replaces musty, damp notes with sharp freshness. The antimicrobial properties often attributed to mint’s essential oils suit this space well, and the CDC’s guide to cleaning and disinfecting at home is a good reminder to let products sit the recommended time on wet-area surfaces. Wiping sinks, faucets, and countertops leaves them gleaming with a spa-like finish, and mirrors and chrome come alive with a mint-based glass cleaner: you trade ammonia’s harsh chemical reek for a cool, refreshing aroma as the streaks disappear. For mildew that keeps returning in damp corners, the CDC’s mold resources explain when fragrance is not enough and the spores themselves need treatment. 4. DIY Mint Recipes Work and Save Money Mixing your own mint cleaners is straightforward and cost-effective, and the satisfaction of building them is real. Recipe Ingredients Best for All-purpose spray 1 part white vinegar + 1 part water + 15 to 20 drops of peppermint or spearmint essential oil; shake before each use Countertops, sinks, and hard surfaces; disinfects, deodorizes, and leaves the signature scent Scrubbing paste Baking soda + a small amount of liquid castile soap + several drops of mint essential oil; apply, rest a few minutes, scrub with a damp sponge Stained sinks and grimy tubs; abrasive on grime, free of harsh chemicals Floor rinse 1 gallon hot water + a quarter cup white vinegar + 10 drops mint essential oil Mopping tile, linoleum, or vinyl; spotless floors and noticeably cleaner air Carpet refresher 1 cup baking soda + 10 to 15 drops peppermint oil, shaken in a jar; sprinkle, sit 15 to 20 minutes, vacuum thoroughly Freshening carpets and rugs so textiles smell crisp and new 5. Its Reach Extends Through the Whole House Spray and wipe the inside of a trash can after each bag goes out; even lined bins develop persistent odors, and mint keeps them honest. Clean pet areas with mint products to neutralize smells without overwhelming sensitive noses with artificial perfume. Polish stainless steel appliances with a soft cloth and a mint-based cleaner; it cuts greasy fingerprints and leaves a streak-free, aromatic finish. Refresh upholstery and other fabric hot spots, following the same sprinkle-and-vacuum logic as the carpet refresher above. 6. Mint Works on Your Head, Not Just Your Hands The benefit is genuinely psychological. Mint aroma is a recognized stimulant: alertness and focus climb while fatigue eases. Cleaning with mint, then, is not just tidying a space but building an environment that helps you feel more awake and productive. The crispness also provides a definitive end-point, because when the cool aroma settles through the house, your brain registers the task as complete and successful. In effect, the chore becomes a form of aromatherapy, and the lingering freshness keeps reminding you of the order you established. How to Shop for Quality Mint Cleaners Read the ingredient list. The most effective, pleasant products scent themselves with true peppermint, spearmint, or eucalyptus oils instead of a synthetic mint-like fragrance, which can turn overpowering with a chemical undertone. Authentic oils deliver the therapeutic depth of the actual plant: a well-made mint cleaner should smell clean and green, like crushed leaves, not artificial candy. Favor brands built on plant-derived ingredients and transparent formulations; the small premium pays off in performance and in the genuine well-being a real mint scent brings. Bring the Professional Freshness Home Daily mint upkeep is excellent; some grime needs equipment and elbow grease beyond any bottle. Toronto Shine Cleaning understands that a truly clean home revitalizes the senses, and brings a detailed, professional approach to every job, from a top-to-bottom deep clean to regular visits that hold the line, with client reviews that speak in spotless terms. Call (647) 424-0355 and come home to air that smells like it was recently, professionally clean. Mint Cleaning Questions, Answered Does mint cleaner actually disinfect?

Mint Cleaning Products: Discover the 6 Benefits of Mint in Cleaning Read More »

Natural Cleaning Products

Amazing Natural Cleaning Products To Add To Your Daily Routine

Amazing Natural Cleaning Products to Add to Your Daily Routine Switching to natural cleaning is not a step backward into grandma’s pantry; it is a practical application of basic chemistry. Most messes in a home, grease, mineral deposits, organic stains, and soap scum, are chemical compounds that simpler ingredients can dissolve or lift away. Once you grasp the acid-alkali interplay, gentle abrasion, and the surfactant power of true soap, a few inexpensive staples replace a whole shelf of specialized products. Distilled White Vinegar: The Acid Workhorse The acid-alkali dynamic drives most natural cleaning: use an acid to dissolve an alkaline mess, or an alkali to neutralize an acidic one. On the acidic side, distilled white vinegar is the champion. Its roughly 5% acetic acid gives it a pH of about 2.5, perfect for dissolving the mineral deposits behind hard water stains and limescale. A vinegar solution makes glassware, faucets, and shower doors sparkle, and a soak can descale a coffee maker or showerhead and restore its flow. A cup of vinegar in the rinse cycle also acts as a fabric softener by dissolving leftover alkaline detergent residue. The hard rule: vinegar’s acidity etches acid-sensitive stone such as marble, granite, and travertine, so keep it off them. Baking Soda and Washing Soda: Gentle but Powerful Scrubs On the alkaline end sits baking soda, or sodium bicarbonate, a mild alkali whose fine, consistent abrasive texture makes it the ideal scouring agent for sinks, fiberglass tubs, and stovetops that harsher powders would scratch. Its stronger cousin, washing soda, or sodium carbonate, runs at a pH around 11 and is a powerful degreaser and water softener that anchors homemade detergent recipes. Baking soda also deodorizes by chemistry, not masking: an alkaline substance neutralizes acidic, sour odors like garbage disposal smells. The fizzy vinegar-and-baking-soda reaction is widely misunderstood: the two form unstable carbonic acid that instantly decomposes into carbon dioxide gas and water. The real power is the agitation of the bubbles, which loosens grime in drains and toilet bowls. Apply the baking soda first, then the vinegar, so the reaction happens on the surface you are cleaning. Liquid Castile Soap: A True Soap for Every Room Castile soap, made from saponified vegetable oils, behaves differently from synthetic detergents. Its molecules are surfactants with a water-loving head and an oil-loving tail: the tail grabs grease and dirt while the head clings to water, so grime gets encapsulated and rinsed away. Dilution makes it endlessly adaptable: shake a couple of drops into a water-filled spray bottle for an everyday all-purpose mist, stir one tablespoon into a pail of hot water for a floor-washing solution, or mix one part soap with three parts water in a foaming dispenser for gentle hand soap. Hydrogen Peroxide: Whitening and Disinfecting Without Chlorine For disinfection and whitening, 3% hydrogen peroxide is the natural alternative to chlorine bleach. As an oxidizer, it breaks down organic material such as bacteria, viruses, and mold spores, which makes it a strong disinfectant for kitchen and bathroom surfaces. A paste of hydrogen peroxide and baking soda works wonders on stubborn white countertop stains and discolored grout: let it sit for 10-15 minutes while it bubbles, then scrub and rinse. The same combination makes a non-chlorine oxygen bleach that brightens laundry without chlorine’s harsh fumes and fabric damage; for comparison, the CDC explains how chlorine bleach disinfects and how to handle it safely. Staple Main Strength Top Uses Distilled white vinegar Acid that dissolves mineral scale Glass, faucets, shower doors, coffee makers Baking soda Mild abrasive alkali Sinks, tubs, stovetops, odor control Castile soap True soap surfactant All-purpose mist, floors, hand soap Hydrogen peroxide Oxidizer and disinfectant Counters, grout, laundry brightening Essential Oils That Earn Their Place Beyond the core staples, essential oils add function, not just fragrance. The properties that matter most for cleaning include: Tea tree oil: antiseptic, antifungal, and antibacterial, ideal for bathroom sprays and mildew-prone areas. Citrus oils from lemon, orange, or grapefruit: excellent degreasers thanks to their d-limonene content, with a fresh uplifting scent. Eucalyptus oil: a natural disinfectant and decongestant; add it to mopping water when someone in the house is sick. Peppermint oil: deters pests like ants and spiders when a few drops sit on cotton balls in corners or entry points. Clove oil: a top choice for slowing mold growth. Putting Natural Cleaning to Work, Room by Room In the kitchen, coat the oven interior, avoiding the heating elements, with a thick paste of baking soda and water and leave it overnight; the softened grease wipes away the next day, and a final vinegar spray neutralizes any soda residue. For stainless steel, mist on vinegar, then polish with a microfiber cloth and one tiny drop of olive oil. In the bathroom, spritz the shower walls after every use with a light blend of water, vinegar, and tea tree oil drops, which stops soap scum and mildew from building up; for discolored grout, work a hydrogen peroxide and baking soda paste into the lines with an old toothbrush, wait about 15 minutes while it bubbles, then scrub and rinse. In the laundry room, pretreat stains with equal parts water and hydrogen peroxide plus a squirt of castile soap, rub castile soap into grease spots, and let hydrogen peroxide handle organic stains like grass or blood. To refresh towels and sheets that have lost absorbency, soak them in hot water with washing soda or borax and a little detergent to pull out built-up residue. Natural Cleaning Tips: Dwell Time and Tools Natural solutions reward patience: most benefit from a few minutes of dwell time to break down grime before you wipe. Tools matter too: microfiber cloths grab dust with static charge far better than cotton rags, stiff and soft brushes cover most scrubbing, and glass spray bottles beat plastic, which some essential oils can degrade over time. Toronto Shine Cleaning brings this health-conscious, eco-friendly approach to every corner of your home through our regular cleaning service and deep cleaning plans.

Amazing Natural Cleaning Products To Add To Your Daily Routine Read More »

old Toothbrushes For Cleaning services

8 Efficient and Economical Ways to Use Old Toothbrushes for Cleaning

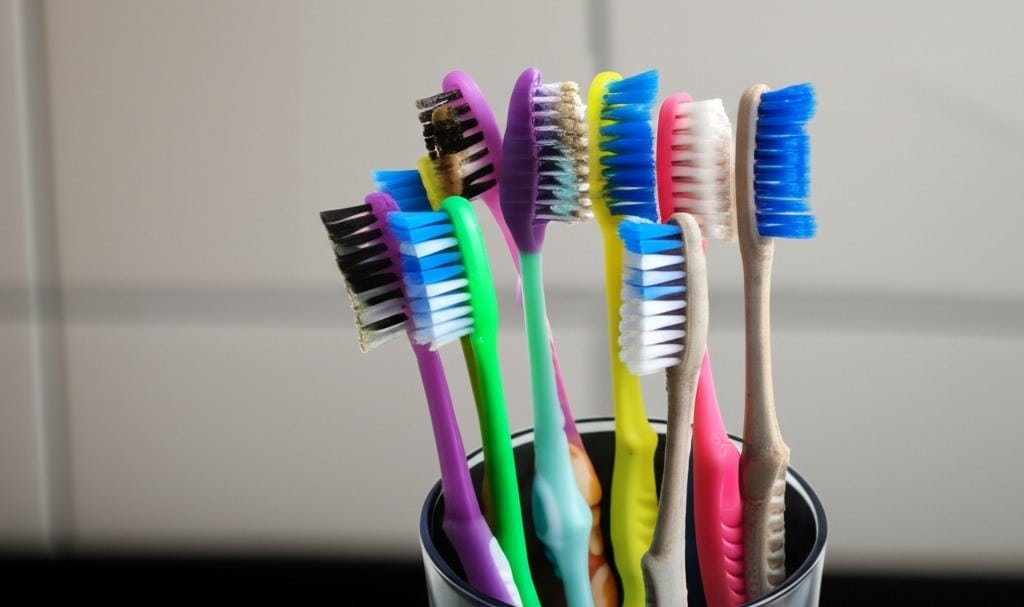
Your Old Toothbrush Is a Precision Cleaning Tool Before you bin a worn toothbrush, see what it becomes: a detailing instrument no cloth or sponge can match. A small head, firm bristles, and easy grip suit it to the tight, awkward spaces where grime hides in every room of the house. Keep a few under the sink instead of buying specialty brushes, and start with four ground rules: Keep the brush bone-dry for electronics, vents, and dry debris sweeps. Use a soft-bristled brush on delicate fabrics, stiff bristles on tough ones. Assign one clearly marked brush to the toilet alone. Rinse the brush well when moving between rooms. 1. Grout Lines on Floors and Backsplashes Porous grout soaks up spilled coffee, sauce splatter, and everyday debris, and a mop glides right over it. Mix baking soda with a little water into a paste, or add a touch of hydrogen peroxide for stubborn stains, and spread it over the lines. Let it sit a few minutes, then scrub with the toothbrush in small circles. The bristles work the paste in and lift embedded dirt out, restoring the original color. Countertop seams where crumbs pack in respond to the same treatment. 2. The Kitchen Sink, Aerator, and Disposal Chalky mineral rings and soap scum collect around the faucet base, exactly where a sponge cannot reach. The angled head gets flush against the fixture, and dipping it in white vinegar helps dissolve hard water stains. Then unscrew the aerator and scrub its fine mesh screen, clearing blockages that quietly weaken water pressure. The rubber splash flaps of a garbage disposal hide the slimiest buildup in the house; lift each flap and scour the underside with the brush and a degreasing dish soap. Nobody enjoys this job, but nothing fits it better. 3. Appliance Nooks and Small Appliances Pull stove knobs off and scrub them individually; run a dry toothbrush along the cooktop-to-counter seam to flick out crumbs before wiping. A mild cleaning solution and the brush gently scour the grease-loaded door seal of your microwave or oven without tearing the gasket. Dishwasher vents, control-panel buttons, and the filter housing all come clean the same way. The brush reaches blender blades, the cutting gear of a can opener, and toaster oven grates safely. On a cheese grater, scrub from the inside out with soapy bristles and every dried ridge releases, with no sponge shreds left behind. 4. Bathroom Details That Harbor Mildew Shower and tub grout takes a constant hit from moisture, soap, and body oils, so pair the brush with a tile cleaner or a strong mix of vinegar and dish soap; the bristles scour away scum yet stay gentle enough not to scratch tile. A sliding shower door track collects a grimy blend of scale, soap, and hair: sweep it dry first, then spray cleaner and scrub end to end, working the corners until the door glides again. It fits the sink overflow hole, which turns musty and mildewed in the dark, and the crevice where the toilet base meets the floor if you keep a clearly marked brush for it. Seat hinges, a mix of plastic and bolts, are impossible for a cloth but easy for a brush, and scrubbing each rim jet with a cleaner-dipped toothbrush keeps the flush strong. Wash your hands well after bathroom detail work, following the CDC handwashing guidance. 5. Window and Door Tracks and Vent Fins Window and sliding door channels gather dust, dirt, dead insects, and outdoor debris. A dry toothbrush loosens the pile and sweeps it into a heap you can vacuum with a crevice tool, while a wet one handles caked mud. The thin fins of heating and air conditioning vents are dust magnets that a cloth bends; brush them gently, dry, fin by fin. 6. Electronics and Carved Furniture Electronics need a completely dry, clean brush. Work it between keyboard keys to dislodge crumbs, dust, and hair, then the same for laptop and console ports, TV vents, and speaker grilles, all safe while the brush stays dry. Carved wood on a headboard or an antique table leg surrenders its dust to a dry brush long after a cloth gives up. 7. Stain Pre-Treatment and Dirty Shoes In the laundry room, apply stain remover to tough spots on durable fabric like denim or canvas, then work the solution in gently with the brush before the item joins the weekly wash routine. On delicates, switch to a soft-bristled brush and a light touch to avoid pilling. Turn the brush over to your shoes: stiff bristles dig packed mud out of boot treads and clean the welt where upper meets sole. 8. Car Detailing on a Shoestring One brush handles dashboard vents, upholstery seams, the gear-shift surround, hubcap crevices, alloy wheel spokes, and the stubborn brake-dust rings around lug nuts. It is a free detailing kit for every spot a larger brush cannot enter. Quick-Reference: One Brush, Eight Jobs Area Target Technique Kitchen Grout lines Baking soda paste, sit briefly, scrub in circles Kitchen Faucet base and aerator Dip in white vinegar; unscrew and scrub the mesh Bathroom Shower track, toilet hinges and jets Loose debris dry, then spray and scrub end to end Whole house Vent fins, keyboards, ports Completely dry brush, gentle strokes Laundry and garage Stains, boot treads, wheels Work remover into fibers; dig dirt from grooves This kind of detail work is the difference between a surface wipe and a true deep clean, and our deep cleaning service delivers it room by room as standard. Toronto Shine Cleaning is bonded and insured, with rates on the pricing page and client feedback on the reviews page, or call (647) 424-0355. Frequently Asked Questions Should I keep separate toothbrushes for different rooms? Yes. Use one for kitchen and appliance work, one for bathroom detail, and a dedicated one for the toilet base and rim jets. Mark them so bathroom chemicals never reach food surfaces, and rinse well between jobs. What should

8 Efficient and Economical Ways to Use Old Toothbrushes for Cleaning Read More »

cleaning services in Edmonton

Edmonton Move-Out Cleaning: Common Mistakes to Avoid

Edmonton Move-Out Cleaning: The Mistakes That Cost Tenants Their Deposits Moving is a study in controlled chaos: boxes stacked into fortresses, furniture wrapped and disassembled, every day a countdown to a new beginning. In that whirlwind, one critical task looks backward, and it is not your average weekly tidy. A move-out clean is a forensic-level deep clean, the final act of stewardship for a space you once called home, and often the single most important factor in getting your full security deposit back from your Edmonton landlord. Lost deposits trace back to a handful of predictable mistakes. Here is how to avoid every one of them. Mistake 1: Reading “Broom-Swept” Too Literally The rental agreement, signed and filed away, suddenly becomes the most important document in the move. Clauses describing the condition the property must be left in are no longer fine print; they are your departure checklist. The phrase “broom-swept condition” is dangerously misleading. To a tenant, it can sound like a quick vacuum and a wipe of the counters. To a property manager preparing to show the unit to prospective tenants, it means a property that is not just empty but immaculate, as close as possible to the day you moved in. The gap between those interpretations is where deposits are lost. Every move-out clean begins with one mindset shift: you are cleaning for someone else’s inspection, so you need the critical eye of a landlord who is financially motivated to find fault. Mistake 2: Washing the Floors and Missing Everything Else Mistake 2 covers the details landlords actually inspect. Work high to low, and skip nothing on this list. Ceiling corners cleared of cobwebs; light fixtures and fans wiped down, because they are dust magnets. Walls, doors, and doorframes washed: scuffs, switch-plate fingerprints, and smudges visible only in certain light all count. Baseboards on hands and knees, every inch, since they trace every room and collect surprising grit. Windows cleaned inside and out where accessible, with real effort on sills and tracks, where dust and dead insects collect; a brush and vacuum attachment signals a thorough job. Closets fully emptied, with shelving, rods, and walls wiped, then floors vacuumed and mopped. Carpets: a professional steam clean is often stipulated in the lease or simply expected, since a household vacuum cannot lift deep-set dirt, allergens, and odors from a year of foot traffic. Mistake 3: Going Soft on the Kitchen The kitchen is the heart of the move-out challenge: a zone of grease, food splatter, and built-up grime. Every cabinet and drawer gets emptied and cleaned inside out, including interior shelves, drawer bottoms, handles, and cabinet faces, with special attention to the sticky film of aerosolized grease above and around the stove. Then the appliances, the main event. The refrigerator is emptied completely, its shelves and drawers washed separately in warm soapy water, its interior scrubbed, its exterior wiped including the top, and the unit pulled from the wall to clear the forgotten landscape of dust and crumbs behind and beneath it, vacuuming the coils so the next tenant inherits an efficient fridge. The oven draws the most dread: baked-on grease and carbonized food need a powerful cleaner, serious scrubbing, soaked racks, scraped interior walls, and door glass cleaned until transparent. Burners get cleaned, drip pans scrubbed or replaced, and the surface degreased. The range hood is degreased and its filter cleaned or replaced per the manufacturer’s instructions. The dishwasher gets its filter cleared of food debris and a cleaning cycle with a dishwasher-specific product to break down soap scum and hard water deposits. Finally, sink, faucet, countertops, and backsplash are scrubbed, disinfected, and polished to the CDC’s cleaning and disinfecting standard. Mistake 4: Treating the Bathroom as a Five-Minute Wipe-Down Bathrooms are judged on soap scum, hard water stains, and sanitation. The toilet is cleaned and disinfected top to bottom: tank, exterior bowl, seat and its hinges, and the base where it meets the floor, a notorious collection point for dust and grime. The shower and tub need heavy-duty work to lift soap scum from walls and glass doors and mineral deposits from fixtures, and grout lines usually demand a stiff brush and a dedicated cleaner to clear mildew and discoloration. The vanity and sink are cleared out and cleaned inside and out like the kitchen cabinets, the sink and faucet scrubbed and polished free of toothpaste residue and water spots, the mirror cleaned to a streak-free shine, and the exhaust fan cover taken down and washed to remove its thick dust coating. The floor is swept and mopped meticulously, including the corners and behind the toilet. Mistake 5: Assuming DIY Is the Cheap Option Once the checklist above lands, the do-it-yourself question becomes practical. DIY looks cost-effective at first glance, then the hidden costs appear. Hidden cost of DIY What it actually takes Supplies Degreasers, oven cleaner, glass cleaner, grout cleaner, floor polish, and disinfectants, plus cloths, brushes, a good mop, and a powerful vacuum; see Health Canada’s household products guidance before buying chemical cleaners Time One person can easily spend one or two full days of hard physical labour, exactly when your energy belongs to the move itself Inadequacy risk Deposit deductions for missed details can easily exceed the cost of hiring professionals Professionals run this checklist daily. They bring industrial-strength products and efficient systems, they know what landlords look for, they accomplish in a few hours with a team what takes one person a full weekend, and they are insured and often guarantee the work, returning to fix anything flagged at the final walkthrough. Edmonton Move-Out Cleaning FAQ What does “broom-swept condition” really require? In practice, landlords expect a clean close to move-in ready: spotless floors, wiped walls and baseboards, empty and cleaned cabinets and closets, and sanitized appliances. Assume the strict reading, because the lenient one is how deposits get deducted. Do I really need to steam clean the carpets? Check your lease. Steam cleaning is frequently stipulated in writing, and where

Edmonton Move-Out Cleaning: Common Mistakes to Avoid Read More »

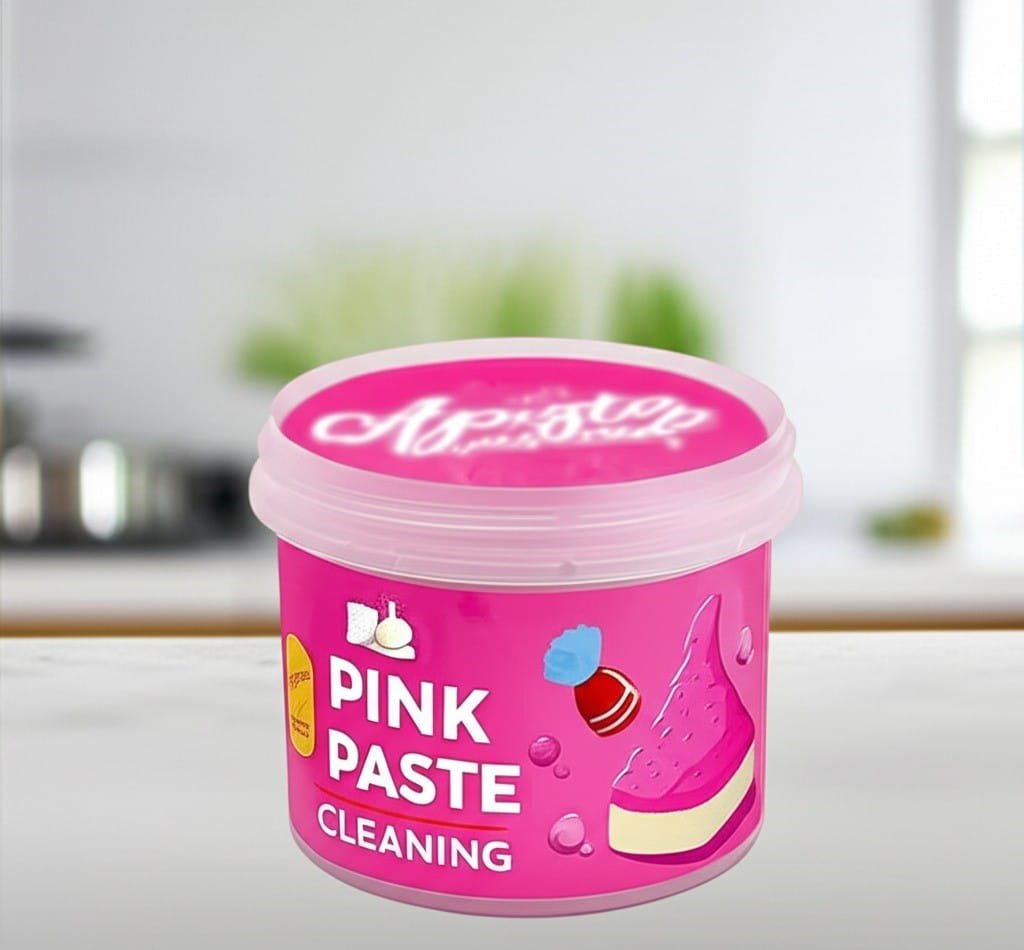
5 Amazing Tips on How to Use Pink Paste Without Causing Harm

5 Amazing Ways to Use Pink Paste Without Causing Harm Pink paste is the specialist of the cleaning cupboard. Its fine abrasive particles physically lift cooked-on grease, soap scum, and hard water film that everyday sprays cannot shift, and it does the job without harsh chemical fumes. The catch is that abrasion is exactly what ruins delicate finishes when the paste is misused. Follow these five ground rules and you can put pink paste to work on the toughest spots in your home without damaging a thing. Tip 1: Start With Less and Work in Circles You need far less paste than you expect: a small scoop on a clean, damp cloth or sponge is enough to start. Spread it over the stained area and rub in small circular motions with gentle to moderate pressure; the abrasive particles lift the grime, so you never need to bear down hard. Rinse thoroughly with clean water once the mark is gone, because paste left to dry forms a chalky film. Finish by buffing with a soft dry cloth to bring back the shine on glossy surfaces. Always let stovetops, ovens, and pans cool completely before cleaning, and never use the paste on a hot surface. Tip 2: Patch Test an Invisible Corner First Before you tackle a visible area, press a dab of paste into an inconspicuous spot, scrub gently, rinse, and inspect. If you see scratching, dulling, or a colour change, stop and switch to a gentler product. The test matters most on polished finishes: glass cooktops, enamel, stainless steel, and coated fixtures usually respond beautifully, but unsealed natural stone such as marble or granite will etch, high-gloss plastic will haze, and gold or silver plated fittings can lose their thin plating. Store every cleaner out of reach of children and follow the label; Health Canada’s household chemical safety guidance covers safe handling and storage. Also remember the paste scrubs but does not disinfect, so check the CDC’s cleaning and disinfecting advice when you need to sanitize a surface afterward. Tip 3: Win the Kitchen Battles In the kitchen, pink paste earns its keep on four fronts. On glass or ceramic cooktops it removes the white haze from boiled-over water and the dark rings around burners; use a soft cloth and very light pressure. On gas stoves, lift the cast-iron grates, scrub the baked-on grease with a scouring sponge, then rinse and dry them completely before they go back. On stainless steel or porcelain sinks it revives dull basins by lifting hard water film, soap residue, and the light rust specks that form near the drain; rinse well and buff dry with a microfiber cloth. It also cuts through the brown grease film on oven door glass and scrubs scorched stainless or copper pan bases back toward new. Keep it away from non-stick interiors, where abrasion destroys the coating, and use an old toothbrush on discoloured grout lines to brighten them dramatically. Tip 4: Reclaim the Bathroom Soap scum is where pink paste feels like magic. On fiberglass tubs, acrylic shower surrounds, and tiled walls, apply it with a sponge, scrub the cloudy buildup away, and rinse with the shower head for a satisfying deep clean. Glass shower doors covered in hard water spots return to full transparency when scrubbed, rinsed, and squeegeed or buffed dry. Chrome and ceramic faucets and basins lose their toothpaste film and mineral crust, including the green or white deposit that forms at the tip of the spout. For stubborn toilet bowl rings in hard water areas, shut off the supply valve and flush out most of the bowl water, then apply the paste to the ring and scrub with a toilet brush or pumice stone; the same method lifts stains on the porcelain exterior. Tip 5: Take It Around the House and Outdoors Painted walls and baseboards shed scuff marks, while door frames come clean quickly too, when you work a tiny amount of paste over them with a damp cloth and light pressure. Yellowed UPVC window frames and door sills brighten back to white, and sliding door tracks scrub clean where dirt compacts. Soot on tile or brick fireplace surrounds comes up with a stiff-bristled brush. Outdoors, barbecue grates respond to a generous coat of paste worked with a wire brush, rusted garden tools and weathered metal patio furniture are revived, and scuffed white sneaker soles look new again when scrubbed with an old toothbrush and wiped clean. Know When to Put the Tub Away Understanding the paste’s limits prevents costly mistakes. Never use it on these surfaces: Unsealed marble, granite, travertine, and other natural stone: the abrasives etch the polish Non-stick cookware interiors: the coating scratches and eventually peels High-gloss plastics and acrylic: fine scratches dull the finish Gold, silver, or chrome plated fittings: the thin plating can wear through Any surface still warm from cooking or baking Surface Pink paste excels at Extra caution Glass or ceramic cooktop White boiled-over marks and burner rings Soft cloth, light pressure Cast-iron stove grates Baked-on grease and carbon Dry fully before replacing Stainless or porcelain sink Hard water film and rust specks Rinse well, buff dry Oven door glass Brown baked-on grease film Use a non-scratch scourer Tile grout Discoloured, dull grout lines Old toothbrush or grout brush Porcelain toilet Stubborn waterline rings Toilet brush or pumice stone Pink Paste Questions, Answered Is pink paste safe on every surface? No. It is abrasive by design, so it suits durable, hard surfaces such as stainless steel, enamel, glass, tile, and glazed porcelain. Keep it off unsealed stone, non-stick coatings, high-gloss plastic, and plated fittings, and always patch test an unseen corner first. Do I have to rinse pink paste off? Yes. The paste contains fine abrasive particles that leave a chalky film if allowed to dry on the surface. Rinse with clean water after scrubbing, then buff dry with a soft cloth for the best finish. Can pink paste replace my regular cleaner? Think of

5 Amazing Tips on How to Use Pink Paste Without Causing Harm Read More »