Blog

Person polishing wooden island with essential oils in sunny kitchen.

How to Develop a Housekeeping Schedule That Works for You

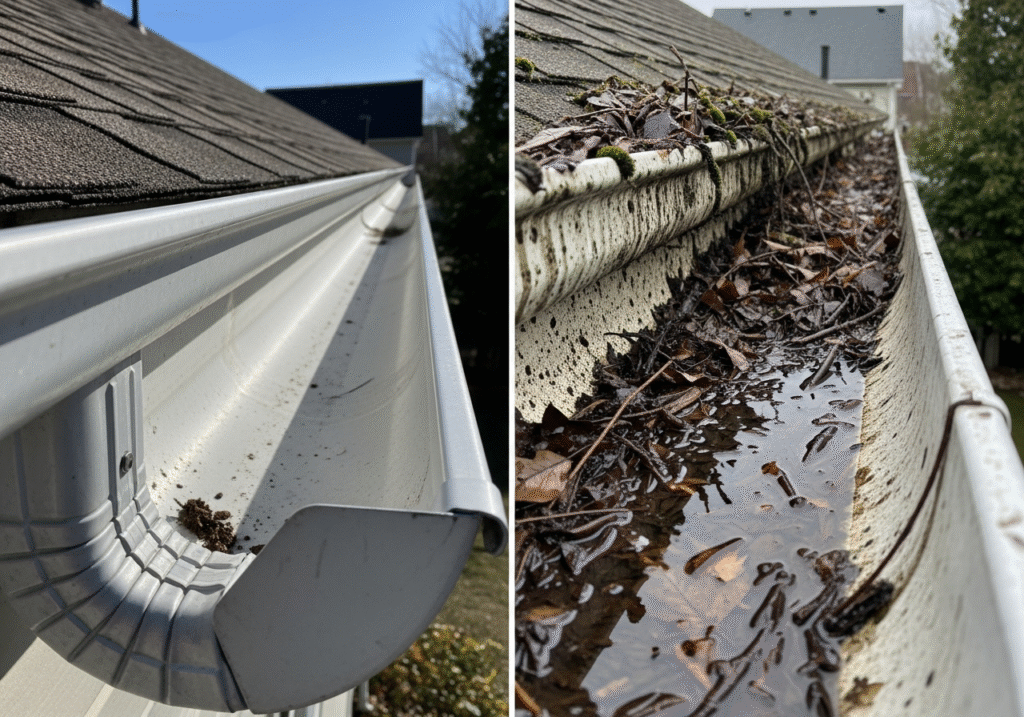
Creating a housekeeping schedule that fits perfectly into your lifestyle can transform your home into a consistently clean and pleasant space without feeling overwhelmed by chores. Whether you’re juggling a busy schedule or just prefer to keep things orderly with minimum fuss, a well-thought-out housekeeping plan is key. Here’s how to develop a housekeeping schedule that works specifically for you. 1. Assess Your Needs and Preferences To extend on assessing your needs and preferences for a housekeeping schedule, it’s essential to consider not just what areas of your home require cleaning, but also how these areas are used throughout the week. This will help you prioritize tasks more effectively. For instance, high-traffic areas like the kitchen or family room might need a quick sweep daily, whereas bedrooms might only need a thorough dusting once a week. Think about your household’s specific needs as well. If you have pets, regular vacuuming might become a daily necessity to manage fur and dander. Alternatively, if you’re dealing with allergies, you might prioritize reducing dust and pollen with more frequent window cleaning and surface wiping. In the process, take stock of all the cleaning tasks you find yourself tackling, both the obvious and the overlooked. This includes everything from the regular wiping down of countertops to the occasional deep clean of your storage areas. This comprehensive approach ensures that nothing gets missed and that your housekeeping efforts are as effective as possible, maintaining a clean and inviting home environment. 2. Break It Down Into Manageable Tasks To further develop your housekeeping schedule by breaking it down into manageable tasks, think about the flow of your week and the rhythm of your household activities. Start by identifying which tasks need attention daily to maintain a basic level of cleanliness and order. For example, managing the clutter that accumulates throughout the day and handling dishes are fundamental to keeping your space functional. Then, consider what housekeeping tasks can be tackled on a weekly basis. These might include more thorough cleaning activities such as vacuuming all carpets, dusting surfaces, and mopping floors, ensuring that each part of your home gets regular attention. This keeps your living areas pleasant and hygienic without daily fuss. For monthly housekeeping duties, look at tasks that contribute to the upkeep and efficiency of your home but don’t need constant attention. Cleaning windows, for instance, not only helps with the aesthetics of your home but also maximizes natural light. Checking and maintaining smoke detectors and deep-cleaning major appliances like your oven and refrigerator are also crucial for safety and functionality. Finally, consider those housekeeping tasks that fit a seasonal schedule. These might include jobs like clearing out gutters to prevent water damage, deep cleaning the garage, or organizing closets as the seasons change. These tasks are typically more labor-intensive and require more time, so scheduling them during specific times of the year helps distribute your workload evenly and keeps everything manageable. By categorizing your cleaning tasks into daily, weekly, monthly, and seasonal activities, you create a balanced housekeeping routine that keeps your home in top shape while remaining adaptable to your lifestyle and energy levels.     3. Allocate Time Slots When allocating time slots for your housekeeping tasks, it’s essential to align them with your personal schedule and energy peaks throughout the day. This consideration ensures that your cleaning routine integrates seamlessly into your life rather than disrupts it. For those who work from home or have flexible hours, you might find that breaking up tasks into smaller segments throughout the day keeps your home tidy without becoming too burdensome. For example, you could set aside time after breakfast to do quick surface cleans and save vacuuming or laundry for your energy peak in the late morning or early afternoon. On the other hand, if you have a more structured day job, you might prefer to designate evenings for light cleaning tasks to refresh your space for the next day. Meanwhile, more intensive cleaning could be reserved for a particular day over the weekend when you can dedicate a few hours to thorough housekeeping without the pressure of work commitments. Moreover, consider how your energy fluctuates during the week. Some people might feel more motivated and energetic at the beginning of the week, making it an ideal time to tackle the more demanding housekeeping chores, leaving lighter tasks for later in the week when fatigue sets in. By thoughtfully allocating time slots for different housekeeping activities around your personal energy levels and daily routine, you ensure your cleaning schedule is not only manageable but also feels naturally integrated into your daily life. 4. Use Tools and Resources Incorporating tools and resources effectively can significantly enhance your housekeeping strategy by providing structure and reminders to help you stay organized and efficient. Beyond using basic tools like checklists and calendars, you can explore a variety of apps designed specifically for housekeeping tasks. These apps often feature customizable reminders, task lists, and even tips for cleaning techniques, which can be particularly helpful for more complex tasks such as seasonal deep cleaning or maintenance checks. Additionally, integrating smart home technology can further streamline your housekeeping routine. For example, smart thermostats can remind you when it’s time to change filters, and smart refrigerators can keep track of groceries and suggest when it’s time to clean out old items. There are also smart vacuum robots that can be scheduled to clean your floors daily without manual intervention, saving you time and effort. Using these tools not only helps in keeping track of routine tasks but also ensures that nothing is overlooked. For instance, setting a monthly reminder to descale your coffee maker or check the smoke detectors can prevent larger issues down the line. With the right digital tools at your disposal, you can ensure that every aspect of your housekeeping schedule is managed with precision, making your cleaning routine as effective and effortless as possible.     5. Involve Others Involving others in the housekeeping process

How to Develop a Housekeeping Schedule That Works for You Read More »

Professional house cleaner in uniform and green gloves sanitizes kitchen countertop.

House Cleaners: 5 Tips for Building a Great Relationship With Them

Maintaining a clean and tidy home is a goal many of us aspire to, but with the fast-paced lives we lead, keeping up can be tough. That’s where professional house cleaners come in handy, especially in bustling cities like Toronto. But once you’ve hired a cleaner, how do you make sure the relationship stays solid and your home gets the best care? Here are five top tips for building a great relationship with your house cleaners: 1. Clear Communication When you first start working with house cleaners, setting the stage with clear communication is crucial. As soon as you welcome them into your home, take the time to discuss what your specific expectations are. Perhaps you need them to focus on the kitchen and bathrooms, or maybe you have rooms that you’d prefer remain private and untouched. Sharing these details upfront can help prevent any misunderstandings that might arise later on. It’s also important to be straightforward about how you like things done. If you have a preferred method of cleaning or special products you’d like used on certain surfaces, letting your house cleaners know from the beginning can make things more efficient for everyone involved. This initial conversation sets the tone for a professional relationship where both parties understand and respect each other’s expectations. Additionally, maintaining open communication throughout your relationship with your house cleaners ensures that any new preferences or issues are addressed promptly. For example, if you notice a spot that was missed or if you’d like to adjust the focus of the cleaning session, speaking up sooner rather than later helps your cleaners adapt quickly and continue providing the best service possible. This ongoing dialogue not only leads to better results but also builds a strong, mutual respect between you and your house cleaners, fostering a partnership that can last for years. 2. Respect Their Time Understanding and respecting the schedule of your house cleaners is essential for a smooth and effective cleaning experience. These professionals carefully manage their time to serve multiple homes each day. By ensuring that your space is accessible and prepared for their arrival, you greatly assist in maximizing their efficiency and the quality of cleaning they can provide. Preparing your home might include small tasks like clearing the floors of clutter, toys, or clothes, which can otherwise hinder your cleaners’ ability to get straight to work on more intensive tasks like vacuuming or mopping. Think of it as setting the stage for them to perform their best work without unnecessary obstacles. Moreover, life can be unpredictable, and sometimes you might need to cancel or reschedule a cleaning session. In such cases, providing as much notice as possible is not just courteous but also crucial for house cleaners to adjust their schedules accordingly. They appreciate having the opportunity to rearrange their appointments or fill the slot with another client.     3. Provide a Friendly Environment Creating a welcoming and considerate atmosphere for your house cleaners goes beyond just the cleanliness of the space; it’s about how you treat them as individuals. Small gestures of kindness, such as offering a glass of water or a quick snack, can significantly enhance their comfort and energy levels while they work. This type of hospitality not only makes the cleaning session more pleasant but also fosters a positive and respectful relationship. Additionally, a simple thank you or a compliment on a job well done can make a big difference in how valued and appreciated your house cleaners feel. Recognizing their efforts not only boosts morale but also encourages a deeper commitment to their work. When house cleaners feel respected and acknowledged, they are more likely to go above and beyond, ensuring that every nook and cranny of your home receives attention. Furthermore, maintaining a friendly dialogue, asking about their day, or showing interest in their well-being can reinforce a positive working environment. This level of personal interaction shows that you see them as more than just service providers but as vital contributors to your home’s upkeep. Ultimately, when house cleaners are treated well and respected in their work environment, it reflects in the quality of their cleaning and the ongoing relationship you share with them. 4. Trust Their Expertise When you hire professional house cleaners, you’re not just paying for their time; you’re also benefiting from their wealth of experience and knowledge in effective cleaning methods and products. It’s important to remember that these individuals are trained and skilled in their field. Trusting their expertise means being open to their suggestions and recommendations. For instance, if your house cleaners recommend a specific type of cleaning agent for your hardwood floors or a particular approach to treating stains on upholstery, they likely have good reason based on past successes. By trusting their judgment, you can ensure that your home is not only clean but also maintained properly to avoid damage from incorrect cleaning techniques or harsh chemicals. Moreover, house cleaners often have insights into cleaning schedules and maintenance routines that might be beneficial for your home. If they suggest increasing the frequency of cleaning sessions during certain seasons or advise on areas that need more regular attention, considering their advice can help keep your home in top condition year-round. Embracing their expertise can also lead to a more efficient cleaning process. When house cleaners are given the autonomy to apply their best practices, they can work more effectively, ensuring that each cleaning session is as thorough and productive as possible. 5. Stay Consistent and Loyal Consistency and loyalty are key components in nurturing a fruitful relationship with your house cleaners. If you find that their service meets or exceeds your expectations, it makes sense to continue using the same team or individual for your cleaning needs. Regular appointments not only help your cleaners become more familiar with your home and its specific cleaning requirements but also allow them to tailor their services more closely to your preferences. By sticking with the same house cleaners, you

House Cleaners: 5 Tips for Building a Great Relationship With Them Read More »

Caucasian hand meticulously cleans miniature house model with cloth.

7 Steps to a Thorough Home Cleaning: From Top to Bottom

Home Cleaning can feel like a daunting task, but with the right strategy, it doesn’t have to be! Whether you’re prepping for guests, tackling spring cleaning, or just giving your space a much-needed refresh, follow these seven steps to ensure your home shines from top to bottom. 1. Plan and Prepare When planning your home cleaning, it’s also smart to check the inventory of your cleaning products to ensure you have enough supplies to avoid any interruptions. For instance, make sure your cleaning solutions are full, check that your mop heads are clean, and see if your vacuum cleaner bags or filters need replacing. This kind of preparation not only streamlines the cleaning process but also prevents the frustration of having to stop midway to run to the store. Additionally, consider the logistics of your home cleaning. For example, if you live in a multi-story home, plan to start from the top floor and work your way down to efficiently manage the dust and dirt without tracking it back into cleaned areas. This approach saves time and energy, making your cleaning more effective. By taking the time to thoroughly plan and prepare, you can transform what might seem like an overwhelming chore into a series of manageable tasks, making the entire home cleaning process less daunting and more productive.     2. Start at the Top When you begin your home cleaning by starting at the top, it’s efficient to also tackle the cobwebs that might be lurking in the upper corners of your rooms and any dust that has settled on high shelves or ledges. This strategy ensures that you capture all the loose particles before they have a chance to settle elsewhere after you’ve cleaned the lower areas. After dusting the ceiling fans and light fixtures, move on to cleaning any wall hangings, such as picture frames or mirrors, which also tend to accumulate a surprising amount of dust. This top-down approach in home cleaning means that by the time you reach the surfaces and floors, much of the preliminary dust and debris has already been dealt with. 3. Dust and Wipe Surfaces Once you’ve effectively managed the higher areas of your home, continue your home cleaning by focusing on all remaining surfaces. Extend your attention to other furniture pieces, such as tables, chairs, and desks. Utilize your microfiber cloth or duster to pick up dust from these areas, ensuring you reach under any objects and into the corners where dust tends to gather. In your living room and bedrooms, remember to wipe down electronics and appliances, as these can also gather dust that affects their performance and appearance. For fabric surfaces like sofas and armchairs, use an upholstery attachment on your vacuum cleaner to remove dust and allergens, which can significantly freshen up the space. As you move into the kitchen and bathrooms, switch to more robust cleaners designed to handle grease and grime. In the kitchen, make sure to clean the fronts of cabinets, the stovetop, and any counters, particularly around appliances where crumbs and food residues can accumulate. For the bathrooms, give extra care to disinfecting surfaces like faucets, handles, and countertops to ensure they are not just clean but also hygienic. By systematically dusting and wiping from one room to the next, you ensure that no surface is overlooked, contributing to a comprehensive and effective home cleaning session. 4. Tackle the Bathrooms When it comes to home cleaning, giving extra care to the bathrooms is crucial because of the high potential for germ accumulation. Start by applying cleaners to the sink, bathtub, and toilet, allowing them to sit for a few minutes to break down the dirt and grime. During this waiting period, you can tackle other parts of the bathroom such as the mirrors and windows. Use a glass cleaner to ensure these surfaces are streak-free and clear. After allowing the cleaning agents to soak, scrub each area thoroughly with a suitable brush or sponge. For tough grime and lime scale in the toilet or around fixtures, consider using a pumice stone or a specialized cleaning tool that can handle these challenges without damaging the surfaces. Additionally, turn your attention to the grout between tiles, which can often become discolored and moldy. Using a grout brush with a bleach-based cleaner can restore the whiteness and prevent mold from spreading. Once you have scrubbed and rinsed all the major fixtures, finish up by cleaning the floor. The bathroom floor can harbor bacteria and dirt, especially in corners and around the toilet base. Use a disinfectant cleaner and, if possible, a steam mop to ensure the floor is not only clean but also sanitized.     5. Clean the Kitchen Giving the kitchen detailed attention is vital because this space is a central hub of activity and requires hygiene and cleanliness for safety and health. Begin with deep-cleaning the appliances, which involve not just wiping the exteriors but also tackling the interiors. For instance, remove any food particles and grease from the microwave with a cleaning solution designed for appliances. For the oven, use a dedicated oven cleaner to cut through baked-on grime, and consider running a self-cleaning cycle if it’s available. For your refrigerator, take out all items and removable shelves or bins to wash them separately with warm soapy water. Wipe the inside of the fridge with a baking soda solution to remove odors and stains, ensuring all surfaces are dry before replacing the items back neatly. This is also an excellent opportunity to discard any expired or spoiled food, helping to keep the fridge organized and functional. Moving on to the countertops, use a disinfectant cleaner suitable for the material, whether it’s granite, laminate, or stainless steel, to ensure they are not only clean but also germ-free. Don’t forget to clean the backsplash, which can accumulate splatters from cooking. A degreaser can be particularly effective here, especially around the stove area. Cleaning cabinets is another crucial part of kitchen maintenance. Wipe

7 Steps to a Thorough Home Cleaning: From Top to Bottom Read More »

Family Enjoying Spring Cleaning in Sunny Home Illustration, Easy Spring Cleaning Tasks

How to Tackle House Cleaning: 6 Essential Tips

House cleaning can seem like a daunting task, especially when you’re looking at a week’s worth of dishes, dust, and disorder. But you can make the house cleaning process not only efficient but also potentially enjoyable. with the right approach and a few expert tips, you can make the process efficient and maybe even enjoyable! Whether you’re gearing up for a spring clean or just trying to keep things tidy, with these tips and a positive mindset, you can efficiently sweep through your house cleaning chores, leaving your living space spotless and inviting. 1. Set Clear Cleaning Goals Before you even pick up a sponge to start your house cleaning, it’s crucial to make a detailed plan. Deciding exactly what you need to accomplish and setting clear goals for your cleaning session can drastically improve your efficiency and effectiveness. Are you planning a quick tidy-up to freshen up the space, or is a thorough, deep clean necessary? Knowing your objectives upfront will help you prioritize which tasks are most important, allowing you to allocate your time and efforts wisely. For instance, if you are expecting guests, your focus might naturally gravitate towards making sure the living areas and bathrooms are immaculate, as these are the spaces your guests are most likely to see and use. This targeted approach not only saves you time but also ensures that the most crucial cleaning tasks are completed to the highest standard. By clearly defining your cleaning goals before you begin, you can streamline your process, reduce the feeling of being overwhelmed, and achieve better results in a shorter amount of time. 2. DeClutter First One of the biggest roadblocks to efficient house cleaning is clutter. Before you dive into the actual cleaning process, it’s worthwhile to spend some time decluttering. Begin by picking up items that have wandered away from their designated spots and return them to where they belong. This simple act of organizing not only paves the way for a smoother cleaning experience but also immediately enhances the overall appearance of your space. Addressing clutter first ensures that when you start cleaning surfaces like countertops, shelves, and floors, you’re not just moving items around or cleaning around them, which can be inefficient and ineffective. Removing unnecessary items and organizing what’s left can also help reduce stress and make your environment more pleasant and manageable. This initial effort in decluttering can significantly boost your productivity and effectiveness, allowing you to focus on cleaning without distraction. As a result, your house not only looks tidier but also truly feels cleaner and more inviting.     3. Tackle One Room at a Time When it comes to house cleaning, trying to handle every room at once can indeed feel overwhelming and can actually slow you down. A more effective strategy is to break your cleaning tasks down by room, tackling one space at a time. This focused approach not only helps manage the workload but also allows you to see visible results quickly, which can be a great motivation to keep going. Starting with one room, such as the kitchen or bathroom, and fully completing the cleaning tasks there before moving on to the next room, creates a sense of accomplishment. This method ensures that you’re not leaving any room partially cleaned, which can often happen when you’re jumping from one space to another. Focusing on one room at a time also allows you to concentrate your efforts and cleaning supplies, which means you’re less likely to forget a task or misplace your tools. This strategy makes it easier to fit cleaning into your schedule, whether you decide to clean one room a day or dedicate a full day to go through each room systematically. By compartmentalizing the cleaning process, you enhance your efficiency and effectiveness, making the overall task of house cleaning less daunting. 4. Keep Your Tools Handy Keeping your tools handy is essential when it comes to efficient house cleaning. Nothing disrupts the flow of cleaning more than having to stop every few minutes to retrieve supplies. To avoid this, it’s wise to gather all your cleaning tools and products before you begin your session. Utilizing a portable caddy can be particularly effective as it allows you to easily carry all your essentials from one room to another, keeping everything within arm’s reach. Ensure your caddy is stocked with all the necessary items such as gloves, scrub brushes, rags, and various cleaning solutions tailored to different surfaces. This preparation prevents unnecessary pauses and ensures that you have the right tools at the right moment, which can significantly speed up your cleaning process. Having a well-organized caddy helps you maintain focus and reduces the chances of overlooking tasks. By organizing your resources in advance, you can streamline your cleaning routine, making it more productive and less stressful. This strategy not only saves time but also enhances the overall effectiveness of your cleaning efforts, ensuring a smoother, more enjoyable cleaning experience.     5. Use High-Efficiency Cleaning Methods To streamline your house cleaning efforts effectively, adopting high-efficiency cleaning methods is crucial. These methods are designed to maximize your efficiency, ensuring that you get the best results with the least amount of wasted effort and time. For instance, when dusting, it’s highly effective to start from the top of a room and work your way down. This technique ensures that any dust particles that are dislodged and fall to lower levels will be cleaned up in the subsequent steps, preventing the need for re-cleaning already cleaned areas. Similarly, when vacuuming, consider doing the entire house in one continuous session, moving quickly and seamlessly from one room to another. This approach avoids the repeated setup and breakdown of equipment and keeps you in a productive rhythm, reducing the total time spent. By maintaining this flow, you ensure that no area is accidentally overlooked and that your cleaning process is as time-efficient as possible. Adopting these high-efficiency cleaning techniques not only improves the cleanliness of

How to Tackle House Cleaning: 6 Essential Tips Read More »

Close-up of gray acoustic foam panels for soundproofing in studio.

How to Clean Acoustic Foam in 6 Easy Steps

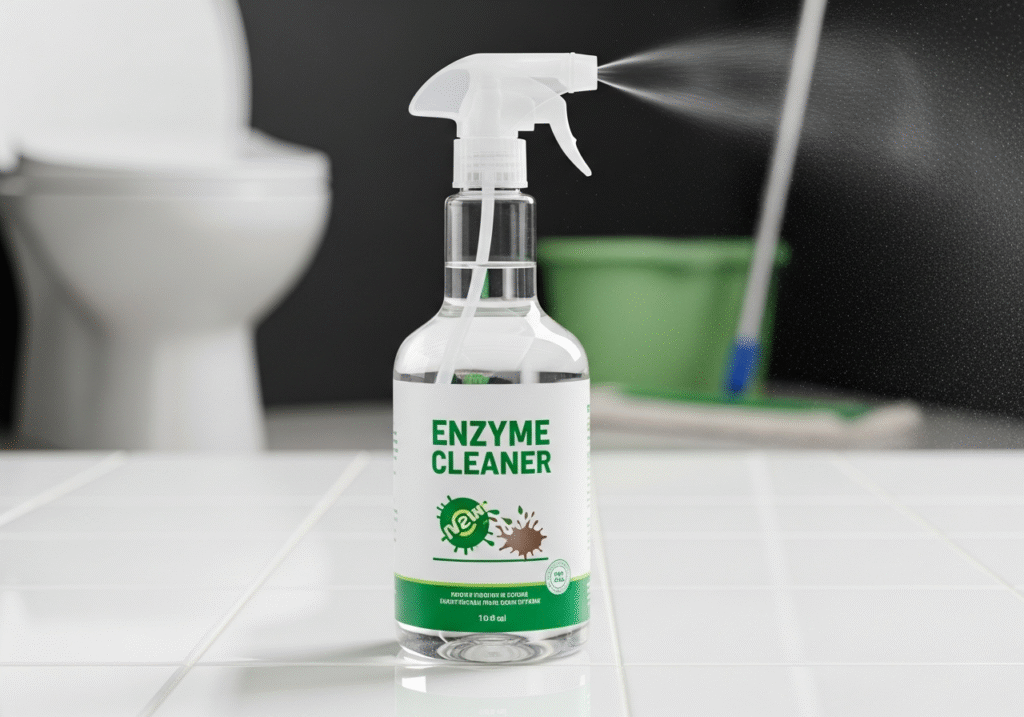
When it comes to maintaining a pristine recording environment or ensuring your home studio remains top-notch, cleaning acoustic foam is a task you can’t overlook. Acoustic foam plays a vital role in managing sound quality by reducing noise and echoes, but it can also gather dust and other particles that may affect its performance. Fear not, for cleaning your acoustic foam isn’t as daunting as it sounds. Here are six easy steps to help you keep your foam looking and functioning like new. Step 1: Vacuum Gently The first step in cleaning your acoustic foam is to vacuum it gently. Using a vacuum cleaner with a soft brush attachment is crucial because the soft bristles are gentle on the foam’s delicate structure. Begin by running the vacuum slowly over the surface of the acoustic foam. This action helps to pull out any loose dust, hair, and small particles that have accumulated on the surface. It’s important to pay attention to the direction in which you vacuum. The foam has a specific texture and pattern, so moving the vacuum along the alignment of these patterns rather than against them helps prevent any potential snagging or pulling that could damage the foam. This method is not just effective but also ensures that the acoustic foam remains in good condition without compromising its ability to absorb sound. Regular vacuuming, perhaps once a week or bi-weekly depending on the location and usage of the foam, is usually sufficient for light cleaning and routine maintenance. This not only keeps the foam looking fresh but also extends its lifespan by preventing the buildup of dust and other particles that can eventually embed deeper into the foam, making them harder to remove later.   Step 2: Spot Clean Stains When maintaining your acoustic foam, addressing spots and stains promptly is essential to prevent permanent damage. After identifying areas that are particularly dirty or stained, it’s crucial to treat these spots separately to ensure thorough cleaning without soaking the entire piece of foam. Here’s how you can tackle those stubborn stains effectively: Begin by mixing a very mild laundry detergent with water to create a cleaning solution that is gentle yet effective. It’s important to use a mild detergent to avoid any harsh chemicals that could potentially degrade the acoustic properties of the foam. Once your solution is ready, immerse a clean, soft cloth into the mixture and wring it out until it is just damp, not wet. This control of moisture is critical because introducing too much water into the foam can lead to issues like mold growth or breakdown of the foam structure over time. Gently dab the damp cloth on the stained areas of the acoustic foam. The key here is to pat the stains rather than scrub them, as scrubbing can push the dirt deeper into the foam or cause surface damage. Pat the area until the stain begins to lift. This method may need to be repeated a few times with fresh portions of your damp cloth to fully remove the stain. After treating the stained areas, if you notice any soap residue, it’s a good idea to go over the spots with a clean cloth that has been dampened with plain water. This helps in removing any leftover detergent which, if left behind, could attract more dirt over time. Step 3: Use a Foam Cleaning Solution For those times when your acoustic foam needs more than just a light cleaning, opting for a specialized foam cleaning solution is a smart choice. These solutions are specifically designed to handle the unique material of acoustic foam, ensuring that they clean deeply without causing any harm to the structure or acoustic properties of the foam. To use a foam cleaning solution effectively, start by gently spraying a light coat across the surface of the acoustic foam. It’s important to cover all areas but avoid saturating the foam. These cleaning agents are formulated to act on the dirt and oils that can accumulate in the foam from airborne particles and environmental exposure. By letting the solution sit for a few minutes, you give it time to penetrate and break down this buildup, making it easier to wipe away. Once the solution has had time to work, take a clean, dry cloth and gently wipe over the surface of the acoustic foam. This step helps to lift away the dirt and debris that the cleaning solution has loosened. Be sure to use soft, gentle strokes to avoid damaging the foam’s surface. This wiping not only removes the cleaning agent but also any particles that have been broken down and brought to the surface. This deeper cleaning method can be particularly useful in environments where the foam is exposed to more frequent use or in areas with higher levels of dust and air pollution. Regular use of a foam cleaning solution can help maintain the visual appeal and functional integrity of your acoustic foam, ensuring it continues to perform its sound-absorbing duties effectively.     Step 4: Rinse with a Damp Cloth Once you’ve addressed specific stains or applied a cleaning solution to your acoustic foam, the next critical step is to rinse the foam with a damp cloth. This process is essential to ensure that no cleaning solution remains on the foam, as leftover chemicals can attract more dirt or degrade the foam’s quality over time. To do this effectively, select a clean cloth and slightly dampen it with clean water. It’s important to ensure the cloth is not overly wet—squeeze out any excess water so that it’s just damp enough to pick up any remaining soap without saturating the foam. Saturating your acoustic foam can lead to a range of problems, such as extended drying times and potential for mold growth if not properly aired out. Gently wipe the surface of the foam with the damp cloth, going over areas where the cleaning solution was applied. This gentle wiping helps lift and remove any traces

How to Clean Acoustic Foam in 6 Easy Steps Read More »

Person polishing wooden island with essential oils in sunny kitchen.

7 Natural Ways to Clean and Polish Wood for a Lasting Shine

Wood furniture and surfaces add warmth and elegance to any home, but keeping them in pristine condition can be a bit of a challenge. Fortunately, you don’t have to rely on harsh chemicals to keep your wood items looking their best. Here are seven natural methods to clean and polish wood that not only bring out its beauty but are also eco-friendly and gentle on your furniture. 1. Vinegar and Olive Oil Mixture One of the most effective and gentle ways to care for your wood furniture is by using a mixture of vinegar and olive oil. This combination is not only simple to prepare but also highly effective in maintaining the luster and health of wood surfaces. The acidity of the vinegar gently cleanses the wood, removing dirt and grime without damaging the wood’s natural structure. Meanwhile, the olive oil acts as a nourishing polish, deeply conditioning the wood and enhancing its inherent shine. To make this natural wood cleaner and polish, combine one part white vinegar with three parts olive oil in a bowl or a jar. This ratio ensures that the oil sufficiently coats and protects the wood while the vinegar keeps it clean and bright. Before applying, it’s essential to stir the mixture thoroughly to blend the ingredients well. Using a soft, lint-free cloth, dip it into the mixture and wring out any excess liquid. Gently apply the solution to your wood furniture, always rubbing gently in the direction of the wood grain. This technique ensures that the oil penetrates evenly and prevents any cross-grain scratches that could mar the surface. After applying, take another clean cloth and buff the wood lightly to bring out a more vibrant shine and ensure that no excess oil remains on the surface. This method is particularly beneficial for wood items that are handled frequently or exposed to the elements, as it not only cleans but also provides a protective layer that enhances the wood’s durability and appearance.     2. Lemon Juice and Olive Oil This natural polish not only cleans effectively but also leaves a delightful, citrusy aroma that invigorates any space. Lemon juice, known for its potent cleaning properties, cuts through dirt and buildup without harsh chemicals. It’s particularly effective at tackling greasy residues that can accumulate on kitchen tables and cabinets, making it an excellent choice for areas where food is prepared. When combined with olive oil, this mixture does more than just clean. Olive oil acts as a natural conditioner, penetrating deep into the pores of the wood to restore moisture and protect it from drying out or cracking. This is especially important for wood that may be exposed to heat or air conditioning, which can sap the moisture from wood and leave it looking dull. To prepare this wood polish, mix one part freshly squeezed lemon juice with two parts olive oil. It’s important to use fresh lemon juice rather than bottled for the best results, as fresh lemon juice contains natural enzymes that are effective at breaking down grime. After mixing, apply the solution to a soft cloth, making sure the cloth is damp but not overly wet, which could saturate and damage the wood. Gently rub the cloth over the wood surfaces in your home, following the grain of the wood to avoid any scratches. The olive oil will nourish the wood, while the lemon juice enhances its color and sheen. 3. Beeswax Polish Beeswax polish is an exceptional choice for maintaining and enhancing the natural beauty of wood furniture. This traditional method goes beyond mere surface cleaning to provide a protective barrier that safeguards wood against scratches, moisture, and everyday wear and tear. When beeswax is combined with a nourishing carrier oil like jojoba or coconut oil, it creates a robust polish that not only enhances the wood’s appearance but also fortifies its durability. To prepare your own beeswax wood polish, start by sourcing natural beeswax, which can typically be found at craft stores or online. Melt the beeswax in a double boiler until it becomes liquid. Carefully blend in your choice of carrier oil—jojoba oil is especially good for its long shelf life and mimicking the natural oils found in wood, while coconut oil offers a slightly sweet fragrance and additional antibacterial properties. A good ratio to maintain is one part beeswax to three parts oil, which ensures that the mixture is easy to apply while still being rich enough to penetrate deeply into the wood. Once the beeswax and oil have fully integrated, allow the mixture to cool slightly; it should still be warm enough to be malleable. Using a soft, lint-free cloth, work the warm polish into the wood surfaces, rubbing in circular motions to ensure that the mixture covers evenly. This method allows the wax to fill in tiny pores and scratches, creating a smooth, even surface. After applying the beeswax polish, allow it to sit on the wood for a few minutes to ensure deep penetration. Then, with another clean, soft cloth, buff the wood to a high shine. This final buffing step not only enhances the wood’s natural luster but also helps to harden the protective wax coating, forming a durable seal that repels dust, water, and stains. 4. Tea Brewing Tea brewing offers a surprisingly effective method for cleaning and enriching the appearance of wood furniture. The natural tannins found in black tea make it an excellent choice for gently cleansing and enhancing the natural grain of wood surfaces. These tannins, which give tea its characteristic color and astringency, also have properties that can help to lift dirt and residue without the harsh effects associated with chemical cleaners. To use tea as a cleaning solution for wood, start by brewing a strong pot of black tea. Typically, using one or two more tea bags than you would for drinking creates the ideal concentration for cleaning. Allow the tea to steep until it’s very strong, then let it cool to room temperature to prevent

7 Natural Ways to Clean and Polish Wood for a Lasting Shine Read More »

Kitchen rust, rust, oven rust

How to Remove Rust and Corrosion from Metal: 5 Best Methods

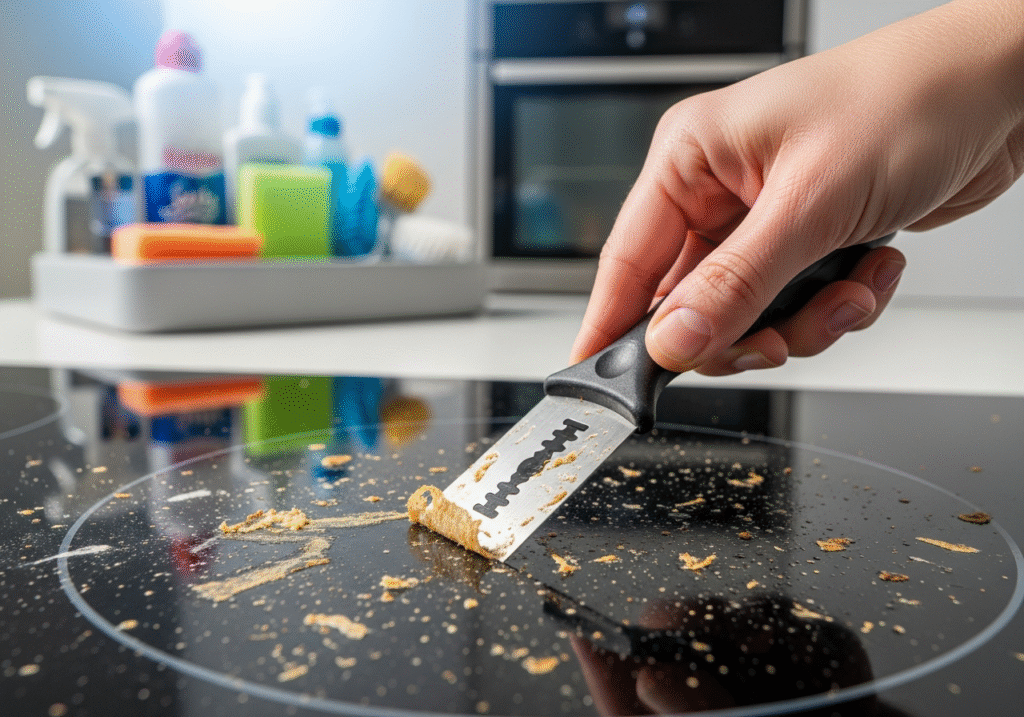
Dealing with rust and corrosion on metal surfaces can be a real headache, especially when it starts affecting the functionality or aesthetics of your items. Whether it’s tools, outdoor furniture, or any metal object, knowing how to effectively remove rust can prolong the life of your belongings and keep them looking great. Here, we’ll walk through five effective methods to get rid of rust and corrosion from metal. Grab your gloves, and let’s get started! 1. White Vinegar Bath: The Natural Soak White vinegar isn’t just a staple for your salad dressing—it’s also a highly effective natural rust remover for metal objects. The key ingredient here is acetic acid, which actively reacts with rust to help dissolve it, clearing the way for a cleaner, shinier metal surface beneath. This method is especially suitable for those who prefer eco-friendly cleaning solutions over harsh chemicals. To start, if you’re dealing with smaller metal items, simply find a container large enough to fully submerge them in white vinegar. Allow these items to sit in the vinegar bath overnight. This extended soak gives the acetic acid ample time to penetrate and break down the rust. For larger metal pieces that can’t be easily submerged, you don’t need to worry about finding an oversized container. Instead, grab some rags or even old towels, soak them in vinegar, and wrap them around the rusted areas of the metal. The goal is to keep the rusty spots thoroughly moistened with vinegar, so sometimes it might be helpful to re-soak the rags periodically to keep them wet throughout the soaking period. Once the soaking time has elapsed, it’s time to tackle the loosened rust. Using a metal brush or a piece of crumpled aluminum foil, scrub the treated areas vigorously. The abrasive action of the brush or foil helps to lift and remove the rust particles from the metal surface. After you’ve scrubbed the metal clean, the final step is to rinse the items with water. This not only removes any remaining vinegar and rust residue but also stops the acetic acid from further acting on the metal. Be sure to dry the metal thoroughly after rinsing. Leaving the metal wet could potentially lead to new rust formation, undoing all your hard work. Dry it off with a clean cloth or towel to ensure that every nook and cranny is moisture-free.     2. Baking Soda Paste: The Gentle Scrub When faced with less aggressive rust or when you need to treat delicate metal surfaces, baking soda emerges as an excellent, mild alternative to harsher chemical rust removers. This common household item is not only accessible but also gentle on metal while being tough on rust. To utilize baking soda for rust removal, start by preparing a thick paste. This is done by mixing baking soda with a small amount of water until you achieve a consistency that’s substantial enough to cling to vertical surfaces without dripping. This paste formation is crucial as it ensures that the baking soda stays in contact with the rusted areas long enough to facilitate the cleaning process. Once your paste is ready, apply it generously over the rusted portions of the metal. Spread the paste evenly, covering all rusty spots thoroughly. After applying, let the paste sit on the rust for a couple of hours. This dwelling time is vital as it allows the baking soda to chemically interact with the rust, breaking it down and making it easier to scrub away. Following the resting period, take a brush and gently scrub the treated areas. The texture of the baking soda paste helps to exfoliate the rust from the metal surface without scratching or damaging it. Scrubbing should be done with enough pressure to remove rust but gentle enough to preserve the integrity of the metal underneath. The final step in this rust removal process is to rinse and dry the metal. Washing off the baking soda paste with water not only cleans away the loosened rust particles but also any residual baking soda. It’s important to thoroughly dry the metal after rinsing. Any lingering moisture could potentially lead to new rust formation, which would counteract your cleaning efforts. Use a clean, dry cloth to wipe down the metal, ensuring that it is completely dry and free of moisture.     3. Potato and Dish Soap: The Surprising Trick It might sound unconventional at first, but using a potato combined with dish soap is a surprisingly effective method for removing rust from metal surfaces. This technique leverages the natural oxalic acid found in potatoes, an organic compound that interacts with rust to dissolve and loosen it, making removal a breeze. To start this rust-removal process, simply take a regular potato and slice it in half. The fresh cut surface of the potato will be used as your ‘applicator’. Apply a liberal amount of dish soap to this cut end of the potato. The dish soap not only helps in lubricating the surface but also enhances the rust removal process due to its degreasing properties. Next, use the soapy potato half just as you would a brush. Rub the cut end with the dish soap directly onto the rusted areas of the metal. As you do this, the oxalic acid from the potato interacts with the rust, breaking it down, while the dish soap aids in gently scrubbing the rust away without damaging the metal underneath. This method is especially useful for dealing with small patches of rust or for treating areas that are typically hard to reach with conventional tools. After thoroughly scrubbing the rusted areas, the next step is to rinse the metal. This step is crucial as it washes away the residual potato juices and soap, along with the loosened rust particles. Make sure to rinse the metal thoroughly to ensure that no soapy or acidic residues remain, as these could cause further corrosion if left on the metal. Finally, drying the metal effectively is key to prevent any

How to Remove Rust and Corrosion from Metal: 5 Best Methods Read More »

Hand cleaning shiny surface with microfiber cloth and water droplets.

How to Clean Plastic Surfaces: 6 Effective Ways to a Deep Clean

When it comes to cleaning, plastic surfaces can be tricky. They’re everywhere—from your kitchen storage containers to outdoor furniture and even children’s toys. Knowing the right way to tackle the cleaning can make your items look like new and extend their life. Whether you’re dealing with a stubborn stain or just routine cleaning, here are five effective ways to deep clean your plastic surfaces. 1. Vinegar Alone or with Salt Vinegar is an excellent choice for cleaning plastic surfaces, thanks to its natural ability to cut through grease and grime while leaving your plastics looking shiny and new without harmful chemical residues. To effectively use vinegar in your cleaning routine, begin by dampening a clean cloth with undiluted white vinegar and gently wiping over the plastic surfaces to remove everyday dirt and buildup. For more stubborn stains or areas with sticky residues, consider adding a bit of salt to the affected areas before you apply the vinegar. The salt acts as an abrasive, helping to scrub away the grime without scratching the plastic. Allow the mixture of vinegar and salt to sit on the stains for a few minutes, enhancing its ability to break down the dirt effectively. Once you’ve allowed it to sit, use the vinegar-dampened cloth for a final pass over the plastic, ensuring that you’ve thoroughly cleaned the area. Complete the process by rinsing the plastic with clean water to remove any lingering vinegar or salt, and dry it off with a soft towel. This method not only cleans effectively but also provides an eco-friendly way to maintain your plastic items in pristine condition without causing damage over time. 2. Baking Soda Paste Baking soda, recognized for its gentle abrasive properties, serves as an excellent choice for addressing tough stains on surfaces without risking any scratches. To harness its cleaning power, begin by mixing a few tablespoons of baking soda with a minimal amount of water to create a dense, powerful paste. When your paste is prepared, directly apply it to the stained areas on the plastic. Employ a soft brush or sponge to softly scrub at the stain, effectively lifting and removing it through the natural abrasive action of the baking soda, which ensures a thorough clean without harming the material. Continuing the process, it’s crucial to thoroughly rinse the plastic with clean water after scrubbing. This step is essential to eliminate all residual baking soda paste, which, if left unchecked, could leave behind white marks or residue. To finalize the cleaning, dry the surface with a soft cloth. This not only helps in preventing water spots but also ensures it looks clean, refreshed, and well-maintained. This cleaning method using baking soda paste is not just effective but also environmentally friendly and economical, making it a preferred option for maintaining the cleanliness and appearance of various plastic items around your home. Whether it’s kitchen containers, children’s toys, or garden furniture, this approach helps ensure that your surfaces remain in excellent condition, effectively extending their lifespan and keeping them looking as good as new.     3. Bleach for Disinfecting When disinfecting plastic surfaces, especially those frequently used in the kitchen or bathroom, bleach stands out as an exceptionally effective cleaning agent. It is adept at removing mold, mildew, and is essential for sanitizing secondhand items thoroughly. To begin safely cleaning plastic with bleach, dilute one tablespoon of bleach in a gallon of water. This ratio ensures effective disinfection while minimizing any harsh effects on the plastic material. Once you have prepared the bleach solution, apply it generously to the plastic surfaces needing disinfection. Allow the solution to settle and work its magic for about 5 to 10 minutes. During this time, it’s crucial to ensure that the area is well-ventilated. The use of protective gloves is also advised to protect your skin from any potential irritation caused by the bleach. After the bleach has sufficiently acted on the contaminants, it’s important to thoroughly rinse the plastic with clean water. This step removes all remaining traces of bleach, which, if left behind, could cause damage or discoloration over time. Finish the process by drying the surface completely. Ensuring the surface is dry not only prevents water marks but also inhibits any future bacterial or mold growth, often a concern in damp environments. By implementing this cleaning regimen, you enhance the hygiene and safety of plastic surfaces, particularly in areas prone to frequent use or high bacterial exposure. 4. Isopropyl Alcohol for Sticky Residues Isopropyl alcohol is particularly effective in cleaning sticky residues from labels, tapes, or spills on surfaces. Its properties make it a reliable choice for tackling the frustrating sticky spots that can mar the appearance of plastic items. To utilize this method, begin by applying a small amount of isopropyl alcohol onto a cloth or paper towel. Proceed by gently rubbing the affected area on the plastic. The alcohol works quickly to dissolve the adhesive or sticky substance, allowing for easy removal without requiring excessive force or scrubbing, which could potentially damage the surface. Once the sticky residue is fully removed, it is crucial to rinse the surface thoroughly with clean water. This step is essential to ensure that no traces of isopropyl alcohol remain, as residual alcohol could potentially degrade the plastic over time or leave behind a filmy residue. After rinsing, dry the surface completely with a soft cloth. This not only prevents water marks but also ensures that the plastic is perfectly clean and free from any lingering stickiness. By following this simple yet effective method, you can ensure that your plastic items are maintained in pristine condition. Isopropyl alcohol’s ability to handle sticky residues makes it an indispensable tool in your cleaning arsenal, particularly for preserving the aesthetic and functional quality of plastic objects around your home or office. 5. Commercial Plastic Cleaners For those who prefer a ready-made cleaning solution, commercial plastic cleaners are an excellent choice. These products are specifically formulated for surfaces and are particularly useful for

How to Clean Plastic Surfaces: 6 Effective Ways to a Deep Clean Read More »

deep cleaning toronto

How Cleaning Your Home Can Fuel Your Weight Loss Journey: 6 Surprising Benefits

In the quest for weight loss, you might be surprised to learn that your very own home can serve as an unexpected ally. Yes, you heard that right—cleaning your home isn’t just about maintaining a tidy space; it can also be a key player in your weight loss journey. Let’s dive into how getting your clean on can actually help you slim down and achieve your fitness goals. 1. Calorie Burning Made Easy Believe it or not, regular household chores can be a real game changer when it comes to burning calories and aiding weight loss. Whether you’re vacuuming the carpets, scrubbing the bathroom, or dusting the shelves, each activity demands a level of physical effort that contributes to your daily energy expenditure. Just think about it—30 minutes of moving around, cleaning, can burn up to 130 calories. This amount varies, of course, depending on factors like your body weight and how vigorously you clean. But the calorie burning doesn’t stop there. Consider more intensive tasks like washing windows or deep cleaning your kitchen. These can ramp up your energy use even further, making them excellent allies in your weight loss efforts. It’s not just about the calories you burn while cleaning, either. This increase in physical activity can boost your metabolism, helping you burn more calories even when you’re at rest. So, next time you gear up for a cleaning session, remember it’s not just about the sparkle—it’s also about fueling your weight loss journey. Keep up the good work around the house, and you might find yourself fitting more comfortably into your jeans—it’s a win-win! 2. Stress Reduction Managing your stress is just as important as diet and exercise. High levels of stress can not only trigger comfort eating but also slow down your metabolism, which can hinder your weight loss efforts. However, engaging in household cleaning offers a surprising but effective relief from stress. The simple act of tidying up can have a meditative quality, allowing you to concentrate on the task at hand rather than on the stressors of your daily life. As you clean, you’re not just organizing your space; you’re also clearing your mind. This mental decluttering can lead to lower stress levels, which in turn reduces the likelihood of stress-induced eating habits. It’s about creating a healthier environment both physically and psychologically. By integrating cleaning into your routine, you can foster a sense of control and accomplishment, further reducing anxiety and improving your overall mental health.     3. Boosting Your Activity Levels Finding time for regular gym sessions can be a challenge, but integrating cleaning into your daily routine offers a practical solution to boost your activity levels. This is crucial for weight loss, as increasing the amount of movement throughout your day can significantly enhance your calorie-burning potential. Simple household chores like sweeping, mopping, or reorganizing your pantry are not just mundane tasks; they are opportunities to get your body moving. Every bit of physical activity counts when it comes to losing weight. The act of bending, stretching, and walking around your home while cleaning contributes to a more active lifestyle. These movements may seem insignificant on their own, but when combined throughout the day, they can have a substantial impact on your energy expenditure. Furthermore, integrating cleaning into your weight loss strategy can be especially beneficial if you spend many hours seated during the day, such as at a desk job. Breaking up long periods of inactivity with cleaning tasks can help keep your metabolism active and your body engaged, which are both key components in effective weight loss. 4. Improving Diet Choices Maintaining a clean and organized kitchen is a subtle yet powerful way to support your weight loss goals. When your kitchen environment is tidy and every item has its place, it becomes much easier to make healthier food choices. The effort you put into cleaning and organizing your kitchen pays off by reducing the temptation to opt for quick, less nutritious snacks. Instead of rummaging through cluttered cabinets and grabbing whatever is easiest—often processed and high-calorie foods—a well-organized kitchen encourages you to reach for healthier options like fruits, vegetables, or nuts. Additionally, when your kitchen is inviting and well-maintained, you’re more likely to spend time there preparing your meals. This leads to better control over what you eat, how it’s cooked, and portion sizes, all of which are crucial for weight loss. Cooking at home can be a delightful experience when you have a clean space that makes ingredients and utensils easily accessible. You might find yourself experimenting with new, healthy recipes instead of falling back on old habits of ordering takeout or microwaving ready-meals. By creating an environment that supports healthy eating, you’re setting yourself up for success on your weight loss journey. A tidy kitchen not only promotes good hygiene but also facilitates a lifestyle where making nutritious choices becomes the natural, easy decision. This way, your home becomes a bastion of support in your quest for health, influencing your diet in the most positive way. 5. Routine and Discipline Embedding regular cleaning into your daily or weekly schedule not only keeps your space neat but also fosters a strong sense of routine and discipline, which are vital for successful weight loss. This sense of structure extends beyond just your cleaning habits. As you become accustomed to a regular cleaning schedule, the discipline required for this can easily translate into more structured eating and exercise routines. Maintaining a consistent schedule helps to mitigate the randomness that can lead to poor dietary choices or skipping workouts. When your day is structured, you’re less likely to find yourself without a plan at meal times, which decreases the chances of indulging in fast food or unhealthy snacks. Similarly, setting aside specific times for physical activities, just like you do for cleaning, can ensure that you regularly make time for exercise. The benefits of such a disciplined lifestyle are cumulative. The more ingrained these habits become, the less

How Cleaning Your Home Can Fuel Your Weight Loss Journey: 6 Surprising Benefits Read More »

House cleaner inside a home

7 Innovative Tools Every Home Should Have to Prevent Falls

Falls at home can be serious, especially for the elderly or those with mobility challenges. To prevent falls and ensure a safer living environment, incorporating innovative tools into your home is essential. From non-slip solutions to advanced alert systems, here are five tools that can help minimize the risk and keep you and your loved ones safe. 1. Non-Slip Floor Treatments Non-slip floor treatments are an essential strategy for fall prevention in any home. These practical solutions are suitable for a wide array of flooring types—whether it’s tile, hardwood, or laminate. By adding a microscopic texture to the surface of your floors, non-slip treatments significantly minimize the likelihood of slipping. This is crucial for maintaining safety, especially in wet conditions where falls are more common. The effectiveness of these treatments in reducing fall risks is particularly noticeable in areas of the home prone to moisture, such as bathrooms and kitchens. Here, the floors are often slick due to water and spills, making them hazardous. Applying a non-slip solution in these areas ensures that even if the floor gets wet, the grip remains substantially improved, thereby helping to prevent falls. Furthermore, the beauty of non-slip treatments lies in their invisibility and the way they preserve the aesthetic appeal of your flooring. They provide peace of mind without compromising the style of your home, making them a top choice for those looking to enhance safety in a subtle yet effective manner. 2. Motion-Sensor Lighting Motion-sensor lighting is a key feature to consider when looking to prevent falls within the home. By providing immediate illumination in response to movement, these lights ensure that pathways, staircases, and rooms are well-lit as soon as someone enters a space. This automatic lighting is especially vital during the night or in dimly lit areas of the home, where the risk of tripping or stumbling is increased. The convenience of motion-sensor lighting extends beyond safety. It eliminates the need for fumbling around in the dark trying to find a light switch, which not only helps prevent falls but also enhances the overall usability and accessibility of your living space. These systems are designed to be energy efficient as well, which means they help save on electricity costs. The lights will turn off automatically after no motion is detected for a specified duration, ensuring that energy isn’t wasted. This functionality makes motion-sensor lighting an excellent choice for all households, particularly those with elderly residents or individuals with mobility issues. Integrating these lights into your home security system can also provide a dual benefit of deterring potential intruders while keeping the interior and exterior premises safely lit to prevent falls. This blend of safety, convenience, and energy efficiency underscores why motion-sensor lighting is so effective in creating a safer home environment. 3. Grab Bars and Handrails Installing grab bars and handrails is an indispensable step in creating a safer home environment to prevent falls. These aids are crucial for stability and support in areas where falls are most likely to occur, such as the bathroom and along staircases. In bathrooms, where wet surfaces significantly increase the risk of slipping, having sturdy grab bars near the bathtub, shower, and toilet can provide the necessary support to safely navigate these areas. This can be particularly beneficial for individuals with reduced mobility or balance issues. Similarly, handrails along stairways and in hallways help stabilize movements for everyone in the household, from young children who are just learning to navigate stairs to older adults who might need extra support. The strategic placement of these tools can make a significant difference in reducing the likelihood of falls within these high-risk zones. Today’s market offers a variety of grab bars and handrails that not only prioritize safety but also aesthetics. Modern designs are available in numerous styles and finishes, allowing homeowners to choose options that seamlessly integrate into their existing home decor. This means enhancing safety without having to compromise on style. Manufacturers have recognized the need for these products to blend functionality with visual appeal, ensuring that safety measures do not detract from a home’s overall look and feel.     4. Smart Floor Mats Smart floor mats represent a significant advancement in technology designed to prevent falls within the home. These innovative mats can be strategically placed in areas where falls are likely to occur, such as next to the bed, in front of seating areas, and across high-traffic zones. By monitoring movement, these mats are not just passive elements of home decor; they actively contribute to the safety of individuals, especially those who are vulnerable due to age or mobility issues. The technology behind smart floor mats is designed to detect anomalies in movement patterns or the absence of expected movement. For instance, if someone were to fall and remain on the ground, the mat would identify this unusual lack of activity and could automatically send an alert to a designated phone number or connected medical alert system. This ensures that assistance can be dispatched promptly, potentially reducing the severity of injuries or speeding up medical response times. Additionally, these mats can be programmed to recognize signs that may indicate a high risk of falling. This could include frequent, unstable movements around high-risk areas like the bathroom or kitchen. In these cases, alerts can be sent to caregivers or family members, informing them of potentially dangerous behaviors that might precede a fall. 5. Cordless Vacuum Cleaners Cordless vacuum cleaners play a crucial role in helping to prevent falls around the house by eliminating the risk associated with loose cords, a common tripping hazard during cleaning activities. Their cord-free design simplifies the task of keeping floors clean and safe from obstacles that could cause someone to trip and fall. This makes them an invaluable tool in any home, particularly those with children, pets, or individuals who may be more vulnerable to falls. The advantages of cordless vacuum cleaners extend beyond their lack of cords. Being lightweight and easy to maneuver, they significantly reduce

7 Innovative Tools Every Home Should Have to Prevent Falls Read More »