Blog

Airbnb professional cleaning

Airbnb Cleaning: How Hosts Can Prepare for World Cup Guests

Airbnb Cleaning Before a Wave of Big-Event Guests When a marquee tournament like the FIFA World Cup sends fans streaming into host cities, short-term rental hosts meet their most demanding audience yet: travelers who booked months ahead, paid premium rates, and arrive with hotel-grade expectations. In that market, one factor reigns supreme over stylish decor, high-end amenities, or even location, and it is cleanliness. A guest may forgive a lumpy pillow or slow Wi-Fi, but they will never forgive a dirty bathroom or a greasy kitchen. The path to consistent five-star reviews during a booking surge runs through one thing: a meticulous, unwavering commitment to a professional cleaning standard, prepared well before the first fan drops their bags. Think Like a Hotelier, Not a Homeowner Turning that commitment into reality is a cleaning checklist, and it deserves to be treated as a business tool rather than a tidy-up reminder. A professional checklist is a systematic, top-to-bottom blueprint for a flawless turnover: it guarantees consistency whether you clean yourself or hand keys to a service, provides accountability, eliminates guesswork, and turns an overwhelming task into a repeatable process. The philosophy behind it is psychological. Guests walk into your rental seeking a sanctuary, comfort, safety, and a break from their own chores, so any trace of the previous occupant, a stray hair, a smudged glass, a crumb on the counter, shatters the illusion and erodes trust. A checklist is what separates a home that is merely not dirty from one that feels professionally prepared, sanitized, and genuinely welcoming. The Golden Rule: Work Top to Bottom One principle governs every step that follows: start high and finish low. Dust and debris dislodged from ceiling fans, shelves, and light fixtures fall to the floor, which is the last surface you clean. Working with gravity instead of against it means no surface ever needs a second pass, which is the foundation of an efficient turnover and precious time saved when check-out pressure is on. Room-by-Room Airbnb Turnover Checklist Kitchen: the first make-or-break room Begin with the appliances. Empty the refrigerator completely of any food or drink left behind, wipe every shelf and drawer with a food-safe disinfectant, and clear fingerprints from the exterior and handles. Clean the microwave inside and out, check the oven for crumbs and spills, and degrease the stovetop until it shines. Open the dishwasher, confirm it is empty, and rinse the filter at the bottom, a small step with an outsized effect on performance and odor. Then the surfaces: countertops cleared and sanitized, the backsplash behind stove and sink degreased, the sink scrubbed spotless with the faucet polished, and cabinet fronts wiped of drips. For a busy event season, keep the restock list visible and finish it every single turnover: A fresh sponge or dishcloth and a full bottle of dish soap. A new roll of paper towels and a wiped-down, restocked coffee and tea station. A garbage can emptied, cleaned, and relined with a fresh bag. Sanitized, streak-free glassware and cutlery, checked one piece at a time. Only once the kitchen is clean and stocked should the floor be swept or vacuumed along the cabinet edges, then mopped. Bathroom: zero room for error The toilet comes first: bowl, tank exterior, base where it meets the floor, and the often-missed seat hinges. The shower and tub need a detailed scrub against soap scum and hard water stains, with every stray hair removed, the drain checked and cleared, and the glass door wiped to a streak-free shine. At the vanity, scrub the sink, polish the faucet, and clean the mirror spot-free before restocking: a fresh full roll on the holder with at least one spare visible, a full and wiped hand soap dispenser, toiletries topped up and neatly arranged, and perfectly folded fresh towels. Finish by mopping around the base of the toilet, the spot everyone notices. Bedroom: the guest’s sanctuary Linens are non-negotiable: sheets, pillowcases, and duvet cover freshly laundered for every single guest, made to a hotel standard with crisp lines and tucked corners. Dust from ceiling fan and light fixtures down through the headboard, nightstands, dresser, window sills, and picture frames. Check inside closets and drawers for left-behind items and straighten the hangers, then vacuum the whole floor, including under the bed where dust hides. Living area: comfort under a microscope Dust everything from the coffee and end tables to bookshelves, the entertainment centre, and exposed electronics, then wipe light switches and door handles. Vacuum sofas and chairs under the cushions for crumbs and lost items, fluff and arrange the pillows, and straighten or launder throw blankets before the floors are vacuumed or swept and mopped. Final Staging and the Scent Test With the rooms done, walk the property through arriving guests’ eyes. Are remotes visible and neatly placed? Is the welcome book in its spot? Fluff the pillows one last time and fold the toilet paper into its hotel triangle. Then judge the scent: avoid strong artificial air fresheners, which can irritate sensitive guests and feel like a cover-up. The best aroma for a rental is no aroma at all, just the clean smell of a space disinfected where it counts, in line with CDC advice on cleaning and disinfecting your home, and ventilated before arrival. Store any concentrates you use safely, as Health Canada’s household products guidance recommends. Every Turnover Versus the Periodic Deep Clean Frequency What Belongs on the List Every turnover Fresh linens, appliance wipe-downs, bathroom sanitization, restocking, floors, staging Monthly or quarterly Wash shower curtain and liner, clean inside kitchen cabinets, wash windows, wipe baseboards and trim, deep clean the oven, full fridge clear-out Seasonally Professional carpet cleaning, patio and exterior furniture refresh Airbnb Preparation FAQ Does a checklist really change review scores? Reviews punish inconsistency more than effort. A repeatable checklist guarantees every guest gets the same sanitized, staged experience, which builds trust, glowing reviews, and repeat bookings over a season. How far ahead should I prepare for an event surge? Start

Airbnb Cleaning: How Hosts Can Prepare for World Cup Guests Read More »

Your Complete Guide to a Pest-Free Kitchen This Spring

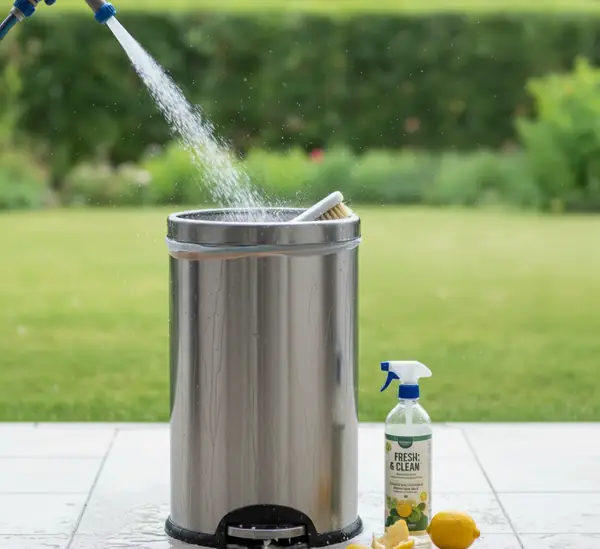
Your Complete Guide to a Pest-Free Kitchen This Spring Spring thaws bring warmth, but they also bring ants, fruit flies, and other pests into your kitchen. A standard surface wipe-down is not enough. Pests are drawn to food, water, and shelter. To keep them out, you need a strategic deep clean that removes every crumb, sticky residue, and pheromone trail. Here is how to turn your kitchen into an inhospitable fortress. Clean Behind and Under Appliances The space behind your refrigerator and stove is a dark, undisturbed haven for pests. Move appliances away from the wall, unplug the refrigerator first, and sweep up crumbs and dust. Use a degreasing solution to scrub the floor and walls. This single act eliminates a massive food source that could sustain an entire ant colony. Remove Water Sources and Entry Points Pests need water as much as food. Fix dripping faucets and wipe the sink basin and surrounding counter dry at night so no damp patches remain. Check under the sink for slow drips and condensation, and empty the drip tray beneath the refrigerator. Seal the small gaps where pipes enter walls with silicone caulk, and add door sweeps to exterior doors. Denying pests water and a way in makes every other step in this guide more effective. Empty and Scrub Pantry Cabinets A small tear in a flour bag or a sticky ring from a honey jar is an open invitation. Empty every shelf, vacuum corners with a crevice tool, and wipe each surface using a fifty-fifty mix of white vinegar and water; the scent alone sends ants elsewhere. Store Food in Airtight Containers Cardboard and paper packaging are not pest-proof. Transfer flour, sugar, rice, pasta, cereal, and pet food into airtight glass or hard plastic containers. This creates an impenetrable barrier and seals off enticing aromas. Wipe down jars and bottles before returning them to shelves. Store dry goods in glass or hard plastic with tight seals Wipe jar exteriors to remove sticky residues Keep countertops free of crumbs and spills Never leave dirty dishes overnight Deep Clean the Garbage Disposal and Trash Bins Fruit flies breed in the fermenting sludge inside garbage disposals. Flush with boiling water, then grind ice cubes and coarse salt to scour blades. Finish with lemon quarters for fresh scent. For trash bins, hose them out monthly, scrub with hot soapy water, then let them dry in the sun before returning them indoors. Pest Prevention Task Method Frequency Behind appliances Sweep, vacuum, degrease Seasonally Pantry shelves Vinegar wipe-down Monthly Garbage disposal Boiling water, ice + salt, lemon Weekly Trash bins Hose down, scrub, sun dry Monthly Floors and baseboards Vinegar solution mop Weekly Erase Ant Pheromone Trails Ants follow invisible chemical trails left by scouts. Simply killing visible ants does not stop the next wave. Mop floors with a vinegar and water solution, focusing on edges along walls and cabinets. Wipe down baseboards and kick plates at the bottom of cabinets. This neutralizes the trails. After every meal, wipe countertops and backsplash thoroughly. For more information on preventing ant infestations, see the Canada pest control ants guide. For general pest control strategies, check Canada pest control tips. Keep a small cleaning caddy under the sink stocked with vinegar, baking soda, and microfiber cloths. Quick responses to spills and crumbs matter more than any single deep clean, because scout ants move fast once they find food. A weekly ten-minute reset of counters, floors, and bins keeps trails from forming in the first place. When to Call in Professional Help If you keep spotting ants or roaches after two weeks of consistent cleaning, the nest may sit inside a wall cavity or under flooring where no surface clean can reach. A professional service finds the source instead of chasing the visible trail. Toronto Shine Cleaning serves homes across the GTA, and you can check our service locations to confirm coverage in your neighbourhood. Frequently Asked Questions What attracts ants to my kitchen? Crumbs, sticky spills, uncovered food, and water sources. Ant scouts leave pheromone trails that guide colony members back to food. How do I stop fruit flies in my kitchen? Clean the garbage disposal with boiling water, ice, salt, and lemon. Take out trash daily and wipe down damp surfaces. Is vinegar effective as a pest deterrent? Yes. Vinegar neutralizes ant pheromone trails and its scent naturally repels many insects. What kind of containers keep pests out of my pantry? Airtight glass or hard plastic containers with tight-sealing lids. Avoid paper, cardboard, or loosely closed bags. How often should I deep clean behind my refrigerator? At least once per season, and more frequently if you have noticed pest activity. For a thorough deep clean that eliminates hidden crumbs and residues, Toronto Shine Cleaning provides comprehensive kitchen deep cleaning services. Call (647) 424-0355 to schedule your spring pest-prevention clean.

Your Complete Guide to a Pest-Free Kitchen This Spring Read More »

caps

How to Make Your Favorite Cap Look Brand New Again

A well-worn cap is more than just an accessory; it is a sign of a life lived, a loyal companion on sunny days, during workouts, and at sporting events. Over time, it inevitably becomes a testament to this service, accumulating a grimy mixture of road dust, sweat stains, and the natural oils from our hair and skin. Cleaning a cap, however, can be a source of significant anxiety. The fear of ruining its shape, fading its color, or, in the case of a vintage find, disintegrating its cardboard brim is enough to make many people simply retire a dirty hat rather than risk washing it. The truth is that cleaning a cap is a straightforward process, but it is a craft that demands a specific, gentle approach, one where the material and construction of the cap dictate the method. Label Before any cleaning can begin, there are three universal preparatory steps that apply to almost every type of hat. The first and most important is to check for a care label. While often absent on older hats, modern caps will usually have a small tag on the interior that provides the manufacturer’s specific instructions for washing. These instructions are your most reliable guide and should always be followed if available. The second step is to perform a spot test. Whatever cleaning solution you plan to use, test it first on a small, inconspicuous area of the cap, like the underside of the brim or the interior sweatband. Apply a small amount, let it sit for a few minutes, and then blot it with a white cloth to ensure it does not cause any color bleeding or damage. The third step is a thorough dry-brushing. Using a soft-bristled brush, gently brush the entire surface of the cap to remove any loose, caked-on dirt and dust. This is a crucial step that prevents you from turning dry dirt into mud when you introduce water. Baseball Cap Let us begin with the most common and versatile piece of headwear: the classic baseball cap, typically made from durable materials like cotton, canvas, or synthetic blends like polyester. The most common and most damaging mistake people make with these caps is tossing them into the washing machine or dishwasher. While some modern, sturdily constructed caps may survive a machine wash on a gentle cycle, it is an inherently risky method that can deform the cap’s structured crown and damage the brim. The dishwasher, a popular internet “hack,” is even more perilous. The combination of extremely hot water and harsh, caustic dishwasher detergent can be catastrophic for the cap’s fabric, causing severe color fading and weakening the fibers. The safest and most effective method for cleaning a baseball cap is always to do it by hand. To hand-wash a baseball cap, you will need a clean sink or a basin, cool to lukewarm water, and a mild, gentle detergent. A small amount of a clear dish soap or a specialized hat cleaner is ideal. Avoid using standard laundry detergent, as it can be too harsh. Fill the sink with water and add a few drops of your chosen soap, swishing it around to create a light lather. Before submerging the entire cap, focus on the most heavily soiled area: the interior sweatband. This area absorbs the most sweat and oil and is often the primary source of stains and odors. Apply a small amount of your cleaning solution directly to the sweatband and gently scrub it with a clean, soft-bristled brush, like an old toothbrush. Once you have pre-treated the sweatband, submerge the entire cap in the soapy water. Let it soak for at least thirty minutes, or up to a few hours for a very dirty cap. This dwell time is essential, as it allows the soapy water to penetrate the fibers and loosen the embedded grime. After the soak, you can gently agitate the cap in the water and use your brush to lightly scrub any remaining spots on the exterior. Once you are satisfied that the cap is clean, drain the dirty water and rinse the cap thoroughly under a stream of cool, clean running water. Gently squeeze the cap to remove excess water, being careful not to wring or twist it, which can permanently ruin its shape. Now we move to the most critical phase of the process: drying. The way you dry a cap is what preserves its shape. Never put a cap in a clothes dryer. The high heat will shrink the fabric and can warp or damage the brim, especially if it is a modern plastic one. The proper method is to reshape the cap and let it air dry. Find an object that mimics the shape of a head, such as a large coffee can, a glass canister, or a small bowl turned upside down. Place the damp cap over this form. This will ensure that the crown dries in its intended, rounded shape rather than collapsing into a wrinkled mess. You can also stuff the crown tightly with a balled-up, clean white towel. Place the cap on its form in a well-ventilated area, away from direct sunlight, which can cause colors to fade. Allow it to air dry completely, which may take up to 24 hours. Delicate Materials For more delicate materials, the approach must be even more cautious. A wool cap, for example, is highly susceptible to shrinking and felting if submerged in water and agitated. For wool, spot cleaning is always the preferred method. Use a very small amount of a wool-safe detergent mixed with cool water. Apply the suds to a clean cloth and gently dab at any stained areas. Do not scrub vigorously. To rinse, use another cloth dampened with plain cool water to blot the area. Dry the cap using the same air-drying method on a form. 1.Straw Hats The cleaning process for straw hats, such as Panama hats or fedoras, is entirely different, as water can cause the straw to

How to Make Your Favorite Cap Look Brand New Again Read More »

Tools and Gadgets Professionals Use for a Perfect Spring Clean

The Tools and Gadgets Professionals Use for a Perfect Spring Clean

Spring Cleaning Gadgets That Do the Heavy Lifting A proper spring clean is a full reset after a winter of sealed windows, tracked-in salt, and dust that settled on every surface. It asks far more of your equipment than a weekly wipe down does. A thin sponge cannot touch a season of soap scum, and a feather duster just launches the dust back into the air. Crews that finish a whole house in hours work from a compact kit in which every tool solves one problem. These five gadgets are that kit, in the order we use them. 1. A HEPA Vacuum With the Full Attachment Kit The vacuum is the only non-negotiable item in the kit. Months of closed windows leave indoor air loaded with dust, pet dander, and pollen that has drifted onto every horizontal surface. A standard filter lets much of that fine material blow straight back out of the exhaust, so a sealed HEPA (High-Efficiency Particulate Air) filter matters: it traps microscopic particles instead of recirculating them, the principle behind Health Canada’s guidance on indoor air contaminants. Dry pickup comes before wet work, so you never turn loose dust into mud. The three attachments that decide the outcome Long crevice tool: pulls dense dirt, dead insects, and dust out of window tracks, squeezes between couch cushions, runs along baseboards, and reaches the gap between the stove and the counter. Soft-bristled dusting brush: lifts winter dust off blinds, lampshades, and carved furniture without scratching, and clears air vents and return registers. Upholstery tool: works sofas, armchairs, and curtains, and matters most on the mattress, where it removes the dead skin cells that feed dust mites. 2. A Drill Brush Set for Caked-On Grime Vacuuming handles loose debris, but a deep clean means dealing with grime that has bonded to a surface. A drill brush set is a handful of durable nylon brushes that chuck into any cordless drill, turning a tool you already own into a power scrubber running hundreds of rotations per minute. The large flat brush covers wide areas such as a fiberglass shower floor or tile floor. The small bullet-shaped brush, paired with a paste of oxygen bleach, drives into grout lines and brings years of grey back toward the original colour. The round corner brush fits the curved inside of a bathtub or sink basin, where the stubborn soap scum ring sits at the waterline. Because a chemical and a spinning brush are involved, ventilate the room, follow the label as Health Canada’s household products guidance recommends, and never mix cleaners. 3. An Extendable Microfiber Duster for High and Low Zones The lines that define a spring clean are the ones routine cleaning never reaches, and this tool is built for exactly that. The telescoping handle cleans ceiling fan blades from the floor instead of a wobbly chair, and the bendable head locks at a ninety-degree angle so you can run it across the tops of tall kitchen cabinets, bookcases, and door frames where a thick furry layer collects. Microfiber is statically charged, so it traps particles rather than flicking them up to resettle later, and the sleeve washes. Shorten the handle and the same duster saves your knees on every baseboard. 4. A Handheld Steam Cleaner for Chemical-Free Sanitizing For hygiene without a cabinet of chemicals, a handheld steam cleaner delivers. A small internal boiler pushes water past its boiling point and sends high-pressure steam through interchangeable nozzles. The heat melts baked-on stovetop grease, dissolves the grimy collar around faucet bases and drains, and softens burnt-on food in a microwave. Steam kills 99.9% of common household germs and bacteria, so it suits high-touch surfaces, toilet bases, and garbage cans, in line with the CDC advice to clean a surface before disinfecting it. A concentrated jet nozzle blasts gunk out of shower door tracks and window frames, while a brush attachment lifts dirt and mildew from porous grout. 5. A Melamine Foam Sponge for the Final Pass The last 10% is what makes a home look professionally done, and a melamine foam eraser is the best finishing tool in the kit. It behaves like ultra-fine sandpaper, lifting marks no spray can touch. Lightly dampened, it erases shoe scuffs from walls, crayon from a hallway, and greasy fingerprints around light switches. Use light pressure, since too much force can burnish a paint finish. It also clears tea and coffee stains inside mugs, lifts soap scum off glass shower doors, and whitens rubber sneaker soles. Spring Cleaning Gadget Quick Reference Gadget Best use Where it beats elbow grease HEPA vacuum and attachments Dust and dry debris Tracks, vents, seams, and mattresses before any water Drill brush set Caked-on grime and grout Hundreds of rotations per minute, not hand scrubbing Extendable microfiber duster High and low neglect lines Fan blades and cabinet tops, no ladder needed Handheld steam cleaner Grease and sanitizing Plain water only, into crevices a cloth cannot reach Melamine foam sponge Scuffs and final detail Marks on paint, glass, and rubber When a Gadget Kit Is Not Enough Buying all five tools costs money and cupboard space, and the kit is still only half a deep clean; the rest is hours on your knees. Our deep cleaning service for homes brings the whole kit plus the crew to use it. The pricing page lists rates before HST: a deep clean starts at $270.38 for a studio or one-bedroom and $393.75 for a two-bedroom, and a regular maid service visit from $212.63 for a studio or one-bedroom keeps the result from sliding back. Frequently Asked Questions What is the most useful spring cleaning gadget? A vacuum with a sealed HEPA filter and a crevice tool. It removes dust and allergens first, so every wet step afterwards works on grime instead of loose soil, and the crevice tool reaches gaps nothing else can. Is steam cleaning as effective as a chemical disinfectant? On most household surfaces, yes, provided the steam is hot enough and

The Tools and Gadgets Professionals Use for a Perfect Spring Clean Read More »

post-winter

Transform Your Backyard: A Guide to Restoring Your Outdoor Space

Transform Your Backyard: A Guide to Restoring Your Outdoor Space After a long Canadian winter, your patio, deck, or balcony needs a thorough refresh. Dirt, dead leaves, and winter salt residue cover every surface. With a methodical approach, you can restore your outdoor space and get it ready for spring and summer gatherings. Follow this guide to reclaim your backyard. Clean the Floor or Deck Surface Start with the foundation. Clear all furniture, planters, and decor off the deck or patio. Sweep away loose debris with a stiff-bristled push broom. For wooden decks, mix warm water with oxygen bleach powder and scrub with the wood grain using a long-handled deck brush. Rinse thoroughly with a garden hose. For concrete or stone patios, the same solution works well, and a pressure washer is safe on these surfaces for deep cleaning. Wash Patio Furniture by Material Different materials need different care. For plastic or resin furniture, warm water and dish soap remove most dirt. For mildew or oxidized film, use one part white vinegar to three parts water with a non-abrasive sponge. For wood furniture like teak or cedar, use a soft brush with mild soapy water, scrub with the grain, and apply a protective sealer once dry. For metal furniture, a simple wipe-down suffices; inspect wrought iron for rust chips and touch up with rust-resistant paint. Refresh Outdoor Cushions Vacuum cushions with an upholstery attachment to remove dust. Mix mild soap with lukewarm water and scrub stained areas gently. Do not saturate the foam. Rinse with a damp cloth, squeeze out excess water, and stand cushions on edge in a sunny, breezy spot until completely dry. Vacuum cushions before washing to remove loose dirt Use mild soap and avoid saturating foam Dry upright in direct sun and breeze Inspect for mildew and treat with vinegar solution Deep Clean the Barbecue A clean barbecue performs better and is safer. Disconnect the propane tank. Fire up the grill to high heat with the lid closed for 15-20 minutes to incinerate food residue. Once cool, scrape the grates with a stainless steel brush. Remove flavorizer bars and scrape the cook box interior. Clean the grease trap thoroughly with hot soapy water to prevent grease fires. For stainless steel exteriors, use a specialized cleaner and wipe with the grain using a microfiber cloth. Outdoor Element Cleaning Method Key Tip Wood deck Oxygen bleach, scrub with grain, hose rinse Avoid pressure washer on wood Concrete patio Oxygen bleach or vinegar, pressure washer ok Scrub algae stains directly Plastic furniture Dish soap and water or vinegar solution Non-abrasive sponge only Wood furniture Mild soap, soft brush, seal after drying Always scrub with the grain BBQ grates High heat burn-off, stainless steel brush Clean grease trap to prevent fires Tend to Greenery and Garden Beds Winter leaves its mark on greenery too. Pull weeds while the soil is soft from spring rain so the roots come out whole. Rake dead leaves and spent mulch out of garden beds, then add a fresh layer of mulch to suppress weeds and hold moisture. Trim branches that touch the house, because they give ants and rodents a bridge indoors. Edge along walkways and sweep leftover sand or salt off paths. A few minutes of weekly weeding beats an hour of rescue work in July. Keep It Clean All Season A restored backyard stays that way with light, regular upkeep. Sweep the deck weekly, wipe furniture monthly, and rinse the grill after heavy use. If the season gets away from you, a one-time reset brings everything back. Toronto Shine Cleaning helps homeowners across the GTA, and you can find your neighbourhood on our locations page. Many clients read our customer reviews before booking their first seasonal reset. Final Touches Hose down outdoor rugs, clean patio table glass, wipe planters and railings. These small details make the space feel fresh and inviting. Enjoy your restored outdoor living area all season long. For information on backyard safety, visit Canada backyard safety tips. Yard work is also a great way to stay active, and the CDC physical activity benefits page explains why it matters for your health. Frequently Asked Questions Can I use a pressure washer on my wood deck? Only with extreme caution. An incorrect nozzle can gouge soft wood. Oxygen bleach and a deck brush are safer. How do I remove white chalky film from plastic patio furniture? Use one part white vinegar to three parts water with a non-abrasive scrub sponge. What is the best way to dry outdoor cushions? Stand them upright on edge in direct sun with good airflow on all sides. How often should I clean my BBQ grease trap? After every few uses. A clean grease trap prevents dangerous grease fires. Do I need to seal wood furniture after cleaning? Yes. A protective sealer or oil nourishes the wood and protects it from sun and rain. Restore your backyard to its full potential this season. For a home that is equally clean indoors, Toronto Shine Cleaning offers deep cleaning services that handle winter dust and grime. Call (647) 424-0355 for a free estimate.

Transform Your Backyard: A Guide to Restoring Your Outdoor Space Read More »

The 20 Spots You’re Forgetting on Your Spring Cleaning Checklist

The 20 Spots You Are Forgetting on Your Spring Cleaning Checklist Spring cleaning is a full-scale, top-to-bottom reset: a chance to clear away the dust, clutter, and grime of the colder months. The scale of the task can be overwhelming, and the secret to managing it is a single, indispensable tool, the checklist. A well-structured checklist is a strategic roadmap that breaks an overwhelming goal into clear, achievable steps. The most effective way to build one is by room, turning the job of cleaning an entire house into a series of focused projects with a clear sense of accomplishment as each space is checked off. Kitchen: The Most Intensive Room The kitchen is where grease, food particles, and daily traffic converge, so it should be a top priority. Deep cleaning it means going far beyond wiping counters: Tops of cabinets and the refrigerator, where a sticky greasy film of dust collects The refrigerator interior, removable shelves, condenser coils, and the floor beneath it The oven interior and stovetop grates, soaked and scrubbed rather than surface-wiped The sink, faucet, drain, and garbage disposal, descaled and deodorized For the fridge, empty it completely, discard expired food, wash shelves and drawers in warm, soapy water, and pull the unit away from the wall to vacuum the dusty condenser coils. For the oven, tackle baked-on residue with the self-cleaning function or a non-toxic baking soda paste left to sit overnight. Soak stovetop grates and burner caps in hot, soapy water before scrubbing, flush the drain with boiling water and a baking soda and vinegar solution, and finish with backsplash grout, baseboards, and a thorough mop. Bathrooms: Sanitation and Soap Scum Bathrooms need a focus on sanitation and the removal of soap scum and mineral deposits. The four spots people skip most are the exhaust fan cover, the showerhead and grout, the toilet exterior, and the vanity and medicine cabinet. Remove the fan cover, wash it, and vacuum the blades and housing. Descale the showerhead by soaking it in vinegar, then scrub walls, tub, and doors with a soap-scum cleaner, working every grout line with a stiff brush. Clean the entire toilet exterior, including the tank, base, and the floor line where the toilet meets the floor. Clear the vanity completely, polish fixtures, scrub the basin and overflow hole, and discard expired products from the medicine cabinet. Launder the shower curtain and bath mats, then finish with baseboards and a mopped floor. Bedrooms: Dust and Allergens Bedrooms are less about grime and more about dust and allergens, and the goal is a fresh, restful environment. Strip the bed and vacuum the entire mattress with an upholstery attachment, spot-clean stains, and deodorize with a baking soda sprinkle that is vacuumed up after sitting. Wash everything you often overlook: the duvet or comforter, pillows, and mattress protector. Use the season for a wardrobe switch: empty the closet, wipe the shelves, and bring spring and summer clothes forward. Dust from the top down, starting with ceiling fan blades, light fixtures, and dresser tops, then clean windows, curtains, and blinds, and finish with a thorough vacuum including under the bed. Living and Common Areas: Deep Dusting and Order High-traffic areas need deep dusting and restored order. Remove cushions and use a crevice tool in upholstery seams and under frames to reach years of crumbs and dust. Move furniture to vacuum normally covered areas, and consider professional carpet cleaning to remove embedded winter dirt and allergens. Wipe baseboards and spot-clean wall scuffs, dust the tops of door frames, picture frames, and electronics, and clean windows and treatments to let in the fresh spring light. The Forgotten Whole-Home Spots These tasks apply to the entire house and are the ones most often missed in a room-by-room approach. Add them to the end of your checklist: Doors and doorframes, especially around handles and on top ledges Light switches and outlet covers, disinfected in every room Air vents and registers, covers removed and washed Smoke and carbon monoxide detectors, tested with fresh batteries Window tracks, deep cleaned on every window you open Room Most forgotten spot Method Kitchen Fridge condenser coils Vacuum with the unit pulled out Bathroom Exhaust fan cover Wash cover, vacuum blades Bedroom Mattress surface Vacuum, spot-clean, baking soda Living room Upholstery seams Crevice tool, cushions removed Whole home Air vents and registers Remove covers, wash, replace A checklist transforms an amorphous, stressful concept into a clear, actionable plan. Physically checking off each item reinforces progress and turns a mountain of chores into a series of conquered hills. When the process feels too time-consuming, professional help delivers the result without the labor. Toronto Shine Cleaning specializes in deep, restorative work: the team systematically tackles every item on a spring cleaning checklist, from deep cleaning services that cover kitchens, bathrooms, and baseboards to regular maid service that keeps the results lasting. Our bonded and insured cleaners carry a $1,000,000 insurance policy, and deep cleaning starts from $270.38 before HST for a studio or one-bedroom home. See the full pricing page and find your neighbourhood on our locations page, then call (647) 424-0355 to book. For healthy indoor air while you clean, see the Government of Canada guide on air contaminants, and follow the CDC handwashing guidance after handling vents, filters, and dusty surfaces. Spring Cleaning Checklist FAQ Why is a checklist the best way to spring clean? A checklist breaks an overwhelming whole-house project into clear, room-by-room steps, so nothing is forgotten and each completed room provides a sense of accomplishment. It turns a mountain of chores into a series of manageable tasks. What is the most forgotten area in the kitchen? The tops of cabinets and the refrigerator, plus the condenser coils and floor underneath the fridge. These out-of-sight areas trap a sticky greasy film of dust and are easy to skip in a routine wipe-down. How do I deep clean my mattress during spring cleaning? Strip the bed and vacuum the entire mattress with an upholstery attachment. Spot-clean

The 20 Spots You’re Forgetting on Your Spring Cleaning Checklist Read More »

Activated Charcoal for cleaning home

5 Proven Facts About Activated Charcoal for Cleaning Your Home

5 Proven Facts About Activated Charcoal for Cleaning Your Home Activated charcoal is one of nature’s most effective yet understated cleaning tools. Unlike harsh chemical cleaners that mask odors or rely on abrasive scrubbing, activated charcoal works through a quiet scientific process called adsorption. This porous black substance traps impurities at the molecular level, pulling odors, pollutants, and contaminants out of the air and water without adding any chemicals to your home. Here are five proven ways to put it to work. 1. Understanding How Activated Charcoal Works The cleaning power of activated charcoal comes from its enormous surface area. During production, carbon-rich materials like coconut shells or wood are heated to extremely high temperatures and then treated with oxygen or steam. This activation process creates millions of microscopic pores, giving a single gram of activated charcoal a surface area equivalent to a football field. When air or water passes over this porous surface, odor molecules, volatile organic compounds, and other impurities become physically trapped in the pores. This is adsorption, a surface-level bonding process that physically removes pollutants rather than masking them with fragrances. 2. Natural Air Deodorizer for Every Room Activated charcoal excels as a passive, continuous deodorizer. Placing breathable charcoal bags in musty basements, closets, cabinets, or laundry rooms creates a 24-hour odor trap that works silently in the background. Unlike conventional air fresheners that simply add scent, charcoal actually removes the odor-causing molecules from the air. It is especially effective against the musty smell caused by mold and mildew spores that thrive in damp environments. The CDC notes that mold can cause nasal stuffiness, throat irritation, and coughing, so reducing airborne mold spores with activated charcoal supports a healthier indoor environment. Where a bag works hardest: Basements and laundry rooms, where damp air breeds musty smells Entry closets and shoe cubbies that trap footwear odors Next to litter boxes and pet bedding Inside gym bags, cars, and hockey gear lockers 3. Fresher Kitchen and Refrigerator A small bag of activated charcoal in the refrigerator absorbs odors from onions, garlic, strong cheeses, and leftovers far more effectively than baking soda. It also traps ethylene gas, a natural ripening agent emitted by fruits and vegetables. By removing this gas, activated charcoal can help extend the freshness of your produce. It prevents flavor transfer between different foods so your butter does not taste like last night’s fish. In the pantry, charcoal bags keep dry goods areas fresh and free of stale smells. Application Placement Effectiveness Refrigerator deodorizer One small bag per shelf Absorbs odors, extends produce freshness Basement or closet One medium bag per 100 sq ft Reduces musty smells continuously Pet area or litter box Bag near the source Traps ammonia and odor molecules Shoe closet or gym bag Small bag inside each compartment Absorbs moisture and bacteria odors Bathroom One bag in a discreet corner Neutralizes humidity-related smells 4. Water Filtration and Purification Many household water pitchers and faucet filters use activated carbon as their primary filtration medium. As water flows through the charcoal, it traps chlorine, pesticides, industrial solvents, and other organic compounds that affect taste and odor. The Government of Canada recommends using household products safely, and activated charcoal filters offer a chemical-free way to improve drinking water quality. Note that charcoal filters do not remove dissolved minerals, fluoride, nitrates, bacteria, or viruses, so they are best used for improving the taste of municipally treated water rather than treating unknown water sources. 5. Reusable and Sustainable One of the most impressive features of activated charcoal is its reusability. When the bonding sites on the charcoal become full, you can recharge it by placing the bags in direct sunlight for several hours. The heat and ultraviolet radiation break the bonds holding trapped molecules, clearing the pores so the charcoal can start adsorbing again. Because one set of bags can serve for years, charcoal deodorizing also creates far less waste than disposable fresheners and costs little once you own the bags. Most quality charcoal bags last one to two years with regular recharging. Frequently Asked Questions Is activated charcoal safe to use around pets and children? Yes, activated charcoal is non-toxic and chemical-free. It poses no danger to pets or children when used in breathable bags. However, loose powder should be kept away from small children as it can create a mess. How often should I recharge my activated charcoal bags? Recharge them once a month by placing them in direct sunlight for two to four hours. Bags used in very humid or odorous environments may need more frequent recharging. Can activated charcoal remove cigarette smoke smell? Yes, it effectively adsorbs the volatile organic compounds found in cigarette smoke. Place multiple bags in the affected room for best results. Does activated charcoal work for car odors? Absolutely. A medium charcoal bag placed under a seat will absorb food smells, pet odors, and mustiness from damp carpets. Enhance Your Home Cleaning Routine Activated charcoal is a versatile, chemical-free cleaning tool that tackles odors, improves air quality, and even helps filter your water. While it handles airborne impurities effectively, deep-seated grime and heavy cleaning still require professional attention. Toronto Shine Cleaning offers professional deep cleaning services and regular maintenance cleaning to keep your home genuinely pristine. Call (647) 424-0355 or check our cleaning prices to learn more about our services.

5 Proven Facts About Activated Charcoal for Cleaning Your Home Read More »

drawer with kitchen organizers

7 Genius Kitchen Drawers Organization Ideas You Need to Try

7 Genius Kitchen Drawers Organization Ideas You Need to Try Kitchen drawers accumulate clutter quickly. Spatulas tangle with whisks, measuring spoons disappear, and the infamous junk drawer takes over. Organizing your drawers transforms daily cooking from frustrating to seamless. These seven ideas will turn your kitchen drawers into a model of efficiency. Empty Everything and Start Fresh Remove every item from every drawer. Vacuum crumbs and dust from the corners, then wipe interiors with a gentle all-purpose cleaner. A clean, empty drawer is the psychological reset you need to build an intentional system. Edit Ruthlessly Sort every item into keep, donate, or discard piles. Be honest: have you used it in the last year? Is it broken or rusty? Do you own duplicates? Be especially critical of single-purpose gadgets like avocado slicers or strawberry hullers. A good knife does the job just as well, freeing up valuable drawer space. Zone Your Drawers by Kitchen Workflow Store tools near where you use them. The prep zone near your counter holds knives, peelers, graters, and measuring cups. The cooking zone near the stove holds spatulas, tongs, wooden spoons, and oven mitts. The eating zone near the dishwasher holds everyday cutlery and serving utensils. A baking zone near your mixer stores pastry tools and cookie cutters. Use Drawer Dividers and Organizers Loose items slide into chaos. Expandable cutlery trays keep forks and spoons in order. Adjustable bamboo or plastic dividers create custom lanes for cooking utensils. Modular bins group similar items together, such as one bin for baking supplies and another for food wraps and bags. Expandable cutlery tray for forks, knives, spoons Adjustable dividers for cooking utensils Modular bins for baking supplies and small gadgets In-drawer knife block for safety and blade protection Conquer the Utility Drawer Transform the junk drawer into a command center. Use small individual containers for pens, batteries, rubber bands, tape, and a mini screwdriver. Each item gets its own home, preventing the pile-up that creates chaos. Store Cutting Boards and Baking Sheets Vertically Deep lower drawers are perfect for vertical storage of cutting boards, baking sheets, and cooling racks. Use adjustable dividers to keep them upright and easy to grab without shuffling through a stack. Kitchen Zone Drawer Contents Organizer Type Prep zone Knives, peelers, graters, measuring cups In-drawer knife block, mini bins Cooking zone Spatulas, tongs, whisks, oven mitts Adjustable dividers Eating zone Cutlery, serving utensils, napkins Expandable cutlery tray Baking zone Pastry brushes, cookie cutters, piping tips Modular bins Utility drawer Pens, batteries, tape, small tools Individual small containers Keeping hands clean while organizing is essential for food safety. Review the CDC handwashing guide for proper hygiene. Before using cleaning products on your drawers, check the Canada safe household product use page for safety tips. Organize the Drawers You Forget Three drawers rarely get attention: the one above the trash can, the one under the oven, and the one closest to the back door. The trash-can drawer needs a roll of spare bags, deodorizer discs, and a microfiber cloth for the rim. The oven drawer suits oven mitts and sheet pans laid flat. The back-door drawer earns its keep as a landing zone for keys, sunglasses, and dog leashes, so nothing migrates onto the counters. Keep the System Alive Organization fails when maintenance disappears. Once a month, take five minutes per drawer: return strays, wipe crumbs from dividers, and re-check the keep pile for anything you no longer use. When a new gadget enters the kitchen, something old leaves; one-in, one-out keeps capacity honest. Label bin edges if several people share the kitchen so the system survives without anyone policing it. Drawers also stay organized longest in a clean kitchen, because crumbs and grease make them sticky and push everyone back into old habits. Frequently Asked Questions How do I stop my kitchen drawers from becoming a mess again? Use dividers and bins so every item has a designated home. Resist the urge to toss items in randomly. What should I do with duplicate kitchen tools? Keep the one in best condition and donate the rest. You do not need three vegetable peelers. How should I store sharp knives in a drawer? Use an in-drawer knife block or a blade guard to protect both the blade and your fingers. What is the best way to organize a deep drawer? Use modular bins for vertical storage of cutting boards, baking sheets, and large containers. How do I keep a utility drawer from becoming a junk drawer? Use small individual containers so every item from batteries to pens has its own compartment. Not sure if we cover your area? Browse our service locations across the GTA. Transform your kitchen drawers into a highly functional space. For a deep clean that makes organizing even more rewarding, Toronto Shine Cleaning offers regular cleaning services to keep your kitchen spotless. Call (647) 424-0355 to schedule today.

7 Genius Kitchen Drawers Organization Ideas You Need to Try Read More »

How to Make Your Home Smell Amazing Without Synthetic Fragrances

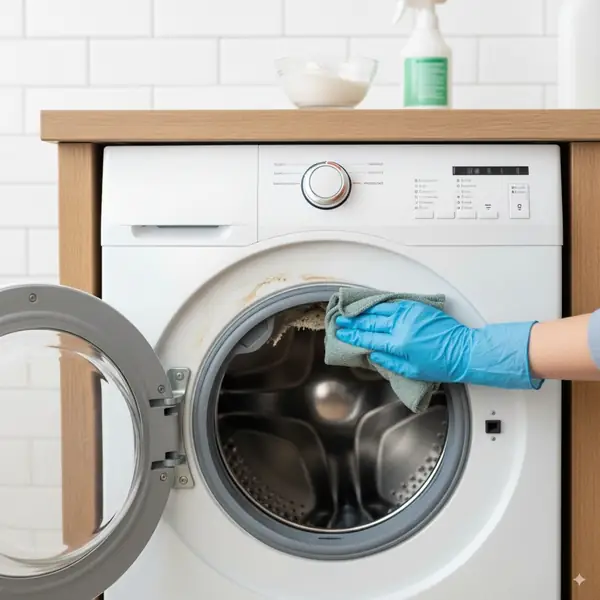
Why a Fresh Home Smells Like Nothing at All Most homes do not really smell. They are sprayed to smell like rainstorms and wildflower meadows, but that freshness is borrowed. Aerosol sprays, plug-in diffusers, and scented candles do one job: they bury unwanted odors under stronger chemical fragrances. That approach has two flaws. The odor source is still there, slowly winning again, and the word “fragrance” on a label can hide a blend of many compounds, including volatile organic compounds (VOCs) that end up in the air you breathe. Health Canada groups VOCs among the indoor air contaminants that can affect health, and sensitive people may notice headaches, eye irritation, or breathing discomfort. The better route is chemistry, not perfume. Household odors are usually acidic or alkaline molecules. Baking soda is a gentle alkali that neutralizes acidic smells, while the acetic acid in white vinegar neutralizes alkaline ones. Use these agents to react with odors, then remove the source, and your home smells genuinely clean, which is to say it smells like almost nothing at all. Baking Soda: The Absorber That Neutralizes Baking soda, also called sodium bicarbonate, shines on fabrics that trap smells deep in their fibers, such as carpets, area rugs, and upholstered furniture. Sprinkle a liberal, even layer across the whole surface; you want a visible coating, not a light dusting. Leave it for at least 30 minutes. For pet odors or mustiness, several hours or overnight works dramatically better, because the powder keeps reacting with acidic odor molecules and absorbing the oils that hold them. Finish by vacuuming slowly with overlapping passes so the powder, and the odors it captured, come all the way up. For tight spaces, baking soda acts as a passive odor absorber: Keep an open box in the refrigerator to trap food smells from onions, fish, and leftovers. Set a small bowl in a musty closet, inside a smelly gym bag, or under the liner at the bottom of the garbage can. Freshen drains by pouring half a cup of baking soda down the sink, then half a cup of white vinegar; the fizz loosens grime while the soda neutralizes odors rising from the P-trap. White Vinegar: The Air Neutralizer Plain white vinegar owes its power to acetic acid, a mild acid that bonds with alkaline odor molecules floating in the air, such as those from cooked fish, bacon, or stale smoke. Set a few small bowls of vinegar around the room and leave them for several hours. The sharp vinegar smell is temporary; it disappears completely as the liquid dries, carrying the trapped odors with it. Vinegar also rescues laundry. Musty bath towels usually suffer from detergent residue and body oils that trap bacteria. Add one cup of white vinegar to the rinse cycle to strip that residue so towels come out truly clean. Once dry, they do not smell of vinegar at all. Other Natural Tools Worth Keeping Activated charcoal is the strongest passive absorber of all. Its porous structure gives it an enormous microscopic surface area, making it a sponge for odor molecules, especially those tied to mold and mildew. Hang small bags in damp basements, closets, or rooms where pet odors linger. Fresh coffee grounds work differently: the nitrogen in coffee neutralizes sulfur-type smells. A bowl of dry grounds in the fridge or freezer absorbs strong odors, and rubbing grounds on your hands removes garlic and onion smells after cooking. Tool How It Works Best For Baking soda Neutralizes acidic odors and absorbs moisture Carpets, fridge, closets, drains White vinegar Acetic acid neutralizes alkaline airborne odors Kitchen smells, musty towels Activated charcoal Traps odor molecules in its porous surface Basements, closets, pet areas Coffee grounds Nitrogen neutralizes sulfur-type odors Fridge, freezer, hands after cooking Deep Cleaning: Remove the Source, Not Just the Symptom Every absorber and neutralizer treats the symptom. The lasting fix is finding where the smell is born and cleaning it away. Start in the kitchen, the busiest odor factory in most homes. Flush the garbage disposal with boiling water, grind a handful of ice cubes with coarse salt to scour the blades, then grind a few lemon or lime peels to release their deodorizing oils. Take the trash can outside and wash it with soap and water periodically, and check under the refrigerator and stove for spills that have been hiding for months. In the bathroom, the P-trap under the sink collects soap scum and hair that can smell like sewer gas, while the base of the toilet and the shower curtain liner hold odors only scrubbing removes. In the laundry room, the rubber gasket of a front-loading washing machine is a notorious home for slimy, musty mildew; wipe it dry after each load and clean it with a vinegar or diluted bleach solution. Mold and mildew become odor culprits wherever moisture lingers, and the CDC’s mold guidance and Health Canada’s mould resources agree: clean up the growth and fix the dampness that feeds it. Wash pet beds regularly. Curtains, upholstered furniture, and carpets quietly absorb cooking smells, pet oils, and stale air, and only a deep, restorative cleaning releases them. If you would rather have the job done properly in one visit, a professional deep cleaning service reaches the hidden grime, mildew, and dust that cause persistent household odors. Between deep cleans, our regular cleaning service keeps everyday surfaces from building up smells in the first place, and our pricing is transparent so you know exactly what to expect. Frequently Asked Questions Can I use baking soda and vinegar together? Yes, but understand the trade-off. Combined, they fizz and help dislodge grime in drains, which is a genuinely useful trick. For surface odors, they mostly neutralize each other, so use them separately, one after the other, to get the full benefit of each. How long should baking soda sit on a carpet? At least 30 minutes for light freshness. For pet accidents, smoke, or musty smells, leave it overnight and vacuum slowly in

How to Make Your Home Smell Amazing Without Synthetic Fragrances Read More »

coffee spilled on natural stone

How to Remove Coffee Stains: A Step-by-Step Guide for Every Surface

Why Coffee Stains Are So Stubborn That first cup of coffee is a daily ritual for millions, but every cup carries a small risk: the spill. Coffee contains tannins, natural plant pigments that give the drink its deep brown color and make it one of the most persistent stain-makers in the home, able to mark a favorite shirt, a pale carpet, or a marble countertop in seconds. The good news is that a coffee stain is almost always removable with quick action and the right technique for the surface. Three golden rules apply to every fresh coffee spill, no matter the surface: Act immediately. While the spill is wet, the pigments are still suspended in liquid and easy to lift. As it dries, tannins bond with the fibers or pores and the stain becomes far harder to remove. Blot, never rub. Scrubbing spreads the pigment and pushes it deeper. Press a clean, dry cloth or paper towel onto the spill, working from the outside edges inward. Spot test first. Solutions strong enough to break down coffee can also damage dyes and delicate finishes. Washable Fabric: Flush, Treat, Then Launder For a cotton shirt, tablecloth, or any washable fabric, blot the excess first, then take the garment to a sink and run cold water through the back of the stained area. Rinsing from behind pushes the coffee pigments back out along the path they entered instead of driving them deeper into the fabric weave. For heavier spills, mix equal parts white vinegar and water with a few drops of clear, non-bleach dish soap. Work the solution into the stain, let it sit for at least 15 minutes, then launder as usual in the warmest water your care label allows. For older, set-in stains or durable white fabrics, dissolve oxygen bleach powder, which is sodium percarbonate, in the hottest water the fabric can safely handle and soak the garment for several hours or overnight. One warning matters more than any other: do not put the item in the dryer until the stain is gone. Heat sets tannin stains permanently, so if a trace remains after washing, repeat the pre-treatment and wash again before applying any heat. Carpet and Upholstery: Blotting Is Everything Carpet and upholstery cannot go in the washing machine, so patience is essential. After blotting the fresh spill, mix two cups of cool water with one tablespoon of white vinegar plus one tablespoon of clear, non-bleach dish soap. Never pour the solution onto the carpet; oversaturation can soak the padding and invite mildew. Instead, dampen a clean white cloth with the mixture and blot the stain from the outside in, moving to a fresh section of cloth as the coffee transfers off the fibers. This routine follows the CDC’s guidance on cleaning soft surfaces, which notes that regular cleaning with soap and water removes most dirt and germs. Once the stain lifts, blot the area with a cloth dampened with plain cool water to remove soap residue. Finish by laying a thick stack of dry paper towels over the spot, weighed down with books, for several hours so moisture wicks out of the fibers and padding, preventing water marks and mildew. Hard Surfaces and Natural Stone Non-porous surfaces such as ceramic tile, laminate countertops, and vinyl flooring make coffee removal easy: wipe fresh spills with a damp cloth, and treat dried rings with a paste of baking soda and water left for 10 to 15 minutes, then gently scrubbed with a non-scratch sponge. Porous stone is a different story. Marble, travertine, and unsealed grout react badly to acid, so keep vinegar away from them; it can etch and dull the surface permanently. For a coffee ring on light-colored stone, make a poultice by mixing baking soda with a few drops of hydrogen peroxide until it reaches a peanut-butter consistency. Spread the paste over the stain, cover it with plastic wrap, tape down the edges, and leave it for 24 to 48 hours so it can slowly draw the pigment out of the stone’s pores. Scrape away the dried paste and wipe clean. For stained grout, press a paste of oxygen bleach powder and hot water into the lines, wait 30 minutes, scrub with a stiff grout brush, and rinse thoroughly. Wherever you use oxygen bleach or another product, read the label and follow it: Health Canada’s household chemical safety tips cover safe use, storage, and disposal, and the CDC’s bleach guidance warns against mixing bleach with other cleaners, which can release dangerous vapors. Mugs and Thermoses: No Scrubbing Required The brown film inside a favorite mug is the same tannin buildup, and it usually survives regular dishwashing. Sprinkle one to two teaspoons of baking soda into the mug, pour in just enough hot water to make a paste, and give it 30 minutes to sit before washing as usual. For an effortless deep clean, drop in one denture cleaning tablet, fill the mug or thermos with warm water, and wait; the effervescent oxygen action lifts the tannin film completely and restores the vessel to like-new condition. Surface First Step Heavy Stain Treatment Washable fabric Flush cold water through the back Vinegar and dish soap soak, then oxygen bleach pre-soak Carpet and upholstery Blot with soap and vinegar solution Repeat blotting, rinse, then dry with weighted towels Tile, laminate, vinyl Wipe with damp cloth Baking soda paste for 10-15 minutes Marble and stone Blot only, no acid cleaners Baking soda and peroxide poultice for 24-48 hours Mugs and thermoses Baking soda paste Denture tablet soak in warm water Frequently Asked Questions Why does coffee stain so quickly? Coffee contains tannins, natural pigments that begin bonding with fabric fibers and surface pores as soon as the liquid starts to dry. That is why blotting a wet spill within the first minutes gives you the best chance of a complete removal. Can I use vinegar to clean marble countertops? No. Vinegar and other acid cleaners etch and dull natural stone such as

How to Remove Coffee Stains: A Step-by-Step Guide for Every Surface Read More »