Blog

How to Clean and Sanitize Bedding for a Healthy Sleep Environment

How to Clean and Sanitize Bedding for a Healthy Sleep Environment We spend about one-third of our lives in bed, and during those hours our bodies shed millions of dead skin cells, release oils, and produce sweat. This organic residue accumulates in sheets, pillows, and comforters, creating a breeding ground for dust mites, bacteria, and allergens. Properly cleaning and sanitizing bedding is not just about freshness; it is a vital health routine that protects your skin, respiratory system, and overall well-being. Here is a comprehensive guide to keeping every layer of your bed clean and hygienic. Why Regular Bedding Care Matters Dust mites are microscopic organisms that feed on dead skin cells. A warm, humid mattress with unwashed sheets is the perfect environment for them to thrive. Their waste products trigger allergic reactions, morning congestion, sneezing, and eczema flare-ups. Regular washing at high temperature remains the one dependable method for keeping mite numbers down. According to CDC guidelines on home cleaning and disinfection, cleaning surfaces regularly is the first step in preventing germ spread, and this applies equally to bedding. Adding CDC guidance on disinfecting with bleach is useful for tackling stubborn odors on white linens. Washing Sheets and Pillowcases Strip and wash sheets at least once a week. For white or light-colored cotton or linen sheets, use hot water (60 degrees Celsius) to melt body oils and sebum while destroying mites and their eggs. With darker or colored sheets, use warm water to prevent fading, with an occasional hot wash for sanitization. Choose a gentle, unscented, or hypoallergenic detergent to avoid leaving chemical residues that can cause skin irritation. Avoid liquid fabric softeners and dryer sheets; they deposit a waxy film on fibers that reduces breathability and traps heat. Instead, add half a cup of white vinegar to the rinse cycle to soften fabric naturally and remove soap residue. Deep-Cleaning Pillows Pillows accumulate dead skin, sweat, and hair oils over time and can double in weight. Use zippered pillow protectors as a machine-washable barrier and wash them every few weeks with your sheets. Deep-clean pillows themselves at least twice a year. Down, feather, and synthetic pillows can be machine-washed two at a time on a gentle cycle with cool or warm water and a small amount of mild detergent. Run an extra rinse cycle to flush all soap from the dense filling. Drying is critical: use low heat and include clean tennis balls or wool dryer balls to break up clumps and restore loft. Expect several hours and multiple cycles. For memory foam or latex pillows, spot-clean stains by hand and vacuum the surface; never machine-wash them. Caring for Duvets and Comforters If you use a duvet cover, wash it every one to two weeks. Clean the duvet insert once or twice a year, depending on the fill. Down and synthetic duvets can be washed in a large-capacity machine; if it does not fit, visit a laundromat with commercial machines or have it professionally cleaned. Between washes, hang pillows and duvets outside in direct sunlight for a few hours. The sun’s UV rays act as a natural sanitizer and deodorizer, killing bacteria and restoring loft without chemicals. Mattress Protector Maintenance A breathable, waterproof mattress protector sits under your bottom sheet, shielding the mattress from spills, sweat, and allergens. Wash it every two to three months on a warm cycle, and avoid high heat in the dryer, which can damage the waterproof backing. A good protector can extend the life of your mattress by years. Bedding Cleaning Schedule Item Frequency Method Sheets and pillowcases Weekly Hot wash (60 degrees C) with hypoallergenic detergent Pillow protectors Every 2-3 weeks Warm wash with sheets Pillows Twice per year Gentle cycle, extra rinse, low-heat dry with dryer balls Duvet cover Every 1-2 weeks Wash with sheets Duvet insert 1-2 times per year Commercial machine or professional cleaning Mattress protector Every 2-3 months Warm cycle, no high heat in dryer Additional Tips for Fresh Bedding Always dry bedding completely before storing to prevent mildew Store sheet sets inside a matching pillowcase for easy organization Use breathable cotton storage bags instead of plastic bins Replace pillows every 2-3 years, or when they lose shape Vacuum your mattress during seasonal deep cleans to remove surface dust Frequently Asked Questions How often should I wash my sheets? At least once a week. If you sweat heavily, have oily skin, or let pets on the bed, wash them more frequently. Can I use bleach on my white sheets? Yes, but sparingly. Oxygen bleach is gentler on fibers than chlorine bleach and effective for whitening and sanitizing white cotton sheets. Why do my sheets feel rough after washing? This is often caused by detergent buildup or high heat drying. Use half the recommended detergent and add white vinegar to the rinse cycle. How do I know when a pillow needs replacing? If it no longer springs back after folding, has yellow stains, or smells musty even after washing, it is time for a new one. Is it safe to dry-clean a duvet? Yes, professional dry cleaning is safe for most duvets and is recommended for oversized inserts that do not fit in home machines. Establishing a regular bedding cleaning routine improves your sleep quality and protects your health. While you focus on maintaining a hygienic bedroom, Toronto Shine Cleaning can help with the deep cleaning needs throughout the rest of your home. Check our pricing page for affordable rates and see if we serve your area. Call (647) 424-0355 to schedule a professional cleaning service today.

How to Clean and Sanitize Bedding for a Healthy Sleep Environment Read More »

Cottage for Spring: A Step-by-Step Guide to Cleaning and Opening Your Cottage for Summer

Step-by-Step Guide to Cleaning and Opening Your Cottage for Summer For millions of Canadians, late spring means it is time to open the family cottage. After six months of harsh winter weather, a shuttered cottage presents unique challenges: musty air, fine dust, and evidence of wintering pests. Opening the cottage properly takes a systematic approach so the space ends up safe, clean, and comfortable for the season ahead. The sequence below walks through the whole job in order. Exterior Inspection First Before stepping inside, walk the perimeter of the property. Check the roof for missing shingles or damage from fallen branches. Inspect siding, gutters, and downspouts for security and debris. Look closely at windows and doors for cracked glass, damaged screens, or gaps in caulking that could let in water or pests. Check the deck and stairs for rot or loose boards. This initial inspection ensures the cottage shell is secure before you begin interior cleanup. Ventilate and Inspect the Interior Open all windows and doors to establish airflow and flush out the musty, stagnant air that built up over the winter. While the cottage airs out, do a slow walkthrough. Look for water stains on ceilings and walls, damp corners, and buckled flooring. Watch for evidence of winter guests, mice and red squirrels chief among them. If you find mouse droppings or nesting materials, do not sweep or vacuum dry, as this can aerosolize hantavirus particles. Instead, wear rubber gloves and a mask, saturate the area with a disinfectant spray or a 1:10 bleach-to-water solution, let it sit for ten minutes, then wipe up droppings with paper towels and seal them in a plastic bag. Disinfect the surface again afterward. Deep-Clean the Kitchen With safety checks complete, move to the kitchen. If you left the refrigerator unplugged with doors propped open (the correct winter practice), it will have collected dust and possibly dead insects. Wash the interior with warm water and mild dish soap, paying attention to rubber door gaskets. Check stovetop burner wells and oven cavities for nesting materials before turning them on. Wipe down all cabinet interiors and wash all dishes, glasses, and cutlery before use. According to CDC guidelines on mold prevention, addressing moisture and cleaning surfaces promptly prevents mold growth in seasonal properties. Restore the Bathroom and Water System During winterization, water lines were drained and non-toxic antifreeze was poured into toilet bowls and drains. Once the water pump is primed and turned on, run every faucet and flush toilets until the water runs completely clear. Check all plumbing connections for leaks. Scrub and sanitize the toilet, sink, and shower, using a vinegar solution to dissolve hard water mineral deposits that settled over the winter. Dust and Refresh Living Areas and Bedrooms Fold protective covers inward to trap dust and take them outside to shake out and launder. Vacuum upholstered furniture, removing cushions to reach deep crevices. Shake area rugs outdoors before vacuuming. Launder stored blankets, comforters, and mattress protectors that absorbed musty smells. Place mattresses and pillows in direct sunlight for a few hours; UV rays are a natural sanitizer and deodorizer. Dust from ceiling beams and rafters down to baseboards using an extendable duster. Sweep and mop all hard floors with a gentle, wood-safe cleaner. Manage Humidity for the Summer Cottages are naturally prone to dampness due to proximity to water. Place moisture-absorbing tubs (calcium chloride) in closets and cabinets. Use activated charcoal bags in high-humidity areas to continuously absorb ambient odors. Proper ventilation and humidity control are key to preventing mold, according to Health Canada. Essential Cottage Opening Checklist Inspect roof, siding, gutters, windows, and deck for winter damage Open all windows and doors for ventilation Safely clean any rodent droppings using disinfectant (never dry sweep) Wash refrigerator interior, stove, cabinets, and all dishes Flush water system until clear; check for leaks Scrub and sanitize bathroom fixtures Dust top to bottom; launder all textiles and bedding Place mattresses and pillows in sunlight for natural freshening Set up dehumidifiers and charcoal odor absorbers Test smoke and carbon monoxide detectors Seasonal Cottage Cleaning Tasks Area Key Task Why It Matters Exterior Inspect roof, siding, and deck Catch winter damage before it worsens Kitchen Sanitize appliances and cabinets Prevent food contamination from pests Plumbing Flush antifreeze, check for leaks Ensure water is safe and pipes are sound Bedrooms Sun-dry mattresses and pillows Kill bacteria and remove musty odors General Dust and mop thoroughly Remove winter grime and cobwebs Frequently Asked Questions How do I safely clean mouse droppings at the cottage? Never sweep or vacuum dry droppings. Wear gloves and a mask, spray the area with a bleach solution (1 part bleach to 10 parts water), let sit for 10 minutes, then wipe with paper towels and seal in a plastic bag. What should I do if the water smells after winter? Run all faucets and flush toilets until the water runs clear. If the smell persists, have the well water tested or flush the system with a hydrogen peroxide solution. How do I remove musty smell from cottage linens? Wash them with half a cup of white vinegar in the rinse cycle, then dry them in direct sunlight if possible. Do I need a dehumidifier at the cottage? Yes, cottages near water are naturally humid. Using moisture absorbers in closets and a dehumidifier in damp areas helps prevent mold. When should I test the smoke and CO detectors? On your first day opening the cottage, test all detectors and replace batteries if needed. Opening the cottage after a long winter is a big project. While you focus on getting your seasonal retreat ready, Toronto Shine Cleaning can keep your city home spotless with professional regular or deep cleaning services. We also offer deep cleaning for every room and transparent pricing to fit your budget. Call (647) 424-0355 to schedule a service today.

Cottage for Spring: A Step-by-Step Guide to Cleaning and Opening Your Cottage for Summer Read More »

tourist arriving at an Airbnb apartment

What to Expect from a Professional Airbnb Cleaning Service

What to Expect from a Professional Airbnb Cleaning Service In the competitive short-term rental market, nothing shapes a guest’s verdict faster than cleanliness. Travelers book an Airbnb expecting a home-like experience with the standardized comfort of a high-end hotel, and the moment they cross the threshold, what they see, feel, and smell decides the stay. A single stray hair in the bathroom, a greasy fingerprint on a cabinet, or a musty bedroom can destroy that impression and produce the negative review that hurts most: because reviews drive search rankings, booking rates, and nightly pricing, a rigorous turnover routine is not a chore. It is business strategy. Here is what a professional Airbnb cleaning service should actually do for your property. Turnover Cleaning Is Not Regular Housekeeping A routine residential clean maintains comfort for the people living there. A turnover clean is a meticulous staging and sanitization process designed to erase every trace of the previous occupants and present a blank slate that makes each new guest feel like the first. And it has to happen inside a brutal, high-pressure window: typically the four hours between an 11 a.m. check-out and a 3 p.m. check-in. That constraint is why professional teams run a fixed, step-by-step system rather than improvising. The Turnover Sequence, Step by Step Inspection comes before cleaning Quality service starts the moment the guests leave, with a room-by-room walkthrough: visible damage to walls, furniture, and appliances; confirmation that amenities like the television, Wi-Fi, and kitchen appliances work; and a sweep for left-behind items. Anything damaged or missing is photographed immediately, because that documentation is what supports a reimbursement claim. Laundry starts first Beds are stripped and towels collected before a surface is wiped, because washing, drying, and folding linens is almost always the bottleneck of the turnover window. Hosts should keep double or even triple sets of identical sheets and towels so beds can be remade with fresh, pre-washed linens while the dirty load runs. Top to bottom through the living spaces Cleaning proceeds from high to low so debris falls onto floors that have not yet been done: light fixtures, ceiling fan blades, picture frames, and furniture tops get dusted; light switches, door handles, and remote controls get wiped with disinfectant, following CDC guidance on cleaning and disinfecting high-touch surfaces; and upholstered furniture is vacuumed with cushions lifted so crumbs disappear from the crevices. Beds go back with crisp linens arranged to an inviting, unlived-in standard. The kitchen gets hotel scrutiny Guests are highly sensitive to grease and food residue. The refrigerator and freezer are cleared completely of leftovers and opened items, with shelves and door bins wiped of sticky spots. The microwave interior is cleaned, the stovetop and appliance exteriors are degreased and polished, and the oven and dishwasher get an interior check. Then the detail that separates amateurs from professionals: every dish, piece of cutlery, and glass is inspected and re-washed if needed, because a dirty fork is a major guest detractor. Counters, backsplashes, and the sink basin finish the pass, and the garbage can is cleaned and sanitized, since it is a primary source of kitchen odors. The bathroom gets the deepest sanitization Any lapse here is the most noticeable and least forgiven, and hair removal is the absolute priority: one strand on the floor, in the sink, or on a folded towel can destroy a guest’s perception of the whole stay. The toilet is disinfected bowl, base, handle, and behind-the-bowl reach; the shower, tub, and tile walls are scrubbed of soap scum and hard water buildup; faucets, showerheads, and drain covers are polished spot-free; and the mirror gets a streakless wipe. When disinfection is warranted, a good team sanitizes diluted solutions properly, in line with CDC guidance on disinfecting with bleach. Finally, fresh fluffy towels are folded out with hand soap, shampoo, conditioner, and body wash fully stocked. Floors and final staging With rooms done, carpets and rugs are vacuumed slowly in overlapping passes to lift dust and hair, while hard surfaces are swept or vacuumed before a damp microfiber mop, with corners and behind-the-door zones included. The last stage elevates a clean into a guest-ready stay: throw pillows arranged, the welcome guide and Wi-Fi details placed prominently, welcome snacks presented, closets checked for tidy hangers, every bulb confirmed working, and one final walkthrough with a guest’s eyes. A Professional Turnover at a Glance Stage Focus Why It Matters 1. Inspect Damage, amenities, left-behind items Photos protect reimbursement claims 2. Laundry Linens and towels started immediately Removes the schedule bottleneck 3. Clean Kitchen, bathrooms, high-touch surfaces Prevents the 1-star cleanliness review 4. Stage Beds, restock, welcome guide, inspection Converts a clean stay into five stars Why Hosts Outsource the Turnover Consistency at this standard, every single turnover, is a heavy ask for hosts running multiple listings or juggling other careers. The physical toll of scrubbing, the logistics of unpredictable check-outs, and the constant fear that one missed detail becomes a bad review can drain the joy from hosting. A professional team brings efficiency, reliability, and systematic attention that is genuinely hard to replicate alone. What to expect from a service worth hiring: A documented checklist covering inspection, laundry, rooms, kitchen, bathroom, floors, and staging on every visit. Dependable timing inside the 11 a.m. to 3 p.m. window, including tight same-day turnarounds. Restock verification for towels, toiletries, dishes, and consumables before each arrival. Damage documentation with photos, plus bonded and insured crews you can trust with keys and guests. Airbnb Cleaning FAQ How is an Airbnb turnover clean different from a deep clean? A turnover resets the unit between guests: laundry, sanitization, restocking, and staging inside a few hours. A deep clean goes further, behind appliances, into grout, and across every surface, and most hosts schedule one periodically, such as our deep cleaning service, between heavy booking stretches. How quickly can a turnover be done? Most standard turnovers fit the four-hour gap between typical 11 a.m. check-out and 3 p.m. check-in, provided linens are

What to Expect from a Professional Airbnb Cleaning Service Read More »

The Best Ways to Store and Organize Shoes in Small Spaces

Managing a household involves keeping various objects in order, but few collections present as persistent a challenge as our shoes. For many families, these items accumulate silently in entranceways, migrate under beds, and pile up in dark closet corners. Because we wear different types of footwear for various activities, seasons, and social occasions, our personal collection can grow rapidly, easily outstripping the storage space we have available. An unorganized collection of footwear is more than just a visual distraction; it is a source of daily friction, leading to frantic searches for a missing left boot in the morning, dust-covered heels in the closet, and the tracking of outdoor dirt and allergens throughout the living spaces. Taking the time to systematically organize your shoes is a transformative act of home maintenance. It protects your investment in high-quality items, simplifies your daily routine, and creates a more hygienic, peaceful environment. Gather all the Shoes The process of organizing your collection must begin with a complete and honest assessment of every pair. This requires a total empty-out. Gather every single pair of shoes from across your home-from the front door, the bedroom closets, the mudroom, the back porch, and under the beds-and lay them out in a single, well-lit area. This physical consolidation is a crucial first step, as it forces you to confront the true scale of what you own. It is common to discover duplicate styles you had forgotten about, pairs that no longer fit, or boots that have become too worn to wear. Seeing everything in one place provides a psychological reset, allowing you to transition from a mindset of accumulation to one of deliberate curation. With the entire collection laid bare, the editing and sorting phase begins. This is where you must be practical and sometimes ruthless. Pick up each pair of shoes and evaluate its condition, comfort, and utility. Assess the structural integrity: are the soles worn thin, are the heels wobbly, or are the straps frayed beyond repair? If an item is damaged, decide if it is truly worth the cost of a professional repair; if not, it should be discarded. Next, evaluate comfort and fit. Many closets are filled with “aspirational” items-painfully high heels, stiff boots, or running gear that is slightly too small-kept out of a sense of guilt or the hope that they will eventually become comfortable. If a shoe causes blisters or pain, it is occupying valuable real estate without providing any value. Sort your items into distinct piles: keep, donate, repair, or discard. This purging process edits your collection down to only the footwear that serves your current lifestyle and comfort needs, making the subsequent storage phase much more manageable. Cleaning Before any items are placed into their new organized homes, they must be thoroughly cleaned. Storing dirty shoes is a critical mistake that can lead to permanent damage and unpleasant odors. Footwear accumulates a layer of grit, moisture, and organic matter from the ground, which, if left on the material in a closed closet, can degrade leathers and synthetics, creating an environment where mold and mildew can thrive. Wipe down the uppers of your boots and sneakers with a damp cloth and a mild soap solution, and use a stiff brush to scrub the outsoles clean of any packed-on dirt or mud. For leather items, apply a quality conditioner to keep the material supple and prevent cracking. Suede items should be dry-brushed with a specialized brush to restore the nap. Most importantly, allow all shoes to air dry completely in a well-ventilated area before putting them away. To address odors, sprinkle a small amount of baking soda inside each pair and let it sit overnight to absorb moisture and neutralize bacteria, shaking it out before storage. Once your edited collection is clean and dry, the strategic planning of your shoes storage spaces can begin. The most effective systems are based on the principle of zoning, which means storing your items based on how often you wear them. This creates a logical flow and prevents high-traffic areas from becoming overwhelmed. Organization 1.Entryway The entryway is your home’s transition zone, and it is the most valuable and vulnerable real estate in the home organization system. It should be reserved strictly for the footwear you wear every single day. A common mistake is allowing the entryway to become a storage locker for the entire family’s boots and sneakers, leading to a chaotic pile right inside the front door. Limit this zone to one or two pairs of immediate-use shoes per person. To contain these pairs neatly, utilize a low, open rack, a durable boot tray, or a storage bench with built-in cubbies. This keeps daily footwear off the floor, allows wet or dirty items to dry safely, and creates a clear, welcoming entry to your home. 2.Bedroom Closet The primary bedroom closet is the zone for your active, seasonal wardrobe. This is where you should store the items you wear regularly but not necessarily every day-your work shoes, casual sneakers, and current-season options. Within the closet, organize the collection by category: group all your sneakers together, then your work footwear, and then your casual flats or boots. This categorization makes finding the right pair for an outfit an intuitive, effortless task. Within each category, arrange the items by color, working from light to dark, which creates a visually calming and orderly display that reduces morning decision fatigue. 3.Deep Storage Deep storage is reserved for out-of-season footwear, formal wear, and specialty sports gear that you only access occasionally. Swapping your shoes seasonally is a highly effective way to maximize space in your primary closet. As the weather warms in the spring, clean and prep your heavy winter boots and move them to deep storage, bringing your summer sandals and lightweight footwear to the front. Conversely, in the fall, perform the reverse switch. Deep storage areas can include the high, hard-to-reach top shelves of your closet, the space under your bed, or even a dry, organized storage closet in another part of the house. By removing out-of-season footwear

The Best Ways to Store and Organize Shoes in Small Spaces Read More »

dishcloth cleaning

Dishcloth Cleaning: How to Stop Kitchen Cloths from Smelling Musty

Dishcloth Cleaning: How to Stop Kitchen Cloths from Smelling Musty The humble dishcloth is one of the most hardworking tools in your kitchen, used constantly to wipe counters, dry dishes, and clean up spills. But because it is always exposed to moisture, food particles, and warm temperatures, it becomes a breeding ground for bacteria, mold, and mildew. Using a contaminated cloth to wipe a food preparation surface does not clean it; it actively spreads bacteria. Understanding how to properly clean, sanitize, and care for your dishcloths is essential for a healthy kitchen. Why Dishcloths Smell Bad When you wipe a counter, the cloth picks up food particles, grease, and moisture. If it is rinsed quickly and left damp and crumpled in the sink, those organic materials remain trapped in the fibers. Bacteria such as E. coli and Salmonella multiply rapidly in warm, moist conditions. Within hours, a neglected cloth can develop millions of bacterial colonies, producing the sour, musty odor that signals it is unsafe for use. The CDC recommends cleaning surfaces regularly and using proper disinfecting methods to prevent the spread of germs in the home. For bleach-based sanitizing, the CDC also offers guidance on cleaning and disinfecting with bleach. Daily Habits for Fresh Dishcloths After every use, rinse the cloth under hot running water to flush out food residue and soap scum, then wring it as tightly as you can. A cloth left soaking in the sink or lying flat becomes a bacteria farm; hang it so air can move around it, whether over the faucet, a towel bar, or the edge of a drying rack. That one habit does more to slow bacterial growth and prevent odors than any detergent. How Often to Change Your Dishcloth Swap in a fresh dishcloth daily, and grab a clean one right away whenever raw meat, poultry, or fish juices touch the counter. Letting one cloth serve for days lets bacteria build toward unsafe levels. A morning swap keeps kitchen hygiene on track. Laundering Dishcloths Correctly Accumulate dirty dishcloths in a breathable bin or bag, never an airtight container, which traps moisture. Wash them separately on a heavy-duty cycle with hot water, at least 60 degrees Celsius, to melt grease and neutralize bacteria. Use a high-quality laundry detergent and add oxygen bleach powder (sodium percarbonate) for whitening and sanitizing. Never use liquid fabric softeners or dryer sheets. These products deposit a waxy film on fibers that clogs pores, reduces absorbency, and locks in bacteria. Instead, add half a cup of white vinegar to the rinse cycle to naturally soften fabric and neutralize odors. Alternative Sanitizing Methods Boiling Place dirty dishcloths in a pot, cover with water, and bring to a rolling boil. Let them simmer for 10 to 15 minutes. The intense heat kills all bacteria, yeast, and mold spores without harsh chemicals. Remove with tongs, let cool, rinse, wring out, and hang to dry. Microwave Method Thoroughly wet the cloth, place it on a microwave-safe plate, and heat on high for one to two minutes. The steam sanitizes the fibers. Use caution when removing the hot cloth, and only use this method on 100 percent cotton or natural fiber cloths; synthetic materials can melt. Choosing the Right Dishcloth Material Material Pros Cons Best For Cotton Absorbent, durable, soft Prone to odors, stains easily General kitchen use Microfiber Traps dirt effectively, dries fast Cannot use hot water or high heat Daily wiping and streak-free drying Swedish (cellulose/cotton) Highly absorbent, dries fast, biodegradable Wears out after months of use Replacing paper towels, eco-friendly option Dishcloth Care Tips Rinse and wring out thoroughly after each use Hang to dry in a well-ventilated area, never in a pile Replace with a fresh cloth every day Wash on hot (60 degrees C) with oxygen bleach Avoid fabric softeners and dryer sheets Boil or microwave for deep sanitization between washes Retire cloths when they develop a persistent odor even after washing Frequently Asked Questions How often should I replace my dishcloths? Cotton dishcloths should be replaced every few months. Once they develop a persistent musty smell that boiling cannot remove, it is time to retire them. Can I wash dishcloths with my regular laundry? It is better to wash them separately on a heavy-duty hot cycle, as they carry high levels of bacteria and grease that can transfer to clothing. Is it safe to microwave a dishcloth to sanitize it? Yes, but only if it is completely wet and made of natural fibers. Never microwave a dry cloth, as it can catch fire. Use caution removing the hot cloth. What is the best material for kitchen dishcloths? Cotton is most popular for its absorbency and durability. Swedish dishcloths are excellent for quick drying and reducing waste, while microfiber is ideal for streak-free cleaning. Why does my dishcloth smell sour even after washing? You may be using too much detergent or fabric softener, which leaves residue that traps bacteria. Wash on hot with half the detergent and add vinegar to the rinse. Keeping your dishcloths clean is a small but vital part of kitchen hygiene. For a deeper clean throughout your entire home, Toronto Shine Cleaning offers professional residential cleaning services. Explore our deep cleaning options and check our pricing to find the right plan for your home. Call (647) 424-0355 to schedule a regular or deep cleaning today.

Dishcloth Cleaning: How to Stop Kitchen Cloths from Smelling Musty Read More »

barbecue grill cleaning

Get Your Grill Ready for Summer: A Professional Deep Cleaning Guide

Get Your Grill Ready for Summer: A Professional Deep Cleaning Guide The first long weekend of the season is Toronto’s unofficial barbecue starting gun, and nothing ruins it faster than a grill still wearing last October. Old grease burns, imparts off flavors, and even invites flare-ups. A proper deep clean takes an afternoon, mostly passive, and your steaks will taste the difference all summer. Here is the professional sequence, from the burn-off to the leak test. Step 1: The Burn-Off Fire the empty grill to high and close the lid for 15 to 20 minutes. The heat carbonizes the residue on the grates into ash, which is dramatically easier to remove than sticky, partially cooked grease. Open the lid carefully, let the grill cool just enough to work near, and brush the grates with a stainless steel grill brush to strip the loosened debris. This step does the heavy lifting before any scrubbing starts. Step 2: Disassemble and Soak Once the grill is cool enough to touch, take it apart: grates, heat tents or flavorizer bars, burner protectors, and the grease tray. Set everything to soak in hot, soapy water for at least 30 minutes; an hour does better for a grill that skipped its spring clean last year. While the parts soak, gather your kit: Stainless steel grill brush and a plastic scraper for the cook box Rubber gloves and scouring pads Degreasing dish soap and a bucket Microfiber rags for final wipes Step 3: Clean the Cook Box and Burners With the parts out, scrape the interior walls of the cook box with the plastic scraper; never metal, which can damage porcelain and coatings. Push the debris toward the grease tray and remove it in one go. Then pay attention to the burner tubes, the part most home cleanings miss: clogged ports cause uneven flames and cold spots. Clear each port with a wire or a paperclip, gently, so the gas flows evenly again. Step 4: Scrub, Rinse, and Dry Return to the soaking parts and scrub them with scouring pads until the grime lifts, then rinse everything clean and dry completely. Drying matters more than it sounds: cast iron grates rust when stored wet, and moisture on steel parts undoes an afternoon’s work in a week. Coat cast iron lightly with cooking oil before it goes back in place, the same logic as a cast iron pan. Step 5: Polish the Outside The exterior deserves more than a wipe: mix white vinegar and water half and half, spray onto a microfiber cloth rather than directly onto the grill, and wipe with the grain of the stainless steel. Follow any dedicated stainless cleaner the same way. This is also the moment to check hoses and connections for cracks or brittleness from the winter in storage. Step 6: Reassemble and Test for Leaks Put everything back in reverse order, grates seated properly and grease tray emptied and lined. Before the first cookout, do the leak test: apply soapy water to the hose and all connection points, open the gas, and watch. Bubbles mean a leak; tighten the connection and test again. If bubbling continues, replace the part before you cook, no exceptions. Finish with a 10 to 15 minute burn at medium high to burn off any residue left from cleaning, and the grill is officially ready. Step Time Notes Burn-off and brush 20 minutes High heat, lid closed, then cool slightly Disassemble and soak 30 to 60 minutes, passive Grates, heat tents, grease tray Scrape and clear burners 15 minutes Plastic scraper; paperclip for ports Scrub, rinse, dry 30 minutes Dry fully to prevent rust Reassemble and leak test 20 minutes Bubbles mean stop and fix first Grill Cleaning FAQs How often should a grill be deep cleaned? Once at the start of the season and once near the end is the baseline, with a quick grate brush and grease tray check every few cooks through summer. Regular small cleans make the seasonal deep cleans genuinely easy. Can I use oven cleaner on my grill? Better not on the cooking surfaces; oven cleaners are caustic and not meant for food contact. Hot soapy water, a scraper, and elbow grease handle the cook box, and any strong chemical, if you use one at all, belongs on the unheated exterior only with gloves and ventilation, per Health Canada’s household chemical safety guidance. Why does clean food handling matter at a cookout? Grilling season is also hand-to-mouth season: raw meat juices on hands, tongs, and counters spread bacteria fast at backyard parties. Wash hands before and after handling raw meat; the CDC’s handwashing guidance is the standard every cook should follow between the raw chicken and the salad bowl. My grill has rust spots on the grates. Clean or replace? Light surface rust scrubs off with the brush and a vinegar soak, then a coat of cooking oil protects the bare metal. Heavy, flaking rust or cracked grates are a replacement, since no cleaning reliably restores food-safe condition. Too Big a Job? Leave the Kitchen to Us The grill is only half of summer prep; the indoor kitchen takes the same beating from hosting. Toronto Shine Cleaning’s deep cleaning service resets kitchens top to bottom, and recurring housekeeping keeps them guest-ready all season. A deep studio or one bedroom clean starts at $270.38 before HST, with everything listed on the pricing page. Call (647) 424-0355 and spend your summer cooking, not scrubbing.

Get Your Grill Ready for Summer: A Professional Deep Cleaning Guide Read More »

Yoga mat

Yoga Mat: A Complete Guide to Daily and Deep Cleaning Your Yoga Mat

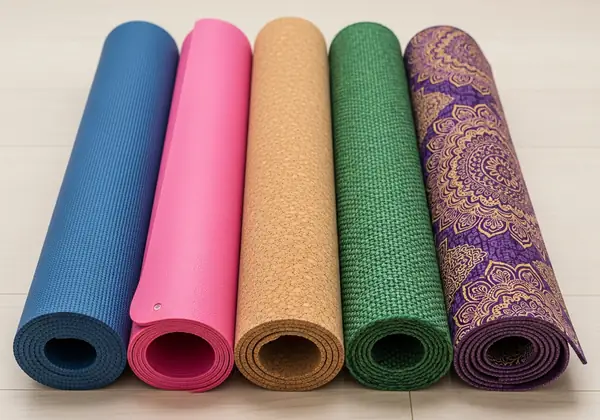
How to Deep Clean Your Yoga Mat A yoga mat is a deeply personal piece of equipment. It is more than rubber or foam: it is a portable sanctuary where you connect with your breath, challenge your body, and find calm and focus. That close contact comes with a hygienic responsibility. With every practice, the mat absorbs sweat, body oils, dust from the floor, and microscopic bacteria. Over time this buildup makes the mat slippery, grimy, and odorous. Cleaning your yoga mat is not just an aesthetic chore. It preserves grip and integrity, extends the mat’s lifespan, and keeps your practice space clean, healthy, and inviting. Know Your Mat Material First The first principle of yoga mat care is understanding the material. Most common mats are PVC (polyvinyl chloride) or TPE (thermoplastic elastomer), durable closed-cell materials that do not absorb moisture readily. Natural rubber mats offer exceptional grip and eco-friendly properties, but they are open-cell, more porous, and absorb liquids. Newer high-performance mats may have a polyurethane top layer designed to absorb moisture for a non-slip grip. The wrong product can be disastrous: a harsh chemical degrades natural rubber, while an oily solution permanently ruins the grip of a polyurethane surface. Always check the manufacturer’s website for cleaning recommendations specific to your mat. Daily Wipe-Down Routine A quick wipe-down after each practice is the single most effective way to prevent deep-seated grime. Make a simple daily spray at home: mix roughly three parts water to one part white vinegar in a small spray bottle. The mild acidity breaks down light sweat and oils and acts as a natural disinfectant and deodorizer. Add a few drops of a high-quality essential oil to counter the vinegar scent: tea tree oil has natural antibacterial and antifungal properties, and lavender offers a calming scent with antimicrobial benefits. Spritz the mat lightly and wipe it with a clean, damp microfiber cloth. The crucial step is letting the mat air dry completely before rolling it up. Rolling up a damp mat is the primary cause of mildew and musty odors. Monthly Deep Clean for PVC and TPE Mats A periodic deep clean removes the stubborn buildup that makes a mat feel slippery and dull. Do it at least once a month, or more often with frequent practice or hot yoga. For standard PVC or TPE mats the process is straightforward: Fill a bathtub or large basin with a few inches of lukewarm water, just enough to submerge the mat. Add no more than a single teaspoon of a gentle, clear, non-moisturizing dish soap. Soak the mat for ten to fifteen minutes to loosen embedded grime. Scrub both sides gently with a soft cloth or non-abrasive sponge, focusing on hand and foot areas. Rinse meticulously with a shower head until the water runs completely clear with no bubbles. Roll the mat inside a towel sandwich, pressing firmly, then hang it to air dry for 24 to 48 hours. Too much soap leaves residue that makes the mat dangerously slippery, so keep the rinse thorough and the soap minimal. Special Care for Open-Cell and Polyurethane Mats Open-cell mats such as natural rubber behave like sponges. Avoid a full soak when possible: lay the mat on the shower floor, spray it down with lukewarm water, and clean with a highly diluted, gentle soap solution and a soft cloth. Rinse even more thoroughly to flush soap from the porous structure, then hang it to dry for 48 hours or more. Never use vinegar on natural rubber, as the acid breaks down the rubber over time, and keep rubber mats out of direct sunlight, which makes them brittle and discolored. Polyurethane top layers are absorbent but sensitive. Never use essential oils, harsh chemicals, or abrasive scrubbers on them, as these can permanently ruin the sticky feel. Deep clean with the same gentle submersion method as a PVC mat, using an extremely small amount of very mild soap and an exceptionally thorough rinse. For a persistent musty smell in any mat, sprinkle a light, even layer of baking soda over the dry surface, let it sit for at least thirty minutes, and vacuum it up with a brush attachment. The baking soda absorbs odors without liquids. Mat type Cleaning method Soap and additives Drying time PVC or TPE Submerge in lukewarm water Max 1 teaspoon mild dish soap 24 to 48 hours, hung Natural rubber Spray-down, no full soak Highly diluted gentle soap, no vinegar 48 hours or more, out of sunlight Polyurethane top layer Gentle submersion Very mild soap, no oils or abrasives 24 to 48 hours, hung By understanding your mat’s material and adopting a routine of daily maintenance plus monthly deep cleaning, you keep a stable, hygienic foundation for your practice, allowing you to focus on your breath instead of the grime beneath your feet. The same principle applies to your home: a clean environment supports a peaceful, healthy life. Toronto Shine Cleaning provides professional deep cleaning services for every surface, with bonded and insured cleaners and a $1,000,000 insurance policy, and regular maid service keeps homes serene between deep visits. See what clients say on our reviews page or check pricing for your home size. Call (647) 424-0355 to book. For more on why regular movement and hygiene matter, read the CDC on the benefits of physical activity and the Government of Canada guide on indoor air contaminants, including mold and moisture. Yoga Mat Cleaning FAQ How often should I deep clean my yoga mat? Deep clean at least once a month, and more often if you practice frequently or attend hot yoga. Wipe the mat down after every session with a water and vinegar spray, and always let it dry completely before rolling it up. What is the best daily cleaner for a yoga mat? A spray of three parts water to one part white vinegar with a few drops of tea tree or lavender essential oil works well for PVC, TPE, and most closed-cell mats.

Yoga Mat: A Complete Guide to Daily and Deep Cleaning Your Yoga Mat Read More »

A family of tourists enjoying Canada during the World Cup.

Booking for the World Cup in Canada? 6 Tips for a Clean and Secure Stay

How to Book a Clean and Safe Stay for the 2026 World Cup in Canada The 2026 FIFA World Cup is coming to North America, and Canada is proud to host matches in Toronto and Vancouver. As millions of fans plan their trips, finding accommodation that is both clean and secure becomes the top priority. Whether you choose a hotel or a short-term rental, methodically vetting your stay ensures your focus stays on the tournament, not on your lodging. Here is your complete guide to booking a spotless and safe home base in Canada. Know Your Accommodation Options Hotels offer standardized cleaning protocols, front-desk staff, and 24-hour security. They are predictable but can be expensive during a global event. Short-term rentals on platforms like Airbnb and Vrbo offer more space, kitchen access, and a local feel, but cleaning standards vary widely by host. Knowing the trade-offs helps you choose what fits your needs and budget. Read Reviews the Right Way Start with reviews. Skip the overall star rating and read the last ten to fifteen entries. Look for recurring keywords. Search for “clean,” “spotless,” and “hygienic” to confirm high cleaning standards. Search for “dirty,” “dusty,” or “mold” as red flags. For safety, look for phrases like “safe neighborhood” or “felt secure.” A host who responds quickly to questions before booking is likely to be reliable during your stay. The platform search function inside reviews is your best tool for finding these keywords quickly. Scrutinize Photos and Descriptions Host photos reveal real cleaning habits. Zoom in on bathroom grout lines, the base of toilets, corners of floors, and the area behind the kitchen faucet. Dark or blurry images can hide dirt. A host who invests in good photography is often one who takes pride in their property. Read the property description carefully. A detailed listing that mentions “professionally cleaned between each guest” or “enhanced cleaning protocols” signals a host who invests in cleanliness. Look for Superhost badges on Airbnb for additional peace of mind. Evaluate Location and Building Security Do not rely on the host’s description of the neighborhood alone. Use Google Maps Street View to walk the block virtually. Search the neighborhood name plus “Toronto safety” for local perspectives from blogs and forums. Proximity to public transit is key for safe travel after matches. For apartment buildings, check for secure entrances, key fob access, concierge desks, or buzzer systems. For houses, look for private entrances, deadbolt locks, and good exterior lighting. Ask the host directly about security features before booking if the listing does not mention them. Keep Transactions On-Platform Always book and pay through the official platform. Avoid hosts who ask for wire transfers or off-platform payments, as this voids platform guarantees and customer protection policies. Keep all communication on the platform for a written record. Key Items to Pack for a Clean Stay Disinfecting wipes for door handles, remote controls, and light switches Hand sanitizer with at least 60 percent alcohol for quick hand cleaning Microfiber cloth for wiping down surfaces without streaks Travel-size spray cleaner for kitchen and bathroom counters Vetting Step What to Check Reviews Keywords “clean,” “spotless,” “safe neighborhood” in recent entries Photos Grout, corners, faucet base, stovetop for real cleanliness Description Detailed amenity list, cleaning protocol mentions, Superhost status Location Street View walk, neighborhood safety search, transit proximity Security Fob entry, concierge, deadbolts, exterior lighting For health guidance on cleaning during your travels, see the Canada travel health information page. General home cleaning best practices are outlined in the CDC guide on cleaning and disinfecting. Frequently Asked Questions Is it better to book a hotel or a short-term rental for the World Cup? Hotels offer consistent cleaning and security but cost more. Short-term rentals provide more space and local amenities but require careful host vetting. What is the most important factor for a clean rental? Recent reviews that consistently mention “clean” or “spotless” are the strongest indicators of a host who prioritizes hygiene. How can I check neighborhood safety before booking? Use Google Maps Street View and search the neighborhood name plus “safety” or “travel guide” online for real-world perspectives from residents and local blogs. Should I message the host before booking? Yes. Asking about cleaning processes or building security reveals how responsive and professional the host is. What cleaning supplies should I bring? Disinfecting wipes, hand sanitizer, and a microfiber cloth let you quickly sanitize high-touch surfaces on arrival. Enjoy the 2026 World Cup in Canada with confidence. A clean, secure accommodation lets you focus on the matches. Guests notice bathrooms and kitchens first, so target those rooms before anything else. If you are a host preparing your property for visiting fans, Toronto Shine Cleaning offers deep cleaning services that ensure every corner meets guest expectations. For regular upkeep between guests, our maid service can handle turnovers efficiently. Call (647) 424-0355 for a custom quote sized to your property.

Booking for the World Cup in Canada? 6 Tips for a Clean and Secure Stay Read More »

Cleaning Hacks Using Lemon and Salt

10 Genius Cleaning Hacks Using Lemon and Salt

We need to add lemon and salt to our daily cleaning arsenal. In the modern pursuit of a clean home, we are often led to believe that effectiveness comes in a specialized bottle, a complex chemical formula designed for a single purpose. Yet, some of the most potent and versatile cleaning solutions are not born in a laboratory but are found in the simple, humble ingredients of our kitchens. Among these, the powerful partnership of lemon and salt stands out as a timeless, effective, and surprisingly sophisticated cleaning agent. This is not a quaint piece of folklore; it is a practical application of basic chemistry, a dynamic duo where the gentle acidity of the lemon and the fine, abrasive texture of the salt work in perfect synergy to dissolve, scrub, and shine a remarkable variety of surfaces. Natural Cleaner The magic of this combination lies in understanding the distinct role each component plays. The lemon is the chemical workhorse of the team. Its juice is a natural, mild solution of citric acid. This acid is a powerful chelating agent, meaning it is incredibly effective at reacting with and dissolving alkaline mineral deposits, such as the calcium and magnesium that make up the chalky, white buildup of limescale. It is also a potent agent against oxidation, the chemical process that causes metals like copper and brass to tarnish and turn dull. The lemon’s natural bleaching properties can help to lighten organic stains, and its bright, clean scent is a powerful natural deodorizer, cutting through unpleasant smells rather than just masking them. Salt, in this partnership, is the physical force. In its crystalline form, sodium chloride is a gentle but effective abrasive. When used as a scrubbing agent, its fine, hard edges work to physically dislodge and lift away grime, residue, and the very tarnish that the lemon’s acid has just chemically loosened. It provides the “elbow grease” without the risk of scratching that more aggressive abrasives would pose. Salt is also hygroscopic, meaning it absorbs moisture, which can help in lifting certain types of liquid stains from porous surfaces. When lemon and salt are combined, you get a complete cleaning system: the acid dissolves and loosens, and the salt scours and removes, creating a solution that is far more powerful than the sum of its parts. Perhaps the most celebrated and visually satisfying application of lemon and salt is in the restoration of tarnished metals. Copper cookware, with its fiery, rose-gold luster, is a prime example. Over time, exposure to oxygen and moisture causes copper to develop a dull, brownish, or even greenish patina. To restore it, the process is beautifully simple. Cut a fresh lemon in half and dip the cut, fleshy side into a small bowl of kosher or table salt, ensuring it is well-coated. Then, simply take this salted lemon half and begin to scrub the exterior of the copper pan in a firm, circular motion. As you rub the salted lemon across the dull surface, you will witness an almost magical transformation. The tarnish seems to melt away in its wake, revealing the brilliant luster of the pristine copper beneath. For more control or for larger surfaces, you can squeeze the lemon juice into a bowl, mix it with salt to form a thick paste, and apply this paste with a soft cloth. Continue scrubbing until the entire surface is clean, then rinse the item thoroughly with warm water. The final step, which is absolutely critical for a perfect finish, is to dry the pan immediately and completely with a soft, clean cloth. This prevents new water spots from forming and beginning the tarnishing process anew. This same principle applies with equal effectiveness to brass. Brass doorknobs, cabinet hardware, candlesticks, and decorative items that have become dull and dark can be brought back to life with the same lemon and salt technique. The acid and abrasive combination will cut through the years of oxidation, restoring the warm, golden shine of the brass. It is a simple way to revive the details of your home without resorting to harsh, foul-smelling chemical polishes. Kitchen The power of lemon and salt extends deep into the heart of the kitchen, proving its worth as a food-safe, non-toxic cleaning agent for food preparation surfaces. One of its best uses is on wooden cutting boards. Over time, wooden boards can absorb the pungent odors of garlic and onion and can develop stains from ingredients like berries or beets. To clean, deodorize, and sanitize your board, sprinkle it liberally with coarse salt. Then, take a lemon half and use it to scrub the salt into the entire surface of the board, squeezing the lemon to release its juice as you go. The salt acts as a powerful abrasive, scouring away fine food particles and lifting stains from the wood grain, while the lemon’s citric acid works to neutralize odors and kill bacteria. Let this lemon and salt slurry sit on the board for ten to fifteen minutes, then use a bench scraper or a spatula to scrape it off. Give the board a final rinse with a damp cloth and allow it to dry completely. This versatile duo can also be used to tackle light stains on laminate countertops and butcher blocks. The mild bleaching action of the lemon juice, combined with the gentle scrubbing power of the salt, can help to lift stains from tea, coffee, or fruit juice. A crucial word of caution, however, is necessary here: you must never use this acidic combination on porous, natural stone surfaces like marble, granite, or travertine. The citric acid will react with the calcium carbonate in the stone, causing permanent etching and dulling the polished finish. Bathroom In the bathroom, the power of lemon and salt is primarily directed at the relentless problem of hard water stains. The chrome fixtures, faucets, and drain covers that are constantly exposed to water can quickly develop a cloudy, white film of limescale. To remove this, create a paste of lemon and salt. Apply this paste to the affected areas and

10 Genius Cleaning Hacks Using Lemon and Salt Read More »

The Best DIY Methods for Cleaning Your Bathroom Sink Drain

DIY Methods to Clean Your Bathroom Sink Drain Naturally A slow-draining bathroom sink is one of the most common household frustrations. Toothpaste, soap scum, hair, and shaving cream accumulate daily, eventually creating clogs and unpleasant odors. You do not need harsh chemicals to fix it. These DIY methods use simple household ingredients and basic tools to restore your drain to full flow and keep it fresh. Regular maintenance prevents the buildup that leads to standing water and costly plumbing repairs. Weekly Boiling Water Flush The easiest preventative measure is a weekly boiling water flush. Boil a full kettle, then pour the water straight into the drain in a slow, steady stream. The heat melts congealed grease, soap scum, and waxy buildup before they can trap hair and form solid clogs. This thirty-second habit keeps your drain flowing freely and prevents odors from developing. Make it part of your Sunday cleaning routine for best results. Baking Soda and Vinegar Treatment For deodorizing and breaking up mild clogs, the baking soda and vinegar method is safe and effective. Pour half a cup of baking soda into the drain, followed by half a cup of white vinegar. The fizzing chemical reaction scrubs pipe walls and neutralizes odor-causing bacteria. Cover the drain with a stopper for fifteen to thirty minutes, then flush with boiling water. This is a great natural alternative to chemical cleaners and costs pennies per use. Remove and Clean the Pop-Up Stopper Most clogs form right below the pop-up stopper. Look for the pivot rod extending from the drainpipe under the sink. Place a bucket underneath, loosen the retaining nut (usually hand-tight), and pull the rod free. Lift the stopper out of the drain. You will likely find a dense clump of hair and gunk wrapped around the shaft. Clean it thoroughly with an old toothbrush and hot soapy water, then set it aside to dry. This step alone often resolves a slow drain entirely. Use a Drain Snake for Physical Removal After removing the stopper, use a plastic zip-it drain snake. Feed the barbed strip into the pipe as far as it will go, then pull it back slowly. The barbs snag hair and debris that has built up further down. Repeat until the tool comes up clean. This method clears bathroom sink drains without any chemicals and is inexpensive to do at home. A basic zip-it tool costs only a few dollars at any hardware store. Signs Your Drain Needs Attention Water drains noticeably slower than usual after use Unpleasant odors rise from the drain opening Gurgling sounds when the sink empties Standing water that takes minutes to clear Method Best For Frequency Boiling water flush Preventative maintenance Weekly Baking soda + vinegar Odors and minor clogs Monthly Stopper removal + snake Moderate to stubborn clogs As needed P-trap disassembly Deep annual cleaning Yearly Clean the P-Trap for Stubborn Blockages The P-trap is the U-shaped pipe beneath your sink. It holds water to block sewer gases but also collects debris that passes through the stopper. Place a bucket underneath, loosen the two slip nuts by hand, and lower the trap. Empty it, scrub the interior with a bottle brush, then reassemble. Hand-tighten the nuts and run water to check for leaks. This thorough approach ensures a properly sealed bathroom sink drain when complete and removes every trace of accumulated debris. What to Avoid Never use liquid chemical drain cleaners. They are highly corrosive to pipes, especially older metal ones, and create hazardous toxic puddles if they fail to clear the clog. Stick to mechanical and natural methods for safe, effective results. Prevention through regular maintenance is always better than dealing with a fully blocked pipe. A well-maintained drain also means fewer bacteria and less odor coming up from the pipe, keeping your whole bathroom smelling fresh. For general guidance on cleaning safely at home, consult the CDC home cleaning and disinfecting guide and the Canada safe household product use page. Frequently Asked Questions How often should I flush my bathroom sink drain with boiling water? At least once a week to melt soap scum and grease before they form clogs and create odors. Does baking soda and vinegar really clean drains? Yes. The fizzing reaction scrubs pipe walls and neutralizes odor-causing bacteria effectively and naturally. When should I remove the pop-up stopper? When your drain is slow and the clog is clearly near the top of the pipe below the stopper assembly. Is it safe to take apart the P-trap myself? Yes. It is a straightforward DIY task using only hand tools and a bucket for water. Most slip nuts turn by hand. Why should I avoid chemical drain cleaners? They corrode pipes and create toxic standing water if the clog holds. Natural methods are safer and equally effective. Keep your bathroom sink drain fresh and flowing with these simple DIY methods. For the rest of your home, Toronto Shine Cleaning provides professional deep cleaning services that tackle every surface. Our regular maid service also keeps bathrooms spotless between deep cleans. Find your nearest Toronto location and call (647) 424-0355 to schedule your service today.

The Best DIY Methods for Cleaning Your Bathroom Sink Drain Read More »