Cleaning Oven Racks: A Step-by-Step Guide to Oven Rack Maintenance
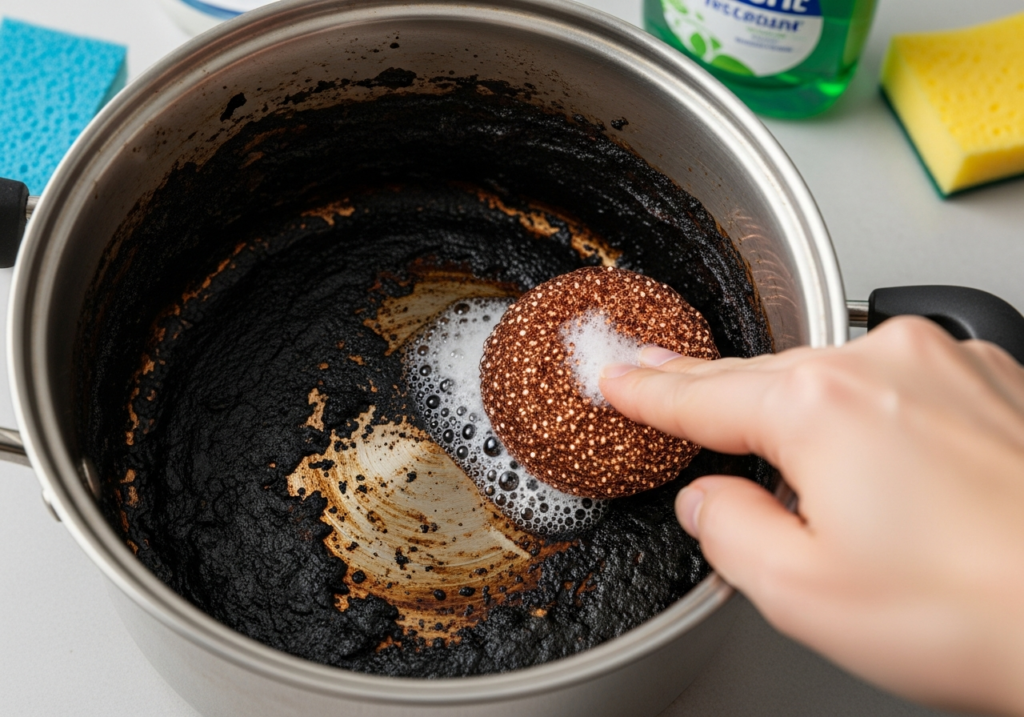
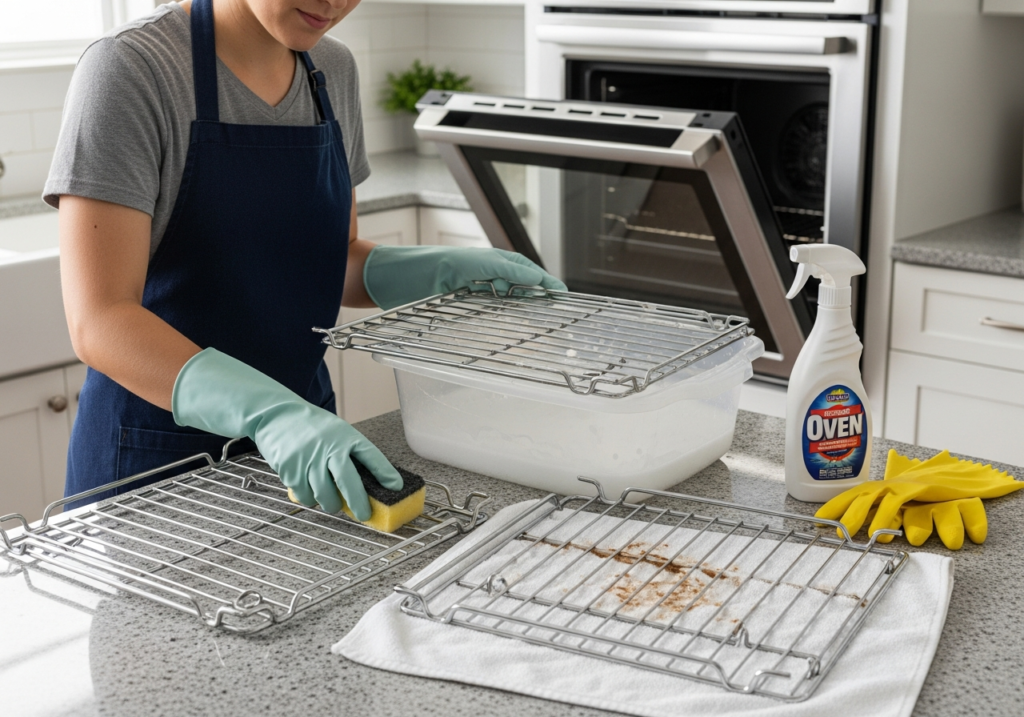
The oven is usually the heart of the kitchen, but we often forget about the oven racks. We polish the stainless steel exterior until it gleams, we wipe the glass door, and we scrub the stovetop daily. Yet, lurking behind that heavy insulated door lies a landscape of culinary history that we prefer to ignore. The oven shelves, or racks, are the silent victims of every roast chicken, every bubbling lasagna, and every Thanksgiving turkey. They catch the drips, the splatters, and the overflows. Over time, the intense heat of the oven bakes these spills into a rock-hard, carbonized coating that wraps around the metal bars like a second skin. Cleaning these awkward, bulky, and heavily soiled items is widely considered one of the most detested chores in the household. However, the difficulty of the task is often exaggerated by the use of the wrong methods. Restoring your oven shelves to their original silver shine does not require brute force; it requires the strategic application of chemistry and time. Fats and Sugars To conquer the oven rack, one must first understand the nature of the enemy. The black substance coating the metal is not merely “dirt.” It is a combination of polymerized fats and carbonized sugars. When oil or food juices hit the hot metal, they undergo a chemical change, bonding to the surface. Repeated heating cycles cure this bond, turning it into a substance similar to the seasoning on a cast-iron skillet, but unwanted and uneven. This is why a quick wipe with a soapy sponge does absolutely nothing. You are trying to remove a material that has been engineered by heat to stay put. Furthermore, the geometry of the rack—a series of parallel bars and cross-braces—makes mechanical scrubbing tedious and ineffective, as a scouring pad struggles to wrap around the thin wires. The first and most critical rule of cleaning oven racks involves what not to do. Do not leave them in the oven during the “self-clean” cycle. This is a common error. The self-cleaning cycle uses extreme temperatures, often exceeding 900 degrees Fahrenheit, to incinerate food residue into ash. While the porcelain enamel of the oven walls can withstand this, the chrome plating of standard oven racks cannot. The high heat causes the chrome to oxidize and discolor, turning the racks a dull, permanent blue or gold. Worse, it strips the natural lubricity of the metal, making the racks rough and difficult to slide in and out. If you value the smooth operation and shiny appearance of your racks, they must be removed and cleaned separately. Secret Ingredient The most effective method for cleaning oven racks requires no scrubbing at all, but it does require a bathtub. This technique utilizes the power of soaking and enzymatic breakdown. To begin, place an old towel or two in the bottom of your bathtub. This is essential to protect the surface of the tub from scratches caused by the metal racks. Lay the racks flat on the towels. Fill the tub with very hot water—as hot as your tap will allow—until the racks are completely submerged. The heat helps to soften the grease. The secret ingredient here is powdered dishwasher detergent or a high-quality laundry detergent. Dissolve a generous cup of the powder in the water. These detergents are formulated with enzymes designed to break down biological matter (proteins and starches) and degreasers to attack fats. Let the racks soak overnight. This dwell time is the active ingredient. As you sleep, the enzymes and surfactants work to dissolve the bond between the carbonized food and the chrome. In the morning, you will likely find the water has turned a murky brown. Take a sponge or a soft brush and wipe down the racks. The grime, which was previously concrete-hard, should slide off with minimal effort, revealing the shining metal beneath. Rinse them thoroughly and dry them before returning them to the oven. This method is ideal for racks that have a heavy buildup of mixed food residue. Trash Bag For racks that are coated in stubborn, baked-on grease that defies the bathtub soak, the ammonia method is the nuclear option. This technique relies on fumes rather than liquid soaking. You will need a heavy-duty trash bag large enough to hold the racks and a bottle of household ammonia. Place the racks inside the bag and add about two cups of ammonia. You do not need to submerge the racks; the liquid does not even need to touch them. Seal the bag tightly—using duct tape or a tight knot—to trap the air inside. Place the bag outside or in a very well-ventilated garage, as ammonia fumes are potent and irritating to the lungs. Leave it for twenty-four hours. In this contained environment, the ammonia fumes circulate and penetrate the porous structure of the burnt-on grease. The chemical reaction loosens the carbon from the metal. When you open the bag the next day (keeping your face away from the opening to avoid the blast of fumes), the grime will be soft and gummy. It can be sprayed off with a garden hose or wiped away with hot soapy water. This method is incredibly effective but requires strict adherence to safety protocols regarding ventilation and skin protection. Baking Soda and Vinegar For those who prefer a more natural approach or wish to avoid strong chemicals, baking soda and vinegar offer a non-toxic alternative, though it requires more physical labor. Place the racks in the bathtub (again, on a towel) or a large utility sink. Sprinkle baking soda liberally over the metal, ensuring the bars are coated. Then, spray white vinegar over the powder. The mixture will fizz aggressively, creating a foaming reaction. This chemical agitation helps to lift dirt. Once the fizzing stops, add hot water until the racks are covered and let them sit overnight. The baking soda acts as a mild abrasive and alkaline cleaner, while the vinegar helps to dissolve mineral deposits and grease. The next day, you will need to
Cleaning Oven Racks: A Step-by-Step Guide to Oven Rack Maintenance Read More »