Cleaning Products

Carpets Cleaning: 12 Mistakes You Need to Stop Making

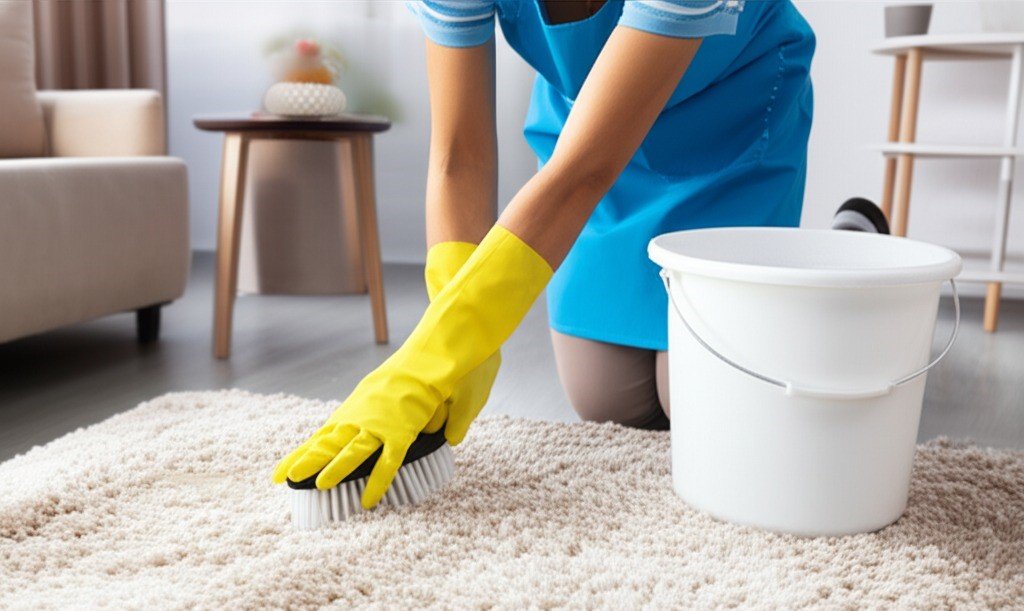
Carpet Cleaning: 12 Mistakes You Need to Stop Making Your carpet is a textile made of specific fibers, dyes, and backings, not a surface for any cleaner you grab from under the sink. Many household cleaners contain bleach that can permanently strip color, while others are so alkaline or acidic they can burn synthetic fibers or dissolve natural ones like wool. Dish soap is a frequent culprit: it cuts grease but leaves a sticky residue that attracts dirt faster than the surrounding carpet. The twelve mistakes below quietly destroy carpets, and all of them are avoidable. Mistakes That Damage Carpet Fibers Rubbing a stain is the most natural, and most destructive, impulse. Vigorous scrubbing pushes the spill deeper into the fibers and the padding beneath, can create a breeding ground for mildew, and frays the fibers so they look fuzzy and worn forever. Always blot with a clean, white cloth, working from the outside of the spill inward. Never apply cleaning solution directly to the carpet, either: pouring it on oversaturates the area, spreads the stain under the surface, and risks water damage to your subfloor. Instead, apply a small amount of solution to a cloth and blot with that. Excess water is the most damaging mistake of all, especially with rented machines, where multiple wet passes are tempting. Overwetting can dissolve the glue between the carpet backings, causing ripples and buckling, and it can trigger wicking, where old stains rise back to the surface as the carpet dries. A properly cleaned carpet should feel only slightly damp and dry within 6 to 12 hours; if it stays wet for 24 hours or more, it has been overwetted, and damp carpet and padding can grow mold. Mistakes That Make Stains Permanent Waiting too long turns a minor spill into a permanent stain, because dyes and acids in wine, coffee, juice, and pet urine chemically bond with the fibers over time. The golden rule is to act immediately: blot the excess, identify the stain, and treat it right away. Never skip the spot test. Even a reputable product can react unpredictably with your carpet’s specific dyes, so test any cleaner on a hidden area such as inside a closet or under a large piece of furniture before treating a visible stain. And always rinse. Any solution left in the fibers dries into a sticky, stiff residue that acts like flypaper for dirt, which is why spots darken and reappear shortly after cleaning. After blotting a stain, mist the area with clean water and blot again with a dry cloth. Mistakes That Wear Carpets Out Early Infrequent vacuuming is the silent destroyer of carpets. Fine, abrasive grit settles deep in the pile, and every footstep grinds it against the fibers like sandpaper, dulling them and creating traffic lanes. Vacuum high-traffic areas at least twice a week and the rest of the home at least once. Use a beater bar or rotating brush for cut-pile carpets, a suction-only vacuum for loop-pile styles like Berber to avoid snagging, and keep the bag or canister no more than two-thirds full for maximum suction. Deodorizing powders are another well-intentioned mistake: they coat fibers with fragrance, and most household vacuums cannot fully remove the fine powder, which builds into a paste-like layer at the base of the pile and can clog your vacuum. Fix odors at the source with proper cleaning, and remember that a cleaner home means better indoor air quality for everyone in it. Mistakes That Undo Your Hard Work Walking on a wet carpet crushes the weakened pile, leaving matted footprints, and shoe soles transfer dirt and oils onto freshly cleaned fibers. Stay off the carpet until it is completely dry, and speed drying with fans, a dehumidifier, or the HVAC system. Ignoring the padding is another costly error: the pad acts like a sponge, and liquid from spills or pet accidents wicks back up to the surface for weeks, returning stains and odors no matter how well you clean the surface. Significant spills often need professional subsurface extraction to flush the pad. Be careful with homemade solutions, too. Vinegar is an acid that can damage natural fiber carpets like wool or silk, baking soda is a fine particulate that builds up over time, and mixing vinegar with a bleach-containing cleaner can release toxic chlorine gas. Commercial carpet cleaners are pH-balanced and formulated with surfactants and rinsing agents that rinse away cleanly. Mistakes in Maintenance Planning Waiting until the carpet looks visibly filthy is the costliest mistake of all, because by then it holds pounds of deep-seated abrasive grit that is actively wearing down the fibers. Schedule professional cleanings as preventative care: for a typical household, an annual professional cleaning is recommended, with more frequent cleanings for homes with pets, children, or high traffic. Keeping up with cleaning routines is part of the everyday hygiene practices that protect your family’s health. The 12 Carpet Cleaning Mistakes at a Glance Mistake Consequence Fix Using the wrong product Color loss, burned fibers, sticky residue Use carpet-specific, fiber-appropriate cleaners Rubbing stains Frayed fibers, stain pushed deeper Blot from the outside in Applying products directly Oversaturation, subfloor damage Apply to a cloth, then blot Using too much water Buckling, mold, wicking Dry within 6 to 12 hours Not rinsing Residue attracts dirt Rinse with clean water and blot dry Vacuuming too rarely Abrasive grit wears fibers down Vacuum high-traffic areas twice a week Skipping professional cleanings Embedded soil becomes permanent Book an annual deep cleaning Frequently Asked Questions How long should carpet take to dry after cleaning? A properly cleaned carpet should feel only slightly damp and dry completely within 6 to 12 hours. If it remains wet for 24 hours or more, it has been overwetted, which risks mold and mildew in the padding. How often should I vacuum my carpets? Vacuum high-traffic areas at least twice a week and the rest of the home at least once a week. Frequent vacuuming removes the abrasive grit

Carpets Cleaning: 12 Mistakes You Need to Stop Making Read More »
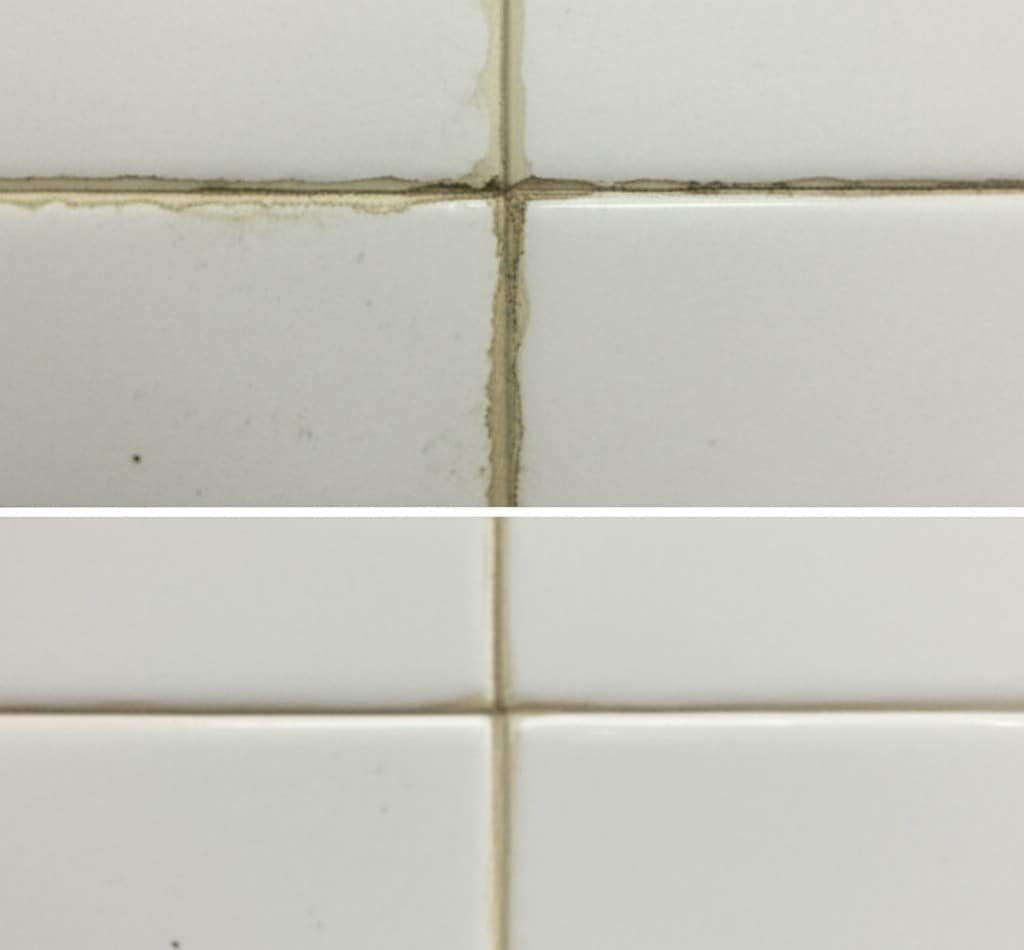
before and after grouting

Grout Cleaning: Essential Products for a Sparkling Home

Grout Cleaning: Essential Products for a Sparkling Home Grout lines lock your tiles in place, but their porous, cement-based composition makes them a magnet for water, dirt, soap scum, and oils. Over time, that absorption causes discoloration, staining, and the growth of mold and mildew. Cleaning grout properly means penetrating those pores to lift embedded grime, and the right products make all the difference. Prepare Before You Clean Before any intensive cleaning, ensure good ventilation by opening windows and doors and using a fan, because commercial cleaners and even vinegar can produce irritating fumes in a confined space. Wear waterproof gloves and safety glasses or goggles to protect your skin and eyes, and good airflow protects indoor air quality. Then clean the tile surface itself: sweep or vacuum loose debris, and mop with warm water and a pH-neutral cleaner, because applying grout cleaner to dirty tiles simply pushes surface dirt into the lines. DIY Grout Cleaning Products For routine maintenance and light discoloration, a baking soda paste is the best starting point. Baking soda is a mild abrasive that scrubs away surface stains without scratching tile or eroding grout. Make a thick paste with water, apply it to the lines, let it sit for 10 to 15 minutes, and scrub with a stiff-bristled grout brush in a circular motion. Never use a wire brush, which is too harsh. For stubborn dirt and soap scum, spray the paste with equal parts white vinegar and water; the fizzing reaction helps dislodge dirt from deep in the pores. Let it bubble for several minutes, then scrub and rinse. Skip vinegar on natural stone tiles like marble, travertine, or limestone, because the acid can etch and dull the surface, and always test in an inconspicuous area first. Hydrogen Peroxide for Mold and Mildew For mold, mildew, or grout that has yellowed, hydrogen peroxide is the more effective agent. Make a paste with baking soda and hydrogen peroxide instead of water, let it sit for at least 15 minutes so the oxidizing action can work, then scrub and rinse. For stronger whitening, apply 3 percent hydrogen peroxide directly to the lines. Unlike chlorine bleach, it is less harsh and does not produce toxic fumes, making it a safer choice for deep cleaning. Mold in damp areas like showers can affect health, and the CDC advises removing mold promptly and preventing moisture buildup. Steam Cleaning A handheld steam cleaner uses high-pressure, high-temperature steam to blast away dirt, kill mold, and sanitize without chemicals. The heat loosens embedded grime and the pressure forces it out of the pores. Move the nozzle slowly along the lines and wipe away the loosened dirt with a clean cloth. Steam is safe for most tile types, including ceramic, porcelain, and granite, but avoid it on loose or crumbling grout, where the pressure could dislodge sections. Commercial Grout Cleaners: Alkaline and Acidic When DIY methods fall short, commercial grout cleaners are formulated for the job. Alkaline cleaners, with a high pH, break down organic stains like grease, soap scum, and grime, and are generally safer for most tile and grout. Acidic cleaners, with a low pH, remove mineral deposits such as rust, efflorescence, and hard water stains, but they are powerful and can severely damage natural stone. Always wear full protective gear, ventilate the room, and never mix an acidic cleaner with an alkaline cleaner or one containing bleach, because the reaction can release toxic gas. Why Chlorine Bleach Is a Bad Idea Chlorine bleach whitens grout temporarily, but it erodes the grout structure, making it more porous and prone to future staining. It can also strip color from colored grout and damage tile glaze, and leftover residue can react with other cleaners later. Oxygenated bleach, a powder activated by water, is a much safer and more effective alternative for whitening. Rinse, Dry, and Seal Rinsing is never optional. Leftover cleaner dries into a sticky film that attracts dirt faster than before, so rinse with a sponge and clean water, changing the water often, then dry completely. Sealing is the single most important step for long-term results. Wait at least 24 hours after cleaning so the grout is fully dry, then apply a penetrating sealer with a brush-tip applicator, tracing the lines carefully and wiping any excess off the tile face. One or two coats are typical, and the sealer needs 24 to 48 hours to cure, during which the area should stay dry and free of traffic. Clean, dry surfaces are also the foundation of good hygiene in bathrooms and kitchens. Essential Grout Cleaning Products Baking soda for a gentle scrubbing paste. White vinegar for extra fizzing power on stubborn soil, never on natural stone. Hydrogen peroxide for mold, mildew, and whitening. A stiff-bristled grout brush, never a wire brush. A handheld steam cleaner for chemical-free deep cleaning. Alkaline and acidic commercial cleaners for tough or mineral-based stains. A penetrating grout sealer to protect your work. Grout Cleaning Products at a Glance Product Best For Caution Baking soda paste Light stains, routine maintenance Use a grout brush, not a wire brush White vinegar Soap scum and stubborn soil Never on marble, travertine, or limestone Hydrogen peroxide Mold, mildew, yellowed grout Test on a hidden area first Steam cleaner Chemical-free deep cleaning Avoid loose or crumbling grout Alkaline cleaner Grease, soap scum, grime Follow dwell time instructions Acidic cleaner Rust, efflorescence, hard water Never mix with bleach or alkaline cleaners Penetrating sealer Long-term protection Wait 24 hours after cleaning, cure 24 to 48 hours Frequently Asked Questions Can I use vinegar to clean grout? Yes, on ceramic or porcelain grout: equal parts white vinegar and water react with a baking soda paste to lift stubborn soil. Do not use vinegar on natural stone tiles like marble, travertine, or limestone, because the acid can etch them. How do I whiten yellowed grout? Make a paste with baking soda and 3 percent hydrogen peroxide, let it sit for at least 15 minutes, scrub

Grout Cleaning: Essential Products for a Sparkling Home Read More »

5 Amazing Tips on How to Use Pink Paste Without Causing Harm

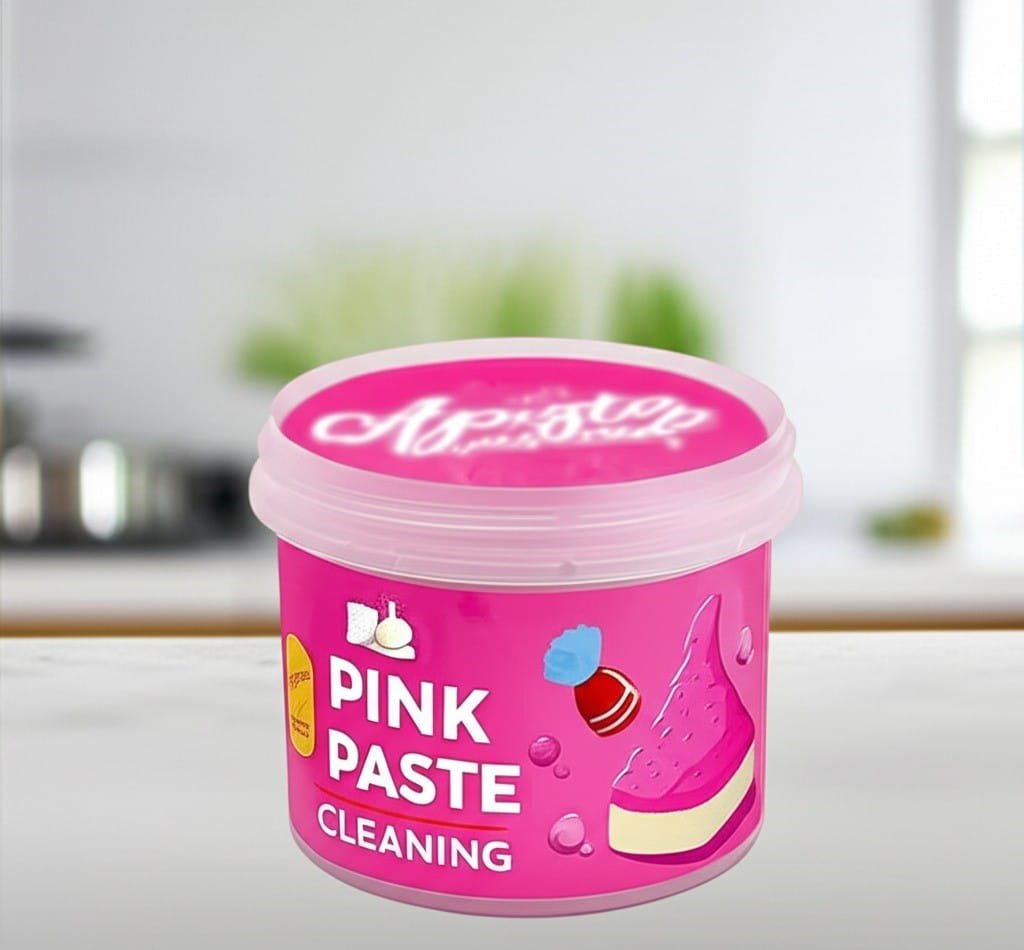
5 Amazing Ways to Use Pink Paste Without Causing Harm Pink paste is the specialist of the cleaning cupboard. Its fine abrasive particles physically lift cooked-on grease, soap scum, and hard water film that everyday sprays cannot shift, and it does the job without harsh chemical fumes. The catch is that abrasion is exactly what ruins delicate finishes when the paste is misused. Follow these five ground rules and you can put pink paste to work on the toughest spots in your home without damaging a thing. Tip 1: Start With Less and Work in Circles You need far less paste than you expect: a small scoop on a clean, damp cloth or sponge is enough to start. Spread it over the stained area and rub in small circular motions with gentle to moderate pressure; the abrasive particles lift the grime, so you never need to bear down hard. Rinse thoroughly with clean water once the mark is gone, because paste left to dry forms a chalky film. Finish by buffing with a soft dry cloth to bring back the shine on glossy surfaces. Always let stovetops, ovens, and pans cool completely before cleaning, and never use the paste on a hot surface. Tip 2: Patch Test an Invisible Corner First Before you tackle a visible area, press a dab of paste into an inconspicuous spot, scrub gently, rinse, and inspect. If you see scratching, dulling, or a colour change, stop and switch to a gentler product. The test matters most on polished finishes: glass cooktops, enamel, stainless steel, and coated fixtures usually respond beautifully, but unsealed natural stone such as marble or granite will etch, high-gloss plastic will haze, and gold or silver plated fittings can lose their thin plating. Store every cleaner out of reach of children and follow the label; Health Canada’s household chemical safety guidance covers safe handling and storage. Also remember the paste scrubs but does not disinfect, so check the CDC’s cleaning and disinfecting advice when you need to sanitize a surface afterward. Tip 3: Win the Kitchen Battles In the kitchen, pink paste earns its keep on four fronts. On glass or ceramic cooktops it removes the white haze from boiled-over water and the dark rings around burners; use a soft cloth and very light pressure. On gas stoves, lift the cast-iron grates, scrub the baked-on grease with a scouring sponge, then rinse and dry them completely before they go back. On stainless steel or porcelain sinks it revives dull basins by lifting hard water film, soap residue, and the light rust specks that form near the drain; rinse well and buff dry with a microfiber cloth. It also cuts through the brown grease film on oven door glass and scrubs scorched stainless or copper pan bases back toward new. Keep it away from non-stick interiors, where abrasion destroys the coating, and use an old toothbrush on discoloured grout lines to brighten them dramatically. Tip 4: Reclaim the Bathroom Soap scum is where pink paste feels like magic. On fiberglass tubs, acrylic shower surrounds, and tiled walls, apply it with a sponge, scrub the cloudy buildup away, and rinse with the shower head for a satisfying deep clean. Glass shower doors covered in hard water spots return to full transparency when scrubbed, rinsed, and squeegeed or buffed dry. Chrome and ceramic faucets and basins lose their toothpaste film and mineral crust, including the green or white deposit that forms at the tip of the spout. For stubborn toilet bowl rings in hard water areas, shut off the supply valve and flush out most of the bowl water, then apply the paste to the ring and scrub with a toilet brush or pumice stone; the same method lifts stains on the porcelain exterior. Tip 5: Take It Around the House and Outdoors Painted walls and baseboards shed scuff marks, while door frames come clean quickly too, when you work a tiny amount of paste over them with a damp cloth and light pressure. Yellowed UPVC window frames and door sills brighten back to white, and sliding door tracks scrub clean where dirt compacts. Soot on tile or brick fireplace surrounds comes up with a stiff-bristled brush. Outdoors, barbecue grates respond to a generous coat of paste worked with a wire brush, rusted garden tools and weathered metal patio furniture are revived, and scuffed white sneaker soles look new again when scrubbed with an old toothbrush and wiped clean. Know When to Put the Tub Away Understanding the paste’s limits prevents costly mistakes. Never use it on these surfaces: Unsealed marble, granite, travertine, and other natural stone: the abrasives etch the polish Non-stick cookware interiors: the coating scratches and eventually peels High-gloss plastics and acrylic: fine scratches dull the finish Gold, silver, or chrome plated fittings: the thin plating can wear through Any surface still warm from cooking or baking Surface Pink paste excels at Extra caution Glass or ceramic cooktop White boiled-over marks and burner rings Soft cloth, light pressure Cast-iron stove grates Baked-on grease and carbon Dry fully before replacing Stainless or porcelain sink Hard water film and rust specks Rinse well, buff dry Oven door glass Brown baked-on grease film Use a non-scratch scourer Tile grout Discoloured, dull grout lines Old toothbrush or grout brush Porcelain toilet Stubborn waterline rings Toilet brush or pumice stone Pink Paste Questions, Answered Is pink paste safe on every surface? No. It is abrasive by design, so it suits durable, hard surfaces such as stainless steel, enamel, glass, tile, and glazed porcelain. Keep it off unsealed stone, non-stick coatings, high-gloss plastic, and plated fittings, and always patch test an unseen corner first. Do I have to rinse pink paste off? Yes. The paste contains fine abrasive particles that leave a chalky film if allowed to dry on the surface. Rinse with clean water after scrubbing, then buff dry with a soft cloth for the best finish. Can pink paste replace my regular cleaner? Think of

5 Amazing Tips on How to Use Pink Paste Without Causing Harm Read More »

Different Types of Cleaning Cloths

Different Types of Cleaning Cloths: Clean Your Home Without Damaging it

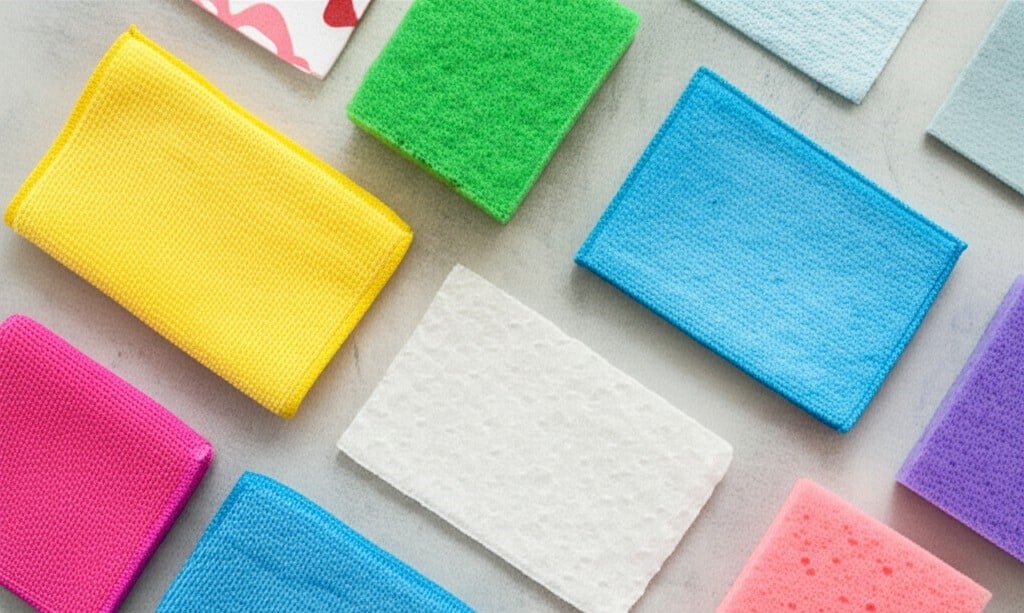
The cleaning cloths is the single most fundamental tool in the arsenal of both the professional and the homeowner. Its importance is often overlooked in favor of powerful chemical solutions or advanced machinery, yet the success of any cleaning task hinges on the material used to wipe, scrub, and polish a surface. The wrong cloth can leave behind lint, create streaks, fail to absorb liquid, or, in the worst-case scenario, scratch and permanently damage the very surface it is meant to clean. A deep understanding of the different types of cleaning cloths is not a minor detail; it is the foundation of effective and efficient cleaning. The market is filled with various cleaning cloths, each designed with a specific purpose in mind. Microfiber Microfiber has revolutionized the cleaning industry over the past few decades, and for good reason. It is not a single type of cloth but a category of textiles made from incredibly fine synthetic fibers, typically a blend of polyester and polyamide. For a fiber to be classified as a microfiber, it must be finer than one denier, which is approximately the diameter of a silk strand. Most cleaning-grade microfibers are significantly finer than that. The true genius of microfiber lies in its manufacturing process. The fibers are split into a star-like or wedge-shaped cross-section. This creates an enormous amount of surface area within the cloth and a network of microscopic hooks that are exceptionally effective at trapping dust, dirt, grime, and microbes. Unlike traditional cotton cleaning cloths, which tend to push larger particles around, a microfiber cloth actively grabs and holds onto debris. Furthermore, the material possesses a natural positive electrostatic charge when dry, which acts like a magnet for negatively charged dust particles. This makes it an unparalleled tool for dusting without the need for chemical sprays. When used damp, microfiber’s effectiveness shifts to its capillary action. The vast network of fibers can absorb between seven and eight times its own weight in liquid. This incredible absorbency allows it to lift and remove dirt and grease with minimal water, often eliminating the need for harsh cleaning chemicals. The fine fibers can penetrate microscopic pores and irregularities on a surface that other cloths simply skim over. However, not all microfiber is created equal; the weave and pile of the cloth dictate its best use, making the selection of specific microfiber cleaning cloths a crucial decision for achieving optimal results. All-Purpose Microfiber: This is the most common and versatile type. It has a looped pile, similar to a traditional terry cloth towel but much finer. This texture is excellent for scrubbing and trapping larger particles of dirt and grime. It’s the workhorse for general cleaning tasks like wiping down countertops, cleaning spills, scrubbing bathrooms, and washing general household surfaces. Its high absorbency makes it effective for both wet and dry applications. Waffle Weave Microfiber: Characterized by a distinctive grid-like pattern of recessed squares, this weave significantly increases the cloth’s surface area. This design is engineered for maximum absorbency and quick drying. Waffle weave cloths are the superior choice for drying tasks. They can absorb large amounts of water without becoming oversaturated quickly, making them perfect for drying dishes, glassware, and especially for automotive detailing, where leaving a streak-free finish on a car’s body is paramount. Glass and Polishing Microfiber: These cloths have a very tight, flat, suede-like weave with no pile. This smooth surface is designed to glide effortlessly over reflective surfaces. Because it lacks the looped fibers of a terry weave, it is virtually lint-free. Its primary purpose is to clean and polish glass, mirrors, windows, stainless steel appliances, and chrome fixtures without leaving behind streaks, smudges, or fibers. For best results, one of these flat-weave cleaning cloths is often used slightly damp to clean, followed by a second, dry one to polish to a perfect shine. High-Pile or Plush Microfiber: These cloths feature long, soft, fluffy fibers. The primary advantage of this design is its ability to trap and hold large quantities of dust deep within its pile, preventing it from being released back into the air. This makes it the ultimate reusable dusting tool, far superior to disposable static cloths. The plushness also makes it ideal for delicate tasks like buffing car wax without scratching the paint or for applying polish to fine furniture. Proper care is essential to maintain microfiber’s unique properties. They should be washed only with other microfiber or non-linting synthetic materials. Washing them with cotton will cause lint to become embedded in the fibers, ruining their effectiveness. Crucially, fabric softener and bleach must never be used. Fabric softener clogs the microscopic gaps in the fibers, destroying their ability to absorb and trap dirt. Bleach degrades the synthetic fibers, causing them to break down. Washing these cleaning cloths correctly ensures they last for hundreds of uses while maintaining their superior cleaning power. Cotton Before the advent of microfiber, cotton was the undisputed king of cleaning cloths. Derived from a natural plant fiber, cotton is known for its softness and high absorbency. It is durable and can withstand harsh chemicals like bleach and high washing temperatures, which can be useful for sanitization when dealing with heavy contamination. Cotton Terry Cloth: These are the familiar towels found in bathrooms and kitchens. Their looped pile is designed for absorbing large volumes of water. While effective for mopping up significant spills or for heavy-duty scrubbing where potential linting is not a concern, these cotton cleaning cloths are not ideal for fine cleaning. They tend to smear dirt more than lift it and often leave behind noticeable lint, especially on glass and dark surfaces. Flour Sack Towels: These are thin, tightly woven cotton cloths, historically made from the sacks used for flour. Their key advantage is that they are virtually lint-free. This makes them an excellent, classic choice for drying glassware and polishing silverware to a brilliant shine. They are less absorbent than terry cloth, but their smooth surface makes them superior finishing cleaning cloths for specific tasks where a perfect, clear finish is required. Cotton Rags: The most economical option is often a repurposed old

Different Types of Cleaning Cloths: Clean Your Home Without Damaging it Read More »

Cleaning vinegar vs regular vinegar

Cleaning Vinegar vs Regular Vinegar: Which One Should You Use?

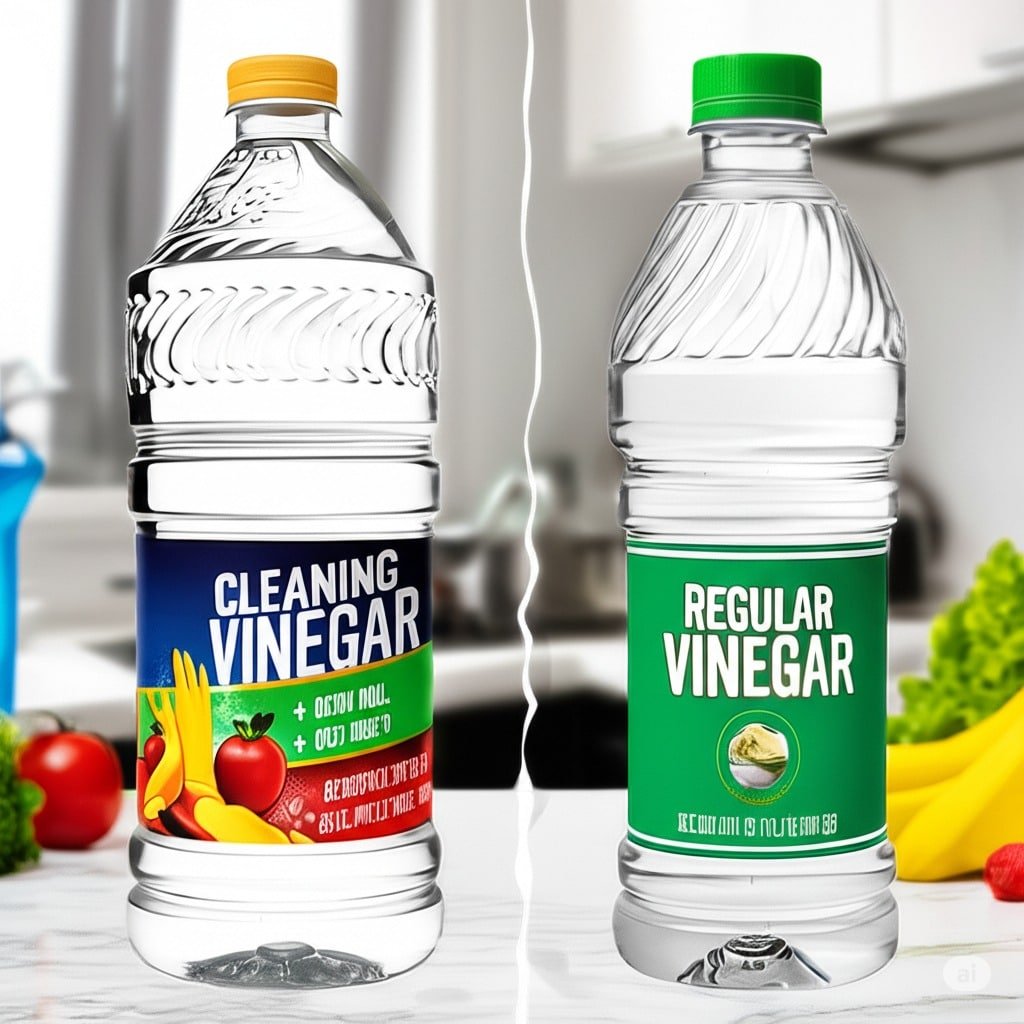
Walking down the cleaning aisle, you see it: a jug labeled “Cleaning Vinegar.” It sits near the all-purpose sprays and scouring powders, looking distinctly more industrial than its culinary cousin in the condiment aisle. The question arises naturally: is this just a marketing gimmick, or is there a real, functional difference between the vinegar you put on your salad and the one you use on your shower door? The answer is simple and significant. Yes, there is a difference, and understanding it is key to using this powerful natural cleaner safely and effectively. 1.Fermentation Process At its core, all vinegar is a solution of acetic acid and water. This acid is the active ingredient responsible for vinegar’s cleaning power. It’s created through a two-step fermentation process. First, yeast converts sugars from a plant source, like corn, apples, grapes, or grains, into alcohol. Then, a specific type of bacteria, Acetobacter, converts that alcohol into acetic acid. The final concentration of this acid is what separates one type of vinegar from another. Let’s first consider the familiar bottle of regular distilled white vinegar, a staple in pantries everywhere. This is the product most people grab when a cleaning recipe calls for vinegar. Standard white vinegar sold for culinary purposes in North America has a strictly regulated acidity level, typically containing 5% acetic acid. This percentage is not arbitrary; it’s a balance that makes it palatable and safe for consumption while still being effective for pickling, marinading, and creating salad dressings. Because it’s food-grade, it offers a distinct peace of mind when used for cleaning in kitchen environments. You can descale your coffee maker with it and know that any residue left behind is harmless. You can wipe down your countertops or clean your microwave, confident that you aren’t introducing harsh, inedible chemicals where you prepare your food. The 5% acidity of regular white vinegar is potent enough for a vast range of household cleaning tasks. Its acidic nature is excellent at breaking down and dissolving mineral deposits, which is why it works so well against hard water stains and scale buildup. When you run a cycle of vinegar and water through your coffee machine or kettle, the acetic acid goes to work on the calcium and magnesium deposits, dissolving them and flushing them away, improving the machine’s performance and the taste of your beverage. The same principle applies to cleaning shower heads clogged with scale or removing the white, chalky film that hard water leaves on glass shower doors and faucets. 2.Degreaser and Deodorizer Furthermore, regular vinegar is an effective degreaser and deodorizer. It cuts through light grease on stovetops and backsplashes. Its ability to neutralize alkaline odors makes it a fantastic solution for eliminating smells from garbage disposals, refrigerators, or musty laundry. A small bowl of vinegar left on a counter can absorb and neutralize unpleasant cooking odors overnight. As a rinse aid in the dishwasher, it helps break down soap residue and leaves glassware sparkling and spot-free. When used in laundry, a cup in the rinse cycle can act as a natural fabric softener, breaking down detergent buildup and leaving clothes feeling softer without a waxy coating. Its applications are broad, making it a true multi-purpose workhorse for general, everyday cleaning. Now, let’s turn our attention to the jug labeled “Cleaning Vinegar.” At first glance, it looks the same, a clear liquid, just like its culinary counterpart. The crucial difference, however, lies in its strength. Cleaning vinegar is formulated with a higher concentration of acetic acid, typically around 6% to 8%. While a jump from 5% to 6% might seem insignificant, it represents a 20% increase in acidic strength. This boost in potency makes it a more formidable opponent against tougher, more stubborn messes where regular vinegar might require more time or more scrubbing to be effective. This increased acidity means cleaning vinegar excels at heavy-duty jobs. It cuts through thick, caked-on soap scum in bathtubs and showers with noticeably more ease. It tackles severe hard water stains on glass and fixtures that have been building up for months. For homes with very hard water, cleaning vinegar can be the difference between a frustrating scrub session and a quick, satisfying wipe-down. It’s also more effective at cleaning neglected tile grout, its higher acidity helping to lift deep-set grime and mildew stains. Some people even use it as a more natural alternative to chemical herbicides for killing weeds that pop up in the cracks of driveways and sidewalks, as the stronger acid is more effective at desiccating the plant life. 3.Not For Consumption However, this increased power comes with important caveats, primarily concerning safety and surface compatibility. The most critical distinction is that cleaning vinegar is not produced to be food-safe. It is not intended for consumption, and it should never be used in cooking or food preparation. Its production is not regulated by food safety standards, and it may contain impurities not present in distilled white vinegar. The label will almost always include a warning: “Not for consumption.” The stronger concentration also means it releases more potent fumes. When using cleaning vinegar, especially in enclosed spaces like a bathroom, proper ventilation is not just recommended, it’s essential. Opening a window or running an exhaust fan helps to dissipate the strong acidic smell and prevents irritation to the respiratory system. For individuals with sensitivities, the fumes from cleaning vinegar can be overwhelming. It’s also more likely to cause skin and eye irritation upon direct contact. Wearing gloves is a wise precaution to protect your hands, and care should be taken to avoid splashing it into your eyes. The heightened acidity also increases the risk of damaging certain surfaces. While all vinegar should be used with caution on sensitive materials, cleaning vinegar requires even greater care. It should never be used on natural stone surfaces like marble, granite, travertine, or limestone. The acid, even when diluted, will etch and dull the surface, causing permanent damage. It’s also too harsh for unsealed

Cleaning Vinegar vs Regular Vinegar: Which One Should You Use? Read More »

Island Cleaning Supplies: The Ultimate Guide for a Sparkling Space

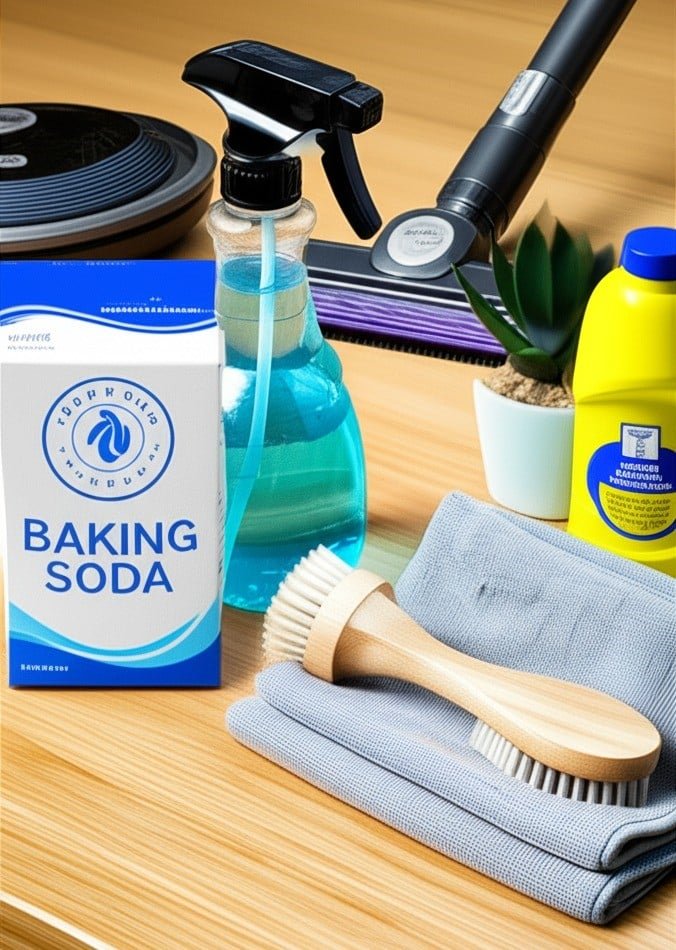
Island Cleaning Supplies: Build the Ultimate Portable Kit Island cleaning is a simple idea with powerful results: keep a compact, portable caddy stocked with versatile tools and multi-purpose products so you can handle any mess wherever it appears, without repeated trips to a supply closet. This approach saves space, time, and money by favouring a lean arsenal of proven products over a collection of single-use bottles. Here is what belongs in an island cleaning kit, and why each piece earns its place. The Microfiber Foundation No chemical outperforms a high-quality microfiber cloth. Millions of fine split fibres create an immense surface area that traps dust, grime, and bacteria instead of pushing them around like cotton rags do, and each cloth can absorb moisture equal to about seven times its own weight, drying surfaces without streaks or lint. Stock several types: general-purpose cloths for daily wiping, a tighter-weave glass and polishing cloth for mirrors and chrome, and waffle-weave cloths for spills and dish drying. Buy a dozen or more and colour-code them, blue for glass, green for the kitchen, red for the bathroom, so germs never travel from room to room. Bottles, Brushes, and Squeegees A professional-grade spray bottle with an adjustable nozzle gives you real control: a fine mist for damp dusting or a concentrated stream for grout lines, which flimsy dollar-store triggers cannot deliver. Alongside it, keep a palm-sized dish brush with nylon bristles for sinks and counters and a narrow, stiff-bristled grout brush for tile lines, tracks, and corners. A high-quality squeegee belongs in the kit too. Its best job is preventive: a 30-second wipe-down of shower glass and tile after every shower removes the water that soap scum and mildew need to form, drastically cutting future deep scrubbing. The Liquid Trio Three humble liquids cover nearly every cleaning need in the home: White distilled vinegar: its acetic acid dissolves hard water mineral deposits on faucets and shower heads and inside coffee makers, and diluted with water it becomes a streak-free glass cleaner and a natural deodorizer. Never use it on marble, granite, or travertine, where the acid etches the surface permanently Dish soap: a surfactant that breaks water’s surface tension so it can lift oils and grease. A few drops in a spray bottle of warm water make a safe all-purpose cleaner for counters, cabinets, painted walls, and sealed wood floors, and a thin coat left on a greasy stovetop for 10-15 minutes softens caked-on grime Isopropyl alcohol at 70% concentration: a fast-evaporating solvent and disinfectant. Sprayed 50/50 with water and wiped with microfiber, it leaves stainless steel fingerprint-free and gleaming, and it safely cleans electronics such as keyboards, remotes, and phones without moisture damage The Powders: Gentle and Heavy Duty Baking soda is the gentle abrasive: a mild alkali whose fine grit lifts stuck-on stains from porcelain, fiberglass, and enamel alike without scratching a thing. Sprinkled on a damp sponge, or mixed with water into a paste for burnt-on oven spills, it scrubs hard; an open box in the fridge absorbs odours, and a sprinkle on carpets before vacuuming neutralizes trapped smells. For jobs baking soda cannot touch, a powdered cleanser such as Bar Keepers Friend brings heavier artillery. Its active ingredient, oxalic acid, removes rust spots and tarnish from copper and brass, cutlery scuffs in sinks, and the dull film on stainless steel. Always wear gloves, work in a ventilated area, and never mix it with other cleaners, following the safe-use rules Health Canada sets out in its household chemical safety guide and its overview of household product hazards. The Machine That Makes It Work A vacuum with a HEPA filter and a full set of attachments is the engine of the system. A HEPA filter traps microscopic dust and allergens instead of blowing them back into the air, which matters for allergy sufferers. The attachments unlock the machine’s range: a crevice tool reaches corners and baseboards, a soft dusting brush handles blinds and lampshades, and an upholstery tool cleans fabric furniture. Vacuuming is always the first step of any deep clean, because dry soil left in place turns to mud the moment a liquid cleaner touches it. Kit item Primary job Watch out Microfiber cloths Traps dust, dries streak-free Colour-code by room White vinegar Dissolves hard water film Never on natural stone Dish soap Cuts grease anywhere Rinse food-contact surfaces Isopropyl alcohol 70% Streak-free shine, electronics Keep away from flames Baking soda Gentle scrubbing and odours Rinse thoroughly Bar Keepers Friend Rust, tarnish, set-in stains Gloves and ventilation Squeegee Prevents soap scum buildup Use after every shower HEPA vacuum Removes dust before wet cleaning Check filter regularly Island Cleaning Supplies FAQs What is island cleaning? It is the practice of keeping a self-contained portable caddy of versatile tools and products, so you can clean any room without returning to a central supply closet. The approach reduces clutter, saves time, and cuts the number of single-purpose products you buy. Which island cleaning products are truly essential? Start with microfiber cloths, an adjustable spray bottle, dish soap, white vinegar, baking soda, and a HEPA vacuum. Add 70% isopropyl alcohol, a grout brush, a squeegee, and a powdered cleanser for rust and tarnish as your needs grow. Is vinegar safe on all surfaces? No. Its acidity dissolves mineral deposits beautifully, but it etches natural stone such as marble, granite, and travertine. Test any unfamiliar surface in a hidden spot first, and dilute vinegar with water for most jobs. How do I clean safely with multiple products? Never mix cleaning products, especially bleach with anything acidic or ammonia-based, because the combination can release toxic gas. Read labels, use gloves where advised, and keep products out of children’s reach; Health Canada’s chemical safety pages explain the details. Your Kit, Plus a Professional Finish Building an island cleaning kit simplifies everyday maintenance, and when the whole home needs more than a caddy can deliver, a professional clean fills the gap. Toronto Shine Cleaning’s regular cleaning service and deep cleaning

Island Cleaning Supplies: The Ultimate Guide for a Sparkling Space Read More »

Ammonia – 3 Essential Tips On How To Use

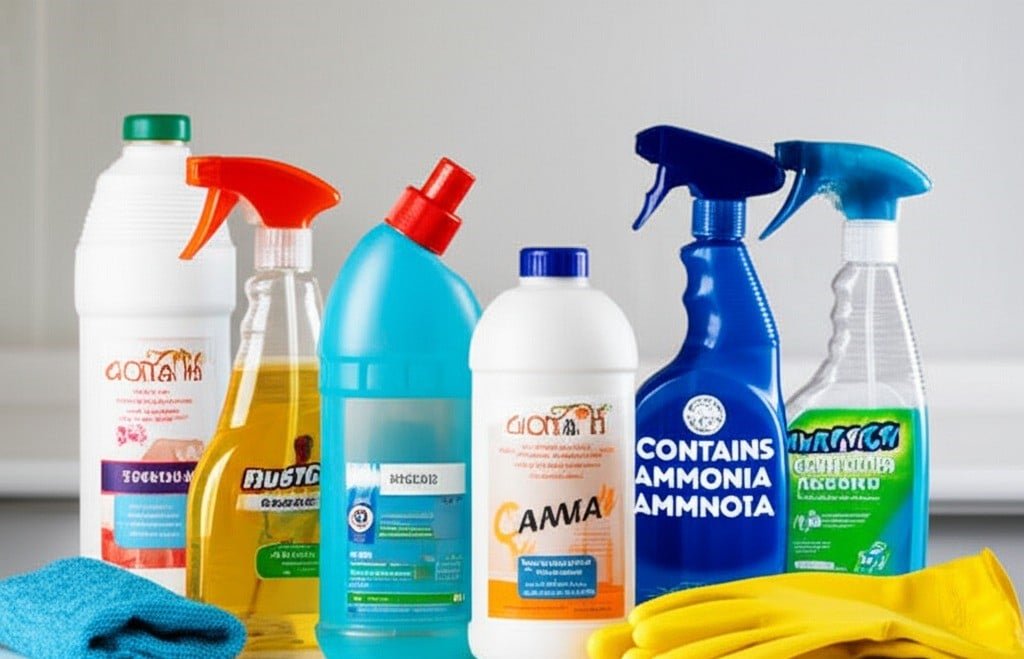
Ammonia Cleaning Done Right: Where This Powerful Cleaner Helps and Where It Harms Ammonia is a nitrogen-hydrogen compound that has anchored serious cleaning routines for generations. It dissolves in water to form ammonium hydroxide, an alkaline solution that shrugs off grease and grime that gentler products leave behind. In pure form it is a gas with a sharp, instantly recognizable smell. That strength comes with real rules: used carelessly, ammonia can create toxic fumes or dull expensive surfaces. Here is how to get its benefits while avoiding every common trap. Why Ammonia Cuts Grease and Leaves Glass Streak-Free Ammonia cleans because it is strongly alkaline. It sits near the top of the pH scale, the standard measure of how acidic or alkaline a substance is. That position makes it brutal on acidic soils: kitchen grease, cooking oils, and the oily films behind fingerprint smudges. The solution emulsifies fats, breaking them into small water-soluble particles you can wipe away. This process, saponification, works the same way soap is made, which is why range hoods and stovetops clean with far less scrubbing than you would expect. Ammonia also evaporates quickly and completely. It does not leave a film behind, which explains its long run as the key ingredient in glass and mirror cleaners. Soap-based detergents can streak; an ammonia solution clears the glass and simply dissipates. Stainless steel appliances, chrome fixtures, and other high-shine non-porous surfaces benefit from the same no-residue behaviour, since water spots and haze never get a chance to form. Where Household Ammonia Earns Its Place You will meet ammonia in many commercial bottles, sometimes without it shouting from the front label: glass cleaners, heavy-duty all-purpose cleaners for kitchens and bathrooms, oven cleaners built on concentrated ammonium hydroxide, certain floor cleaners for no-wax vinyl and linoleum, and even diluted formulas in jewelry solutions for hard gemstones and precious metals. Around the home, ammonia-based products handle: Greasy cabinet doors, backsplashes, and range hoods with a diluted solution Fingerprint-prone stainless steel refrigerators and dishwashers, wiped clean and streak-free Ovens, where the chemistry reduces how much physical scrubbing you must do Sinks, tubs, and bathroom tile, lifting soap scum and body oils, and restoring chrome faucets and showerheads Windows and mirrors, for a transparent finish few other cleaners can match Laundry duty: pretreating organic stains like blood or grass, and adding a cup to white linens to brighten them and strip detergent residue Many households skip the branded bottles entirely and buy plain household ammonia to dilute with water, which is an economical, versatile mix for the jobs above. The One Rule That Cannot Be Overstated: Never Mix Ammonia with Bleach Combining ammonium hydroxide with sodium hypochlorite (bleach) releases chloramine gas, which is highly toxic. Inhaling it can trigger coughing, shortness of breath, chest pain, nausea, and watery eyes, and heavy or prolonged exposure can cause serious lung damage or even death. The danger is not limited to deliberately blending two liquids in a bucket. Using a bleach cleaner and then an ammonia cleaner on the same surface without a thorough rinse in between can release chloramine right where you are standing, for example in an enclosed toilet bowl. Reading labels on every product you use is how you avoid building a dangerous cocktail by accident. Health Canada’s guidance on using household chemicals safely walks through buying, using, storing, and disposing of products like these, and the CDC explains how to clean and disinfect with bleach without inviting trouble. Ventilation and Protective Gear Are Part of the Job Even alone, ammonia fumes irritate the eyes, nose, throat, and lungs, and a poorly ventilated room invites headaches, dizziness, and respiratory irritation. Open windows and doors and run an exhaust fan before any ammonia task, from glass spray to heavy-duty oven cleaner, so the fumes dissipate instead of pooling around your face. Because the solution is caustic, waterproof gloves protect skin from irritation or burns during long sessions, and safety glasses or goggles are a wise shield against splashes, which can damage eyes immediately. Surfaces That Must Never See Ammonia Surface or material Ammonia safe? What goes wrong Porous stone: marble, limestone, travertine No It reacts with calcium carbonate and etches the finish permanently Hardwood floors No Strips the protective finish, dries the wood, discolors it Waxed surfaces No Strips the wax bare Wool and silk fabrics No Weakens and damages delicate natural fibers Glass, chrome, stainless steel Yes Dissolves oily films and evaporates without streaks Ammonia-Free Alternatives When the Smell Wins The pungent odor is ammonia’s biggest drawback, and sensitivity to it is a legitimate reason to switch. Vinegar-based solutions are acidic and excel on mineral deposits. Isopropyl alcohol also delivers a streak-free shine on glass. pH-neutral cleaners are gentler across a wider range of surfaces, though they lack ammonia’s heavy degreasing muscle. More ideas on product hazards, from cookware to cleaning products and craft materials, are collected by Health Canada. Treat ammonia as a specialized tool rather than a universal solvent, and it stays valuable instead of dangerous. Skip the Guesswork with Professional Deep Cleaning If matching strong chemistry to every surface sounds like too much risk for one Saturday, that is fair. Our team brings the correct products to every job. Book a deep cleaning or a regular cleaner, compare plans on the pricing page, or call Toronto Shine Cleaning at (647) 424-0355. Ammonia Safety FAQ Can I mix ammonia with vinegar? This combination is less dangerous than ammonia plus bleach, but it neutralizes both products into a weak solution that wastes your effort. Acid and alkali cancel each other out, so keep them in separate tasks with a full rinse between them, and always check labels before pairing any two cleaners. Is household ammonia the same as what is in glass cleaner? Glass cleaners use a diluted form of the same ingredient, ammonium hydroxide, along with surfactants and solvents. Straight household ammonia is stronger and must be diluted with water before most jobs, which gives you control over the

Ammonia – 3 Essential Tips On How To Use Read More »