How to Clean a Burnt Pot: 5 Methods to Save Your Cookware
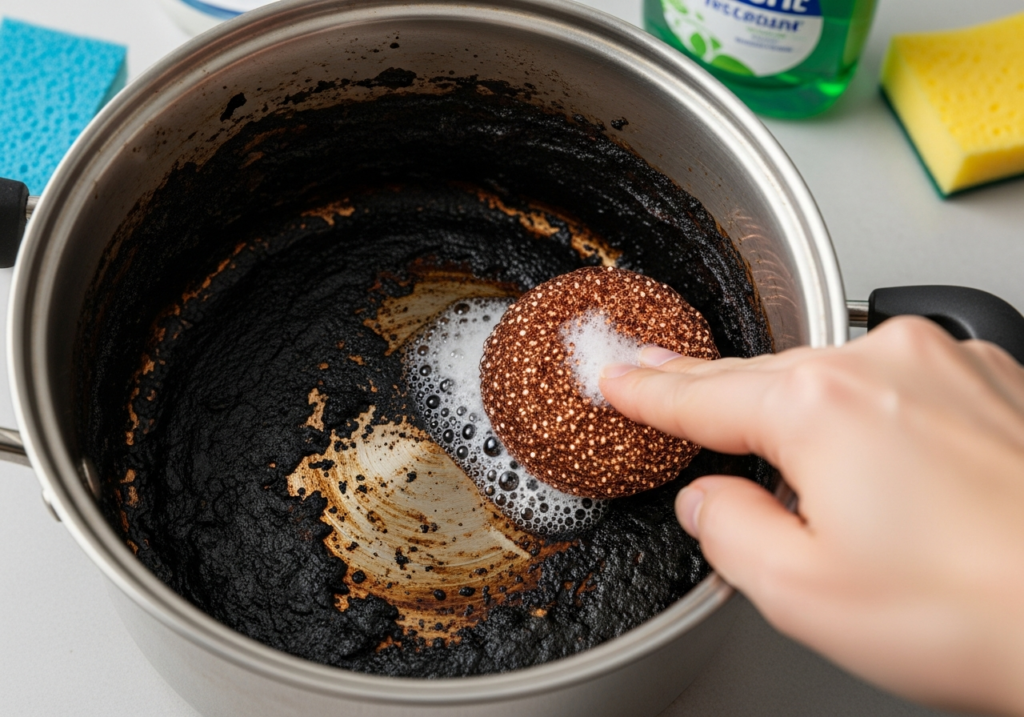
The culinary disaster of a burnt pot is a universal experience that transcends skill level. It usually happens in a split second of distraction; you turn your back to chop parsley or answer a text message, and suddenly the kitchen is filled with acrid smoke and the sinking realization that your dinner is ruined. However, the greater tragedy often follows the meal, when you are left staring at a piece of cookware coated in a thick, black, carbonized crust that seems fused to the metal at a molecular level. The instinct to throw the pot away is strong, but it is almost always unnecessary. High-quality cookware is resilient, designed to withstand high heat and abuse. With the right application of chemistry, patience, and mechanical force, even the most hopelessly scorched vessel can be restored to its former glory. Metal Scouring Pad The first step in salvaging a burnt pot is to suppress the urge to attack it immediately with a metal scouring pad. While abrasive force has its place, using it prematurely simply results in exhaustion and a scratched surface. You must first understand the material you are working with, as the cleaning protocol for stainless steel differs vastly from that of cast iron, enamel, or non-stick surfaces. Stainless steel is the most forgiving, able to withstand acidic solvents and heavy scrubbing. Enamel, like that found on Dutch ovens, is glass fused to metal and can crack or scratch if treated too roughly. Non-stick coatings are the most fragile; once the coating is compromised by a burn or a scratch, the pan is effectively dead. Cast iron, conversely, is virtually indestructible but requires a specific method to avoid stripping its seasoned finish. Identifying the metal dictates the method. Stainless Steel For the most common victim—the stainless steel pot—the most effective first line of defense utilizes thermal shock and solubility. This is essentially the culinary technique of deglazing, applied for cleaning purposes. If the pot is still hot, pour a cup of water into it immediately. The water will boil violently, turning to steam. This rapid phase change helps to lift the fond—or in this case, the char—from the bottom of the pot. Use a wooden spoon to scrape the bottom while the water boils. Often, this simple step removes the bulk of the disaster. If the pot has already cooled, fill it with water and a healthy squirt of dish soap, bring it to a boil on the stove, and let it simmer for ten minutes. The heat softens the carbonized sugar and protein matrix, turning the concrete-like crust into a sludge that can be poured away. 1.Vinegar and Baking Soda If boiling water is insufficient, we must turn to basic kitchen chemistry: the reaction between an acid and a base. This method is particularly effective for stubborn, black crusts on stainless steel. Cover the bottom of the pot with a generous layer of baking soda. Then, pour white vinegar over the powder. The mixture will fizz aggressively as it releases carbon dioxide. This chemical agitation helps to break the bonds between the burnt food and the metal. Once the fizzing stops, the mixture settles into a neutral solution. However, the real power comes from the dwell time. Top the pot up with hot water and let it sit for several hours, or preferably overnight. By the next morning, the alkalinity of the baking soda will have weakened the organic structure of the burnt food, allowing it to be scrubbed away with a standard sponge. 2.Laundry Staple For burns that have defied both heat and chemistry, there is a surprising hack involving a laundry staple: the dryer sheet. This method works exceptionally well on casserole dishes and stainless steel pots. Place a new dryer sheet in the bottom of the burnt pot and fill it with warm water. Press the sheet down so it is submerged and leave it for an hour. The conditioning agents in the dryer sheet—designed to soften fabric fibers—act as surfactants that reduce the surface tension of the water and loosen the bond of the burnt food. It turns the crust into a soft layer that slides right off. While this method requires a thorough washing afterward to ensure no laundry chemicals remain, it is remarkably effective for saving elbow grease. 3.Oxalic Acid There comes a point, however, where household pantry items fail. This usually occurs with polymerized oil stains—those brown, sticky spots that turn black and hard, often found on the sides of the pot or the bottom exterior. For this, you need a specialized abrasive containing oxalic acid. Products like Bar Keepers Friend are the gold standard for this. Oxalic acid attacks the rust and oxidation on a molecular level while the micro-abrasives polish the surface. Make a paste with the powder and a little water, apply it to the burnt area, and let it sit for a minute—but no longer, as it can etch the metal. Then, scrub. This is the only method that will restore the mirror-like shine to stainless steel and remove the rainbow-colored heat tint that often accompanies a high-heat disaster. Cast Iron Cast iron requires a completely different philosophy. You cannot boil water in it for long periods, and you generally want to avoid soaking it in soap, as this risks rust and stripping the seasoning. The best method for a burnt cast iron skillet is the salt scrub. Pour a cup of coarse kosher salt into the pot while it is still warm (but not hot enough to burn you). Use a folded paper towel or a dedicated rag to scour the salt into the iron. The salt acts as a hard abrasive that grinds away the char without damaging the metal. It also absorbs the excess grease. Once the salt turns black and the pot feels smooth, dump it out, rinse quickly with hot water, dry thoroughly over a flame, and apply a thin coat of oil. If the burn is truly catastrophic—meaning the food is
How to Clean a Burnt Pot: 5 Methods to Save Your Cookware Read More »