Don’t Ruin Your Walls: 5 Common Mistakes Homeowners Make When Washing Walls
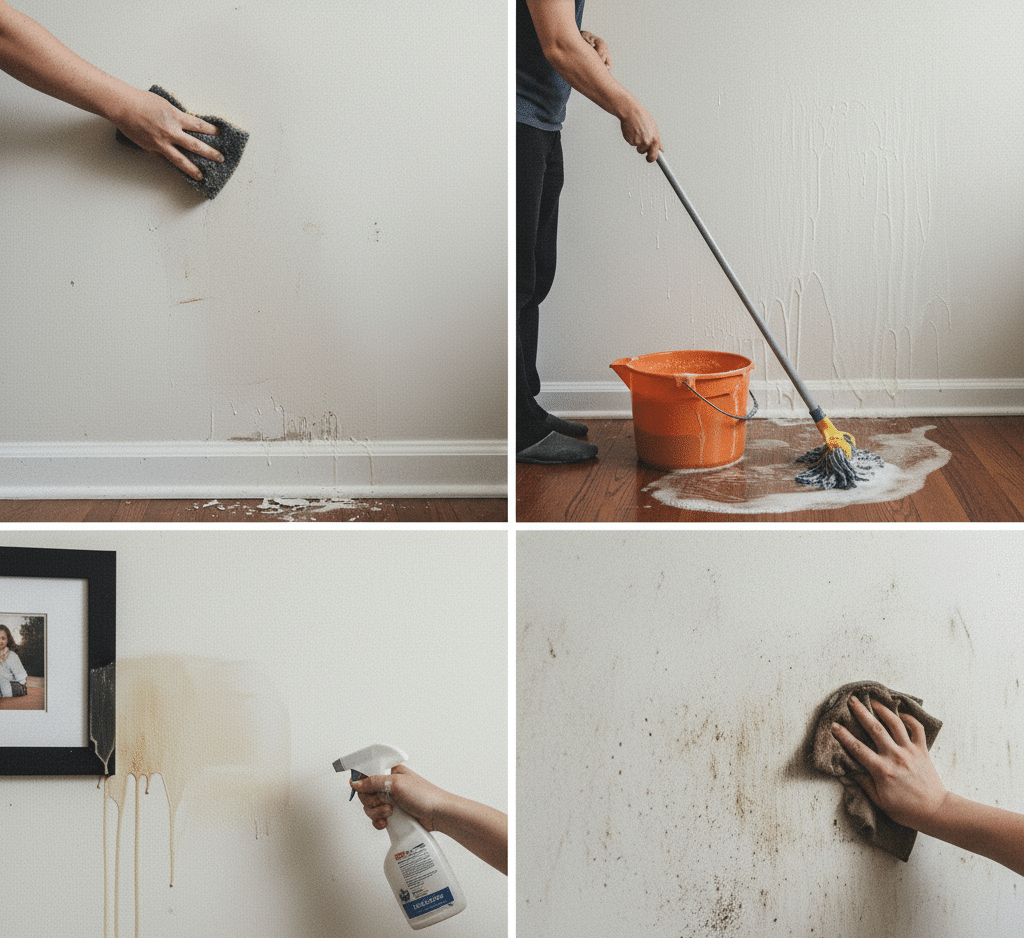
As the final weeks of winter drag on, we often find ourselves looking down. We scrutinize the floors for salt stains, check the carpets for crumbs, and inspect the grout lines for discoloration. Our concept of a clean home is largely horizontal, defined by the surfaces we walk on and the tables we eat from. However, this perspective ignores the vast majority of the square footage in any room: the vertical topography. The walls, doors, and baseboards constitute a massive surface area that, while not subjected to foot traffic, is subjected to a relentless atmospheric assault. During the long, sealed-up months of winter, these surfaces become magnetic traps for a specific type of grime that is often invisible to the naked eye until the unforgiving light of spring exposes it. Understanding the physics of this accumulation and the precise technique required to remove it is the missing link between a house that looks tidy and a house that feels profoundly clean. Static Electricity Station To appreciate the necessity of wall washing, one must understand the behavior of air in a heated home. Winter is the season of static electricity. The furnace pumps dry, warm air through the house, lowering the humidity levels significantly. This dry air generates a static charge on the vertical surfaces of your home, effectively turning your painted drywall into a magnet. Simultaneously, the heating system creates convection currents. As warm air rises and cool air falls, it creates a continuous cycle of circulation that carries microscopic dust, pet dander, cooking oils, and soot from candles or fireplaces. When this particulate matter brushes against the statically charged walls, it clings. It does not settle lightly like dust on a bookshelf; it bonds. Over months, this creates a uniform, grey film that dulls the color of the paint and absorbs light, making the room feel smaller and dimmer. This accumulation is often most visible in the form of “thermal tracking” or “ghosting.” If you look closely at the areas above your baseboard heaters or near your air vents, you may see faint, dark vertical streaks. This is caused by the temperature difference between the wall studs and the insulation, which affects how condensation and dust adhere to the paint. It is a visual map of the airflow in your home, drawn in soot and skin cells. Ignoring this buildup does not just degrade the aesthetic of the room; it degrades the air quality. The walls act as a reservoir for allergens. Every time a door is slammed or a draft blows through, microscopic particles detach from the wall and re-enter the breathing zone. Therefore, washing the walls is not merely a cosmetic task; it is a respiratory intervention essential for the transition into allergy season. However, the act of washing a wall is fraught with peril for the uninitiated. The most common and disastrous mistake is the direction of the clean. Intuition tells us to start at the top and work our way down, letting gravity help us. In the context of painted walls, gravity is the enemy. If you apply a wet sponge to the top of a dry, dirty wall, water will inevitably squeeze out and trickle down in long, narrow rivulets. These drips cut through the layer of dry dust and soot, creating clean streaks against the dirty background. The dry, porous paint absorbs this dirty water instantly. If you then try to wipe these streaks away, you will find they are permanent. You have essentially stained the wall with cleanliness. Prevent To prevent this streaking, you must adopt the professional “bottom-up” technique. It feels counter-intuitive, but it is chemically sound. You begin washing at the baseboard and work your way up to the ceiling. By wetting the lower section first, any drips that run down from your sponge as you move higher will land on a surface that is already wet and clean. A drip on a wet surface does not soak in; it floats on top of the film of water and can be easily wiped away without leaving a mark. This technique ensures a uniform finish without the “crying” lines that ruin a paint job. Furthermore, the cleaning solution should be mild. A mixture of warm water and a scant amount of dish soap or a specialized pH-neutral wall cleaner is sufficient. Harsh chemicals can strip the sheen off eggshell or satin paints, leaving dull patches that are just as unsightly as the dirt. The baseboards represent the horizon line of this vertical landscape, and they suffer a unique form of abuse. They act as the bumper rails for the vacuum cleaner and the collection shelf for everything that gravity pulls to the floor. In winter, the dust that settles on baseboards often mixes with the residual humidity from the bathroom or kitchen, turning from a loose powder into a grey, paste-like sludge that clings to the intricate profiles of the molding. The mistake most homeowners make is introducing water too early. If you take a wet rag to a dusty baseboard, you create mud. This mud gets pushed into the corners and caulking lines, where it dries into a dark, hard grout. The protocol for baseboards must be a two-stage process: dry removal followed by wet cleaning. First, the loose dust must be evacuated using a vacuum with a brush attachment or a dry microfiber duster. Only once the dry debris is gone should you introduce a damp cloth to remove the adhered grime. To protect your back and knees—baseboard cleaning is notoriously physically punishing—utilize tools with extension handles. A flat microfiber mop, usually reserved for floors, can be turned on its side to scrub long stretches of baseboard efficiently from a standing position. This ergonomic adjustment transforms a back-breaking chore into a manageable walkthrough. Doors and Switch Plates While walls and baseboards collect environmental debris, doors and switch plates collect biological evidence. These are the high-touch zones of the home. Consider the area around a light switch or a
Don’t Ruin Your Walls: 5 Common Mistakes Homeowners Make When Washing Walls Read More »