Home Improvement

a clean and organized garage

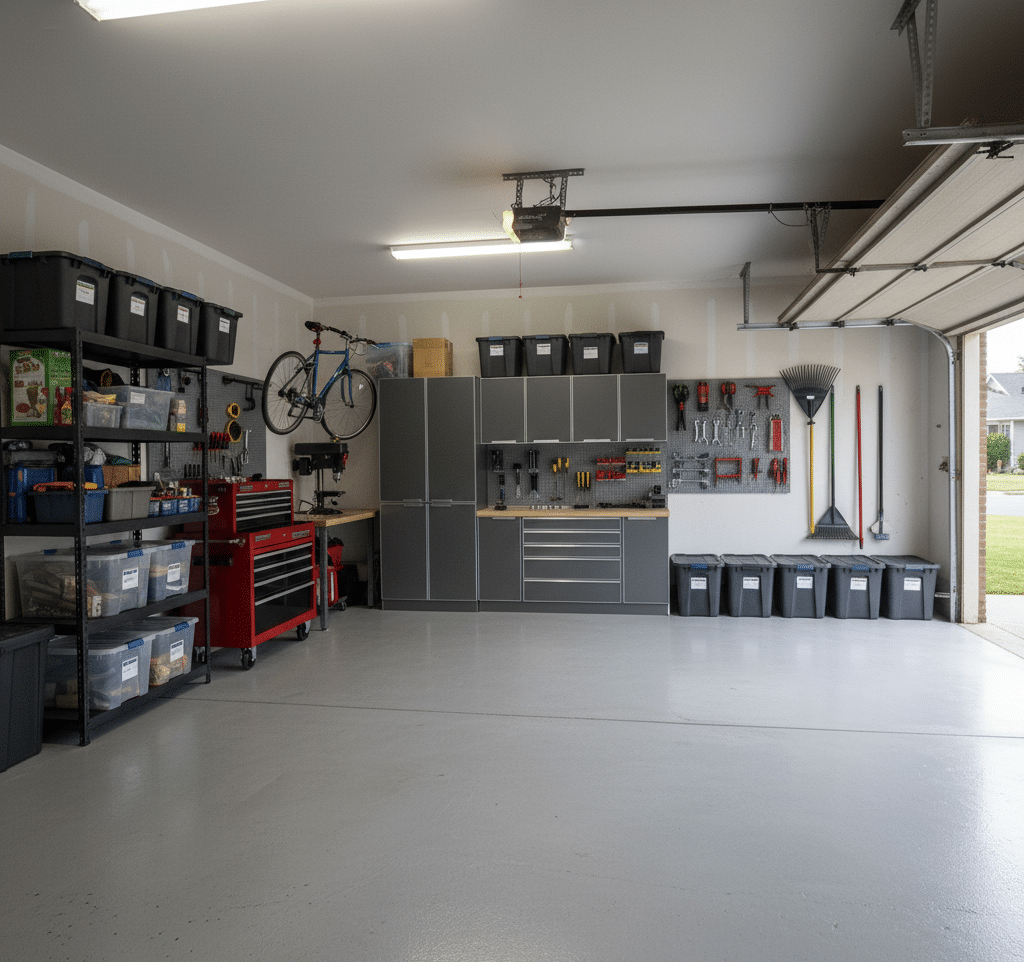
Garage Cleaning: 5 Effective Strategies to Keep Your Garage Organized

The garage is the forgotten room. It is the one space in the home that is allowed to descend into a state of organized, and then disorganized, chaos. It begins as a home for your car, a place for your tools. But slowly, inevitably, it becomes the household’s dumping ground. It is the final destination for items that have no other place: the broken lawnmower, the half-empty cans of paint, the boxes from a move that happened five years ago, the sporting equipment for a hobby long since abandoned. Before you know it, parking a car inside is a distant memory, and finding a specific screwdriver requires an archaeological dig. Cleaning the garage is not like cleaning a kitchen. It is not a simple task of wiping surfaces and mopping floors. It is a project. It is an act of reclamation, of taking back a significant portion of your home’s square footage and returning it to a state of function and purpose. It is a process that can feel overwhelming, but when broken down into a systematic, manageable plan, it is entirely achievable. This is not about a quick tidy-up; this is about a full-scale reset. 1.Preparation and Strategy Before a single box is moved, the project must be planned. The single biggest mistake people make when tackling a garage is underestimating the scope of the job. This is not a two-hour task. For the average cluttered garage, you need to dedicate an entire weekend. Block it out on your calendar. Arrange for kids or pets to be elsewhere. Treat it with the seriousness of a home renovation project, because in many ways, it is. The second part of preparation is gathering your supplies. Going into this battle unarmed is a recipe for frustration and failure. You will need a specific set of tools for sorting, and another for the deep cleaning that will follow. For Sorting and Decluttering: Heavy-Duty Trash Bags: You will generate more trash than you think. Get more bags than you think you will need. Sturdy Boxes or Bins: These will be for items you intend to keep, donate, or sell. A Labeling System: A thick permanent marker and either labels or masking tape are essential. Every box must be clearly marked with its intended destination. For Cleaning: Safety Gear: At a minimum, you need heavy-duty work gloves to protect your hands from dirt, sharp objects, and chemicals. A dust mask is also critical, as you will be kicking up years of dust, dirt, and potentially mold spores. Safety glasses are a good idea, especially when sweeping and dealing with chemicals. Broom and Dustpan: A stiff-bristled push broom is ideal for the large floor surface. Shop-Vac: A standard household vacuum is no match for a garage. A shop-vac can handle everything from fine dust and sawdust to dead leaves, cobwebs, and small debris. Buckets: You will need at least one large bucket for your cleaning solution. Scrub Brushes: A long-handled deck brush is excellent for the floor, and a smaller, handheld stiff brush is good for corners and stubborn spots. Cleaning Agents: A heavy-duty degreaser is non-negotiable for tackling oil and fluid stains on the concrete floor. You may also want a powdered concrete cleaner or a simple, strong all-purpose cleaner. Rags and Sponges: A large supply of old rags is necessary for wiping down surfaces and for the final detailing. 2.Evacuation and Purge The most effective, albeit intimidating, method for decluttering a garage is to remove everything. Every single item must come out. The goal is to get the garage completely empty, creating a blank canvas for the deep clean and a forcing mechanism for decision-making. Wait for a clear, dry day and use your driveway as a staging area. As you pull items out, immediately begin sorting them into four distinct categories. This is where your boxes and labels come into play. Keep: This category is exclusively for items that you use, need, and that belong in the garage. Be ruthless. If you haven’t used a tool in over a year, do you really need to keep it? Is that box of old cables for electronics you no longer own providing any value? The garage is functional space, not a museum of past projects. Donate/Sell: These are items that are in good, usable condition but no longer serve a purpose for you. Old sporting equipment, tools you have duplicates of, functional but unused garden supplies. Place these directly into designated boxes. Once a box is full, tape it shut and label it. This prevents you from second-guessing your decisions. Trash/Recycle: This will likely be your largest category. Be prepared to fill several bags. This includes broken tools, expired chemicals, dried-up paint, rotten wood, and anything that is simply junk. Pay close attention to hazardous waste. Old paint, motor oil, pesticides, and other chemicals cannot simply be thrown in the regular trash. Check with your local municipality for hazardous waste drop-off locations and procedures. Group these items together for a separate, responsible disposal run. Relocate: You will inevitably find things that do not belong in the garage. Kitchen appliances, sentimental photo albums, out-of-season clothing. These items have been stored in the garage out of convenience, not logic. Put them in a “Relocate” box to be moved to their proper place inside the house later. Do not get sidetracked by taking them inside now; stay focused on the garage purge. As you work, you will be tempted to create a “maybe” pile. Resist this urge. Indecision is the enemy of progress. If you truly cannot decide on an item, place it in a single “quarantine box.” Seal the box and write a date on it six months in the future. If you have not needed to open that box by that date, take the entire unopened box directly to a donation center. 3.The Deep Clean With the garage completely empty, you can now see the true state of the space. It is time for the top-to-bottom clean. This is a fundamental principle of cleaning: start high and work your way

Garage Cleaning: 5 Effective Strategies to Keep Your Garage Organized Read More »
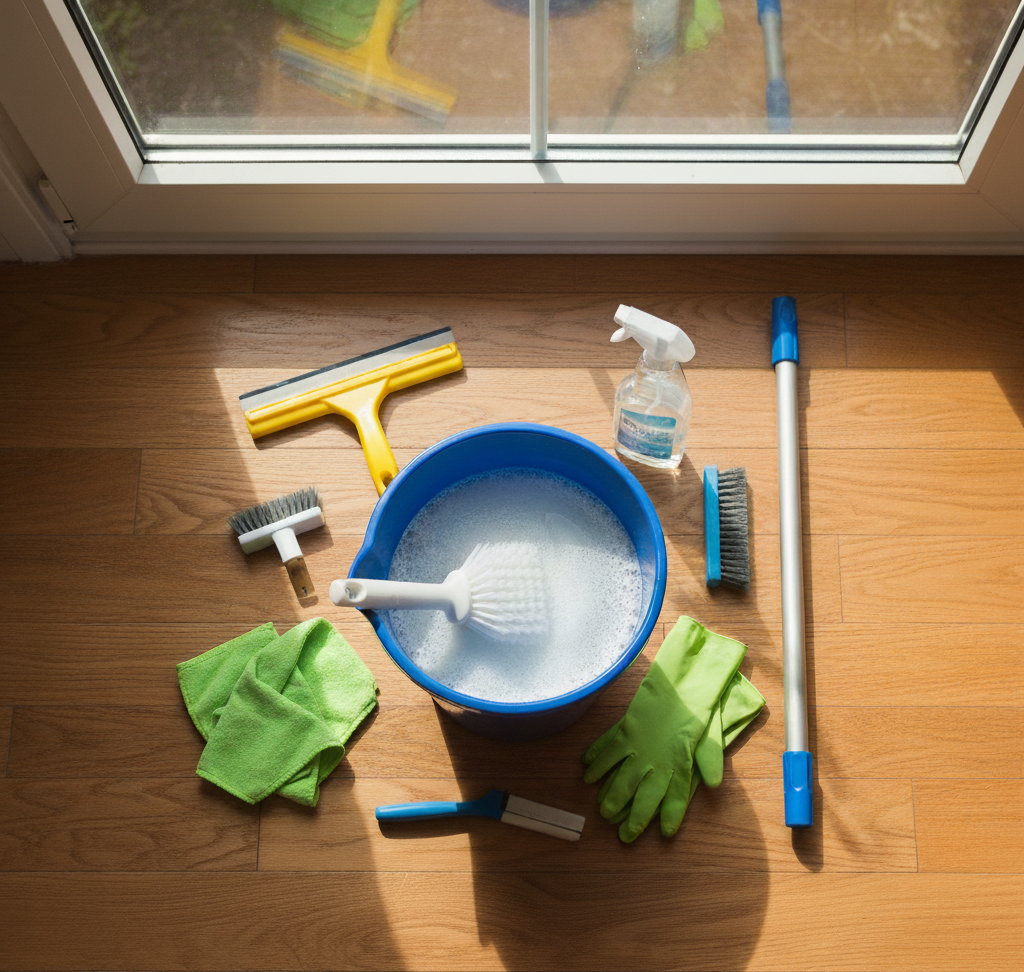
essential window cleaning tools

7 Essential Window Cleaning Tools Every Home Needs

7 Essential Window Cleaning Tools for Streak-Free Glass A spray bottle of blue liquid and a roll of paper towels will never give you a professional finish. That approach mostly moves dirt around, leaves a static-attracting residue, and deposits lint on the glass. Professional window cleaning tools are not complicated, but each one is designed to work with the others to remove dirt and water completely and efficiently. Here are the seven essentials every home needs. 1. Squeegee The squeegee is the heart of the operation and the single most important tool in the kit. A professional squeegee has a comfortable handle, a metal channel that holds the blade perfectly straight, and a soft, pliable rubber blade with a sharp, square edge. A nicked or rounded blade leaves streaks no matter how good your technique is. A 10 or 12 inch squeegee is a versatile starting point for most homes. 2. Scrubber or T-Bar Before the squeegee can dry the glass, the window must be scrubbed. The applicator, also known as a scrubber or T-bar, holds a removable microfiber sleeve that carries a significant amount of cleaning solution. Its texture agitates and lifts grime without scratching the glass. Choose a scrubber a couple of inches wider than your squeegee so every pass gets full coverage. 3. Bucket Any bucket can hold water, but professionals use a rectangular bucket wide enough to fully submerge the scrubber and squeegee, so the tools are evenly wetted. Many have side clips that keep your tools out of the dirty water and ready for use, which makes the whole process cleaner and more organized. 4. Soap The cleaning solution is a lesson in simplicity. The goal is not a mountain of suds, which are hard to remove and leave a film. Professionals use highly concentrated, biodegradable soaps that add slip to the water so the squeegee glides smoothly. For home use, a few drops of clear dish soap in a gallon of cool water is enough to break surface tension and lift grease. Too much soap causes streaks, because the water does the cleaning and the soap is only there to help. 5. Microfiber Cloths Microfiber cloths are the detailing tools that separate a good job from a perfect one. They are highly absorbent and, most importantly, lint-free. Keep at least two: one for wiping frames and sills before you start, and a completely dry one for wiping the squeegee blade between strokes and detailing the edges of the pane when you finish. 6. Scraper For paint overspray, dried bug residue, or adhesive, a proper window scraper holds a single-edge razor blade at a safe angle. The absolute rule is that the glass must be wet: using a scraper on dry glass guarantees scratches. On a wet, lubricated surface it removes the most resilient grime without leaving a mark. 7. Extension Pole For windows out of reach, an extension pole is a much safer alternative to a ladder. Professional scrubber and squeegee handles attach securely to the pole, letting you clean second-story windows from the ground while improving safety and speed. Falls are a leading cause of injury, and the CDC tracks fall data for good reason, so reducing ladder use around the home is smart. Window Cleaning Technique That Works Wet the glass with the scrubber, working the solution over the whole pane. Scrub away the dirt, then remove the dirty water with the squeegee. Wipe the squeegee blade with a dry microfiber cloth after each pass. Detail the edges of the pane and wipe the sill to finish. Keeping window sills and tracks dry also prevents mold from growing around windows, where moisture tends to collect. Window Cleaning Tools at a Glance Tool Role Pro Tip Squeegee Removes water and solution from glass Keep the rubber blade sharp and square Scrubber or T-bar Wets and scrubs the glass surface Pick one wider than the squeegee Bucket Holds solution and tools Use side clips to keep tools out of dirty water Soap Adds slip for a smooth glide A few drops of clear dish soap per gallon Microfiber cloths Detail frames, edges, and sills Keep one dry for blade and edge work Scraper Removes paint, bugs, and adhesive Only use on wet glass Extension pole Reaches upper windows safely Safer than a ladder for second-story panes Frequently Asked Questions What is the best homemade window cleaning solution? A few drops of clear dish soap in a gallon of cool water. It breaks surface tension and lifts grease without creating the heavy suds that leave film and streaks on glass. How often should windows be cleaned? Interior windows every one to two months, and exterior windows at least twice a year, more often in spring and fall when pollen and dust are heaviest. Why do my windows streak after cleaning? Streaks usually come from a nicked squeegee blade, too much soap, or drying the glass with a linty cloth. Check the blade, cut the soap, and finish with a dry microfiber cloth. Can I clean second-story windows without a ladder? Yes. An extension pole with a scrubber and squeegee attachment lets you reach upper panes from the ground, which is safer and faster than balancing on a ladder. Every tool in this system has a purpose, and together they produce a result that consumer products cannot match. For a flawless finish without the hassle, Toronto Shine Cleaning uses this exact system of professional-grade window cleaning tools so your windows are impeccably clean every time. Pair it with a deep cleaning service, book regular maid service, review our pricing, or contact us at (647) 424-0355 from any of our locations.

7 Essential Window Cleaning Tools Every Home Needs Read More »

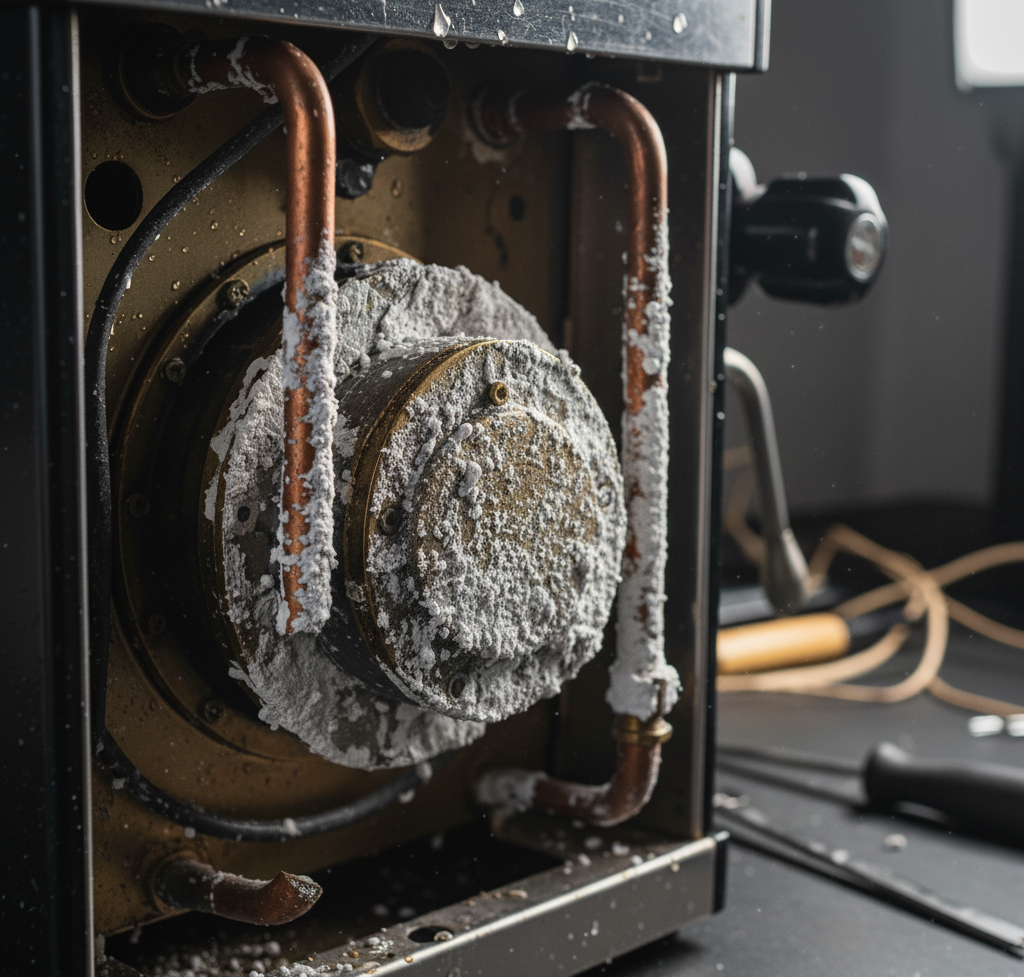
scale buildup in an espresso machine

Descaling Agent: Essential Tips On How To Use This Cleaning Product

Descaling Agent: Essential Tips on How to Use This Cleaning Product Limescale is the silent buildup that infiltrates appliances wherever hard water flows. Every time water evaporates, traces of calcium carbonate and magnesium stay behind, hardening over time into a stubborn crust. That scale is not just unsightly; it threatens how efficiently your most-used appliances run, how long they last, and even their hygiene. The countermeasure is a descaling agent, and knowing how to choose and apply one turns a vague chore into simple preventative upkeep that saves money and adds years of life to your machines. The Chemistry: Why Acid Dissolves Limescale Understanding a descaler is understanding basic chemistry. Limescale is alkaline, so only an acid can dismantle it. A descaling agent is essentially a buffered acidic liquid engineered to attack mineral crusts safely: the acid reacts with calcium carbonate and converts the scale into water-soluble substances you can flush away. The stakes are highest in appliances that heat water. Heating elements attract limescale: as water heats, minerals precipitate faster and coat the element in an insulating layer. The machine then burns noticeably more energy to hit the same temperature, driving up electricity bills, and chronic overheating can eventually burn the element out. Kettles, coffee makers, washers, and dishwashers all qualify. Pantry Descaling Agents: Vinegar, Citric Acid, and Lemon For many routine jobs, simple non-toxic household acids work perfectly, and Health Canada’s tips for using household chemicals safely apply to them just as they do to commercial bottles: read labels, ventilate, and protect your skin. White vinegar (acetic acid): the most accessible descaler, strong enough for light to moderate buildup. It is inexpensive and multi-purpose, but the strong, lingering odor demands thorough rinsing, and it may lack punch against very heavy, long-term scale. Use it for routine care of kettles, drip coffee makers, and showerheads. Citric acid: sold as a powder in grocery and bulk food stores, it is a more powerful acid that works faster on tougher scale, and its big advantage is being completely odorless, so it will not leave a vinegar aftertaste in coffee or tea. Most commercial eco-friendly descalers are simply citric acid in a box, and it is highly effective and safe for most applications. Lemon juice: a weaker form of citric acid for very light tasks like faucet water spots and surface film. Not strong enough for appliance interiors, but useful externally, and it leaves a fresh scent. Commercial Descalers: When to Buy the Bottle Serious buildup or delicate, high-end appliances call for a formulated product. Health Canada’s overview of household product safety reminds you to follow label directions on dilution and contact time for any cleaning chemical. Two families dominate: Formic acid or sulfamic acid descalers: industrial-strength acids common in products designed for high-performance espresso machines and specialized equipment. They work very quickly and remove heavy scale extremely well, but they are potent: handle them with care, follow the label’s dilution and contact-time instructions precisely, and wear gloves. Lactic acid descalers: a gentler, plant-derived, biodegradable option. Because lactic acid is less corrosive than the stronger acids, it stays safe across a wide range of appliances while still delivering excellent descaling power. Practical Descaling Methods Appliance by Appliance Appliance Method Electric kettle Fill halfway with equal parts white vinegar and water, boil, then let it sit for an hour before pouring out and rinsing thoroughly. For an odorless clean, boil one to two tablespoons of citric acid powder in a half-full kettle, let it sit, and rinse: the scale dissolves completely. Drip coffee maker Scale slows brewing, disrupts water temperature, and makes coffee taste bitter and chalky. Run a reservoir of equal parts vinegar and water through a full brew cycle with a clean filter in place, discard it, then run two to three cycles of fresh water to rinse out all residue and taste. Espresso machine Check the user manual first. Many makers warn that vinegar’s acidity can harm internal aluminum parts and rubber seals over time, so they specify a commercial descaler instead. Typically you run the solution through via the reservoir, then rinse extensively so every trace is flushed out. Washing machine and dishwasher Run the empty machine on the hottest, longest cycle. In the washer, add two cups of white vinegar or half a cup of citric acid to the detergent dispenser. In the dishwasher, set a bowl holding a cup of vinegar on the top rack, or sprinkle half a cup of citric acid across the bottom. This clears scale plus soap scum. Showerhead and faucet Erratic spray or reduced flow usually means scale. For the baggie method, pour white vinegar into a sturdy plastic bag, submerge the head or aerator, and secure the bag with a rubber band or twist tie. Soak several hours or overnight, remove the bag, run the water to flush dissolved scale, and scrub leftovers with an old toothbrush. Safety Precautions Before You Pour Know your materials: acids etch unsealed natural stone such as marble, travertine, and limestone, so keep vinegar and other acidic cleaners off them, and show caution with cast iron and some aluminum surfaces. Follow commercial descaler directions precisely for dilution and contact time. Ventilate the area, since fumes from vinegar and stronger descalers are irritating. Rinse thoroughly, especially in anything that handles food or beverages; multiple fresh-water passes prevent residue and aftertaste. Wear gloves with any descaling product, natural or not, to avoid skin irritation. Descaling belongs inside a proper deep clean, and if mineral neglect has spread beyond your kettle, our deep cleaning service tackles hard-water buildup through the whole house. Lighter upkeep fits a regular maid schedule, and prep for a move is covered under move in and out cleaning. Frequently Asked Questions About Descaling Agents Which is better for a kettle, vinegar or citric acid? Both dissolve scale well. Vinegar comes straight from the pantry but leaves a strong odor and needs rinsing; citric acid is odorless, works faster, and is the safer bet if

Descaling Agent: Essential Tips On How To Use This Cleaning Product Read More »

Back to School and Home Clean

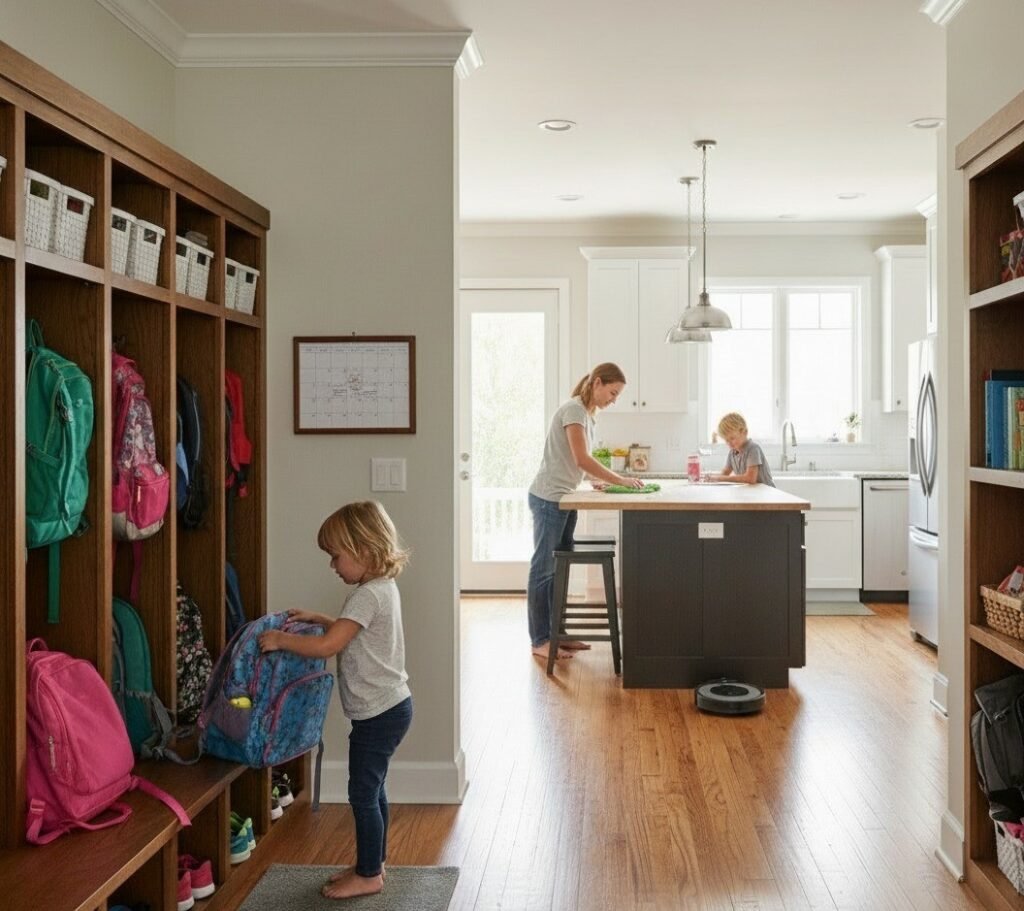
Back to School: 7 Effective Ways to Keep Your Home From Turning Into Chaos

September in Canada is a vibrant month of energy and back to school time. The leaves begin to change color, the air grows crisp, and the country prepares for the autumn season. At the heart of every home, the most significant transition is the much-anticipated Back to School period. Mornings become more hurried, evenings are filled with homework and extracurricular activities, and the constant flow of backpacks, lunchboxes, and outdoor shoes can quickly transform an organized house into chaos. For Canadian families, this Back to School period demands more than just buying school supplies; it requires an adaptation of household routines, especially in cleaning and organizing, to ensure that the home remains a sanctuary of peace and order amidst the bustle of the new Back to School season. A well-managed home during this time is not only more pleasant to live in but also a fundamental pillar for the well-being and productivity of all its members. The Chaos of the Back to School Period The end of summer and the start of the academic year bring with them a host of new challenges for home organization and hygiene. Suddenly, the spaces that once housed summer play now need to accommodate school uniforms, books, art supplies, and gear for countless after-school activities. The increased traffic of children and teenagers entering and leaving the house means more dirt, more germs, and often, more clutter. Backpacks dropped by the entrance, papers scattered across the kitchen table, damp gym clothes on the bedroom floor, these are familiar scenarios for many Canadian families as the Back to School rush begins in September. Furthermore, the school environment is a fertile ground for the spread of germs. Children bring home not only new knowledge but also the viruses and bacteria circulating in classrooms, elevating the importance of cleaning focused on disinfection. Adapting cleaning strategies to face this new rhythm is essential for maintaining health and sanity at home during the Back to School transition. 1.Key Areas of Focus for Back to School Clean-up To combat the chaos of the Back to School season, it’s crucial to concentrate cleaning and organizing efforts in areas most impacted by the school routine: Entrances and Mudrooms: These are the first lines of defense against outdoor dirt. In many Canadian homes, the mudroom or entry area quickly becomes a repository for dirty shoes, coats, backpacks, and lunchboxes as everyone rushes for Back to School. To prevent dirt from spreading throughout the house and to maintain order: Create Designated Zones: Install hooks for coats and backpacks, and trays or shelves for shoes. This prevents items from piling up on the floor. Daily Cleaning: Sweep or vacuum this area daily. In Calgary and other Canadian cities, shoes track in a lot of dirt, especially as the weather begins to change. Regular Disinfection: Wipe down doorknobs and surfaces that hands frequently touch with a disinfectant, vital during Back to School germ season. The Kitchen: The kitchen shifts from a place of relaxed summer meals to a headquarters for lunchbox prep and quick meals, a core part of the Back to School routine. Lunchbox Organization: Dedicate a cupboard or shelf for lunchboxes and water bottles. Wash them immediately after use and allow them to dry. Countertop Cleaning: Wipe and disinfect countertops after each food and snack preparation. Crumbs and spills are inevitable. Refrigerator Organization: With more food being prepared and stored, keep the refrigerator organized and clean up spills immediately. Spotless Sink: Encourage immediate washing of dishes or loading the dishwasher to prevent accumulation. Study Areas and Desks: With homework in full swing, these areas can quickly become disorganized as part of the Back to School workload. Keep It Simple: Encourage a clean and minimalist study space to reduce distractions. Material Storage: Use desk organizers, drawers, and shelves to store pens, papers, books, and school supplies. Regular Cleaning: Dust and wipe down desk surfaces regularly. Encourage children to put away their materials after each study session. Bedrooms: Bedrooms can easily become clutter zones with clothes and personal items, especially with the morning Back to School rush. Make the Bed: The habit of making the bed every day creates a foundation of order for the room. Laundry Hampers: Ensure each bedroom has a laundry hamper to prevent clothes from ending up on the floor. Quick Tidy-Up Routine: Teach children to spend 5-10 minutes before bedtime tidying their rooms, putting away clothes and toys. Bathrooms: With increased exposure to germs at school, bathrooms need extra attention during the Back to School period. Daily Wipe-Down: Quickly wipe down the sink and toilet to remove visible dirt. Frequent Disinfection: Use a disinfectant on doorknobs, faucets, toilets, and light switches several times a week. Clean Towels: Encourage the use of clean face and hand towels daily or every other day. 2.Implementing New Routines The secret to maintaining order during the Back to School season is establishing routines that become habits: Daily Power Clean (15-20 Minutes): At the end of the day, just before the family settles down, do a collective 15-20 minute “power clean.” Each family member can have a task: one tidies the living room, another puts away dishes, another wipes kitchen countertops. This ensures you wake up to a relatively organized home, setting a positive tone for the next day as the Back to School routine begins again. Weekly Zone Cleaning: Instead of trying to clean the entire house in one day, divide the house into “zones” and dedicate one day of the week to each. This approach is highly effective for managing cleaning tasks alongside Back to School schedules. Envolve the Children: Cleaning should not solely be the parents’ responsibility. Assign age-appropriate chores to children. Making cleaning a family effort not only distributes the load but also teaches responsibility and the value of a clean environment, crucial lessons during the Back to School transition. 3.Fighting Back-to-School Germs With increased social interaction at schools, disease prevention becomes a priority. High-Touch Surfaces: Focus on regularly disinfecting doorknobs, light switches, remote controls, cell phones, and other frequently touched surfaces, especially important as children bring home germs during Back to School. Hand Hygiene: Reinforce the habit of frequent handwashing, especially upon returning home from school, before meals, and after using the bathroom. Keep hand sanitizer available in strategic areas. Lunchboxes and Water Bottles: Wash lunchboxes and water

Back to School: 7 Effective Ways to Keep Your Home From Turning Into Chaos Read More »

getting ready for fall cleaning

September Cleaning: 7 Quick And Easy Steps To Get Ready For Fall

Why September Is the Month to Reset Your Home In Canada, September closes out summer and opens the long indoor season. The house needs more than a dust-off: it needs a cleanout that removes the clutter and grime of the warm months and readies every room for the weeks when windows stay shut and family time moves inside. A systematic September cleaning pays off twice, once in a healthier, calmer home right away and again in easier living all winter. Work in order, from planning and decluttering through room-by-room detail, and the whole project becomes manageable instead of overwhelming. Plan the Project Before You Spray Anything Start by scheduling time blocks for each area or task type, which turns a mountain into a list of afternoon-sized steps. Then take inventory of your supplies so you are never hunting for a bottle mid-task. Microfiber cloths, a vacuum with attachments, a mop, buckets, and protective gloves All-purpose cleaner, disinfectant, glass cleaner, bathroom cleaner, and floor cleaner Eco-friendly, non-toxic products if children, pets, or allergy sufferers live in the house Declutter First With the Three-Box Method Every room gets sorted before any cleaning starts, using three boxes: keep and organize, donate or sell, and trash or recycling. Begin with summer gear, so beach equipment, garden decorations, and warm-weather clothes get packed away. Work through clothing, toys, books, and stationery; clear the pantry and refrigerator of expired food and regroup what stays; gather papers and magazines into categories; and rotate the wardrobe so autumn layers sit at the front. Fewer objects means less dust to chase and fewer surfaces to wipe. When you finish, deliver the donation box the same week so it does not become clutter again. Kitchen Deep Clean for the Season The kitchen earns the most attention because it feeds everyone. Clean the oven interior and its grease and residue, wash the microwave inside and out, and empty the refrigerator fully, wiping shelves and drawers with mild soap and water. Run the dishwasher on a vinegar cycle to clear deposits and odours. Wipe cabinets and drawers inside and out, scrub countertops and backsplashes, disinfect the sink and faucets, and freshen the garbage disposal. Finish by mopping or steaming the floor. Bathrooms, Bedrooms, and Living Areas Bathrooms Scrub toilets, showers, and tubs, and attack the tile grout where mold and mildew settle. Wash or replace the shower curtain and liner, clean mirrors and light fixtures, disinfect every contact point from faucets to doorknobs and switches, then wash and disinfect the floor. Toss expired products from the medicine cabinet while you are in there. Excess moisture is what invites bathroom mold in the first place, and Health Canada’s advice on reducing humidity, moisture, and mould is worth applying to every damp room before winter closes the house up. Bedrooms Launder all sheets, duvets, and blankets along with the curtains. Vacuum the mattress and flip or rotate it to extend its life. Dust furniture, light fixtures, and ceiling fans, vacuum or mop including under the bed, and rebuild the closets with the seasonal clothing swap you prepped during decluttering. Living spaces Dust every piece of furniture, electronic, and decorative item, vacuum or shampoo the upholstery, clean the windows and the blinds or curtains covering them, and refresh the floors. Give extra passes to remote controls, light switches, and doorknobs, the surfaces everyone touches and nobody cleans. Entryways, Laundry Room, and the Spots Everyone Forgets Hallways and entryways take the first hit from outdoors, so clear shoe racks and coat hooks, wipe scuff marks off the walls, and vacuum or mop deeply to lift tracked-in mud and debris. In the laundry room, wipe the washer and dryer exteriors, scrub the dryer lint trap thoroughly for efficiency and fire safety, wash the utility sink, and organize detergents. Then walk the house for the overlooked list: Area September task Why it matters before winter Windows Clean inside and out Maximizes the weak natural light of the darker months HVAC filters Clean or replace Indoor air quality suffers once windows stay closed, and Health Canada’s overview of indoor air contaminants explains the health stakes Walls, baseboards, doors, and frames Wash away marks and dust Trapped grime ages fast under winter heating Light fixtures and ceiling fans Dust and wash Dull fixtures dim every room Trash cans and small appliances Disinfect bins; wash toaster, coffee maker, kettle Odours build quickly in closed-up houses Patio furniture, barbecue, bikes, garden tools Clean, then store Protects equipment through freeze-thaw weather Carpets and rugs Deep clean Removes summer grit before winter traffic grinds it in Maintenance: Keep the Reset From Slipping The September clean buys you a fresh baseline; daily habits defend it. Reinforce quick mini-cleaning sessions after dinner, hold a weekly schedule that rotates deeper tasks room by room, and do a seasonal check-in each quarter to adjust for what the new weather demands. Smart storage solutions protect your organization gains, and delegating tasks among household members keeps the workload shared instead of dumped on one person. September Cleaning FAQ How long does a full September cleanup take? Most homes need several sessions across one or two weekends once you plan, declutter, and clean room by room. Time-blocking the rooms in advance keeps any single day from feeling impossible. Should carpets really be cleaned in the fall? Yes. Summer drags in dirt and allergens that settle deep into pile, and a clean carpet improves indoor air for the months when windows barely open and foot traffic moves indoors. What is the one step people skip most? Replacing heating and air conditioning filters. It is quick, cheap, and it does more for winter air quality than any surface scrub. When should I outsource the whole project? If the season’s cleanout lands in one packed weekend, a professional deep clean handles the rooms and details while you handle everything else. Pair it with a move-in or move-out service if the fall also brings a lease change. Treat the September reset as an investment

September Cleaning: 7 Quick And Easy Steps To Get Ready For Fall Read More »

Clean-Looking House vs. Sanitized House

Clean-Looking House vs. Sanitized House: Why It’s More Important Than You Think

Clean-Looking House vs. Sanitized House: Why the Difference Matters A tidy home can be a deceptive space. Countertops gleam, cushions are fluffed, and floors show no visible debris, which is exactly the picture most of us aim for during a weekly clean. Yet this visual order has little to do with the true hygienic condition of the home. That tidy look is an aesthetic victory built for optics: damp cloth swipes over counters, one fast vacuum pass, clutter hurried into closets before guests arrive. A sanitized house, by contrast, is defined by science rather than looks, with germs, bacteria, viruses, and fungi reduced to levels considered safe for human health. Understanding the gap between the two is the first step toward a home that genuinely protects your family. The Limits of a Clean-Looking Home Chasing a visibly tidy space is not pointless. Living in cluttered, visibly dirty surroundings contributes to stress, while tidying and organizing have real psychological benefits and create a calmer, more restful home. The problem is that the very tools used to create that look can spread the unseen world. A damp sponge that has been used for days removes crumbs while spreading millions of bacteria across the counter it is meant to clean. A dust cloth moves particles around, some of which float into the air and settle again later. A vacuum without a HEPA filter can suck allergens from the carpet and blast them back out of the exhaust. Appearance-based cleaning manages the macro while the micro is left to thrive. Cleaning, Sanitizing, and Disinfecting Are Not the Same These three words are often used as synonyms, but they describe different levels of action, and each has its place. Process What It Does Where It Matters Cleaning Removes visible soil, dirt, and organic matter with soap, water, and friction Everywhere; it is the required first step before any chemical treatment Sanitizing Lowers germs to a safe public-health level, killing 99.9% of specified bacteria in a short time Kitchen counters and sinks after food prep, and bathrooms Disinfecting Kills virtually all microorganisms, including hardy viruses and fungi Doorknobs, light switches, and remotes after illness; toilet bowls You cannot sanitize a dirty surface: soil gives germs a place to hide and can neutralize the chemicals, which is why the CDC’s home cleaning guidance says to clean first and disinfect when needed. Sanitizing a counter after wiping away crumbs actively targets bacteria like E. coli and Salmonella that cause foodborne illness, and sanitizing the sink where raw meat juices splashed is just as critical. Disinfection is more of a targeted intervention, such as treating surfaces after a family member has had the flu. The most overlooked ingredient in both is dwell time: the product must stay wet on the surface for the minutes listed on its label. Spraying and immediately wiping is often ineffective. Hotspots Where Appearance Hides Risk High-touch surfaces can look perfectly clean while carrying germs transferred from unwashed hands. Give regular attention to: Doorknobs, cabinet pulls, faucet handles, and the refrigerator door. Remote controls, keyboards, and cell phones. Kitchen details: the sink drain, faucet aerator, microwave handle, coffee maker buttons, and stove knobs. Bathroom details: the toilet base, toothbrush holder, and shower curtain or door. A polished stainless sink still hides biofilm in the drain, and a rinsed wooden cutting board can harbor bacteria in its knife grooves, risking cross-contamination between raw meat and fresh vegetables. In the bathroom, moisture at the toilet base and in the toothbrush holder fosters bacterial growth, while shower curtains and doors are prime spots for mold and mildew, which release spores that can affect respiratory health. Soft Surfaces and the Air You Breathe A truly sanitized home also includes what you cannot see: carpets, upholstery, and curtains act as giant filters that trap dust, pollen, pet dander, and microscopic organisms. A standard vacuum may lack the filtration to remove deep-down grit, so choose a HEPA-filtered model whose trapped particles are never recirculated, and every so often bring in professionals for hot water extraction or steam cleaning, whose heat kills dust mites, bacteria, and other deeply embedded allergens. Cleaning methods affect air quality too: harsh chemical cleaners release volatile organic compounds, while dry dusting sends allergens airborne. The healthier approach is damp-wiping with microfiber cloths, ventilating during and after cleaning, and using a HEPA air purifier where needed. For safe handling of any product you do use, Health Canada’s household chemical safety advice covers buying, storing, and disposing of cleaners correctly. Building a Sanitized Home Without Going Overboard Moving from a clean-looking house to a sanitized one is a shift in perspective: from reactive and appearance-based to proactive and health-based. It means reading labels, respecting dwell times, and focusing on hotspots rather than broad visible surfaces. A germ-free bubble is not the goal: full sterility is neither achievable nor desirable in a family home. The aim is smart management of the microbial world so your living space actively supports your well-being. Toronto Shine Cleaning specializes in exactly this gap between tidy and truly clean, with a deep cleaning service that reaches the hotspots above and regular maintenance cleanings that keep them that way. See our pricing, browse client reviews, or call (647) 424-0355 to book a healthier home. Frequently Asked Questions About Sanitizing Your Home What is the difference between cleaning and sanitizing? Cleaning removes visible dirt and organic matter with soap, water, and friction. Sanitizing is a chemical step that lowers remaining germs to a safe public-health level, killing 99.9% of specified bacteria in a short contact time. How long should a disinfectant stay on a surface? Long enough to stay wet for the dwell time printed on the product label, often several minutes. Wiping it away immediately defeats the purpose, so let the product sit before you dry the surface. Which surfaces should I sanitize most often? Food preparation areas, sinks, and bathrooms carry the highest risk, and high-touch spots like doorknobs, light switches, remotes, and phones

Clean-Looking House vs. Sanitized House: Why It’s More Important Than You Think Read More »

old Toothbrushes For Cleaning services

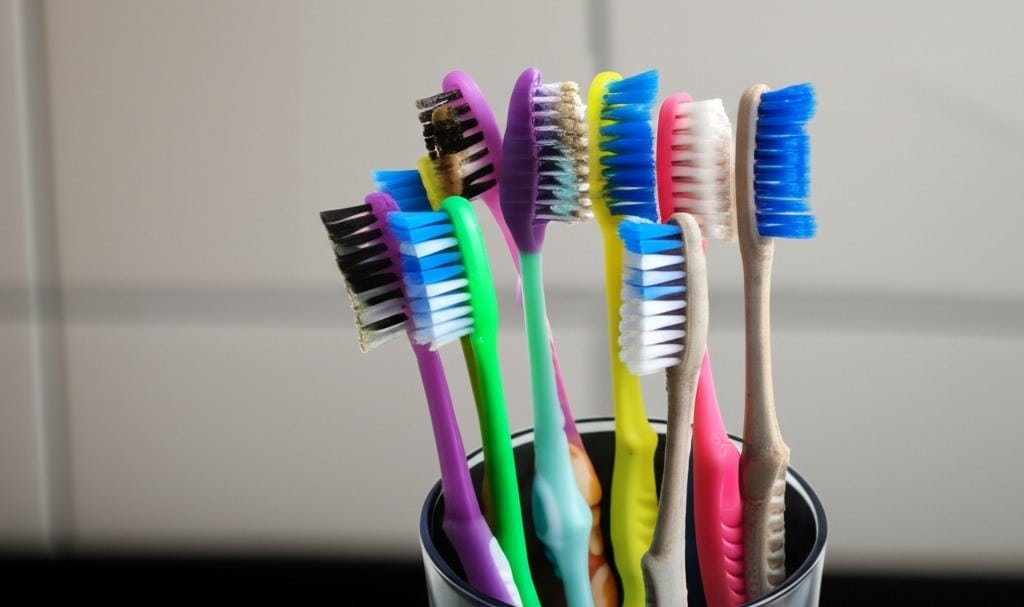
8 Efficient And Economical Ways To Use Old Toothbrushes For Cleaning

Before you discard that old toothbrush, consider its second life as a precision cleaning instrument. Its small head, firm bristles, and ergonomic handle make it an unparalleled tool for tackling the grime that accumulates in the tightest, most awkward spaces in your home. Its utility extends far beyond the bathroom sink, reaching into every room to restore detail and cleanliness where larger tools cannot. 1.Floor Joints In the kitchen, the toothbrush becomes an indispensable ally. Start with the grout lines on your tiled floor or backsplash. These porous channels are magnets for spilled coffee, sauce splatters, and general kitchen debris. A standard mop or sponge glides over them, but a toothbrush gets right in. Create a paste using baking soda and a small amount of water or, for tougher stains, a bit of hydrogen peroxide. Apply the paste directly to the grout and let it sit for a few minutes. Then, take your old toothbrush and scrub in small, circular motions. The bristles will agitate the paste and lift the embedded grime, restoring the grout to its original color. This same method works wonders on countertop grout where crumbs and food particles become trapped. 2.Sink Move to the kitchen sink. The area around the base of the faucet is a breeding ground for mineral deposits and soap scum. The angled head of a toothbrush can get right up against the fixture, scrubbing away the chalky white residue. Dip the brush in white vinegar to help dissolve hard water stains. Don’t forget the faucet’s aerator; unscrew it and use the toothbrush to scrub the fine mesh screen, clearing any blockages that affect water pressure. The sink drain itself, particularly the rubber splash guard in a garbage disposal, is another target. Lift the rubber flaps and use the toothbrush with a degreasing dish soap to scrub away the slimy, foul-smelling buildup on the underside. It’s a task no one enjoys, but one for which the toothbrush is perfectly designed. 3.Microwave Appliances are filled with nooks that a cloth can’t reach. The control knobs on your stove can be removed and scrubbed individually. The tiny crevice between the cooktop and the counter is a trap for crumbs; a dry toothbrush can flick them out before you wipe the area down. The seal around your microwave or oven door collects grease and food splatter. A toothbrush dipped in a mild cleaning solution can gently scrub this gasket clean without causing damage. The vents on the front of your dishwasher, the control panel buttons, and even the intricate filter system inside can all be detailed with a toothbrush. For small appliances, its use is even more pronounced. The blades of a blender, the cutting gear of a can opener, and the grates of a toaster oven are all easily and safely cleaned with a toothbrush. A particularly clever use is for cleaning a cheese grater. Instead of shredding your sponge, scrub the grater from the inside out with a soapy toothbrush to dislodge every last bit of dried-on cheese. 4.Bathroom The bathroom presents its own set of detailed cleaning challenges. Shower and tub grout is constantly exposed to moisture, soap, and body oils, leading to mildew and soap scum. A toothbrush, paired with a specialized tile cleaner or a potent mixture of vinegar and dish soap, is the ultimate weapon. Its bristles are stiff enough to scour away the grime without scratching the tile. The track for a sliding shower door is notoriously difficult to clean. It’s a narrow channel that collects a disgusting combination of hard water deposits, soap scum, and hair. A dry toothbrush can first be used to loosen and sweep out the dry debris. Follow up by spraying a cleaner into the track and using the toothbrush to scrub it from end to end, reaching into the corners. The result is a smoothly gliding door and a far more hygienic shower environment. Look closely at your bathroom fixtures. The overflow hole in the sink is a dark, damp space that can develop odors and mildew. A toothbrush can be inserted and scrubbed around the opening to clean it thoroughly. The base of the toilet, where it meets the floor, collects dust and other unpleasantries. A dedicated, clearly marked toothbrush can be used to scrub this crevice clean. The most overlooked area is the toilet seat hinges. The complex plastic and metal parts are impossible to clean with a cloth. A toothbrush can get into every single gap, removing the grime that builds up around the bolts and hinges, a detail that makes the entire toilet look and feel cleaner. The jets under the rim of the toilet bowl, often clogged with mineral deposits, can be individually scrubbed with a toothbrush dipped in toilet bowl cleaner to ensure a powerful, effective flush. 5.Windows And Doors Beyond the kitchen and bath, the toothbrush proves its worth throughout the house. Window and sliding door tracks are a prime example. Dust, dirt, dead insects, and outdoor debris collect in these channels. A dry toothbrush works perfectly to loosen and sweep this material into a pile that can be easily vacuumed up with a crevice tool. For caked-on mud, a wet toothbrush will do the job. The delicate fins of heating and air conditioning vents are dust magnets. A dry toothbrush can gently brush the dust off each fin without bending or damaging them. 6.Electronics For electronics, a completely dry, clean toothbrush is essential. Gently brush it over your computer keyboard to dislodge crumbs, dust, and hair from between the keys. Do the same for the ports and vents on a laptop, gaming console, or television. The fine bristles can get into these areas without causing static damage, provided the brush is dry. The intricate patterns on furniture, such as carved wood on a headboard or the detailed legs of an antique table, can also be dusted with a dry toothbrush, which removes dust from crevices a cloth would miss. 7.Clothes Its applications in laundry

8 Efficient And Economical Ways To Use Old Toothbrushes For Cleaning Read More »

Airbnb Cleaning Service

How to Choose The Best Airbnb Cleaning Services in Toronto: 5 Key Factors

Airbnb Cleaning Services in Toronto: 5 Key Factors for a Five-Star Turnover A successful short-term rental lives or dies by one process: the turnover. This is not a simple tidy-up; it is a complete, systematic reset of the guest experience. In a world-class city the standards are exceptionally high, and the smallest oversight, a stray hair or a sticky spot on the counter, can compromise an entire stay. If you are choosing between companies offering Airbnb cleaning services in Toronto, here are the five factors that separate a professional reset from a rushed wipe-down. Factor 1: A Systematic Process That Starts at Checkout The moment a guest departs, the clock begins. The first action is ventilation: all windows and balcony doors open to flush out stale air and lingering odors from cooking or fragrances, creating a neutral, fresh canvas while the space airs out. During this window, a professional crew runs a preliminary walkthrough for assessment, not cleaning, scanning each room for new damage such as scuffs on walls, carpet stains, or broken items. Issues are documented immediately with clear, time-stamped photographs and reported to the host, standard operating procedure for any reliable service. Beds are stripped completely, and all towels, bathmats, and kitchen cloths go into laundry bags to prevent cross-contamination. Factor 2: Bedroom and Bathroom Detail Work The bedroom is a guest’s sanctuary, and its cleanliness must be absolute. After the linens come off, the mattress protector and pillows are inspected for staining and laundered or replaced as needed, and the mattress itself is vacuumed with an upholstery attachment to lift dust, allergens, and skin cells. Fresh linens go back on with intent: taut sheets, hotel-style corners, and a wrinkle-free duvet, because the bed is a presentation. Headboards, nightstands, and dressers are wiped down, drawers and closets are opened and checked for items left behind, and picture frames, lamps, and window sills are dusted before the floor is vacuumed under the bed and behind furniture. Nowhere is cleanliness scrutinized more intensely than the bathroom. A quality disinfectant goes on the shower, bathtub, toilet, and sink, then sits for several minutes to dissolve soap scum, grime, and bacteria, following the CDC’s logic for cleaning and disinfecting surfaces at home. The shower and tub are scrubbed wall to wall with special brushes for grout lines and drains, and glass doors are squeegeed to a streak-free finish. The toilet is disinfected inside and out, from bowl and seat to tank and the entire base down to the floor. Once sanitized, the space is restocked: ample toilet paper, fresh hand soap, full shampoo, conditioner, and body wash bottles, and three freshly laundered towels per guest, a bath towel, hand towel, and washcloth, folded neatly. The floor is mopped last, and light switches, door handles, and the exhaust fan cover get a final wipe. Factor 3: Kitchen Disinfection and Restocking The kitchen is where guest trust is won or lost. Turnover cleaning starts by emptying the refrigerator and freezer of any food left behind, then wiping every interior shelf, drawer, and door seal with a food-safe disinfectant. Appliance exteriors and handles are polished, the microwave is cleared of splatters, the oven is inspected for spills, and the stovetop is degreased until it shines. Countertop items like the coffee maker and toaster are lifted so the surfaces underneath can be fully sanitized. The sink is scoured, the faucet polished, and cupboards and drawers spot-checked, with all provided dinnerware, glassware, and cutlery inspected. When it is a DIY job, follow Health Canada’s advice on using household chemicals safely; a professional crew handles those products for you. Restocking is part of the service: fresh paper towels, a new sponge, dish soap, dishwasher pods, a cleaned and full coffee station, and bins emptied, wiped, and relined before the floor is swept and mopped. Factor 4: Living Areas and the Extra-Mile Details The living room is where first impressions form, so every surface from coffee tables to the television stand and bookshelves is dusted. Upholstery is vacuumed with cushions removed to clean the frame beneath, cushions are fluffed and arranged, and throw blankets are folded. Books and magazines are organized, rugs are straightened and vacuumed, and the floor is finished with attention to corners and baseboards. Then come the details that elevate a clean from standard to exceptional: Baseboards wiped down to remove scuffs and dust. Door frames, doorknobs, and light switches sanitized as high-touch points. Interior windows checked for fingerprints and smudges. Every light bulb checked so none are burnt out for the arriving guest. Factor 5: The Final Walkthrough and Handoff The last step is quality control with fresh eyes: a supervisor or the cleaner tours the property as a newly arriving guest would, checking that pillows are perfectly arranged, the welcome mat is straight, and the air smells neutrally clean. The thermostat is set to a comfortable temperature, blinds are adjusted to a uniform position, and only then is the property securely locked and a confirmation message sent to the host. For hosts aiming for Superhost status, this level of turnover is not a luxury; it is a strategic necessity. Toronto Shine Cleaning serves properties across the city and the GTA, which you can confirm on our locations page. The Turnover at a Glance Area Reset essentials Restocking and checks Bedroom Vacuumed mattress, hotel-style bed-making, wiped surfaces Fresh linens, lost-item sweep of drawers Bathroom Disinfected and scrubbed tub, shower, toilet; squeegeed glass Three fresh towels per guest, soap and TP stocked Kitchen Disinfected fridge, degreased stove, scoured sink Coffee station, dish supplies, relined bins Living areas Dusted surfaces, vacuumed upholstery, finished floors Bulbs, blinds, thermostat, final walkthrough Airbnb Cleaning FAQs How quickly can a turnover crew reset my unit? Professional crews work from a fixed checklist and arrive fully equipped, built around tight turnover windows between late checkouts and evening arrivals. Book a company that treats those windows as non-negotiable and confirms completion after every visit. Do Airbnb cleaners handle laundry as well? A

How to Choose The Best Airbnb Cleaning Services in Toronto: 5 Key Factors Read More »

housekeeper deep cleaning

Deep Cleaning Services in Toronto, We Do It Right!

Deep Cleaning Services in Toronto: The Complete Reset Your Home Needs A regular cleaning keeps surfaces tidy, but the grime that accumulates below the surface quietly builds up over the months. That is the domain of specialized deep cleaning services in Toronto. Unlike standard housekeeping, a deep clean is a comprehensive, methodical process that tackles dirt in every often-overlooked, hidden corner of your home: a fundamental reset that restores your space to a truly pristine state. What Makes a Deep Clean Different? Professional deep cleaning focuses on a thorough, top-to-bottom reset of every room, targeting buildup that routine visits simply do not reach. It goes far beyond the surface and into the details: grease on cabinet fronts, dust in air vents, limescale on fixtures, and grime in grout lines. The scope demands expertise and specialized equipment, and more and more Toronto homeowners and businesses are investing in it, whether for a spring reset or as part of ongoing maintenance. For a fuller breakdown of what a session covers, see our guide to deep cleaning services in Toronto. Kitchen Deep Cleaning: Degreasing and Appliance Interiors In kitchens, the work is all about degreasing and disinfecting, starting inside your cupboards. Crews empty cupboards and pantries to inspect for spills, sticky residue, forgotten food, and signs of pests, then degrease and sanitize every interior surface. Handles and cabinet fronts get attention too, because repeated hand contact leaves a sticky film. Appliances receive treatment they almost never get at home: Oven: racks soaked, interior carbon buildup scrubbed, door glass cleaned for a like-new view. Stovetop: grates and burner caps removed and cleaned, boiled-over residue scrubbed from the surface. Range: pulled out so the sides, the floor behind it, and the wall are reached and wiped clean. Refrigerator and freezer: emptied, shelves and drawers washed, door gaskets detailed with a small brush, condenser coils vacuumed of dust to support efficiency and lifespan. Small appliances: toaster crumb trays emptied, coffee makers and kettles descaled, microwave interiors scrubbed, including the often-splattered ceiling. Bathroom Deep Cleaning: Soap Scum, Limescale, and Grout Bathrooms are scrubbed and sanitized top to bottom, dissolving soap scum and body residue from tubs and showers with specialized agents made for stubborn film. Shower doors and glass enclosures are cleaned until streak-free, the tracks at the base are cleared of accumulated gunk, and tiles and grout lines are meticulously scrubbed to lift mildew and dirt from porous grout. Stubborn mold and mildew in damp bathrooms are common culprits, and the CDC’s guidance on mold and your health explains why proper removal matters. Health Canada also recommends keeping indoor humidity low and fixing moisture sources so mould cannot take hold in the first place. Fixtures get their shine back as limescale and mineral deposits are removed from faucets and showerheads, and chrome is polished. Toilets are cleaned inside the bowl and across the entire exterior, from the tank lid and handle to the seat, hinges, base, and surrounding floor, plus the often-ignored overflow hole inside the tank, flushed clean with disinfectant. Vanity and medicine cabinets are emptied and wiped inside, and exhaust fan covers are removed and washed, because a dusty fan cannot ventilate properly and traps the humidity that leads to mildew. Living Areas and Bedrooms: A Top-to-Bottom Reset Crews work from the ceiling down to the floor in every room. Cobwebs are removed from corners and ceiling edges, light fixtures and ceiling fan blades are dusted, and the tops of bookcases, wardrobes, and cabinets are reached. Walls are spot-cleaned of scuffs and splatters, and baseboards, door frames, window frames, and switch plates are hand-wiped one by one. The process continues behind and beneath the obvious. Furniture is moved so the floors underneath are reached, and upholstery is vacuumed with crevice tools to extract dust, skin cells, and allergens from fabric. Wood furniture is polished, lampshades and blinds are dusted, and the air system itself is addressed: vents and grilles are vacuumed and wiped, and HVAC return air covers are pulled and dusted out. Professional crews rely on HEPA-filter vacuums that capture microscopic allergens rather than recirculating them, and steam cleaners that sanitize without harsh chemicals. When Toronto Homes Need a Deep Clean Most Deep cleaning requests tend to follow life events: Moving into or out of a home, when deposits and first impressions are at stake. Post-renovation cleanup after the construction dust settles in every crack. Seasonal refreshes, especially the annual spring clean. Before hosting an event or gathering, such as a wedding at home or the holidays. Preparing a space for a new baby or toddler who will crawl across every floor. Allergy season, when dust, dander, and pollen accumulate indoors. How to Choose a Professional Deep Cleaning Company Not all services are created equal, so choose carefully. Look for a company that offers a range of deep cleaning options with a detailed, transparent list of what each package includes. Prioritize experienced, trained professionals who understand the right products and techniques for different surfaces, and verify that the company is insured and bonded to protect your home and belongings. What to check Why it matters Transparent scope and checklist You can compare packages and know what is covered before booking. Trained, vetted crew Correct products and techniques protect finishes instead of damaging them. Insurance and bonding Toronto Shine carries a $1,000,000 insurance policy and a $10,000 accidental breakage and surety bond. Flat, upfront pricing Our deep clean starts at $270.38 before HST for a studio or one-bedroom, shown on our pricing page. Deep Cleaning Service FAQs What is included in a deep cleaning service in Toronto? A full reset of each room: kitchen cabinets and appliances inside and out, bathrooms degreased and descaled with grout scrubbed, walls spot-cleaned, baseboards and switch plates wiped, vents dusted, furniture moved, and floors and carpets thoroughly cleaned. How is deep cleaning different from regular housekeeping? Regular visits maintain cleanliness on visible surfaces. A deep clean restores the areas maintenance skips, which is why many homes pair

Deep Cleaning Services in Toronto, We Do It Right! Read More »

housekeeper

What Is A Housekeeper – 3 Reasons Why You Should Hire

A housekeeper is far more than just someone who cleans your home. While the primary image that comes to mind might be someone with a vacuum or a dust cloth, the reality of a professional housekeeper’s role is much broader, encompassing a comprehensive approach to home management and the overall well-being of a living space. They are individuals entrusted with maintaining the order, cleanliness, and functionality of a household, often serving as a crucial backbone for busy individuals and families. It’s about creating and sustaining an environment where you can truly thrive, not just exist. Think of a housekeeper not as a visitor who performs a single task, but as a dedicated manager of your domestic environment. Their responsibilities extend well beyond surface-level tidiness. They delve into the intricate details of what makes a house feel like a home  a place of comfort, peace, and efficiency. This often includes a wide array of duties that can be customized to suit specific household needs, but generally covers everything from meticulous cleaning to organizational tasks and even light household management. They are experts in ensuring that every corner of your home is not just clean, but cared for, reflecting an understanding of proper maintenance and the nuances of different materials and surfaces. 1.Light and Heavy Cleaning For instance, their cleaning duties are exhaustive. This isn’t just a quick sweep or a superficial wipe-down. A professional housekeeper engages in deep cleaning protocols for kitchens and bathrooms, sanitizing surfaces, scrubbing grout, polishing fixtures, and ensuring these critical areas are hygienic and sparkling. They handle floor care with precision, knowing the right methods for hardwood, tile, carpet, or laminate, ensuring longevity and shine. Dusting isn’t limited to visible surfaces; it extends to baseboards, light fixtures, ceiling fans, blinds, and intricate decor, preventing the buildup of allergens and maintaining a fresh atmosphere. Vacuuming and mopping are performed thoroughly, reaching under furniture and into corners that are often overlooked in daily tidying. Laundry management is also a common duty, involving washing, drying, folding, ironing, and putting away clothes, linens, and towels, ensuring that your wardrobe and household textiles are always fresh and ready. They make beds with an eye for detail, turning a simple chore into an act of creating a welcoming sanctuary. Beyond the immediate act of cleaning, a housekeeper is also an organizational wizard. They help in reducing clutter, creating systems for storage, and maintaining order in common areas, closets, and pantries. This proactive approach to organization means less time spent searching for items and more time enjoying a harmonious living space. They might assist with tidying up children’s play areas, ensuring toys are stored properly, or organizing bookshelves and filing systems. It’s about creating a flow in the home that makes daily living smoother and less stressful. This often involves an intuitive understanding of how a household operates and anticipating what areas might become disorganized, intervening before chaos takes hold. Furthermore, a housekeeper often takes on light household management responsibilities. This can include managing household supplies, ensuring that cleaning products, toiletries, and even certain pantry staples are always stocked. They might run light errands, such as dropping off dry cleaning or picking up groceries. For homes with pets, they might assist with basic pet care, like feeding or tidying up pet areas. They can also oversee plant care, ensuring your indoor greenery thrives. In some cases, especially in larger homes, a housekeeper might coordinate with other service providers, such as plumbers, electricians, or gardeners, ensuring maintenance schedules are met and issues are addressed promptly. They act as a central point of contact, ensuring the home functions like a well-oiled machine, even when you are not present to manage every detail yourself. The distinction between a “cleaner” and a “housekeeper” is critical. A cleaner typically comes for a few hours, performs specific cleaning tasks, and then leaves. Their focus is solely on the immediate cleanliness of the space. A housekeeper, on the other hand, often has a more encompassing and ongoing relationship with the household. They are involved in the continuous upkeep, proactive organization, and management of the home’s daily rhythm. They build an intimate understanding of the home’s needs, its inhabitants’ preferences, and the specific routines that keep everything running smoothly. This level of dedication and involvement fosters a deeper sense of trust and partnership, where the housekeeper becomes an invaluable asset to the household’s operational efficiency and overall peace. 2.Making Up For Lost Time So, why should you consider hiring a housekeeper? The reasons are multifaceted and profoundly impactful on your daily life. Primarily, it’s about reclaiming your time. In today’s fast-paced world, time is arguably our most precious commodity. Juggling demanding careers, family responsibilities, social obligations, and personal pursuits leaves very little room for the arduous and often relentless demands of household chores. The hours spent on cleaning, organizing, and maintaining a home can quickly accumulate, eating into weekends, evenings, and any potential moments of relaxation. Hiring a housekeeper liberates these hours, allowing you to dedicate them to activities that genuinely enrich your life – spending quality time with loved ones, pursuing hobbies, engaging in personal development, exercising, or simply enjoying uninterrupted rest. Imagine coming home after a long day not to a list of chores, but to a clean, organized, and welcoming sanctuary, ready for you to unwind. This isn’t just about saving time; it’s about investing in your personal well-being and life satisfaction. Beyond time, hiring a housekeeper significantly reduces stress and mental load. The burden of an untidy or disorganized home can weigh heavily on one’s mind, creating a constant hum of anxiety and guilt. The mental energy expended on planning cleaning schedules, remembering what needs to be done, or feeling overwhelmed by accumulated mess is immense. A housekeeper takes this entire burden off your shoulders. The peace of mind that comes from knowing your home is being professionally cared for, consistently and thoroughly, is immeasurable. It eliminates potential arguments or frustrations over chore distribution in shared living spaces and

What Is A Housekeeper – 3 Reasons Why You Should Hire Read More »