Post Renovation/Construction Guide

August cleaning preparation

How to Prepare for August Cleaning: 7 Steps, Fast and Easy

Why August Deserves Its Own Cleaning Reset Toronto air in late August has a particular weight. Summer peaks just before it starts retreating, and every room shows it: pollen-dusted glass, grit ground into entryway tile, a fridge stuffed with barbecue leftovers. An August clean is not ordinary tidying. It is a systematic reset that strips out the season’s specific grime and lays a clean foundation for the indoor months ahead. The seven steps below cover the whole arc. Step 1: Deal With the Air First Open windows let pollen, city dust, and allergens drift into every room, and the HVAC system has run nearly nonstop all season. Its filter is your first line of defense: a grey, clogged unit wastes energy and pushes right back the particles you are trying to evict, so replacing it is the opening move. Once the new filter is in, vacuum every intake and exhaust vent with a brush attachment. As you work through the rest of the plan, the CDC’s home cleaning and disinfecting guidance is a sound baseline for surface work. Step 2: Windows, Screens, and Tracks Screens have spent the season intercepting bugs, leaves, and dirt. Pull them and wash each one with a soft brush, mild soap, and a spray from the garden hose. While they dry, attack the channels they came from: window tracks and sills are small graveyards for dust and insects, so vacuum the loose debris and scrub the caked residue with an old toothbrush. Then wash the glass on both sides, choosing an overcast day, because sun bakes cleaner onto the pane and leaves streaks. This step brightens the house immediately. Step 3: Floors Carry the Season’s Story The floors hold the record of summer: sand from the Beaches, garden soil, grass tracked in from the park. Mop hard floors thoroughly and expect high-traffic lanes to need a second pass. Wall-to-wall carpet and area rugs are due for a real extraction clean with a rented or owned carpet machine, because ordinary vacuuming never reaches the settled grit and allergens; the murky water you dump out is proof of that. Pull furniture aside and clean underneath, where three months of dust bunnies and lost hair clips have gathered quietly. Step 4: Cut the Kitchen’s Grease Film The refrigerator has been a revolving door all summer. Empty it shelf by shelf, wash the shelves and drawers in warm soapy water, wipe the interior with a food-safe cleaner, and check expiration dates as you go. Handles and doors get wiped in the same motion. Summer cooking leans on frying and grilling, which leaves a sticky film on cabinets, backsplash, and especially the range hood: spray a degreaser, let it sit a few minutes, then wipe it clean. Finish by pulling the oven and stove forward to wash the exposed sides and the floor behind them, the most forgotten grease traps in any home. Step 5: Reset the Living Room’s Soft Surfaces Dust and dander settle into fabric, so give upholstery real attention. Launder any sofa cushion covers marked machine-washable; for everything else, vacuum slowly with the right attachment, working into every seam and crevice. To pull odors, scatter baking soda over the fabric, let it sit for half an hour, then vacuum it off. Wash throw blankets and pillows per their care tags. Dust with a damp microfiber cloth, which traps particles instead of scattering them, and reach the spots daily cleaning skips: picture-frame tops, ceiling fan blades, and lamp shades. Step 6: Bathrooms After a Humid, High-Traffic Season Bathrooms absorb summer humidity and a steady stream of guests in swimwear, so scrub grout lines on floors and in showers where soap scum and mineral deposits have hardened; a baking soda and vinegar paste handles them well. Wash the shower curtain and its liner. Then remove the exhaust fan cover, usually caked with dust, and clean it so the fan can genuinely pull moisture from the air. That detail matters because damp, stagnant air invites mildew, and the CDC’s page on mold explains why controlling moisture is the real defense. Empty medicine cabinets and vanities, tossing expired products. Step 7: Retire the Summer Gear and Reclaim Storage Seasonal belongings need a clean exit. Wash pool toys and inflatables, dry them fully, deflate, and store them for next year. Give the barbecue grill its post-season service: scrape the grates, empty the grease trap, wipe the exterior, then cover it for cooler months. Wipe the pollen layer off patio furniture, and make sure cushions are completely dry before boxing them, since damp cushions in storage grow mildew. Finish with the declutter: Sort summer clothes into keep, donate, and toss piles. Organize the garage and basement so sports equipment, camping gear, and garden tools each have a designated home. This is the step that turns chores into an actual season handoff. The August Reset at a Glance Zone Core tasks Why now Air system Replace filter, vacuum vents Pollen and dust loaded every room Windows Wash screens, scrub tracks, clean glass Brighter rooms before light fades Floors Double mop, carpet extraction, move furniture Settled grit holds allergens vacuums miss Kitchen Fridge reset, degrease hood and cabinets Old grease invites odor and pests Upholstery Launder covers, baking soda pass, damp dust Fabric collects dander all season Storage Wash, dry, and box seasonal gear Protects belongings and reclaims space August Cleaning Questions, Answered How long does a full reset take? Split it across two weekends: one for air, windows, floors, and upholstery, another for the kitchen, bathrooms, and storage. Doing the filter swap first means you are never blowing last season’s dust onto surfaces you just cleaned. What should I cut if I only have one day? The air step and the floors. Allergens drawn in through open windows end up in the filter and ground into carpet pile, so clearing those two gives the health payoff even when everything else waits. Is renting a carpet cleaner worth it? If sandy feet crossed the

How to Prepare for August Cleaning: 7 Steps, Fast and Easy Read More »

housekeeper

What Is a Housekeeper? 3 Reasons Why You Should Hire One

A Housekeeper Is a Manager, Not Just a Visitor With a Vacuum Most people picture a housekeeper with a duster or a vacuum, but the actual role runs far deeper. A professional housekeeper maintains the order, cleanliness, and function of a household as a whole system, which is why busy families and professionals treat the position as backbone rather than luxury. The job is not to perform one task and leave; it is to sustain an environment where the people who live there can thrive. Here is what the role genuinely covers, how it differs from standard cleaning, and three reasons households hire for it. What a Housekeeper Actually Handles Deep and routine cleaning: kitchens, bathrooms, floors, careful dusting, vacuuming, and laundry. Organization: clutter control, storage systems, tidy play spaces, and orderly shelves. Light management: stocked supplies, small errands, pet care, plants, and vendor coordination. The duties fall into three broad categories. The first is cleaning of every depth: kitchen and bathroom sanitizing, grout scrubbing, fixture polishing, and floor care matched to hardwood, tile, carpet, or laminate so each material lasts longer. Dusting reaches baseboards, light fixtures, ceiling fans, blinds, and decor rather than stopping at tabletops, and vacuuming and mopping go under furniture and into forgotten corners. Laundry is commonly part of the role too: washing, drying, folding, ironing, and putting away clothes, linens, and towels, plus beds made with real care. The second category is organization. A housekeeper reduces clutter and builds storage systems for closets, pantries, and common areas, tidies children’s play spaces, and straightens bookshelves and paperwork. The payoff is fewer hours hunting for things and a home that flows through the day instead of fighting you. The third is light household management: keeping cleaning products, toiletries, and pantry staples stocked, running small errands like groceries or dry cleaning, handling basic pet-care tasks such as feeding or tidying pet areas, and watering indoor plants. In larger homes, a housekeeper can also coordinate plumbers, electricians, and gardeners, acting as the single point of contact so maintenance actually happens while you are at work. Cleaner or Housekeeper: Know What You Are Hiring The distinction matters when you book. A cleaner arrives for a set number of hours, completes defined tasks, and leaves; the focus is the condition of the space that day. A housekeeper holds an ongoing relationship with the home, handling continuous upkeep, proactive organization, and the daily rhythm of the place, and learns its quirks and your preferences over time. That accumulated knowledge is what turns a service into a partnership. Dimension Standard cleaner Housekeeper Relationship Scheduled visit, task list Ongoing steward of the household Scope Cleaning the space Cleaning, organizing, light management Knowledge General best practice Your routines, materials, and preferences Typical result A clean house today A smoothly run house every week Reason 1: You Buy Back Your Time The first case for hiring is arithmetic. Careers, family, social commitments, and personal goals all compete with chores, and cleaning hours accumulate quietly, swallowing weekends and evenings. A housekeeper liberates that time for what actually enriches your life: people you love, hobbies, exercise, or genuine rest. Coming home to a finished sanctuary instead of a to-do list is not indulgence; it is a transfer of the day’s least rewarding hours to someone whose job it is to do them well. If reclaimed hours go toward movement, the CDC summary of the benefits of physical activity is a good reminder of what that time is worth. Reason 2: Less Stress and a Genuinely Healthier Home An untidy space runs a constant background process in your mind: the guilt, the planning, the nagging awareness of what still needs doing. A housekeeper closes that process. The mental load lifts when you know professionals care for the home consistently, chore arguments in shared households evaporate, and the space is always ready for impromptu guests or for your own enjoyment. The hygiene side is just as real. Housekeepers are trained in technique and product use, and they sanitize in ways that limit germs, dust, and allergens, which matters most in homes with children, pets, or anyone with allergies or respiratory sensitivities. Consistent cleaning improves indoor air quality, slows the spread of illness, and handles trouble spots like bathroom mildew or pollutant-loaded carpet. Hand-in-hand with that, reliable habits like the ones in the CDC’s handwashing guidance protect a household most when the surfaces around them are kept clean too. Reason 3: Expertise That Pays for Itself Professional knowledge of surfaces, materials, and agents means contents are preserved, not just wiped. Housekeepers work fast with systematic methods, and they spot what you might miss: a small repair before it grows, early signs of pests, a failing seal. That extra pair of watchful eyes extends the life of furnishings, appliances, and finishes, which defers replacement costs you would otherwise pay later. The role also flexes to household type. Dual-career parents get hours back with their kids. Elderly or mobility-limited residents keep their independence in a safe, comfortable home. Frequent travelers return to a place that kept running. And for people who simply dread cleaning, the dread itself is removed. Consistency builds trust, and trust is the product. What the Investment Really Covers Yes, there is a cost, and yes, it buys more than square footage. Toronto Shine Cleaning’s regular housekeeping visits start at $212.63 before HST for a studio or one-bedroom and $273 for a typical two-bedroom home, with deeper resets priced from $270.38; the full menu sits on our pricing page. We are bonded and insured under a $1,000,000 policy with a $10,000 accidental breakage and surety bond, and you can read what clients say on our reviews page. Weigh that against the value of your evenings and your peace of mind, and the math tends to favor the hire. Compare it with a one-off deep clean or book recurring help through our regular maid service, and call (647) 424-0355 when you are ready. Housekeeper Questions, Answered Do I need a

What Is a Housekeeper? 3 Reasons Why You Should Hire One Read More »

Organizing a Small Kitchen

Organizing a Small Kitchen in 5 Easy Steps

Organizing a Small Kitchen in 5 Easy Steps A small kitchen is not a problem to solve so much as a space to design. When every item has a logical home and the counters stay clear, even a tiny galley feels roomy and works fast. The secret is a five-step sequence: clear, purge, zone, store vertically, and maintain. Follow it once and your kitchen will stay organized for years. Step 1: Clear the Counters Counter space is the most valuable real estate in a small kitchen, so it cannot double as storage. Remove every appliance, crock, and decoration, then wash the surfaces thoroughly. Only items used multiple times a day earn their spot back: for most households that means a coffee maker or electric kettle and possibly a knife block. The toaster, blender, and stand mixer, used weekly, belong in an easy-to-reach cabinet, while monthly or occasional appliances go on a higher shelf or out of the kitchen entirely. A clear counter becomes your baseline, and returning to it after every cooking session keeps the kitchen feeling open. Step 2: Purge Cabinet by Cabinet Empty one cabinet completely onto the counter and sort everything by type, all the mugs together, all the glasses together, all the plates together. The duplicates become obvious fast: with two or three people in the home, twenty mugs make no sense, so keep the best six to eight and donate the rest. Apply the same logic to plates, bowls, and glassware, and discard anything chipped, cracked, or stained, because every item in a small kitchen must earn its space. In the drawers, keep one or two of each essential tool and let go of single-purpose gadgets you have not touched in six months. Then work through the pantry the same way. Check every expiry date and toss anything past it, and donate unopened in-date food you know you will never eat. Decant grains, pasta, cereal, sugar, and flour into clear, airtight, stackable containers with labels showing contents and dates. You will see your inventory at a glance, keep food fresher, and free up the bulky packaging space. The CDC’s food safety basics reinforce why checking dates and storing dry goods properly protects your household, and the CDC’s handwashing guidance is a good reminder to wash up before handling food in your newly organized kitchen. Step 3: Create Workflow Zones With the purge done, arrange cabinets by how you cook rather than by habit. The cabinets beside the stove hold pots, pans, baking sheets, oils, and the spices you reach for daily: that is the cooking zone. Under the sink, the cleaning zone, live dish soap, sponges, dishwasher detergent, and trash bags. The longest clear stretch of counter becomes the preparation zone, so the drawers and cabinets beneath it should hold cutting boards, mixing bowls, measuring cups, and knives. Finally, keep everyday dishes and cutlery closest to the dishwasher or draining board so putting them away takes seconds. A kitchen arranged this way feels intuitive because everything sits where you use it. Zone Where it lives What it stores Cooking Cabinets beside the stove Pots, pans, oils, daily spices Cleaning Under the sink Dish soap, sponges, trash bags Preparation Near the open counter Boards, bowls, knives, measures Everyday dishes Near dishwasher or drying rack Plates, glasses, cutlery Step 4: Think Vertically and Use Every Gap Small kitchens win by stacking. Inside cabinets, these tricks multiply every shelf and drawer: Under-shelf baskets create a second tier, and shelf risers double the usable height of each shelf A multi-tier lazy Susan rescues deep corner cabinets, and pull-out sliding shelves make the back row visible Vertical file sorters or tension rods store baking sheets, muffin tins, and cutting boards on their side, easy to grab On the walls, a magnetic knife strip empties a whole drawer, a rail with S-hooks holds utensils and mugs, and floating shelves display everyday dishes Under the sink, a tension rod across the cabinet top hangs spray bottles by their triggers and frees the floor for stackable bins The refrigerator sides take magnetic hooks, a paper towel holder, or a spice rack, and a slim rolling cart slides into the gap beside the fridge for bulk paper goods Step 5: Maintain the System Daily Organization lasts only as long as the return habit. After every use, wash an item and put it straight back in its designated home; never let clean dishes or appliances rest on the counter overnight. Keep the under-sink bin and pantry labels current, and once a month do a quick sweep for items that crept in without a home. This five-minute daily discipline is what keeps a small kitchen feeling dramatically larger and keeps you from ever needing a full reorganization again. Small Kitchen Organization FAQs How do I organize a small kitchen with no pantry? Convert one tall cabinet into pantry space using pull-out shelves or risers, decant dry goods into uniform clear containers, and store rarely used appliances elsewhere in the home. A slim rolling cart adds pantry storage in any gap. What should I keep on a small kitchen counter? Only items used several times a day, typically a coffee maker or kettle and a knife block. Everything else, including toasters and mixers, belongs in cabinets so the counter stays clear and the room feels larger. How many dishes does a small kitchen need? Keep six to eight of each everyday item when two or three people live in the home, plus a few serving pieces. Excess dishes and mugs are the fastest way to fill limited cabinets, so donate what you do not genuinely use. How do I keep my small kitchen organized once it is done? Return every item to its home immediately after use, clear the counters each evening, and label pantry containers. A few minutes of daily maintenance prevents the slow buildup that forces another full reorganization. A Sparkling Kitchen, Minus the Grime Once your small kitchen is organized, professional cleaning lifts

Organizing a Small Kitchen in 5 Easy Steps Read More »

closet

How To Organize Your Closet The Easy Way – 4 Incredible Tips

How to Organize Your Closet the Easy Way: 4 Proven Tips An organized closet is not about buying matching boxes and hangers. It is a simple four-step system: empty the space, screen every item, group what remains, and maintain the result. Each step takes decision-making off your shoulders, and when it is done you will see everything you own at a glance and start each day faster. Here is the easy way to get there. Tip 1: Empty the Closet and Start Clean Set aside a real block of time, a full afternoon for most closets, and gather supplies first: heavy-duty trash bags, donation bags or boxes, a box for items needing repair, microfiber cloths, an all-purpose cleaner, and a vacuum with its crevice and upholstery attachments. Then remove everything, every garment from the rod, every shoe from the floor, every shelf and drawer emptied, and pile it all on the bed. Seeing the full volume of your wardrobe in one place is the honest reality check that makes the next step easier. With the closet bare, deep clean it from top to bottom: dust the shelves and rod, wipe walls and baseboards, vacuum corners and floor with the crevice tool. This is also the moment to inspect for dampness, mould, or pests while everything is visible, because a clean, dry closet is the only foundation worth rebuilding on. Tip 2: Screen Every Item Into Four Piles Work through the mountain one item at a time with no shortcuts, sorting into four piles: keep, donate, trash, and repair. Ask these five questions for each piece: Have I worn it in the last year? Seasonal coats and holiday pieces count, but an everyday shirt untouched for twelve months is unlikely to be worn again Does it fit me right now? Store for the body you have today, not a future size; an aspirational piece you love can live in a separate box, not your main closet Is it in good condition? Permanent stains and irreparable damage mean trash or textile recycling, never donation, while a missing button or small tear goes to the repair pile with a two-week deadline Does it match my current life and style? Jobs, seasons, and tastes change, and the wardrobe should reflect the present How does it make me feel? Clothing that itches, pinches, or makes you self-conscious is not serving you Be ruthless with duplicates, keep the best black t-shirt and the favourite pair of jeans rather than six near-identical versions, and park truly sentimental pieces in a labelled memory box instead of the active wardrobe. When the piles are done, move the trash out immediately and load the donation boxes into the car the same day, before second-guessing starts. Tip 3: Group Like With Like and Assign a Home Sort the keep pile by category, all t-shirts together, all trousers together, all dresses together, and plan the layout around how you get dressed. The eye-level, easy-reach zone is prime real estate and belongs to frequently worn items; formal wear and off-season pieces go higher or further back. Then decide what hangs and what folds. Blouses, button-downs, dresses, skirts, trousers, jackets, and blazers wrinkle easily and belong on hangers. Heavy knit sweaters stretch out when hung, so fold them, along with t-shirts, jeans, and activewear. Switch to uniform slim velvet hangers: they grip clothes that wire and plastic hangers let slip, take far less rod space, and create the clean look that makes each item visible. Hang by category, and within each category from light to dark, for faster outfit choices. For folded items, file folding changes everything. Fold each piece into a rectangle and stand it upright like a file, so every shirt is visible at a glance without digging through a stack. Drawer dividers keep socks and undergarments contained, labelled baskets or clear bins hold scarves, belts, and hats, and transparent shoeboxes and a compact rack keep footwear off the floor. Add an over-the-door organizer for extras and wall hooks for robes, purses, and daily jackets to use every inch of vertical space. Tip 4: Maintain With Simple Daily Rules An organized closet maintains itself with three habits. First, one in, one out: every new purchase means an old item is donated or discarded. Second, a five-minute reset each evening or week that returns clothes, shoes, and accessories to their homes, so nothing piles up on a chair or the floor. Third, seasonal rotation: pack off-season clothing into sealed totes stowed under the bed, on high shelves, or in another dry spot, freeing prime closet space for what you wear now. Health Canada’s dust mite guidance recommends regular washing of clothing and bedding to control allergens, and the CDC’s mould overview notes that sealed storage in dry conditions keeps fabric safe from damp and mildew between seasons. A little weekly upkeep beats another full overhaul next year. Pile Rule of thumb Destination Keep Worn recently, fits now, feels great Back into the organized closet Donate Good condition, just not for you Charity drop-off within days Trash Stained, damaged beyond repair Bin or textile recycling Repair Small fix needed Mended within two weeks Memory box Sentimental, never worn Separate labelled storage Closet Organization FAQs How long does organizing a closet take? Plan for two to four hours for a standard closet, or a full day for a large walk-in. The sorting step takes the longest, so work in focused blocks and finish the donation drop-off the same day to avoid second-guessing. Should I fold or hang my clothes? Hang anything that wrinkles easily, such as blouses, dresses, trousers, jackets, and button-down shirts, and fold heavy knits that stretch on hangers, plus t-shirts, jeans, and activewear. Uniform velvet hangers save space and stop slipping. How do I stop my closet from getting messy again? Adopt one-in-one-out for new purchases, do a five-minute reset when clothes come off, and rotate seasonal items into sealed storage bins. These habits prevent the slow accumulation that created the

How To Organize Your Closet The Easy Way – 4 Incredible Tips Read More »

Labeling Kitchen Items – 4 Easy and Fast Tips

Labeling Kitchen Items: Four Fast Tips for a Safer, Faster Kitchen A label looks like a small thing until its absence causes a big one. In any space where food is prepared, stored, or cleaned, the words on a container decide whether a meal is safe, whether groceries are used or binned, and whether a cleaner helps or harms. Without clear labeling, a kitchen drifts into guesswork, and guesswork is where allergies, spoilage, and chemical mistakes live. These four tips take minutes to set up and pay for themselves the first time someone grabs the right jar without opening it. Tip 1: Label Every Container You Decant, Contents and Allergens Included Packaging labels do the heavy lifting for you while a product is sealed: “contains” and “may contain” statements protect people with allergies to gluten, dairy, soy, peanuts, tree nuts, eggs, fish, and shellfish, and skipping that step can turn a safe meal into a medical emergency. The responsibility does not end when you open the package. Transfer flour into a pretty canister and the gluten question disappears for whoever cooks next. Every decanted container needs its contents named and any relevant allergen noted. Store regular flour and gluten-free flour apart, each labeled, and sugar and salt can never be confused again. For the rules behind those warnings, the CDC’s food safety basics explain how contamination and misidentification put people at risk. Tip 2: Track Dates So Nothing Rots in the Back of the Pantry Expiry and best-before dates are not decorative. Manufacturers set them from product stability data, and eating past an expiry date raises the odds of foodborne illness, from mild digestive upset to infections like salmonella or E. coli. On dairy, meats, and prepared foods, the date marks the window of safest consumption; on shelf-stable goods, a best-before signals peak quality, and ignoring it costs you taste, texture, and nutrients. The trouble is that dates vanish the moment you open the package, so write a fresh one. When you prep homemade sauces, stocks, or chopped vegetables, label them with the contents plus the preparation date. That habit makes a First-In, First-Out rotation possible: older items move forward, spoilage drops, and you stop guessing whether that jar is three weeks or three months old. Bonus Tip: Storage Instructions Belong on the Label “Refrigerate after opening” and “store in a cool, dry place away from direct sunlight” are not suggestions; they reflect how ingredients respond to temperature, light, and air. Copy those conditions onto your own labels so the next person does not have to find the original box. Tip 3: Treat Every Cleaner Bottle Like a Mini Safety Manual Kitchens double as chemical storage, and a cleaning label carries the active ingredients, hazard class (corrosive, irritant, flammable), first-aid steps, required gloves or eye protection, ventilation needs, and compatible surfaces. Mistaking a strong oven cleaner for dish soap can hurt a person and a countertop in the same stroke, and mixing incompatible chemicals can produce toxic fumes. Keep cleaners in their original, labeled containers. If you must decant, label the new bottle with the exact product name and dilution, store it away from food zones, and follow Health Canada’s advice on using household chemicals safely, which also covers storage and disposal. Their wider hub on household product safety lists hazards for common items from cookware to craft materials. Tip 4: Read Nutrition Panels Before You Decide What Goes in the Cart Labels earn their keep at the shopping stage. The nutrition facts panel breaks down calories, fats, carbohydrates, sugars, sodium, and protein, which matters when you manage diabetes, heart disease, or hypertension, and it lists vitamins and minerals that reveal nutrient-dense choices. Ingredient lists support vegans avoiding animal products and anyone dodging specific additives, preservatives, or artificial colors. Governments mandate this disclosure, and manufacturers face penalties and recalls for inaccuracies, so the information is legally enforced and dependable. Knowing the rules were checked for you turns a label into a trust signal. What to Label, Zone by Zone Kitchen zone What gets a label Details to include Pantry Decanted dry goods: flours, grains, spices, baking soda and baking powder Contents plus allergen note; keeps lookalikes apart Fridge and freezer Leftovers, prepped veg, stocks, sauces, opened packages Contents, prep date, use-by window, storage condition Cleaning cupboard Any decanted cleaner or diluted mix Exact product name, dilution ratio, keep-from-food warning Countertop Jars and canisters in daily use Contents so anyone can grab the right one without opening Efficiency follows safety here. When every container states what it holds and when it was made, inventory checks take minutes, prep speeds up, and cross-contamination risks shrink: a baking soda and baking powder mix-up can collapse an entire cake. Clear labeling also spreads responsibility, since everyone in a busy family kitchen can find what they need and use it safely. The habit only takes four seconds per container, and the moments that demand it repeat themselves: Right after decanting a dry good into a new canister Whenever leftovers or prepped ingredients go into the fridge As soon as an opened package hides its printed date inside Every time a cleaner gets diluted into a spray bottle A Well-Labelled Kitchen, Every Week, Without the Labor Labels handle the knowing; cleaning still has to happen. Toronto Shine Cleaning pairs a tidy, labeled kitchen with surfaces that match, through our regular maid service or a seasonal deep clean, with rates on the pricing page. Call (647) 424-0355 to book, or read what other households say on our reviews. Kitchen Labeling FAQ What information should a homemade food label carry? Name the contents, add the preparation date, note any major allergen present, and include a storage instruction such as “refrigerate” or “use within 3 days.” For freezer items, add a best-by estimate so rotation stays honest. Four short lines on masking tape covers everything anyone in the house needs. What is the difference between an expiry date and a best-before date? An expiry date marks the safety

Labeling Kitchen Items – 4 Easy and Fast Tips Read More »

How Mental Health and House Cleaning are Completely Linked

How Mental Health and House Cleaning Are Completely Linked Your home spends most of its hours absorbing your inner weather. When stress, overwhelm, or low mood take hold, mail stacks up on the counter, laundry lingers in the basket, and dust settles on surfaces you no longer have the energy to notice. When you feel calm and in control, the rooms tend to follow. That mirror is not a coincidence; it is a two-way relationship. Cleaning, often dismissed as a chore, is one of the most accessible tools available for managing how you feel, because it is physical work with visible results that feeds back into your mind. Here is the mechanics of that loop. Cleaning Restores a Sense of Control Life is unpredictable at scale. You cannot steer global events, the economy, other people, or the surprises your career and personal life throw at you, and that helplessness feeds anxiety. A home is different: it is a small, manageable universe where your actions land with direct, immediate consequences. You pick the cleaner, you put in the effort, and the floor goes from grimy to gleaming because you decided it would. Sorting a chaotic pantry or closet offers a contained problem with a clear solution, a rare thing in a world of ambiguous ones. That feeling of efficacy does not stay in the kitchen; confidence earned on a small, winnable task ripples outward into bigger challenges. The Repetitive Motion Is an Active Meditation Scrubbing, wiping, sweeping, and folding are rhythmic, and rhythm grounds a racing mind. When anxious thoughts loop over past regrets or future worries, the sensory demands of cleaning pull attention into the present: warm soapy water on your hands, the back-and-forth hum of the vacuum, the scent of lemon polish, a cloth squeaking across glass. This is a core principle of mindfulness, anchoring you in the now and granting a break from mental chatter. Focused activity lets the nervous system settle, lowering cortisol and easing physical stress signs like a rapid heart rate and shallow breathing. Stay with it and you can slip into flow, that state where time fades and you surface feeling refreshed and centered. A Finished Room Is a Dose of Dopamine Brains are wired to enjoy accomplishment. Watching a filthy, cluttered room become an orderly one through your own effort releases dopamine, the neurotransmitter tied to pleasure, motivation, and satisfaction, so the before-and-after is chemically rewarding, not merely Instagram-worthy. It is evidence of your own competence. This is why making your bed each morning shifts an entire day: it is the first completed task, the first small win that sets a precedent. Every cleared counter and polished surface reinforces capability, which cuts directly against the lethargy, apathy, and futility that depression feeds on. Clutter Charges You Rent on Your Attention The flip side is real too. Clutter is excessive sensory input: every object in view sends a signal, and a crowded room bombards the brain. Paper piles whisper about unfinished tasks, an overflowing laundry basket nags about pending chores, and the visual noise drains focus even below conscious awareness. Living like this keeps stress mildly elevated, makes relaxation hard, and steals the cognitive resources you wanted for work, hobbies, or conversation. Decluttering removes the noise and hands your mind clear space. The benefits of moving your body while you do it stack on top, which the CDC documents in its research on the benefits of physical activity, including reduced short-term anxiety and a lower risk of depression and anxiety over time. Public Health Agency of Canada resources on mental health and wellness and being active for your health make the same connection from the Canadian side. What a Tidy Space Does for Focus, Ritual, and Sleep Beyond mood, order supports performance. A desk buried in old mugs and stray papers fractures attention, and minutes vanish hunting for a pen. A clear workspace minimizes distraction and smooths workflow, and the principle travels: a tidy kitchen makes cooking pleasant, a neat living room becomes actual rest rather than low-grade agitation. Cleaning also marks life transitions, which is why spring cleaning persists across cultures as a way to sweep out the old and make room for the new: Scrubbing after a breakup reclaims your space and closes a chapter Cleaning after an illness signals recovery and a fresh start Preparing a nursery or a home office is an act of hope and readiness Finally, there is sleep, which underpins mood regulation and cognitive function. A cluttered, dusty bedroom fights rest, while a clean sanctuary, fresh sheets pulled back, tells the brain the day is over. Waking rested makes stress easier to carry. Small Cleaning Habits and What They Give Back If you feel Try this What it returns Overwhelmed A ten-minute timer on one counter or shelf A finished task and proof you can start Anxious Rhythmic wiping or vacuuming, no phone Present-moment focus and calmer breathing Stuck or flat Make the bed, then one drawer An early dopamine win to build on Distracted Clear the desk you work at Fewer visual signals competing for attention Restless at night Tidy the bedroom before bed A cue that the day is done, better sleep If even the small version feels unreachable this season, that is exactly when outside help works best, because a professional reset removes the backlog so the habit can actually start. Toronto Shine Cleaning offers thorough, judgment-free service: a one-time deep cleaning restores the baseline, and regular maid visits keep it from sliding back, with rates on the pricing page and coverage across every GTA area listed in our locations. Mental Health and Cleaning FAQ Does a messy house mean I have a mental health problem? No. Homes get messy through busy seasons, illness, moves, and plain fatigue, and one messy weekend proves nothing. The connection runs both ways, but diagnosis belongs to professionals. If clutter consistently feels impossible to face and drains your mood for weeks, that is worth discussing with a

How Mental Health and House Cleaning are Completely Linked Read More »

disorganized home

Why Hiring A Professional Organizer Is Important – 5 Key Factors

Why Hiring A Professional Organizer Is Important Belongings pile up quietly. An item here, a stack there, and rooms that once felt open start to feel cramped and heavy. This is not simply untidiness. Clutter raises the background level of stress at home, makes ordinary tasks harder, and turns cleaning into a losing battle. When counters disappear under paper and floors become obstacle courses, real cleanliness stays out of reach. That is when many people realize the problem is not the cleaning at all. It is the sheer volume of stuff, and a professional organizer solves it with a methodical plan instead of another round of tidying. How Clutter Quietly Takes Over Dust settles in every gap between objects, so surfaces never feel clean. Cleaning takes longer because piles must be moved before anything can be wiped. Time disappears into hunting for keys, documents, or one ingredient. Duplicate purchases happen when you cannot find what you own. Stress builds from a space that feels out of your control. The work starts with an in-depth consultation. The organizer asks how you use each space, what frustrates you, and what a more functional home would look like, then assesses the scope of the clutter and the habits behind it. It is a judgment-free conversation that produces a plan to fit your life. 5 Key Factors That Make an Organizer Worth It 1. Do You Really Need All the Objects? Decluttering is the heart of the process and usually the hardest part. An organizer guides you through it calmly and objectively, one category at a time, so you can decide what stays and what goes. Three plain questions settle it: Is it useful? Do I love it? Do I need it? Sentimental pieces get respectful strategies, such as digitizing photos and letters or building one memory box, so memories are honoured without a room full of boxes. Anything left over leaves responsibly by way of charity donations, resale, recycling, or waste disposal. 2. Sorting and Categorizing With the excess cleared, remaining items are grouped by kind, a like-with-like principle that puts all baking supplies together, all stationery in one spot, and all cleaning products with each other. In a home where things have drifted for years, this step reveals what you own and where duplicates hide. The organizer then plans the space, studying closets, cabinets, shelves, drawers, and vertical room before designing storage that is efficient and easy to reach. In a kitchen that might mean reconfiguring pantry shelves, adding clear stackable containers, setting up a first-in-first-out rotation to cut food waste, and finding homes for pot lids and baking sheets. 3. Closets, Rooms, and Awkward Spaces In closets, uniform hangers save space and create visual calm, folding techniques expand drawer capacity, shoe storage keeps pairs visible, and accessories such as scarves, belts, and jewelry get their own systems, plus seasonal rotation so off-season clothing is stored properly. Home offices gain paper management for action, reference, and archive files, digital organization advice, an ergonomic desk layout, and supplies within reach. Children’s rooms work better with clear bins, picture labels, and toy rotation. Garages, basements, and attics get heavy-duty shelving, durable clear bins, and zones for tools, sporting gear, and holiday decorations. 4. Labeling and Maintenance Coaching Clear, consistent labels tell everyone in the household where things belong, and they keep a system from slowly collapsing. A good organizer does not simply set up shelves and leave. They coach you on daily or weekly resets and routines for handling mail and groceries, and often offer follow-up sessions to fine-tune the system as needs change. 5. Time and Money Reclaimed The benefits reach far beyond a tidier house. An organized space brings calm and control, and the minutes saved each week add up to hours for something you enjoy. Knowing what you own prevents duplicate buys, an organized pantry and fridge reduce food waste, and papers are less likely to be misplaced, so late fees are avoided. Best of all, organizers maximize the space you already have, so a small home feels bigger and you may skip the storage unit entirely. An orderly home is also far easier to clean, because dust and grime have fewer places to hide. Where Organizing Helps Most Situation Main Benefit Why It Matters Moving Only pay to transport what you need Systems are set up in the new home from day one New baby, empty nest, downsizing, blended household Guidance through changing space needs Transitions stay smooth, not chaotic Chronic disorganization Tailored, compassionate strategies Support where habits or ADHD have built a wall Preparing a home for sale Better photos, better showings Can command a higher price and sell faster After a renovation Resettling into the improved space Keeps the new layout functional and beautiful Three myths still stop people from asking for help. One is that organizing is a luxury for the wealthy, when it is really an investment in time and a home that works. Another is the fear that a stranger will force you to throw away cherished possessions, though the final decision always rests with you. The third is shame, the idea that you should manage alone, even though organizing is a specialized skill just like plumbing or electrical work. Frequently Asked Questions Will an organizer make me throw out things I love? No. Professional organizers work collaboratively, and every decision about what stays rests with you. Sentimental items get strategies for honouring them without keeping everything. How long does a typical organizing project take? It depends on the space and how much clutter has accumulated. A single closet can be finished in one session, while a whole home takes several visits plus follow-up coaching. Does an organized home really stay cleaner? Yes. Fewer objects mean fewer surfaces for dust to settle, fewer obstacles to move before cleaning, and easier access to floors and corners. Can I hire help for just one room? Absolutely. Single-project help is a common way to start, and many

Why Hiring A Professional Organizer Is Important – 5 Key Factors Read More »

bottle of vinegar

How To Use Vinegar For Cleaning, Do You Know? – 6 Expert Tips

How to Use Vinegar for Cleaning: 6 Expert Tips From the Pantry Staple Before shelves filled with specialty sprays, households reached for one jug to cut grease, clear clouds from glass, and freshen drains: white distilled vinegar. It still deserves that spot. A basic bottle costs very little, stores indefinitely, and takes on an outsized share of everyday chores when you know what it can and cannot do. The trick is treating it like the mild acid it is: matched to the right surface, given the right contact time, and kept away from the few materials it damages. The six expert tips below cover the jobs vinegar handles best, the dilutions that matter, and the short list of places to leave it in the cupboard. Why the Simple Stuff Works: About 5 Percent Acidity Typical household vinegar runs around 5 percent acetic acid, and that acidity is the entire engine. It loosens the bonds that hold grease to a backsplash, dissolves the chalky calcium carbonate behind hard-water crust, and creates an environment where many common household germs and mold spores struggle to persist. It is not a hospital-grade disinfectant and should not be labeled as one, but for routine maintenance on most surfaces a properly used wipe does real work. Health Canada’s resource hub for household products explains how everyday items should be handled, stored, and disposed of safely. Tip 1: Use It as a Kitchen Grease Cutter Splatter beside the stove, the filmy side of the range hood, and the upper cabinet doors near a cooktop all shed a vinegar spray. Mist the surface, give the acid a few minutes to soften the grease, then wipe with a cloth and rinse the cloth as you go. A daily or every-other-day pass prevents the sticky layer from hardening into buildup that demands a solvent. Tip 2: Freshen the Fridge and Food-Prep Areas Vinegar’s antimicrobial edge makes it a sensible wipe-down for refrigerator shelves and counters between deeper washes. Keep a spray bottle of equal parts water and vinegar in the kitchen, clean surfaces after food prep, and rinse with plain water afterward on anything that touches food, since the sour smell lingers on a film of residue. A cup dropped into a kitchen drain, followed by hot water about half an hour later, tackles the odors that cling to disposals and traps. For quick odor relief around the home, these go-to moves all work: A small open bowl left on the counter for a few hours after fish or garlic-heavy dinners A few tablespoons down the kitchen drain, chased by hot water later A diluted wipe-down of closet shelves and basement surfaces An open jar set into a musty lunch bag or cooler overnight A vinegar brew cycle through the coffee maker when mustiness lingers Tip 3: Neutralize Odors Instead of Masking Them Commercial fresheners cover smells with perfume; vinegar removes odor-causing molecules instead. The sharp scent reads strongly at first but vanishes once surfaces dry, which is why a treated room ends up neutral rather than floral. Where odors return daily, pair the habit with the quick moves listed above so the source gets addressed rather than buried. Tip 4: Descale Showers, Kettles, and Coffee Makers Toronto water leaves a white crust on faucets and inside appliances, and acetic acid is one of the cheapest descalers available. Tie a plastic bag of vinegar around a showerhead and leave it overnight to clear the nozzles, wrap vinegar-soaked paper around a faucet base for a few hours, or run a brew cycle of equal parts vinegar and water through a coffee maker or kettle followed by fresh-water rinses. Descaling restores heating efficiency and extends the life of both appliances. Tip 5: Get Streak-Free Glass and Stainless Steel Half water, half vinegar in a spray bottle replaces most commercial glass cleaners. Mist windows, mirrors, or a stainless sink, then wipe with a microfiber cloth or crumpled newspaper for a bright, line-free finish. The acid breaks up the residue that causes haze, and the solution evaporates clean instead of leaving surfactants behind. For a streak-free shine on a tall pantry door, spray top to bottom in sections rather than all at once. Tip 6: Pair It With Baking Soda for a Gentle Scour Vinegar is not an abrasive, but combined with baking soda it fizzes into a paste that lifts stuck-on grime without scratching. Apply the mixture inside a cool oven, around a stained sink, or along grimy tile lines, let the reaction bubble and loosen the debris for several minutes, then scrub gently and rinse. The combination is a practical middle step between a plain wipe and a chemical cleaner, and both ingredients sit in most pantries already. Where Vinegar Should Never Go The same acidity that dissolves scale can etch natural stone such as marble, granite, and travertine, wear down unsealed grout, and dull the finish on waxed wood floors. When a product label or surface is uncertain, test a hidden corner first, and store the bottle away from other cleaners rather than mixing cocktails on your own; guidance on safe use of household chemical products applies to acidic cleaners just as it does to anything stronger. Quick Reference: Mix, Contact Time, and Job Task Mix Contact time Greasy stovetop backsplash Full strength, sprayed A few minutes, then wipe Countertop and fridge wipe Equal parts with water Wet a minute or two, then rinse Showerhead scale Undiluted, bagged Overnight Windows and mirrors Equal parts with water Wipe and buff immediately Oven or grout scrub Paste with baking soda Several minutes of fizz, then scrub Vinegar Cleaning Questions, Answered Does vinegar kill mold? It handles many common household mold spores on non-porous surfaces, which makes it useful on shower tile. Persistent or spreading growth is a different problem and deserves a professional assessment before you scrub. Can I use apple cider vinegar instead of white? For deodorizing bowls, yes. For surfaces, skip it: the color and sugars can stain or leave

How To Use Vinegar For Cleaning, Do You Know? – 6 Expert Tips Read More »

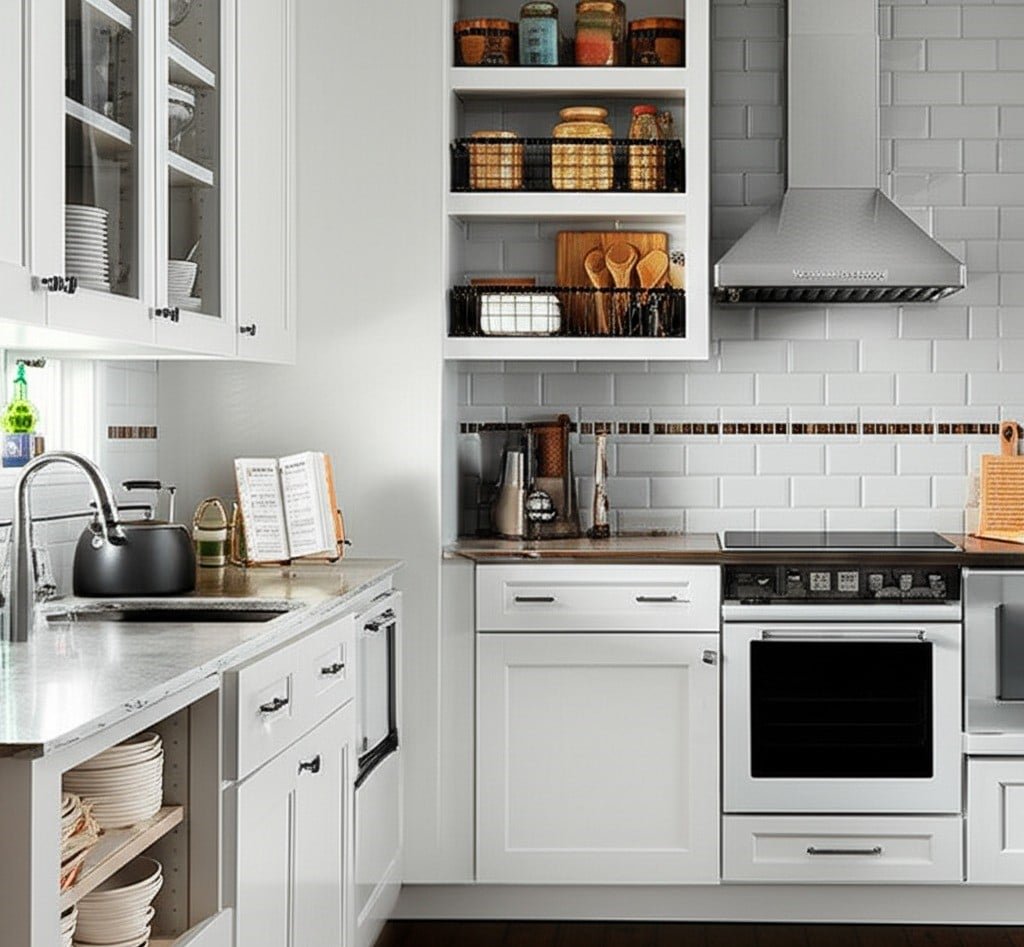
white wooden cabinet near window

Post Renovation Cleaning in Scarborough

Post Renovation Cleaning in Scarborough After months of planning and construction, your Scarborough home renovation is finally complete. But before you can enjoy your new space, a thorough post-renovation cleaning is essential. Construction dust, debris, and hazardous materials can linger on every surface. Professional post-renovation cleaning ensures your home is safe, spotless, and ready for move-in. Toronto Shine Cleaning specializes in post-renovation cleaning across Scarborough, removing every trace of construction residue so you can enjoy the full beauty of your newly renovated space. Why Post-Renovation Cleaning Matters Renovations leave behind fine dust particles that settle on floors, walls, cabinets, and inside HVAC vents. Drywall dust, sawdust, and paint splatters can spread throughout the home and affect indoor air quality. These fine particles are small enough to remain airborne for hours after work ends, settling on every horizontal surface. Beyond dust, sharp objects such as nails, staples, and broken tiles pose safety risks, especially in households with children or pets. Leftover adhesive, caulk residue, and paint drips can also mar new surfaces if not cleaned promptly and properly. A thorough cleaning removes these hazards and reveals the true beauty of your renovated space. Indoor air quality is a primary concern after any renovation. Construction dust contains silica, gypsum, and other particles that can irritate the respiratory system. According to the Canada.ca guide on reducing humidity and mould, poor ventilation combined with construction dust can contribute to indoor air contaminants. Professional cleaning with HEPA-filtered vacuums captures these fine particles and prevents them from recirculating. Key Benefits of Professional Post-Renovation Cleaning Thorough dust removal: HEPA-filtered vacuums capture fine drywall dust, silica particles, and sawdust that household vacuums simply recirculate into the air. Surface protection: Professional cleaners use the right techniques for new paint, fresh grout, and sealed hardwood to avoid damage or discolouration during the cleaning process. Time savings: A full post-renovation clean can take four to eight hours. Hiring professionals frees you to focus on unpacking, decorating, and settling into your renovated home. Health and safety: Removal of sharp debris, chemical residues, and airborne dust protects your family from injury and respiratory irritation after construction ends. Common Post-Reno Contaminants Where They Accumulate Why They Need Removal Drywall dust Floors, shelves, inside cabinets, window sills Irritates respiratory system, causes scratching on finished surfaces Paint splatters and adhesive Window frames, baseboards, door hardware Affects finish appearance, can harden and become permanent stains Sharp debris (nails, staples) Carpets, corners, under appliances Safety hazard for bare feet and pets; can damage vacuum cleaners Construction dust in vents HVAC registers, ductwork, ceiling fans Recirculates fine dust every time the system runs Step-by-Step Cleaning Process A complete post-renovation clean follows a logical progression. Start by clearing all large debris and construction waste from every room. Next, dust from the top down: ceilings, ceiling fans, light fixtures, and window frames. Use a damp microfiber cloth or HEPA vacuum attachment so dust is captured rather than scattered. Wipe walls gently with a barely damp cloth to collect fine drywall dust without damaging fresh paint. Clean all doors, handles, and frames, as these high-touch areas collect the most residue. Once vertical surfaces are clean, move to floors. Vacuum carpets and hard floors thoroughly, then mop hard surfaces with appropriate cleaners for tile, hardwood, or laminate. Pay special attention to corners and edges where debris accumulates. In kitchens and bathrooms, sanitize all surfaces including countertops, sinks, and cabinets inside and out. Clean inside appliances such as the oven, refrigerator, and microwave, which may have collected dust during construction. Wipe down all switch plates, outlet covers, and door handles. Finally, wipe down HVAC vents and replace filters to prevent construction dust from circulating through your home. A final walk-through ensures every room is inspected for missed spots. Why Hire Professionals for Post-Renovation Cleaning Professional cleaners bring industrial-grade vacuums with HEPA filtration, specialized cleaning solutions, and the expertise to tackle stubborn post-renovation residue. They can reach high corners, clean inside ductwork, and safely dispose of construction debris. DIY attempts often miss the fine dust that settles on horizontal surfaces and inside cabinets, which may resurface days later and undo the sense of freshness you expect from a new renovation. Professional teams also know which cleaning agents work safely on new paint, fresh grout, and sealed hardwood without causing damage or discolouration. For Scarborough homeowners, booking a professional post-renovation clean saves time and guarantees a truly spotless result. Frequently Asked Questions How long does a post-renovation cleaning take? For an average Scarborough home, expect four to eight hours depending on the scope of the renovation and the amount of debris left behind. Should I clean before or after the renovation crew leaves? After. The renovation crew should handle their own debris removal, and then a deep clean addresses the fine dust and hidden grime they leave behind. Is post-renovation cleaning safe for pets? Yes. Professional cleaners use eco-friendly, non-toxic products that are safe for pets and children once all surfaces are dry. Do you clean windows after renovation? Yes. Post-renovation cleaning includes interior window cleaning to remove dust, paint splatters, and adhesive residue from glass surfaces and frames. Ready for a fresh start in your newly renovated Scarborough home? Call (647) 424-0355 to schedule your post-renovation cleaning. We offer deep cleaning, regular maintenance, and move-in/out cleaning across Scarborough. Check our pricing for transparent rates. Serving all GTA locations. For indoor air quality information, read the CDC guidelines on cleaning and disinfecting your home.

Post Renovation Cleaning in Scarborough Read More »