Post Renovation/Construction Guide

clean carpet

DIY vs. Store-Bought: What’s the Best Carpet Cleaning Solution?

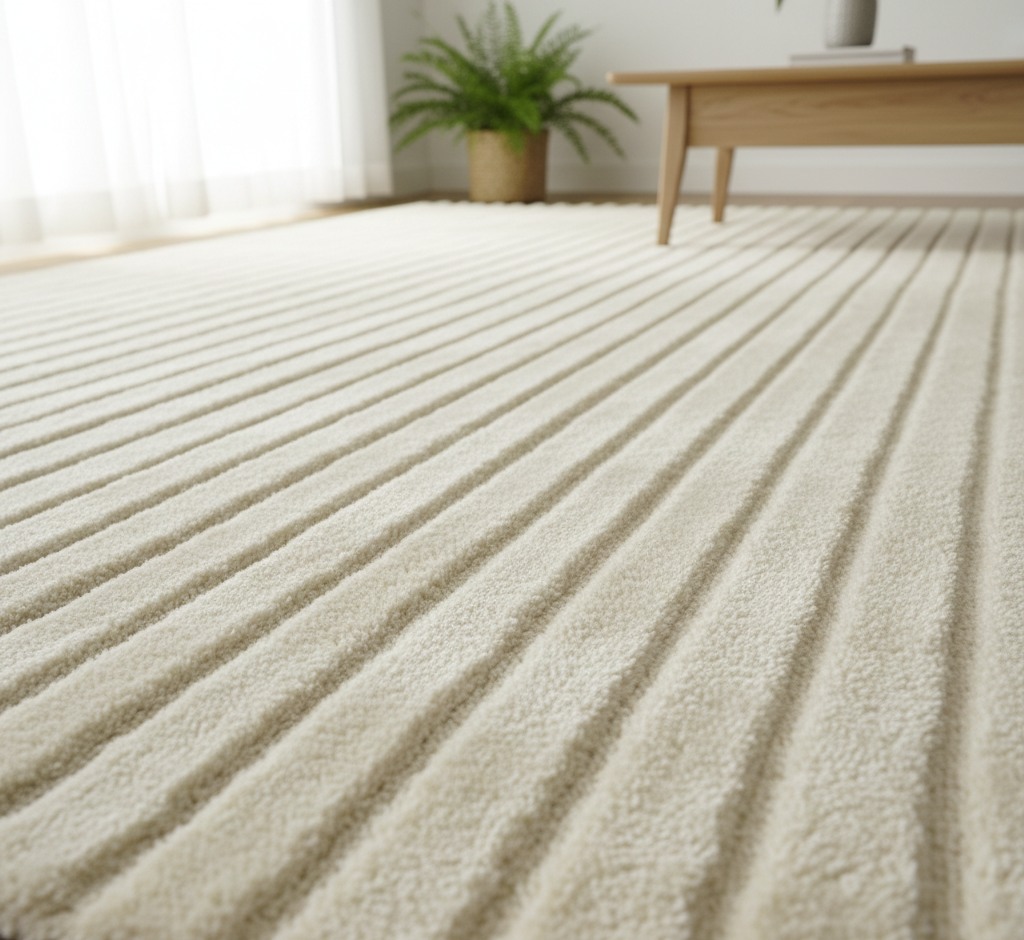
DIY vs. Store-Bought: What’s the Best Carpet Cleaning Solution? Every homeowner asks this question, and the honest answer is that no single product wins for every situation. The cleaner that lifts a pet stain may do nothing for grease, and the mixture that handles a small spill is not what you need for a full-room deep clean. The best carpet cleaning solution is the right solution for the right problem, so the real skill is knowing what each type of cleaner does and when to use it. The Chemistry Behind Carpet Cleaners Commercial and homemade carpet cleaners rely on the same few families of ingredients. Surfactants break the surface tension of water so it can penetrate fibers, latch onto greasy dirt, and hold it in suspension until it is blotted or extracted away; simple dish soap is a basic surfactant. Enzymes are proteins that break down other proteins, starches, and fats, which makes them the only real answer for organic stains like blood, grass, or urine. Solvents dissolve substances that water cannot, such as grease, oil, ink, and tar. Oxidizers release oxygen that breaks the chemical bonds of colored stains; hydrogen peroxide and sodium percarbonate, the active ingredient in OxiClean, are the most common examples. Ingredient What It Breaks Down Common Example Surfactants General dirt and light grease Clear dish soap Enzymes Proteins, starches, fats Protease, amylase, lipase cleaners Solvents Oil, ink, tar, wax Rubbing alcohol, citrus degreasers Oxidizers Colored stains like wine and coffee Hydrogen peroxide, sodium percarbonate DIY Carpet Cleaning Solutions That Work White vinegar and water is the classic first response: mix equal parts distilled white vinegar and water in a spray bottle, mist the area lightly, let it sit for 5 to 10 minutes, and blot with a clean, white cloth. Vinegar is a mild acid that dissolves grime, neutralizes alkaline messes, and deodorizes, but it can set protein-based stains like eggs or blood, so skip it there. Baking soda is a mild alkali that absorbs moisture and odors: sprinkle it dry over the carpet and leave it for several hours or overnight before vacuuming, or pile it onto a wet, greasy spill and let it form a dry crust, then scrape and vacuum. For general dirt, no more than one-quarter teaspoon of clear, simple dish soap in a cup of warm water gives extra lifting power, but overuse or poor rinsing leaves a sticky residue that attracts dirt faster than before. Hydrogen peroxide at 3 percent works on tough organic stains like blood, wine, or coffee: apply a small amount, let it bubble for 10 to 15 minutes, blot, and always test it in a hidden spot first because it can mildly bleach carpet color. When to Choose a Commercial Carpet Cleaner DIY solutions are great for everyday messes, but commercial products bring targeted chemistry for hard jobs. Enzyme-based cleaners labeled for pet stains and odors are the non-negotiable choice for urine, feces, vomit, blood, and food spills, because only enzymes truly break down the odor-causing proteins. Oxidizing cleaners are the go-to for red wine, juice, coffee, and tea. Solvent-based spotters handle grease, oil, and ink. Carpet shampoos for cleaning machines come in high-traffic, pet, and oxy formulas, and it is crucial to buy one designed for your machine so excess foam cannot damage the motor. Dry carpet cleaning powders are useful for natural fiber rugs and quick freshen-ups between deep cleans. Carpets trap dust and allergens, so a thorough clean also supports better indoor air quality. Technique Matters More Than the Product Even the best carpet cleaning solution fails when technique is wrong. Act fast, because fresh spills lift far more easily than set-in ones. Blot, never rub, working from the outside of the stain inward with a clean, white cloth. Always spot test any new product on a hidden area. Do not over-saturate, because soaking can damage the carpet backing and subfloor and invite mold and mildew growth. Rinse thoroughly by blotting with plain water after treatment, since leftover residue attracts dirt and creates dark spots over time. Around pets and children, prompt cleanup is part of everyday hygiene that keeps the whole household healthier. The Best Carpet Cleaner for Every Situation General dirt and light spills: DIY white vinegar and water solution. Pet urine and organic accidents: commercial enzyme-based cleaner. Red wine, coffee, or juice: commercial oxidizing (Oxi) cleaner. Grease or oil: absorb with baking soda, then a solvent-based spotter. Full-room deep clean: machine-compatible carpet shampoo, such as a pet formula. Frequently Asked Questions Is vinegar safe for all carpets? No. Vinegar is acidic, and it can react with and set certain protein-based stains like blood or eggs. Test it in a hidden area first, and never use it on stains you cannot identify. Can I use dish soap on carpet stains? Yes, in very small amounts: no more than one-quarter teaspoon of clear dish soap in a cup of warm water. Too much soap leaves sticky residue that attracts dirt, so rinse by blotting with plain water afterward. What removes pet urine smell from carpet? An enzyme-based cleaner is the only reliable answer. Enzymes break down the uric acid crystals and proteins that cause lingering odors, while vinegar or soap only mask them temporarily. How often should I deep clean my carpets? For a typical household, an annual professional deep cleaning is recommended, with more frequent cleanings for homes with pets, children, or heavy foot traffic. Does hydrogen peroxide bleach carpets? It can. Hydrogen peroxide is an oxidizer with a mild bleaching effect, so always test it in an inconspicuous spot, such as inside a closet, before treating a visible stain. Choosing the right carpet cleaning solution is detective work: identify the stain, understand the chemistry, and match the product to the problem. For a comprehensive professional deep clean that takes the guesswork out of the equation, Toronto Shine Cleaning uses professional-grade solutions and commercial equipment to tackle any stain on any type of carpet. Explore our deep cleaning service,

DIY vs. Store-Bought: What’s the Best Carpet Cleaning Solution? Read More »
Cleaning Patios and Decks: 5 Essential Tips for Cleaning Your Patio Before the Snow

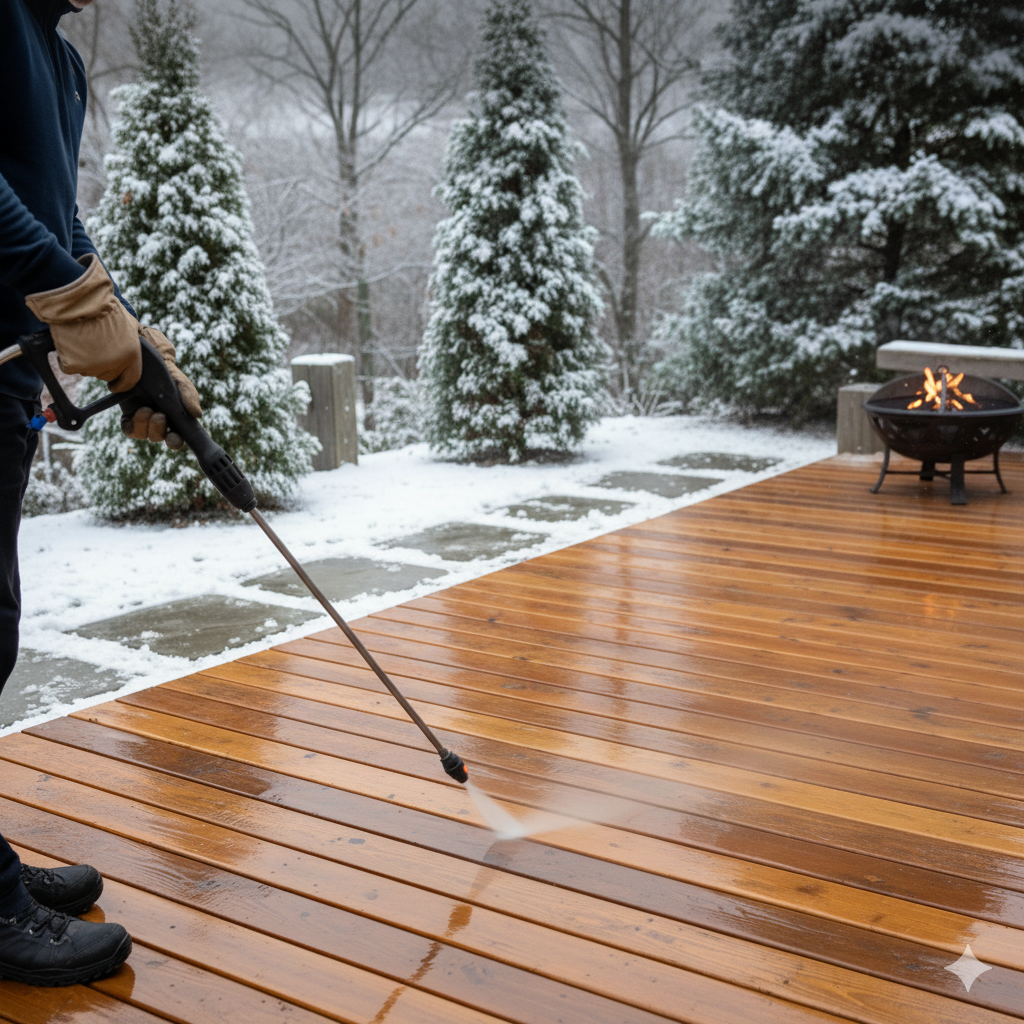
The patio or deck is an extension of the home. It is an outdoor living room, a place for summer barbecues, quiet morning coffees, and evenings with friends. But unlike a living room, it is in a constant battle with the elements. It is exposed to rain, sun, snow, falling leaves, bird droppings, and the slow, creeping advance of mold, mildew, and algae. Over the course of a season, this relentless exposure can transform a beautiful, welcoming space into a grimy, stained, and even hazardous one. Cleaning a patio or deck is not a simple wipe-down. It is a project of reclamation. It is about pushing back against the natural decay and restoring the space to a state of cleanliness, safety, and readiness. Whether you are preparing it for enjoyment in the spring or putting it to bed for the winter, a thorough cleaning is a non-negotiable part of responsible homeownership. The process requires a systematic approach, the right tools, and an understanding that different materials demand different methods. 1.First Step The first step in this project, before a single drop of cleaner is applied, is the great evacuation. You cannot clean a space that is cluttered. Everything must be removed from the deck or patio surface. This means the furniture, the grill, the planters, the umbrellas, and the outdoor rugs. This step is not just about clearing the way; it is a forcing mechanism that reveals the true state of the surfaces underneath. It uncovers the hidden stains, the patches of green algae under a planter, and the full extent of the dirt you are about to tackle. With the space completely clear, the next step is a thorough sweep. Use a stiff-bristled push broom to remove all the loose debris: leaves, twigs, dirt, cobwebs, and anything else that has accumulated. Pay special attention to the corners and the spaces between deck boards where debris loves to hide. This initial sweep is crucial because it removes the abrasive, gritty material that could otherwise scratch the surfaces during the scrubbing phase. Now, with a clear and swept surface, you can properly assess the situation. Look closely at the material. Is it a wooden deck, a composite deck, or a hardscape patio made of concrete, pavers, or natural stone? Identify the specific problems you need to address. Are there dark, blackish spots that indicate mold? Green, slimy patches of algae, which can be a serious slipping hazard? Dark, circular stains under where planters used to be? Grease splatters around the grill area? The answers to these questions will determine your plan of attack and the specific cleaning solutions you will need. 2.Wooden Decks For wooden decks, the approach must balance cleaning power with the need to protect the wood fibers. The wrong cleaner or technique can cause irreparable damage. The gentlest method should always be the first attempt. A simple solution of a mild pH-neutral soap, like dish soap, mixed in a bucket of warm water can be surprisingly effective for light dirt. Apply the solution, scrub gently with a soft-bristle deck brush, and rinse thoroughly. For the more common and stubborn issues of algae, mold, and ingrained dirt, a more powerful solution is needed. The best choice for a wooden deck is a cleaner based on oxygen bleach (sodium percarbonate). Unlike chlorine bleach, which is harsh, can damage wood fibers, and is harmful to surrounding plants, oxygen bleach is a non-toxic alternative that cleans by releasing oxygen ions when mixed with water. This process breaks down dirt, mold, and algae without harming the wood. To use it, mix the powdered oxygen bleach with water according to the manufacturer’s directions. It is critical to wet the entire deck surface with plain water from a hose before you apply the cleaner. A dry deck will absorb the cleaning solution too quickly and unevenly. Apply the oxygen bleach solution with a mop or a garden sprayer and let it sit on the surface for 10-15 minutes, but do not let it dry. This “dwell time” is when the chemical reaction is happening. After it has sat, use a stiff-bristled deck brush, scrubbing in the direction of the wood grain, to agitate the grime. At the end, rinse the deck completely with a hose until all the cleaner and dirt are gone. 3.High Pressure Washer The question of the pressure washer inevitably arises when cleaning decks. A pressure washer is a powerful tool that, in inexperienced hands, can do far more harm than good. A stream of water that is too powerful or held too close can easily gouge the wood, raise the grain, and create a fuzzy, splintered surface. If you choose to use one, you must do so with extreme caution. Use the lowest possible pressure setting (no more than 1200 PSI for most softwoods like pine), and use a wide, 40-degree fan tip. Keep the nozzle at least a foot away from the wood surface at all times, and use long, sweeping motions, never stopping in one spot. A pressure washer should be seen as a tool for rinsing, not for blasting away dirt. The chemical cleaner does the real work of lifting the grime; the pressure washer just washes it away. For composite decks, the cleaning process is generally less intensive. While marketed as “low-maintenance,” they are not “no-maintenance.” They are still susceptible to mold and mildew, which can feed on the organic fillers within the composite material. A gentle scrub with a soft-bristle brush and a mild soap solution is often sufficient for general cleaning. For mold, a solution of one part white vinegar to two parts water can be effective. Avoid using abrasive cleaners or metal brushes, which can scratch and dull the surface. Pressure washing is generally safer on composite than on wood, but the same precautions of low pressure and a wide fan tip should be observed. 4.Concrete, Paving or Stone Patios made of concrete, pavers, or stone present a different set of challenges. These

Cleaning Patios and Decks: 5 Essential Tips for Cleaning Your Patio Before the Snow Read More »

woman giving her friend a cleaning gift card

Cleaning Gift: The Most Thoughtful Thanksgiving Gift You Can Give

Thanksgiving is a holiday centered on the beautiful, simple act of gathering. It’s about the warmth of a crowded table, gifts, the familiar comfort of shared recipes, and the expression of gratitude for the people in our lives. We plan menus, we brine turkeys, and we coordinate who will bring which dessert. But beneath this joyful preparation lies a silent, often stressful, and monumental task that almost always falls on the host: the pre-Thanksgiving deep clean. We have all felt it. The week before the guests arrive is a frantic race against the clock. It is a period of scrubbing, dusting, and mopping, driven by the quiet but intense pressure to present a home that is not just tidy, but impeccably clean. It is a labor of love, but it is labor nonetheless. It is hours spent on hands and knees, wiping baseboards and scrubbing floors, when that time could be spent perfecting a pie crust or simply taking a moment to breathe before the happy chaos begins. This year, consider a different kind of contribution. Instead of offering to bring another side dish that will crowd the refrigerator, think about giving a gift that truly serves the person you are thankful for. Consider giving the gift of a clean home. It may sound unconventional, but a pre-Thanksgiving cleaning, whether performed by you or a professional service, is one of the most thoughtful, practical, and profoundly impactful gifts you can possibly give a friend who is hosting. It is a gesture that transcends a simple present; it is a gift of time, of peace of mind, and of genuine, functional support. The Gift of Time In our busy lives, time is the most precious and non-renewable resource we have. During the holiday season, this becomes acutely apparent. The host of a Thanksgiving dinner is not just cooking a single meal; they are orchestrating a major event. Their to-do list is a marathon of planning, shopping, chopping, and baking. The last thing they have is a surplus of free hours. Let’s be honest about what a true guest-ready clean entails. It is not a quick wipe of the counters. It is a comprehensive, top-to-bottom effort. The Dusting: This means getting not just the coffee table, but the tops of the door frames, the ceiling fan blades, the baseboards, and the window sills. It is a detailed, meticulous job that can easily take an hour or more. The Kitchen Deep Clean: The kitchen is the heart of Thanksgiving, and it needs the most intensive work. This involves scrubbing the stovetop, wiping down the fronts of all appliances, cleaning the microwave, disinfecting the countertops, and making sure the sink is sparkling. This is a solid hour of focused work, at minimum. The Bathroom Scrub: The guest bathroom needs to be pristine. This means scrubbing the toilet, cleaning the sink and faucet, wiping down the mirror until it is streak-free, and washing the floor. The Floors: Every hard-surface floor in the main living areas needs to be thoroughly swept and mopped. Every carpet needs to be vacuumed, including moving furniture to get the dust bunnies hiding underneath. This can easily consume another hour or two, depending on the size of the home. The Final Touches: Cleaning entryway glass, tidying up clutter, and giving everything a final polish. When you add it all up, a proper pre-hosting deep clean can easily take five to eight hours of hard, physical work. By giving the gift of a cleaning, you are handing your friend an entire day of their life back. That is a day they can now use to finalize their menu, to bake a dessert without rushing, to spend time with their children who are excited for the holiday, or, most importantly, to simply sit down with a cup of tea and mentally prepare for the joy of hosting, rather than the stress of it. You are not just saving them a chore; you are giving them the space to enjoy the process. The Gift of Peace of Mind The physical labor of cleaning is only half the battle. For any host, the mental load can be even more exhausting. The pressure to have a “perfect” home is a real and often unspoken source of anxiety. Every dust bunny in the corner, every smudge on the window, and every crumb under the dining table can feel like a personal failing when you are about to welcome people into your home. This “hosting anxiety” creates a mental checklist that runs on a constant loop in a host’s mind. Did I remember to dust the lampshades? Is the guest bathroom clean enough? Does the house smell fresh? This internal monologue is a significant source of stress that detracts from the true spirit of the holiday. When you give the gift of a clean home, you are silencing that nagging voice. You are taking a huge, stressful item off their mental checklist and completely erasing it. Imagine the profound sense of relief your friend will feel, walking into their home a day or two before Thanksgiving to find that it is already done. The floors are gleaming. The kitchen is sanitized and ready for the culinary marathon. The bathroom is sparkling. This gift allows your friend to transition their focus from the presentation of their home to the purpose of the gathering. They can channel all their energy into what truly matters: the food, the conversation, and the connection with their loved ones. They can be a present, relaxed, and joyful host, not a frazzled, exhausted one who is secretly worrying about whether a guest noticed the dust on the baseboards. You are not just cleaning their house; you are clearing their mind. A Foundation for the Entire Holiday Season Thanksgiving in many ways is the official kick-off to the entire winter holiday season. The festivities of November flow directly into the preparations for December. A deep clean for Thanksgiving is therefore not just a gift for a single day; it is a foundational gift that keeps on

Cleaning Gift: The Most Thoughtful Thanksgiving Gift You Can Give Read More »

wet cleaning wipes

Wet Wipes: 5 Why Wipes Aren’t the Best Solution

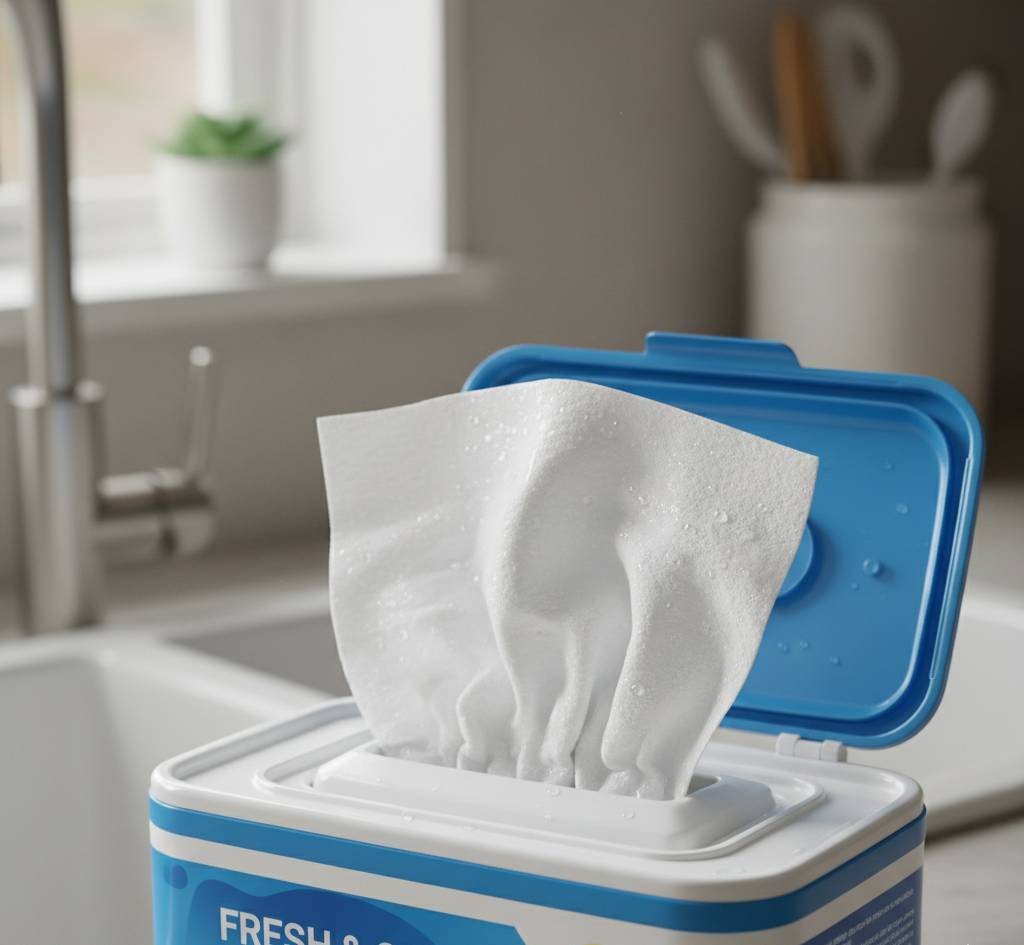
The convenience wet wipes is undeniable. It sits on the counter, in the car, in a handbag, a small, sealed packet promising a swift and simple solution to life’s messes. It is the wet wipe, and in the space of a few short decades, it has become one of the most ubiquitous and relied-upon products in modern life. From wiping a baby’s bottom to removing stubborn makeup, from sanitizing a shopping cart handle to a quick clean of a dusty dashboard, the wet wipe presents itself as the ultimate tool of immediate, portable cleanliness. But this convenience comes at a steep, and often hidden, price. The very qualities that make the wet wipe so appealing-its strength, its moisture, its disposability-are the same qualities that contribute to a cascade of environmental, infrastructural, and even personal health problems. The story of the wet wipe is a classic tale of a modern convenience with profound and unintended consequences. To truly understand its impact, we must look beyond the clean surface it leaves behind and examine the journey it takes after its single, fleeting use. What Are Wet Wipes Actually Made Of? The most significant misconception about wet wipes is what they are made of. We use them much like paper towels or toilet paper, and so we assume they are, in fact, a form of paper. This could not be further from the truth. If you have ever tried to tear a wet wipe, you know it has a surprising, fabric-like strength. This is because the vast majority of wet wipes are not made from paper at all, but from non-woven fabrics composed of plastic resins like polyester and polypropylene. These are the same materials used to make clothing, ropes, and plastic bottles. They are chosen for their durability and their ability to remain strong when saturated with liquid. This is precisely why they are so effective at scrubbing. However, it is also why they are an environmental disaster. Unlike paper, which is made from wood pulp and biodegrades relatively quickly, these plastic fibers do not break down in any meaningful timeframe. A single wet wipe can persist in the environment for hundreds of years, slowly breaking apart not into organic matter, but into smaller and smaller plastic fragments known as microplastics. The “Flushable” Myth This brings us to the most damaging myth perpetuated by the industry: the “flushable” wipe. Many brands market their wipes as safe to flush, creating the impression that they will simply disintegrate like toilet paper once they enter the plumbing system. This is a catastrophic falsehood. Toilet paper is specifically designed to have very short fibers that lose all their structural integrity almost immediately upon contact with water. Wet wipes are designed to do the exact opposite. When flushed, they do not break down. They travel through the pipes intact, where they snag on imperfections, catch on other debris, and begin to form the foundation of clogs. In the municipal sewer systems, this problem scales up to a monstrous degree. Here, the flushed wipes combine with the fats, oils, and grease (FOG) that are improperly poured down drains from household kitchens. The strong plastic fibers of the wipes act as a durable net, binding with the congealing fats to create colossal, rock-hard masses known as “fatbergs.” These blockages, which can grow to be the size of a bus and weigh several tons, are a plague on modern cities. They cause raw sewage to back up into streets and homes, require enormous and expensive efforts to break apart with high-pressure water jets and manual labor, and place an incredible strain on our aging water infrastructure. Every single time a “flushable” wipe is flushed, it becomes a potential building block for the next fatberg. The problem is not just contained to the sewers. During periods of heavy rainfall, sewer systems can overflow, discharging this toxic slurry directly into our rivers and oceans. Here, the wet wipes emerge, carpeting riverbeds and washing up on beaches in what is now grimly referred to as a “wet wipe reef.” They are frequently mistaken for food by marine animals and birds, leading to internal blockages and death. The Problem with the Bin Even when disposed of correctly in a trash can, the problems do not disappear. Because they are made of plastic, they end up in landfills where they will sit for centuries without biodegrading. They contribute to the ever-growing mountain of single-use plastic waste that is a hallmark of our disposable culture. Furthermore, the cleaning solutions and preservatives they are soaked in can leach into the soil and groundwater over time. The Cost to Our Health and Skin The convenience of a wet wipe can also come at a cost to our skin. In order to keep the wipes moist and free of mold and bacteria within their packaging, they are saturated in a solution that often contains a cocktail of chemicals, including preservatives, fragrances, and surfactants. Preservatives like parabens and methylisothiazolinone are necessary to prevent the growth of microbes, but they are also known skin irritants and allergens for many people. The “fragrance” listed on a package is often a proprietary blend of dozens of chemicals that do not have to be disclosed individually, and these are common triggers for dermatitis and allergic reactions. For personal hygiene, particularly on sensitive areas, the constant use of wet wipes can disrupt the skin’s natural microbiome, the community of beneficial bacteria that protects our skin. The chemical and physical action of wiping can strip away the skin’s natural protective oils, leading to dryness, irritation, and a compromised moisture barrier. From a cleaning perspective, wipes often provide an illusion of clean rather than a true removal of dirt and germs. Without a rinsing action, they often just smear bacteria and grime across a surface rather than lifting it away. A proper cleaning process involves a cleaning agent to loosen dirt and a cloth or sponge that can be rinsed out, physically removing the contaminants from

Wet Wipes: 5 Why Wipes Aren’t the Best Solution Read More »

5 Rust Removal Tips: The Ultimate Solution for Stubborn Rust Stains

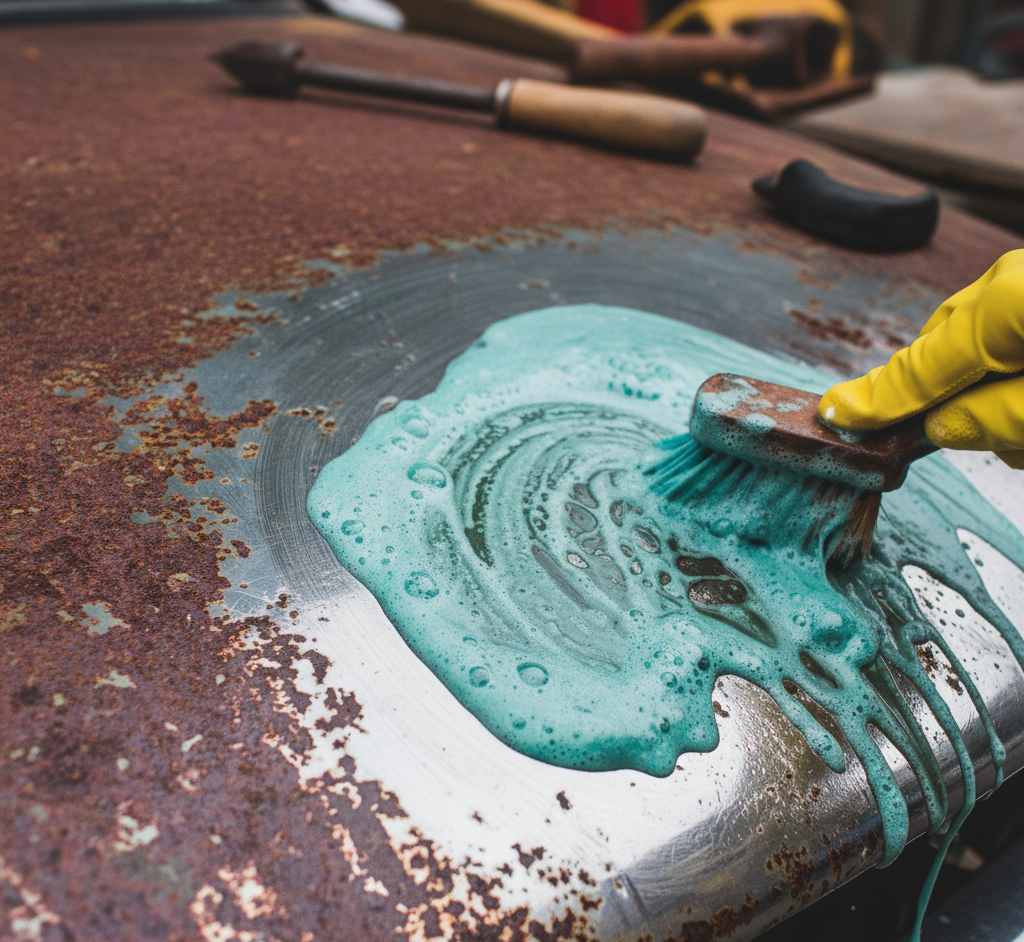
It is a slow, silent, and relentless process of decay. Rust creeps into the corners of our homes, staining our fixtures, seizing our tools, and weakening the structures we rely on. It is a familiar reddish-brown stain, the universal sign of iron’s surrender to the elements. While it may seem like a simple cosmetic issue, this form of corrosion, known as rust, is a chemical reaction that actively eats away at metal, compromising its integrity and leaving a trail of stubborn, unsightly marks in its wake. Dealing with rust is a fundamental aspect of home maintenance. It is not a battle that can be won with a single, miraculous cleaning product. It requires a deeper understanding of what it is, why and where it forms, and a strategic, two-pronged approach of prevention and removal. To control this type of corrosion is to control the very environment that allows it to thrive. What is This Corrosion? In the simplest terms, rust is the common name for iron oxide. It is the result of a chemical reaction called oxidation, which occurs when iron or its alloys, like steel, are exposed to oxygen and moisture for a prolonged period. The simple formula is: Iron + Oxygen + Water = Hydrated Iron (III) Oxide (the substance we call rust) This explains why it is so pervasive in certain areas of a home. The bathroom, with its constant humidity and water splashes, is a perfect breeding ground. The kitchen sink, the outdoor patio furniture left in the rain, the damp basement, any environment where iron-based metals meet air and water is a potential site for rust to form. The presence of salt can dramatically accelerate this process, which is why cars in regions with snowy, salted roads degrade so much faster. The key takeaway from this simple science is that if you can eliminate one of the three components, iron, oxygen, or water, you can prevent the problem. Since we cannot eliminate the metal itself or the oxygen in the air, the entire strategy of rust prevention revolves around one single, critical goal: moisture control. The Common Culprits Before you can fight it, you must know where to find it. It often appears in predictable places where moisture is a constant companion. The Bathroom: This is the epicenter of household corrosion. Stains in the toilet bowl are often caused by high iron content in the water or from the degradation of old cast-iron plumbing pipes. The metal components in the tank can also corrode and stain the bowl. Metal shower caddies, the bottoms of shaving cream cans, and bobby pins left on the ledge are common sources of these stains on porcelain and fiberglass. The drain, showerhead, and faucet fixtures can also develop issues over time. The Kitchen: Stainless steel sinks are resistant, not immune. If wet cast iron pans, steel wool, or other iron objects are left in the sink, they can cause rust stains to form on the surface. Cast iron cookware is a special case. It requires a protective layer of polymerized oil, called seasoning, to prevent it from oxidizing instantly. The racks in your dishwasher, especially if their vinyl coating becomes chipped, can expose the metal underneath, leading to spots that can stain your dishes. The Laundry Room: Metal buttons, zippers, or rivets on clothing can leave marks on other garments during a wash cycle. A forgotten nail or screw in a pocket can do the same. The Garage, Basement, and Outdoors: Hand tools made of steel are highly susceptible to corrosion if stored in a damp or humid environment. Wrought iron or steel patio furniture will corrode quickly if its protective paint coating is scratched or chipped, leading to flaky rust. The grates and body of a grill are constantly exposed to moisture and heat, making them prime candidates for the problem. 1.Prevention The easiest way to deal with corrosion is to stop it from ever starting. Prevention is about diligent moisture control and creating protective barriers. Keep Surfaces Dry: This is the most fundamental rule. Wipe down your kitchen sink after doing dishes. Squeegee the walls of your shower after use. Dry your tools before putting them away. Improve Ventilation: In moisture-prone areas like the bathroom, always use the exhaust fan during and after a shower to pull humid air out. A dehumidifier in a damp basement can make a world of difference for preventing issues on tools and stored items. Use Protective Coatings: For outdoor metal furniture, railings, and grills, a coat of corrosion-inhibiting paint is essential. Inspect these items annually and touch up any chips or scratches immediately to prevent moisture from reaching the metal. For tools, a light coating of a machine oil can create a barrier against moisture. For cast iron cookware, maintain a good layer of seasoning. Avoid Prolonged Contact: Do not leave wet metal items sitting on susceptible surfaces. This means no wet cans on the bathtub ledge, no wet cast iron pans in the sink, and no wet steel wool on the countertop. Address High-Iron Water: If the stains in your toilet and sinks are from the water itself, consider installing a water softener or an iron filter for your home’s water supply. 2.Effective Removal When rust does appear, you need the right technique for the specific surface you are cleaning. The methods range from gentle, natural solutions to more aggressive chemical and abrasive approaches. The Natural Acidic Approach (For Light to Moderate Corrosion) The principle here is simple: a mild acid can dissolve iron oxide. White Vinegar: The acetic acid in vinegar is a fantastic remover. For small items like tools, nuts, or bolts, you can submerge them in a bath of white vinegar and let them soak for several hours, or even overnight. The rust will dissolve and can be scrubbed away with a brush. Lemon Juice and Salt: For stains on less-durable surfaces, like clothing or countertops, a paste of lemon juice and salt is a great option. The salt acts as a gentle abrasive, and the citric acid in the lemon juice dissolves the unwanted buildup. Baking Soda: For a more gentle approach, a

5 Rust Removal Tips: The Ultimate Solution for Stubborn Rust Stains Read More »

The Benefits of Hiring a Professional

Post-Construction Cleaning: 3 The Benefits of Hiring a Professional

Post-Construction Cleaning: The Final Step That Makes a Renovation Livable The day the contractors pack up is not the day your space is ready to live in. Between the finished drywall and the first evening on the new couch sits a layer of fine dust, sticker residue, paint splatter, and debris that no ordinary cleaning routine was built to handle. Post-construction cleaning is a specialized discipline: a top-to-bottom reclamation project that turns a hazardous worksite into a clean, breathable home. Here is what makes the job so demanding, the three-phase process professionals follow, and the equipment it takes to do it right. What Makes Construction Debris Different from Everyday Dirt Construction dust is not the soft fluff that gathers on bookshelves. It is a fine, gritty, abrasive particulate cocktail of drywall compound (gypsum), plaster, sawdust, cement powder, and silica. The particles are light enough to go airborne at the slightest disturbance, travel through HVAC systems, and settle in a uniform, ghostly layer on every surface: inside cabinets, on top of door frames, within light fixtures, on ceiling fan blades, and deep in the fibers of any existing carpet. Because this dust is a significant respiratory irritant, removing it completely is a health matter, not just an aesthetic one. Health Canada’s overview of indoor air contaminants explains why dust and construction-stage chemicals deserve serious removal, not a quick sweep. Beyond the dust, a finished job site holds stray nails, orphaned screws, wood and drywall offcuts, plastic shavings from plumbing work, and hardened blobs of caulk or adhesive. New windows, appliances, and fixtures arrive covered in protective plastic films and manufacturer stickers that leave stubborn, sticky residue. There are almost always errant paint splatters on hinges, glass, or flooring, and ladder scuffs on brand-new baseboards. A household all-purpose cleaner and a roll of paper towels will only smear this grime and risk permanent damage to expensive new surfaces. The Three-Phase Post-Construction Cleaning Process A truly effective post-construction clean is systematic, not one chaotic wipe-down. Each phase builds on the last so no detail is overlooked. Phase When it happens Main focus Rough clean During the final days of construction or right after the contractors leave Bulk debris removal, peeling protective films, first heavy vacuum pass Deep clean Once the space is free of major hazards and clutter Top-to-bottom cleaning of every surface, inside and out Final touch-up 24-48 hours after the deep clean, before furniture arrives Light vacuum, horizontal surfaces, smudge check on glass and fixtures Phase 1: The Rough Clean This stage clears the battlefield. The crew collects, removes, and properly disposes of all large trash and debris, from wood scraps and leftover materials to hardware packaging and cardboard. Large piles of drywall dust and sawdust are scraped and swept from the floors, every protective plastic film is peeled off windows, doors, appliances, and fixtures, and a heavy-duty shop-vac takes a preliminary pass over the thickest dust layers. The space still looks dirty when this phase ends, but it is now safe and accessible for detailed work. Phase 2: The Deep Clean The deep clean is the heart of the process, and it follows one guiding principle: start high and work down, so dislodged dust only ever falls onto surfaces you have not yet cleaned. Ceilings, walls, light fixtures, ceiling fans, and recessed lighting are wiped first, then the tops of door frames, window casings, and molding. Both sides of every window and glass door are cleaned, with paint splatters, caulk, and sticker residue lifted off by a professional razor scraper, while sills and tracks give up their surprising haul of sawdust. Doors are wiped completely, including hinges, knobs, and the often-forgotten top edge. Trim, baseboards, built-in shelving, and every cabinet, cupboard, and drawer are cleaned inside and out, which matters before clean dishes, food, or linens move in. In the kitchen and bathrooms, countertops are cleaned and disinfected following CDC guidance on cleaning and disinfecting your home, sinks and faucets are freed of plumber’s putty, appliances are wiped inside and out, and showers, tubs, toilets, mirrors, and chrome are polished to a shine. Floors come last: edges and corners with a vacuum crevice tool, hard surfaces vacuumed and mopped in multiple passes with fresh water, and carpets gone over with a commercial-grade vacuum in several directions to pull fine dust from the pile. Phase 3: The Final Touch-Up After the intensive deep clean, the space rests for 24-48 hours so any airborne dust stirred up during cleaning settles one last time. The final pass is deliberately light: another quick vacuum of floors and carpets, a wipe of countertops, tables, and window sills, and a close check for smudges on glass, mirrors, and shiny fixtures. The goal is a pristine, move-in-ready space that feels brand new from every angle. The Equipment a True Post-Construction Clean Requires None of this works with standard household supplies. The essential toolkit looks like this: Shop-vac with a HEPA filter: The most crucial piece. Household vacuums clog on fine dust and often exhaust microscopic particles straight back into the air, while a HEPA filter traps them permanently. A large supply of microfiber cloths: Their split fibers trap and hold dust instead of smearing it the way cotton rags and paper towels do. A-frame ladders and extension dusters: For safe, effective reach to high ceilings, fixtures, and cabinet tops. Plastic and razor-blade scrapers: For stubborn stickers, paint, and caulk without damaging new surfaces. Appropriate cleaning solutions: A kitchen degreaser, a pH-neutral floor cleaner safe for your specific new flooring, and a mineral deposit remover for bathroom fixtures. Frequently Asked Questions About Post-Construction Cleaning Can I skip the rough clean and go straight to a deep clean? No. Bulk debris and protective films have to come out first. Scrubbing around piles of nails, cardboard, and thick dust wastes effort and risks scratched or permanently stained surfaces. Why wait 24-48 hours before the final pass? Cleaning agitates fine particles into the air, where they hang for a day

Post-Construction Cleaning: 3 The Benefits of Hiring a Professional Read More »

a clean and organized garage

Garage Cleaning: 5 Effective Strategies to Keep Your Garage Organized

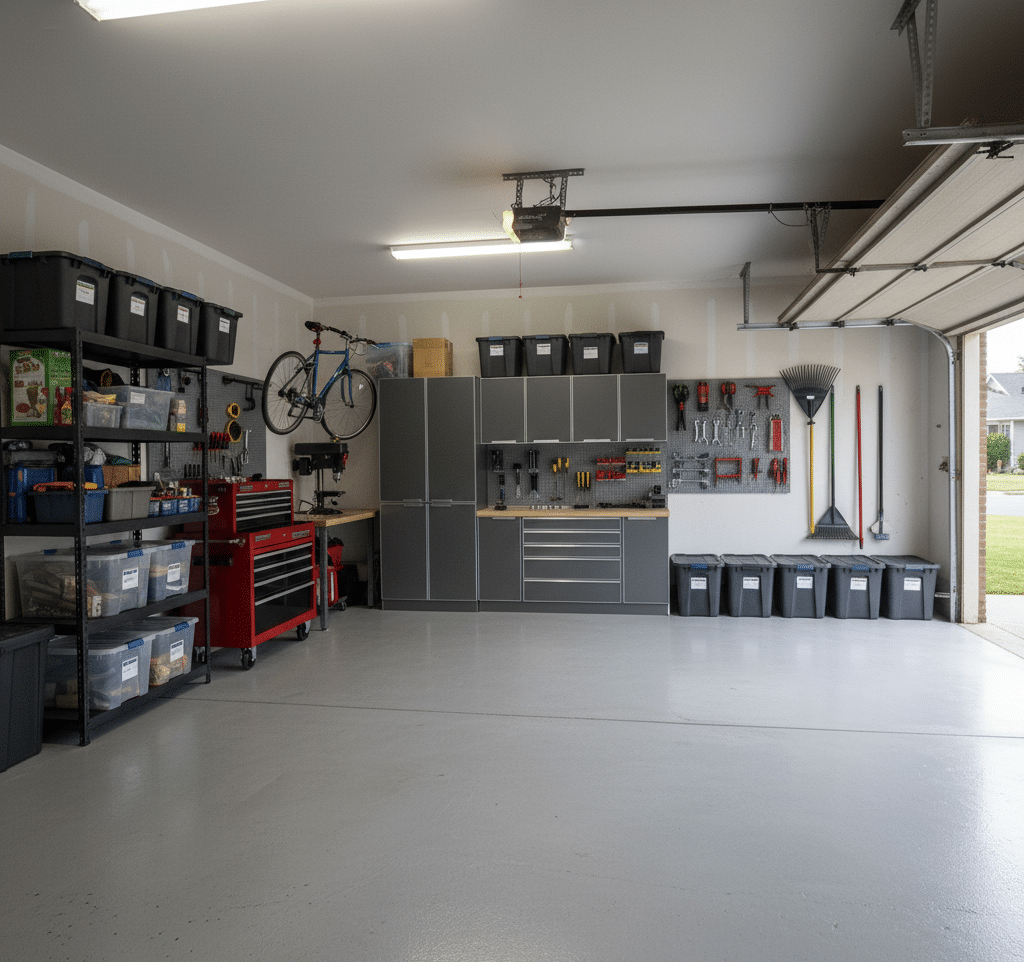
The garage is the forgotten room. It is the one space in the home that is allowed to descend into a state of organized, and then disorganized, chaos. It begins as a home for your car, a place for your tools. But slowly, inevitably, it becomes the household’s dumping ground. It is the final destination for items that have no other place: the broken lawnmower, the half-empty cans of paint, the boxes from a move that happened five years ago, the sporting equipment for a hobby long since abandoned. Before you know it, parking a car inside is a distant memory, and finding a specific screwdriver requires an archaeological dig. Cleaning the garage is not like cleaning a kitchen. It is not a simple task of wiping surfaces and mopping floors. It is a project. It is an act of reclamation, of taking back a significant portion of your home’s square footage and returning it to a state of function and purpose. It is a process that can feel overwhelming, but when broken down into a systematic, manageable plan, it is entirely achievable. This is not about a quick tidy-up; this is about a full-scale reset. 1.Preparation and Strategy Before a single box is moved, the project must be planned. The single biggest mistake people make when tackling a garage is underestimating the scope of the job. This is not a two-hour task. For the average cluttered garage, you need to dedicate an entire weekend. Block it out on your calendar. Arrange for kids or pets to be elsewhere. Treat it with the seriousness of a home renovation project, because in many ways, it is. The second part of preparation is gathering your supplies. Going into this battle unarmed is a recipe for frustration and failure. You will need a specific set of tools for sorting, and another for the deep cleaning that will follow. For Sorting and Decluttering: Heavy-Duty Trash Bags: You will generate more trash than you think. Get more bags than you think you will need. Sturdy Boxes or Bins: These will be for items you intend to keep, donate, or sell. A Labeling System: A thick permanent marker and either labels or masking tape are essential. Every box must be clearly marked with its intended destination. For Cleaning: Safety Gear: At a minimum, you need heavy-duty work gloves to protect your hands from dirt, sharp objects, and chemicals. A dust mask is also critical, as you will be kicking up years of dust, dirt, and potentially mold spores. Safety glasses are a good idea, especially when sweeping and dealing with chemicals. Broom and Dustpan: A stiff-bristled push broom is ideal for the large floor surface. Shop-Vac: A standard household vacuum is no match for a garage. A shop-vac can handle everything from fine dust and sawdust to dead leaves, cobwebs, and small debris. Buckets: You will need at least one large bucket for your cleaning solution. Scrub Brushes: A long-handled deck brush is excellent for the floor, and a smaller, handheld stiff brush is good for corners and stubborn spots. Cleaning Agents: A heavy-duty degreaser is non-negotiable for tackling oil and fluid stains on the concrete floor. You may also want a powdered concrete cleaner or a simple, strong all-purpose cleaner. Rags and Sponges: A large supply of old rags is necessary for wiping down surfaces and for the final detailing. 2.Evacuation and Purge The most effective, albeit intimidating, method for decluttering a garage is to remove everything. Every single item must come out. The goal is to get the garage completely empty, creating a blank canvas for the deep clean and a forcing mechanism for decision-making. Wait for a clear, dry day and use your driveway as a staging area. As you pull items out, immediately begin sorting them into four distinct categories. This is where your boxes and labels come into play. Keep: This category is exclusively for items that you use, need, and that belong in the garage. Be ruthless. If you haven’t used a tool in over a year, do you really need to keep it? Is that box of old cables for electronics you no longer own providing any value? The garage is functional space, not a museum of past projects. Donate/Sell: These are items that are in good, usable condition but no longer serve a purpose for you. Old sporting equipment, tools you have duplicates of, functional but unused garden supplies. Place these directly into designated boxes. Once a box is full, tape it shut and label it. This prevents you from second-guessing your decisions. Trash/Recycle: This will likely be your largest category. Be prepared to fill several bags. This includes broken tools, expired chemicals, dried-up paint, rotten wood, and anything that is simply junk. Pay close attention to hazardous waste. Old paint, motor oil, pesticides, and other chemicals cannot simply be thrown in the regular trash. Check with your local municipality for hazardous waste drop-off locations and procedures. Group these items together for a separate, responsible disposal run. Relocate: You will inevitably find things that do not belong in the garage. Kitchen appliances, sentimental photo albums, out-of-season clothing. These items have been stored in the garage out of convenience, not logic. Put them in a “Relocate” box to be moved to their proper place inside the house later. Do not get sidetracked by taking them inside now; stay focused on the garage purge. As you work, you will be tempted to create a “maybe” pile. Resist this urge. Indecision is the enemy of progress. If you truly cannot decide on an item, place it in a single “quarantine box.” Seal the box and write a date on it six months in the future. If you have not needed to open that box by that date, take the entire unopened box directly to a donation center. 3.The Deep Clean With the garage completely empty, you can now see the true state of the space. It is time for the top-to-bottom clean. This is a fundamental principle of cleaning: start high and work your way

Garage Cleaning: 5 Effective Strategies to Keep Your Garage Organized Read More »

Best Ways To Clean Window Screens And Make Them Look Like New

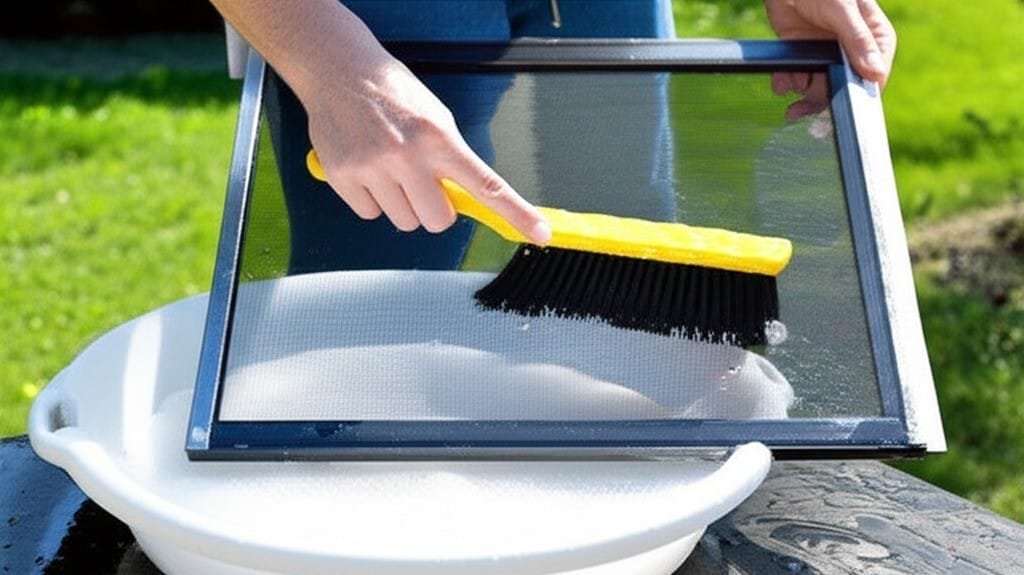
To begin cleaning your window screens, assemble your equipment. Professional results depend on having the right tools on hand. You will need a pair of buckets, a high-quality squeegee fitted with a sharp, flexible rubber blade, a strip applicator, several clean microfiber cloths, a soft-bristled brush, a garden hose with an adjustable spray nozzle, and your preferred cleaning solution. A simple yet highly effective solution can be made by mixing a gallon of cool water with just a few drops of dish soap in one bucket. The aim is for a slightly soapy mixture, not a foam; excessive soap will leave a residue on the glass that proves difficult to remove and subsequently attracts more dirt. The second bucket should contain only clean water for rinsing your tools. For interior work, a spray bottle filled with the same solution is more practical. For stubborn stains like mineral deposits, you might also require distilled white vinegar or a pad of fine #0000 grade steel wool. 1.Remove The Screen The most crucial first step, one that is fundamental to a lasting clean, is to address the window screens. Cleaning the glass first is a futile effort, as reinstalling dirty window screens will instantly coat your pristine windows with a fresh layer of dust and grime. Begin by carefully removing all the window screens from their frames. Take note of their fastening mechanisms; some utilize plunger bolts, while others have tension springs or clips. It is a good practice to label each of the window screens with a small piece of masking tape indicating its specific location (e.g., “Dining Room, Right”) to prevent confusion during reinstallation, as sizes can vary subtly. For window screens that have only a light coating of dust and loose debris, a dry cleaning method is often sufficient. Lay the screen on a flat, protected surface like a drop cloth or lean it securely against a wall. Use a soft-bristled brush or the brush attachment of your vacuum cleaner to gently go over the entire surface. This action will dislodge loose particles from the mesh of the window screens without the need for water. This is the fastest way to refresh window screens that are not heavily soiled. For window screens burdened with caked-on dirt, pollen, or greasy buildup, a wet cleaning is unavoidable. Move the window screens to a suitable outdoor location like a driveway or lawn. Start with a gentle pre-rinse using the garden hose on a low-pressure setting. A powerful jet of water can easily stretch, tear, or otherwise damage the delicate mesh material or even dent the frames of the window screens. In a bucket, mix a solution of warm water and a small amount of mild dish soap. Submerge a soft-bristled brush in this soapy water and gently scrub both sides of the screen. Use light, consistent pressure and work in systematic, overlapping motions. Pay close attention to the frames surrounding the mesh, as these channels are notorious for trapping dirt. After you have thoroughly scrubbed the window screens, rinse them completely with the hose. It is vital to wash away all soap residue, as any lingering film will act as a magnet for new dirt. To check, run a clean finger across the mesh; it should not feel slippery. 2.Dry Completely Once cleaned, the window screens must be dried completely. Lean them against a wall, fence, or outdoor furniture in a location that gets good air circulation and, ideally, some sun. Do not rush this step. Allowing the window screens to air dry thoroughly is critical. Reinstalling damp or wet window screens can trap moisture within the window frame and track, creating an ideal environment for mold and mildew to grow, which can cause damage and potential health issues. The time it takes for your window screens to dry is the perfect opportunity to clean the rest of the window assembly. With the window screens set aside to dry, direct your attention to the window tracks, sills, and frames. This often-neglected area makes a significant impact on the final look and functionality of your windows. Open the window fully to expose the tracks. Use a vacuum cleaner with a crevice tool attachment to suction out all the loose dirt, cobwebs, dead insects, and other accumulated debris. For stubborn, compacted dirt, use a stiff, dry brush or a putty knife to loosen it from the corners and channels before vacuuming. Following the dry removal, perform a wet cleaning. Dip a small, firm brush, like an old toothbrush, into your cleaning solution and scrub the tracks meticulously. Use a microfiber cloth to wipe out the loosened grime and suds. To reach into tight corners, you can wrap the cloth around the tip of a flathead screwdriver. Wipe down the entire window frame and sill, both inside and out, with a damp cloth, and then dry everything thoroughly with a clean, dry cloth.   3.Cleaning The Windows Now, you can proceed to clean the exterior glass. If the windows are exceptionally dirty, a quick rinse with the hose will remove the outermost layer of grit, preventing you from scratching the glass with your applicator. Submerge your strip applicator in the soapy water, wring out the excess, and wash the entire glass surface. Be methodical, working from edge to edge to ensure the entire pane is wet and scrubbed, loosening all the dirt. The squeegee is your tool for a streak-free finish. Before your first pull, use a microfiber cloth to wipe a narrow, one-inch vertical strip down one side of the pane. This “dry edge” allows the squeegee to start on a dry surface, preventing it from skipping. Place the squeegee at the top of the window, overlapping onto this dry strip. Angle the blade at about 30 degrees to the glass, apply light, even pressure, and pull it straight down in one continuous, smooth motion. After every single pull, wipe the rubber blade clean with a cloth. This is not optional; a dirty blade

Best Ways To Clean Window Screens And Make Them Look Like New Read More »

cobwebs being cleaned

Spider Webs: How to Completely Get Rid of the Webs That Appear Out of Nowhere in August

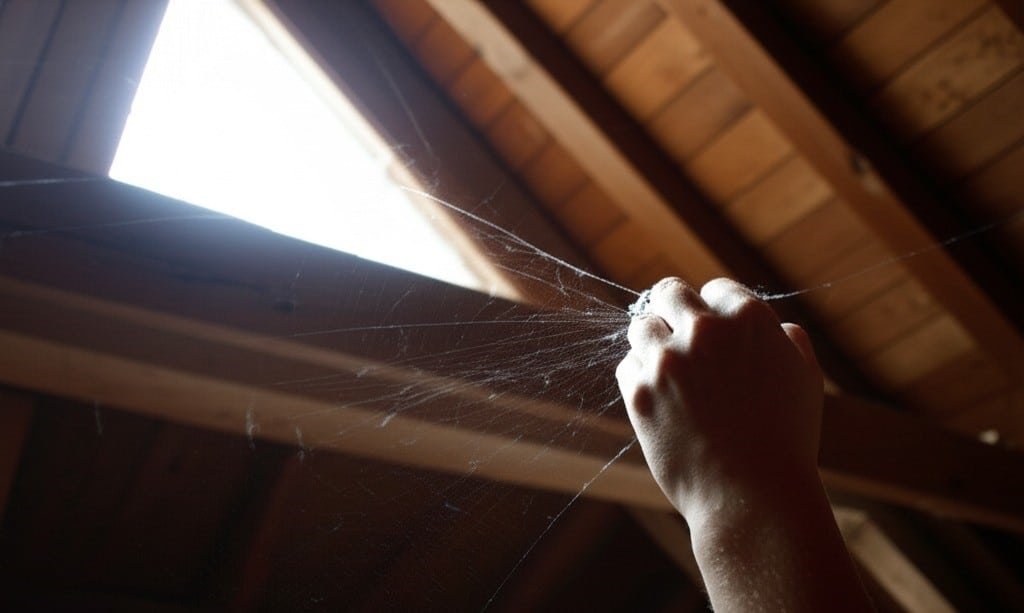
The arrival of August in Canada brings a specific, almost magical, change to the morning light. Spiders and their webs, the sun sits lower, and the air holds a hint of the coolness to come. This new light, combined with the morning dew, reveals something that has been building all summer but has remained largely invisible: a sudden, pervasive network of spider webs. They appear on porch railings, stretch between shrubs, frame every window, and cling to the eaves of the house. It can feel like an overnight invasion, a silken siege on your property. This phenomenon is not your imagination. Late summer is the peak season for many species of orb-weavers and other spiders. They have spent the spring and summer growing to maturity, and August is when their populations, and therefore their webs, are at their most numerous and conspicuous. Understanding how to manage this seasonal surge requires a systematic approach that addresses both the existing webs and the conditions that invite them. 1.Complete Removal The first step is a thorough and methodical removal of all visible webs. For the exterior of your home, your primary tool should be a long-handled duster or a clean broom with soft bristles. The goal is not simply to tear the webs down, but to capture them. A simple swipe will often break the web, leaving sticky anchor points and strands behind that will quickly collect dust and debris. Instead, use a gentle, rolling or twisting motion. Press the head of the broom or duster into the center of the web and rotate it. The silk will adhere to the bristles, winding around the tool like cotton candy. This technique removes the bulk of the web cleanly and often catches the spider along with it. Work your way systematically around the perimeter of your home. Pay close attention to corners, under eaves, around porch lights, window frames, door frames, and beneath deck railings. These are all prime locations for spiders as they offer shelter and are high-traffic areas for the flying insects they prey on. 2.Hose For webs that are particularly stubborn or in hard-to-reach places, a garden hose with a high-pressure nozzle can be effective. A strong jet of water will dislodge the webs and wash away the residue. However, this method is less precise and can sometimes just push the webs into other areas. Be mindful of spraying water directly into vents, under siding, or at window seals, as this can lead to moisture problems. A pressure washer can also be used, but it requires extreme caution. Use the lowest possible pressure setting and a wide-angle fan tip. High pressure can strip paint, damage wood, and force water behind your siding, causing significant and costly damage. For most residential situations, a standard hose is the safer and more appropriate choice. 3.Dish Soap After the initial removal, you will likely notice a faint, sticky residue where the web’s main anchor points were attached. This residue is what new spiders will often use as a foundation for their own webs. Cleaning this off is a crucial step in preventing a quick return. For painted surfaces, siding, and window frames, a simple solution of warm water with a small amount of dish soap is effective. Use a sponge or a soft-bristled brush to gently scrub the areas. For glass, a standard window cleaner or a solution of equal parts water and white vinegar will remove the residue and leave the surface streak-free. This follow-up cleaning might seem tedious, but it removes the “scent trails” and structural remnants that signal a viable web location to other spiders. 4.Vacuum Cleaner The interior of your home requires a more delicate touch. The single most effective tool for removing indoor spider webs is a vacuum cleaner with its hose and attachments. The crevice tool is perfect for reaching into the corners where walls meet the ceiling, along baseboards, and behind furniture. The brush attachment is ideal for more delicate surfaces like lampshades, curtains, and bookshelves. The power of the vacuum ensures you are not just removing the web, but also the spider and, most importantly, any unseen egg sacs. An egg sac can contain hundreds of spiderlings, and simply dusting it away can cause it to rupture, releasing them into the room. Vacuuming contains the problem entirely. Make it a habit to use the vacuum attachments to trace the upper and lower perimeters of every room during your regular cleaning routine. This proactive measure will catch new webs before they become noticeable. Areas that are often overlooked include basements, garages, and attics. These quiet, cluttered, and often damp spaces are ideal habitats for spiders. A thorough vacuuming of these areas, moving boxes and storage containers to get into the corners, is essential for controlling the indoor population. 5.Prevention Once the existing webs are gone, the focus must shift entirely to prevention. Removing webs is a temporary solution; creating an environment that is unattractive to spiders is the long-term goal. This strategy begins with controlling their food source: insects. Most insects are attracted to light, particularly bright, white light. The classic porch light is a nightly buffet for moths, gnats, and other flying creatures, which in turn attracts spiders who build their webs nearby to catch this easy prey. A simple and highly effective change is to switch your exterior bulbs to yellow “bug lights” or sodium vapor lights. These bulbs emit a wavelength of light that is far less visible and attractive to most insects. This single change can dramatically reduce the number of insects congregating around your doors and windows, and consequently, the number of spiders setting up camp. Alternatively, consider installing motion-activated security lights instead of lights that stay on all night. The light will only come on when needed, creating a less reliable food source for the spiders. 6.Block The next line of defense is to physically block their entry into your home. Spiders are masters of finding small openings. Conduct a detailed

Spider Webs: How to Completely Get Rid of the Webs That Appear Out of Nowhere in August Read More »

housekeeper deep cleaning

Deep Cleaning Services in Toronto, We Do It Right!

Deep Cleaning Services in Toronto: The Complete Reset Your Home Needs A regular cleaning keeps surfaces tidy, but the grime that accumulates below the surface quietly builds up over the months. That is the domain of specialized deep cleaning services in Toronto. Unlike standard housekeeping, a deep clean is a comprehensive, methodical process that tackles dirt in every often-overlooked, hidden corner of your home: a fundamental reset that restores your space to a truly pristine state. What Makes a Deep Clean Different? Professional deep cleaning focuses on a thorough, top-to-bottom reset of every room, targeting buildup that routine visits simply do not reach. It goes far beyond the surface and into the details: grease on cabinet fronts, dust in air vents, limescale on fixtures, and grime in grout lines. The scope demands expertise and specialized equipment, and more and more Toronto homeowners and businesses are investing in it, whether for a spring reset or as part of ongoing maintenance. For a fuller breakdown of what a session covers, see our guide to deep cleaning services in Toronto. Kitchen Deep Cleaning: Degreasing and Appliance Interiors In kitchens, the work is all about degreasing and disinfecting, starting inside your cupboards. Crews empty cupboards and pantries to inspect for spills, sticky residue, forgotten food, and signs of pests, then degrease and sanitize every interior surface. Handles and cabinet fronts get attention too, because repeated hand contact leaves a sticky film. Appliances receive treatment they almost never get at home: Oven: racks soaked, interior carbon buildup scrubbed, door glass cleaned for a like-new view. Stovetop: grates and burner caps removed and cleaned, boiled-over residue scrubbed from the surface. Range: pulled out so the sides, the floor behind it, and the wall are reached and wiped clean. Refrigerator and freezer: emptied, shelves and drawers washed, door gaskets detailed with a small brush, condenser coils vacuumed of dust to support efficiency and lifespan. Small appliances: toaster crumb trays emptied, coffee makers and kettles descaled, microwave interiors scrubbed, including the often-splattered ceiling. Bathroom Deep Cleaning: Soap Scum, Limescale, and Grout Bathrooms are scrubbed and sanitized top to bottom, dissolving soap scum and body residue from tubs and showers with specialized agents made for stubborn film. Shower doors and glass enclosures are cleaned until streak-free, the tracks at the base are cleared of accumulated gunk, and tiles and grout lines are meticulously scrubbed to lift mildew and dirt from porous grout. Stubborn mold and mildew in damp bathrooms are common culprits, and the CDC’s guidance on mold and your health explains why proper removal matters. Health Canada also recommends keeping indoor humidity low and fixing moisture sources so mould cannot take hold in the first place. Fixtures get their shine back as limescale and mineral deposits are removed from faucets and showerheads, and chrome is polished. Toilets are cleaned inside the bowl and across the entire exterior, from the tank lid and handle to the seat, hinges, base, and surrounding floor, plus the often-ignored overflow hole inside the tank, flushed clean with disinfectant. Vanity and medicine cabinets are emptied and wiped inside, and exhaust fan covers are removed and washed, because a dusty fan cannot ventilate properly and traps the humidity that leads to mildew. Living Areas and Bedrooms: A Top-to-Bottom Reset Crews work from the ceiling down to the floor in every room. Cobwebs are removed from corners and ceiling edges, light fixtures and ceiling fan blades are dusted, and the tops of bookcases, wardrobes, and cabinets are reached. Walls are spot-cleaned of scuffs and splatters, and baseboards, door frames, window frames, and switch plates are hand-wiped one by one. The process continues behind and beneath the obvious. Furniture is moved so the floors underneath are reached, and upholstery is vacuumed with crevice tools to extract dust, skin cells, and allergens from fabric. Wood furniture is polished, lampshades and blinds are dusted, and the air system itself is addressed: vents and grilles are vacuumed and wiped, and HVAC return air covers are pulled and dusted out. Professional crews rely on HEPA-filter vacuums that capture microscopic allergens rather than recirculating them, and steam cleaners that sanitize without harsh chemicals. When Toronto Homes Need a Deep Clean Most Deep cleaning requests tend to follow life events: Moving into or out of a home, when deposits and first impressions are at stake. Post-renovation cleanup after the construction dust settles in every crack. Seasonal refreshes, especially the annual spring clean. Before hosting an event or gathering, such as a wedding at home or the holidays. Preparing a space for a new baby or toddler who will crawl across every floor. Allergy season, when dust, dander, and pollen accumulate indoors. How to Choose a Professional Deep Cleaning Company Not all services are created equal, so choose carefully. Look for a company that offers a range of deep cleaning options with a detailed, transparent list of what each package includes. Prioritize experienced, trained professionals who understand the right products and techniques for different surfaces, and verify that the company is insured and bonded to protect your home and belongings. What to check Why it matters Transparent scope and checklist You can compare packages and know what is covered before booking. Trained, vetted crew Correct products and techniques protect finishes instead of damaging them. Insurance and bonding Toronto Shine carries a $1,000,000 insurance policy and a $10,000 accidental breakage and surety bond. Flat, upfront pricing Our deep clean starts at $270.38 before HST for a studio or one-bedroom, shown on our pricing page. Deep Cleaning Service FAQs What is included in a deep cleaning service in Toronto? A full reset of each room: kitchen cabinets and appliances inside and out, bathrooms degreased and descaled with grout scrubbed, walls spot-cleaned, baseboards and switch plates wiped, vents dusted, furniture moved, and floors and carpets thoroughly cleaned. How is deep cleaning different from regular housekeeping? Regular visits maintain cleanliness on visible surfaces. A deep clean restores the areas maintenance skips, which is why many homes pair

Deep Cleaning Services in Toronto, We Do It Right! Read More »