Spring Cleaning

Grill Cleaning A Masterclass in Barbecue Grill Maintenance

Grill Cleaning: A Masterclass in Barbecue Grill Maintenance

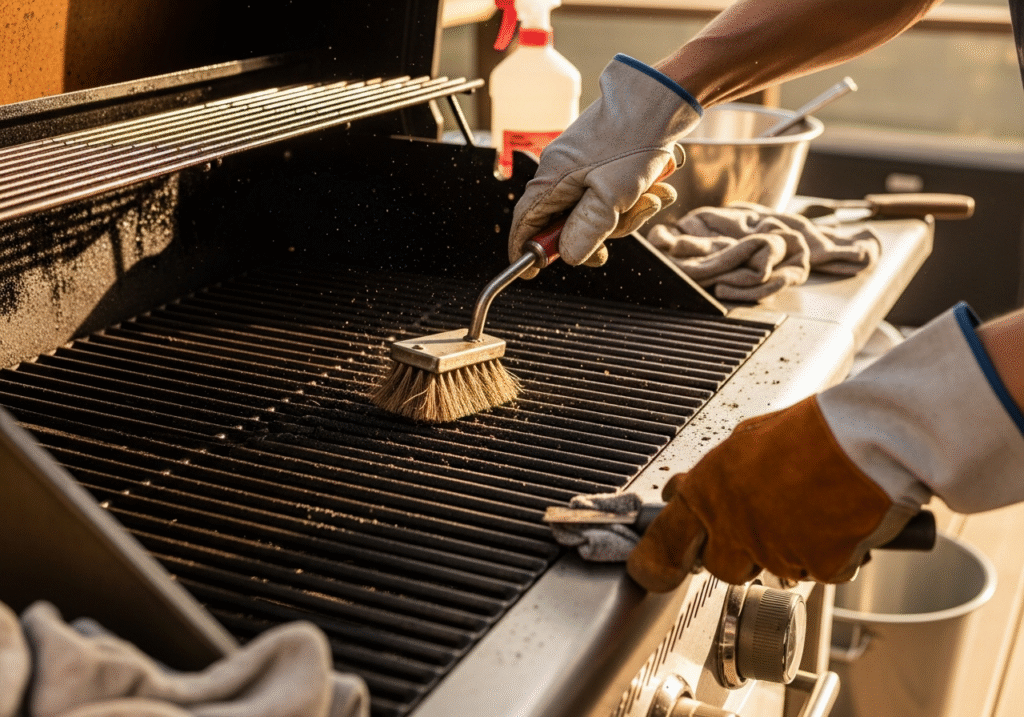
Cleaning the grill is important and the barbecue is undoubtedly the centerpiece of the outdoor culinary experience, a symbol of leisure, summer evenings, and the primal joy of cooking over an open fire. It’s a meeting point for friends and family, where the aroma of grilled meat and caramelized vegetables creates a festive atmosphere.However, once the last burger is flipped and the guests have departed, the grill is often abandoned to cool in the darkness, coated in a layer of rendered fat, charred marinades, and ash. This cycle of use and neglect is the primary cause of equipment failure and culinary disappointment. A grill is a cooking appliance just like a stove or an oven, yet it is exposed to the elements and subjected to intense, direct heat that carbonizes food residue into a stubborn, cement-like substance. Mastering the art of Barbecue Grill Cleaning is not merely a chore to be endured; it is a fundamental requirement for food safety, fire prevention, and the preservation of the flavor profiles you work so hard to create. A Dirty Grill Enhances The Flavor To understand the necessity of Barbecue Grill Cleaning, one must first dispel the persistent myth that a dirty grill adds flavor. There is a common misconception among amateur pitmasters that the black crust accumulated on the grates and the flavorizer bars is “seasoning,” similar to what one might find on a cast-iron skillet. This is false. A cast-iron skillet is seasoned with polymerized oil that creates a non-stick surface. The buildup on a grill is simply carbonized food waste, rancid grease, and soot. When this material heats up, it does not release a pleasant smoky aroma; it emits acrid, bitter smoke that coats fresh food with the taste of old, burnt meals. Furthermore, this buildup contains polycyclic aromatic hydrocarbons (PAHs) and heterocyclic amines (HCAs), chemical compounds formed when fat burns at high temperatures, which are known carcinogens. Regular Barbecue Grill Cleaning removes this toxic residue, ensuring that the smoke flavoring your food comes from your wood chips or charcoal, not from the decaying remnants of last month’s chicken wings. The process of Barbecue Grill Cleaning must begin with a focus on safety, particularly regarding the fuel source. If you are working with a gas grill, the tank should be turned off and disconnected. If it is a charcoal grill, all old ash must be cold and removed. The most critical safety hazard in a neglected grill is the grease fire. Every time you cook fatty foods, the rendered liquid drips down past the burners and collects in a tray or cup at the bottom of the unit. Over time, this grease creates a thick, flammable sludge. If a flare-up from the burners reaches this reservoir, the entire bottom of the grill can become an inferno that is difficult to extinguish with water. Routine Barbecue Grill Cleaning involves locating this grease management system—often hidden behind the doors of the cart—and scraping out the tray or replacing the disposable liner. Neglecting this hidden area is the leading cause of grill-related property damage. How to Clean Properly The grates are the primary point of contact for your food and naturally receive the most attention during Barbecue Grill Cleaning. The method of cleaning depends entirely on the material. Porcelain-coated cast-iron grates are fragile; if the porcelain chips, water enters the iron and causes rust, which eventually destroys the grate. For these, a soft brass brush or a nylon scrubber is preferred over harsh steel. Stainless steel grates are more durable and can withstand aggressive scrubbing with a stainless steel wire brush or a scraper. However, a significant safety concern has arisen in recent years regarding wire brushes. Loose bristles can snap off, adhere to the sticky grill surface, and eventually become embedded in food, leading to severe medical emergencies if ingested. As a result, many experts now recommend using coil brushes, wooden scrapers that form-fit to the bars over time, or even a ball of crumpled aluminum foil held with tongs for safe Barbecue Grill Cleaning. Beneath the grates lie the heat deflectors, often called flavorizer bars or heat tents. These metal angles protect the burners from direct dripping and help distribute heat evenly. They are also the first line of defense against grease and are subjected to extreme thermal shock. During Barbecue Grill Cleaning, these bars should be removed and scraped clean. They are often coated in a thick layer of white and black ash. If this ash is allowed to build up, it acts as an insulator, preventing the grill from reaching high searing temperatures. If these bars are crumbling or have holes rusted through them, cleaning is futile, and they must be replaced to protect the delicate burners underneath. The Burner Tubes The burner tubes themselves are the engine of a gas grill, and maintaining them is a delicate part of Barbecue Grill Cleaning. Over time, the tiny ports—the holes where the gas exits—can become clogged with drippings or corrosion. This results in uneven heating, where one side of the grill is hot while the other is tepid. Worse, insects such as spiders are attracted to the smell of propane and the shelter of the tubes. They often spin webs inside the venturi tubes (the mix point for air and gas), which creates a blockage. This blockage forces gas back toward the control knobs, leading to a “flashback” fire behind the control panel. Cleaning the burners involves using a venturi brush to clear the tubes and a small pin or paperclip to poke out any clogged ports, ensuring a consistent blue flame across the entire length of the tube. The interior of the lid and the cookbox is an area that often causes alarm for grill owners. Over time, the inside of the lid develops what looks like peeling black paint. This is rarely paint; it is a deposit of carbonized grease and smoke that has built up in layers and is now flaking off due to heat expansion. While not toxic, these flakes can fall onto your food, looking like

Grill Cleaning: A Masterclass in Barbecue Grill Maintenance Read More »

cleaning an air fryer

5 Signs Your Air Fryer Needs a Deep Clean Immediately

The air fryer has rapidly ascended the ranks of kitchen appliances to become as essential as the toaster or the microwave. It promises the golden, crispy texture of deep-fried food with a fraction of the oil, a proposition that has won over health-conscious cooks and busy families alike. However, this miracle machine hides a dirty secret. The very mechanism that makes it effective—high-speed air circulation—is also what makes it uniquely prone to accumulating filth. As the fan whips superheated air around the chamber, it also whips droplets of grease, crumbs, and spices, coating not just the basket, but the walls, the fan blades, and the heating element itself. Over time, these layers of debris polymerize, turning into a sticky, tar-like substance that can smoke, ruin the flavor of your food, and even pose a fire hazard. While most users rinse the basket after use, a true deep clean is rarely performed, leaving the heart of the machine to slowly suffocate under a blanket of carbonized grease. Anatomy of an Air Fryer To understand how to clean an air fryer effectively, one must appreciate the anatomy of the mess. Unlike a traditional oven, which is large and has static heating elements, an air fryer is a compact convection chamber. When you cook a fatty piece of chicken or a burger, the fat renders and spatters. In a large oven, this spatter hits the walls far away from the food. In an air fryer, the walls and the heating element are inches away. The intense heat bakes this grease onto the surfaces almost instantly. If you notice an acrid smell when you turn the machine on, or if thin wisps of white smoke escape from the vents, it is a sign that the machine is burning old food residue rather than cooking your dinner. 1.Should I Wash the Items by Hand or in The Dishwasher? The deep cleaning process must begin with safety. The air fryer should be unplugged and completely cool. Attempting to clean a hot element is dangerous and can lead to burns or damage to the cleaning tools. Once the unit is safe to handle, the easy part begins: the removable components. The basket and the crisper plate (or pan) are the workhorses. Most are dishwasher safe, but relying solely on the dishwasher is often a mistake. The harsh detergents and high heat of a dishwasher can degrade the non-stick coating over time, causing it to flake off. It is far better to wash these parts by hand. If there is stubborn, baked-on grease, the secret is not scrubbing, but soaking. Fill the basket with hot water and a generous squirt of grease-fighting dish soap. Let it sit for at least twenty minutes. This softens the bond between the food and the metal. For the stubborn residue that remains after soaking, you must be careful with your choice of tools. The non-stick coating in air fryers is notoriously fragile. A green scouring pad or a steel wool ball will destroy the surface in seconds, rendering the basket useless. Instead, use a non-abrasive sponge or a soft-bristled brush. If you encounter a spot that refuses to budge, create a paste using baking soda and a little water. Apply this paste to the spot and let it sit. Baking soda is a mild alkali that helps dissolve grease and offers a gentle abrasion that won’t scratch the coating. 2.Inside The Air Fryer Once the basket is clean, the real work begins. The interior of the main unit is where the deep clean truly happens, and it is the area most often neglected. To access this, you often need to turn the air fryer upside down or lay it on its back. Before doing this, ensure the crumb tray or basket is removed to prevent loose debris from falling into the fan. Looking up into the cavity, you will see the heating element—usually a spiral metal coil—and the fan behind it. This area is likely coated in dark brown spots or a greasy film. This buildup acts as an insulator, preventing the element from radiating heat efficiently, and it creates smoke. Cleaning the heating element requires precision. You cannot spray water or cleaner directly into this area, as it leads to the motor and electronics. Instead, you must use a damp tool. A soft toothbrush or a bottle brush is ideal for this. Dip the brush in warm, soapy water and shake off the excess liquid. Gently scrub the coil to remove the carbonized grease. It is a tedious process, as the grease is often baked on hard. For tough spots on the element, a paste of baking soda and water can be applied carefully with the toothbrush. Let it dry, then scrub it off with a clean, damp brush. It is crucial to be gentle; bending or damaging the heating coil can ruin the machine. Behind the heating element lies the fan. This is the hardest part to reach, but it is critical for airflow. If the fan blades are heavy with grease, the motor has to work harder to spin them, which can shorten the lifespan of the appliance. You can use a long-handled brush or a cotton swab to wipe the blades. It is difficult to get them perfectly clean without disassembling the unit—which voids the warranty and is generally not recommended—but removing the bulk of the surface grease will significantly improve performance. 3.Air Fryer Walls The walls of the interior chamber also need attention. These are usually metal or heat-resistant plastic. A microfiber cloth dampened with a mixture of vinegar and water is excellent for wiping these down. The vinegar cuts through the grease and neutralizes odors without leaving a soapy residue that could burn the next time you cook. Be sure to wring out the cloth well; you want to wipe the surface, not drench it. Pay special attention to the corners and the area where the basket slides in, as crumbs often accumulate here and

5 Signs Your Air Fryer Needs a Deep Clean Immediately Read More »

Dangerous to Your Health: 5 Common Products That are Dangerous For Your Daily Life

What would be dangerous to your health? The modern home is often viewed as a sanctuary, a controlled environment where we retreat from the pollution and chaos of the outside world. We scrub, spray, and polish surfaces with the intention of creating a safe, hygienic space for our families. However, there is a profound irony hidden within the cabinets under our sinks. In our aggressive pursuit of cleanliness, we have introduced a chemical arsenal that often makes the air inside our homes significantly more toxic than the air outside. The products we trust to sanitize our countertops and brighten our floors are frequently composed of volatile compounds that are potentially dangerous to your health. Understanding the chemistry of these common household items is the first step in dismantling the dangerous myth that a strong chemical smell equates to a clean home, when in reality, it often signals the presence of toxins. 1.Sodium Hypochlorite The most ubiquitous and perhaps most misunderstood chemical in the cleaning arsenal is sodium hypochlorite, commonly known as bleach. It is the default weapon for many when tackling mold, mildew, or bathroom grime. The risk of bleach lies not just in its corrosive nature, which can burn skin and eyes upon contact, but in its respiratory impact. Bleach is highly volatile. When used in a confined space like a shower or a small bathroom, the fumes react with organic matter to create chlorinated volatile organic compounds that are dangerous to your health, especially if you suffer from respiratory issues. inhaling these fumes causes immediate irritation to the mucous membranes of the throat and lungs. Furthermore, the chemical instability of bleach leads to one of the most common and deadly household accidents: the mixing of cleaners. If bleach is mixed with ammonia—which is found in urine and many glass cleaners—it produces chloramine gas. If mixed with acidic cleaners, it releases chlorine gas. Both of these reactions create an immediate atmospheric condition that is acutely dangerous to your health, leading to hospitalization or worse. 2.Ammonia Ammonia itself is another staple that warrants extreme caution. It is the primary active ingredient in many glass and window cleaners due to its ability to evaporate quickly without streaking. However, ammonia is a powerful irritant. Upon inhalation, it seeks out moisture, meaning it aggressively attacks the eyes, the throat, and the lungs. High concentrations of ammonia are dangerous to your health, causing chemical burns to the respiratory tract and exacerbating chronic conditions like asthma. The risk is compounded by the method of application. Most ammonia products are sold in spray bottles. When the trigger is pulled, the chemical is aerosolized into a fine mist. This mist hangs in the breathing zone, ensuring that the person cleaning inhales a significant dose with every breath. The distinct, sharp odor of ammonia is a warning signal from the body that the environment has become dangerous to your health, yet many push through the discomfort under the false impression that the pain is necessary for cleanliness. 3.Fragrance or Parfum Beyond the obvious corrosives, there is a silent and pervasive threat hiding in almost every bottle: fragrance. The word “fragrance” or “parfum” on an ingredient label represents a regulatory loophole. It is considered a trade secret, meaning manufacturers are not required to list the hundreds of specific chemicals that make up their signature scent. Within this chemical cocktail, one often finds phthalates. Phthalates are a group of chemicals used to make scents last longer, but they are also known endocrine disruptors. They mimic hormones in the body, potentially interfering with reproductive development, making them subtly but profoundly dangerous to your health over the long term. When you spray a lemon-scented counter spray or plug in a floral air freshener, you are releasing these compounds into the air. They settle on surfaces, are absorbed through the skin, and are inhaled into the bloodstream. 4.Air Fresheners and Fabric Deodorizers Air fresheners and fabric deodorizers are particularly egregious offenders in this category. These products do not clean; they coat. Many air fresheners work by releasing a nerve-deadening agent that temporarily interferes with your ability to smell, or by coating the nasal passages with an oily film. Others simply overload the air with volatile organic compounds (VOCs) to mask the underlying odor. These VOCs contribute to poor indoor air quality, leading to headaches, dizziness, and fatigue. The use of aerosol sprays adds another layer of risk, as the propellants themselves can be flammable and irritating to the lungs, making the very act of freshening the room dangerous to your health. Using these products is essentially solving a hygiene problem with a pollution problem, replacing a bad smell with a toxic chemical cloud. 5.Oven Cleaners and Drain Openers The heavy artillery of kitchen cleaning, oven cleaners and drain openers, represents the most immediate physical danger. Oven cleaners are typically formulated with lye (sodium hydroxide), a caustic substance that dissolves baked-on grease by turning it into soap. This chemical is so corrosive that it can cause permanent blindness if it splashes into the eyes and severe chemical burns on the skin. The fumes generated when spraying a cold oven are bad enough, but many people make the mistake of spraying the cleaner onto a warm oven. This vaporizes the lye, creating a toxic cloud that fills the kitchen and is immediately dangerous to your health upon inhalation. Similarly, drain openers rely on concentrated sulfuric acid or lye to burn through hair and grease clogs. These chemicals generate intense heat and can damage old pipes, but the health risk to the user is paramount. If the product fails to clear the clog and a plumber later tries to snake the drain, the splashing backwash creates a scenario that is physically dangerous to your health. 6.Quats In the post-pandemic world, the use of quaternary ammonium compounds, or “quats,” has exploded. These are the active ingredients in most disinfectant wipes and sprays. While effective at killing bacteria and viruses, quats are powerful lung irritants. There is growing evidence to suggest that frequent exposure to quats

Dangerous to Your Health: 5 Common Products That are Dangerous For Your Daily Life Read More »

Washroom Cleaning

Beyond the Surface: Why Washroom Cleaning Requires a Different Strategy

The washroom is undeniably the most functionally demanding environment within any architectural structure. It is a dedicated zone where the biological realities of human life intersect with the rigid requirements of sanitation. Unlike a living room or a bedroom, where cleaning is largely a matter of aesthetics and dust management, washroom cleaning is a constant battle against microbiology and chemistry. Every surface in a bathroom is subjected to a relentless cycle of wetting and drying, a process that creates distinct layers of mineral deposits, soap scum, and bacterial colonies known as biofilm. To clean a washroom effectively, one must move beyond the superficial act of wiping surfaces and understand the microscopic warfare taking place on the tile, the porcelain, and the grout. 1.Soap Residue The foundation of effective washroom hygiene lies in understanding the nature of the dirt you are fighting. In the shower and bathtub, the primary enemy is calcium stearate, commonly known as soap scum. This substance acts as a binding agent for filth, formed when the fatty acids in bar soap react with the minerals in hard water. This reaction creates a waxy, insoluble precipitate that clings tenaciously to fiberglass, glass, and tile. Trying to remove this substance with a standard all-purpose cleaner is often an exercise in futility because most general cleaners are pH-neutral. To break down the alkaline mineral bonds of soap scum, you need an acidic cleaner. This is why professional cleaners often rely on products containing phosphoric or citric acid. However, this chemical warfare requires caution; acid can etch natural stone like marble or travertine, destroying the finish permanently. 2.Mold Biofilm presents a different, more insidious challenge than simple dirt. This slime layer is a complex colony of bacteria that adheres to surfaces and secretes a protective, glue-like substance. In the washroom, this often manifests as the pink or orange discoloration seen in the corners of the shower. While it wipes away easily, it returns rapidly because the colony is resilient. True mold, typically black or dark green, is a fungus that roots into porous surfaces. The grout lines between your tiles are the most vulnerable points in the room. Grout is essentially cement, a porous material that absorbs water and organic matter like a sponge. When mold establishes itself in grout, surface scrubbing is often insufficient because the root structure lies deep within the pores. Effective remediation requires penetrating cleaners that can reach the sub-surface level to kill the root, followed by a sealer to lock moisture out. 3.Toilet The toilet, often viewed as the centerpiece of washroom cleaning, is frequently cleaned incorrectly due to a focus on the visible bowl rather than the invisible hygiene hazards. The mechanics of the flush create what is known as an aerosol plume. When a toilet is flushed with the lid up, microscopic droplets of water mixed with waste are ejected into the air, settling on nearby surfaces. Cleaning the toilet requires a top-down approach that addresses this spread. The most neglected area is the intersection between the toilet base and the floor. This area often accumulates a mix of condensation, dust, and stray urine, creating a persistent odor that no amount of air freshener can mask. Furthermore, the siphon jets—the small holes under the rim where water enters the bowl—often become clogged with mineral deposits and mold, reducing flush power and harboring bacteria. A bent brush is necessary to physically dislodge this buildup. 4.Faucet Aerator The sink and vanity area suffer from a unique cocktail of toothpaste splatters, hair, and makeup residues. The faucet aerator, the small mesh screen at the tip of the spout, is a hidden trap. It filters sediment from the water lines, but it also creates a damp environment where bacteria can grow. If the water flow seems irregular, it is likely because the aerator is calcified. Unscrewing this piece and soaking it in vinegar is a maintenance step that ensures the water you use to brush your teeth is actually clean. The sink drain, specifically the overflow hole near the top of the basin, is a dark, damp cave that rarely gets cleaned. It creates a perfect breeding ground for biofilm, which releases a musty, sewer-like odor. Pouring a cleaning solution down the overflow and using a small brush to agitate the interior walls is necessary to eliminate this phantom smell. 5.Mirrors and Glass Surfaces Mirrors and glass surfaces in the washroom are unforgiving of poor technique. The high humidity of the room often causes dust to stick to the glass, creating a muddy streak when wiped with a damp cloth. The secret to streak-free glass is not the chemical, but the tool. Traditional cotton cloths often leave lint or residues that cause streaking. A high-quality microfiber cloth, specifically woven for glass, uses microscopic hooks to lift oils and dust without the need for heavy detergents. Furthermore, the edges of the mirror, where the glass meets the frame, are often prone to corrosion caused by harsh ammonia-based cleaners seeping behind the glass. Cleaners should always be sprayed onto the cloth, never directly onto the mirror. 6.Floor The floor of the washroom is the final resting place for everything that falls or settles in the room. Because of the high moisture levels, dust on a bathroom floor does not sweep up easily; it smears. This mud-like dust packs into the corners and the grout lines. Mopping is often ineffective because it simply pushes this dirty water around, filling the low-lying grout lines with a slurry of gray filth. True floor hygiene in a washroom requires hand-cleaning the perimeter and the corners where the mop cannot reach. The area behind the toilet, often cramped and difficult to access, is a prime location for dust bunnies to collect moisture and begin to rot. This area should always be cleaned by hand to ensure that the source of potential odors is physically removed. 7. Exhaust Fan Ventilation is the invisible cleaner of the washroom. The exhaust fan is the single most important

Beyond the Surface: Why Washroom Cleaning Requires a Different Strategy Read More »

Persian rug being used

Persian Carpet: How to Identify if Your Rug Needs a Professional Wash or Just a Vacuum

A Persian carpet is far more than a simple floor covering; it is a piece of art, a historical document, and often a family heirloom that carries the weight of generations within its intricate fibers. Unlike the mass-produced, synthetic wall-to-wall carpeting that covers the floors of modern offices, a genuine Persian rug is a living, organic entity. It is composed of natural materials—typically wool, silk, and cotton—and dyed with complex pigments. Because of this intricate biology and craftsmanship, the cleaning and maintenance of these textiles require a philosophy that is fundamentally different from standard household cleaning. Treating a hand-knotted Persian rug with the same chemicals and mechanical aggression used on a polyester rug is the fastest way to destroy its value. Understanding the anatomy of the rug is the first step in stopping the unintentional damage that many owners inflict in the name of cleanliness. Structure The structural integrity of a Persian rug relies on the millions of knots tied by hand around the foundation threads. This density gives the rug its durability, but it also creates a unique problem regarding soil accumulation. In a standard carpet, dirt sits relatively loosely on the backing. In a Persian rug, fine dust and grit migrate down through the pile and settle deep within the foundation of the knots. This debris is not just unsightly; it is mechanically destructive. Under a microscope, these particles look like tiny shards of glass. Every time you walk over the rug, the pressure of your foot grinds these sharp particles against the delicate fibers, acting like a slow-motion guillotine that slices the wool at the base. Standard vacuuming is often insufficient to remove this deep-seated sediment, and using a vacuum with a beater bar—the rotating brush roll found on most upright machines—is a primary cause of damage. The beater bar pulls at the knots, shreds the delicate pile, and can tear the fringes off completely. The correct approach is to use suction only and to vacuum the back of the rug occasionally to vibrate the dirt out of the foundation using gravity. Cleaning Products Beyond the physical removal of dust, the chemical interaction between cleaning agents and the rug’s fibers is a minefield of potential disasters. Wool is a protein fiber, similar to human hair, protected by a layer of scales and natural oils called lanolin, which provide a soft sheen and stain resistance. Most commercial carpet cleaners are highly alkaline, formulated to blast through synthetic grease. When these products touch wool, they strip away the lanolin, leaving the fibers brittle, dry, and dull. High alkalinity can even cause a chemical burn, turning the wool yellow or brown permanently. The cleaning of a Persian rug requires a pH-neutral or slightly acidic solution that respects the protein structure of the wool. This is why traditional methods often utilize vinegar or specialized plant-based shampoos rather than harsh industrial detergents. The stability of the dye is another critical factor. Many older or tribal rugs use vegetable dyes that are not chemically locked into the fiber like modern synthetics. These dyes can bleed when wet. A common tragedy occurs when a homeowner attempts to spot-clean a spill with hot water and a generic cleaner. The heat opens the fiber cuticles, allowing the dye to migrate. Suddenly, deep reds bleed into creamy white areas, creating a muddy, irreversible stain. Furthermore, the use of hot water is almost always a mistake because wool shrinks when exposed to heat and agitation, a process known as felting. A hot steam cleaning session can distort the shape of the rug, causing it to buckle and ruin its ability to lay flat. Scrub Stain removal is the battlefield where most rugs are lost. The panic that sets in after a spill often leads to frantic scrubbing. This mechanical action is disastrous. When wet, wool fibers are swollen and vulnerable. Scrubbing distorts the pile, causing the fibers to untwist and fuzz, creating a texture difference called “blooming” that remains even after the stain is gone. The only correct immediate action is blotting—pressing straight down with a clean, white cotton towel to absorb liquid without lateral movement. Pet Urine Pet urine poses a specific, severe threat that goes beyond simple staining. Urine begins as an acid but creates a highly alkaline reaction as it decomposes. This shift can destabilize dyes, but more insidiously, it rots the cotton foundation of the rug, a condition known as dry rot. The salts left behind pull moisture from the air, keeping the foundation perpetually damp and feeding bacteria. This weakens the structural threads to the point where the rug can crack or tear when moved. Standard enzymatic cleaners often leave sticky residues that attract more dirt. Dealing with pet urine usually requires a full immersion wash by a professional to flush out the salts completely. The Fringe The fringe of the rug is another area of frequent abuse. The fringe is the end of the warp threads that form the rug’s skeleton. If the fringe unravels, the knots slide off, and the structure disintegrates. Homeowners often use bleach to keep the fringe white, but bleach degrades the cotton, causing the threads to become brittle and snap. The fringe should be cleaned gently with the same mild solution as the rest of the rug and never subjected to the vacuum cleaner’s beater bar. Water damage is frequently the result of improper drying after a DIY cleaning attempt. Because a Persian rug is dense, moisture trapped in the center becomes a breeding ground for mold and mildew if not dried rapidly. This can happen in as little as twenty-four hours, resulting in a distinct, permanent odor and fungal growth that eats away at the cellulosic fibers. Professional cleaning facilities use centrifuges and temperature-controlled drying rooms to ensure the rug is bone dry. Washing a rug on a driveway often results in a rug that stays wet for days, inviting rot. Steam Cleaning and True Rug It is also crucial to differentiate between steam cleaning

Persian Carpet: How to Identify if Your Rug Needs a Professional Wash or Just a Vacuum Read More »

Make Your Stove Look New Again with These Simple Tools

The stove is the undeniable workhorse of the kitchen, the command center where raw ingredients are transformed into meals. It is also, by nature of its function, the appliance most prone to filth. Every splatter of oil, every boil-over of pasta water, and every dropped crumb contributes to a layer of grime that, if left unchecked, hardens into a substance nearly as tough as the metal it sits upon. Cleaning a stove is not merely a matter of aesthetics; it is a matter of safety and efficiency. A grease-laden stovetop is a fire hazard, and clogged burner ports result in uneven heating that ruins food. Yet, despite its importance, stove cleaning is often performed incorrectly, with homeowners using the wrong chemicals on the wrong surfaces, scratching delicate glass, or neglecting the hidden areas where grease accumulates the most. Mastering the art of stove maintenance requires understanding the specific materials you are working with—whether it is tempered glass, cast iron, or enamel—and applying the right chemical and mechanical leverage to remove residue without causing damage. 1.Glass-Ceramic Cooktop The glass-ceramic cooktop, a staple of modern kitchens, presents a unique paradox: it is the sleekest surface to look at but often the most frustrating to maintain. The smooth, black surface shows every fingerprint and dust mote, but the real enemy is burnt-on food. A common mistake is attacking these surfaces with abrasive scouring pads. The rough side of a standard kitchen sponge is practically sandpaper to a glass cooktop. Over time, this creates a haze of micro-scratches that dulls the finish and, more importantly, traps dirt, making future cleaning even harder. The correct tool for a glass top is not a scrubber, but a razor blade scraper. When food is burnt onto the surface—especially sugary substances which can actually pit the glass if left to cool—a metal scraper held at a forty-five-degree angle is the only way to physically shear the carbon off without damaging the substrate. This should be done while the surface is wet with a specific glass cooktop cleaner or a paste of baking soda and water, which acts as a lubricant. The goal is to lift the debris, not grind it into the glass. Polishing with a dry microfiber cloth afterwards is what restores the shine, but the heavy lifting is done by the blade. 2.Gas Stove Gas ranges offer a completely different set of challenges, primarily centered around the heavy, cast-iron grates. These grates are porous and subjected to direct flame, meaning that grease spills are baked into the iron almost instantly. Scrubbing these by hand at the sink is a labor-intensive task that rarely yields perfect results. The structure of the grates, with their many corners and rough texture, shreds sponges and resists brushes. The most effective method for cleaning heavy cast iron grates utilizes the chemistry of ammonia fumes. By placing the grates inside a heavy-duty garbage bag with a splash of ammonia and sealing it tight for twenty-four hours, you allow the fumes to penetrate the grease. The ammonia breaks down the bond between the carbonized food and the iron. When you open the bag the next day—preferably outside to avoid inhaling the strong fumes—the grime usually wipes off with minimal scrubbing. This method saves hours of physical labor. It is important, however, to rinse them thoroughly and dry them completely, perhaps even placing them in a warm oven for a few minutes, to prevent rust from forming on the exposed iron. Beneath the grates lie the burner caps and heads, the actual machinery of the gas stove. If your flame is yellow instead of blue, or if the ignition clicks incessantly before lighting, the cause is almost always a clogged port. Food spills can block the tiny holes where gas escapes, disrupting the flow and air mixture. Cleaning these requires precision, not brute force. A straightened paper clip or a needle can be used to gently clear the ports, but one must be careful not to break the metal tip off inside the hole. The burner heads themselves can be soaked in warm soapy water, but the electrical igniter—the little ceramic nub that sparks—must remain dry. If this ceramic piece gets wet or coated in cleaner, the stove will not light until it has dried out completely. Reassembling the burners requires checking the alignment; a cap that sits slightly askew will result in a dangerous, uneven flame that can flare up unexpectedly. 3.Electric Stove Electric coil stoves, often seen in older apartments, are frequently neglected because they seem difficult to disassemble, but they are actually the most modular of all designs. The coils themselves rarely need cleaning because they get hot enough to burn off most residue, but the drip pans beneath them are magnets for disaster. These metal bowls catch everything that falls through the coils. When they are coated in black, carbonized grease, they become a smoke generator every time the stove is turned on. While many people wrap these in aluminum foil to avoid cleaning them, this is a dangerous practice that can trap heat and melt the wiring or cause a short circuit. Drip pans are inexpensive and should be viewed as semi-disposable. If they are rusted or hopelessly caked, replacing them is safer and more effective than scrubbing. If they are salvageable, they should be removed and boiled in a mixture of water and vinegar to loosen the charred remains. The coils themselves pull out, but one must be careful never to submerge the electrical contacts in water. 4.Control Panel and Buttons The control panel and knobs are the most touched but often the least cleaned parts of the stove. Because they are usually located above the cooking surface or on the front face, they are constantly bombarded with microscopic grease splatters. Over time, this grease works its way behind the knobs, acting as a glue that makes them difficult to turn. To clean this area effectively, the knobs must be pulled off. Simply wiping around them pushes

Make Your Stove Look New Again with These Simple Tools Read More »

Woman cleaning the counter with pH-neutral products next to her.

Understanding pH-Neutral Cleaners: The Complete Guide

In the world of cleaning products, there is soap with a neutral pH. Its name may sound technical, something best left to a chemistry lab, but the principle behind it is the single most important concept for anyone looking to clean their home effectively while preserving its surfaces. Understanding the power of a balanced pH is the key to moving from a cycle of aggressive cleaning and potential damage to a routine of gentle, sustainable maintenance that protects your investment and keeps your home looking its best for years to come. pH Scale To grasp the importance of a pH-neutral cleaner, one must first understand the pH scale itself. It is a simple spectrum that measures the acidity or alkalinity of a water-based solution, ranging from 0 to 14. A pH of 7, the very middle of the scale, is considered neutral. Pure water is the perfect example of a neutral substance. Anything below 7 is acidic, with common household examples being vinegar and lemon juice. Anything above 7 is alkaline (or basic), a category that includes powerful cleaners like bleach, ammonia, and many oven degreasers. The further a substance is from the neutral 7, the more chemically reactive and potentially caustic it becomes. This reactivity is precisely what makes strong acidic or alkaline cleaners effective at certain tasks, like dissolving hard water stains or cutting through heavy grease, but it is also what makes them incredibly dangerous to a wide variety of common household surfaces. A pH-neutral soap is a cleaning agent, or surfactant, that has been carefully formulated to have a pH level at or very near 7. It is designed to perform its primary function—lifting and suspending dirt, oils, and grime so they can be wiped away, without being chemically aggressive. It does not seek to dissolve, etch, or strip the surface it is cleaning. Instead, it works on a mechanical level, breaking the bond between the soil and the surface. This gentle nature is its greatest strength. It is the “do no harm” principle of the cleaning world, a safe and reliable option for routine cleaning on materials that would be irreversibly damaged by the harshness of a cleaner at either extreme of the pH scale. Natural Stones Perhaps the most critical application for pH-neutral soap is in the care of natural stone surfaces. Marble, limestone, travertine, and onyx are stunningly beautiful materials that lend an air of luxury and permanence to a home. They are also incredibly vulnerable. These stones are primarily composed of calcium carbonate, a mineral that has a violent reaction with acid. When an acidic cleaner—even a seemingly harmless, “natural” one like vinegar—is used on a marble countertop or floor, it initiates a chemical reaction that literally dissolves a microscopic layer of the stone. This process is called etching, and it leaves a dull, whitish mark that looks like a stain but is, in fact, physical damage to the stone’s surface. It cannot be wiped away; it must be professionally re-honed and polished to be removed. An alkaline cleaner, while less immediately dramatic, can also dull the stone’s finish and seep into its porous structure over time. A pH-neutral cleaner is the only recommended product for the routine cleaning of these calcium-based stones, as it removes daily grime without altering the stone’s delicate chemical makeup, preserving its natural luster and integrity. Even for more durable stones like granite, which is less susceptible to etching, long-term use of harsh chemicals can degrade the sealant that protects it from staining, making a pH-neutral soap the wisest choice for daily maintenance. This principle of preservation extends directly to flooring, particularly sealed hardwood and modern luxury vinyl tile (LVT). A sealed hardwood floor is protected not by the wood itself, but by the layers of polyurethane or other sealant applied on top of it. This finish is what gives the floor its shine and protects the wood from moisture and scratches. While it is a durable layer, it is not impervious. Aggressive, high-alkaline cleaners can, over time, chemically strip away this protective finish. The floor may look clean at first, but with each cleaning, the finish becomes duller and thinner, leaving the wood itself more vulnerable to damage. A pH-neutral floor cleaner, properly diluted, will lift dirt from the surface of the polyurethane without harming it, prolonging the life of the floor’s finish and keeping it looking vibrant. The same logic applies to LVT and laminate flooring. These products have a factory-applied top wear layer that protects the printed design beneath. The manufacturers of these floors almost universally recommend only pH-neutral cleaners, as harsh chemicals can cause the wear layer to become cloudy or brittle, permanently marring the floor’s appearance and often voiding its warranty. Delicate Materials The gentle touch of a pH-neutral soap is also invaluable when caring for more delicate materials like leather upholstery and certain textiles. Leather is a natural skin that contains oils to keep it supple and prevent it from cracking. Cleaners with a high alkaline content can strip these essential oils, leading to dryness, brittleness, and a faded appearance. A pH-neutral leather cleaner, by contrast, removes surface dirt without disrupting the material’s natural balance. When spot-cleaning upholstery or even delicate clothing, a pH-neutral solution is the safest starting point. It is far less likely to cause discoloration or damage to the fibers than a more chemically reactive product. It embodies the professional approach: always start with the least aggressive method possible. However, it is equally important to understand the limitations of pH-neutral soaps. Their gentle nature means they are not the right tool for every single cleaning challenge. They are masters of maintenance, not miracle workers for extreme situations. For example, in a bathroom plagued by hard water stains and soap scum, a pH-neutral cleaner will struggle. Soap scum is a combination of soap residue and mineral deposits (calcium and magnesium), which are alkaline. To dissolve them effectively, an acidic cleaner is required to break down the mineral bonds.

Understanding pH-Neutral Cleaners: The Complete Guide Read More »

5 Reasons Why Hiring a Cleaning Service is the Best Form of Self-Care

Why hire a specialized cleaning service? The modern home is a hub of activity, a place of work, rest, and family life. Yet, maintaining its cleanliness can feel like a relentless, never-ending task. The dust settles almost as soon as it’s wiped away, the floors seem to attract dirt, and the kitchen and bathrooms demand constant attention. For many, the weekend, which should be a time for relaxation and recharging, is instead consumed by a long list of chores. This constant cycle of cleaning can become a significant source of stress and a drain on our most valuable resource: time. It is in this gap between the desire for a clean, peaceful environment and the reality of a busy life that a residential house cleaning service finds its purpose, offering not just a service, but a solution to a pervasive modern problem. 1.Quality of Life Hiring a professional cleaning service is often viewed as a luxury, but it is more accurately described as an investment in your quality of life. Consider the hours spent each week sweeping, mopping, scrubbing, and dusting. For a moderately sized home, this can easily add up to four, five, or even more hours. A professional service reclaims those hours for you, handing them back to be spent on what truly matters. This could mean more time with family, pursuing a hobby, exercising, or simply enjoying a well-deserved rest. The cumulative effect of this reclaimed time is profound, reducing burnout and allowing for a better work-life balance. It transforms the home from a place of constant obligation into a true sanctuary, a space you can enter after a long day and immediately feel at ease, rather than being confronted with a list of tasks that need doing. 2.Quality of Cleanliness Beyond the gift of time, there is the undeniable difference in the quality of the clean itself. A professional cleaner brings a level of expertise and efficiency that is difficult for the average homeowner to replicate. They are trained in the most effective methods and understand the specific needs of different surfaces. They know which products to use on natural stone versus laminate, how to clean stainless steel without leaving streaks, and the best techniques for removing stubborn soap scum from glass shower doors. This knowledge prevents costly damage that can result from using the wrong chemical or an abrasive sponge on a delicate surface. Furthermore, professional services come equipped with commercial-grade tools and supplies that are often more powerful and effective than standard consumer products. Their high-powered vacuums with HEPA filters can capture a significantly higher percentage of dust, allergens, and pet dander, leading to improved indoor air quality. This is particularly beneficial for households with allergy sufferers, asthmatics, children, or pets. The result is not just a home that looks clean, but one that feels and is, on a microscopic level, healthier. The process of a professional clean is systematic and thorough. Cleaners typically work with a detailed checklist, ensuring that no area is overlooked. They employ methodical strategies, such as cleaning from top to bottom to ensure dust and debris fall downwards before the floors are addressed, and working from one side of a room to the other. This structured approach guarantees consistency and completeness. A standard recurring clean will typically involve a comprehensive dusting of all surfaces, including furniture, shelves, and window sills; cleaning and disinfecting kitchen countertops, sinks, and appliance exteriors; scrubbing toilets, showers, tubs, and bathroom vanities; and vacuuming carpets and mopping hard floors. This regular maintenance keeps the home at a consistent level of cleanliness, preventing the deep buildup of grime. 3.Deep Cleaning For homes that have gone some time without a thorough cleaning or for clients new to a service, a deep clean is often recommended. This is a far more intensive and detailed service that addresses the areas often missed in a regular routine. A deep clean will include all the tasks of a standard clean but will go much further. It can involve washing baseboards and trim, cleaning light fixtures and ceiling fans, wiping down doors and door frames, cleaning behind and underneath furniture and appliances, scrubbing grout lines, and cleaning the interior of windows. This is the reset button for your home, tackling the accumulated dirt and dust in every nook and cranny, and establishing a new baseline of clean that makes subsequent maintenance easier. Specialized services like move-in and move-out cleanings are another critical offering. Preparing a home for sale or ensuring a new home is pristine before you unpack is an enormous task on top of the already stressful process of moving. A move-out clean is designed to leave the property in immaculate condition for the next occupants, often a requirement for retrieving a security deposit. This is the most exhaustive clean of all, performed on an empty home. Every interior surface is addressed, including the inside of all cabinets, drawers, closets, the oven, and the refrigerator. It ensures the home is presented in its best possible light, which can be a significant factor for real estate agents and potential buyers. Conversely, a move-in clean provides immense peace of mind, sanitizing the space and ensuring you are starting your new chapter in a fresh, thoroughly cleaned environment. 4.Trust and Security One of the most significant barriers for people considering a cleaning service is the idea of trust and security. Inviting someone into your personal space requires confidence in their professionalism and integrity. This is why reputable cleaning companies place such a high emphasis on their hiring and training processes. They conduct background checks on their employees and ensure they are thoroughly vetted. Furthermore, professional services are bonded and insured. Bonding provides protection against theft, while insurance covers any accidental damage that might occur to your property during the cleaning process. This comprehensive protection offers homeowners the peace of mind that they are working with a trustworthy organization that stands behind its work and its people. The relationship with a cleaning service is

5 Reasons Why Hiring a Cleaning Service is the Best Form of Self-Care Read More »

Perfect Cleaning Schedule

Cleaning Schedule: A Room-by-Room Guide to Your Perfect Cleaning Schedule

For many, cleaning a house is a cycle of chaos and control, and having a daily cleaning schedule becomes essential. It exists in the extremes: either a frantic, multi-hour marathon of scrubbing and scouring in a desperate attempt to reclaim a space that has descended into disarray, or a state of blissful ignorance where the dust bunnies multiply in the corners and the sticky film on the kitchen counter becomes an accepted part of the landscape. We clean in a panic before guests arrive, we clean in a fit of frustration when we can no longer stand the mess, and we clean on the first sunny day of spring with a burst of ambitious energy that quickly fades. This reactive approach to cleaning is exhausting, inefficient, and ultimately, a losing battle. The secret to a consistently clean, calm, and functional home does not lie in more powerful chemicals or more aggressive scrubbing. It lies in a simple, transformative tool: a cleaning schedule. Proactive Maintenance The very idea of a cleaning schedule can feel restrictive, conjuring images of a rigid, joyless routine. But in reality, a schedule is the opposite of a restriction; it is a form of freedom. It is the freedom from the overwhelming feeling of not knowing where to start. It is the freedom from the guilt of a messy home and the freedom from having to sacrifice an entire weekend to a cleaning binge. A schedule transforms the monumental task of “cleaning the house” into a series of small, manageable, and predictable habits. It is the difference between facing a mountain and climbing a single step each day. It is about proactive maintenance, not reactive disaster control. Creating a schedule that works is about understanding the different rhythms of your home and the tasks required to maintain it. These tasks can be broken down into different frequencies: daily, weekly, monthly, and seasonal. By assigning tasks to these categories, you create a system that ensures everything gets done in its own time, preventing the kind of deep-seated grime that requires a marathon session to remove. The daily tasks are the bedrock of the system, the small habits that take no more than fifteen to twenty minutes but have the greatest impact on the daily sense of order in your home. These are the actions that prevent chaos from ever taking root. This includes making the bed each morning, an act that takes less than two minutes but instantly makes an entire room feel more put-together. It means wiping down the kitchen counters and sink after every meal. This simple wipe prevents the buildup of sticky spills and crumbs that become harder to clean the longer they sit. A quick sweep of the kitchen floor at the end of the day catches the daily debris and stops it from being tracked throughout the rest of the house. Another cornerstone of the daily routine is the “one-load” rule for laundry. By doing a single load of laundry from start to finish each day—washing, drying, folding, and putting away—you prevent the dreaded mountain of clothes from ever forming. Cleaning Day From these high-impact daily habits, we move to the weekly core clean. This is the more traditional “cleaning day,” but when broken down and performed consistently, it becomes a much less daunting task. You can choose to tackle all of these tasks on a single day, or you can assign one or two rooms to different days of the week, a method often called “zone cleaning.” The weekly routine is about a more thorough reset of the main living areas. The bathrooms are a primary focus of the weekly clean. This is a matter of hygiene as much as appearance. This means a thorough scrubbing of the toilet, inside and out. It involves cleaning the shower or bathtub, scrubbing away the beginnings of soap scum before it can become a thick, stubborn film. The bathroom sink and countertops should be scrubbed and disinfected, and the mirror should be wiped to a streak-free shine. Finally, the bathroom floor should be swept and mopped. The kitchen, the heart of the home, also requires a weekly deep dive. This goes beyond the daily counter wipe. It means wiping down the exterior of all your appliances—the refrigerator, the dishwasher, the microwave, and the stovetop—to remove fingerprints and splatters. It involves cleaning the inside of the microwave, a task made simple by heating a bowl of water and vinegar to loosen the grime. The kitchen floor, which sees the most traffic and spills, needs to be thoroughly mopped. The rest of the home requires a focus on the universal enemy: dust. The weekly routine should include a thorough dusting of all surfaces in the living areas and bedrooms. This includes furniture, shelves, and any decorative items. Following the dusting, a comprehensive vacuuming of all floors is essential. This includes carpets, rugs, and hard surfaces. Regular vacuuming not only keeps floors looking clean but also improves indoor air quality by removing dust, dander, and other allergens. Deep Cleaning Beyond the weekly routine lies the monthly deep dive, the set of tasks that addresses the slow, creeping grime that is often overlooked. These are the details that separate a tidy house from a truly clean one. This is the time to wipe down all the baseboards in your home, which are magnets for dust and scuffs. Clean your light fixtures and ceiling fans, carefully wiping away the dust that accumulates on bulbs and blades. This is also the time to deep clean some of your hardworking appliances. Run a cleaning cycle on your washing machine to prevent the buildup of soap scum and mildew. Clean the filter in your dishwasher to improve its performance. This is also a good opportunity to clean your window sills and the tracks of your sliding doors, which are notorious for trapping dirt and insects. At the end, we have the seasonal, or quarterly, tasks. These are the major projects, the whole-home

Cleaning Schedule: A Room-by-Room Guide to Your Perfect Cleaning Schedule Read More »

Hot Tub Cleaning: Get Perfectly Balanced Hot Tub Water Every Time

The hot tub is a unique and cherished feature of a home, a vessel of relaxation and hydrotherapy that promises to melt away the stresses of the day. It is a place of quiet solitude under the stars or a centerpiece for social gatherings with friends and family. But this luxury comes with a non-negotiable responsibility. A hot tub is not a “set it and forget it” appliance like a refrigerator or a dishwasher. It is a small, self-contained, and highly active body of water, a delicate ecosystem that requires consistent, diligent maintenance to remain a source of pleasure and not become a source of murky, unsanitary, and potentially hazardous problems. The Chemistry of Water To own a hot tub is to become a part-time water chemist. The warm, bubbling environment that is so inviting to us is also the perfect breeding ground for bacteria, algae, and other microorganisms. The key to a clean, safe, and enjoyable hot tub experience is not about performing a massive, hours-long cleaning session once a year. It is about a regular, simple, and consistent routine of testing, balancing, and sanitizing. Understanding the fundamentals of this routine is the most important aspect of hot tub ownership. The foundation of hot tub care is water chemistry, and the three most important pillars of that chemistry are alkalinity, pH, and the sanitizer level. These three elements are interconnected, and a problem with one will inevitably affect the others. The first step for any hot tub owner is to get comfortable with testing the water, which should be done at least two or three times a week, or more often with heavy use. The most common method is with test strips, which are simple, color-coded strips of paper that you dip into the water for a few seconds. The first level you should check and adjust is the total alkalinity. Alkalinity is the water’s ability to resist changes in pH. It acts as a buffer, a stabilizing force that prevents the pH level from swinging wildly. The ideal range for total alkalinity in a hot tub is typically between 80 and 120 parts per million (ppm). If your alkalinity is too low, the pH will be unstable and can drop suddenly, making the water corrosive. If it is too high, it can cause the pH to drift upward, leading to cloudy water and scale formation. You can raise the alkalinity with a product often called “Alkalinity Increaser” (sodium bicarbonate) and lower it with a pH decreaser (sodium bisulfate). Always adjust the alkalinity first, before you address the pH. Alkalinity Once your alkalinity is in the correct range, you can adjust the pH. The pH is the measure of how acidic or basic your water is, on a scale of 0 to 14. A pH of 7 is neutral. The ideal range for a hot tub is between 7.4 and 7.6. This is not an arbitrary number; it is slightly alkaline to match the natural pH of the human eye, which is why it is the most comfortable for bathers. If the pH is too low (acidic), the water can be corrosive to the hot tub’s components, like the heater and the pump seals, and it can be irritating to the skin. If the pH is too high (basic), it will cause the sanitizer to become sluggish and ineffective, lead to cloudy water, and promote the formation of scale on the shell and in the plumbing. You can raise the pH with a “pH Increaser” (sodium carbonate) and lower it with a “pH Decreaser” (sodium bisulfate). Only after both the alkalinity and pH are properly balanced can you effectively manage the sanitizer. The sanitizer is the chemical that actively kills bacteria and other harmful microorganisms in the water. The two most common types of sanitizer are chlorine and bromine. Chlorine is fast-acting and a powerful oxidizer, but it can have a stronger chemical smell and is less stable in the hot, high-pH environment of a spa. Bromine is more stable at higher temperatures and has a less noticeable odor, making it a very popular choice for hot tubs. It also has the unique ability to be reactivated by “shocking” the water. The ideal level for chlorine is between 1 and 3 ppm, and for bromine, it is between 3 and 5 ppm. You must maintain these levels at all times to ensure the water is safe for bathing. Hot Tub Filters Even with a perfectly maintained sanitizer level, the water will accumulate other unwanted waste products over time. Soaps, lotions, deodorants, and organic matter from bathers build up in the water, creating a food source for bacteria and making the water cloudy and unpleasant. To combat this, you need to “shock” your hot tub on a regular basis, typically once a week. Shocking is the practice of adding a large dose of an oxidizer to the water. This does several things: it breaks down all the organic waste, it kills any resistant bacteria, and in a bromine spa, it reactivates the used bromine ions, turning them back into effective sanitizer. Always shock the spa with the cover off and the jets running to allow it to circulate properly and to let the gasses vent. Beyond the daily and weekly chemical maintenance, the hot tub has other physical components that require regular attention. The most important of these is the filter. The filter is the kidney of your hot tub, constantly working to remove small particles, hair, and debris from the water. A dirty, clogged filter cannot do its job, which will result in cloudy water and will put a strain on your pump. The filter cartridges should be removed and rinsed with a garden hose at least once a week. The goal is to spray the debris out from between the pleats of the filter. Every few months, the filter needs a deep clean. This involves soaking it overnight in a specialized filter cleaning solution to break down

Hot Tub Cleaning: Get Perfectly Balanced Hot Tub Water Every Time Read More »