Summer Cleaning

Perfect Cleaning Schedule

Cleaning Schedule: A Room-by-Room Guide to Your Perfect Cleaning Schedule

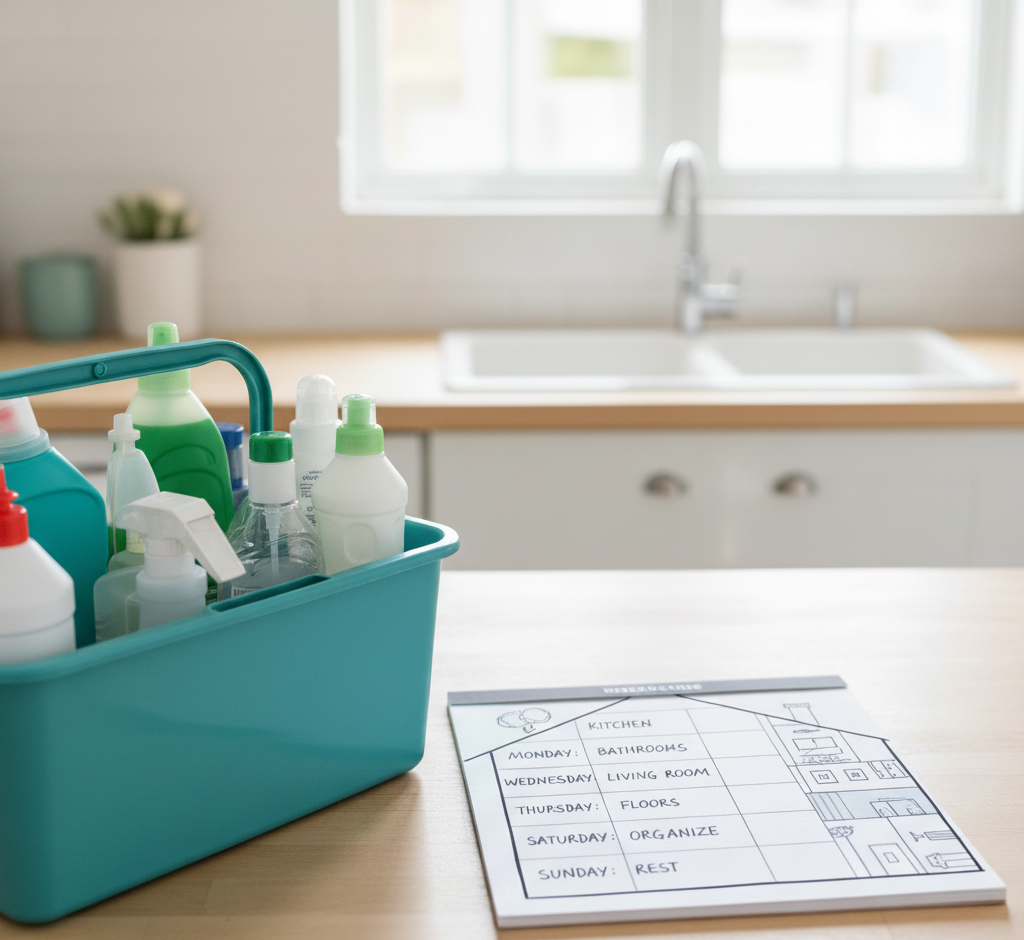
Why a Cleaning Schedule Beats Cleaning Marathons For many households, cleaning swings between two extremes: frantic multi-hour marathons before guests arrive, or weeks of ignoring the dust bunnies and sticky counters until frustration wins. This reactive approach is exhausting and inefficient. The secret to a consistently clean home is not stronger chemicals or more scrubbing; it is a simple cleaning schedule that turns one overwhelming project into small, predictable daily habits. Breaking tasks into daily, weekly, monthly, and seasonal frequencies keeps grime from ever building up to marathon levels, and it frees your weekends. Daily Habits: Fifteen to Twenty Minutes That Work Daily tasks are the foundation of the system. They take little time but have the biggest impact on how your home feels: Make the bed each morning; it takes under two minutes and instantly makes the bedroom look put together. Wipe kitchen counters and the sink after every meal so spills and crumbs never harden. Give the kitchen floor a quick sweep at day’s end so crumbs never get tracked through the house. Follow the one-load rule: wash, dry, fold, and put away a single load of laundry daily so the pile never becomes a mountain. The Weekly Reset: Bathrooms, Kitchen, and Dust The weekly clean is a deeper reset of the main living areas. You can do everything on one cleaning day or spread one or two rooms across the week, an approach called zone cleaning. Bathrooms deserve a full scrub for hygiene as much as appearance: the toilet inside and out, the shower and tub to stop soap scum before it thickens, the sink and countertops scrubbed and disinfected, the mirror polished streak-free, and the floor swept and mopped. In the kitchen, wipe down appliance exteriors including the refrigerator, dishwasher, microwave, and stovetop, clean the microwave interior by heating a bowl of water with vinegar to loosen grime, and mop the floor. Throughout the living areas and bedrooms, dust every surface, then vacuum carpets, rugs, and hard floors; regular vacuuming lifts the dust, dander, and allergens that would otherwise circulate. Monthly Projects for the Details Monthly tasks catch the slow, creeping grime that separates merely tidy homes from deeply clean ones. Wipe down baseboards, which collect dust and scuffs; clean light fixtures and ceiling fans; run an empty cleaning cycle on the washing machine to prevent soap scum and mildew; and clean the dishwasher filter to keep it performing well. Window sills and sliding door tracks also trap dirt and insects, so give them a monthly pass. Seasonal Projects: The Whole-Home Reset Every quarter, set aside time for the big jobs. Empty the refrigerator and freezer, wipe down shelves and drawers, and discard expired food. Wash windows inside and out, deep clean carpets and upholstery with a rented machine or a professional service, and organize closets and pantries while decluttering. Season-specific extras include cleaning the gutters in the fall and pressure washing the deck in the spring. Frequency Typical tasks Time tip Daily Make beds, wipe counters, quick sweep, one load of laundry Batch these into a 20-minute evening routine Weekly Bathroom scrub, appliance wipe-downs, dusting, vacuuming, mopping Assign one or two rooms per day Monthly Baseboards, light fixtures, washing machine cycle, window sills Pair with bill-paying day as a reminder Seasonal Fridge deep clean, windows, carpets, closets, gutters, deck Pick one weekend per season and book help early Make the Schedule Fit Your Life A schedule is a template, not a rigid document. If you live alone and rarely cook, the kitchen needs less attention; if you have kids and pets, daily floor care and weekly vacuuming become non-negotiable. Task batching helps some households: make Monday dusting day and Tuesday floor day so you stay focused with one set of tools. A clear schedule also makes delegation easy, since everyone in the family knows which tasks belong to which day, removing the constant negotiation about who cleans what. Above all, aim for progress, not perfection. Miss a day and simply pick it up tomorrow; because the system prevents buildup, one skipped task never snowballs into a disaster. Cleaning science supports the approach: the CDC explains that regular cleaning and disinfecting of your home removes most germs from surfaces, and that handwashing is one of the best ways to stop germs from spreading between family members. Frequently Asked Questions About Cleaning Schedules How long should daily cleaning take? Fifteen to twenty minutes is enough when you focus on the high-impact habits: making the bed, wiping counters after meals, a quick floor sweep, and one load of laundry. Is it better to clean one room a day or everything weekly? Both work. Zone cleaning, with one or two rooms per day, keeps the workload even, while a single weekly cleaning day suits people who prefer to finish everything at once. What should I clean monthly that people usually forget? Baseboards, ceiling fans and light fixtures, the washing machine drum, dishwasher filter, and window sills and sliding door tracks are the details that quietly collect grime. How do I stay consistent with a cleaning schedule? Keep tasks small and visible, pair them with existing habits such as morning coffee or evening TV, and remember that a missed day is fine as long as you resume the next day. When should I hire professional cleaners instead of doing it myself? Monthly and seasonal projects such as carpet deep cleaning, fridge resets, and whole-home refreshes are ideal to outsource, especially before holidays or when allergies act up. Keep the Schedule on Track With Professional Help The heaviest items on your schedule do not have to be DIY. Toronto Shine Cleaning’s regular cleaning service handles the weekly core clean, while our deep cleaning service covers the monthly and seasonal projects that need extra muscle. We serve homes across Toronto and the GTA, and our reviews show what consistent cleaning looks like. Call (647) 424-0355 or check our pricing to build your routine around a professional team.

Cleaning Schedule: A Room-by-Room Guide to Your Perfect Cleaning Schedule Read More »

Hot Tub Cleaning: Get Perfectly Balanced Hot Tub Water Every Time

The hot tub is a unique and cherished feature of a home, a vessel of relaxation and hydrotherapy that promises to melt away the stresses of the day. It is a place of quiet solitude under the stars or a centerpiece for social gatherings with friends and family. But this luxury comes with a non-negotiable responsibility. A hot tub is not a “set it and forget it” appliance like a refrigerator or a dishwasher. It is a small, self-contained, and highly active body of water, a delicate ecosystem that requires consistent, diligent maintenance to remain a source of pleasure and not become a source of murky, unsanitary, and potentially hazardous problems. The Chemistry of Water To own a hot tub is to become a part-time water chemist. The warm, bubbling environment that is so inviting to us is also the perfect breeding ground for bacteria, algae, and other microorganisms. The key to a clean, safe, and enjoyable hot tub experience is not about performing a massive, hours-long cleaning session once a year. It is about a regular, simple, and consistent routine of testing, balancing, and sanitizing. Understanding the fundamentals of this routine is the most important aspect of hot tub ownership. The foundation of hot tub care is water chemistry, and the three most important pillars of that chemistry are alkalinity, pH, and the sanitizer level. These three elements are interconnected, and a problem with one will inevitably affect the others. The first step for any hot tub owner is to get comfortable with testing the water, which should be done at least two or three times a week, or more often with heavy use. The most common method is with test strips, which are simple, color-coded strips of paper that you dip into the water for a few seconds. The first level you should check and adjust is the total alkalinity. Alkalinity is the water’s ability to resist changes in pH. It acts as a buffer, a stabilizing force that prevents the pH level from swinging wildly. The ideal range for total alkalinity in a hot tub is typically between 80 and 120 parts per million (ppm). If your alkalinity is too low, the pH will be unstable and can drop suddenly, making the water corrosive. If it is too high, it can cause the pH to drift upward, leading to cloudy water and scale formation. You can raise the alkalinity with a product often called “Alkalinity Increaser” (sodium bicarbonate) and lower it with a pH decreaser (sodium bisulfate). Always adjust the alkalinity first, before you address the pH. Alkalinity Once your alkalinity is in the correct range, you can adjust the pH. The pH is the measure of how acidic or basic your water is, on a scale of 0 to 14. A pH of 7 is neutral. The ideal range for a hot tub is between 7.4 and 7.6. This is not an arbitrary number; it is slightly alkaline to match the natural pH of the human eye, which is why it is the most comfortable for bathers. If the pH is too low (acidic), the water can be corrosive to the hot tub’s components, like the heater and the pump seals, and it can be irritating to the skin. If the pH is too high (basic), it will cause the sanitizer to become sluggish and ineffective, lead to cloudy water, and promote the formation of scale on the shell and in the plumbing. You can raise the pH with a “pH Increaser” (sodium carbonate) and lower it with a “pH Decreaser” (sodium bisulfate). Only after both the alkalinity and pH are properly balanced can you effectively manage the sanitizer. The sanitizer is the chemical that actively kills bacteria and other harmful microorganisms in the water. The two most common types of sanitizer are chlorine and bromine. Chlorine is fast-acting and a powerful oxidizer, but it can have a stronger chemical smell and is less stable in the hot, high-pH environment of a spa. Bromine is more stable at higher temperatures and has a less noticeable odor, making it a very popular choice for hot tubs. It also has the unique ability to be reactivated by “shocking” the water. The ideal level for chlorine is between 1 and 3 ppm, and for bromine, it is between 3 and 5 ppm. You must maintain these levels at all times to ensure the water is safe for bathing. Hot Tub Filters Even with a perfectly maintained sanitizer level, the water will accumulate other unwanted waste products over time. Soaps, lotions, deodorants, and organic matter from bathers build up in the water, creating a food source for bacteria and making the water cloudy and unpleasant. To combat this, you need to “shock” your hot tub on a regular basis, typically once a week. Shocking is the practice of adding a large dose of an oxidizer to the water. This does several things: it breaks down all the organic waste, it kills any resistant bacteria, and in a bromine spa, it reactivates the used bromine ions, turning them back into effective sanitizer. Always shock the spa with the cover off and the jets running to allow it to circulate properly and to let the gasses vent. Beyond the daily and weekly chemical maintenance, the hot tub has other physical components that require regular attention. The most important of these is the filter. The filter is the kidney of your hot tub, constantly working to remove small particles, hair, and debris from the water. A dirty, clogged filter cannot do its job, which will result in cloudy water and will put a strain on your pump. The filter cartridges should be removed and rinsed with a garden hose at least once a week. The goal is to spray the debris out from between the pleats of the filter. Every few months, the filter needs a deep clean. This involves soaking it overnight in a specialized filter cleaning solution to break down

Hot Tub Cleaning: Get Perfectly Balanced Hot Tub Water Every Time Read More »

woman giving her friend a cleaning gift card

Cleaning Gift: The Most Thoughtful Thanksgiving Gift You Can Give

Thanksgiving is a holiday centered on the beautiful, simple act of gathering. It’s about the warmth of a crowded table, gifts, the familiar comfort of shared recipes, and the expression of gratitude for the people in our lives. We plan menus, we brine turkeys, and we coordinate who will bring which dessert. But beneath this joyful preparation lies a silent, often stressful, and monumental task that almost always falls on the host: the pre-Thanksgiving deep clean. We have all felt it. The week before the guests arrive is a frantic race against the clock. It is a period of scrubbing, dusting, and mopping, driven by the quiet but intense pressure to present a home that is not just tidy, but impeccably clean. It is a labor of love, but it is labor nonetheless. It is hours spent on hands and knees, wiping baseboards and scrubbing floors, when that time could be spent perfecting a pie crust or simply taking a moment to breathe before the happy chaos begins. This year, consider a different kind of contribution. Instead of offering to bring another side dish that will crowd the refrigerator, think about giving a gift that truly serves the person you are thankful for. Consider giving the gift of a clean home. It may sound unconventional, but a pre-Thanksgiving cleaning, whether performed by you or a professional service, is one of the most thoughtful, practical, and profoundly impactful gifts you can possibly give a friend who is hosting. It is a gesture that transcends a simple present; it is a gift of time, of peace of mind, and of genuine, functional support. The Gift of Time In our busy lives, time is the most precious and non-renewable resource we have. During the holiday season, this becomes acutely apparent. The host of a Thanksgiving dinner is not just cooking a single meal; they are orchestrating a major event. Their to-do list is a marathon of planning, shopping, chopping, and baking. The last thing they have is a surplus of free hours. Let’s be honest about what a true guest-ready clean entails. It is not a quick wipe of the counters. It is a comprehensive, top-to-bottom effort. The Dusting: This means getting not just the coffee table, but the tops of the door frames, the ceiling fan blades, the baseboards, and the window sills. It is a detailed, meticulous job that can easily take an hour or more. The Kitchen Deep Clean: The kitchen is the heart of Thanksgiving, and it needs the most intensive work. This involves scrubbing the stovetop, wiping down the fronts of all appliances, cleaning the microwave, disinfecting the countertops, and making sure the sink is sparkling. This is a solid hour of focused work, at minimum. The Bathroom Scrub: The guest bathroom needs to be pristine. This means scrubbing the toilet, cleaning the sink and faucet, wiping down the mirror until it is streak-free, and washing the floor. The Floors: Every hard-surface floor in the main living areas needs to be thoroughly swept and mopped. Every carpet needs to be vacuumed, including moving furniture to get the dust bunnies hiding underneath. This can easily consume another hour or two, depending on the size of the home. The Final Touches: Cleaning entryway glass, tidying up clutter, and giving everything a final polish. When you add it all up, a proper pre-hosting deep clean can easily take five to eight hours of hard, physical work. By giving the gift of a cleaning, you are handing your friend an entire day of their life back. That is a day they can now use to finalize their menu, to bake a dessert without rushing, to spend time with their children who are excited for the holiday, or, most importantly, to simply sit down with a cup of tea and mentally prepare for the joy of hosting, rather than the stress of it. You are not just saving them a chore; you are giving them the space to enjoy the process. The Gift of Peace of Mind The physical labor of cleaning is only half the battle. For any host, the mental load can be even more exhausting. The pressure to have a “perfect” home is a real and often unspoken source of anxiety. Every dust bunny in the corner, every smudge on the window, and every crumb under the dining table can feel like a personal failing when you are about to welcome people into your home. This “hosting anxiety” creates a mental checklist that runs on a constant loop in a host’s mind. Did I remember to dust the lampshades? Is the guest bathroom clean enough? Does the house smell fresh? This internal monologue is a significant source of stress that detracts from the true spirit of the holiday. When you give the gift of a clean home, you are silencing that nagging voice. You are taking a huge, stressful item off their mental checklist and completely erasing it. Imagine the profound sense of relief your friend will feel, walking into their home a day or two before Thanksgiving to find that it is already done. The floors are gleaming. The kitchen is sanitized and ready for the culinary marathon. The bathroom is sparkling. This gift allows your friend to transition their focus from the presentation of their home to the purpose of the gathering. They can channel all their energy into what truly matters: the food, the conversation, and the connection with their loved ones. They can be a present, relaxed, and joyful host, not a frazzled, exhausted one who is secretly worrying about whether a guest noticed the dust on the baseboards. You are not just cleaning their house; you are clearing their mind. A Foundation for the Entire Holiday Season Thanksgiving in many ways is the official kick-off to the entire winter holiday season. The festivities of November flow directly into the preparations for December. A deep clean for Thanksgiving is therefore not just a gift for a single day; it is a foundational gift that keeps on

Cleaning Gift: The Most Thoughtful Thanksgiving Gift You Can Give Read More »

Best Ways To Clean Window Screens And Make Them Look Like New

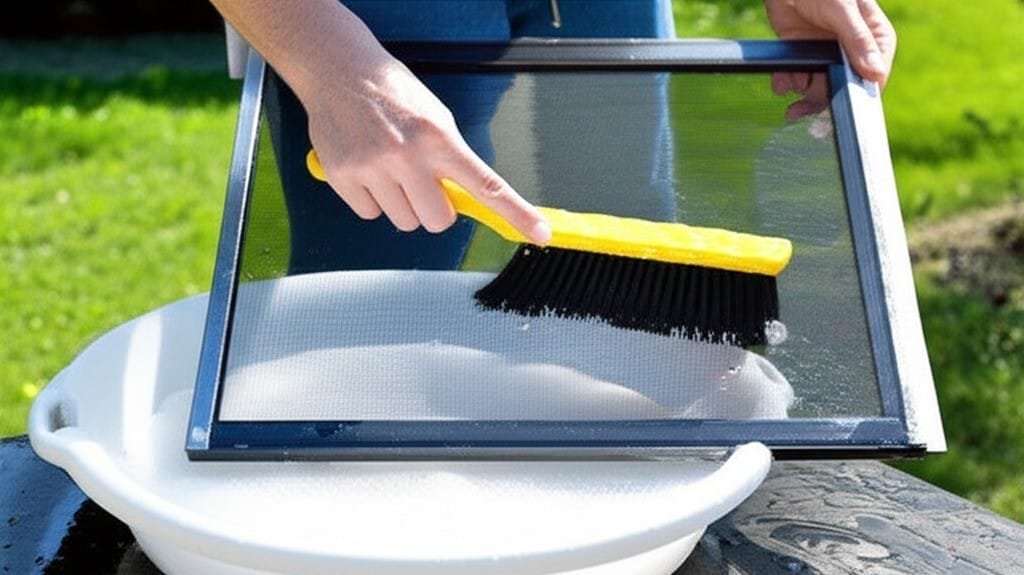
Best Ways to Clean Window Screens and Restore Your View Windows only look their best when every component is clean, and that work starts with the screens, not the glass. Begin by gathering your kit: a garden hose for rinsing, two buckets, a squeegee with a supple rubber blade, a strip applicator, microfiber cloths, a soft-bristled brush, and the cleaning solution you prefer. The classic recipe is one gallon of cool water plus a few drops of mild dish soap: slightly soapy, never foamy, because excess suds leave a film that attracts fresh dirt. Keep the second bucket full of clean water for rinsing your tools. Indoors, a spray bottle with the same solution is more practical, and for stubborn mineral deposits, keep distilled white vinegar or #0000 grade steel wool on hand. Step 1: Remove and Clean the Screens First Cleaning the glass before the screens is wasted effort, because reinstalling dirty screens instantly coats your fresh panes with a new layer of dust and grime. Start by carefully removing each screen from its frame. Note the fastening mechanism, which may be plunger bolts, tension springs, or clips, and label every screen with a small piece of masking tape noting its location, such as “Dining Room, Right,” since sizes can vary subtly between windows. For screens with only light dust, a dry method is fastest. Lay each screen flat on a drop cloth or lean it securely against a wall, then work a soft-bristled brush or the brush attachment of your vacuum over the whole mesh to dislodge loose particles without water. Screens with caked-on dirt, pollen, or greasy buildup need a wet cleaning. Move them to a driveway or lawn and pre-rinse gently on a low-pressure hose setting, since a powerful jet can stretch or tear the mesh and dent frames. Mix warm water with a little mild dish soap, scrub both sides with a soft brush using light, overlapping strokes, and pay extra attention to the frame channels, which trap dirt. Rinse completely: any lingering soap film acts as a magnet for new dust. Check by running a finger across the mesh: it should not feel slippery. Screen Condition Cleaning Method Key Detail Light dust only Dry brushing or a vacuum brush attachment Fastest option; no drying time needed Dust and pollen film Low-pressure rinse, then a mild soap scrub on both sides Keep rinsing until the mesh no longer feels slippery Caked-on or greasy grime Warm soapy water with a soft brush Focus on frame channels, then dry fully before reinstalling Step 2: Dry Screens Fully and Clean the Tracks Let the screens air dry completely against a wall, fence, or outdoor furniture in a spot with good airflow and some sun. Do not rush this step. Reinstalling damp screens traps moisture inside the window frame and track, creating ideal conditions for mold and mildew that can damage your home and health; the CDC explains how mold thrives wherever moisture collects. While they dry, clean the window assembly itself. Open the window fully, vacuum the tracks with a crevice tool to remove loose dirt, cobwebs, and dead insects, and loosen compacted grime in the corners with a stiff dry brush or putty knife before vacuuming again. Follow with a wet pass: scrub the tracks with a small firm brush such as an old toothbrush dipped in your solution, wipe out the loosened grime with a microfiber cloth, and use a cloth wrapped around a flathead screwdriver tip to reach tight corners. Wipe the frame and sill inside and out, then dry everything thoroughly. Step 3: Squeegee the Glass Like a Professional If the exterior glass is very dirty, rinse off the loose grit first so you do not drag it across the pane. Soak the strip applicator in the sudsy bucket, squeeze off the surplus liquid, then glide it across the full pane from edge to edge. Then reach for the squeegee. Before the first pull, wipe a narrow one-inch vertical dry strip down one side of the pane so the blade starts dry and does not skip. Set the squeegee at the top of the pane so it overlaps that dry strip, tilt the handle so the blade meets the glass at roughly 30 degrees, press evenly but gently, and draw the tool down in one smooth motion. Wipe the rubber blade after every pull, because a dirty blade drags a line of grime across the next stroke. Overlap each pass by about an inch and a half to avoid leaving lines, and finish by drying the edges and sill with a clean microfiber cloth. For interior glass, the technique is the same but the setup needs more care. Lay a towel or drop cloth on the sill and floor below to catch drips, mist the pane with a spray bottle instead of dipping into a bucket, and use the same top-to-bottom overlapping strokes, wiping the blade after each pass and detailing the edges with a dry cloth. Step 4: Reinstall Screens and Keep Them Clean Once the glass sparkles and the frames and tracks are dry, return each screen to its labeled window and secure it properly. This full-sequence clean, from mesh to tracks to glass, extends the life of your screens and delivers an unobstructed view. Keep them that way with a few simple habits: Reinstall every screen only after frames, tracks, and mesh are completely dry. Fasten all clips, plunger bolts, and tension springs firmly when you are done. Wipe the frames and sills occasionally so dust does not settle straight back onto fresh glass. The same attention to detail matters in damp climates and humid summer air, and Health Canada offers practical steps for controlling moisture and mold at home. If you would rather leave ladders, buckets, and squeegees to the pros, Toronto Shine Cleaning handles screens, tracks, and glass across the GTA as part of our regular cleaning and deep cleaning service, and we also prepare windows for tenants

Best Ways To Clean Window Screens And Make Them Look Like New Read More »

Why is My House So Dusty in August? – 8 Professional Tips For a Flawless Home

Why Is My House So Dusty in August? Eight Professional Fixes You wipe the coffee table, and an hour later the familiar film is back. Run a hand over a bookshelf and you come away grey. In August it feels like a losing battle, and that is not imagination: several environmental and lifestyle factors converge to turn your home into a fine particulate collector. 1. Dry Summer Air Carries the Outdoors Inside August ranks among the driest months on the calendar. Without rain, garden beds, park lawns, and construction sites go dry and powdery, and any gust of wind, passing car, or set of footsteps on the driveway sends fine soil, sand, and dried plant matter swirling upward. Because windows and doors tend to stand open for the breeze, that grit is practically invited in: it drifts through the screens and settles on every surface. Much of what you dust is the outside world imported into your living room. 2. Late-Summer Pollen Adds to the Load The botanical calendar compounds the problem. Late summer is peak season for wind-borne pollen, most notably ragweed. These grains are microscopic, lightweight, built to travel for miles, and small enough to pass through standard window screens, so once indoors they add volume to house dust and often trigger allergic reactions. That film on your television is dried soil, silica, pollen, and neighbourhood pollutants delivered by the breeze you are enjoying. 3. Your HVAC System Can Circulate Dust Around the Clock Your cooling system is both a defense and a possible culprit. With the air conditioner running almost constantly, air keeps cycling toward the return vents, and the only thing standing between that dust and your rooms is the filter. A cheap, old, or clogged filter traps little, and moving air can dislodge older trapped dust and blow it back into your rooms. Constant cycling keeps particles in perpetual motion, so they rarely settle long enough to stay gone. Add the dehumidifying effect of air conditioning: in humid air, dust absorbs moisture, grows heavier, and settles quickly, but in dry conditioned air it stays light and buoyant, floating longer and drifting further before landing. 4. Pets, Carpets, and Summer Activity Stir Everything Up People and pets add their own dust in August: summer holidays mean more foot traffic, and every walk across a carpet or drop onto a sofa kicks settled dust back into the air. Many dogs and cats also shed heavily in late summer, releasing dander, essentially dead skin flakes; dander is a leading dust component, a top allergen, and light enough to stay airborne for hours while binding other particles together. Carpets, rugs, upholstery, and curtains are the reservoirs: a carpet can hold pounds of dirt deep in its pile while still looking clean, and each footstep works like a small bellows puffing it back into the room. 5. Ditch the Feather Duster The feather duster is among the least effective tools for August dust: it flicks particles into the air, where they float until they settle elsewhere, often on the floor you just cleaned. The goal is removal, not relocation, so swap it for tools that actually capture dust. 6. Dust with a Damp Microfiber Cloth, Top to Bottom A slightly damp microfiber cloth is the most effective dusting tool you own: its split fibers carry a static charge that attracts and traps particles, and moisture keeps them from becoming airborne. Work top-down: ceiling fans, the tops of tall furniture, and picture frames first so dislodged dust falls on surfaces you have not cleaned yet, then tables and counters, and floors last. 7. Vacuum with a HEPA Filter, Slowly A standard vacuum without proper filtration can behave like a feather duster on a grand scale: the finest particles pass through the bag or canister and blast out of the exhaust into the air you breathe. HEPA, short for high-efficiency particulate air, traps 99.97% of airborne particles down to 0.3 microns, a certified standard that keeps pollen, dander, dust mite debris, and fine soil locked inside the vacuum. On carpets, make slow passes so the brush roll and suction can agitate the pile and pull up embedded grit, and use the attachments on upholstery, curtains, and baseboards. Health Canada’s indoor air contaminants hub explains why fine particles deserve this level of attention. 8. Block Dust at the Door and Filter the Air Prevention multiplies the effect of better cleaning tools. Simple habits add up: Scrape shoes on a coarse mat outside, then catch finer dirt and moisture on an absorbent mat inside. Keep a no-shoes policy indoors to cut tracked-in soil dramatically. Run a MERV 8-13 HVAC filter and check it more often in heavy-use months. Place a HEPA air purifier in bedrooms and main living areas as a second layer of defense. Humidity matters too: very damp rooms invite mould and dust mites, so pair your dusting routine with Health Canada’s moisture and mould guidance. How August Dust Builds Up, At a Glance Source Why It Peaks in August Best Countermeasure Outdoor soil and pollen Dry ground and ragweed season enter through open windows Doormats, no-shoes policy, window screens HVAC system Constant cooling cycles recirculate particles and dry the air MERV 8-13 filter, changed more often Pets and people Late-summer shedding and extra indoor activity HEPA vacuum and damp microfiber dusting Carpets and soft furnishings Stored dust is pumped out by every footstep Slow vacuum passes and attachment use Win the Battle Against August Dust August dust is a perfect storm of dry, windy weather, recirculating HVAC air, pollen, pets, and busy households. The fix is methodical: capture dust with the right tools, filter the air, and block dirt at the door. When you want a reset that reaches dust hidden deep in carpets and upholstery, Toronto Shine Cleaning serves the GTA with regular cleaning and thorough deep cleaning. See our locations, compare pricing, or call (647) 424-0355 to book your appointment. Frequently Asked Questions About Dusty Houses in August

Why is My House So Dusty in August? – 8 Professional Tips For a Flawless Home Read More »