Cleaning Guide

flu season

Flu Season: Is Your “Clean” Home Making You Sick? The Hidden Germs You Missed

Why Your “Clean” Home Can Still Spread the Flu Flu season in Canada peaks in December and January, when homes are sealed tight against the cold and filled with guests. Influenza viruses travel in droplets from coughs and sneezes, but they also ride on hands and settle on surfaces, where they can survive on hard materials like stainless steel and plastic for up to 48 hours. A home that looks spotless can still be a transmission hub, because the germs are hiding on the objects everyone touches and almost no one sanitizes. Protecting your household means shifting from cosmetic cleaning to targeted, health-focused cleaning. Clean First, Then Disinfect: the Order Matters Cleaning and disinfecting are two different steps, and skipping the first one makes the second fail. Cleaning physically removes dirt, dust, and germs from a surface using soap or detergent and water. Disinfecting then kills the germs that remain, using a registered chemical product. If you spray disinfectant onto a visibly dirty surface, the organic soil shields the germs and inactivates the product, so the process wastes time and leaves pathogens behind. The CDC home cleaning guidance recommends always cleaning surfaces before disinfecting them, and doing both steps more often during cold and flu season. Respect the Dwell Time The most common mistake is wiping disinfectant off too soon. Registered disinfectants need to stay visibly wet on the surface for a set contact time, usually three to ten minutes depending on the product, before they actually kill viruses. Spray and immediately wipe removes the product before it works. Read the label, apply enough product to keep the surface wet for the full dwell time, and let it air dry. This one habit separates real disinfecting from just moving germs around. The Hidden Germ Hotspots Most Homes Miss We all wipe kitchen counters, but the flu spreads through the objects fingers touch constantly. The handle of the refrigerator, the buttons on the microwave, the flush lever in the bathroom, the light switch plate, and the remote control all pass from hand to hand dozens of times a day, and they rarely see a disinfectant. Door hardware deserves special attention in winter: the entry doorknob, the deadbolt, the storm door handle, and any garage keypad or smart lock are touched by every person entering the house, often right after touching outdoor surfaces. These surfaces turn a family home into a germ relay during a busy holiday week. Room Hidden hotspots Flu-season routine Entryway Doorknobs, deadbolt, keypad, handrails Wipe with disinfectant daily Kitchen Fridge and oven handles, coffee maker, salt and pepper shakers Clean, then disinfect twice weekly Living room Remote controls, game controllers, light switches Sanitize weekly with alcohol wipes Bathroom Flush lever, faucet handles, toothbrush holder Disinfect every day during peak season Home office Keyboard, mouse, phone screen Wipe weekly, never drip liquid inside Electronics, Towels, and the Germs You Carry Daily Smartphones are the ultimate high-touch objects: they go from kitchen counter to bathroom to bed, and they are pressed against the face dozens of times a day. Most modern phone screens handle gentle disinfection well; wipes with 70 percent isopropyl alcohol are generally safe for touchscreens, while bleach, abrasive cleaners, and dripping liquids are not. Apply the wipe, let the surface dry completely, and avoid pooling moisture in ports and speakers. Keyboards and mice need the same attention, especially in households where several people share one workspace. Hand towels are another overlooked link in the chain. A shared bathroom towel can be touched by every member of a household, plus guests, many times a day during the December party season. During flu season, swap bathroom hand towels daily, wash them in hot water, and consider paper towels for gatherings so every guest dries their hands on a fresh sheet. The CDC handwashing guidance reminds us that clean hands stop the spread, but only if the towel that dries them is not itself a shared surface. Pillowcases and bedding deserve more frequent washing too, since flu sufferers shed virus onto linens while they sleep. Air, Humidity, and the Bigger Picture Viruses do not only wait on surfaces. Flu droplets hang in the air and attach to dust particles, which is why heating vents, ceiling fans, and dusty baseboards deserve a vacuum pass before and during flu season. Keeping indoor humidity around 40 to 60 percent also helps: flu viruses survive longer and transmit more easily in dry air, and comfortably moist air keeps the nasal passages that trap viruses working properly. A humidifier, regular ventilation, and thorough dusting work alongside surface disinfection to lower the viral load. Build a Daily Germ-Breaking Routine Disinfect entry door hardware and light switches every morning Wipe down kitchen appliance handles and counter zones after each meal Sanitize the flush lever, faucet handles, and toothbrush holder daily Give remotes, phones, and keyboards an alcohol wipe weekly Switch to fresh hand towels daily or paper towels when guests visit Vacuum vents, baseboards, and under furniture to remove dust that carries particles Consistency beats intensity. A two-minute pass over the high-touch map every day does more to protect a family than a marathon cleaning session once a month, because germs are reintroduced constantly by the people who live there. When someone in the house is already sick, add daily disinfection of everything they touch, wash your own hands after contact, and keep their linens and towels separate until they recover. Frequently Asked Questions About Flu Season Germs What is the difference between cleaning and disinfecting? Cleaning removes dirt and some germs with soap and water; disinfecting uses chemicals to kill the germs that remain. You need both, in that order, because dirt stops disinfectants from working. How long should disinfectant stay on a surface? Read the label: most registered disinfectants need to stay visibly wet for three to ten minutes to kill viruses. Wiping them off early defeats the purpose, so apply enough product and let it air dry. Is it safe to clean my

Flu Season: Is Your “Clean” Home Making You Sick? The Hidden Germs You Missed Read More »
Dangerous to Your Health: 5 Common Products That are Dangerous For Your Daily Life

Are Everyday Cleaning Products Dangerous to Your Health? Your home feels like the safe place, sealed off from city pollution. Inside many Toronto houses the opposite is true: the sprays under the sink can make indoor air more toxic than the air outside. Health Canada warns that household chemical products can cause poisonings, burns, fires and explosions when handled unsafely. A strong chemical smell is not proof of clean. Here is what five everyday products actually do, and the simpler habits that keep homes safe. Five Common Products Dangerous to Your Health 1. Bleach Bleach, the sodium hypochlorite default against mold, mildew and bathroom grime, is corrosive enough to burn skin and eyes on contact, and it is highly volatile. In a closed shower stall or small bathroom, its fumes react with organic matter and form chlorinated volatile organic compounds that immediately inflame the mucous membranes of the throat and lungs, especially dangerous with respiratory conditions. The deadliest habit is mixing: bleach plus ammonia, which lives in urine and many glass cleaners, generates chloramine gas, and bleach plus an acidic cleaner releases chlorine gas. Both can lead to hospitalization or worse. 2. Ammonia Glass and Window Cleaners Ammonia is why glass cleaner dries fast without streaks, and why it demands respect. It hunts moisture, so inhaled ammonia attacks the eyes, throat and lungs directly. High concentrations cause chemical burns in the respiratory tract and aggravate chronic conditions like asthma. Trigger-sprays aerosolize it into a fine mist that lingers in your breathing zone. That sharp odor is a warning signal, not evidence the glass needs you. 3. Fragrance, Air Fresheners and Fabric Deodorizers The word fragrance, or parfum, on a label is a regulatory loophole: scents count as trade secrets, so the hundreds of chemicals behind the scent are never listed. The cocktail commonly includes phthalates, added to make scents linger, which are known endocrine disruptors that mimic hormones and can interfere with reproductive development over long-term exposure. Air fresheners and fabric sprays do not clean anything. Some release agents that deaden your nerves or coat nasal passages with oily film; others bury odors under volatile organic compounds tied to headaches, dizziness and fatigue. Aerosol propellants add flammable lung irritants. The Government of Canada’s household products safety hub lists hazards in everyday cleaning items. 4. Oven Cleaners and Drain Openers Oven cleaners are built on lye, or sodium hydroxide, which strips baked-on grease by turning it into soap. That same reaction destroys living tissue: splashes cause severe burns and permanent blindness. Spraying a warm oven vaporizes the lye into a toxic cloud that fills the kitchen. Drain openers burn through hair and grease clogs with concentrated sulfuric acid or lye, generating intense heat that can damage old pipes; if a plumber later snakes a surviving clog, the splash-back is caustic. 5. Disinfectant Wipes and Sprays Quaternary ammonium compounds, the quats behind most disinfectant wipes and sprays, kill germs well, but they are powerful lung irritants. Growing evidence suggests frequent exposure can cause asthma even in otherwise healthy users. Quats also leave a residue, and a child who touches a wiped table then sucks their fingers is ingesting a pesticide. Blanketing whole rooms instead of high-touch points adds chemical load and feeds antibiotic resistance. Two Traps Behind Friendly Labels Carpet cleaners and upholstery shampoos bring their own risks. Many spot removers rely on perchloroethylene, a dry-cleaning solvent that is a neurotoxin and a classified carcinogen, and across a large floor it keeps off-gassing for days or weeks. Naphthalene, the mothball chemical in some carpet cleaners, releases fumes that can cause confusion, nausea and liver damage. Fibers trap all of it and release it back with every step and sit. Green labels deserve the same skepticism. The word natural is largely unregulated in cleaning products, and a green bottle can still carry allergens like limonene, a citrus oil that reacts with ozone in your air to form formaldehyde, a known carcinogen. Concentrated plant-based detergents can still irritate skin and lungs. Read the ingredient list, not the leaf on the label. The Real Risk Is the Daily Total Toxicologists call the running tally your body burden. One spray does little; a weekly ritual of glass cleaner, floor polish, counter spray, toilet cleaner and air freshener becomes a chemical soup the body must filter. When that load stays high, chronic inflammation, skin conditions and respiratory sensitivity can follow. Children and pets pay the most because smaller bodies and faster metabolisms process the same exposure less efficiently. Safer Swaps That Still Clean The most effective cleaner is usually the simplest: mechanical action. Removing dirt beats masking it. Instead of Reach for Why it works Everyday surface sprays Microfiber cloth, water and real scrubbing Fibers trap dirt and pathogens, removing more bacteria than a light chemical wipe, with no residue left behind Bleach on general surfaces Hydrogen peroxide Disinfects without chlorine fumes or toxic residue Commercial limescale removers White vinegar A mild acid that dissolves mineral deposits and soap scum without off-gassing Scouring powders Baking soda Gentle physical abrasion for sinks, tubs and baked-on messes Ventilation and Protection: The Free Upgrades Even safe cleaners need discipline. Health Canada’s page on using household chemicals safely covers the buying, use and storage rules that prevent accidents, and these habits carry it into daily practice: Ventilate. Never clean a sealed room: open a window and run the exhaust fan, especially in small bathrooms where fume levels spike fastest. Protect your skin. It is the body’s largest organ and absorbs chemicals readily, so glove up around degreasers and solvents and wear a mask for concentrated products. Remove, don’t mask. The goal is neutral air and residue-free surfaces, not a perfume cloud that signals a fresh chemical dose. Frequently Asked Questions Is it really dangerous to mix cleaning products? Yes. Bleach plus ammonia releases chloramine gas, and bleach plus any acidic cleaner releases chlorine gas. Both react within seconds in a closed room and can lead to hospitalization. Use one product

Dangerous to Your Health: 5 Common Products That are Dangerous For Your Daily Life Read More »

Washroom Cleaning

Beyond the Surface: Why Washroom Cleaning Requires a Different Strategy

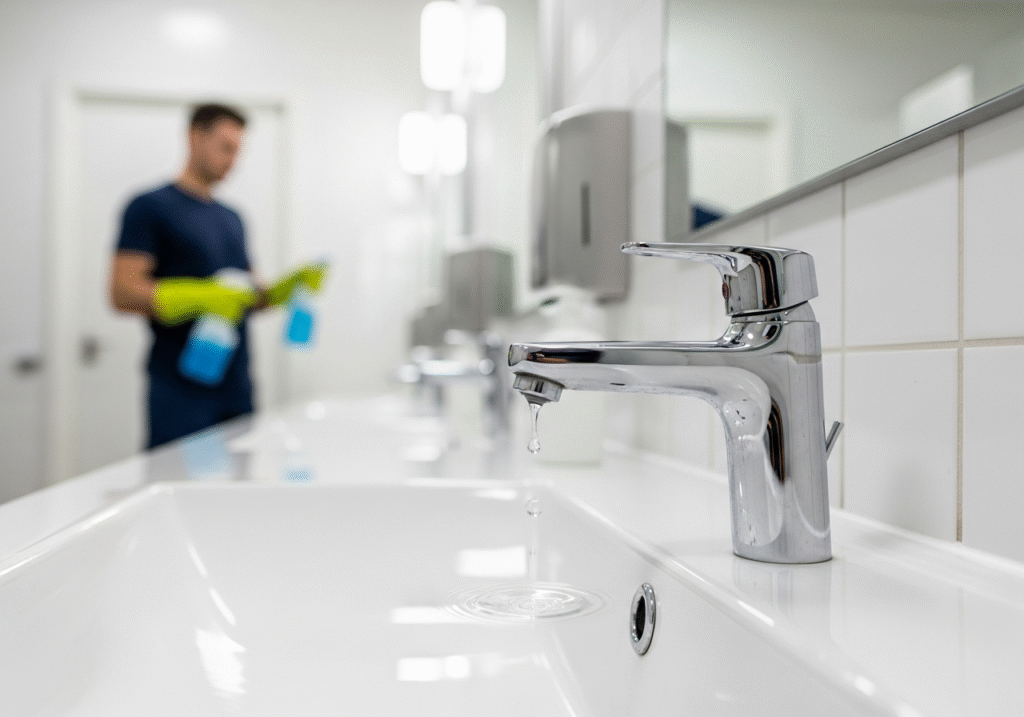
The washroom is undeniably the most functionally demanding environment within any architectural structure. It is a dedicated zone where the biological realities of human life intersect with the rigid requirements of sanitation. Unlike a living room or a bedroom, where cleaning is largely a matter of aesthetics and dust management, washroom cleaning is a constant battle against microbiology and chemistry. Every surface in a bathroom is subjected to a relentless cycle of wetting and drying, a process that creates distinct layers of mineral deposits, soap scum, and bacterial colonies known as biofilm. To clean a washroom effectively, one must move beyond the superficial act of wiping surfaces and understand the microscopic warfare taking place on the tile, the porcelain, and the grout. 1.Soap Residue The foundation of effective washroom hygiene lies in understanding the nature of the dirt you are fighting. In the shower and bathtub, the primary enemy is calcium stearate, commonly known as soap scum. This substance acts as a binding agent for filth, formed when the fatty acids in bar soap react with the minerals in hard water. This reaction creates a waxy, insoluble precipitate that clings tenaciously to fiberglass, glass, and tile. Trying to remove this substance with a standard all-purpose cleaner is often an exercise in futility because most general cleaners are pH-neutral. To break down the alkaline mineral bonds of soap scum, you need an acidic cleaner. This is why professional cleaners often rely on products containing phosphoric or citric acid. However, this chemical warfare requires caution; acid can etch natural stone like marble or travertine, destroying the finish permanently. 2.Mold Biofilm presents a different, more insidious challenge than simple dirt. This slime layer is a complex colony of bacteria that adheres to surfaces and secretes a protective, glue-like substance. In the washroom, this often manifests as the pink or orange discoloration seen in the corners of the shower. While it wipes away easily, it returns rapidly because the colony is resilient. True mold, typically black or dark green, is a fungus that roots into porous surfaces. The grout lines between your tiles are the most vulnerable points in the room. Grout is essentially cement, a porous material that absorbs water and organic matter like a sponge. When mold establishes itself in grout, surface scrubbing is often insufficient because the root structure lies deep within the pores. Effective remediation requires penetrating cleaners that can reach the sub-surface level to kill the root, followed by a sealer to lock moisture out. 3.Toilet The toilet, often viewed as the centerpiece of washroom cleaning, is frequently cleaned incorrectly due to a focus on the visible bowl rather than the invisible hygiene hazards. The mechanics of the flush create what is known as an aerosol plume. When a toilet is flushed with the lid up, microscopic droplets of water mixed with waste are ejected into the air, settling on nearby surfaces. Cleaning the toilet requires a top-down approach that addresses this spread. The most neglected area is the intersection between the toilet base and the floor. This area often accumulates a mix of condensation, dust, and stray urine, creating a persistent odor that no amount of air freshener can mask. Furthermore, the siphon jets-the small holes under the rim where water enters the bowl-often become clogged with mineral deposits and mold, reducing flush power and harboring bacteria. A bent brush is necessary to physically dislodge this buildup. 4.Faucet Aerator The sink and vanity area suffer from a unique cocktail of toothpaste splatters, hair, and makeup residues. The faucet aerator, the small mesh screen at the tip of the spout, is a hidden trap. It filters sediment from the water lines, but it also creates a damp environment where bacteria can grow. If the water flow seems irregular, it is likely because the aerator is calcified. Unscrewing this piece and soaking it in vinegar is a maintenance step that ensures the water you use to brush your teeth is actually clean. The sink drain, specifically the overflow hole near the top of the basin, is a dark, damp cave that rarely gets cleaned. It creates a perfect breeding ground for biofilm, which releases a musty, sewer-like odor. Pouring a cleaning solution down the overflow and using a small brush to agitate the interior walls is necessary to eliminate this phantom smell. 5.Mirrors and Glass Surfaces Mirrors and glass surfaces in the washroom are unforgiving of poor technique. The high humidity of the room often causes dust to stick to the glass, creating a muddy streak when wiped with a damp cloth. The secret to streak-free glass is not the chemical, but the tool. Traditional cotton cloths often leave lint or residues that cause streaking. A high-quality microfiber cloth, specifically woven for glass, uses microscopic hooks to lift oils and dust without the need for heavy detergents. Furthermore, the edges of the mirror, where the glass meets the frame, are often prone to corrosion caused by harsh ammonia-based cleaners seeping behind the glass. Cleaners should always be sprayed onto the cloth, never directly onto the mirror. 6.Floor The floor of the washroom is the final resting place for everything that falls or settles in the room. Because of the high moisture levels, dust on a bathroom floor does not sweep up easily; it smears. This mud-like dust packs into the corners and the grout lines. Mopping is often ineffective because it simply pushes this dirty water around, filling the low-lying grout lines with a slurry of gray filth. True floor hygiene in a washroom requires hand-cleaning the perimeter and the corners where the mop cannot reach. The area behind the toilet, often cramped and difficult to access, is a prime location for dust bunnies to collect moisture and begin to rot. This area should always be cleaned by hand to ensure that the source of potential odors is physically removed. 7. Exhaust Fan Ventilation is the invisible cleaner of the washroom. The exhaust fan is the single most important

Beyond the Surface: Why Washroom Cleaning Requires a Different Strategy Read More »

Baseboard Heaters routine day

Baseboard Heaters: The Step-by-Step Heater Cleaning Routine

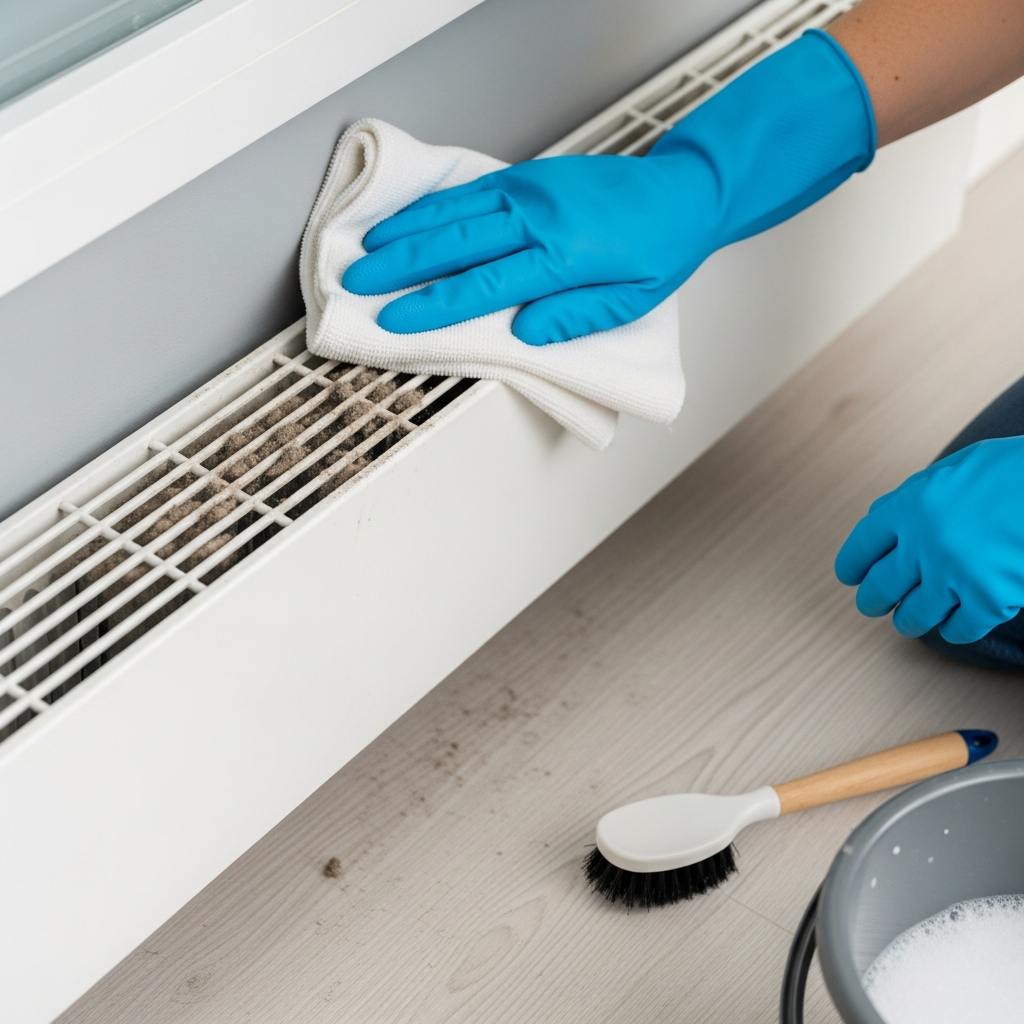
Why Baseboard Heaters Need a Cleaning Routine Baseboard heaters keep many Toronto apartments and older homes warm, especially where forced-air ductwork could never be retrofitted. They sit at floor level under windows, out of sight until autumn’s first cold snap switches them on and fills the room with the sharp smell of scorched dust. That odor means the units are clogged, wasting electricity and blowing combustion particles back into your air. This routine protects your lungs, your hydro bill and your fire safety. How a Quiet Metal Box Collects Trouble These heaters are passive convection engines with no blower fan, just a heating element inside a metal pipe wrapped in aluminum fins. Room air is drawn into the bottom of the housing, crosses the hot element and exits at the top, because warm air rises and cool air falls. That silent loop acts like a floor-height vacuum, pulling in fur, skin flakes, lint and dust. The fins are the weak point. Hundreds of thin, sharp aluminum plates sit close together for surface area, and the tight gaps wedge debris in place. Over months the buildup packs into a gray mat that insulates the metal, so the unit runs longer and harder to reach the set temperature. Three costs of a neglected heater Money. A dust-coated exchanger loses heat to itself, and longer run cycles show up as a spike in your electricity bill: part of your heating budget literally warms lint. Air quality. That October burning smell is dust and hair actually carbonizing on the element. The convection loop suspends those fine particles and combustion byproducts in your breathing zone, hitting asthma and allergy sufferers hardest. Health Canada’s overview of indoor air contaminants covers particulate sources at home. Safety. Lint is highly flammable. Most dust merely chars, but fur clumps, paper or curtain edges on the element can ignite, often unnoticed behind sofas or drapes. The dark, warm interior also invites mold and pests through spring and summer. Health Canada’s guidance on mould and household moisture explains why hidden damp spots matter. Step-by-Step Baseboard Heater Cleaning Routine Step 1: Kill the power and prove it Turn the circuit off at the main breaker panel, never just the thermostat, because a sudden temperature drop can fire the element while your hands are inside. Sweep a voltage detector across the unit to confirm it is dead. Aluminum fins bend under a fingertip or careless vacuum nozzle, and flattened fins block airflow completely at that spot. Step 2: Remove the cover and start dry Pry off the faceplate; difficulty varies by model. Attack the dust dry: water on packed dust turns it into mud that no crevice tool can lift. A strong vacuum with a crevice nozzle pulls debris from between the fins without dragging plastic across them; a soft brush handles the cover. Step 3: Blow out the core, strategically Compressed air clears the matted fuzz wedged near the heating rod, but it launches a dust cloud. Hold the vacuum nozzle at the blast zone to catch the plume, aim parallel to the fins from back to front, and wear a mask, then vacuum the floor afterward. Step 4: Degrease the sticky buildup Kitchen units collect a film of airborne cooking grease, and bathroom units gather hairspray residue plus humidity rust. Wipe the faceplate and fin tops with a damp cloth and mild degreaser, on a dead unit only, and never spray the core, where shock and corrosion risks live. A soft toothbrush dipped in solution can free greasy fins if you dry the area thoroughly before power returns. Step 5: Comb, repaint and clear the zone An inexpensive fin comb, borrowed from air-conditioner service, straightens crushed blades and returns lost heat output. Steel housings rust in damp rooms; sand the spots and repaint only with heat-rated metal paint, since standard paint peels and smells. Never coat the element or fins themselves: paint insulates them and burns off as toxic fumes. Because swapping a whole unit means hiring an electrician, refurbishing yellowed covers outdoors with high-heat enamel is the smart money. Give the unit room: manufacturers want at least 12 inches clear in front and 6 inches above. Blocked covers trap heat, trip the thermal safety limit switch and ruin furniture, and drapes resting on a heater act as a lid and fire hazard; hem floor-length panels above the intake. Electric vs Hydronic Baseboards Aspect Electric Hydronic Heat source Element inside the pipe Hot water from a central boiler through copper pipe Cool-down Stops when the thermostat does Stays warm longer after shutdown Surface heat Element gets hot enough to scorch debris Lower surface temperature, slightly safer against fire Service note Test the breaker before touching fins No shock risk in the fins, but green corrosion on copper means a slow leak and a plumber visit Their fins clog the same way, so the routine above applies to both types. Tune the Rest of the System Two details finish the job. Old bi-metal thermostats are inaccurate and cycle the unit violently, and each start-stop pulse stirs dust into the element; digital or smart models hold steadier heat and schedule warm-up for when someone is home. Watch the wall above each heater too: soot ghosting, carbonized dust plated onto drywall, resists scrubbing once set and needs stain-blocking primer and repaint, so regular cleaning is the only prevention. Frequently Asked Questions Why does my heater smell like burning when I switch it on? Autumn’s first runs carbonize the dust and fur that settled on the element over summer. A mild smell fading within a day or two is that residue; a strong or lasting odor means heavy buildup, so cut breaker power and clean the fins first. Can a dirty baseboard heater really start a fire? Yes, if enough ignitable material reaches the element. Dense lint, paper or drapery fabric resting on the heating rod can catch fire, often behind furniture where a smolder goes unnoticed. Clearances of 12 inches in front and

Baseboard Heaters: The Step-by-Step Heater Cleaning Routine Read More »

Washing Machine Cleaning Tablets: Are You Wasting Money on Washer Tablets?

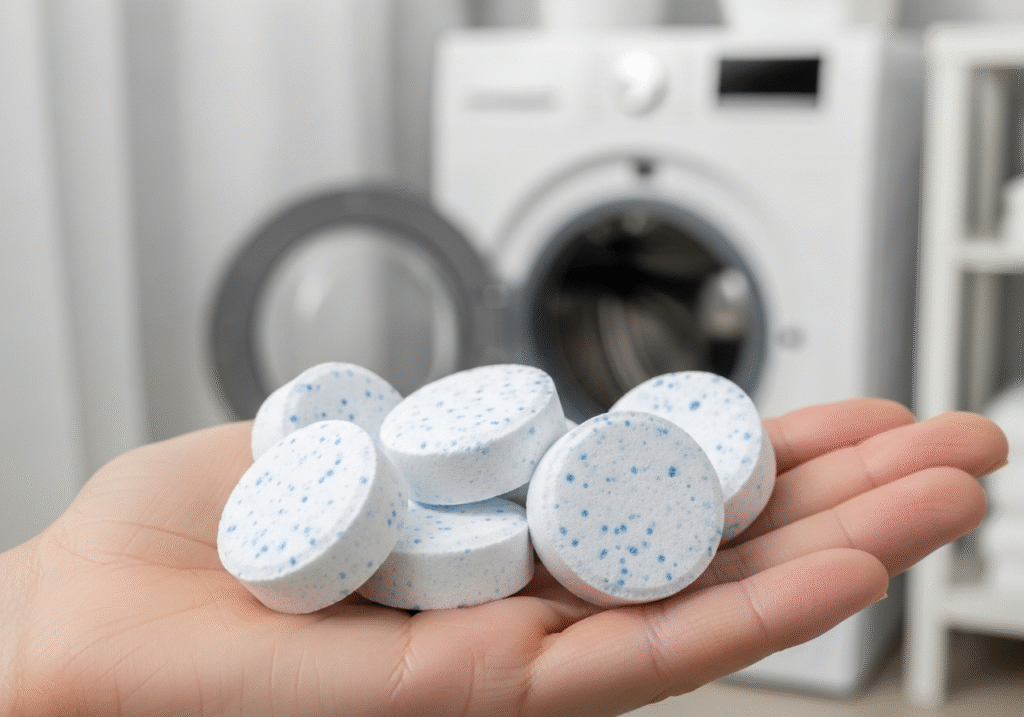
Let’s understand how to use washing machine cleaning tablets? The modern laundry room is often viewed as a sanctuary of hygiene, a place where the grime of the outside world is washed away, leaving behind only the scent of fresh linen. Central to this operation is the washing machine, an appliance that we instinctively trust to be the cleanest object in the house. We assume that because gallons of hot water and detergent flow through it daily, it must be self-cleaning. However, this assumption is the primary cause of a domestic crisis that affects millions of households: the slow, invisible accumulation of biological sludge that destroys appliances and ruins clothing. In response to the rise of high-efficiency machines and the foul odors that accompany them, the market has introduced a specific chemical solution: washing machine tablets. These small, effervescent pucks have become a staple in the cleaning aisle, promising to strip away years of neglect with a single cycle. Yet, to truly understand their value and their limitations, one must look past the marketing and understand the chemistry and mechanics of why our machines get dirty in the first place. Sustainability or Disaster? To understand the necessity of washing machine tablets, one must first look at the engineering shift that created the problem. Decades ago, traditional top-loading washers used massive volumes of water. They filled the tub to the brim, allowing clothes to float freely, and the aggressive mechanical agitation flushed soil and residue down the drain effectively. Today, in the name of environmental preservation and energy efficiency, we use front-loading or high-efficiency top-loading machines. These devices use a fraction of the water, relying on the tumbling action of the drum to clean clothes through friction and gravity. While this is a victory for sustainability, it is a disaster for internal hygiene. The dirt, dead skin cells, body oils, and excess detergent that are stripped from your clothing are not always flushed away. Instead, due to the low water volume, they are often cast onto the walls of the outer tub-a stationary drum that surrounds the spinning basket you see. In this dark, warm, and damp crevice, a layer of biofilm begins to grow. This biofilm is a sticky, living matrix of bacteria and mold that feeds on the residual laundry products we leave behind. Washing machine tablets are engineered specifically to target this hidden environment. Unlike laundry detergent, which is chemically formulated to lift soil from fabrics and suspend it in water using surfactants, cleaning tablets are designed to be aggressive against hard surfaces. They are typically composed of concentrated oxidative agents, such as sodium percarbonate, which breaks down into hydrogen peroxide and soda ash when dissolved in water. When a tablet is dropped into the drum and the cycle begins, it effervesces violently. This fizzing action is not merely theatrical; it serves a crucial mechanical purpose. It helps to disperse the active chemical ingredients throughout the entire volume of the drum, splashing the cleaning solution up to the “roof” of the tub and into the crevices of the spider arm-the metal bracket that holds the drum in place and is notorious for corroding and snapping due to chemical buildup. Alkaline Cleaning Products The chemistry of washing machine tablets is typically alkaline, which is essential for their function. Most of the grime inside a washer is acidic in nature-fatty acids from soap scum, body lipids, and grease. By introducing a highly alkaline solution, the tablets can saponify these fats, turning them into a soluble soap that can be rinsed away. Many advanced formulations also include specific enzymes. These enzymes act as biological catalysts that digest the organic matter within the biofilm, effectively eating away the food source that allows mold to thrive in the damp recesses of the pump and drain lines. By breaking down the structural integrity of the sludge, the tablet allows the water to flush it out of the system. However, a dangerous misconception exists regarding what these tablets can actually achieve. Many homeowners treat them as a repair tool rather than a maintenance tool. If a washing machine has been neglected for five years and has developed a thick, black ring of mold on the rubber door gasket, a washing machine tablet will not remove it. Mold has root structures that penetrate the porous rubber of the seal. No amount of splashing chemical water will scrub that physical infestation away. The tablet is designed to maintain the hard, non-porous surfaces-the stainless steel of the drum and the heavy plastic of the outer tub. Relying solely on a tablet while ignoring the physical gaskets is why many frustrated users claim the product “doesn’t work.” It works perfectly for its intended chemical purpose, but it cannot perform miracles on permanent organic staining that requires manual agitation and a mildewcide. Water Temperature The effectiveness of washing machine tablets is also entirely dependent on how they are used, particularly regarding water temperature. This is where user error runs rampant. Almost all cleaning tablets rely on chemical reactions that require heat energy to activate. The oxygen release from the bleaching agents is significantly more vigorous and effective in scalding hot water. If a user throws a tablet in and runs a “Quick Wash” or a cold cycle, they are essentially wasting their money. The tablet may not even fully dissolve, leaving a gritty, chalky residue at the bottom of the drum that adds to the mess rather than resolving it. To get the full benefit, the machine must be set to its hottest possible setting-often labeled “Sanitize” or “Extra Hot.” This heat ensures that the tablet dissolves completely and that the chemical solution is energetic enough to penetrate the layers of calcified grime. A major contributor to the sludge that tablets are fighting is the overuse of fabric softener. Fabric softener is, essentially, liquid fat. It is designed to coat the fibers of your clothing with a thin layer of lipids to make them feel slick and reduce static.

Washing Machine Cleaning Tablets: Are You Wasting Money on Washer Tablets? Read More »

Persian rug being used

Persian Carpet: How to Identify if Your Rug Needs a Professional Wash or Just a Vacuum

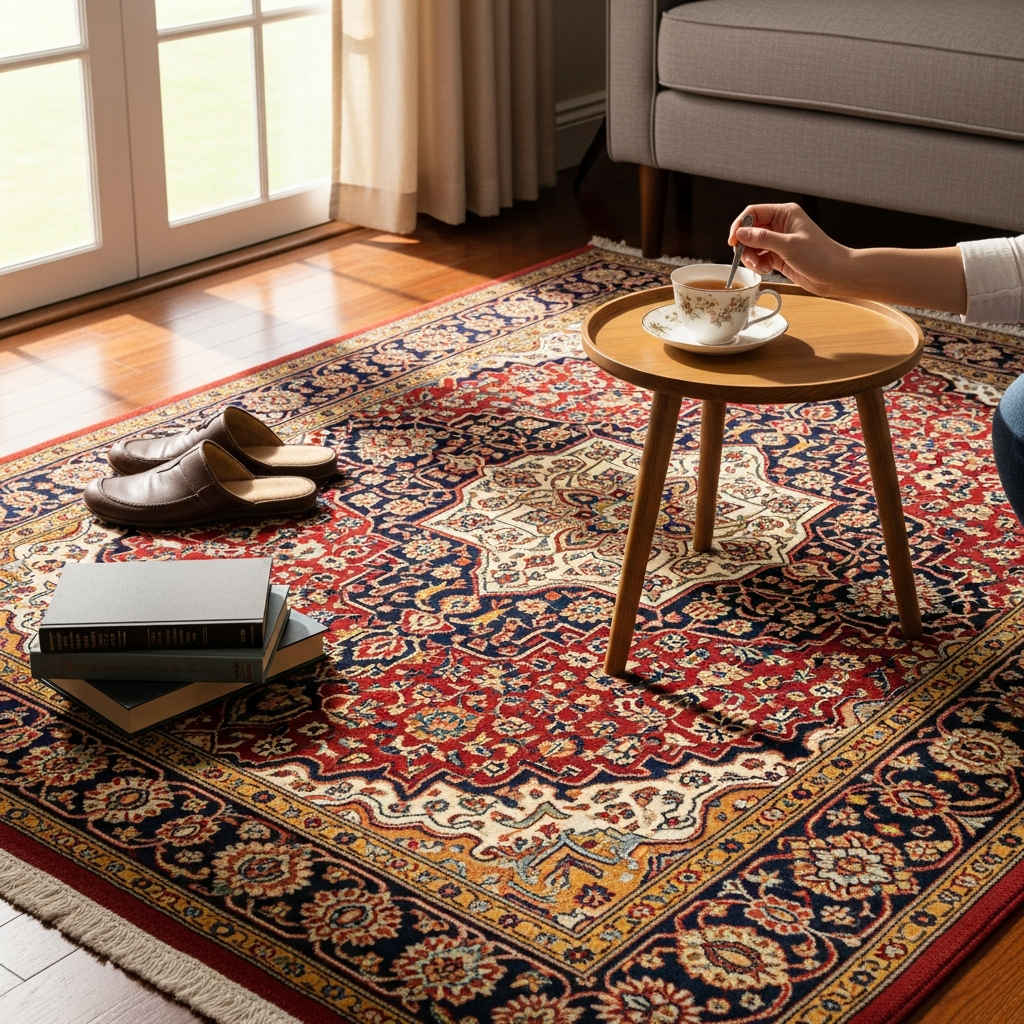
Persian Carpet Care: Professional Wash or Just a Vacuum? A Persian carpet is far more than a floor covering. It is a piece of art, a family heirloom, and a historical document woven from wool, silk, and cotton with complex natural pigments. Because it is an organic textile, its care follows a different philosophy from synthetic wall-to-wall carpeting. Treating a hand-knotted Persian rug with the same chemicals and mechanical aggression used on a polyester rug is the fastest way to destroy its value. The Anatomy of a Hand-Knotted Rug: Why Grit Is Destructive A Persian rug is held together by millions of hand-tied knots, and that density creates a unique soiling problem. Fine dust and grit migrate down through the pile and settle deep in the foundation, where they act like tiny shards of glass. Every footstep grinds those particles against the wool, slicing fibers at the base like a guillotine. Standard vacuuming cannot remove this deep sediment, and the beater bar on most upright machines is a primary cause of damage: it pulls at the knots, shreds the pile, and can tear the fringes. The correct approach is suction only, plus the occasional vacuum of the back of the rug so gravity helps vibrate grit out of the foundation. Alkaline Cleaners and the Chemistry of Wool Wool is a protein fiber protected by a layer of scales and natural oils called lanolin, which give the rug its sheen and stain resistance. Most commercial carpet cleaners are highly alkaline, formulated for synthetic grease, and they strip the lanolin, leaving wool brittle, dry, and dull. High alkalinity can even cause a chemical burn that turns the wool yellow or brown permanently. Persian rugs need a pH-neutral or slightly acidic solution that respects the protein structure, which is why traditional methods favor vinegar or plant-based shampoos. Dyes, Heat, and the Risks of DIY Spot Cleaning Many older and tribal rugs use vegetable dyes that are not chemically locked into the fiber. These dyes bleed when wet, and a common tragedy happens when a homeowner spot-cleans a spill with hot water and a generic cleaner. The heat opens the fiber cuticles, the dye migrates, and deep reds bleed into creamy white areas, creating a muddy, irreversible stain. Hot water is almost always a mistake: heat and agitation cause felting, so the fibers shrink and the rug distorts, buckles, and no longer lies flat. Stain response is where most rugs are lost. Panic leads to frantic scrubbing, but wet wool fibers are swollen and vulnerable. Scrubbing distorts the pile, untwists the fibers, and creates a texture difference called blooming that remains even after the stain is gone. The only correct immediate action is blotting: pressing straight down with a clean white cotton towel to absorb liquid without lateral movement. Pet Urine, the Fringe, and Water Damage Pet urine is a severe threat that goes beyond staining. It starts as an acid but becomes highly alkaline as it decomposes, which destabilizes dyes and, more insidiously, rots the cotton foundation in a condition known as dry rot. The salts left behind pull moisture from the air, keep the foundation damp, and feed bacteria until the threads crack or tear when the rug is moved. Standard enzymatic cleaners often leave sticky residues that attract more dirt, so pet urine usually requires a full immersion wash by a professional to flush the salts out completely. The fringe is the end of the warp threads that form the rug’s skeleton, and if it unravels the knots slide off. Never bleach it, because bleach degrades cotton and makes the threads brittle. Clean it gently with the same mild solution as the rest of the rug, and never let a beater bar touch it. Water damage is usually the result of improper drying after a DIY wash. A dense Persian rug traps moisture in its center, and mold and mildew can develop in as little as 24 hours, leaving a permanent odor and fungal growth that eats the cellulosic fibers. Professional facilities use centrifuges and temperature-controlled drying rooms to get the rug bone dry; washing it on a driveway leaves it wet for days, inviting rot. Steam Cleaning vs True Rug Washing Treatment What it does Safe for Persian rugs? Suction-only vacuuming Lifts surface dust without agitation Yes, as routine maintenance Spot blotting Absorbs fresh spills straight down Yes, with a clean white towel Hot water extraction Injects hot detergent into the pile No, heat and alkalinity damage wool Immersion rug wash Dusting, dye test, cool water, controlled drying Yes, at a dedicated facility Most in-home carpet cleaners use hot water extraction, which is catastrophic for Persian rugs: the heat and high alkalinity are wrong for wool, and cleaning on the floor means the back is never rinsed properly. A true wash happens at a dedicated facility where the rug is dusted, tested for dye stability, submerged in cool flowing water, and dried under controlled conditions. The CDC notes that mold grows on carpet and fabric wherever moisture lingers, and Health Canada’s mould guidance is the same message: damp textiles need rapid, thorough drying. For routine upkeep, follow the CDC’s soft surface cleaning guidance for carpet and rugs. Deep grit that suction cannot lift from the knot foundation. Any dye bleed, color migration, or bloomed pile after a spill. Pet urine accidents, which leave salts and may cause dry rot. Fringe damage, musty odor, or a rug that stayed wet more than a day. When these signs appear, a professional wash is the safe answer. Toronto Shine Cleaning applies the same rigorous, knowledgeable approach to your whole home, with a $1,000,000 insurance policy and $10,000 breakage and surety bond behind every visit. Call (647) 424-0355, see our cleaning prices, or book a deep home cleaning for the rest of your residence. A regular maid service keeps everyday dust from settling into fine textiles, and we serve locations across the GTA. Frequently Asked Questions Can I steam clean a Persian rug?

Persian Carpet: How to Identify if Your Rug Needs a Professional Wash or Just a Vacuum Read More »

december checklist

December Checklist: 11 Things You Must Do Before the First Major Snowfall

December Home Prep: The Canadian Checklist That Beats the First Snowfall December in Canada asks for more than patience. The month buries autumn under snow, shortens daylight, and stacks holidays into four busy weeks, so its first half belongs to preparation, not panic. This eleven-task checklist covers the roof, the plumbing, the heating system, the emergency supplies, and the pre-holiday deep clean, ideally before the first major snowfall locks you indoors. 1. Clean the Gutters Before Ice Dams Can Form Work from the top down, starting at the roofline. Leaves, twigs, and sludge left in the gutters overwinter into a frozen dam. When mild days melt roof snow, that dam traps the water, which backs up under shingles, refreezes, and pushes moisture into the roof deck, insulation, and interior walls. One ice dam repair dwarfs the cost of raking out the gutters, and late fall, after leaf drop but before the deep freeze, is the last comfortable moment to clear them. 2. Drain and Shut Down Every Exterior Water Source Disconnect garden hoses, drain them fully, and store them for the season. Then close the interior shut-off valve feeding each outdoor tap and open the tap itself so remaining water drains out. This five-minute chore stops water from freezing, expanding, and bursting a pipe, which is how a mild December night turns into a flooded basement. 3. Stage Shovels, Ice Melt, and Scrapers Before the Blizzard Rush Do not shop for snow gear during a storm warning, when shelves empty fast. Check shovels for cracks, keep ice melt, sand, or grit in a sealed container so it stays dry and free-flowing, and replace a chipped windshield scraper now. Prepared tools turn a snow day from stressful into routine. 4. Chase the Drafts Around Windows and Doors An annoying October draft becomes a heater-taxing problem in December. Walk every window and exterior door, feel for moving air, and look for visible gaps. Swap out worn weatherstripping, and fit plastic insulation film kits over older windows; the film traps a still layer of air that cuts heat loss. 5. Service the Heating System While It Warms Up Replace the furnace filter before the system runs hard every day: a clogged filter restricts airflow, wastes energy, and pushes dust and allergens through the house, one of the effects behind Health Canada’s indoor air contaminants reporting. If your furnace carries a whole-house humidifier, clean its pad or filter, switch it on, and set it against dry winter air. Persistent dampness or a musty smell is a different problem; mould guidance from Health Canada covers moisture control. 6. Sweep the Chimney and Stack Seasoned Wood If nobody has cleaned and inspected your chimney this season, book it now. Creosote from past fires is a genuine fire hazard. Keep your firewood dry, seasoned, and stored under cover with airflow around it, with a small indoor supply ready for cold nights. 7. Build a 72-Hour Emergency Kit for Storm Outages December storms knock power out for hours or days. Assemble a kit you can find in the dark, kept somewhere accessible: Reliable flashlights with spare fresh batteries Warm blankets for every household member A stocked first-aid kit and any daily medications Non-perishable food and bottled water to cover at least 72 hours A battery-operated or hand-crank radio for storm updates A fully charged power bank for your phone 8. Stock the Pantry and Freezer Before the Run Once the first big storm lands, a grocery run becomes a trek. Load staples early: pasta, rice, canned goods, coffee, and enough freezer meals for a comfortable snow day. A full freezer also holds temperature better during an outage than an empty one. 9. Deep Clean the House Before the Decorations Go Up With safety tasks handled, late November or early December is the smart moment for a seasonal deep clean. Run the oven’s self-clean cycle now, well before holiday baking, scrub the kitchen, and give living areas and guest bathrooms a thorough dust and vacuum, the same clean-first approach the CDC recommends for household surfaces. A reset home feels calmer during a chaotic month. Recurring maid service keeps the baseline tidy through the party weeks. 10. Fortify the Entryway and Test the Light Strings The front zone will soon swallow boots, coats, hats, and mittens, so set up a durable mat for wet feet, reachable hooks, and baskets for accessories now. Declutter unused items before gifts arrive to make room for them. Before decorating, plug in every strand of holiday lights and replace dead bulbs early. 11. Winter Proof the Vehicle, Kit Included Winter tires are not only for snow. Their softer rubber compound grips far better and shortens stopping distances in any cold, even on dry pavement, so mount them before the temperature truly turns. Replace streaking wiper blades, top up with winter-rated washer fluid that will not freeze, and store spare bottles away from living space, since washer fluid is a household chemical with real hazards. 11a. Add a Car Emergency Kit Every winter trip deserves a small kit in the trunk: a blanket, a compact shovel, traction sand or kitty litter, a flashlight, jumper leads, and some shelf-stable snacks. December Prep at a Glance Task Best timing What it prevents Gutter clearing Late November Ice dams, roof and wall damage Exterior taps off Before first hard freeze Burst pipes, flooded basements Furnace filter swap Early December High bills, dusty air, strain Chimney inspection Before heavy fireplace use Creosote fires Deep clean Before decorations and guests Holiday chaos on a dirty house Winter tires First sustained cold Longer stopping distances December Checklist FAQ Is it too late to clean gutters in December? Not usually. Clear them on any dry, above-freezing day before the next snowfall. If the debris has already frozen in, wait for a thaw or hire a roof and gutter crew rather than chipping at ice on a ladder. How often should the furnace filter be changed in winter? Check it monthly during the

December Checklist: 11 Things You Must Do Before the First Major Snowfall Read More »

Make Your Stove Look New Again with These Simple Tools

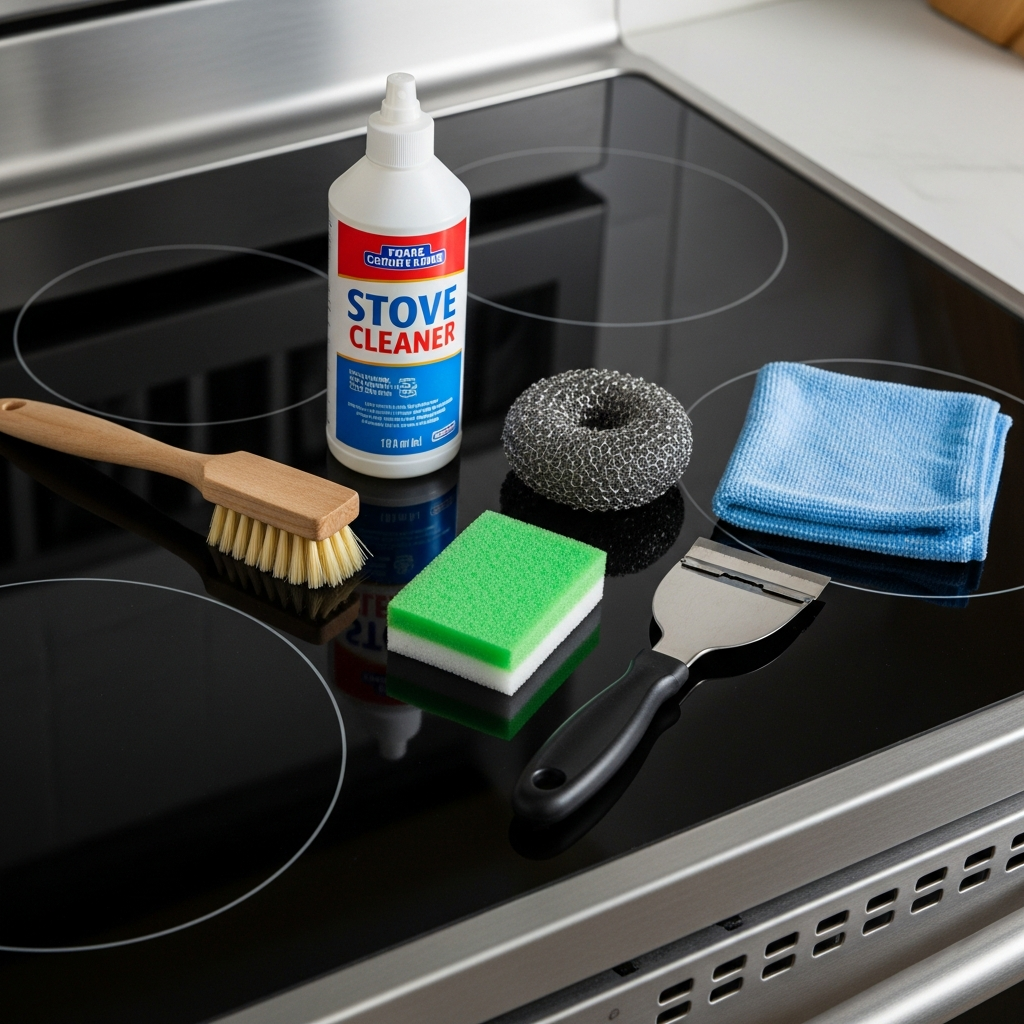
The stove is the undeniable workhorse of the kitchen, the command center where raw ingredients are transformed into meals. It is also, by nature of its function, the appliance most prone to filth. Every splatter of oil, every boil-over of pasta water, and every dropped crumb contributes to a layer of grime that, if left unchecked, hardens into a substance nearly as tough as the metal it sits upon. Cleaning a stove is not merely a matter of aesthetics; it is a matter of safety and efficiency. A grease-laden stovetop is a fire hazard, and clogged burner ports result in uneven heating that ruins food. Yet, despite its importance, stove cleaning is often performed incorrectly, with homeowners using the wrong chemicals on the wrong surfaces, scratching delicate glass, or neglecting the hidden areas where grease accumulates the most. Mastering the art of stove maintenance requires understanding the specific materials you are working with-whether it is tempered glass, cast iron, or enamel-and applying the right chemical and mechanical leverage to remove residue without causing damage. 1.Glass-Ceramic Cooktop The glass-ceramic cooktop, a staple of modern kitchens, presents a unique paradox: it is the sleekest surface to look at but often the most frustrating to maintain. The smooth, black surface shows every fingerprint and dust mote, but the real enemy is burnt-on food. A common mistake is attacking these surfaces with abrasive scouring pads. The rough side of a standard kitchen sponge is practically sandpaper to a glass cooktop. Over time, this creates a haze of micro-scratches that dulls the finish and, more importantly, traps dirt, making future cleaning even harder. The correct tool for a glass top is not a scrubber, but a razor blade scraper. When food is burnt onto the surface-especially sugary substances which can actually pit the glass if left to cool-a metal scraper held at a forty-five-degree angle is the only way to physically shear the carbon off without damaging the substrate. This should be done while the surface is wet with a specific glass cooktop cleaner or a paste of baking soda and water, which acts as a lubricant. The goal is to lift the debris, not grind it into the glass. Polishing with a dry microfiber cloth afterwards is what restores the shine, but the heavy lifting is done by the blade. 2.Gas Stove Gas ranges offer a completely different set of challenges, primarily centered around the heavy, cast-iron grates. These grates are porous and subjected to direct flame, meaning that grease spills are baked into the iron almost instantly. Scrubbing these by hand at the sink is a labor-intensive task that rarely yields perfect results. The structure of the grates, with their many corners and rough texture, shreds sponges and resists brushes. The most effective method for cleaning heavy cast iron grates utilizes the chemistry of ammonia fumes. By placing the grates inside a heavy-duty garbage bag with a splash of ammonia and sealing it tight for twenty-four hours, you allow the fumes to penetrate the grease. The ammonia breaks down the bond between the carbonized food and the iron. When you open the bag the next day-preferably outside to avoid inhaling the strong fumes-the grime usually wipes off with minimal scrubbing. This method saves hours of physical labor. It is important, however, to rinse them thoroughly and dry them completely, perhaps even placing them in a warm oven for a few minutes, to prevent rust from forming on the exposed iron. Beneath the grates lie the burner caps and heads, the actual machinery of the gas stove. If your flame is yellow instead of blue, or if the ignition clicks incessantly before lighting, the cause is almost always a clogged port. Food spills can block the tiny holes where gas escapes, disrupting the flow and air mixture. Cleaning these requires precision, not brute force. A straightened paper clip or a needle can be used to gently clear the ports, but one must be careful not to break the metal tip off inside the hole. The burner heads themselves can be soaked in warm soapy water, but the electrical igniter-the little ceramic nub that sparks-must remain dry. If this ceramic piece gets wet or coated in cleaner, the stove will not light until it has dried out completely. Reassembling the burners requires checking the alignment; a cap that sits slightly askew will result in a dangerous, uneven flame that can flare up unexpectedly. 3.Electric Stove Electric coil stoves, often seen in older apartments, are frequently neglected because they seem difficult to disassemble, but they are actually the most modular of all designs. The coils themselves rarely need cleaning because they get hot enough to burn off most residue, but the drip pans beneath them are magnets for disaster. These metal bowls catch everything that falls through the coils. When they are coated in black, carbonized grease, they become a smoke generator every time the stove is turned on. While many people wrap these in aluminum foil to avoid cleaning them, this is a dangerous practice that can trap heat and melt the wiring or cause a short circuit. Drip pans are inexpensive and should be viewed as semi-disposable. If they are rusted or hopelessly caked, replacing them is safer and more effective than scrubbing. If they are salvageable, they should be removed and boiled in a mixture of water and vinegar to loosen the charred remains. The coils themselves pull out, but one must be careful never to submerge the electrical contacts in water. 4.Control Panel and Buttons The control panel and knobs are the most touched but often the least cleaned parts of the stove. Because they are usually located above the cooking surface or on the front face, they are constantly bombarded with microscopic grease splatters. Over time, this grease works its way behind the knobs, acting as a glue that makes them difficult to turn. To clean this area effectively, the knobs must be pulled off. Simply wiping around them pushes

Make Your Stove Look New Again with These Simple Tools Read More »

laundry basket in the laundry room

Washing Clothes: 10 Mistakes You Need to Stop Making When Washing Your Clothes

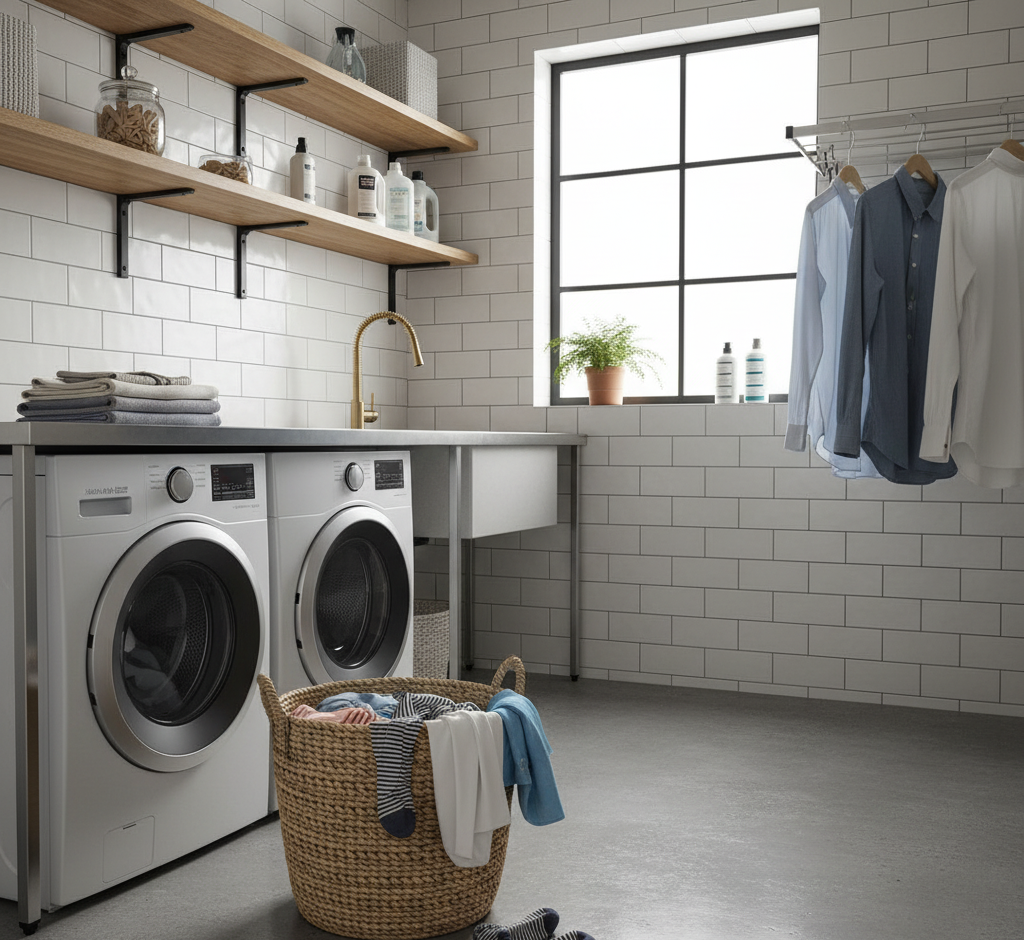
The act of washing clothes is often dismissed as a mundane necessity, a background task that requires little thought beyond separating whites from colors and pressing a button. However, this perceived simplicity is deceptive. Laundry is a chemical and mechanical process that involves a delicate balance of water temperature, agitation, chemical agents, and fabric types. When this balance is disrupted by habitual errors, the consequences are expensive and frustrating. Clothes fade prematurely, fibers break down, elastic snaps, and mysterious holes appear in favorite garments. Furthermore, the appliances themselves, often significant financial investments, suffer from misuse, leading to mechanical failures and mold growth. To truly care for a wardrobe and maintain the efficiency of a household, one must unlearn the common practices that have likely been passed down through generations or assumed out of convenience. 1.First Mistake The first critical error occurs long before the start button is pressed, during the sorting phase. Most people operate under the assumption that sorting is purely a chromatic exercise-keeping red socks away from white shirts to prevent pink underwear. While preventing dye transfer is important, sorting by fabric weight and texture is arguably more critical for the physical preservation of the garments. A washing machine cleans through agitation; clothes rub against each other to dislodge soil. When you mix heavy, abrasive fabrics like denim jeans with delicate materials like silk or fine cotton, you are effectively creating a sandpaper effect. The heavy items thrash against the lighter ones, causing micro-abrasions that manifest as pilling, holes, and a general loss of softness. Furthermore, the texture of fabrics dictates their lint behavior. Washing lint-shedding items, such as heavy cotton towels, with lint-attracting fabrics, like synthetic leggings or corduroy, results in a visual disaster that makes dark clothes look permanently dirty. 2.Individual Preparation Once the piles are sorted, the preparation of individual garments is often neglected. This mechanical oversight leads to tearing and stretching. The rule for hardware is simple yet frequently confused: zippers must be closed, and buttons must be open. A zipper left unzipped is essentially a flexible saw blade loose in the drum. As it spins, the metal teeth can snag on lace, scratch the surface of other fabrics, and even chip the interior paint of the washing machine. Conversely, buttoned shirts suffer from the opposite problem. When a shirt is wet, it is heavy. If it is buttoned up, the centrifugal force of the spin cycle pulls aggressively at the threads holding the buttons, distorting the buttonholes and causing buttons to pop off. Pockets also require vigilant inspection. A stray tissue can disintegrate and cover an entire load in white confetti, while heavier objects like coins can bypass the seal and damage the drain pump. 3.Detergent The application of detergent is the area most rife with misconceptions. Decades of marketing have convinced consumers that more foam equals more cleaning power. In reality, the opposite is true for modern high-efficiency machines. These appliances use very little water, relying on friction to clean. When you use too much detergent, you generate a massive volume of suds that acts as a cushion between the clothes, preventing the necessary friction that scrubs away dirt. The clothes simply float in a bubble bath, emerging with their stains intact. Worse, the rinse cycle cannot remove this excess chemical load. The result is a layer of soap residue left on the fibers, which acts as a magnet for dirt and skin oils, creating a breeding ground for bacteria and leading to the “sour” smell often associated with old towels. 4.Fabric Softener Compound this issue with the habitual use of fabric softener, and you have a recipe for textile ruin. Fabric softener works by coating fibers with a layer of lipid-based chemicals to force them to feel slick. While this feels nice instantly, it functionally destroys the utility of absorbent fabrics. Towels coated in softener lose their ability to wick water; they simply push moisture around the skin. Athletic wear, engineered to breathe and wick sweat, becomes clogged and sealed by these waxy deposits, trapping body odors deep within the weave. A simple substitution of white vinegar in the rinse cycle can soften fabrics by stripping away detergent residue and neutralizing static without leaving a damaging coating behind. 5.Amount The physical loading of the machine also requires a specific balance. There is a tendency to stuff the drum to capacity to minimize the number of loads, but a packed machine is a useless machine. For the chemistry of the detergent to work, it must dissolve and circulate. For the mechanical action to work, clothes must have room to tumble. A solid brick of wet fabric in the center of the drum will never get clean. Conversely, washing a single heavy item is a mechanical hazard. A lone wet blanket creates a severe imbalance during the spin cycle, causing the drum to bang violently against the chassis, wearing out the suspension and bearings. 6.Water Temperature selection is another variable where habit often overrides logic. The default to cold water for everything, driven by eco-consciousness, is noble but insufficient for sanitation. While cold water is excellent for preventing shrinkage and protecting dyes, it often lacks the thermal energy required to activate the enzymes in detergents that target heavy oils. Bed sheets and towels, which are reservoirs for dead skin and dust mites, require hot water to be truly sanitized. A cold wash for these items is merely a rinse. However, using hot water indiscriminately is equally damaging, as it sets protein-based stains like blood and sweat into the fabric permanently. A nuanced understanding of temperature-hot for sanitation, warm for average soil, and cold for delicate protection-is necessary. 7.Stains When stains do occur, the immediate reaction is often the wrong one. The instinct to rub a spill vigorously is a destructive reflex. Rubbing drives the stain deeper into the yarn and abrades the surface of the fabric, often causing color loss that is more noticeable than the stain itself. The correct technique is

Washing Clothes: 10 Mistakes You Need to Stop Making When Washing Your Clothes Read More »

Paperwork Organization

Paperwork Organization: 7 Steps to Organizing Your Important Documents

Accumulation of paperwork is arguably the most stressful type of disorder found in the modern home. Unlike a sink full of dishes or a basket of dirty laundry, which represent simple, repetitive chores, a pile of paperwork represents a stack of unmade decisions. Each envelope, receipt, and flyer carries a potential obligation, a deadline, or a piece of information that might be needed in some hypothetical future. This ambiguity is what makes paper so difficult to manage. We let it accumulate on kitchen counters, dining tables, and entry consoles not because we are lazy, but because we are afraid of making the wrong choice. We fear throwing away something vital, yet we lack the immediate energy to process it. Organizing your paperwork is therefore less about tidiness and more about establishing a workflow that allows you to manage your life with confidence and efficiency. It is about moving from a state of reactive anxiety to one of proactive control. 1.Look For All The Papers To begin the process of organizing your paperwork, you must first understand the scope of the problem. You cannot organize a clutter problem in piecemeal fashion; you must attack it in its entirety. This means gathering every scrap of loose paper from every corner of your house. You must look inside junk drawers, check the bottom of work bags, clear off the refrigerator door, and empty the glove compartment of your car. Bring everything to a large, central surface, such as a dining room table. This step is often visually overwhelming, but it is necessary. Seeing the sheer volume of paper in one location breaks the illusion that you can simply “tidy up” a little bit at a time. It forces you to confront the reality of the accumulation and provides the psychological leverage needed to be ruthless in your sorting. 2.Triage Once you have your mountain of paper, the next phase is the triage. This is a rapid-fire sorting process where you make quick decisions based on the immediate nature of the document. You are not filing yet; you are simply categorizing. Create three distinct piles: Trash, Action, and Archive. The Trash pile should be the largest. It includes junk mail, expired coupons, flyers for services you will never use, and envelopes from opened mail. Be aggressive here. If the information is readily available online, you generally do not need the physical paper. As you sort, keep a shredder or a dedicated bag for shredding nearby. Any document containing personal information like your name, address, social security number, or financial details that goes into the trash must be shredded to protect against identity theft. This includes credit card offers and old bank statements. The Action pile is for documents that require you to do something. This is your “active” paperwork. It includes bills that need to be paid, forms that need a signature, invitations that require an RSVP, or documents that you need to read or review. This pile represents your current to-do list. The mistake many people make is filing these items away too quickly, where they are forgotten until a deadline is missed. Action items need to remain visible but contained. The Archive pile is for documents that require no immediate action but must be kept for future reference. These are your tax returns, medical records, insurance policies, property deeds, and vehicle registration papers. This pile will eventually move to your filing cabinet or long-term storage solution. You may also encounter a category of sentimental items-cards, letters, children’s drawings. Do not let these derail your progress. Place them in a separate box to be dealt with later. Attempting to reminisce while organizing administrative papers is the fastest way to lose momentum. 3.Desk Organizers With the sorting complete and the trash removed, you can focus on setting up the Action system. Since these papers need to be accessed frequently, they should not be hidden in a drawer. A desktop sorter, a tiered wall file, or a dedicated tray system works best. The goal is to categorize the action required. You might have sections labeled “To Pay,” “To Read,” and “To File.” The “To File” section acts as a holding area for items you have processed-the bill has been paid, the form signed-but have not yet had time to move to the permanent archive. This system prevents active papers from being scattered across flat surfaces. However, a system is only as good as the habits that support it. You must designate a specific time each week to process the Action file. During this weekly session, you pay the bills, sign the forms, and move the completed items to the “To File” section. The Archive is the backbone of your home organization. This is where your permanent records live. Whether you choose a traditional metal filing cabinet, a series of plastic file boxes, or binders, the structure of your filing system should be intuitive. Avoid over-complicating your categories. If you create a folder for every single utility provider, you will end up with a drawer full of thin, floppy files that are hard to navigate. Instead, use broad categories such as “Home,” “Auto,” “Financial,” “Medical,” and “Personal.” Inside the “Auto” category, you can keep everything related to your vehicles-repair logs, insurance, and registration. Inside “Home,” you can store mortgage documents, renovation contracts, and appliance warranties. This broad approach reduces the mental friction of deciding where a document belongs. When you are looking for something later, you simply have to ask yourself the general category it falls under. 4.Labeling Labeling is a critical component of a functional archive. Handwritten scribbles on manila folder tabs are often illegible and discouraging. Use a label maker or write in large, bold block letters. A neat, clearly labeled file is more likely to be used correctly. Furthermore, consider the physical flow of your files. Arranging them alphabetically is the most standard method, but you might prefer arranging them by frequency of use, with the most accessed files at the front.

Paperwork Organization: 7 Steps to Organizing Your Important Documents Read More »