Cleaning Products

5 Toxic Cleaning Products You Should Stop Buying Today

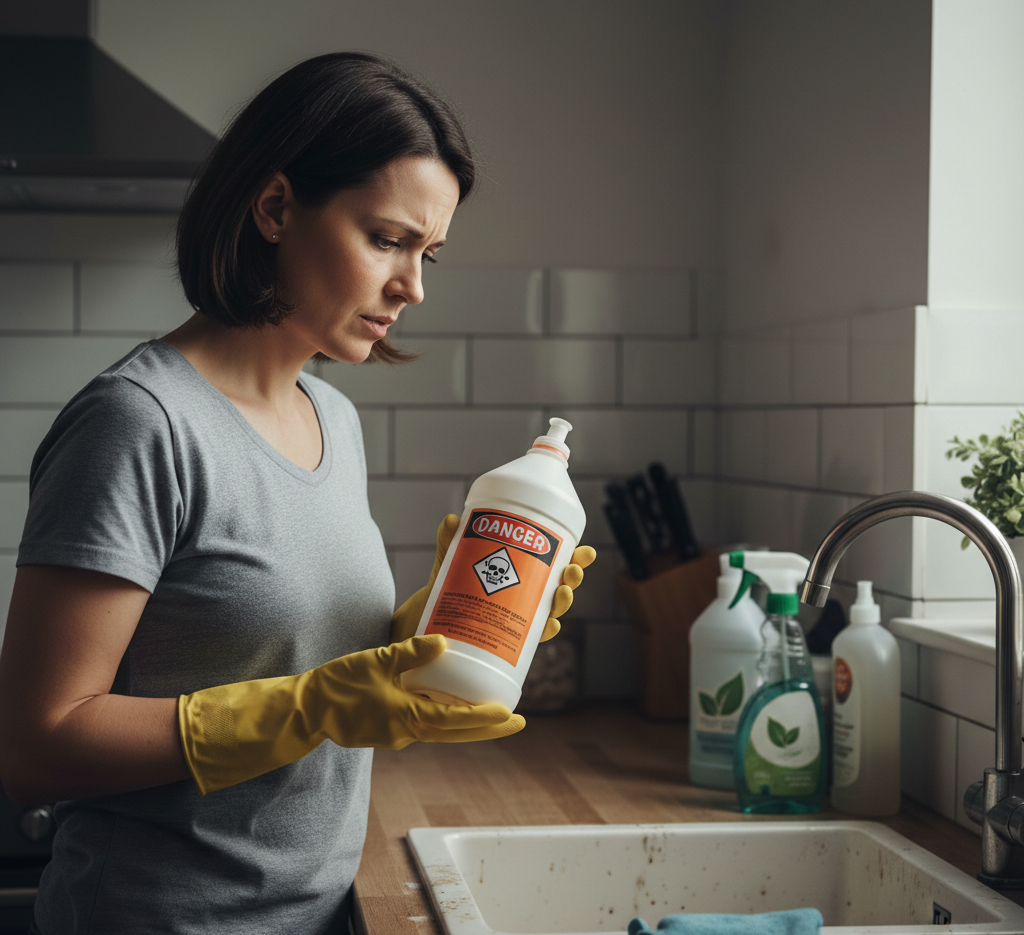
Do you know which products are toxic? In the quest for a clean and healthy home, a paradox often arises. We scrub, spray, and sanitize with the intention of creating a safe environment, yet the very products we use can introduce a host of hazardous chemicals into our living spaces. The brightly colored liquids lining the supermarket aisles often contain aggressive, industrial-strength compounds that, while effective at removing grime, can pose significant risks to our respiratory systems, our skin, and the overall air quality of our homes. Making informed choices about what we bring across our thresholds is not about succumbing to fear, but about embracing a more mindful and effective approach to cleaning, one where true cleanliness is not achieved at the expense of our well-being. Bleach One of the most ubiquitous and misunderstood products in the conventional cleaning arsenal is chlorine bleach. Marketed as the ultimate disinfectant and whitener, its power comes from its highly reactive nature. This reactivity is precisely what makes it so dangerous. The most immediate risk lies in its potential for accidental mixture. When chlorine bleach is combined with ammonia—a common ingredient in many glass and all-purpose cleaners—it creates toxic chloramine gas, which can cause severe respiratory distress. When mixed with an acid, such as a toilet bowl cleaner or even vinegar, it produces chlorine gas, a chemical weapon infamous for its devastating effects on the lungs. Even when used on its own in a poorly ventilated area, the fumes from bleach can be a powerful irritant to the eyes, throat, and lungs, particularly for individuals with asthma or other respiratory sensitivities. For a safer approach to disinfecting, a solution of white vinegar and water can handle most household germs. For whitening laundry and treating stubborn stains on white surfaces, hydrogen peroxide or oxygen-based bleach powders are excellent alternatives that break down into harmless water and oxygen. Ammonia Ammonia itself, even when not mixed with bleach, is another chemical to handle with extreme caution. It is the active ingredient in many popular window and glass cleaners, prized for its streak-free finish. However, ammonia is a potent respiratory irritant. Its sharp, pungent odor is a clear warning sign from our bodies that we are inhaling something harmful. The fumes can cause coughing and irritation in the throat and lungs, and can be particularly aggravating for people with chronic respiratory conditions. A far safer, cheaper, and equally effective alternative for cleaning glass and mirrors is a simple solution of equal parts white vinegar and water in a spray bottle. The mild acidity of the vinegar cuts through smudges and films effortlessly, and wiping with a clean microfiber cloth ensures a perfectly clear, streak-free shine without any toxic fumes. Caustic Soda Perhaps the most aggressive and overtly dangerous products found under our sinks are conventional drain cleaners. These products are designed to solve a stubborn problem by dissolving dense clogs of hair and grease deep within our plumbing. To achieve this, they rely on extremely caustic chemicals like sodium hydroxide, also known as lye. These substances are highly corrosive, designed to burn through organic matter. While they may burn through the clog, they can also cause severe chemical burns to the skin and eyes upon contact and can permanently damage older plumbing pipes. The risk is magnified when the cleaner fails to dislodge the clog, leaving a pipe full of highly toxic, standing liquid that is incredibly dangerous to deal with. A much safer approach to drain maintenance is preventative. A weekly flush with a kettle of boiling water can dissolve grease buildup before it becomes a problem. For minor clogs and odors, the classic combination of baking soda and vinegar, with its fizzing mechanical action, can loosen debris. For a true blockage, the most effective and safest solution is not chemical, but physical: a simple plastic drain snake can physically pull out the clog without any risk to your pipes or your health. Similarly caustic ingredients are found in most aerosol oven cleaners. These products are formulated to cut through thick layers of baked-on, carbonized grease, and they often contain the same lye found in drain cleaners. The aerosol spray format is particularly hazardous as it atomizes these caustic chemicals, making them easy to inhale. The fumes can cause immediate and severe respiratory irritation. The safer alternative requires a bit more time but is completely non-toxic and remarkably effective. Create a thick paste of baking soda and water and spread it liberally all over the cool interior surfaces of your oven, avoiding the heating elements. Let this paste sit overnight. The baking soda will work to soften and break down the carbonized grease. The next day, using a plastic scraper and a damp cloth, you can wipe and scrub away the paste, and the grime will come with it, all without a single toxic fume. Synthetic air Fresheners One of the most subtle but pervasive categories of harmful products is synthetic air fresheners. This includes aerosol sprays, plug-in diffusers, and scented candles made with fragrance oils. The goal of these products is not to clean, but to mask odors by releasing a continuous stream of chemicals into the air. The term “fragrance” on an ingredient list is a legal loophole that can hide a proprietary blend of hundreds of different chemicals, including phthalates and a host of volatile organic compounds (VOCs). Phthalates are endocrine disruptors that can interfere with the body’s hormonal systems, while VOCs can contribute to a wide range of health issues, from headaches and dizziness to long-term respiratory problems. True freshness comes not from masking odors, but from eliminating them. Open your windows to allow for natural ventilation. Place a small bowl of baking soda or activated charcoal in a room to absorb ambient smells. For a pleasant scent, simmer a pot of water on the stove with natural ingredients like cinnamon sticks, cloves, and citrus peels, or use a diffuser with pure, high-quality essential oils. Triclosan At the end, be wary

5 Toxic Cleaning Products You Should Stop Buying Today Read More »

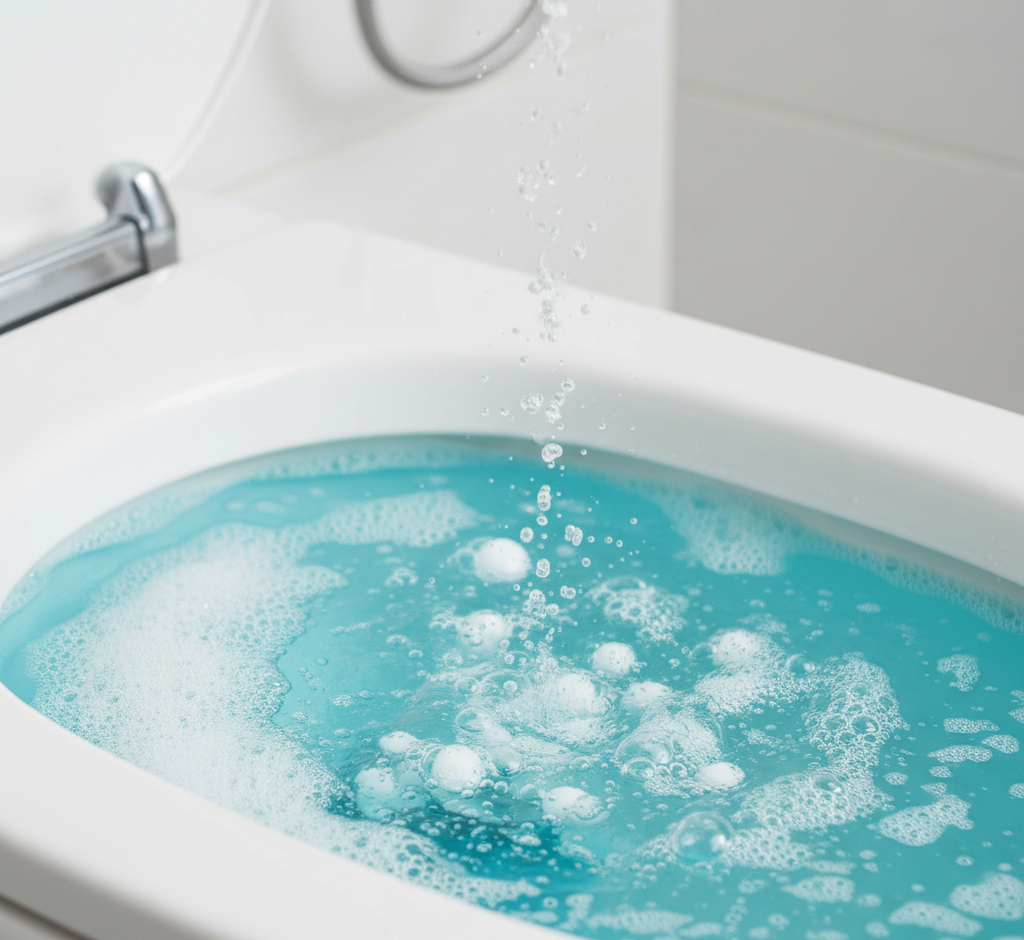
How to Clean a Sink Drain Without Using Harsh Chemicals

A sink drain is one of the hardest-working and least-appreciated fixtures in a home. Day after day, it dutifully swallows everything we send its way: soap scum, toothpaste, shaving cream, grease from cooking, and countless tiny food particles. Over time, this constant barrage takes its toll. The first sign of trouble is often subtle, a slight gurgle as the water slowly spirals away. Soon, you notice a persistent, unpleasant odor wafting up from the depths, a smell of decay and stagnant water. Eventually, the drain becomes fully clogged, turning your sink into a basin of murky, standing water. Cleaning a sink drain is not just a reactive task for when a clog occurs; it is a crucial act of preventative maintenance that preserves the health of your plumbing and the freshness of your home. Effective Ways 1. Hot Water The most effective approach to drain care begins with simple, regular maintenance designed to prevent major blockups. One of the easiest and most powerful preventative measures is a regular boiling water flush. At least once a week, boil a full kettle of water and pour it directly down the drain. The intense heat of the boiling water is incredibly effective at melting and dissolving the congealed grease, soap scum, and other fatty substances that are the primary culprits in building up slow-moving clogs. This simple act keeps the interior of your pipes clear, flushing away the sticky buildup before it has a chance to solidify and trap other debris. It is a thirty-second task that can save you from a major headache down the line. 2. Baking Soda and White Vinegar To address the common issue of drain odors, the classic combination of baking soda and white vinegar is a safe and remarkably effective solution. This method works through a simple acid-base chemical reaction that fizzes and scrubs the inside of the drain pipe, while also neutralizing the odor-causing bacteria that thrive in the dark, damp environment. Start by pouring about half a cup of dry baking soda directly into the drain opening. Follow this with an equal amount of plain white vinegar. The mixture will immediately begin to foam and bubble vigorously. This fizzing action is not just for show; it is actively working to dislodge small particles of grime and hair from the pipe walls. Place a drain stopper or a small cloth over the opening to contain the reaction within the pipe. Let this mixture work its magic for fifteen to thirty minutes. To finish, flush the drain thoroughly with another kettle of boiling water to wash away all the loosened debris and any remaining vinegar and baking soda. This process not only combats odors but also serves as a gentle cleaning that helps to keep drains flowing freely. Manual Removal When you are faced with a slow-moving drain that regular maintenance cannot resolve, it is time to escalate to a physical removal of the blockage. More often than not, the primary obstruction is located very close to the drain opening, caught on the mechanism of the stopper. Before reaching for any tools, you must first address this gatekeeper. For a bathroom sink with a pop-up stopper, look for the small metal rod that extends from the back of the drainpipe just below the sink. This is the pivot rod, and it is held in place by a retaining nut. Unscrew this nut, pull the rod out slightly, and you will be able to lift the stopper straight out of the drain opening. For kitchen sinks or other drains with lift-and-turn or push-and-pull stoppers, they can often be removed by unscrewing them counter-clockwise while holding the main body in place. Once the stopper is removed, you will likely be greeted by a disgusting but satisfying sight: a clump of hair, soap scum, and other gunk that was the main cause of your slow drain. Clean the stopper thoroughly before setting it aside. With the stopper removed, you can now access the top section of the drainpipe. A simple, inexpensive plastic tool known as a drain snake or zip-it tool is incredibly effective here. This is a long, thin, flexible strip of plastic with barbed, tooth-like edges. Simply feed the tool down into the drain as far as it will go, then slowly pull it back up. The barbs will snag onto the hair and grime, allowing you to pull up the blockage. You will likely need to repeat this process several times, wiping the tool clean after each pass. This physical removal of the clog is far more effective and safer for your pipes than any chemical solution. For the most stubborn clogs or as a part of a deep annual cleaning, you may need to address the P-trap. This is the U-shaped section of pipe located directly beneath your sink. Its clever design serves two critical functions: it holds a small amount of water at all times to create a seal that blocks unpleasant sewer gases from entering your home, and its curved shape makes it an effective trap for larger debris (or dropped rings), preventing clogs from forming deeper in your plumbing system. While cleaning the P-trap may seem intimidating, it is a straightforward task that most homeowners can handle. Before you begin, prepare the area. Place a bucket directly underneath the P-trap to catch the water and debris that will spill out. It is also wise to lay down some old towels to protect your cabinet floor. Wearing rubber gloves is highly recommended. The P-trap is connected to the vertical and horizontal pipes by two large slip nuts. These are often made of plastic and can usually be loosened by hand by turning them counter-clockwise. If they are too tight, a pair of channel-lock pliers can be used, but be careful not to apply too much force and crack the plastic. Loosen the nut on the vertical pipe first, then the one on the horizontal pipe. As you loosen the second nut, be prepared

How to Clean a Sink Drain Without Using Harsh Chemicals Read More »

pizza stone clean

How to Make Your Stained Pizza Stone Look and Cook Like New

A pizza stone is a transformative tool in any home kitchen, the secret weapon for achieving a crisp, pizzeria-quality crust that a standard metal baking sheet simply cannot replicate. Its magic lies in its material—typically a porous ceramic, cordierite, or clay—which absorbs moisture from the dough and distributes heat with incredible efficiency. This very porosity, however, is the source of much confusion and anxiety when it comes to cleaning. A pizza stone does not behave like a metal pan or a ceramic dish. Its cleaning process is counterintuitive, a ritual of care where what you don’t do is far more important than what you do. Mishandling this essential tool can lead to a soapy-tasting pizza, a cracked stone, or a sticky, smoky mess. What you Should Never use 1. Soap or Detergent The first and most inviolable rule of cleaning a pizza stone is to never, under any circumstances, use soap or detergent. This cannot be overstated. The porous nature of the stone acts like a very hard sponge. If you apply soap to its surface, it will absorb the soap deep into its structure. The next time you heat the stone to the high temperatures required for making pizza, that trapped soap will heat up, release fumes, and bake its unpleasant, chemical taste directly into the bottom of your crust. No amount of rinsing can fully remove soap that has been absorbed into the ceramic. This single mistake can permanently ruin a pizza stone, relegating every future pizza to a soapy-flavored disappointment. 2. Thermal Shock The second golden rule is to avoid thermal shock at all costs. A pizza stone is a single, solid piece of ceramic that expands when heated and contracts when cooled. If this temperature change happens too quickly, the stress will cause it to crack. This means you must never plunge a hot stone into a sink of cool or even lukewarm water. The sudden, drastic temperature change will almost certainly break it in half. Similarly, you should never place a cold stone into a preheated oven. The proper practice is to always place the stone in a cold oven and allow it to preheat along with the oven itself. Special Care With these critical “don’ts” established, the correct cleaning process is a study in gentle, methodical care, focused on function over aesthetics. The goal is not to return the stone to its original, pristine beige color, but to remove any physical food debris, leaving a smooth, functional cooking surface. In fact, a well-used pizza stone is supposed to be stained. The dark, splotchy marks that develop over time are a sign of a well-seasoned stone, similar to the patina on a cast iron skillet. These stains are battle scars from countless delicious pizzas, and they do not affect the stone’s performance in any negative way. Obsessing over these cosmetic imperfections is a common beginner’s mistake. The cleaning process should always begin with a complete cool-down. After you have finished baking, simply leave the stone in the oven, turn the oven off, and let it cool down gradually with the oven. This may take several hours. Once the stone is completely cool to the touch and can be handled safely, you can remove it for cleaning. The first and primary step is a thorough dry scrape. Your goal here is to remove any raised, physical debris—the drips of burnt cheese, the patches of scorched tomato sauce, or the bits of crust that have fused to the surface. The best tool for this job is a flat, rigid scraper, such as a bench scraper or a metal spatula. Hold the scraper at a low angle and use firm pressure to shear the baked-on food from the stone’s surface. You can also use a stiff-bristled grill brush or a dedicated pizza stone brush for this task. Scrape every bit of residue off until the entire surface feels smooth to the touch, even if it is still stained. For the vast majority of cleanings, this dry scraping is the only step required. Once you have dislodged all the debris, you can simply wipe it away with a dry cloth. If you have particularly stubborn spots that the dry scrape cannot conquer, you can escalate to a gentle wet cleaning. This requires extreme caution with water. Remember, you should never soak or submerge the stone. Instead, take a soft cloth or a non-abrasive sponge, dampen it with a small amount of plain, warm water, and wring it out thoroughly. Use this damp cloth to scrub at the specific problem area. You can use a small amount of force to lift the stubborn spot. Once it is removed, use a dry cloth to wipe away any moisture immediately. Stubborn Stains For a specific, greasy stain that feels sticky or tacky, a baking soda paste is an effective next step. Baking soda is a mild alkali and a gentle abrasive that can help lift grease without damaging the stone. In a small bowl, mix a few tablespoons of baking soda with just enough water to form a thick paste. Apply this paste to the stained area and let it sit for about ten to fifteen minutes. Then, using a stiff brush or a damp cloth, scrub the area gently. The paste will help to break down and lift the grease. The most critical part of this method is the removal. You must meticulously rinse the area with a damp cloth, wiping it several times to ensure all the baking soda residue is gone. Any leftover baking soda can affect the taste of your next pizza. For a truly deep, restorative clean, some people opt to use their oven’s self-cleaning cycle. This is a high-risk, high-reward method that should be approached with caution. Place the cool, scraped pizza stone into a cool oven. Lock the oven door and run the self-cleaning cycle according to your oven’s instructions. This cycle will heat the oven to extremely high temperatures (often over 900°F or 480°C), which

How to Make Your Stained Pizza Stone Look and Cook Like New Read More »

screen

Screen Cleaning: A Step-by-Step Guide to Cleaning Your Laptop and TV Screens

The screens on our televisions and computer monitors are our windows to the world of information and entertainment. They are high-precision pieces of technology that we interact with daily. As such, they are magnets for dust, fingerprints, smudges, and the occasional unfortunate sneeze. Keeping these screens clean is not just a matter of aesthetics; a clear, spotless display provides a better viewing experience and can even reduce eye strain. However, modern screens are incredibly delicate surfaces, often coated with sensitive anti-glare and anti-reflective layers. Cleaning them with the wrong tools or chemicals can lead to permanent damage, including scratches, stripped coatings, or streaks that are far more distracting than the original smudges. What you Shouldn’t use Before ever touching your screen, the most critical lesson is understanding what not to use. This is a situation where avoiding the wrong thing is more important than finding the right one. First and foremost, you must never use any cleaning solution that contains harsh chemicals like ammonia, alcohol, acetone, or toluene. These are the primary ingredients in most general-purpose glass cleaners, like Windex, and they are catastrophic for modern screens. These chemicals are designed to cut through grime on durable, non-porous glass like windows and mirrors. On a television or monitor, they will aggressively strip away the delicate anti-glare and anti-reflective coatings, leaving behind a cloudy, permanently hazy finish. The tool you use to wipe the screen is just as important as the liquid. Never use paper towels, toilet paper, or facial tissues. While they feel soft to our hands, paper products are made of wood pulp and contain abrasive fibers that can leave a network of fine, microscopic scratches on the screen’s surface. Over time, these tiny scratches will accumulate and create a noticeable dullness. They also have a frustrating tendency to shed lint, leaving behind more debris than you started with. Similarly, avoid using any kind of rough cloth, such as a dish towel, a t-shirt, or a terry cloth rag. The texture of these fabrics can also be abrasive and cause damage. At the end, the technique itself requires a gentle approach. You should never apply significant pressure while wiping, as this can damage the liquid crystals or pixels underneath the surface, leading to permanent dark spots or lines. And most importantly, never, under any circumstances, spray any liquid directly onto the screen. Gravity will cause the liquid to run down the surface and seep into the bezel at the bottom edge, where it can penetrate the internal electronics and cause irreversible damage, shorting out the device completely. Preparation With the warnings established, the correct process for cleaning your screen is a gentle, multi-step approach that starts with the least invasive method and only escalates as needed. The first step is always preparation. Turn off the device completely and unplug it from the wall. This is a crucial safety measure, but it also serves a practical purpose. A black, unlit screen makes dust, smudges, and fingerprints far more visible than a bright, active one. You should also let the screen cool down to room temperature, as cleaning a warm screen can sometimes lead to streaking. For the majority of cleaning situations, where the only issue is a light layer of dust and perhaps a few minor smudges, a dry wipe is all that is required. The undisputed champion for this task is a large, clean, dry microfiber cloth. Microfiber is a synthetic material with fibers that are incredibly fine, much thinner than a human hair. This structure makes them exceptionally soft and non-abrasive. Furthermore, when used dry, the fibers create a natural static charge that actively attracts and traps dust particles rather than just pushing them around the screen. Starting from one of the top corners, gently wipe the screen in a broad, sweeping motion, either horizontally or vertically. Do not scrub in small, tight circles. Use light, even pressure, letting the cloth do the work. This single, simple step will safely remove about ninety percent of the grime that accumulates on a typical screen. When a dry cloth is not quite enough to remove stubborn fingerprints or oily smudges, it is time to introduce a minimal amount of moisture. The best and safest liquid to use is distilled or deionized water. Tap water contains minerals like calcium and magnesium which, while harmless to drink, can leave behind a faint, chalky residue or streaks on the screen as the water evaporates. To use distilled water, you must never apply it directly to the screen. Instead, lightly dampen a clean microfiber cloth. The cloth should be just barely moist to the touch, not wet. If you can wring any drops out of it, it is too wet. Once the cloth is properly dampened, wipe the screen with the same gentle, sweeping motions you used for the dry wipe. Again, apply minimal pressure. This will be enough to break down and lift most common smudges. Greasy Marks For more stubborn, greasy marks that distilled water alone cannot handle, you may need a slightly stronger, yet still safe, cleaning solution. You can purchase commercially prepared screen cleaning sprays, which are specifically formulated to be free of harsh chemicals. Alternatively, you can create your own highly effective solution by mixing equal parts of distilled water and plain white vinegar. The mild acetic acid in the vinegar is excellent at cutting through oily residue from fingerprints. As with the water, this solution should be applied to your microfiber cloth, never directly to the screen. After wiping the smudges away with the lightly dampened cloth, it is an essential final step to immediately go over the screen again with a second, completely dry microfiber cloth. This final dry buff will remove any lingering moisture and prevent any streaks from forming as the solution dries, leaving a perfectly clear, uniform finish. The frame and stand of your television or monitor, often made of glossy plastic, can be cleaned with the same methods. A dry microfiber cloth

Screen Cleaning: A Step-by-Step Guide to Cleaning Your Laptop and TV Screens Read More »

cooper pan

How to Clean Copper Pans and Remove Tarnish for a Brilliant Shine

Copper pans is the jewel of the kitchen, prized by professional chefs and passionate home cooks alike for its exceptional performance and stunning, undeniable beauty. Its ability to conduct heat with unparalleled speed and precision makes it a responsive and intuitive tool, allowing for nuanced control that is simply unattainable with other materials. Beyond its remarkable function, a set of gleaming copper pans hanging from a pot rack is a statement piece, an aesthetic centerpiece that lends a warm, fiery glow to any kitchen. Yet, this beauty and performance come with a responsibility. Copper is a reactive metal, and its brilliant, rose-gold luster is susceptible to the natural process of oxidation, which results in a dull, sometimes greenish-brown film known as tarnish. Cleaning copper is therefore not just a matter of hygiene, but a rewarding ritual of restoration, a process of bringing a magnificent tool back to its original, brilliant glory. Copper Pans A crucial aspect to understand before beginning any cleaning process is that a copper pan is often two distinct entities that require separate care. The stunning exterior is, of course, the signature copper. The interior cooking surface, however, is almost always lined with a non-reactive metal, most commonly stainless steel or, in more traditional and vintage pans, tin. This lining is essential because copper itself can react with acidic foods like tomatoes or vinegar, potentially leaching into your meal and affecting its taste. Therefore, you must approach the cleaning as two separate jobs: one for the durable interior and another for the delicate, reactive exterior. 1.Interior Cooking Surface Let us first address the interior cooking surface. If your pan is lined with stainless steel, which is the most common and durable option in modern copper cookware, the cleaning process is straightforward and robust. For daily washing after cooking, simple dish soap and warm water applied with a non-abrasive sponge or cloth are all that is needed. If you have stubborn, burnt-on food particles, resist the urge to attack them with steel wool. Instead, fill the pan with an inch of water, add a single drop of dish soap, and gently heat it on the stove for a few minutes. This will soften and loosen the residue, allowing it to be scrubbed away with minimal effort. Stainless steel can also develop a rainbow-like, iridescent discoloration known as heat tint. While harmless, it can be unsightly. To remove it, a paste made from a powdered cleanser like Bar Keepers Friend and a little water is remarkably effective. Apply the paste, scrub gently with a soft sponge, and rinse thoroughly to restore the steel’s brilliant silver shine. If your pan has a tin lining, much greater care must be taken. Tin is a very soft metal and can be easily scratched, which will compromise the surface. For tin-lined pans, only use soft cloths, warm water, and mild soap. Never use abrasive cleaners or scouring pads, and avoid overly aggressive scrubbing. 2.Copper Exterior With the interior handled, the focus shifts to the main event: restoring the copper exterior. This is fundamentally a chemical process, one that requires a mild acid to react with and dissolve the copper oxide that forms the tarnish. This chemical action is often combined with a very gentle abrasive to help lift the dissolved tarnish away from the surface. Fortunately, some of the most effective and safest cleaners for this task can be created from simple, inexpensive ingredients found right in your kitchen. The most classic and widely used method involves the powerful combination of lemon and salt. The citric acid in the lemon is the chemical powerhouse that breaks down the tarnish, while the fine crystals of salt act as a gentle but effective scrubbing agent. The application is beautifully simple. Slice a fresh lemon in half and dip the cut, fleshy side into a small bowl of kosher or table salt, ensuring it is well-coated. Then, simply take this salted lemon half and begin scrubbing the exterior of the copper pan in a firm, circular motion. You will see the tarnish begin to disappear almost instantly, a satisfying transformation that reveals the bright, clean copper underneath. For more control or for larger pans, you can squeeze the juice of a lemon into a bowl, mix it with a few tablespoons of salt to form a paste, and apply this paste with a soft cloth. Continue scrubbing until the entire surface is clean, then rinse the pan thoroughly with warm water. The final step, which is absolutely critical for a perfect, lasting finish, is to dry the pan immediately and completely with a soft, clean cloth, like a microfiber towel. Any water droplets left to air dry will create new spots and begin the tarnishing process anew, undoing all of your hard work. 3.Ketchup Another surprisingly effective and readily available acidic cleaner is ketchup. While it may seem like an unlikely candidate, ketchup contains both vinegar (acetic acid) and tomato concentrate (which also has a degree of acidity), providing the mild chemical action needed to break down light tarnish. This method is best for maintenance cleaning or for pans that are only slightly dulled rather than heavily oxidized. Simply smear a thin layer of ketchup all over the copper surface, ensuring complete coverage. Let it sit for ten to thirty minutes, allowing the acids time to work. Then, simply wipe it off with a soft cloth and rinse well with warm water. The tarnish should be gone, and the pan will be noticeably brighter and warmer in tone. 4.Vinegar, Salt and Flour For more heavy-duty, set-in tarnish that has built up over time, a more potent paste made from white vinegar, salt, and flour is an excellent solution. The flour in this mixture plays a crucial role; it acts as a thickener, creating a paste that allows the acidic vinegar and abrasive salt to cling to the vertical surfaces of the pan for an extended period, giving them more time to work their magic. In

How to Clean Copper Pans and Remove Tarnish for a Brilliant Shine Read More »

beatiful wooden floor

Cleaning Hardwood Floors: Stop Scratching Your Wood Floors with These Essential Cleaning Habits

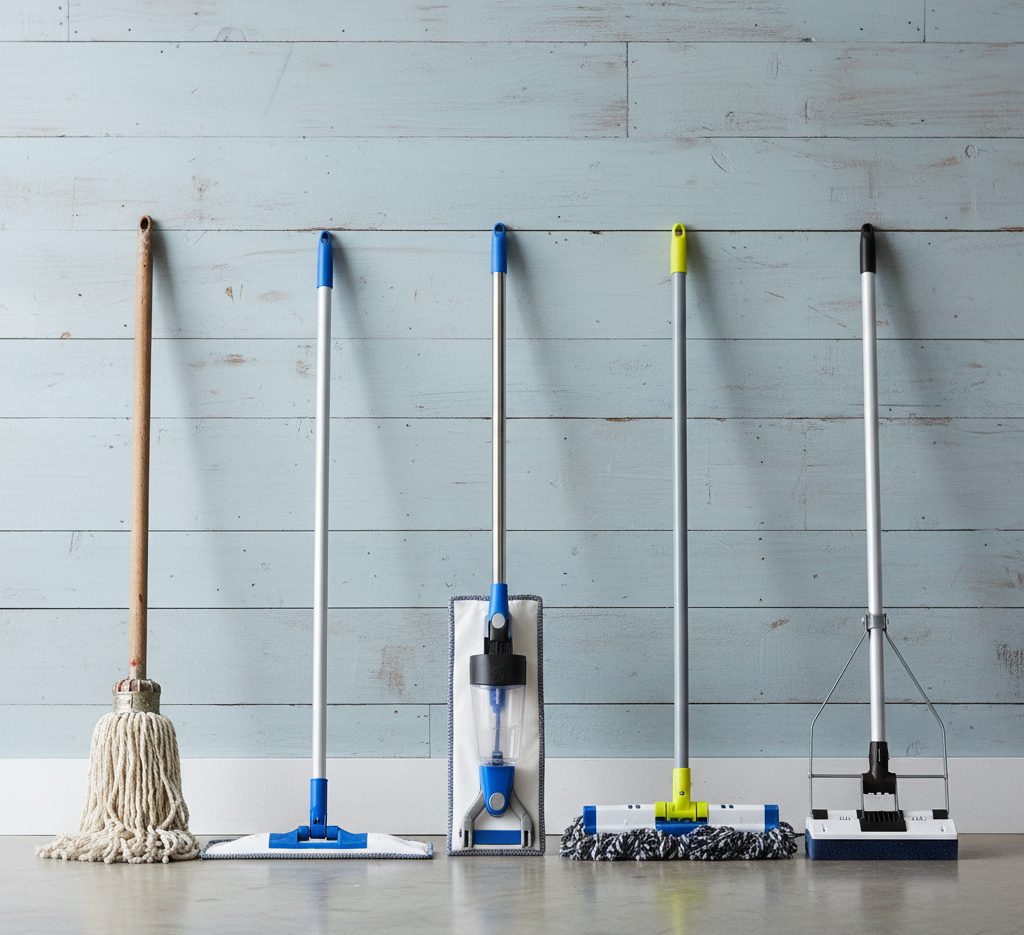
Hardwood floors represent a significant architectural and financial investment within a home. They provide an organic warmth and a timeless visual anchor that synthetic materials simply cannot replicate. However, this beauty is intrinsically tied to the biological reality of the material. Wood is a cellular, once-living entity that continues to respond dynamically to its environment long after it has been milled and installed. Furthermore, the surface that you walk on, clean, and interact with daily is rarely the raw wood itself. In contemporary flooring, it is almost exclusively a microscopic, transparent layer of polyurethane resin. This finish serves as a sacrificial shield, meticulously designed to absorb the intense friction of daily life and protect the highly vulnerable timber underneath. Understanding that your cleaning efforts are primarily directed at preserving this thin layer of plastic resin, rather than the wood itself, completely shifts the paradigm of floor maintenance. When the finish is preserved, the wood remains pristine; when the finish is compromised, the wood degrades rapidly and irreversibly. The Enemy 1. Silica, Sand, Dirt The most persistent, insidious enemy of this polyurethane finish is not the catastrophic spill or the heavy dropped object, but the invisible accumulation of dry grit. Every time a door opens, microscopic particles of silica, sand, dirt, and pavement dust are carried indoors by shoes, paws, and drafts. This debris settles onto the floorboards and acts with the exact same mechanical properties as low-grit sandpaper. When a foot presses down on a grain of sand and drags it even a fraction of an inch across the floor, it carves a microscopic trench into the finish. A single scratch is entirely invisible, but thousands of these micro-abrasions overlapping over months and years scatter the light that hits the floor. This light scattering is what creates the dull, cloudy appearance characteristic of high-traffic areas, transforming a glossy, luxurious floor into a matte, lifeless surface. 2.Brooms Therefore, the absolute foundation of hardwood maintenance is the relentless, daily removal of this dry, abrasive debris. Sweeping with a traditional bristle broom is highly inefficient for this specific task, as the stiff, thick bristles often flick the fine dust into the air, only for it to settle back onto the floor minutes later. A vacuum cleaner is far superior, but only if it is utilized correctly. The vacuum must be equipped with a specialized hard floor brush, and the rotating beater bar must be strictly disengaged. A spinning beater bar with stiff nylon bristles will continuously strike the floor, essentially beating the dirt into the finish and causing the exact mechanical scratching you are attempting to prevent. Alternatively, a wide, dry microfiber dust mop pushed in a continuous figure-eight motion traps the fine particulate matter using electrostatic attraction, lifting the grit safely away from the surface without requiring electricity or heavy machinery. 3.Water When dry removal is no longer sufficient and wet cleaning becomes necessary to address sticky spills, mud, or adhered biological matter, the homeowner faces the second major hazard: moisture. Wood is inherently hygroscopic. It possesses a cellular structure designed by nature to draw in and transport water. While the polyurethane finish provides a waterproof barrier on the top face of the planks, the microscopic seams between the boards, any deep scratches, and the unfinished undersides remain highly vulnerable entry points. Applying a traditional, saturated string mop to a hardwood floor is an unmitigated disaster. The excess water pools on the surface and inevitably seeps down into the joints through capillary action. Once the water breaches the surface, the wood fibers swell aggressively. Because the planks are installed tightly together, they have nowhere to expand but upward. The edges of the boards push against each other and buckle, creating a permanent, rippled distortion across the floor known as cupping. If the moisture intrusion is severe, the boards may crown in the center or buckle entirely, tearing free from the subfloor. Furthermore, trapped moisture sitting beneath the polyurethane layer breaks the chemical bond between the finish and the wood, causing the clear coat to peel, flake, and turn a milky white. Consequently, any wet cleaning must be executed as an exercise in extreme moderation. Mops The correct implement for washing hardwood floors is a flat microfiber mop system. Microfiber technology is fundamentally different from traditional cotton loops. The microscopic synthetic fibers are split during the manufacturing process, creating an immense surface area that traps dirt and absorbs liquid with extraordinary efficiency. This means a microfiber pad requires only a fraction of the water needed by a traditional mop to clean the exact same square footage. The mop pad should be dampened and wrung out with intense pressure until it is practically dry to the touch before it ever makes contact with the floor. The methodology of applying the cleaning solution is equally critical. You must never pour liquid directly onto a hardwood floor or use a bucket that encourages soaking the mop head. Instead, the cleaning solution should be lightly misted onto the floor using a spray bottle, targeting small, manageable sections of about four square feet at a time, or sprayed directly onto the microfiber pad itself. The ultimate metric of success in wet cleaning hardwood is the evaporation rate. The moisture left behind by the mop must evaporate entirely within sixty seconds. If the floor remains visibly wet and reflective for several minutes, the volume of liquid applied was dangerously high, and the risk of permanent structural damage increases exponentially. Cleaning Products The chemical composition of the cleaning solution is just as important as the mechanical application, and this is an area fraught with persistent, damaging myths. Perhaps the most widespread fallacy is the recommendation of a mixture of white vinegar and water as a safe, natural cleaner for hardwood floors. Vinegar is an aqueous solution of acetic acid. While it is highly effective at cutting through kitchen grease and dissolving mineral deposits on glass or ceramic tile, its acidity is fundamentally incompatible with polyurethane resins. Repeated exposure to

Cleaning Hardwood Floors: Stop Scratching Your Wood Floors with These Essential Cleaning Habits Read More »

Clean the carpets and sofa before spring.

Rugs and Sofa Cleaning: Why March is the Critical Month for Upholstery Care

As the calendar turns toward March and the first genuine rays of spring sunlight begin to pierce the grey canopy of the Canadian winter, homeowners are often greeted by a stark and unflattering revelation. The sun, usually a welcome visitor, acts as a harsh spotlight when it hits the interior of a home that has been sealed tight against the cold for months. It illuminates the floating particulates in the air and casts a glare on the upholstery and flooring, revealing a dullness that was hidden by the ambient gloom of winter. During the cold months, our homes function as closed-loop ecosystems. We lock the windows and run the furnace, recirculating the same air repeatedly. In this environment, the soft furnishings—the wall-to-wall carpeting, the area rugs, and the upholstered sofas—cease to be mere decorations. They transform into giant, passive air filters. They trap the dust, the desiccated skin cells, the pet dander, and the microscopic debris that settles out of the stagnant air. By the time spring arrives, these items are not just dirty; they are saturated “dust sponges” that require a deep, restorative recovery to transition the home from a state of hibernation to a state of health. Vacuum Cleaner To understand the necessity of this recovery process, one must first recognize the limitations of the standard weekly vacuuming routine. While vacuuming is an essential maintenance task, it is strictly a surface-level intervention. A vacuum cleaner relies on suction and airflow to lift loose debris from the top layer of the carpet pile or the fabric weave. It is excellent at removing crumbs, pet hair, and surface dust. However, it is largely ineffective against the deep-seated particulates that have migrated to the base of the fibers. Gravity and the pressure of foot traffic drive grit and soil down to the backing of the carpet, where the vacuum’s airflow cannot reach. This trapped grit is not dormant; it is abrasive. Every time you walk across the rug or sit on the sofa, these sharp, microscopic particles grind against the base of the fibers like sandpaper. Over time, this friction cuts the fibers, leading to the premature baldness or “fuzzing” seen in high-traffic areas. Vacuuming manages the aesthetic, but it does not arrest this structural degradation. A specific and often baffling phenomenon that manifests after a long winter is known as filtration soiling. Homeowners often notice dark, greyish lines appearing around the perimeter of a room, underneath baseboards, or under closed doors. There is a common misconception that this is caused by a vacuum cleaner failing to reach the edge. In reality, it is a physics problem related to airflow. In a home with a forced-air heating system, air is constantly moving from areas of high pressure to areas of low pressure. When the furnace blows warm air into a room, that air seeks an escape route. It often finds it through the tiny gaps between the floorboards and the wall, or under a door. As the air is forced through the edge of the carpet to escape, the carpet acts exactly like a HEPA filter. It traps the microscopic pollutants—carbon soot from candles, road dust, and fine particulate matter—carried in the air. The resulting dark line is a concentrated deposit of oily, airborne soil that has chemically bonded to the carpet fibers. This is not dirt that can be vacuumed away; it is a stain caused by the house breathing through its floor. Sweat, Oils and Creams The composition of the soil trapped in your upholstery adds another layer of complexity. Unlike a hard floor, which allows dirt to sit on the surface, fabric absorbs. Throughout the winter, we spend more time indoors, often lounging on sofas and chairs. The fabric absorbs body oils, perspiration, and the lotions we use to combat dry winter skin. These oils act as a binder. They coat the fibers of the sofa and the rug, making them sticky. When dust settles on an oily fiber, it does not just sit there; it adheres. This creates a dull, heavy appearance that vacuuming cannot resolve because the dust is glued to the fabric. This sticky matrix also becomes a breeding ground for dust mites. These microscopic arachnids feed on dead skin cells, and in the warm, humid microclimate of a sofa cushion, their populations can explode. The waste products they produce are potent allergens. When you sit on a dusty sofa, you compress the cushion, acting like a bellows that puffs these allergens into the air you breathe. Recovering your textiles from this winter load requires a shift from maintenance cleaning to extraction cleaning. This is the fundamental difference between moving dirt around and removing it from the building. Spot cleaning, which is the go-to method for many homeowners dealing with a spill, is often detrimental when applied to general soiling. When you spray a detergent on a sofa armrest and scrub it with a cloth, you are essentially creating a mud slurry. You might lift some of the dirt onto the cloth, but much of the detergent and the dissolved soil is pushed deeper into the foam padding. Furthermore, the detergent residue left behind is sticky. It will attract new dirt faster than the surrounding area, leading to a phenomenon where the “cleaned” spot eventually turns blacker than the rest of the furniture. Extraction Cleaning Extraction cleaning, specifically hot water extraction (often mislabeled as steam cleaning), is the only method capable of breaking the bond between the oil, the dust, and the fiber. This process involves injecting hot water and a specialized cleaning solution into the carpet or upholstery under high pressure. The heat liquefies the body oils and sticky residues, while the pressure agitates the deep-seated grit. Crucially, this injection is immediately followed by high-powered vacuum extraction. The machine pulls the water, the detergent, and the suspended soil out of the fabric and into a waste tank. It is a flushing mechanism. It resets the chemical balance of the fiber, leaving it neutral

Rugs and Sofa Cleaning: Why March is the Critical Month for Upholstery Care Read More »

Shower Curtain Cleaning: Amazing Tips on how to Efficiently Clean All Types of Shower Curtains

The shower curtain is the largest textile in the bathroom, acting as a massive, damp wall that defines the hygiene of the space. While we meticulously scrub the toilet porcelain and polish the chrome fixtures, the curtain often suffers from a form of selective blindness. We pull it shut to hide the tub, or we push it open to enter the shower, rarely stopping to inspect the hem. However, this sheet of fabric or vinyl is biologically active. It resides in a zone of constant humidity, subjected to splashes of body oils, dead skin cells, and soap residue. This combination creates a nutrient-rich environment for the proliferation of bacteria and fungi. The pinkish slime that climbs up the bottom edge and the black speckles of mold that colonize the folds are not merely aesthetic failures; they are colonies of living organisms that degrade the air quality of the room and the cleanliness of your bathing experience. Restoring a shower curtain is a necessary protocol that extends the life of the item and ensures your shower remains a sanctuary rather than a swamp. Exterior and Interior Curtains To clean a shower curtain effectively, one must first distinguish between the two components often present: the decorative outer curtain and the functional inner liner. The outer curtain, usually made of cotton, polyester, or linen, sits outside the tub. It collects dust, hairspray residue, and humidity but rarely suffers from direct soap scum buildup. Cleaning this is largely a laundry task. The inner liner, typically made of vinyl (PVC), PEVA, or treated polyester, bears the brunt of the biological assault. It sits inside the tub, constantly wet and coated in mineral deposits. Treating these two very different materials with the same method often results in a melted liner or a shrunken curtain. The most common and effective method for cleaning a plastic or vinyl liner is, surprisingly, the washing machine. There is a persistent myth that plastic cannot go in the washer, but with the correct mechanics, it is the most efficient way to remove biofilm. The secret to success lies in agitation and temperature control. Plastic liners are non-porous and smooth; they do not rub against themselves effectively enough to scrub away grime. To compensate for this, you must add “scrubbers” to the load. Placing the liner in the machine with two or three clean bath towels provides the necessary friction. The terry cloth loops of the towels act like thousands of tiny brushes, scouring the surface of the plastic as the drum spins. Without the towels, the liner simply glides around in the water, emerging wet but still dirty. Hot Water or Cold Water? Temperature is the critical variable when machine washing plastic. Hot water will soften the vinyl to the point of deformation or melting, ruining the structural integrity of the curtain. Cold water, while safe, may not be effective enough to dissolve the waxy buildup of soap scum. The ideal setting is warm water. It makes the plastic pliable enough to be scrubbed by the towels but not soft enough to stretch. Furthermore, the choice of detergent matters. Standard laundry detergent is designed for fabrics. For a plastic liner coated in minerals and mold, you need chemistry that targets those specific issues. Adding a half-cup of baking soda to the wash cycle provides a gentle abrasion that helps lift the black mold spots without scratching the plastic. For the rinse cycle, adding a half-cup of white vinegar is essential. The acetic acid in the vinegar cuts through the residual detergent and dissolves the calcium carbonate (hard water minerals) that leaves the liner looking cloudy. If the liner is heavily infested with black mold—distinct from the pink bacteria—chlorine bleach is often the only remedy that will kill the root structure of the fungus. However, bleach creates a chemical reaction with some plastics that can cause yellowing or brittleness over time. It should be used sparingly and only on white or clear liners. If you choose to use bleach, do not mix it with vinegar, as this creates toxic chlorine gas. You must choose your chemical weapon: acid (vinegar) for scale and soap scum, or oxidizer (bleach) for mold.   Bathtub Soak For those who prefer not to use a machine, or for liners that are too fragile, the bathtub soak is the manual alternative. Fill the tub with warm water and dissolve a cup of oxygen-based bleach (sodium percarbonate) or a specialized mold remover. Submerge the curtain fully. You may need to weigh it down with a heavy shampoo bottle to keep it underwater. Let it dwell for at least an hour. This soaking period allows the chemical agents to penetrate the biofilm and loosen the bond of the dirt. After the soak, mechanical action is still required. Using a soft-bristled brush or a microfiber cloth, scrub the bottom hem vigorously. This is where the “pink slime”—Serratia marcescens—congregates. This bacterium feeds on fatty deposits from soap and shampoo, and it forms a tenacious grip on the textured hem of the curtain. The drying process is where many homeowners ruin their liners. Never, under any circumstances, put a plastic or vinyl shower curtain in the tumble dryer. The heat, even on a low setting, is often sufficient to melt the plastic, fusing it to itself or, worse, to the drum of your expensive dryer. The proper method is gravity drying. Immediately after the wash cycle finishes, take the liner out and hang it back up on the shower rod. The warm, pliable plastic will drip dry, and the weight of the water will naturally pull any wrinkles out. Spread the curtain fully across the rod to ensure airflow reaches every fold. If you bunch it up while damp, the mold will return within twenty-four hours. Fabric curtains require a different approach. While they can usually be washed on a standard warm or cool cycle, the risk is shrinkage. Cotton and linen are prone to shrinking when exposed to heat and agitation.

Shower Curtain Cleaning: Amazing Tips on how to Efficiently Clean All Types of Shower Curtains Read More »

Coffee Machine Cleaning: 5 Signs Your Coffee Machine Is Clogged with Limescale

The coffee machine is the silent engine of the morning, a device that many regard with a level of reverence usually reserved for religious artifacts. It is the first appliance touched in the day, the vessel that delivers the caffeine required to jumpstart human productivity. However, this reliance often breeds a dangerous complacency regarding hygiene. We assume that because boiling water passes through the system daily, it is inherently self-cleaning. This is a fallacy that leads to bitter coffee, mechanical failure, and the ingestion of mold and bacteria. The internal geography of a coffee maker is a dark, damp, and warm environment, the trifecta for biological growth. Furthermore, the very ingredients used to make the beverage—water and coffee beans—leave behind chemical residues that calcify and oxidize, slowly choking the machine. Cleaning a coffee machine is not merely a matter of rinsing the pot; it is a necessary maintenance protocol involving chemistry and mechanics to preserve the integrity of the brew and the lifespan of the equipment. Distinct Enemies To understand the cleaning process, one must first understand the two distinct enemies of the coffee machine: mineral scale and coffee oils. Water is the solvent of life, but it is rarely pure. Tap water contains dissolved minerals, primarily calcium and magnesium. When water is heated, these minerals precipitate out of the liquid and bond to the heating elements and internal tubing of the machine. This is known as limescale. It acts like cholesterol in an artery, narrowing the passages and insulating the heating coil. A machine suffering from scale buildup will struggle to reach the optimal brewing temperature of 195 to 205 degrees Fahrenheit. It will brew slower, produce lukewarm coffee, and eventually, the pump will fail under the strain of trying to push water through a blocked pipe. The second enemy is the bean itself. Coffee beans are rich in lipids. When roasted and ground, these oils are released to create the flavor and crema we desire. However, once these oils settle on the plastic and metal surfaces of the filter basket, the carafe, and the dispensing showerhead, they begin to degrade. Oxidized coffee oil turns rancid, developing a sharp, acrid flavor profile. If you have ever tasted a cup of coffee that seemed sour or metallic despite using fresh beans, the culprit was likely layers of old, rancid oil coating the machine. This residue is sticky and hydrophobic, meaning a simple water rinse will not remove it; it requires a degreasing agent to break the chemical bond. Descaling For the standard drip coffee maker, the reservoir is the ground zero of biological activity. Because it is often left damp and closed, it frequently harbors coliform bacteria and yeast. The cleaning protocol here requires a descaling solution. While many manufacturers sell proprietary powders, a mixture of white distilled vinegar and water remains a potent and accessible descaler for standard machines. The acid in the vinegar reacts with the alkaline mineral deposits, dissolving them into a liquid state that can be flushed away. The process involves filling the reservoir with a fifty-fifty mixture of vinegar and water, running the brew cycle halfway, and then turning the machine off. This “dwell time” is critical. It allows the acidic solution to sit inside the heating element and the tubing, eating away the scale. After an hour, the cycle is finished, followed by multiple cycles of fresh water to ensure no acetic acid taste remains. However, vinegar has limitations. It can be harsh on the rubber seals and gaskets found in more expensive or complex machines. For high-end espresso machines or pod systems, using a specialized descaling solution based on citric or lactic acid is safer. These acids are odorless and formulated to be gentle on internal components while being ruthless on scale. Using vinegar in a high-pressure espresso pump can sometimes cause the rubber O-rings to degrade, leading to internal leaks. Single-Serve pod Machine The single-serve pod machine presents a unique set of hygiene challenges. These machines rely on a hollow needle to puncture the foil of the coffee capsule. This needle often becomes clogged with coffee grounds and dried oils, restricting flow and causing pressure backups. Cleaning the needle requires a mechanical approach, often using a straightened paper clip or a specialized tool provided by the manufacturer to physically dislodge the blockage. Furthermore, the exit spout of these machines is a trap for coffee splatter. Bacteria known as Serratia marcescens, which manifests as a pinkish slime, loves the drip tray and the nozzle area. Regular wiping with a disinfectant and running a “cleansing brew”—a cycle without a pod—is essential to flush out the internal chamber where the coffee is actually brewed. Espresso Machines Espresso machines are the most complex and require the most rigorous cleaning routine. The group head, the metal component where the portafilter locks in, is subjected to immense pressure and heat. Coffee fines and oils are forced back up into the group head after every shot. If not cleaned, this debris blocks the dispersion screen, causing water to channel unevenly through the puck, resulting in bad espresso. The solution is “backflushing.” This involves inserting a blind filter basket (one with no holes) into the portafilter, adding a specialized detergent powder, and engaging the pump. The pressure forces the soapy water back up into the group head and through the three-way solenoid valve, scrubbing the internal pathways. This should be done daily in commercial settings and at least weekly for home enthusiasts. The steam wand on an espresso machine acts as a direct line to the boiler or thermoblock. When steaming milk, a vacuum effect can occur when the steam knob is closed, sucking a small amount of milk back up into the wand. If this milk residue is allowed to dry, it rots. The bacteria multiply rapidly, and the next time you steam milk, you are injecting that bacteria into your drink. The rule for steam wands is absolute: purge and wipe. Before and after every use, the

Coffee Machine Cleaning: 5 Signs Your Coffee Machine Is Clogged with Limescale Read More »

matress

Mattress Cleaning: 5 Proven Methods to Remove Urine and Sweat Odors From Your Mattress

The mattress is the silent giant of the household. It is the largest piece of furniture we own, the one we spend the most time in contact with, and paradoxically, the one we clean the least. We cover it with sheets and pads, creating a visual barrier that allows us to ignore the biological reality of what lies beneath. However, a mattress is essentially a giant sponge. Every night, it absorbs a fraction of the liter of sweat the average human loses during sleep. It collects the millions of dead skin cells we shed, which trickle down through the weave of the linens to settle in the seams and tufting. Over time, this accumulation of moisture and organic matter creates a complex ecosystem of bacteria, dust mites, and fungal spores. The result is a mattress that smells stale, looks discolored, and compromises the air quality of the very room designed for restoration. Eliminating these odors and extracting the deep-seated dirt is not a matter of a simple spray; it requires a systematic approach that utilizes chemistry to break down biological bonds and physics to extract the debris without ruining the structural integrity of the foam or springs. The First Phase The first phase of mattress restoration is mechanical extraction. Before any liquid or chemical touches the surface, you must remove the dry particulate matter. If you wet a mattress that is full of dust and skin cells, you effectively create a layer of mud inside the fabric. Strip the bed completely, including the mattress protector and any foam toppers. Using a high-powered vacuum with a clean upholstery attachment is non-negotiable. The standard floor head of a vacuum is too dirty and often lacks the concentrated suction required. You must go over the entire surface of the mattress using slow, deliberate strokes. The goal is to pull dust mites and their waste products from deep within the cushioning. Pay particular attention to the piping around the edges and the valleys of the quilting; these are the trenches where gravity deposits the heaviest load of debris. This dry vacuuming step removes the food source for pests and prepares the canvas for chemical treatment. Once the surface is free of loose debris, the battle against odor begins. The most pervasive smell in a mattress is usually a combination of oxidized sweat and body oils. This creates a musty, sour scent that lingers even after the sheets are changed. To combat this, you need a dry absorbent. Baking soda (sodium bicarbonate) is the industry standard for a reason. It is not a perfume that masks odor; it is an amphoteric compound that reacts with both acidic and basic molecules to neutralize them chemically. Sift a generous layer of baking soda over the entire top surface of the mattress. Do not be stingy; the mattress should look like it has been dusted with snow. For an added antimicrobial boost, you can mix a few drops of essential oil, such as lavender or tea tree, into the baking soda before applying it. Baking Soda The critical element here is time. The baking soda needs to sit for at least four hours, though a full day is preferable. During this dwell time, the powder draws moisture and oils out of the fabric and binds the odor molecules. After the wait, vacuum the mattress again thoroughly. You will likely find that the powder has turned slightly grey or clumped, visual evidence that it has absorbed the dampness and dirt from the surface. However, dry cleaning only addresses general odors. Specific, localized stains require a liquid intervention, but this is dangerous territory. A mattress is extremely difficult to dry. If water penetrates into the core foam or the spring encasement, it can get trapped, leading to the growth of mold from the inside out. Therefore, the golden rule of mattress cleaning is to treat the stain, not the bed. You must use as little liquid as possible. For the yellowing caused by sweat and body oils, a mixture of hydrogen peroxide, a small amount of dish soap, and baking soda creates a powerful oxidizing agent. When applied to the stain, the peroxide breaks down the protein structure of the sweat, bleaching the color safely, while the soap cuts through the lipid (fat) layer of the oil. Apply this solution by blotting with a clean white cloth. Never scrub. Scrubbing damages the fibers of the ticking (the mattress fabric) and pushes the stain deeper into the cushioning. Blot gently until the stain lifts. Once the discoloration is gone, use a fresh damp cloth to “rinse” the area by blotting up the soap residue. Soap residue becomes sticky when dry, attracting new dirt faster, so removing it is crucial. To dry the spot, press dry towels firmly into the area to wick up moisture, and then use a hair dryer on a cool setting or a fan to accelerate evaporation. Enzymatic Cleaner Biological accidents, such as urine, vomit, or blood, present a more severe challenge because they contain uric acid and enzymes that crystalize and smell stronger over time. Standard soap will not remove these; it will only clean the surface while the odor source remains in the padding. For these, an enzymatic cleaner is mandatory. These cleaners contain bio-engineered bacteria that literally eat the organic matter. Saturate the stain just enough to reach the depth of the accident. It needs to stay wet for a specific period (check the bottle) to allow the enzymes to digest the uric acid crystals. As the enzymes work, the smell may temporarily worsen—a sign that the bacteria are off-gassing as they consume the waste—before vanishing completely. This is the only way to permanently eliminate the “memory” of the stain. For mattresses that have been in humid environments and have developed a mildew smell, sunlight is the most powerful disinfectant. If physically possible, dragging the mattress outside on a warm, dry, sunny day can perform miracles. The ultraviolet (UV) radiation from the sun kills

Mattress Cleaning: 5 Proven Methods to Remove Urine and Sweat Odors From Your Mattress Read More »