Furniture Cleaning

5 Reasons Why Hiring a Cleaning Service is the Best Form of Self-Care

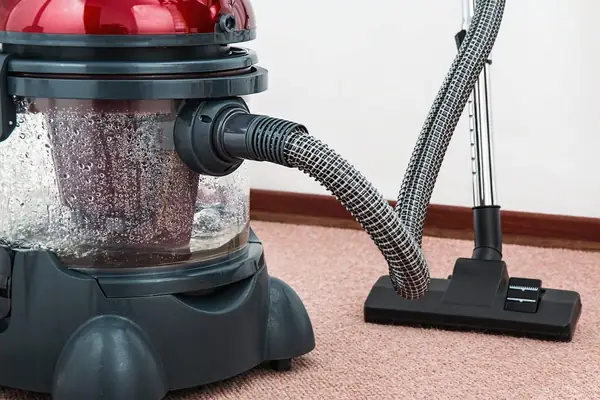
Why hire a specialized cleaning service? The modern home is a hub of activity, a place of work, rest, and family life. Yet, maintaining its cleanliness can feel like a relentless, never-ending task. The dust settles almost as soon as it’s wiped away, the floors seem to attract dirt, and the kitchen and bathrooms demand constant attention. For many, the weekend, which should be a time for relaxation and recharging, is instead consumed by a long list of chores. This constant cycle of cleaning can become a significant source of stress and a drain on our most valuable resource: time. It is in this gap between the desire for a clean, peaceful environment and the reality of a busy life that a residential house cleaning service finds its purpose, offering not just a service, but a solution to a pervasive modern problem. 1.Quality of Life Hiring a professional cleaning service is often viewed as a luxury, but it is more accurately described as an investment in your quality of life. Consider the hours spent each week sweeping, mopping, scrubbing, and dusting. For a moderately sized home, this can easily add up to four, five, or even more hours. A professional service reclaims those hours for you, handing them back to be spent on what truly matters. This could mean more time with family, pursuing a hobby, exercising, or simply enjoying a well-deserved rest. The cumulative effect of this reclaimed time is profound, reducing burnout and allowing for a better work-life balance. It transforms the home from a place of constant obligation into a true sanctuary, a space you can enter after a long day and immediately feel at ease, rather than being confronted with a list of tasks that need doing. 2.Quality of Cleanliness Beyond the gift of time, there is the undeniable difference in the quality of the clean itself. A professional cleaner brings a level of expertise and efficiency that is difficult for the average homeowner to replicate. They are trained in the most effective methods and understand the specific needs of different surfaces. They know which products to use on natural stone versus laminate, how to clean stainless steel without leaving streaks, and the best techniques for removing stubborn soap scum from glass shower doors. This knowledge prevents costly damage that can result from using the wrong chemical or an abrasive sponge on a delicate surface. Furthermore, professional services come equipped with commercial-grade tools and supplies that are often more powerful and effective than standard consumer products. Their high-powered vacuums with HEPA filters can capture a significantly higher percentage of dust, allergens, and pet dander, leading to improved indoor air quality. This is particularly beneficial for households with allergy sufferers, asthmatics, children, or pets. The result is not just a home that looks clean, but one that feels and is, on a microscopic level, healthier. The process of a professional clean is systematic and thorough. Cleaners typically work with a detailed checklist, ensuring that no area is overlooked. They employ methodical strategies, such as cleaning from top to bottom to ensure dust and debris fall downwards before the floors are addressed, and working from one side of a room to the other. This structured approach guarantees consistency and completeness. A standard recurring clean will typically involve a comprehensive dusting of all surfaces, including furniture, shelves, and window sills; cleaning and disinfecting kitchen countertops, sinks, and appliance exteriors; scrubbing toilets, showers, tubs, and bathroom vanities; and vacuuming carpets and mopping hard floors. This regular maintenance keeps the home at a consistent level of cleanliness, preventing the deep buildup of grime. 3.Deep Cleaning For homes that have gone some time without a thorough cleaning or for clients new to a service, a deep clean is often recommended. This is a far more intensive and detailed service that addresses the areas often missed in a regular routine. A deep clean will include all the tasks of a standard clean but will go much further. It can involve washing baseboards and trim, cleaning light fixtures and ceiling fans, wiping down doors and door frames, cleaning behind and underneath furniture and appliances, scrubbing grout lines, and cleaning the interior of windows. This is the reset button for your home, tackling the accumulated dirt and dust in every nook and cranny, and establishing a new baseline of clean that makes subsequent maintenance easier. Specialized services like move-in and move-out cleanings are another critical offering. Preparing a home for sale or ensuring a new home is pristine before you unpack is an enormous task on top of the already stressful process of moving. A move-out clean is designed to leave the property in immaculate condition for the next occupants, often a requirement for retrieving a security deposit. This is the most exhaustive clean of all, performed on an empty home. Every interior surface is addressed, including the inside of all cabinets, drawers, closets, the oven, and the refrigerator. It ensures the home is presented in its best possible light, which can be a significant factor for real estate agents and potential buyers. Conversely, a move-in clean provides immense peace of mind, sanitizing the space and ensuring you are starting your new chapter in a fresh, thoroughly cleaned environment. 4.Trust and Security One of the most significant barriers for people considering a cleaning service is the idea of trust and security. Inviting someone into your personal space requires confidence in their professionalism and integrity. This is why reputable cleaning companies place such a high emphasis on their hiring and training processes. They conduct background checks on their employees and ensure they are thoroughly vetted. Furthermore, professional services are bonded and insured. Bonding provides protection against theft, while insurance covers any accidental damage that might occur to your property during the cleaning process. This comprehensive protection offers homeowners the peace of mind that they are working with a trustworthy organization that stands behind its work and its people. The relationship with a cleaning service is

5 Reasons Why Hiring a Cleaning Service is the Best Form of Self-Care Read More »

Perfect Cleaning Schedule

Cleaning Schedule: A Room-by-Room Guide to Your Perfect Cleaning Schedule

Why a Cleaning Schedule Beats Cleaning Marathons For many households, cleaning swings between two extremes: frantic multi-hour marathons before guests arrive, or weeks of ignoring the dust bunnies and sticky counters until frustration wins. This reactive approach is exhausting and inefficient. The secret to a consistently clean home is not stronger chemicals or more scrubbing; it is a simple cleaning schedule that turns one overwhelming project into small, predictable daily habits. Breaking tasks into daily, weekly, monthly, and seasonal frequencies keeps grime from ever building up to marathon levels, and it frees your weekends. Daily Habits: Fifteen to Twenty Minutes That Work Daily tasks are the foundation of the system. They take little time but have the biggest impact on how your home feels: Make the bed each morning; it takes under two minutes and instantly makes the bedroom look put together. Wipe kitchen counters and the sink after every meal so spills and crumbs never harden. Give the kitchen floor a quick sweep at day’s end so crumbs never get tracked through the house. Follow the one-load rule: wash, dry, fold, and put away a single load of laundry daily so the pile never becomes a mountain. The Weekly Reset: Bathrooms, Kitchen, and Dust The weekly clean is a deeper reset of the main living areas. You can do everything on one cleaning day or spread one or two rooms across the week, an approach called zone cleaning. Bathrooms deserve a full scrub for hygiene as much as appearance: the toilet inside and out, the shower and tub to stop soap scum before it thickens, the sink and countertops scrubbed and disinfected, the mirror polished streak-free, and the floor swept and mopped. In the kitchen, wipe down appliance exteriors including the refrigerator, dishwasher, microwave, and stovetop, clean the microwave interior by heating a bowl of water with vinegar to loosen grime, and mop the floor. Throughout the living areas and bedrooms, dust every surface, then vacuum carpets, rugs, and hard floors; regular vacuuming lifts the dust, dander, and allergens that would otherwise circulate. Monthly Projects for the Details Monthly tasks catch the slow, creeping grime that separates merely tidy homes from deeply clean ones. Wipe down baseboards, which collect dust and scuffs; clean light fixtures and ceiling fans; run an empty cleaning cycle on the washing machine to prevent soap scum and mildew; and clean the dishwasher filter to keep it performing well. Window sills and sliding door tracks also trap dirt and insects, so give them a monthly pass. Seasonal Projects: The Whole-Home Reset Every quarter, set aside time for the big jobs. Empty the refrigerator and freezer, wipe down shelves and drawers, and discard expired food. Wash windows inside and out, deep clean carpets and upholstery with a rented machine or a professional service, and organize closets and pantries while decluttering. Season-specific extras include cleaning the gutters in the fall and pressure washing the deck in the spring. Frequency Typical tasks Time tip Daily Make beds, wipe counters, quick sweep, one load of laundry Batch these into a 20-minute evening routine Weekly Bathroom scrub, appliance wipe-downs, dusting, vacuuming, mopping Assign one or two rooms per day Monthly Baseboards, light fixtures, washing machine cycle, window sills Pair with bill-paying day as a reminder Seasonal Fridge deep clean, windows, carpets, closets, gutters, deck Pick one weekend per season and book help early Make the Schedule Fit Your Life A schedule is a template, not a rigid document. If you live alone and rarely cook, the kitchen needs less attention; if you have kids and pets, daily floor care and weekly vacuuming become non-negotiable. Task batching helps some households: make Monday dusting day and Tuesday floor day so you stay focused with one set of tools. A clear schedule also makes delegation easy, since everyone in the family knows which tasks belong to which day, removing the constant negotiation about who cleans what. Above all, aim for progress, not perfection. Miss a day and simply pick it up tomorrow; because the system prevents buildup, one skipped task never snowballs into a disaster. Cleaning science supports the approach: the CDC explains that regular cleaning and disinfecting of your home removes most germs from surfaces, and that handwashing is one of the best ways to stop germs from spreading between family members. Frequently Asked Questions About Cleaning Schedules How long should daily cleaning take? Fifteen to twenty minutes is enough when you focus on the high-impact habits: making the bed, wiping counters after meals, a quick floor sweep, and one load of laundry. Is it better to clean one room a day or everything weekly? Both work. Zone cleaning, with one or two rooms per day, keeps the workload even, while a single weekly cleaning day suits people who prefer to finish everything at once. What should I clean monthly that people usually forget? Baseboards, ceiling fans and light fixtures, the washing machine drum, dishwasher filter, and window sills and sliding door tracks are the details that quietly collect grime. How do I stay consistent with a cleaning schedule? Keep tasks small and visible, pair them with existing habits such as morning coffee or evening TV, and remember that a missed day is fine as long as you resume the next day. When should I hire professional cleaners instead of doing it myself? Monthly and seasonal projects such as carpet deep cleaning, fridge resets, and whole-home refreshes are ideal to outsource, especially before holidays or when allergies act up. Keep the Schedule on Track With Professional Help The heaviest items on your schedule do not have to be DIY. Toronto Shine Cleaning’s regular cleaning service handles the weekly core clean, while our deep cleaning service covers the monthly and seasonal projects that need extra muscle. We serve homes across Toronto and the GTA, and our reviews show what consistent cleaning looks like. Call (647) 424-0355 or check our pricing to build your routine around a professional team.

Cleaning Schedule: A Room-by-Room Guide to Your Perfect Cleaning Schedule Read More »

woman preparing the house for Halloween

Halloween Cleaning: The Secret to a Stress-Free Halloween? A Pre-Holiday Clean.

Why a Pre-Halloween Clean Makes the Holiday Easier Halloween planning usually centers on costumes, candy, pumpkins, and decorations, but the step that makes everything else work is a pre-holiday clean. A targeted cleaning session that moves from the outside of your home inward prepares your walkway, entryway, and main rooms for trick-or-treaters, guests, and decorations. It is not just about tidiness: clearing wet leaves and clutter prevents slips, a wiped-down kitchen makes treat prep safer, and a dust-free living room shows off your spooky decor instead of hiding it. Start Outside: Walkway, Porch, and Front Door The exterior is where the Halloween experience begins, so it deserves the first pass. The walkway, porch, and front door form the stage for the whole evening and the first point of contact for every visitor. Clear the Walkway and Porch In October, the path to your door is often covered with fallen leaves, twigs, and mud. Damp leaves make the path genuinely slippery, a real risk for small children in bulky costumes moving around in the dark. Sweep the entire walkway from the sidewalk to the front steps, then spray it with a garden hose to wash away residual grime. On the porch, remove leftover summer items such as empty planters, garden tools, and worn-out mats, then sweep the whole surface, paying attention to corners where dust and spiderwebs collect. Real webs usually just look neglected, so clear them away to make room for the fake ones. Wipe Down the Door, Windows, and Lights The front door is the centerpiece of the evening. Wipe it down with a damp cloth and warm water with a few drops of dish soap to remove fingerprints and summer dust, and clean the door handle and hardware while you are at it. Windows beside the entry deserve the same attention, since clean glass makes silhouettes, clings, and lighting effects pop; a half-and-half spray of white vinegar and water, wiped with a microfiber cloth or squeegee, does the job. Wipe railings and handrails too, because parents and kids will grip them in the dark. Finally, dust the exterior light fixtures, where built-up dirt and dead insects can dim the glow, and replace any burned-out bulbs so the path and your best decorations stay visible. Sweep leaves and debris from the whole walkway. Clear summer planters, tools, and worn mats from the porch. Wash the front door, handle, windows, and railings. Dust light fixtures and check every bulb. Clean the doormat and the floor beneath it. Inside: Entryway and Main Living Areas Inside, start with the entryway, which faces a constant parade of opening doors on Halloween night. Clear clutter like shoes, bags, and mail so there is a wide, safe path for groups of excited children. Take the doormat outside and scrub it with soap and water if it is a durable outdoor style, or vacuum it well if it is an indoor mat, and clean the floor underneath, which traps surprising amounts of grit. This is also the moment to place a boot tray by the door for wet footwear in the months ahead. From there, move to the living areas visible from the front door: dust the mantel, bookshelves, and tables where candy bowls will sit, then vacuum floors and upholstery. Removing dust and allergens now means better indoor air quality once the decorations go up and the windows stay closed for winter. Kitchen and Bathroom Prep for Guests and Treats The kitchen becomes the command center for Halloween treats, so clear the countertops and wipe them down with a sanitizing cleaner before any baking or candy prep begins. The CDC’s food safety basics start with keeping hands and surfaces clean, and its cleaning and disinfecting guidance explains when to go beyond a simple wipe. Take the chance to sort through the refrigerator, discarding old leftovers to make room for party platters and drinks. The guest bathroom deserves a quick seasonal refresh: shine the mirror, scrub the sink and toilet, wipe the countertop, and put out fresh hand towels with a full supply of soap and toilet paper. Clean the Decorations and Their Storage Space Before carrying bins up from the basement or garage, sweep the floor and wipe the shelves where they were stored so you do not track old dust into clean rooms. As you unpack, give each item a quick wipe: plastic pumpkins, ceramic figures, and other hard decorations gather a layer of dust in storage, and fabric pieces such as throws and wall hangings freshen up in the dryer on a no-heat air cycle. Area Pre-Halloween focus Why it matters Walkway and porch Sweep leaves, hose off grime Prevents slips in the dark Front door and windows Wipe surfaces, clean glass Clean backdrop for decor Entryway Declutter, clean doormat Safe path, less dirt tracked in Living areas Dust and vacuum Better air quality before winter Kitchen and bathroom Sanitize counters, stock supplies Safe treat prep, happy guests Frequently Asked Questions About Halloween Cleaning How early should I clean before Halloween? Aim for the weekend before, so the house is ready for decorating, costume try-ons, and any early parties, with a quick touch-up on the day itself. Is cleaning the walkway really necessary? Yes. Wet leaves and debris are a slipping hazard for children in bulky costumes moving in the dark, and a clear path also makes your home look inviting. What if I am not hosting a party? The essentials stay the same: safe walkways, a clean entry for trick-or-treaters, a tidy kitchen for candy, and a stocked bathroom. Skip only the extra party prep. How do I clean decorations that sat in storage? Wipe hard items such as plastic pumpkins and ceramic figures with a damp cloth, and freshen fabric pieces in the dryer on an air-only cycle to remove dust. Should I clean before or after decorating? Clean first, then decorate. A dust-free base makes the decorations look better and keeps you from wiping around fragile pieces later. Get

Halloween Cleaning: The Secret to a Stress-Free Halloween? A Pre-Holiday Clean. Read More »

Cleaning a Glass Top Stove: The Do’s and Don’ts for a Perfect Shine

The glass top stove is the centerpiece of the modern kitchen. Its sleek, seamless surface offers a minimalist appeal that is both beautiful and functional. But for all its aesthetic charm, it is an appliance that strikes fear into the hearts of many homeowners. It looks so pristine, so delicate, that the first splatter of grease or boil-over of a sugary sauce can induce a wave of panic. We have all heard the horror stories of permanent stains, unsightly scratches, and a once-glossy surface dulled by the wrong cleaning methods. The truth is, cleaning a glass top stove is not a difficult or dangerous task. It is, however, a precise one. The glass-ceramic surface is a marvel of engineering, designed to withstand incredible temperature fluctuations, but it is not invincible. It is vulnerable to two primary enemies: scratches from improper tools and pitting from certain types of spills. The secret to keeping your glass cooktop looking brand new for years is not about using harsh chemicals or scrubbing for hours; it is about using the right tools, the right techniques, and, most importantly, a consistent routine. Understanding the Do’s and Absolute Don’ts Before we touch on how to clean, we must first establish the ground rules of what to avoid. Most damage to glass cooktops happens when well-intentioned people use the wrong products. To protect your investment, commit these rules to memory. The Absolute Don’ts: Never Use Abrasive Sponges: This is the cardinal sin of glass top stove care. Steel wool, green scouring pads, and any other abrasive sponge will create a web of fine micro-scratches on the surface. These scratches will not only dull the finish permanently but will also create tiny crevices where dirt and grime can become trapped, making future cleaning even more difficult. Never Use Abrasive Cleaners: Powdered cleansers like Comet or Ajax are designed for durable porcelain or stainless steel sinks, not for glass-ceramic. Their gritty particles will scratch the surface just as surely as an abrasive sponge. Never Use Ammonia-Based Cleaners: A standard glass cleaner like Windex might seem like a logical choice, but most contain ammonia. Ammonia is a harsh chemical that can be too strong for the cooktop’s surface, potentially causing discoloration or streaks that are difficult to remove. Never Use a Knife or Sharp Kitchen Utensil to Scrape: When faced with a stubborn, burnt-on piece of food, it is tempting to grab a butter knife to pry it off. This is a fast track to a deep, irreversible scratch. There is only one tool that is safe for scraping, which we will cover later. Never Clean While the Surface is Hot: Aside from the obvious safety risk of getting burned, applying a cool cleaning solution to a hot surface can cause thermal shock, which in extreme cases could crack the glass. Always wait for the indicator light to go off and for the surface to be cool to the touch. Never Let Sugary Spills Sit: If you are boiling jam, making candy, or a pot of sugary sauce boils over, this is the one time you must act quickly. A hot sugar spill can create a chemical bond with the glass-ceramic surface, causing permanent pitting or staining if it is left to cool completely. The Essential Toolkit  You do not need an arsenal of expensive, specialized products. A powerful and safe cleaning kit can be assembled from simple, effective household staples. Microfiber Cloths: You will need at least two-one for cleaning and one for buffing. Microfiber is soft, non-abrasive, and designed to trap dirt and absorb liquid without leaving behind lint. Baking Soda: This is your gentle but effective scrubbing agent. Its mild alkalinity helps to break down grease and food stains, and its fine particles provide just enough abrasion to lift grime without scratching. Distilled White Vinegar: This is your degreaser and polisher. The mild acid in vinegar cuts through grease and, crucially, dissolves the mineral deposits from hard water, which are a primary cause of streaks and hazy films. Keep it in a spray bottle, often diluted 50/50 with water. A Non-Abrasive Sponge or Pad: For scrubbing, you need a sponge that is safe for non-stick pans. A Cooktop Scraper: This is a specialized tool that is essential for any glass stove owner. It is a handle that holds a single-edge razor blade at a safe, low angle. When used correctly, it is the only tool that can safely remove heavy, carbonized food deposits without scratching the glass. Optional – A Commercial Cooktop Cleaner: Products like Weiman or Cerama Bryte are excellent. They are not just cleaners; they are conditioners. They often contain silicones that help to fill in microscopic imperfections and leave behind a protective film that makes future cleaning easier. This is best used as a final polishing step. Daily Maintenance and the Deep Clean Level 1: The Daily Wipe-Down The key to a perpetually clean stove is consistency. A quick, 60-second wipe-down after each use (once the stove is cool) will prevent the buildup that leads to major scrubbing sessions. Wait for it to Cool: Ensure the “Hot Surface” indicator light is off and the cooktop is cool to the touch. Remove Loose Debris: Use a dry paper towel or a microfiber cloth to wipe away any loose crumbs or food particles. Spray and Wipe: Lightly spray the surface with your 50/50 vinegar and water solution. The vinegar will immediately start to break down any light grease splatters from that meal. Buff Dry: Use a second, clean, dry microfiber cloth to wipe the surface dry. Use wide, circular motions to buff the surface to a streak-free shine. This simple routine is your best defense. If you do this every time, you will rarely need to perform a deep clean. Level 2: Burnt-On Messes This is the method for when life happens-a pot boils over, grease splatters and burns on, or the daily wipe-down has been neglected. Start with the Scraper: Once the cooktop is cool, tackle the most severe, raised deposits first. Take your cooktop scraper and, holding it at a low

Cleaning a Glass Top Stove: The Do’s and Don’ts for a Perfect Shine Read More »

clean and sanitized house because of lysol

Lysol 101: A Guide to a Truly Hygienic Home

Lysol 101: Clean First, Disinfect Second, Every Time For more than a century, Lysol has been the name most people associate with killing germs, and its sharp scent is, for many, the very smell of a disinfected home. But the product performs only as well as the person using it understands. Lysol is not an all-purpose cleaner in the traditional sense; its primary job is not to lift dirt but to eradicate the bacteria, viruses, and fungi that live on surfaces. The difference between wiping a counter and truly disinfecting it comes down to a few rules: clean before you disinfect, respect dwell time, and save disinfection for the situations where it matters. This guide walks through the science and the correct technique. What Makes Lysol Work Most Lysol disinfectant formulas, especially the sprays, rely on a class of chemicals called quaternary ammonium compounds, commonly known as quats, with Alkyl Dimethyl Benzyl Ammonium Chloride among the most common. Picture a quat molecule as a tiny positively charged soldier. Bacteria and viruses carry a negatively charged cell wall or envelope, so the quats are drawn to them, lock on, and rupture the wall until the cell’s essential contents leak out and the microorganism dies. Many aerosol formulas also contain ethanol, an alcohol that disinfects by denaturing germ proteins. This combined attack is why the products are effective against a broad spectrum of pathogens, from cold viruses and influenza to E. coli and staphylococcus. Cleaning vs. Sanitizing vs. Disinfecting These three words are used interchangeably, but in professional cleaning they mean different things. Cleaning physically removes visible dirt and debris using soap or detergent, water, and some agitation; it lowers germ numbers but does not necessarily kill them. Sanitizing reduces bacteria on a surface to a level considered safe by public health standards, which lowers infection risk without necessarily killing all viruses and fungi. Disinfecting kills or inactivates nearly 100% of the pathogens named on the product label, and that is the primary purpose of Lysol. The rule that follows is non-negotiable: always clean before you disinfect, because a disinfectant sprayed over a layer of grime cannot reach the germs hiding underneath. The CDC’s home cleaning and disinfecting guidance treats cleaning as the essential first step in any hygiene routine. Dwell Time: The Rule That Decides Whether Disinfection Works Dwell time is the amount of time a disinfectant must stay visibly wet on a surface to kill the pathogens it claims to kill. Spray a countertop and wipe it dry immediately and you have done almost nothing; the chemistry needs minutes to rupture cell walls. The required time is printed on the label and varies by target. Common viruses and bacteria on the label require Lysol Disinfectant Spray to keep the surface wet for 3 minutes, while tougher fungi such as mold and mildew can demand up to 10 minutes. Spray until the surface is thoroughly wet, leave it alone for the full dwell time, and let it air dry completely. How to Use Common Lysol Products Correctly Hard surfaces: wipe away visible dirt first, hold the can 6-8 inches away, spray until the surface is wet rather than misted, honor the dwell time, and air dry. Rinse any food-contact surface with potable water afterward. Soft surfaces: test a small hidden area for colorfastness first, then mist the fabric lightly until it is damp rather than soaked, and let it air dry completely. Disinfecting wipes: pre-clean visibly dirty spots, use a fresh wipe, and keep the surface glistening wet for the stated time, often around 4 minutes for wipes. Use one wipe per surface area to avoid carrying germs from a doorknob to a countertop. All-purpose cleaners: for disinfection these need two passes, one to clean away visible soil and a second to wet the surface for the label’s dwell time. Where Lysol Does Not Belong Unfinished or porous wood can be discolored and damaged by the chemicals and alcohol. Natural stone such as marble, granite, or travertine can develop etching, a permanent dulling of the polished surface, so use a pH-neutral cleaner made for stone instead. Never spray disinfectant on food or directly onto electronics: spray a cloth first, wring it out, then wipe keyboards, phones, and remotes gently. Handle every product with the respect the label demands. Health Canada’s household chemical safety guidance covers safe storage, ventilation, and the rule against mixing cleaning products, which can release toxic gas. Lysol Product Quick Reference Product Best For Non-Negotiable Steps Disinfectant spray Doorknobs, switches, faucets, and fabrics Pre-clean, spray 6-8 inches away, keep wet 3-10 minutes, air dry Disinfecting wipes Quick touch-ups on hard surfaces Fresh wipe per area, keep wet about 4 minutes, air dry All-purpose cleaner Daily cleaning plus disinfection Clean first, then reapply and respect dwell time When Is Disinfecting Actually Necessary? In a healthy household, routine cleaning with soap and water is perfectly sufficient for most daily messes, since it physically removes germs from surfaces. Disinfecting everything every day is unnecessary and may contribute to chemical-resistant bacteria. Save it for the situations where it earns its keep: Frequently touched points such as door handles, light switches, tap handles, remotes, and fridge doors. When someone in the home is sick with a cold, the flu, or another contagious illness. Kitchen and bathroom surfaces prone to contamination from raw meat and bodily fluids, always after cleaning first. Handwashing remains the first line of defense, and the CDC’s handwashing guidance notes that keeping hands clean is one of the main ways to keep germs from spreading in the home. Frequently Asked Questions Can I wipe Lysol off right after spraying? No. Wiping early removes the product before the dwell time is complete, so the disinfection never happens. Spray until the surface is wet, wait the time stated on the label, and let it air dry. Do I need to disinfect my whole house every week? No. Regular cleaning with soap and water handles routine messes. Reserve disinfection for high-touch hotspots,

Lysol 101: A Guide to a Truly Hygienic Home Read More »

woman giving her friend a cleaning gift card

Cleaning Gift: The Most Thoughtful Thanksgiving Gift You Can Give

Thanksgiving is a holiday centered on the beautiful, simple act of gathering. It’s about the warmth of a crowded table, gifts, the familiar comfort of shared recipes, and the expression of gratitude for the people in our lives. We plan menus, we brine turkeys, and we coordinate who will bring which dessert. But beneath this joyful preparation lies a silent, often stressful, and monumental task that almost always falls on the host: the pre-Thanksgiving deep clean. We have all felt it. The week before the guests arrive is a frantic race against the clock. It is a period of scrubbing, dusting, and mopping, driven by the quiet but intense pressure to present a home that is not just tidy, but impeccably clean. It is a labor of love, but it is labor nonetheless. It is hours spent on hands and knees, wiping baseboards and scrubbing floors, when that time could be spent perfecting a pie crust or simply taking a moment to breathe before the happy chaos begins. This year, consider a different kind of contribution. Instead of offering to bring another side dish that will crowd the refrigerator, think about giving a gift that truly serves the person you are thankful for. Consider giving the gift of a clean home. It may sound unconventional, but a pre-Thanksgiving cleaning, whether performed by you or a professional service, is one of the most thoughtful, practical, and profoundly impactful gifts you can possibly give a friend who is hosting. It is a gesture that transcends a simple present; it is a gift of time, of peace of mind, and of genuine, functional support. The Gift of Time In our busy lives, time is the most precious and non-renewable resource we have. During the holiday season, this becomes acutely apparent. The host of a Thanksgiving dinner is not just cooking a single meal; they are orchestrating a major event. Their to-do list is a marathon of planning, shopping, chopping, and baking. The last thing they have is a surplus of free hours. Let’s be honest about what a true guest-ready clean entails. It is not a quick wipe of the counters. It is a comprehensive, top-to-bottom effort. The Dusting: This means getting not just the coffee table, but the tops of the door frames, the ceiling fan blades, the baseboards, and the window sills. It is a detailed, meticulous job that can easily take an hour or more. The Kitchen Deep Clean: The kitchen is the heart of Thanksgiving, and it needs the most intensive work. This involves scrubbing the stovetop, wiping down the fronts of all appliances, cleaning the microwave, disinfecting the countertops, and making sure the sink is sparkling. This is a solid hour of focused work, at minimum. The Bathroom Scrub: The guest bathroom needs to be pristine. This means scrubbing the toilet, cleaning the sink and faucet, wiping down the mirror until it is streak-free, and washing the floor. The Floors: Every hard-surface floor in the main living areas needs to be thoroughly swept and mopped. Every carpet needs to be vacuumed, including moving furniture to get the dust bunnies hiding underneath. This can easily consume another hour or two, depending on the size of the home. The Final Touches: Cleaning entryway glass, tidying up clutter, and giving everything a final polish. When you add it all up, a proper pre-hosting deep clean can easily take five to eight hours of hard, physical work. By giving the gift of a cleaning, you are handing your friend an entire day of their life back. That is a day they can now use to finalize their menu, to bake a dessert without rushing, to spend time with their children who are excited for the holiday, or, most importantly, to simply sit down with a cup of tea and mentally prepare for the joy of hosting, rather than the stress of it. You are not just saving them a chore; you are giving them the space to enjoy the process. The Gift of Peace of Mind The physical labor of cleaning is only half the battle. For any host, the mental load can be even more exhausting. The pressure to have a “perfect” home is a real and often unspoken source of anxiety. Every dust bunny in the corner, every smudge on the window, and every crumb under the dining table can feel like a personal failing when you are about to welcome people into your home. This “hosting anxiety” creates a mental checklist that runs on a constant loop in a host’s mind. Did I remember to dust the lampshades? Is the guest bathroom clean enough? Does the house smell fresh? This internal monologue is a significant source of stress that detracts from the true spirit of the holiday. When you give the gift of a clean home, you are silencing that nagging voice. You are taking a huge, stressful item off their mental checklist and completely erasing it. Imagine the profound sense of relief your friend will feel, walking into their home a day or two before Thanksgiving to find that it is already done. The floors are gleaming. The kitchen is sanitized and ready for the culinary marathon. The bathroom is sparkling. This gift allows your friend to transition their focus from the presentation of their home to the purpose of the gathering. They can channel all their energy into what truly matters: the food, the conversation, and the connection with their loved ones. They can be a present, relaxed, and joyful host, not a frazzled, exhausted one who is secretly worrying about whether a guest noticed the dust on the baseboards. You are not just cleaning their house; you are clearing their mind. A Foundation for the Entire Holiday Season Thanksgiving in many ways is the official kick-off to the entire winter holiday season. The festivities of November flow directly into the preparations for December. A deep clean for Thanksgiving is therefore not just a gift for a single day; it is a foundational gift that keeps on

Cleaning Gift: The Most Thoughtful Thanksgiving Gift You Can Give Read More »

wet cleaning wipes

Wet Wipes: 5 Why Wipes Aren’t the Best Solution

The convenience wet wipes is undeniable. It sits on the counter, in the car, in a handbag, a small, sealed packet promising a swift and simple solution to life’s messes. It is the wet wipe, and in the space of a few short decades, it has become one of the most ubiquitous and relied-upon products in modern life. From wiping a baby’s bottom to removing stubborn makeup, from sanitizing a shopping cart handle to a quick clean of a dusty dashboard, the wet wipe presents itself as the ultimate tool of immediate, portable cleanliness. But this convenience comes at a steep, and often hidden, price. The very qualities that make the wet wipe so appealing-its strength, its moisture, its disposability-are the same qualities that contribute to a cascade of environmental, infrastructural, and even personal health problems. The story of the wet wipe is a classic tale of a modern convenience with profound and unintended consequences. To truly understand its impact, we must look beyond the clean surface it leaves behind and examine the journey it takes after its single, fleeting use. What Are Wet Wipes Actually Made Of? The most significant misconception about wet wipes is what they are made of. We use them much like paper towels or toilet paper, and so we assume they are, in fact, a form of paper. This could not be further from the truth. If you have ever tried to tear a wet wipe, you know it has a surprising, fabric-like strength. This is because the vast majority of wet wipes are not made from paper at all, but from non-woven fabrics composed of plastic resins like polyester and polypropylene. These are the same materials used to make clothing, ropes, and plastic bottles. They are chosen for their durability and their ability to remain strong when saturated with liquid. This is precisely why they are so effective at scrubbing. However, it is also why they are an environmental disaster. Unlike paper, which is made from wood pulp and biodegrades relatively quickly, these plastic fibers do not break down in any meaningful timeframe. A single wet wipe can persist in the environment for hundreds of years, slowly breaking apart not into organic matter, but into smaller and smaller plastic fragments known as microplastics. The “Flushable” Myth This brings us to the most damaging myth perpetuated by the industry: the “flushable” wipe. Many brands market their wipes as safe to flush, creating the impression that they will simply disintegrate like toilet paper once they enter the plumbing system. This is a catastrophic falsehood. Toilet paper is specifically designed to have very short fibers that lose all their structural integrity almost immediately upon contact with water. Wet wipes are designed to do the exact opposite. When flushed, they do not break down. They travel through the pipes intact, where they snag on imperfections, catch on other debris, and begin to form the foundation of clogs. In the municipal sewer systems, this problem scales up to a monstrous degree. Here, the flushed wipes combine with the fats, oils, and grease (FOG) that are improperly poured down drains from household kitchens. The strong plastic fibers of the wipes act as a durable net, binding with the congealing fats to create colossal, rock-hard masses known as “fatbergs.” These blockages, which can grow to be the size of a bus and weigh several tons, are a plague on modern cities. They cause raw sewage to back up into streets and homes, require enormous and expensive efforts to break apart with high-pressure water jets and manual labor, and place an incredible strain on our aging water infrastructure. Every single time a “flushable” wipe is flushed, it becomes a potential building block for the next fatberg. The problem is not just contained to the sewers. During periods of heavy rainfall, sewer systems can overflow, discharging this toxic slurry directly into our rivers and oceans. Here, the wet wipes emerge, carpeting riverbeds and washing up on beaches in what is now grimly referred to as a “wet wipe reef.” They are frequently mistaken for food by marine animals and birds, leading to internal blockages and death. The Problem with the Bin Even when disposed of correctly in a trash can, the problems do not disappear. Because they are made of plastic, they end up in landfills where they will sit for centuries without biodegrading. They contribute to the ever-growing mountain of single-use plastic waste that is a hallmark of our disposable culture. Furthermore, the cleaning solutions and preservatives they are soaked in can leach into the soil and groundwater over time. The Cost to Our Health and Skin The convenience of a wet wipe can also come at a cost to our skin. In order to keep the wipes moist and free of mold and bacteria within their packaging, they are saturated in a solution that often contains a cocktail of chemicals, including preservatives, fragrances, and surfactants. Preservatives like parabens and methylisothiazolinone are necessary to prevent the growth of microbes, but they are also known skin irritants and allergens for many people. The “fragrance” listed on a package is often a proprietary blend of dozens of chemicals that do not have to be disclosed individually, and these are common triggers for dermatitis and allergic reactions. For personal hygiene, particularly on sensitive areas, the constant use of wet wipes can disrupt the skin’s natural microbiome, the community of beneficial bacteria that protects our skin. The chemical and physical action of wiping can strip away the skin’s natural protective oils, leading to dryness, irritation, and a compromised moisture barrier. From a cleaning perspective, wipes often provide an illusion of clean rather than a true removal of dirt and germs. Without a rinsing action, they often just smear bacteria and grime across a surface rather than lifting it away. A proper cleaning process involves a cleaning agent to loosen dirt and a cloth or sponge that can be rinsed out, physically removing the contaminants from

Wet Wipes: 5 Why Wipes Aren’t the Best Solution Read More »

Distilled Water: 5 Simple Secrets on How to Use Distilled Water

The secret to a perfect, streak-free clean is not found in a bottle of expensive, high-tech cleaning solution. It is not achieved through a special microfiber cloth woven with miraculous fibers, nor is it the result of a secret scrubbing technique passed down through generations. The real secret to a flawless, residue-free finish is something far more fundamental and surprisingly simple. It is the water itself. More specifically, it is the absence of minerals in that water. The single most transformative, yet overlooked, tool in any advanced cleaning arsenal is a simple jug of distilled water. We are conditioned to see water as a simple cleaning agent, but the water that flows from our taps is far from pure. It is a complex liquid, carrying a dissolved cargo of minerals and trace elements from its journey through the ground and pipes. The most common of these are calcium and magnesium, the primary culprits behind “hard water.” When you clean a surface with tap water and it evaporates, it leaves these microscopic mineral deposits behind. This is the root cause of nearly every common cleaning frustration: the hazy film on your hardwood floors, the stubborn white spots on your shower door, the frustrating streaks on your windows, and the cloudy residue on your stainless steel appliances. You can scrub and polish for hours, but if you are using tap water, you are fighting a battle against an invisible enemy that you are simultaneously reapplying with every wipe. Distilled water is the elegant solution to this problem. It is water that has been purified back to its most basic, elemental state: pure H₂O. By understanding what it is and how it works, you can elevate your cleaning from a chore of constant frustration to a science of predictable, perfect results. What Exactly Is Distilled Water, and Why Does It Matter? The process of distillation is a simple act of separation. Regular water is boiled into steam. As the water turns into a gas, it leaves behind everything that is not water: minerals, salts, heavy metals, and other contaminants. This pure water vapor is then collected and condensed back into its liquid form. The result is water that is stripped of all its baggage, a true “blank slate.” This purity is precisely what makes it a secret weapon for cleaning. Because distilled water contains no dissolved solids, when it evaporates, it leaves absolutely nothing behind. There are no minerals to create spots, no salts to leave a film. It dries completely clean. This unique property gives it two significant advantages in a cleaning context: It Prevents Residue: As mentioned, it eliminates the source of spots and streaks. This is its most obvious and celebrated benefit. It Is a More Effective Cleaner: Because distilled water is free of dissolved minerals, it is chemically “hungry.” It has a greater capacity to dissolve and absorb other substances, like dirt and soap, making it a more effective solvent than tap water. This means you often need less cleaning solution to achieve the same result. Key Applications for Distilled Water in Your Home Switching to distilled water for specific tasks is a small change that yields disproportionately large results. Here are the most impactful ways to incorporate it into your cleaning routine. 1. The Ultimate Streak-Free Window and Mirror Cleaner This is the classic and most transformative use. For a truly professional, invisible finish on glass, distilled water is non-negotiable. The Problem: The minerals in tap water are the primary cause of streaks on windows and mirrors. No matter how well you squeegee, as the last microscopic droplets of water dry, they leave mineral deposits behind, creating a faint but frustrating haze. The Solution: Create your own professional-grade glass cleaner. In a clean spray bottle, mix a solution of 50% distilled water and 50% distilled white vinegar. The vinegar acts as a powerful cleaning agent, cutting through grease and grime, while the distilled water ensures that once you wipe or squeegee it away, the surface will dry to a perfectly clear, spot-free shine. This simple, cheap solution will outperform almost any commercial glass cleaner on the market. 2. Flawless Stainless Steel and Chrome Stainless steel appliances are notorious for showing every fingerprint and water spot. Distilled water is the key to winning this battle. The Problem: Wiping down stainless steel with a cloth dampened with tap water is a recipe for frustration. As the water dries, it leaves behind a constellation of mineral spots that mar the finish. The Solution: For routine cleaning, simply dampen a clean microfiber cloth with distilled water and wipe the appliance, always following the direction of the grain. For a final polish, use a second, completely dry microfiber cloth to buff the surface. The absence of minerals means no spots will form as it dries. For greasy fingerprints, you can add a single drop of dish soap to your damp cloth, then “rinse” with a separate cloth dampened with only distilled water before buffing dry. The same principle applies to chrome faucets and fixtures in the kitchen and bathroom. 3. A Haze-Free Finish for Hardwood and Laminate Floors If your hard-surface floors look dull and cloudy even after mopping, the culprit is likely a buildup of mineral residue from your tap water. The Problem: Over time, mopping with tap water (even with a floor cleaner) can leave behind a cumulative, hazy film that dulls your floor’s natural shine. The Solution: This is especially effective with a spray mop system. Fill the mop’s reservoir with mostly distilled water and a small splash (a few tablespoons) of white vinegar. The vinegar helps to break down any existing film, while the distilled water ensures no new film is created. The result is a floor that is truly clean, without the dulling residue that compromises its appearance. 4. Spot-Cleaning Carpets and Upholstery Without Leaving a Ring Have you ever cleaned a small spot on your carpet, only to be left with a noticeable ring or outline after it dries? That ring is often caused

Distilled Water: 5 Simple Secrets on How to Use Distilled Water Read More »

cleaning tablets

Cleaning Tablets: The Sustainable Secret to a Spotless Home

Cleaning Tablets: The Small Product Changing How We Clean Walk down any supermarket cleaning aisle and you will see a long-held belief on display: that effective cleaning comes in large, heavy, liquid-filled plastic bottles. That model, built on selling us mostly water, is quietly being overturned by a small, unassuming innovation: the cleaning tablet. Instead of shipping diluted liquid in single-use plastic, a tablet concentrates the active ingredients into a solid puck that you dissolve at home. The result is less waste, less clutter, and a routine that makes more sense for your home and the planet. Why the Liquid Bottle Model Is Broken The most glaring flaw in the traditional liquid cleaner is plastic waste. Most bottles are made from high-density polyethylene, or HDPE, and although they are recyclable in theory, a staggering share of that plastic is never recycled. It ends up in landfills, where it persists for centuries, or in waterways, where it breaks down into harmful microplastics. Canada alone throws away millions of tonnes of plastic every year, which is why the Government of Canada is working to reduce plastic waste and pollution through regulation and better product design. Then there is what is actually inside the bottle. The typical liquid surface cleaner consists of up to 95 percent water, so consumers pay to ship pre-diluted cleaner across the country, an avoidable carbon cost. At home, bulky bottles claim valuable cabinet space, spills are common, and measuring concentrates for mopping is guesswork that leads to waste or a sticky, residue-laden floor. How Cleaning Tablets Work: Just Add Water A cleaning tablet concentrates the chemistry of a liquid cleaner into a small, solid puck: the same surfactants that lift dirt and grease, plus fresheners and other active ingredients, minus the water. Rather than buying a new plastic bottle with every replacement, you keep one reusable spray bottle. Once it empties, fill it with warm water from your tap, drop in a tablet, and give it a few minutes to dissolve fully. What comes out is a fresh, effective cleaning solution made on demand at home. This simple model solves the problems of the old one: the small, paper-based packaging cuts plastic waste by over 99%, a single truckload of tablets replaces many truckloads of liquid, and a box the size of a deck of cards can stand in for a whole arsenal of bottles under the sink. Types of Cleaning Tablets for Every Room The word tablet covers a growing category of concentrated, water-activated cleaners. All-purpose and surface tablets are the most versatile: dissolve one in a spray bottle and it tackles everyday grease and grime on non-porous surfaces such as countertops, sealed stone, tile, and finished wood. Glass cleaner tablets evaporate cleanly and leave mirrors and windows streak-free. Bathroom tablets often include mild acidic components that dissolve soap scum and hard water mineral deposits in showers, tubs, sinks, and on tile. For mopping, floor tablets or dissolvable sheets drop into a bucket of water to create a perfectly portioned, no-rinse mopping solution. A separate family of tablets cleans the machines themselves. Dishwasher cleaning tablets run in an empty dishwasher to break down limescale, grease, and food residue in the filter and spray arms, improving performance. Washing machine tablets run on a hot cycle in an empty drum to dissolve soap scum, mineral buildup, and biofilm, the causes of musty odors. Garbage disposal tablets foam while the disposal runs, scrubbing the blades and chamber walls and deodorizing the unit. Tablet Types and Their Best Uses Tablet Type Where to Use It What It Fights All-purpose Spray bottle for counters, tile, sealed stone Everyday grease, grime, and spills Glass Spray bottle for mirrors and windows Smudges and film, with a streak-free finish Bathroom Spray bottle for showers, tubs, sinks Soap scum and hard water deposits Floor Mop bucket with warm water Dirt and grime with no rinsing needed Dishwasher and washer Empty appliance on a hot cycle Limescale, biofilm, and musty odors Garbage disposal Dropped in while the disposal runs Food grime on blades and chamber walls Best Practices for Getting the Most From Tablets Use a durable reusable bottle made of glass or high-grade plastic such as PET or HDPE, and rinse it out thoroughly between refills. Fill the bottle with warm water first, then drop in the tablet; adding water over the tablet causes excessive foaming. Use warm, not boiling, water, which dissolves the tablet faster and more completely. Be patient: full dissolution can take two to ten minutes, depending on the brand and water temperature. Label your bottles when you use several tablet types, so the glass cleaner never lands on the wrong surface. Are Cleaning Tablets as Effective as Liquid Cleaners? For a small puck, skepticism is fair, but modern chemistry has made these formulas just as effective as liquids, and in some cases more so. The active ingredients match those found in liquids; they are simply dehydrated into solid form and reconstituted with water when you use them. The tablet also delivers a perfect, pre-measured dose every time, keeping the solution at optimal dilution and avoiding both over-strong and weak mixes. As with any cleaning product, follow the dilution and use instructions and keep solutions out of reach of children; Health Canada’s guidance on using household products safely is a good reference for handling cleaning chemicals at home. Frequently Asked Questions Are cleaning tablets really as strong as liquid cleaners? Yes, when used as directed. The active ingredients are the same ones found in liquids, just dehydrated, and the pre-measured dose guarantees the right dilution every time, which is often stronger than a guessed pour from a bottle. Can I use any spray bottle with cleaning tablets? You can use any bottle you already own, but a durable glass or high-grade plastic bottle designed for long-term use works best. Rinse it thoroughly between refills so leftover product does not react with the new solution. How long does it take for a tablet

Cleaning Tablets: The Sustainable Secret to a Spotless Home Read More »

5 Rust Removal Tips: The Ultimate Solution for Stubborn Rust Stains

Rust Is Eating Your Metal, and a Sponge Alone Will Not Stop It Rust creeps into bathrooms, kitchens, garages, and patios without warning, staining fixtures, seizing tools, and quietly weakening the metal you depend on. The familiar reddish-brown mark is more than cosmetic. Rust is an active chemical reaction that eats away at metal and leaves discoloration ordinary scrubbing cannot lift. Controlling it takes two coordinated moves: eliminating the conditions that let it form, and matching the right removal technique to the surface you are cleaning. What Rust Actually Is In everyday terms, iron oxide is what we call rust. It appears through oxidation, whenever iron or a steel alloy stays in contact with oxygen and water too long. Add salt and the process accelerates: vehicles in cities with salted winter roads deteriorate faster. The recipe is always the same: metal, oxygen, moisture. You cannot remove the object or the air, so every effective prevention plan comes down to one goal: moisture control. Where Rust Attacks a Home Bathrooms. The epicenter. Toilet bowl rings usually trace back to iron in the supply water or aging cast iron pipes, and corroding parts inside the tank add their own marks. Wet shower caddies, the damp base of a shaving cream can, and a stray bobby pin all stain porcelain and fiberglass, while drains, shower heads, and faucets corrode over time. Kitchens. A stainless sink resists rust but is not immune: leave a wet cast iron pan or a soaked pad of steel wool in the basin and marks follow. Cast iron cookware depends on its seasoning, a layer of polymerized oil, or it oxidizes almost on contact with air. Chipped vinyl on a dishwasher rack exposes metal that can spot your clean dishes. Laundry rooms. Metal buttons, zippers, and rivets transfer marks onto other garments mid-cycle, as does a forgotten nail or screw in a pocket. Garages, basements, patios. Steel hand tools corrode fast in damp storage. Paint-scratched wrought iron or steel patio furniture starts flaking, and grill grates endure a constant cycle of heat and moisture. Tip 1: Stop Rust Before It Starts The cheapest repair is the one you never need. Keep surfaces dry: wipe the kitchen sink after the dishes, run a squeegee over shower walls after use, and dry tools before storage. Run the bathroom exhaust fan during and after showers, and put a dehumidifier in a damp basement. Coat outdoor furniture, railings, and grills in corrosion-inhibiting paint, inspect those pieces yearly, and touch up chips immediately. A light film of machine oil shields tools, and a maintained seasoning layer shields cast iron. Never park wet metal on susceptible surfaces: no damp cans on the tub ledge, no pans soaking overnight in the sink, no wet steel wool on the counter. If fixtures keep staining after cleaning, the water may be the culprit, and a water softener or iron filter on the house supply is worth considering. Tip 2: Dissolve Light to Moderate Rust with Natural Acids Mild acid dissolves iron oxide, which makes your pantry a capable workshop. Soak small items, like tools, nuts, and bolts, in white vinegar for several hours or overnight, then brush off the dissolved corrosion. On gentler surfaces such as fabric or countertops, work in a paste of lemon juice and salt: citric acid breaks the buildup down while the salt acts as a mild abrasive. For the mildest option, spread baking soda into a thick paste with water, let it sit a few hours, then scrub. And for light surface rust on a knife, halve a potato, dip the cut end in dish soap or baking soda, and rub hard, because potatoes carry oxalic acid that dissolves the layer. Tip 3: Scrub Heavy Corrosion Off Durable Metal When buildup is thick and flaky, physical abrasion wins, but it scratches, so reserve it for surfaces where the finish is irrelevant, like old tools or grill grates. A wire brush, sandpaper, steel wool, or even foil crumpled into a ball will strip oxidation away. Start with a little water or oil as lubricant, move from coarse grit to fine, then wash, dry, and coat the bare metal right away or the rust returns immediately. Tip 4: Reach for Chemical Removers on Stubborn Cases Commercial products use stronger acids, typically oxalic or phosphoric, to dissolve corrosion faster than pantry remedies. Bar Keepers Friend, powered by oxalic acid, handles porcelain and stainless steel, and gel and spray formulas exist for heavy-duty jobs. Treat them as the powerful chemicals they are: gloves on, eyes protected, air moving, and the manufacturer’s label followed exactly. Health Canada’s page on using household chemicals safely covers buying, storing, and handling acidic cleaners around family. Tip 5: Match the Method to the Surface Different materials demand different tactics, and the wrong one can make a stain permanent. Surface Best removal method Watch out for Clothing and fabric Lemon juice and salt first; if that fails, a commercial laundry stain remover made for rust. Never chlorine bleach. It reacts with iron oxide and can set the stain forever. The CDC’s guide to disinfecting with bleach also warns against mixing it with other cleaners. Porcelain and ceramic sinks, tubs, toilets A wet pumice scouring stick lifts reddish rings without scratching the glaze, or use a Bar Keepers Friend and water paste. Metal scrapers that gouge the finish. Concrete garage floors and driveways Trisodium phosphate (TSP) solution worked in with a stiff brush lifts the discoloration. Gloves and ventilation when handling TSP. Small steel tools, nuts, bolts Overnight vinegar soak, then brush. Dry and oil the metal after soaking. Grill grates, old hand tools Abrasive scrubbing, coarse to fine. Coat cleaned metal immediately. Rust Removal FAQ How long should something soak in vinegar to remove rust? Several hours handles light corrosion; overnight works through heavier buildup. Scrub off the softened residue, rinse, and dry the item completely. Will baking soda remove rust? On mild cases, yes. A thick baking soda-and-water paste left for

5 Rust Removal Tips: The Ultimate Solution for Stubborn Rust Stains Read More »