Furniture Cleaning

several different brooms

Let’s Compare 6 Different Types of Brooms so You Know The Best Ways To Use Them.

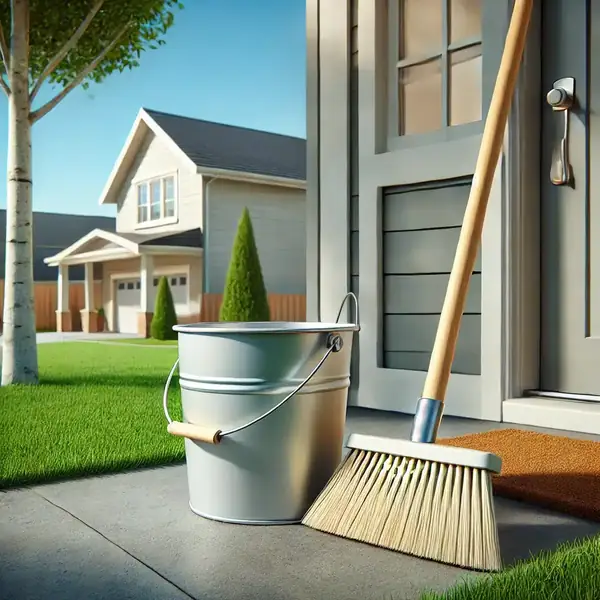
The humble broom is often the most underrated tool in the cleaning arsenal. To the uninitiated, it is simply a bundle of fibers attached to a stick, a primitive device designed to push debris from one location to another. However, this oversimplification is the primary cause of inefficient cleaning, damaged flooring, and unnecessary physical fatigue. The evolution of this implement has diverged into a complex taxonomy of shapes, materials, and specialized functions. Just as a carpenter would not use a sledgehammer to drive a finishing nail, a homeowner should not use a stiff straw sweeper to clean a polished hardwood floor. Understanding the mechanics of these tools-the stiffness of the bristle, the angle of the head, and the composition of the fibers-is essential for mastering the art of the sweep. Using the correct instrument transforms a chore into a seamless maintenance routine, ensuring that dirt is actually removed rather than simply redistributed into the air or the gaps between floorboards. Corn Broom The most recognizable silhouette in the world of sweeping is the traditional corn broom. Crafted from the natural fibers of the sorghum plant, this tool is a relic of agricultural history that has survived into the modern era due to its sheer durability. It is characterized by its stiffness and its rough texture. It is a heavy-duty instrument designed for high-friction environments. Its domain is the outdoors-the concrete patio, the sidewalk, the garage floor, and the barn. The rigid, straw-like bristles are strong enough to move heavy debris like wet leaves, gravel, and snow. They act as a rake and a sweeper combined. However, bringing this natural fiber tool indoors is almost always a mistake. The stiff straws are too abrasive for delicate surfaces like laminate or polished hardwood, potentially leaving micro-scratches in the finish. Furthermore, they are notorious for shedding their own bristles, adding to the mess they are supposed to be cleaning. They lack the fine, split ends required to trap microscopic dust, meaning they push the big rocks while leaving the fine silt behind. Synthetic Angle Broom For the interior of the home, particularly the kitchen and the dining room, the synthetic angle broom is the superior choice. These are typically made from plastic or nylon fibers. The genius of this design lies in its geometry. The head is cut on a diagonal bias, creating a sharp point at one end. This design acknowledges the architectural reality of a room: corners exist. A flat-headed sweeper struggles to reach the dust bunnies trapped where the baseboard meets the cabinet, but an angled head can be maneuvered into tight crevices and under the lips of appliances with precision. The bristles on these tools are usually “flagged.” If you look closely at the tips of the plastic strands, you will see they are frayed or split into tiny hairs. This flagging increases the surface area exponentially, creating a dense web that traps fine flour, pet dander, and dust particles. This implement is designed for the “pull” stroke, gathering light debris gently without kicking it into the air. Push broom When the task involves large, open spaces such as basements, driveways, or warehouses, the standard upright broom becomes inefficient. The biomechanics of the sweeping motion-twisting the waist and pulling the arm across the body-is tiring over large areas. This is where the push brush dominates. This tool features a wide, rectangular block head, ranging from eighteen to thirty-six inches, attached to a handle at an angle. The motion is a forward thrust, utilizing the power of the legs and the body’s weight rather than the lower back. These wide sweepers come in a variety of bristle textures. “Fine” versions have soft, dense fibers for moving dust on smooth concrete. “Coarse” versions have thick, stiff bristles for moving heavy mulch or rocks on asphalt. Many modern iterations utilize a dual-bristle system: a stiff inner core to move heavy objects and a soft outer border to catch the fine dust, providing a comprehensive clean in a single pass. Rubber Broom A relatively modern innovation that addresses a specific biological nuisance is the rubber broom. For households with pets, this device is nothing short of miraculous. Traditional bristle tools are ineffective against pet hair; the static electricity generated by the sweeping motion causes the hair to fly away or float over the bristles. A rubber sweeper features a head made of molded rubber nubbins or thick, flexible fingers. When dragged across a carpet or a hard floor, the rubber creates friction and a static charge that acts as a magnet for fur. It pulls hair out of the weave of a rug that a vacuum cleaner might miss. Furthermore, the head often includes a squeegee edge, making it a dual-purpose tool for cleaning up liquid spills or scrubbing a tile floor with soapy water. It is a hygienic option as well, as the rubber head can be easily washed and sanitized, unlike a straw sweeper which absorbs bacteria. Whisk Broom There is also the specialized category of the whisk broom. This is essentially a handheld version of the traditional corn sweeper or a stiff synthetic brush. It lacks a long handle, forcing the user to get close to the work. Its utility is found in the small, localized mess. It is the tool for the staircase, the upholstery of the car, or the spilled potting soil on a workbench. Because the user is closer to the debris, they can apply more directed pressure to dislodge stubborn dirt. This handheld device often pairs with a dustpan, forming a unit that is essential for “spot cleaning” rather than whole-room maintenance. “Dust Mop” The “dust mop” is technically a cousin of the broom, but it deserves inclusion in the conversation regarding dry floor cleaning. Unlike a sweeper that uses bristles to flick dirt, a dust mop uses a flat head covered in cotton or microfiber loops to glide over the surface. This is the tool of choice for large expanses of gymnasium floors, hospitals, and long hallways. It does not lift heavy

Let’s Compare 6 Different Types of Brooms so You Know The Best Ways To Use Them. Read More »

Valentine's Day and cleaning home

Valentine’s Day: 5 Essential Cleaning Tasks You Should do Before February 14th

Valentine’s Day is a holiday that carries a heavy weight of expectation. We are culturally conditioned to view February 14th as a litmus test for our relationships, a day defined by grand gestures, expensive dinners, and tangible gifts. The traditional narrative involves escaping the home-fleeing to a high-end restaurant or a boutique hotel-to find romance. However, there is a shifting trend toward “staying in.” Whether driven by a desire for privacy, the comfort of home, or simply the exhaustion of navigating crowded venues, many couples are choosing to celebrate within their own four walls. This shift changes the dynamic of the holiday entirely. When the home becomes the venue, the state of the home becomes the atmosphere. You cannot create a romantic, intimate vibe in a space that is cluttered, dusty, or chaotic. In this context, cleanliness is not just a chore; it is the foundation of romance. It is the invisible architecture that allows connection to happen without distraction. Peace of Mind To understand why a clean home is the ultimate aphrodisiac, one must look at the psychology of relaxation. It is biologically difficult to be intimate or relaxed when the brain is processing “visual noise.” Clutter, dirty dishes, and laundry piles serve as visual cues for work. They remind us of the to-do list. When you sit on the sofa to enjoy a glass of wine with your partner, but your eye catches a dust bunny rolling across the floor or a stack of bills on the coffee table, your cortisol levels spike. You are pulled out of the moment and back into the grind of daily management. A pristine home silences this noise. It creates a neutral, serene canvas where the only focus is on the person sitting next to you. It signals that the “work” of the household is paused, granting permission for the “play” of the relationship to begin. 1.Bedroom The bedroom is the sanctuary of Valentine’s Day, yet it is often the room that suffers the most from “lived-in” syndrome. We tend to let the master bedroom become a catch-all for the things we don’t want guests to see in the living room. Piles of clothes on the chair, a nightstand crowded with charging cables and water glasses, and bedding that has lost its crispness all conspire to kill the mood. Transforming this space requires a hotel-level approach to detail. It starts with the bed itself. Laundering the sheets, duvet cover, and pillowcases is non-negotiable. There is a tactile luxury to sliding into a bed that smells fresh and feels crisp. Beyond the linens, the floors need to be cleared. Vacuuming under the bed-a place where dust accumulates undisturbed for months-improves the air quality of the room, removing that subtle, stale scent that often lingers in bedrooms. Clearing the surfaces of the dresser and nightstands allows for the addition of mood lighting, such as candles or a dimmer lamp, without creating a fire hazard or looking cluttered. 2.Bathroom The bathroom creates a different set of challenges. If you are planning a romantic bath or simply want to get ready for the evening in a pleasant environment, the bathroom must be impeccable. Nothing destroys a romantic illusion faster than a ring around the tub, a toothpaste-splattered mirror, or a trash can that hasn’t been emptied. A “spa-level” clean involves scrubbing the grout to remove any mildew, polishing the chrome fixtures until they gleam, and ensuring that the towels are fluffy and fresh. It is about removing the evidence of daily biological maintenance to create a space of pampering. The sensory experience of the bathroom-the smell of soap rather than damp towels, the shine of the tiles-sets the tone for self-care and mutual appreciation. 3. Kitchen and Dining Area For those planning a romantic dinner at home, the kitchen and dining area become the stage. Cooking a meal together can be incredibly romantic, but cooking in a dirty kitchen is stressful. If the sink is full of the morning’s coffee mugs and the stove is covered in last night’s grease splatters, the cooking process becomes a battle against the mess. A pre-Valentine’s deep clean of the kitchen ensures that you have a clean slate. It involves degreasing the stovetop, wiping down the cabinet fronts, and ensuring the dishwasher is empty and ready to receive the dirty dishes as you cook. This logistical preparation allows the evening to flow smoothly. Furthermore, the dining table needs to be reclaimed. In many homes, the table serves as a desk, a mail sorting station, or a laundry folding area. Clearing it completely and polishing the surface allows you to set the table properly, perhaps with a tablecloth, candles, and the “good” china. It signals that this meal is different; it is an occasion. 4.Lighting and Scent Lighting and scent are the final touches of a romantic atmosphere, but they rely heavily on cleanliness to be effective. You cannot light a room beautifully if the light bulbs are coated in dust or if the glass shades are filmy. Dust diffuses light, making a room feel dimmer and dingier. Wiping down light fixtures and cleaning windows allows for a sparkle that mimics a high-end venue. Similarly, scent is powerful. Many people try to mask household odors with heavy perfumes or scented candles. However, the smell of “Vanilla Cupcake” layered over the smell of a full garbage bin or a musty carpet creates a cloying, unpleasant aroma. True freshness comes from removing the source of the odor first. Deep cleaning the carpets, taking out the trash, and scrubbing the sink drains ensures that the air is neutral. Once the air is clean, the subtle scent of fresh flowers or a high-quality candle can actually shine without competing with the funk of the house. Acts of Service There is also the concept of “Acts of Service” as a love language. For many people, seeing their partner scrubbing the floor or taking the initiative to deep clean the bathroom is a profound expression of

Valentine’s Day: 5 Essential Cleaning Tasks You Should do Before February 14th Read More »

Sticker Removal

Sticker Removal: 5 Expert Tips For Removing Stickers From Different Types of Surfaces

Sticker Removal: 5 Expert Tips for Every Type of Surface Nothing kills the joy of a new purchase like the price tag glued to its face. Peel it and you get one of two disasters: the paper tears and leaves a fuzzy white layer, or the sticker comes off but deposits gummy residue that turns grey within days. Adhesives are polymers that bond to a surface, so the winning method softens, dissolves, or lifts that bond without harming what sits underneath. Match the technique to the material and any sticker surrenders without a scratch. Assemble your sticker removal kit: Hair dryer for warming labels on glass, ceramic, metal, and car paint. Cooking oil or isopropyl alcohol for dissolving gummy adhesive. Plastic scraper or plastic razor blades for lifting laminated labels. White vinegar for sun-baked paper labels and price tags. Duct tape and a rubber eraser for delicate surfaces like paper and shoe soles. Tip 1: Start with Heat on Glass, Ceramic, and Metal Resist clawing at the corner: picking separates the paper from the adhesive and leaves exposed glue that is harder to shift. Instead, warm the sticker with a hair dryer on medium heat for about a minute. Heat softens the adhesive polymer so it lets go of the surface while clinging to the label backing; lift a corner slowly and the sticker often peels away as one clean sheet. Heat is the safest first move on hard non-porous items like glass and ceramic, and essential for car decals and laptop lids where solvents could damage paint or electronics. Tip 2: Dissolve Stubborn Glue with Oil or Alcohol Most sticker glues are lipid-based, so cooking oil or even peanut butter loosens them: like dissolves like. Score the sticker so oil penetrates, apply a layer, and wait about twenty minutes; the fats dilute the adhesive until it slides off, and soap and water remove the film. Oil is safe for glass and plastics, but never on unsealed wood or porous stone, which soak it up and stain. Isopropyl alcohol breaks adhesive bonds that oil cannot touch and evaporates instantly, so it is safe for electronics when applied to a cloth rather than sprayed. Alcohol is a paint thinner, though, and can strip painted or varnished finishes, so spot-test in a hidden corner first. Tip 3: Bring Out a Plastic Scraper for Laminated Labels Waterproof plastic-coated labels shrug off oil, water, and vinegar from the top, so attack from the edges. A plastic razor blade or scraper is the right tool: harder than the adhesive but softer than the surface beneath, it slips under the rim and lifts without gouging. Metal blades scratch glass and dig into plastic; they belong only on wet glass at a shallow angle, with a steady hand. For many stubborn labels on jars or new appliances, a set of plastic scrapers pays for itself. Tip 4: Use Vinegar, Acetone, and Tape for the Tough Cases White vinegar: soak a paper towel and lay it over the sticker for thirty minutes to rehydrate the paper and soften sun-baked glue, ideal for price tags on glassware and mugs. Acetone, usually sold as nail polish remover, dissolves almost any adhesive in seconds, but treat it as the nuclear option: it melts plastic on contact, so keep it off storage bins and eyeglass frames. Use it only on glass, unpainted metal, or unfinished ceramic. For the thin dark smear on delicate items like book covers, skip liquids: wrap duct tape around your fingers, sticky side out, and dab until the residue transfers off. Tip 5: Match Your Method to Wood, Shoe Soles, and Car Paint On varnished wood, heat can damage the finish, oil stains the grain, alcohol dissolves lacquer, and water raises the grain, so use mineral spirits or a furniture cleaner on a soft cloth; on raw unfinished wood, fine-grit sandpaper may be the only stain-free option. On new shoe soles, skip moisture and roll residue off with a rubber eraser or crepe block: friction balls the adhesive up for easy brushing. On car paint, never touch the clear coat with a razor blade: soften dealership decals with a hair dryer, lift with a plastic tool, and treat residue with a clay bar or an automotive adhesive remover, since household solvents permanently cloud the finish. Sticker Removal Method at a Glance Surface Best method Never use Glass, ceramic, metal Heat, then oil or vinegar soak Metal scrapers on dry glass Plastic and electronics Hair dryer, isopropyl alcohol on a cloth Acetone, which melts plastic Varnished wood Mineral spirits or furniture cleaner Oil, heat, or alcohol on the finish Shoe soles and leather Rubber eraser or crepe block Liquids that stain the upper Car paint Hair dryer, plastic tool, clay bar Razor blades and nail polish remover Paper and book covers Duct tape dabbing Any liquid or heat What about Ghost Marks After the Sticker Is Gone? That ghost is usually sun fade: the area under the sticker stayed protected while the surrounding surface yellowed, and on wood or fabric the difference is often permanent. On glass or plastic, the adhesive may have reacted with the material, and a mild polishing compound or baking soda paste can blend the mark away. Whenever you work with solvents or removers, follow the Government of Canada’s guidance on using household chemicals safely, and in a small room or closed garage, ventilate and take fresh-air breaks the way Health Canada advises for solvent-based products. Frequently Asked Questions What is the safest way to remove a sticker from a laptop? Warm the sticker with a hair dryer for a minute, lift an edge slowly, then rub residue gently with an alcohol-dampened cloth. Never spray liquid on the device or use acetone, which melts plastic shells. How do I get sticker residue off glass without scratching it? Heat the sticker, remove what you can, and soak residue with cooking oil or hot vinegar for twenty to thirty minutes. A plastic scraper lifts what remains,

Sticker Removal: 5 Expert Tips For Removing Stickers From Different Types of Surfaces Read More »

tidying the bedroom in 5 minutes

How to Clean Your Room in 5 Minutes: A Step-by-Step Routine for Busy Mornings

Why a Five-Minute Room Clean Works Better Than You Think A messy bedroom is often the first casualty of a busy week. When deadlines pile up and energy runs low, clothes cover the chair, mugs crowd the nightstand, and the bed stays tangled. That visual clutter keeps the brain in work mode, so the room meant for rest starts to feel like unfinished business. Most people assume fixing it demands an entire afternoon of sorting and scrubbing, so they postpone the job until the mess looks impossible. In reality, a focused five-minute reset can turn the room around. It is not a deep clean; it is a quick rescue that clears the floor, calms the surfaces, and restores a feeling of control before you rush out the door. What You Need Before the Timer Starts Speed depends on preparation. Decide in advance where every type of clutter will go so you never pause to make decisions mid-clean. This is not the moment for perfect organization; it is a rescue mission with three simple tools: A large trash bag for wrappers, receipts, empty bottles, and anything broken. A laundry hamper, emptied before you begin, for every piece of clothing sitting on the floor. A relocation basket, any bin or box, for objects that belong in other rooms. Keep the three vessels within reach. The instant you leave the room to return a mug to the kitchen, the plan falls apart: the dishwasher, the television, or a buzzing phone will pull you off course. The Five-Minute Routine, Minute by Minute Follow the order below and resist the urge to skip ahead. Each step prepares the next, and the room looks dramatically different by the end. Minute Task Goal 1 Collect trash Remove everything that signals neglect 2-3 Clear floor textiles into the hamper Expose the floor completely 4 Make the bed Anchor the room in order 5 Tidy surfaces, then open the curtains Leave only essentials in view Minute 1: Trash Only Garbage is the easiest category because nothing sentimental is attached to it. Scan for snack wrappers, used tissues, price tags, empty water bottles, and receipts, and break down stray cardboard boxes on the spot. Sixty seconds of ruthless discarding instantly lifts the room’s hygiene and removes the items that suggest neglect. Minutes 2-3: Attack the Floordrobe The mound of half-worn clothes on the rug is the biggest visual offender in any bedroom. There is no time to sniff shirts and judge freshness; anything resting on the floor goes into the hamper, no exceptions. Seeing the carpet again makes the space feel larger and clears the obstacle course underfoot. If a pile of clean clothes is waiting to be put away, fold it once and set it neatly on the chair or the foot of the bed. A tidy stack reads as deliberate, while a sprawled pile reads as chaos. Minute 4: Smooth the Bed The bed is the focal point of the room, and a made bed signals that everything else is under control. You do not need hospital corners: pull the duvet up over the pillows, smooth out the wrinkles, and prop the pillows upright. In about forty-five seconds you create a large, calm surface that balances the busyness around it. Minute 5: Surface Triage and Fresh Air Nightstands, dressers, and desks attract wandering clutter: coffee mugs that drifted in from the kitchen, mail that never made it out of the hallway, tools that wandered in from the garage. Sweep every foreign object into the relocation basket and set it outside the door to be sorted later. Leave only the essentials: a lamp, a book, a clock. Finish by opening the curtains or blinds; natural light and moving air make a room feel cleaner than any spray can. Why Short Resets Beat Weekend Marathons Brief, frequent resets outperform occasional marathons because they stop the buildup before it starts. A daily sweep keeps the bedroom liveable, lowers the stress of sleeping beside a to-do list, and frees your weekend for the jobs that truly matter. It is the same logic behind our regular maid service: steady upkeep beats heroic catch-up sessions. When the whole home needs attention, our team covers everything from bathrooms to baseboards. Frequently Asked Questions How do I clean my room in 5 minutes when it is very messy? Work in the fixed order: trash first, then floor clothes, then the bed, then surfaces. Do not reorganize, do not leave the room, and do not aim for perfect decisions. Speed and visible results are the only goals. What should I do with clothes that are not dirty? Anything that sat on the floor goes in the hamper to keep the room honest. Clean clothes still waiting for a home can be folded once and stacked on a chair or the foot of the bed until you have time to hang them. Can a 5-minute clean replace a deep clean? No. The quick reset handles visible clutter, while a deep clean removes dust, allergens, and grime from carpets, mattresses, and hidden surfaces. The CDC notes that regular cleaning with soap or detergent removes most germs from surfaces, while disinfection is only needed when someone in the home is sick. How often should I reset my room? Daily is best, ideally first thing in the morning or just before bed. A one-minute nightly sweep of surfaces and floors keeps the room from ever reaching the point where five minutes cannot fix it. When Five Minutes Is Not Enough The five-minute reset has honest limits. It will not lift the dust from a ceiling fan, pull allergens out of a mattress, or refresh window tracks; those jobs take time and proper tools. Damp, poorly aired rooms also invite dust mites and mould, which Health Canada links to moisture problems, so periodic vacuuming, washing, and airing still matter. When the grime has settled in and a quick tidy no longer feels like enough, book a deep cleaning service from Toronto

How to Clean Your Room in 5 Minutes: A Step-by-Step Routine for Busy Mornings Read More »

organizing a kitchen pantry

Cleaning The Pantry: 5 Expensive Mistakes You Are Making with Pantry Storage

The pantry is the engine room of the kitchen. It is the repository of potential meals, the fuel station for the family, and, all too often, the most chaotic space in the entire home. A disorganized pantry is not merely an aesthetic annoyance; it is a source of daily friction that wastes money, time, and mental energy. When you cannot see what you have, you inevitably buy duplicates, leading to a cycle of waste where expired cans of beans and stale crackers accumulate in the dark corners of deep shelves. Cooking becomes a chore because locating the necessary ingredients requires an excavation process. Furthermore, a cluttered pantry is a haven for pests, from pantry moths to ants, which thrive in the undisturbed debris of open packages. Transforming this space from a graveyard of good intentions into a streamlined, functional asset requires more than just buying a few plastic bins; it requires a systematic approach to inventory management and spatial planning. 1.Evacuation The process of organizing a pantry must begin with a total evacuation. There is no halfway measure here. Attempting to organize shelf by shelf results in simply shuffling the clutter from one side to the other. You must remove every single item-every spice jar, every cereal box, and every bag of flour-and place them on the kitchen table or counters. This reveals the true volume of your inventory and, more importantly, exposes the physical state of the pantry itself. Once the shelves are bare, you will likely find rings of sticky syrup, scattered grains of rice, and layers of dust. This is the moment to perform a deep clean. Vacuum the corners to remove any cobwebs or insect larvae. Wash the shelves with warm soapy water or a vinegar solution to cut through any grease or sticky residues. If you have wire shelving, pay attention to the undersides of the wires where grime collects. The space must be pristine before anything returns to it; you cannot build a system of order on a foundation of dirt. With the inventory exposed on your counters, the auditing phase begins. This is often the most painful part of the process because it forces you to confront waste. You must be ruthless. Check every expiration date. Spices that have been sitting since the last decade have lost their potency and should be discarded. The half-empty bag of stale chips, the hardened brown sugar, and the tea bags you bought on a whim and never drank must go. This purge is essential to create the negative space required for a functional system. If you find unexpired food that you know realistically you will not eat, donate it to a food bank immediately. Do not put it back in the pantry out of guilt; it will simply expire there later. 2.Categorization Once you have reduced the volume of items, the next step is categorization. Think of your pantry like a grocery store. Stores are navigated by zones-baking, breakfast, dinner, snacks, beverages. You must replicate this logic. Group all baking ingredients together: flour, sugar, baking powder, vanilla, chocolate chips. Group the breakfast items: oats, cereal, syrup, pancake mix. Group the dinner staples: pasta, rice, jarred sauces, canned vegetables. By creating these zones, you reduce the cognitive load of cooking. When you are making a cake, you only need to look at the baking zone. You are not hunting for vanilla extract behind a box of crackers. The most controversial but effective step in pantry organization is decanting. This involves removing food from its original commercial packaging and placing it into matching, airtight containers. Many people view this as an unnecessary aesthetic choice, but it is functionally superior for several reasons. First, commercial packaging is designed to sell the product, not to store it efficiently. Boxes are often half-empty, taking up unnecessary space. Bags are difficult to seal, leading to staleness and spills. Second, uniform containers stack and fit together like a puzzle, maximizing every inch of shelf space. Square or rectangular containers are mathematically more efficient than round ones, which leave gaps of “dead space” between them. Third, clear containers provide an instant visual inventory. You can see exactly how much rice or pasta you have left without opening a box, which simplifies grocery shopping. Finally, airtight containers are the only true defense against pantry moths and weevils, which can chew through cardboard and thin plastic. 3.Identification When selecting containers, consistency is key. Investing in a modular system where the lids are interchangeable and the bases stack securely prevents the “avalanche” effect common in messy pantries. For heavy items like flour and sugar, ensure the containers have wide openings so you can scoop directly out of them with a measuring cup. Labeling is non-negotiable. While you might think you can tell the difference between all-purpose flour and bread flour by sight, you will eventually make a mistake. Use a label maker, a chalk marker, or simple masking tape to identify the contents and, crucially, to note the expiration date on the bottom or back of the container. If you have cooking instructions-like the water-to-grain ratio for quinoa-cut that part of the box out and tape it to the back of the container. The architecture of your shelves dictates where items should live. The prime real estate is the area between your waist and your eye level. This is where your high-use items should go-the daily cereals, the dinner staples, and the snacks. Items that are heavy, like bulk bags of rice, cases of water, or large appliances, should go on the floor or the bottom shelf to prevent injury when lifting. Light items, like paper towels or extra napkins, and rarely used items, like the turkey roaster or holiday-specific sprinkles, should go on the highest shelves. If you have young children, place their approved snacks on a low shelf they can reach independently. This empowers them and keeps them from climbing the shelving units. 4.Facilitators Deep pantries present a specific challenge: things get lost in

Cleaning The Pantry: 5 Expensive Mistakes You Are Making with Pantry Storage Read More »

Storage Ornaments: 8 Amazing Tips For Storing Christmas Decorations Efficiently

Why Smart Christmas Decoration Storage Pays Off The week after the holidays has a particular feel: the guests are gone, the anticipation has faded, and the house that sparkled in December now looks tired and cluttered. Taking the tree down is nobody’s favorite chore, so most of us rush, cramming lights into grocery bags and piling wreaths into the basement corner. That haste has a price, paid next November when you unpack crushed ornaments, knotted lights, and a flattened artificial tree. Efficient Christmas storage protects the money invested in your decor and keeps the holiday magic easy to reach. These eight tips will carry your decorations safely through the off season. Tip 1: Audit Everything Before You Pack It Away Storage starts with a ruthless purge, not a box. As you pull ornaments off the tree and garlands off the banister, check the condition of every item. A light string that flickered all season or has a dead section will not fix itself in the attic, so recycle it now. Ornaments with cracked caps, shattered glass, or a style you no longer love should be donated or tossed. Storing broken or unwanted items wastes space and guarantees you will sort through the same junk next year. Keep only what is functional and brings you joy. Tips 2 and 5: Trees, Wreaths, and Garlands Need Structure The artificial tree is the biggest item you store, and its original cardboard box rarely survives more than one season. Cardboard weakens with moisture and attracts pests, and fighting a fluffy tree back into its factory box is a losing battle. A dedicated canvas tree bag is moisture resistant and roomy enough to hold the sections without crushing needles, and binding each section with cinch straps or old belts shrinks the bundle dramatically. With enough ceiling height, upright storage bags let the tree stand tall all year, so you skip most of the fluffing next December. Wreaths and garlands are the opposite problem: bulky and airy, they flatten under heavy boxes. Hard-shell wreath containers preserve the shape, or hang wreaths on a simple hook in the garage or basement. Coil garlands into a clear bin, or wrap them around a coat hanger, but never let them get compressed. Tips 3 and 4: Protect Ornaments and Tame the Lights Throwing every bauble into one giant bin is a recipe for heartbreak. Fragile glass and ceramic ornaments need individual protection: plastic cups glued to a sheet of cardboard make crush-proof cells for round ornaments, egg cartons cradle small baubles, and bubble wrap is essential for heavy or irregular keepsakes. Then group ornaments by color, theme, or room, so the set for the dining room tree lives in its own labeled box and you never unpack everything to decorate one corner. For lights, the enemy is entropy. Never wind a strand around your arm and drop the coil in a box, because it will tangle as it relaxes. Instead, cut notches in a flat piece of cardboard, wind the strand tautly around it, and plug the male end into the female end to lock it. Masking tape labeled “Mantel” or “Tree Bottom” saves hours of testing next year. Tips 6 and 7: Textiles, Bins, and Labels Stockings, tree skirts, holiday pillows, and table runners face a biological enemy: fabric attracts dust mites, moths, and mildew, especially with food crumbs still in the fibers. Launder or dry-clean everything first, then vacuum-seal bags compress bulky textiles while sealing out moisture and insects. Without vacuum bags, latching plastic bins with a silica gel packet inside are the next best thing. Opaque bins hide their contents, so switch to clear plastic bins and label with detail: “Christmas” is useless, while “Living Room: Stockings, Mantle Lights, and Nutcrackers” is helpful. Load by logic: the items you need first, like Advent calendars and the door wreath, go in last so they sit at the front of the stack, and number the bins so nothing goes missing. Christmas Storage Cheat Sheet Item Best Storage Method Mistake to Avoid Artificial tree Canvas tree bag, sections bound with straps Reusing the original cardboard box Glass ornaments Cups glued to cardboard, egg cartons, bubble wrap Throwing everything loose into one bin Light strings Taut wind on a notched cardboard spool Winding around your arm and dropping in a box Wreaths and garlands Hard-shell containers or hanging hooks Stacking heavy boxes on top Stockings and pillows Laundered, then vacuum-sealed Storing dirty fabric in cardboard Everything Clear bins with specific labels, numbered Opaque bins marked only “Christmas” Your 8-Step Packing Sequence Audit every item and purge broken lights and ornaments first. Bind tree sections with straps and slide them into a canvas bag. Wrap fragile baubles in cups, egg cartons, or bubble wrap. Group ornaments by color, theme, or room in labeled boxes. Wind light strands on cardboard spools and label each plug. Box wreaths in hard shells; coil garlands without compression. Launder textiles, then vacuum-seal or bin them with silica gel. Load bins so first-needed items sit at the front and top. Frequently Asked Questions Can I store Christmas lights by wrapping them around my arm? No, that coil relaxes into knots as soon as it hits the box. Wind each strand tautly around a notched cardboard spool and plug the ends together instead. Are cardboard boxes fine for storing decorations? They are risky long-term. Cardboard weakens with moisture and invites pests, so clear plastic latching bins with silica gel packets are safer, especially in a basement. Should I wash stockings and tree skirts before storing them? Yes, launder or dry-clean textiles first. Food crumbs attract moths, while vacuum-sealed clean fabric stays fresh all year. What is the best way to store fragile glass ornaments? Give each bauble its own cell: plastic cups glued to cardboard for round ornaments, egg cartons for small ones, and bubble wrap for irregular or heavy pieces, then group them by room in labeled boxes. Tip 8: Finish With a Clean House Reset

Storage Ornaments: 8 Amazing Tips For Storing Christmas Decorations Efficiently Read More »

Woman making a to-do list for January after the holiday season.

The January Reset: 8 Essential Tasks to Recover from the Holidays

The January Reset: 8 Essential Tasks to Recover From the Holidays January in Canada is a stark transition: festive lights down, hosting adrenaline gone, and the coldest, darkest stretch of the year arrived. Your home shifts from hosting mode into defense mode, because dry air, road salt, and wasted heat all attack at once. This reset list is a strategic plan for your home’s most vulnerable season, not just a cleaning schedule. 1. Take Down the Tree and Recover From the Holidays Takedown is the first priority, beyond boxing ornaments. By the first week of January, a real tree is usually a dehydrated fire hazard, dropping debris that embeds in carpets and scratches hardwood. Bag the tree before hauling it out, then vacuum with the hose attachment, never the beater bar, which jams on needles. Pull needles out of baseboards, vents, and deep rug pile, label boxes by room as you pack, and toss any light string that failed this year. 2. Win the War on Road Salt January is when salting trucks are busiest, and your entryway floors suffer most. The white crust on boots is calcium chloride or sodium chloride, highly alkaline and abrasive: on hardwood it eats through the polyurethane finish and stains the fibers grey, and on tile it degrades the grout. Wet mopping just spreads the brine, so neutralize it with one cup of vinegar per gallon of warm water, whose acidity breaks the salt bonds. Rinse boot trays in a utility sink, and enforce a no-shoes-past-the-mat policy, your flooring’s best defense all month. 3. Manage Indoor Air Quality and Humidity The house is sealed tight and the furnace runs around the clock, circulating air that grows drier and dustier by the day. Ideal winter humidity sits between 30% and 40%: any lower, and hardwood shrinks and cracks while static pulls dust onto every surface; any higher, and condensation forms inside windows, inviting mold on the sills. Run a humidifier if needed but clean it weekly so it does not spray bacteria, and change the furnace filter, since a clogged one restricts airflow and recirculates allergens. Health Canada’s guidance on indoor air contaminants and health covers the topic in detail. 4. Cut the Dust: Coils, Fans, and Vents With the furnace blasting, convection piles dust onto door frames, fan blades, and refrigerator coils. Vacuum the coils: coated in dust, the fridge cannot shed heat, so the compressor runs longer, wasting energy and shortening its life. Bathroom fans matter too: ventilation is the only exit for shower moisture in a sealed house, and a grille clogged with fuzz traps humidity, inviting mildew on cold exterior walls. 5. Detox the Kitchen After December The kitchen carries the scars of December excess. Purge the refrigerator ruthlessly: bin anything past its date or looking questionable, then scrub the shelves in hot soapy water until every sticky residue is gone. If the oven skipped its pre-turkey scrub, avoid the high-heat self-clean: with sealed windows the fumes have nowhere to escape, so hand-scrub with a baking soda paste instead. Scrub the dishwasher filter too, since it processed a season of grease and gravy. 6. Check Safety Systems Carbon monoxide kills silently, and the danger peaks each winter as furnaces, water heaters, and gas stoves overwork behind sealed windows. Test every CO detector and smoke alarm now, and clear snow and ice off external vents, including the dryer duct and furnace exhaust; a blocked flue can push deadly CO back indoors. Finally, vacuum the dryer vent hose: dry air breeds static and lint ignites easily. 7. Refresh Winter Gear and Declutter One In, One Out The laundry room needs attention too, since coats, scarves, and mittens sponge up sweat, street grime, and bacteria yet rarely get washed. Launder down coats with tennis balls to re-fluff the fill, wash hats and scarves, and treat cuff salt stains with vinegar before the fibers are damaged. December also left a flood of new gifts, so apply the one-in-one-out rule: for every new sweater, donate an old one; for every new toy, take out a broken one. Clutter gathers dust and blocks heat flow, so take on one closet or drawer weekly. The January Reset Checklist Bag and remove the tree, then vacuum needles with the hose attachment. Neutralize entryway salt with a vinegar and water solution. Keep indoor humidity between 30% and 40%; clean the humidifier weekly. Vacuum fridge coils, bathroom fan grilles, and change the furnace filter. Purge the fridge and clean the oven with a baking soda paste. Test CO detectors and clear snow from exterior vents. Wash winter gear and treat salt stains quickly. Declutter with the one-in-one-out rule, one closet a week. January Home Risks at a Glance Threat Damage If Ignored Fast Fix Dry indoor air Shrinking hardwood, heavy static dust Humidifier, cleaned weekly, aiming for 30-40% Road salt Grey stains in finish, ruined grout Vinegar-water wash and no shoes past the mat Clogged furnace filter Overheating furnace, recirculated allergens Fresh filter early in the month Dusty fridge coils Longer compressor runs, wasted energy Vacuum coils at the back or bottom Blocked vents Carbon monoxide backing into the home Clear snow and ice; vacuum dryer hose lint Humid bathroom Mildew on cold walls Clean exhaust fan grille Frequently Asked Questions Why is 30-40% indoor humidity recommended in a Canadian winter? Below that range, hardwood shrinks and static electricity builds; above it, condensation forms on windows and mold can grow on sills. That band keeps both problems away. Can I vacuum pine needles with a regular upright vacuum? Not with a spinning brush running; the beater bar jams on needles and the motor can overheat. Switch to the hose attachment or a hard-floor setting instead. Is the oven self-clean cycle safe in January? In a tightly sealed winter home it is a poor choice, since the high-heat cycle releases fumes with nowhere to escape. Manual cleaning with a baking soda paste protects your indoor air. How do I remove road

The January Reset: 8 Essential Tasks to Recover from the Holidays Read More »

Hostess relaxing on the sofa before the New Year's Eve party.

Final Touch: How to Curate the Perfect Atmosphere for New Year’s Eve

The heavy lifting is finally done. The floors have been scrubbed, the carpets vacuumed, and the refrigerator purged of its expired condiments to make way for platters of food. You have likely spent the last week in a state of high-functioning anxiety, managing a checklist of chores that seemed to grow longer with every item you crossed off. Now, however, you have reached the final countdown. The guests will be arriving in a matter of hours. This is the transition point where you must shift your mindset from that of a cleaner to that of a host. The “final touches” are not about deep sanitation; they are about staging, atmosphere, and logistics. It is the subtle art of curation that transforms a house from a sterile box into a warm, inviting sanctuary ready for celebration. These last-minute adjustments are what guests actually notice, influencing how they feel the moment they step across the threshold. Lighting The most immediate and transformative change you can make in the final hour is the lighting. Lighting is the makeup of the home; it can hide flaws, soften edges, and create intimacy. The harsh glare of overhead recessed lighting or a central chandelier is the enemy of a party atmosphere. It makes guests feel exposed and highlights every speck of dust you might have missed. Walk through your home and turn off the “big lights.” Instead, rely on floor lamps, table lamps, and sconces to create pools of warm, amber light. This lowers the visual center of gravity in the room, encouraging people to sit and relax. If you have dimmer switches, use them aggressively. If you lack sufficient lamp light, candles are your best friend. A few well-placed votives on the mantle or the entryway table create a flickering movement that feels alive and festive. However, ensure these are placed safely away from where coats might swing or elbows might knock them over. Smell Closely tied to lighting is the olfactory experience. The smell of a home is the first thing a guest registers, often before they even take off their coat. You want to avoid the chemical scent of the cleaning products you just used. A house that smells like bleach and lemon pine-sol screams “I just panic-cleaned,” which is not the vibe of effortless hospitality you want to project. Conversely, you must be careful with artificial air fresheners. A heavy, cloying “Vanilla Cookie” candle can be headache-inducing and compete with the aroma of the food you are serving. The best approach for the final touch is a natural, subtle scent. A simmer pot on the back of the stove is an old real estate trick for a reason. Simmering water with a cinnamon stick, a few cloves, and orange peels creates a warm, spicy humidity that permeates the house without smelling synthetic. It smells like the season itself. Entryway The entryway is the bottleneck of the evening, the zone of highest friction. In the final sweep, look at this space through the eyes of a guest who is carrying a bottle of wine, a gift, and a heavy winter coat. Is there actually room for them? A common mistake is leaving the family’s own coats and shoes in the prime spots. Clear out the coat closet entirely. Move your family’s winter gear to a bedroom or the basement for the night. Leave the hangers empty and ready. If you expect a large crowd, a closet might not be enough. Setting up a temporary garment rack or clearing a bed in a nearby room for coats is a thoughtful logistical touch that prevents the dreaded “coat pile” from toppling over on the sofa. Check the floor mat. If it is soaked from your own preparations, swap it for a dry one or lay down a secondary runner. A wet sock is a terrible way to start a party. Bathroom The powder room-the guest bathroom-requires a specific level of detail because it is the one space where your guests will be alone, with time to look around. You have likely already scrubbed the toilet, but the final touches are about comfort. Check the hand towel situation. A single cloth towel will be damp and germ-ridden after the third guest uses it. Consider a stack of single-use paper guest towels, or have a basket of fresh cloth towels ready to be swapped out halfway through the night. Ensure the hand soap dispenser is full; nothing kills the mood like a guest having to water down the dregs of the soap bottle. Check the toilet paper supply. Do not force your guest to root through your vanity cabinets in a panic. A spare roll should be visible and accessible, perhaps in a basket on the tank or a designated holder. Finally, wipe the faucet and the mirror one last time with a microfiber cloth to remove any water spots. That gleam of chrome suggests a level of cleanliness that reassures the guest. Kitchen In the kitchen, the goal of the final touch is to defend your workspace. The kitchen is a magnet; guests will inevitably gravitate toward the island or the counters where you are trying to plate food. To manage this, you must clear the decks. Remove any appliance that is not essential for the party. The toaster, the blender, and the coffee maker (unless coffee is being served) should be stowed away to maximize surface area. Empty the dishwasher and the trash can completely before the first doorbell rings. You will need an empty dishwasher to hide dirty prep dishes quickly as the party starts, and you will need a completely empty trash bin to accommodate the disposable plates and napkins of the evening. If the trash is already half-full of your prep waste, it will overflow within an hour. Set up a “drinks station” away from the main cooking area. By placing the wine, beer, and water glasses on a sideboard or a table in the living room, you physically draw the

Final Touch: How to Curate the Perfect Atmosphere for New Year’s Eve Read More »

The house needs cleaning after the Christmas party.

Removing Glitter from Upholstery: The Best Hacks for a Sparkle-Free Sofa

The Morning After the Party: Assess the Damage Honestly The winter sun on the morning of December 26 illuminates what the season hid. The sofa glitters where an ornament burst, the floor is a mosaic of fallen pine needles, and the rug near the dining table hides a solidified patch of turkey gravy. Restoring the house from this beautiful chaos is a triage operation: prioritize what causes permanent damage, then clear the rest. For a seasonal reset that covers every room, our deep cleaning service handles the heavy lifting. Removing Glitter from Upholstery Without Losing Your Mind Glitter clings to fabric through static electricity, which is why dry dusting fails: wiping a dry cloth charges the particles further, so they jump to vertical surfaces or stick to your clothes. On hard surfaces, use a damp microfiber cloth; moisture neutralizes the charge and adds weight so the particles lift instead of scattering. On a sofa or carpet, the trouble is deeper: vacuuming misses glitter trapped at the base of the pile. Press a ball of children’s play dough, or a wad of masking tape, into the sparkled area; the glitter adheres to the compound more readily than to the fibers. A lint roller is faster across large areas but slightly less precise. Tackle glitter immediately: left alone it migrates into HVAC vents and circulates for months. A simple toolkit makes the sparkle manageable: A lint roller for fast passes over large cushion surfaces. Play dough or masking tape pressed into the pile to lift charged particles. A damp microfiber cloth, which neutralizes static on hard surrounds like coffee tables. Pine Needles: Put Down the Broom By the 26th the tree is dropping hundreds of resin-coated needles. Sweeping is a tactical error: broom bristles flick them into the air or drive them deeper into grout and rug weave, and the sap smears into sticky streaks that attract dirt. Work on your hands and knees with a vacuum hose and crevice tool instead, and do not run the upright beater bar over needles, which jam the mechanism and burn out the belt. On upholstery, wrap duct tape sticky-side out around your hand and pat the cushions. For sap on hardwood, water does nothing; rubbing alcohol or hand sanitizer on a microfiber cloth dissolves it instantly. Holiday Food Stains: The Triage Table Needles and glitter are annoyances, but food stains are a structural threat to textiles. Each type needs a different first move. Stain Do this first Never do this Gravy Scrape solids with a dull knife, mound baking soda over the spot for 15 minutes to pull the fat out, vacuum, then blot with lukewarm water and clear bleach-free dish soap Scrub with hot water, which cooks the protein and sets the stain, or skip the powder and go straight to water, which locks the grease in Red wine Blot immediately with a clean white cloth, pour club soda on the spot and keep blotting; if pigment remains, use one part white vinegar to two parts water with a drop of dish soap Rub, which untwists fibers into permanent blooming, or pour white wine on it, which adds sugar that turns sticky and gray Candle wax Let it harden or speed it up with ice, then shatter and scrape up the chunks and vacuum; melt residue by running a low, no-steam iron over a brown paper bag, moving the paper frequently Wipe hot wax, which smears oil deeper; iron synthetic carpets without testing an inconspicuous spot first Cranberry sauce and chocolate Remove solids, treat cranberry with cool water and vinegar, and chocolate with cold water before an enzyme cleaner digests the cocoa butter and milk proteins Use hot water on fruit dyes, which sets them Do Not Forget the Walls or the Guest Bathroom A magic eraser sponge handles scuffs gently on painted walls; for food splashes, warm water with dish soap beats anything harsher. For product safety context, Health Canada’s household products guidance covers how to choose cleaners responsibly. Then disinfect the powder room high-touch points: flush handle, faucet taps, and doorknob have been touched by every guest. Per CDC cleaning and disinfecting guidance, the surface must stay wet for several minutes before the chemicals actually kill viruses, a detail a quick wipe skips entirely. Glitter and Holiday Mess FAQ Why can I still see glitter after vacuuming the sofa? Suction alone cannot beat static. Vacuum first for the loose layer, then press play dough or masking tape into the pile to pull out charged particles. Can I wash a glitter-covered throw rug in the machine? Shake and tape it outside first to remove loose sparkle, then wash cold. Run the cycle again if glitter remains. Is club soda really better than white wine on red wine? Yes. Carbonation lifts dye particles to the surface without adding sugar that will turn sticky and gray in the carpet. How long do disinfectants need to sit on surfaces? As the CDC notes, the surface must remain visibly wet for several minutes. Read the label’s dwell time and do not wipe early. When Triage Stops Being Enough None of this is easy when your energy is already spent. Post-party cleanup means bending and scrubbing at the moment you would rather enjoy break, and resetting an entire house from Christmas chaos to January calm is a massive undertaking worth delegating. Toronto Shine Cleaning brings industrial extraction that pulls glitter from carpet and professional products that degrease the kitchen after weeks of hosting. Book through our pricing page, keep the year tidy with a regular cleaning plan, or call (647) 424-0355 and let reinforcements handle the hangover.

Removing Glitter from Upholstery: The Best Hacks for a Sparkle-Free Sofa Read More »

Enzyme Cleaner

5 Common Mistakes That Render Your Enzyme Cleaner Useless

In the world of cleaning, there is a constant arms race between the mess and the method. For decades, the dominant strategy has been chemical warfare: using harsh solvents, high-alkaline degreasers, and corrosive bleaches to burn, dissolve, or bleach stains into submission. While these methods are effective for many surface-level issues, they often fail when it comes to the most persistent and unpleasant biological messes. The smell of pet urine that returns on a humid day, the grime in the grout lines that never seems to whiten, or the lingering odor in a drain are all symptoms of organic matter that standard chemicals cannot remove. The solution to these problems is not found in a stronger acid or a harsher solvent, but in biology. Enzyme cleaners represent a fundamental shift in how we approach hygiene, utilizing the power of nature to digest dirt rather than simply wiping it away. How Does it Work? To understand why enzyme cleaners are unique, one must understand what they are composed of. These cleaners are bio-enzymatic formulations. They contain beneficial bacteria along with enzymes. The bacteria are the workers, and the enzymes are the tools they produce. When you spray an enzyme cleaner on a stain, the bacteria remain dormant until they hit a food source-the stain. Once activated, they produce enzymes to break down complex molecules into smaller, simpler pieces. For example, a protease enzyme breaks down proteins (like blood or meat), a lipase enzyme breaks down fats and oils (grease), and an amylase enzyme breaks down starches. The bacteria then consume these broken-down particles, converting them into carbon dioxide and water. Essentially, the cleaner literally eats the stain until it is gone. Animal Urine The most famous and arguably most critical application for enzyme cleaners is in the realm of pet ownership. Anyone who has house-trained a puppy or cared for an aging cat knows the nightmare of urine stains. Urine is composed of urea, urochrome, and uric acid. Standard detergents and water can wash away the urea and urochrome, which removes the sticky texture and the yellow color. However, uric acid forms crystals that are nonsoluble in water and bond tightly to surfaces like carpet fibers, wood, and concrete. Traditional cleaners might mask the smell temporarily with perfume, but they leave the uric acid crystals behind. When the humidity rises or the area gets wet again, these crystals re-hydrate and release strong ammonia gas, bringing the smell back. This signals to the pet that this spot is a “bathroom,” encouraging repeat offenses. Enzyme cleaners specifically formulated with uricase are the only way to break down these crystals permanently. The enzymes digest the uric acid structure, eliminating the source of the odor completely rather than just covering it up. Beyond pet messes, enzyme cleaners are the secret weapon for bathrooms. The pink or orange slime that accumulates in shower corners and around drains is a biofilm-a colony of bacteria that feeds on soap scum and body oils. Because grout is porous, this biofilm can root itself deep into the cement, making it reachable only by scrubbing until your knuckles are raw. Enzyme cleaners work differently. When applied to grout and allowed to sit, the enzymes seep into the pores. They break down the protein and fat structures of the soap scum and body oils that bind the dirt to the tile. Over time, this biological action loosens the grime so it can be easily rinsed away. It is a slower process than using bleach, but it is far more effective at removing the root cause of the discoloration without damaging the grout sealant or etching the tile. Grease The kitchen is another arena where enzymes shine, particularly in the battle against grease. Grease traps and kitchen drains are notoriously difficult to maintain because fat hardens as it cools, coating pipes and causing slow drainage. Chemical drain openers rely on heat and caustic reactions to burn a hole through the clog, which can damage old plumbing and is dangerous to handle. Enzyme drain maintainers are a safer, preventative alternative. When poured down the drain, the lipase enzymes coat the inside of the pipe and slowly digest the organic buildup. They turn the hard grease into water-soluble liquid that flushes away. While they won’t clear a solid hair clog instantly like a snake would, regular use keeps the pipes flowing freely and eliminates the rotting food smell that often rises from the sink. Laundry is perhaps the most undervalued use case for these biological cleaners. Many organic stains-blood, sweat, grass, and baby formula-are protein-based. Hot water and standard detergent can actually “cook” these proteins, setting the stain into the fabric permanently. Cold water and an enzyme soak are the antidote. The enzymes locate the protein strands woven into the fabric and snip the chemical bonds holding them to the cloth. This is why many high-end laundry detergents now boast “bio-active” ingredients. For athletic wear that retains the smell of sweat even after washing, an enzyme soak is often the only way to remove the body oils trapped in the tight synthetic weave of modern performance fabrics. Dwell Time However, the effectiveness of enzyme cleaners comes with a specific set of rules that differs from traditional cleaning. The most important variable is time. In the cleaning industry, this is known as “dwell time.” Unlike a spray-and-wipe glass cleaner, enzymes need time to eat. If you spray a urine stain and wipe it up ten seconds later, you have accomplished nothing. The bacteria need hours, sometimes even days, to fully digest a deep stain. For a carpet stain, the instruction is often to saturate the area-soaking it all the way down to the pad-and then cover it with a damp towel to keep the area moist. Enzymes stop working if they dry out. The bacteria need a moist environment to survive and reproduce. By keeping the stain wet and covered, you allow the colony to expand and consume the waste until the food source is

5 Common Mistakes That Render Your Enzyme Cleaner Useless Read More »