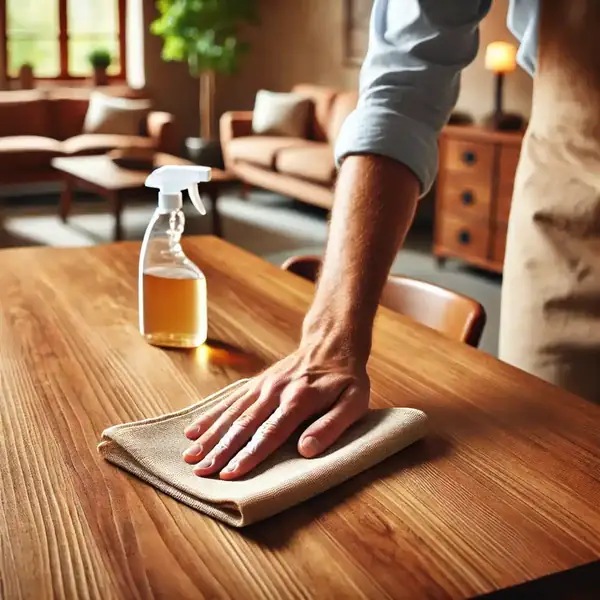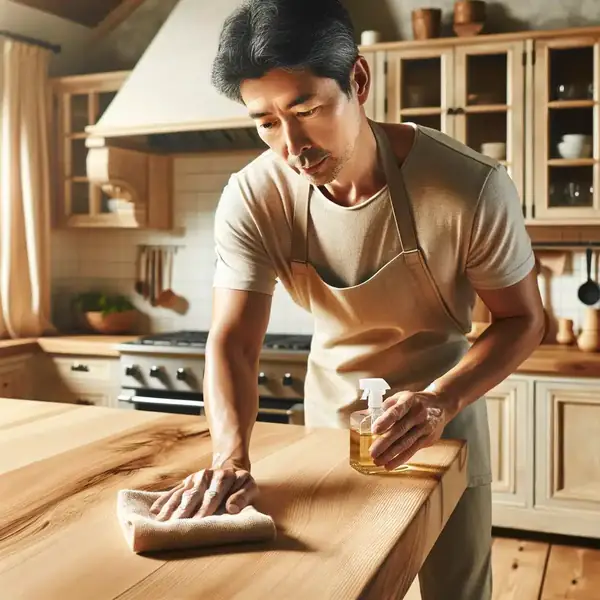
Furniture Cleaning

cleaning basket

7 Key Areas to Focus on for a True Deep Clean

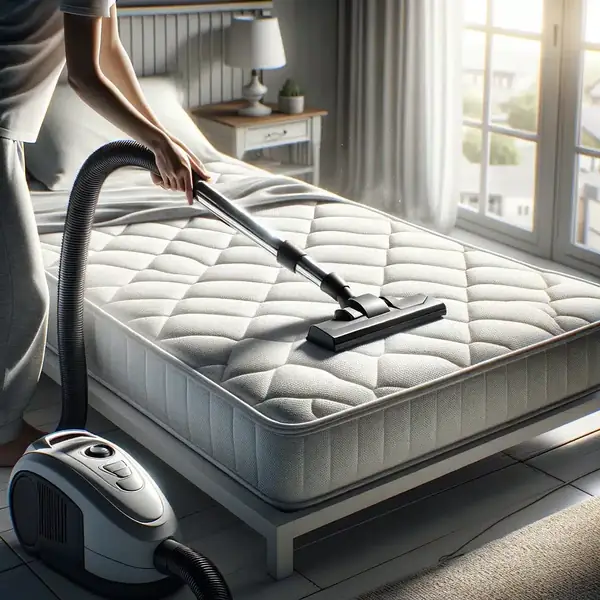
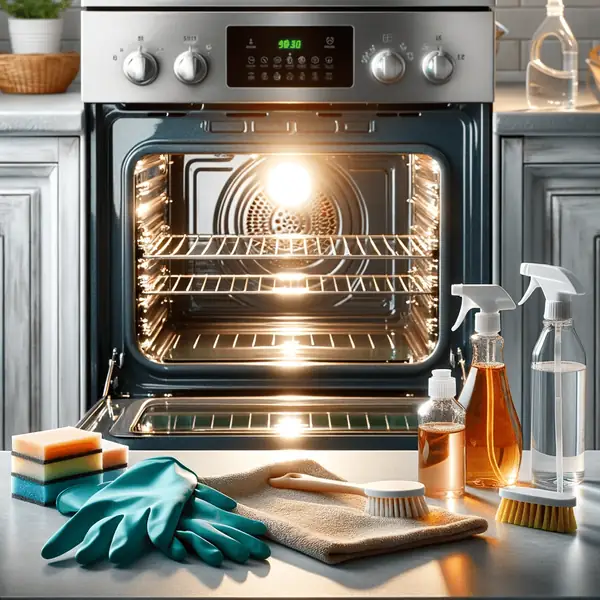
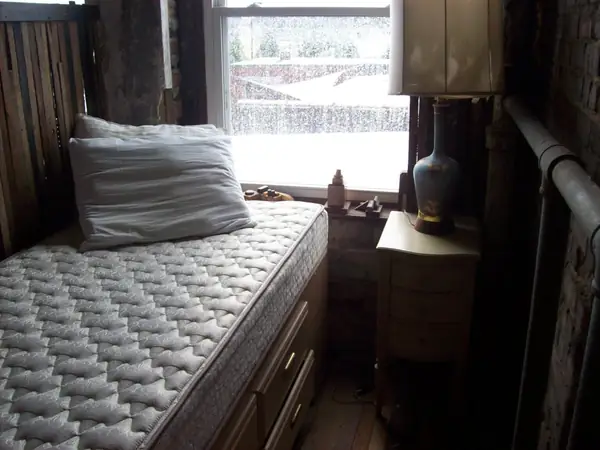
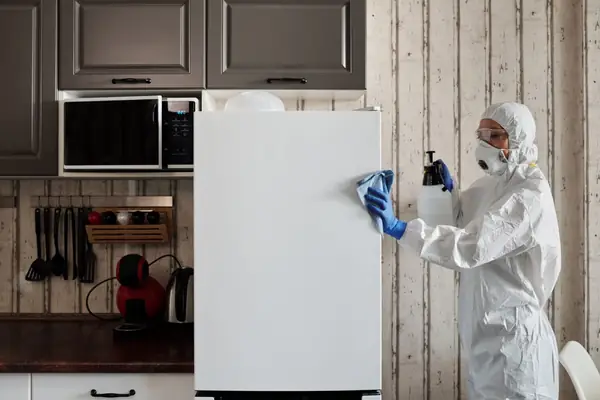
All areas of your well-maintained home are often perceived through the lens of their daily upkeep. We wipe the counters, sweep the floors, and tidy the living room, creating a surface-level impression of cleanliness. This routine is essential for staving off daily chaos, but it is not the same as a true, deep clean. A deep clean is a more methodical and far-reaching process, a restorative act that targets the accumulated grime in the forgotten, neglected, and hard-to-reach areas of a home. It is in these overlooked spaces that dust, grease, and germs build up over time, contributing to poor air quality, unpleasant odors, and a general sense of dinginess that a simple surface wipe cannot erase. The Kitchen The kitchen is the undisputed epicenter of this hidden grime. It is a high-traffic, high-use environment where the byproducts of cooking—grease, steam, and food particles—settle on every conceivable surface. A routine clean addresses the countertops and sink, but a deep clean starts from the top down. The space above your upper kitchen cabinets is a notorious trap for a sticky, greasy film of dust. Out of sight and out of mind, this area accumulates a thick layer of grime that can contribute to kitchen odors and circulate dust throughout the room. A deep clean involves carefully clearing this space and using a powerful degreasing solution to cut through this stubborn layer, restoring a clean surface that no longer sheds dust onto the rest of your kitchen. 1.Oven The appliances themselves are a collection of deep cleaning challenges. The oven, a workhorse of the kitchen, gradually develops a blackened, carbonized layer of burnt-on food and grease. This is not just unsightly; it can smoke during cooking and affect the taste of your food. A deep clean goes beyond wiping the door; it involves a full interior restoration, often using a paste of baking soda and water left to dwell overnight to soften the carbonized layers, followed by a thorough scraping and wiping to reveal the clean enamel beneath. Similarly, the refrigerator requires more than just wiping up a spill. A true deep clean means removing every single item, taking out all the shelves and drawers, and washing them separately in hot, soapy water. The interior walls of the fridge should be wiped down to remove sticky residues and bacteria. 2.Appliances The spaces behind and underneath your major kitchen appliances are some of the most shocking areas to address during a deep clean. Pulling the refrigerator out from the wall will often reveal a startling landscape of dust bunnies, lost food items, and a thick layer of grime on the floor and walls. The refrigerator’s condenser coils, usually located at the back or bottom, are magnets for dust and pet hair. When these coils are clogged, the refrigerator has to work harder to stay cool, wasting energy and shortening the lifespan of the appliance. A deep clean involves vacuuming these coils clear. The same principle applies to the stove. The floor underneath and the wall behind it are catch-alls for splattered grease and fallen food. A thorough degreasing of these hidden surfaces is a quintessential deep cleaning task, as are the often-forgotten kick plates or toe kicks at the very bottom of your cabinets. Bathroom 1.Grout Lines The bathroom is another area where a deep clean is essential for both aesthetics and hygiene. Routine cleaning focuses on the visible surfaces of the toilet, sink, and shower, but the deep-seated grime lies elsewhere. The grout lines between floor and wall tiles are porous and readily absorb soap scum, dirt, and mildew, leading to discoloration. A deep clean involves a meticulous, hands-on scrubbing of every grout line, often with a specialized cleaner and a stiff-bristled brush, to restore its original color. The showerhead itself is a prime target. Over time, mineral deposits from hard water clog the small nozzles, reducing water pressure and creating an ideal environment for bacteria to grow. A deep clean involves unscrewing the showerhead and soaking it in a vinegar solution or, for a simpler method, filling a plastic bag with vinegar and securing it over the showerhead to soak overnight, dissolving the mineral buildup. 2.Toilet The toilet, while a focus of regular cleaning, has its own hidden areas. The base of the toilet, where it meets the floor, and the wall directly behind it are notorious for accumulating dust and unpleasant organic matter. The plastic caps covering the floor bolts are another forgotten spot that needs to be removed and cleaned. The bathroom exhaust fan is a critical but almost universally neglected component. Its cover becomes caked with a thick layer of dust, which not only looks terrible but severely impairs its ability to vent moisture, leading to a higher risk of mold and mildew growth. A deep clean requires removing this cover, washing it thoroughly, and vacuuming the fan blades and housing itself. The overflow hole in the sink basin is another small but important detail, which can be cleaned with a small bottle brush to remove the slimy buildup that contributes to odors. Living Areas 1.Fabrics Moving into the living areas and bedrooms, the primary enemy is dust and the allergens it contains. A routine clean might involve a quick pass with a vacuum, but a deep clean goes much further, starting with the textiles. Curtains and drapes act as giant air filters, trapping an enormous amount of dust, pollen, and pet dander over the winter months. A deep clean involves taking them down and laundering or dry-cleaning them according to their care instructions. Upholstered furniture requires a similar approach. This means removing all the cushions and using a vacuum’s crevice tool to get deep into the seams and under the frame, where years of crumbs, dust, and lost items accumulate. 2.Mattress The mattress is perhaps the most important yet most neglected item to deep clean in a bedroom. We spend a third of our lives on it, shedding dead skin cells that feed a population of

7 Key Areas to Focus on for a True Deep Clean Read More »

Sodium Percarbonate

6 Genius Ways to Use Sodium Percarbonate in Your Cleaning Routine

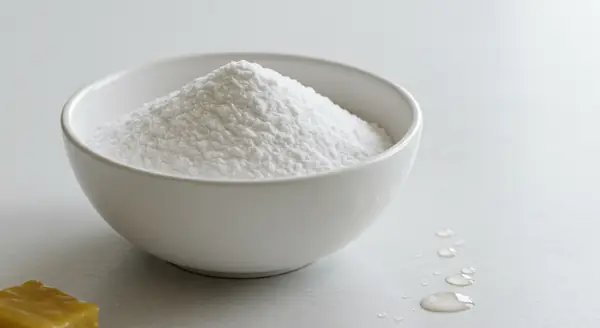
What is Sodium Percarbonate? In the realm of household cleaning, there exists a quiet, unassuming white powder that possesses a truly remarkable power to whiten, brighten, and remove stubborn organic stains. It is not chlorine bleach, with its harsh, corrosive nature and toxic fumes. It is sodium percarbonate, a compound that, when introduced to water, performs a simple and elegant act of chemistry, releasing the cleaning and brightening power of oxygen. This is the ingredient behind the products often marketed as “oxygen bleach,” and understanding its properties unlocks a versatile, effective, and significantly safer way to tackle some of the most persistent cleaning challenges in a home. What is Sodium Percarbonate? At its core, sodium percarbonate is a solid, granulated form of hydrogen peroxide, stabilized with sodium carbonate, also known as soda ash or washing soda. In its dry, powdered state, it is completely inert. The magic begins when it is dissolved in water, particularly hot water. The heat and moisture act as a catalyst, breaking the compound down into its two components: hydrogen peroxide and sodium carbonate. The sodium carbonate is a powerful water softener and cleaning agent in its own right, helping to break down grease and oils. The hydrogen peroxide is where the “oxygen bleach” action comes from. It works as a powerful oxidizer. This means it chemically breaks down the molecules that give organic stains—like coffee, tea, red wine, grass, and blood—their color, effectively making them colorless and allowing them to be easily washed away. Unlike chlorine bleach, which can damage fabric fibers and cause yellowing over time, this process is far gentler on most textiles while being incredibly tough on stains. 1.Whitening The most common and celebrated application for sodium percarbonate is in the laundry room. It is a true champion for restoring dingy whites and brightening light-colored fabrics that have become dull and lifeless. For a general whitening and brightening boost, you can simply add two to three tablespoons of the powder directly to the drum of your washing machine along with your regular detergent. For this method to be most effective, you must use a warm or, preferably, hot water cycle. The heat is essential for fully activating the compound and releasing the maximum amount of oxygen. 2.Stubborn Stain For more targeted and stubborn stain removal, the pre-soak method is unparalleled. This is where the true power of oxygen bleach is revealed. To pre-soak a stained garment, dissolve one to two tablespoons of sodium percarbonate for every gallon of the hottest water the fabric can safely tolerate. It is crucial to dissolve the powder completely in the hot water before adding the garment. Submerge the stained item in this solution and let it soak. The required dwell time can range from one hour for lighter stains to a full eight hours, or even overnight, for deeply set-in, stubborn stains. You will often see the water change color as the stain is lifted from the fabric. After the soak, simply remove the garment, wring it out gently, and launder it as you normally would. This method is incredibly effective for rescuing stained baby clothes, yellowed pillowcases, and dingy dish towels, restoring them to a brightness that regular washing alone cannot achieve. 3.Ceramic and Teacups The wonders of sodium percarbonate extend far beyond the laundry room and into the kitchen, where it can tackle a host of stained and grimy surfaces. One of its most satisfying uses is on ceramic mugs and teacups that have developed a stubborn brown film from years of coffee and tea. To restore them, place one to two teaspoons of the powder in the bottom of the stained mug, then carefully fill it with boiling water. The solution will begin to fizz gently as the oxygen is released. Let it sit for at least thirty minutes. When you pour it out, the brown stains will have vanished, leaving the interior sparkling clean with no scrubbing required. 4.Kitchen Items This same principle can be applied to other kitchen items. Stained plastic cutting boards can be revived by making a paste of sodium percarbonate and a little hot water. Scrub this paste into the surface, let it sit for twenty minutes, and then rinse it clean. It will lift stains from things like berries and tomato sauce while also deodorizing the board. For burnt-on food on stainless steel or ceramic bakeware, a long soak is the answer. Place the dish in a sink, sprinkle it liberally with the powder, and carefully fill it with boiling water. Let it soak for several hours, and the carbonized food that once required intense scraping will soften and lift away with ease. It can also be used to clean and de-gunk the inside of a stained thermos or coffee carafe, following the same soak-and-rinse method as for mugs. 5.Tile Grout In the bathroom, sodium percarbonate is an excellent tool for deep cleaning tile grout. Grout, being porous, easily absorbs soap scum, dirt, and mildew, leading to discoloration. To clean it, create a thick paste of sodium percarbonate and hot water. Apply this paste directly to the grout lines with an old toothbrush or a small brush. Let it sit and work for at least thirty minutes, keeping it moist by occasionally spritzing it with a little water if needed. After the dwell time, scrub the grout lines vigorously with the brush and then rinse the entire area thoroughly with clean water. The oxidizing action will lift the grime from the pores of the grout, leaving it visibly lighter and cleaner. This method is also fantastic for cleaning and whitening shower curtains that have developed mildew spots. A long soak in a hot solution of sodium percarbonate in a tub or large basin can restore them completely. 6.Mildew, Moss, and Algae The power of this compound is not confined to the indoors. It is a highly effective and environmentally friendly cleaner for outdoor surfaces as well, particularly for removing mildew, moss, and algae from wooden decks,

6 Genius Ways to Use Sodium Percarbonate in Your Cleaning Routine Read More »

garage

The Garage Swap: How to Organize Your Space for the New Season

The garage, over the long winter months, inevitably devolves into a state of organized chaos. It becomes a messy, functional holding zone for the tools of the season: snow shovels lean in dusty corners, half-empty bags of salt and sand leave a gritty film on the floor, and the snowblower sits sentinel, waiting for a storm that has now passed. As spring finally asserts itself, the garage requires a fundamental reset. This is more than just a simple tidying; it is a strategic swap-out, a reclamation of space designed to transition the garage from a winter service station into an efficient launchpad for the warmer, more active months ahead. Total Empty-out The most effective, and admittedly most daunting, first step in this process is a total empty-out. To truly reclaim and reorganize the space, you must first see the space. On a clear, dry day, dedicate the time to pull every single item out of your garage and onto the driveway. Every tool, every bin, every bicycle must be removed. This may seem like an extreme measure, but it is the only way to get an honest assessment of what you own, what you need, and the true condition of the garage itself. It creates a blank canvas, a rare opportunity to deep clean and re-envision the layout from the ground up. With the garage completely empty, the second phase begins: the deep clean. The winter leaves behind a specific kind of mess, dominated by road salt, gravel, and sand that has dripped off your vehicle or been tracked in on boots. This gritty residue is not just unsightly; it is abrasive, can damage the concrete floor over time, and is easily tracked into your home, where it can scratch hardwood floors. Begin with a heavy-duty push broom, starting at the back wall and systematically sweeping all the loose debris towards the main garage door. A leaf blower can make short work of this initial pass. Once the loose grit is gone, it is time to address the fine, chalky film of salt. The best way to do this is to hose down the entire floor. Use a nozzle to create a firm spray and work from the back to the front, pushing all the dirty water out onto the driveway. A large floor squeegee is an invaluable tool here, making the process faster and more effective. While the floor dries, take the opportunity to knock down any cobwebs from the corners and ceiling, and wipe down any shelving, workbenches, or cabinets that have accumulated a layer of winter dust. Keep, Donate, Sell or Discard? Now, with a clean and empty space, turn your attention to the collection of items on your driveway. This is the time for a ruthless sort and purge. Create three distinct zones: one for items to keep, one for items to donate or sell, and one for items to discard. Be practical and honest. If a tool is broken beyond repair, get rid of it. If you have five of the same screwdriver, keep the best two and donate the rest. Be especially critical of old paint cans, expired chemicals, and miscellaneous hardware you have not used in years. Remember to check with your local municipality for the proper disposal procedures for hazardous materials like paint and automotive fluids. Reducing the sheer volume of stuff is the single most effective way to make organizing the remainder a manageable task. Storage With your inventory edited down, the next phase is the strategic storage of the winter gear. These are tools you will not need for at least six months, so they can be relegated to the less accessible, “deep storage” areas of your garage. First, clean the tools themselves. Wipe down your snow shovels to remove any salt residue that could cause corrosion. The same goes for your snowblower. Wiping down its metal and plastic surfaces will protect it from rust and degradation. It is also crucial to perform some basic end-of-season maintenance on the snowblower. This typically involves either running the engine until the gas tank is completely empty or adding a fuel stabilizer to the remaining gasoline. This prevents the gas from gumming up the engine components over the summer, ensuring it will start easily next winter. Once prepped, store the snowblower in a back corner or against a wall where it will not be in the way. Shovels, ice scrapers, and other long-handled winter tools are best stored off the floor. Simple wall-mounted hooks or a dedicated rack will keep them organized and out from underfoot. Finally, address the bags of salt and sand. Open bags are messy and can absorb moisture from the humid summer air, causing the salt to clump. Pour any remaining salt or sand into a heavy-duty plastic bin with a secure, airtight lid. This will keep it dry, contained, and ready for the first frost of next season. Spring Equipment Now, with the winter equipment safely stored, the final and most satisfying phase begins: organizing your spring and summer gear for maximum accessibility. The key here is to think in terms of zones and frequency of use. The items you will use most often—the lawnmower, a specific bicycle, your primary gardening tools—should be placed in the easiest-to-reach locations. Wall space is your most valuable asset in a garage. Get as much as you can off the floor. A wall-mounted rack for long-handled gardening tools like rakes, hoes, and shovels is a game-changer. It keeps them organized, visible, and prevents them from becoming a tangled mess in a corner. A pegboard system is perfect for smaller hand tools like trowels, cultivators, and pruning shears, giving every item a designated home. Your lawnmower is a bulky item that will be used weekly. Designate a clear, unobstructed spot for it close to the garage door so you can easily wheel it in and out. This is also a good time to perform its pre-season maintenance: sharpening the blade, changing the

The Garage Swap: How to Organize Your Space for the New Season Read More »

Remove Nail Polish from Any Surface

6 Tips How to Remove Nail Polish from Any Surface

A spilled bottle of nail polish is a moment of pure, heart-stopping panic. That small bottle contains a viscous, intensely pigmented lacquer designed to be durable, hard, and resistant to chipping—all the properties that make it a formidable and terrifying opponent when it lands on your carpet, your wooden floor, or your favorite piece of clothing. Removing a nail polish stain is not like treating a simple food or drink spill; it is a delicate chemical operation that requires patience, precision, and a clear understanding of the interaction between the solvent and the surface. Acting rashly with the wrong product or technique can spread the stain, dissolve the material underneath, and turn a small accident into a permanent disaster. Be Quick Before attempting any removal, there are several golden rules that must be observed. The first and most critical is to act as quickly as is safely possible. Wet nail polish is significantly easier to deal with than polish that has dried and hardened, bonding to the fibers of a fabric or the finish of a floor. Second, your instinct will be to scrub, but you must resist. The correct technique is always to blot, not rub. Rubbing or wiping a wet spill will only smear the polish over a larger area, pushing it deeper into the material and making the problem exponentially worse. Third, regardless of the surface, you must always perform a spot test with your chosen cleaning agent on a hidden, inconspicuous area first. The solvents powerful enough to dissolve nail polish are also powerful enough to dissolve dyes, finishes, and even the fibers of the material itself. Testing on the inside of a hem, a patch of carpet inside a closet, or the underside of a piece of furniture is a non-negotiable step that can save you from irreversible damage. Finally, ensure you are working in a well-ventilated area. Nail polish removers, particularly those containing acetone, produce strong fumes that can be irritating and flammable. The primary weapon in this battle is nail polish remover itself, but it comes in two main forms: acetone-based and non-acetone. Acetone is a powerful, aggressive solvent that is highly effective at dissolving polish quickly. However, it is also highly destructive to many surfaces, including certain plastics, synthetic fabrics like acetate, and virtually all wood finishes. Non-acetone removers are gentler and safer for a wider range of materials, but they work more slowly and may not be powerful enough for a heavy, set-in stain. The wise approach is to always begin with the gentlest method—a non-acetone remover—and only escalate to acetone if necessary, and only after a successful spot test. Surfaces 1.Porous and Delicate Let us begin with the most challenging scenarios: porous and delicate surfaces. If you spill nail polish on a wooden floor or piece of furniture, your first instinct must be to keep the acetone bottle far away. Acetone will strip the lacquer, varnish, or polyurethane finish from wood almost instantly, leaving a permanent, cloudy scar that will require professional refinishing to repair. The correct approach here is a careful and methodical one. If the polish is still wet, gently dab at the very center of the spill with a paper towel to absorb the excess, being extremely careful not to spread the puddle. For dried polish, do not scrape with a metal tool, which will scratch the wood. Instead, try a gentler solvent. Denatured alcohol is a good option. Apply a small amount to a cotton swab and gently dab at the polish, working from the outside edges of the stain inward. You should see the polish begin to dissolve and transfer to the swab. A surprising but effective alternative is aerosol hairspray, which contains solvents that can break down the lacquer. Spray a small amount onto the stain, let it sit for twenty to thirty seconds, and then gently wipe it away with a soft cloth. After using any solvent, you must immediately clean the area with a cloth dampened with a mild soap and water solution to neutralize the solvent, then wipe it completely dry. 2.Carpets Carpet is another common victim of nail polish spills and requires a multi-step, patient approach. First, if the spill is wet, use a spoon or the dull edge of a butter knife to gently scoop up as much of the excess polish as possible. Then, blot the remaining stain with a clean, dry paper towel. Next, begin the solvent treatment. Start with a non-acetone remover. It is crucial that you never pour the remover directly onto the carpet, as this will soak through to the backing and can dissolve the latex that holds the carpet together. Instead, apply a small amount of the remover to a clean, white cloth. Dab the stain with this cloth, again, working from the outside in to prevent the stain from spreading. As the polish transfers to your cloth, continuously move to a clean section of the cloth to avoid redepositing the stain. You will need to repeat this blotting process many times. If the non-acetone remover is not working, you can escalate to acetone, but only after you have tested it on a hidden piece of carpet to ensure it does not cause discoloration or melt the fibers. Once the polish has been lifted, the job is not done. You must now remove the solvent from the carpet fibers. To do this, blot the area with a new cloth dampened with plain, cool water. At the end, clean the spot with a solution of a few drops of clear, non-bleach dish soap mixed in a cup of water to remove any lingering residue from both the polish and the remover. Finish with a final “rinse” by blotting with a water-dampened cloth, and then dry the area by piling a thick stack of clean, dry paper towels on the spot and weighing them down with something heavy for several hours to wick all the moisture out of the carpet and padding. 3.Upholstery The

6 Tips How to Remove Nail Polish from Any Surface Read More »

different types of erasers

Erasers in Cleaning: 7 Genius Tricks for Cleaning Your Home with an Eraser

Where does eraser fit into this? In the vast world of cleaning materials, filled with specialized sprays, powerful scrubs, and high-tech gadgets, one of the most effective and precise tools is often overlooked, relegated to the pencil case or a dusty desk drawer: the simple eraser. This humble instrument, designed to lift graphite from paper, possesses a unique set of properties that make it a surprisingly versatile and powerful secret weapon for tackling some of the most frustratingly stubborn messes around the home. The wonder of the eraser lies not in brute force, but in its gentle, targeted friction, allowing for a level of control and precision that larger tools simply cannot match. Melamine Foam Eraser The most famous and transformative of these tools is, of course, the melamine foam eraser, more commonly known by its brand name, the Magic Eraser. While it shares a name and function with its rubber counterparts, it is a completely different entity. A melamine foam eraser is not a chemical cleaner; it is a micro-abrasive. The foam itself is a unique, open-cell structure that, when wet, becomes as hard as glass on a microscopic level. It acts like an incredibly fine-grained sandpaper, gently abrading and lifting away surface-level grime and stains. This is the secret to its seemingly magical ability to remove marks that soaps and sprays cannot touch. Its most celebrated use is on painted walls and baseboards. The inevitable scuff marks from shoes, furniture, and daily traffic can make an otherwise clean room look tired and worn. Instead of resorting to touch-up paint, a dampened melamine foam eraser can lift these marks with astonishing ease. The process is simple: lightly wet the eraser and squeeze out all the excess water. The eraser should be damp, not dripping. Then, with very gentle pressure, rub the scuff mark. The mark will literally disappear as the micro-abrasive action lifts the transferred color from the surface of the paint. It is crucial to use light pressure, as scrubbing too hard can begin to remove the paint finish itself, leaving a burnished or dulled patch, especially on glossy or satin paints. This tool is also a parent’s best friend, capable of removing crayon, pencil, and some types of ink marker from walls with the same gentle rubbing motion. The power of melamine foam extends far beyond walls. In the kitchen, it can cut through the thin, sticky film of aerosolized cooking grease that builds up on stovetops and range hoods. It is incredibly effective at removing stubborn, baked-on tea and coffee stains from the inside of ceramic mugs, restoring them to their original pristine white. It can even be used to lift burnt-on food residue from glass bakeware and oven doors. In the bathroom, it is a champion against soap scum, scrubbing away the waxy, cloudy buildup from glass shower doors, tile, and fiberglass tubs where other cleaners have failed. It can even be used to restore the white grout between tiles, lifting the embedded grime with targeted scrubbing. The eraser’s ability to conform to surfaces and get into corners makes it a more effective tool than a simple cloth or sponge for these specific tasks. However, because it is an abrasive, it is critical to know where not to use a melamine foam eraser. You should never use it on delicate, high-gloss surfaces like a car’s paint finish, polished wood furniture, or natural stone countertops like marble and granite, as it can create microscopic scratches that will permanently dull the finish. Always test it on a small, inconspicuous area first if you are unsure. Traditional Rubber While melamine foam is the superstar, the traditional rubber or vinyl eraser—specifically a high-quality white vinyl one—has its own unique and surprising set of cleaning superpowers. Its magic lies not in abrasion, but in its “grippy,” slightly tacky texture. This property makes it the perfect tool for removing one of the most annoying household messes: sticky adhesive residue. After peeling a price tag or label off a new piece of glassware, a book cover, or a plastic item, you are often left with a stubborn, gummy residue that smears when you try to wipe it. A white vinyl eraser works wonders here. By rubbing the eraser over the adhesive, its rubbery texture grabs onto the sticky residue, causing it to ball up and lift cleanly from the surface. Keep rubbing, and the adhesive will roll itself into little clumps that can be brushed away, leaving a clean, non-sticky surface behind without the need for oily solvents. This same principle allows a classic eraser to clean other delicate surfaces. It can be used to lift dirt and scuffs from patent leather shoes and handbags without scratching the high-gloss finish. For suede and nubuck, a special suede eraser or a clean art gum eraser is a classic shoe care tool. Its crumbly texture gently lifts dirt out of the fine nap of the material without the use of water, which would stain and flatten the suede. An eraser can even be used for light cleaning on non-precious metals, lifting grime from the surface of hardware or decorative items. The friction and the grabbing power of the rubber can remove surface-level dirt and smudges from things like brass doorknobs or silver-plated picture frames. The Small Eraser At the end, we must not forget the most precise tool of all: the small eraser on the end of a pencil. Its tiny size makes it perfect for detailed cleaning in areas that are otherwise impossible to reach. It can be used to clean the accumulated grime from the crevices of intricate jewelry or around the clasps of a watch band. It is the perfect shape for getting into the tight corners of window tracks or for cleaning the gunk that builds up around the base of a kitchen or bathroom faucet. The pencil tip provides a level of targeted control that allows you to apply pressure to a very specific, small point, lifting a

Erasers in Cleaning: 7 Genius Tricks for Cleaning Your Home with an Eraser Read More »

dwell time

Why Dwell Time is the Secret to a Truly Clean Kitchen

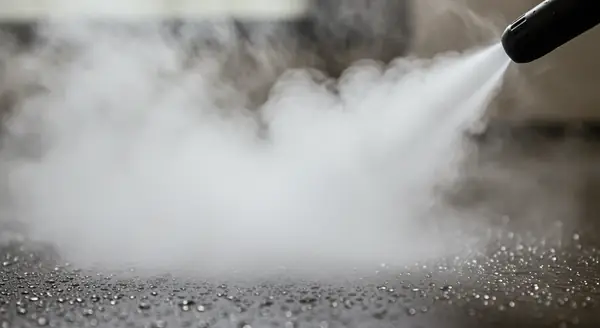
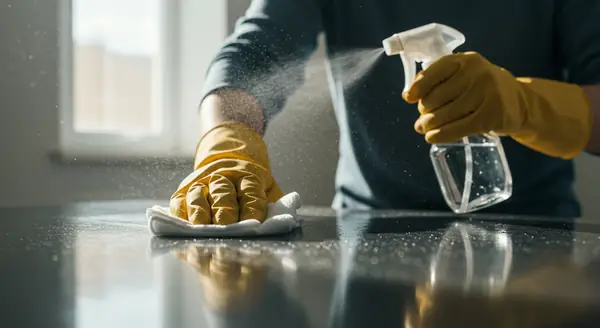
In the world of household cleaning, especially in the demanding environment of the kitchen, we often ignore dwell time and fall into the trap of valuing speed and physical effort above all else. The common instinct when faced with a dirty surface is to spray and immediately wipe, putting faith in the power of “elbow grease” to muscle through the grime. This approach, however, fundamentally misunderstands the science of cleaning. It ignores the single most critical, yet often overlooked, factor in achieving a truly deep and sanitary clean: dwell time. Dwell time, also known as contact time, is the period that a cleaning or disinfecting product must remain wet on a surface to do its job effectively. It is a simple concept with profound implications, transforming cleaning from a battle of force into a strategic process of chemistry, saving time, effort, and ensuring a healthier home. Disinfection and the Breakdown The importance of dwell time is rooted in two distinct chemical processes: disinfection and the breakdown of soils. Let’s first consider disinfection. A kitchen countertop can be a significant hub for bacteria like E. coli and Salmonella, especially after preparing raw meat. When we spray a disinfectant, our goal is not just to wipe away visible dirt, but to kill these unseen pathogens. This process is not instantaneous. Disinfectants work by chemically destroying the cell walls of bacteria and viruses. This chemical assault takes time. Every registered disinfectant product has a specific “kill claim” on its label, which states the amount of time the product must remain on a surface to kill a certain percentage of germs. This can range from thirty seconds to ten minutes or more. If you spray a disinfectant and immediately wipe it dry, you are essentially removing the active chemical agent before it has had the chance to complete its mission. You may have removed some of the germs through the physical act of wiping, but you have not truly disinfected the surface, leaving behind a false and potentially dangerous sense of security. Stubborn and Sticky The second process is the chemical breakdown of grease, food residue, and mineral deposits. Kitchen grime is often stubborn and sticky. The grease that aerosolizes from a frying pan and settles on a stovetop or vent hood is a complex mixture of polymerized fats. The sugary sauce that has boiled over and carbonized onto a cooktop is a hardened, blackened mass. The chalky white film around your sink faucet is a layer of mineral deposits from hard water. Attacking these messes with brute force and scrubbing is an exhausting and often ineffective approach. The surfactants in a degreaser need time to penetrate the layers of grease and emulsify them, breaking them down into smaller, water-soluble droplets that can be easily wiped away. The mild acids in a descaling agent need time to react with and dissolve the alkaline mineral deposits. By spraying a cleaner and giving it a few minutes of dwell time, you are allowing the product’s chemical properties to do the heavy lifting for you, breaking the bonds of the grime so that a gentle wipe, rather than a frantic scrub, is all that is required to remove it. Dwell Time Nowhere is the practical application of dwell time more critical than in the kitchen. Let’s walk through the space to see this principle in action. Consider your countertops after preparing a meal. The correct procedure is a two-step process. First, clean the surface. Use a cloth with warm, soapy water to wipe away all the loose crumbs, food particles, and visible spills. This removes the physical debris that can shield germs from the disinfectant. The second step is to disinfect. Spray the surface with your chosen disinfectant—be it a commercial product or a simple solution of vinegar and water—until it is visibly wet. Then, walk away. Read the product label to determine the required dwell time. Let it sit for that prescribed period, whether it is three minutes or ten. Only after that time has elapsed should you return to wipe the surface dry with a clean cloth or rinse it with water if required. This patient approach is the only way to ensure your food preparation surfaces are hygienically clean. The kitchen sink is often cited as having more bacteria than a toilet bowl, making it a prime candidate for proper disinfection. After scrubbing the basin to remove food particles, you can apply your disinfectant and let it dwell to sanitize the surface. To tackle the mineral buildup around the faucet, soak a few paper towels in white vinegar, wrap them around the base of the faucet and the nozzle, and let them sit for at least thirty minutes. This extended dwell time will allow the vinegar to dissolve the chalky white deposits, which can then be scrubbed away with an old toothbrush, restoring the fixture’s shine. The Stovetop The stovetop is a theater of grease and burnt-on messes. Instead of immediately scrubbing a boil-over, spray it with a quality degreaser or an all-purpose cleaner and let it sit for five to ten minutes. You will often see the hardened mess begin to soften and liquefy as the cleaner penetrates it. A gentle wipe will then remove what would have previously required intense scraping. The same principle applies to the greasy, grimy filter of your range hood. Instead of trying to scrub it in the sink, submerge it in a basin of hot water and a strong degreasing solution and let it soak for at least thirty minutes. This extended dwell time is what allows the hot water and detergent to break down the years of accumulated grease, which will then rinse away with ease. The ultimate testament to the power of dwell time is cleaning a dirty oven. Confronted with a blackened interior coated in carbonized grease, the instinct to scrub is entirely useless. The only effective, non-toxic method relies almost exclusively on an extremely long dwell time. By creating a thick paste

Why Dwell Time is the Secret to a Truly Clean Kitchen Read More »

Deep Cleaning of Your Patio and Deck

Deep Cleaning of Your Patio and Deck: A Small-Space Guide to Spring Preparation

Pre-season cleaning of a communal space such as a patio and outdoor decks is a revitalization ritual. As the last vestiges of winter begin to recede, yielding to the longer days and milder temperatures of early spring, there is a collective, almost primal urge to reconnect with the outdoors. We want to throw open the doors, step onto the patio, and feel the first genuinely warm sun on our faces. However, the space we step into is often a grim tableau of winter’s aftermath. The deck is coated in a grey film of grime, the patio furniture is veiled in a layer of pollen and dust, and the corners are filled with the desiccated leaves and debris of autumn past. The transition from a winter-battered outdoor area to a welcoming spring sanctuary does not happen on its own. It requires a strategic, pre-season clean-up designed to reverse the effects of months of neglect and prepare the foundation for the season of leisure ahead. Complete Cleaning The first order of business in reclaiming your outdoor space is a thorough and uncompromising sweep. Over the winter, even a covered patio or balcony accumulates a surprising amount of debris. Wind blows leaves, twigs, and dirt into corners where they decompose into a dense, muddy sludge. The bristles of a stiff, outdoor broom are required to dislodge this compacted organic matter. This is not just an aesthetic task; leaving rotting leaves against the foundation of the house or the base of wooden deck posts traps moisture and invites insects like carpenter ants to investigate. For decks with gaps between the boards, using a putty knife or a painter’s tool to clear out the debris is essential for promoting airflow and preventing rot from setting in underneath. Once the loose debris is gone, the real work of washing begins. The surfaces of your patio and deck have been subjected to months of precipitation and freeze-thaw cycles, leaving them stained and discolored. The cleaning method must be tailored to the specific material underfoot. For wooden decks, a gentle approach is paramount. The temptation is often to blast the wood with a high-pressure power washer, but this is a common and catastrophic error. The intense force of a power washer can splinter the wood, raise the grain, and strip away the protective sealant, leaving the raw timber exposed to the elements. Instead, a commercial deck cleaner—often an oxygenated bleach formula that kills mildew without the harshness of chlorine—should be applied with a pump sprayer. After allowing the cleaner to dwell and lift the grime, a light scrub with a deck brush and a gentle rinse with a garden hose is all that is needed to restore the color of the wood without causing structural damage. Concrete, Stone Pavers and Balconies Concrete patios, stone pavers, and balconies present a different challenge. These surfaces are porous and can harbor green algae or black mold in shaded, damp areas. For these, a power washer can be an effective tool, provided it is used with a fan-tip nozzle to avoid etching the surface. A solution of water and vinegar can help to kill the biological growth, but for stubborn stains, a specialized masonry cleaner might be required. Pay close attention to the grout or sand lines between pavers; blasting them too aggressively can wash away the jointing material, leading to wobbly stones. Furniture The second phase of the pre-season reset involves the furniture. Patio chairs, tables, and loungers have likely been sitting under a cover or stacked in a corner, accumulating a layer of dust and hosting spider webs. Dragging this furniture out into the sun and giving it a thorough cleaning is essential before it is used. For plastic or resin furniture, a bucket of warm soapy water and a sponge is usually sufficient to remove the winter grime. For metal furniture, particularly wrought iron, this is the time to inspect for rust. If you find spots where the paint has chipped and oxidation has begun, sand them down lightly and apply a coat of rust-inhibiting spray paint. Catching rust early prevents it from spreading and eating through the metal. Cushions and outdoor fabrics should be removed, and if they are machine-washable, laundered to remove mildew and stale odors. If not, a spray-down with a fabric cleaner and a scrub with a soft brush, followed by air-drying in the sun, will refresh them for the season. The barbecue grill, the centerpiece of many outdoor gatherings, requires a deep clean after its winter hibernation. If it was not cleaned properly in the fall, you will likely open the lid to find a grim scene of rancid grease and possibly mold. The grates must be removed and scoured with a grill brush, and the grease trap at the bottom of the unit needs to be emptied and cleaned to prevent a dangerous flare-up during the first cookout of the season. Wiping down the exterior of the grill removes the layer of dust and pollen, restoring its shine and making the entire patio area feel more intentional and cared for. Window At the end, consider the vertical elements of your outdoor space. The glass of the patio doors is likely streaked with water spots and dirt from winter storms. Cleaning both the interior and exterior of this glass is the final touch that visually connects your clean indoor space with your newly revitalized outdoor one. Check the window and door tracks for the same debris that collected on the deck, vacuuming them out to ensure a smooth glide. Wipe down railings, inspect planters for cracks caused by freezing soil, and prepare the space for the new life of spring. The pre-season clean is a ritual of reclamation. It is a physical act that signals the end of indoor confinement and the beginning of outdoor living. It is a laborious but deeply satisfying process that transforms a neglected patch of ground into a functional and beautiful extension of the home. However, the sheer

Deep Cleaning of Your Patio and Deck: A Small-Space Guide to Spring Preparation Read More »

5 Versatile Household Items That Save Time and Money

Managing a household is a masterclass in efficiency, a constant balancing act of time, resources, and energy. The foundation of a well-run home is not an endless collection of specialized gadgets, but a curated arsenal of simple, versatile tools that can tackle a multitude of tasks with unwavering reliability. These are the unsung heroes of daily life, the items that save space, reduce waste, and simplify the endless list of chores that keep a home clean, comfortable, and functional. Embracing this philosophy of versatility is the key to working smarter, not harder. White Vinegar The humble bottle of plain white vinegar is perhaps the most powerful and underestimated tool in any home. Its magic lies in its gentle acidity, which makes it a formidable opponent against a specific category of grime: mineral deposits. In areas with hard water, the chalky, white buildup of limescale is a constant battle. A kettle crusted with mineral scale can be restored to its original shine by simply boiling a solution of equal parts vinegar and water inside it, letting it sit, and rinsing it clean. A showerhead clogged and sputtering from the same mineral deposits can be brought back to life by soaking it overnight in a bag full of vinegar. Its power extends to the laundry room, where a cup added to the rinse cycle acts as a natural fabric softener, breaking down detergent residue and leaving clothes feeling softer without the waxy buildup of commercial softeners. As a cleaner, a 50/50 solution of vinegar and water in a spray bottle is the ultimate streak-free glass and mirror cleaner, outperforming many ammonia-based chemical products. It disinfects countertops, cuts through soap scum on shower doors, and neutralizes odors, proving itself to be a true multi-purpose champion. Baking Soda Just as vinegar is the master of acidic cleaning, its chemical counterpart, baking soda, is the master of alkaline cleaning. This simple white powder is a gentle but effective abrasive and a phenomenal natural deodorizer. Its fine, gritty texture is perfect for creating a cleaning paste to scrub away stubborn food residue from pots and pans or to lift light stains from countertops without scratching the surface. A small dish of baking soda left in the refrigerator or freezer will absorb ambient odors, keeping the space smelling fresh. Sprinkled liberally over a carpet before vacuuming, it can help to lift dirt and neutralize pet or smoke smells that have settled deep within the fibers. For greasy, grimy messes, a sprinkle of baking soda acts as a mild alkali, helping to break down the fatty acids that make up grease, making it easier to wipe away. Its versatility is quiet but profound, a gentle workhorse for a huge variety of cleaning and deodorizing tasks. Microfiber Cloth Moving from consumables to tools, a set of high-quality microfiber cloths is an absolute non-negotiable. They are vastly superior to old cotton rags or disposable paper towels, and their effectiveness is rooted in their scientific design. The fibers of a microfiber cloth are incredibly fine and are split into a star-like shape, creating an enormous surface area. When used dry for dusting, these fibers generate a natural static charge that actively attracts and traps dust particles, rather than just pushing them around as a cotton cloth would. This makes dusting faster, more effective, and actually removes allergens from the home instead of just displacing them. When used damp, the same fine fibers can scrub away grime and absorb spills with remarkable efficiency. They are the key to a streak-free finish on windows, mirrors, and stainless steel appliances. A good set of microfiber cloths, designated for different tasks (e.g., blue for glass, green for general surfaces, yellow for the kitchen), replaces an entire cabinet of disposable wipes and paper towels, making them both an economical and an environmentally friendly choice. Cast Iron Frying Pan In the kitchen, the ultimate versatile tool is a well-seasoned cast iron skillet. In an age of specialized, non-stick pans with limited lifespans, the cast iron skillet is a testament to durability and multi-functionality. It is a single piece of equipment that can sear a steak on the stovetop, be transferred directly into the oven to finish cooking, bake a perfect cornbread or a rustic fruit crumble, and even be used over a campfire. Its ability to get screaming hot and retain that heat evenly is unparalleled. With proper care, which involves simple scraping, rinsing with hot water, and a light application of oil, it develops a natural, non-stick surface called seasoning that only improves with every use. A single cast iron skillet can replace a collection of frying pans, sauté pans, and even some baking dishes. It is an heirloom piece, a tool that performs flawlessly for generations, representing the very essence of buying once and buying well. Building on the principle of durable, multi-purpose cookware, a high-quality Dutch oven, typically made of enameled cast iron, is another indispensable workhorse. While a cast iron skillet excels at high-heat searing and frying, the Dutch oven is the master of slow, moist cooking. It is the perfect vessel for making soups, stews, and braising tough cuts of meat until they are meltingly tender. Its heavy lid seals in moisture and heat, allowing for even, consistent cooking. But its versatility extends far beyond stews. A Dutch oven is one of the best tools for baking artisanal, crusty bread at home, trapping the steam to create a perfect rise and a professional-quality crust. It can be used for deep-frying, for boiling pasta, or for serving a large dish directly at the table, where its excellent heat retention will keep the food warm. It is a single pot that serves as a stockpot, a roaster, a bread cloche, and a beautiful serving dish, embodying the principle of investing in quality pieces that perform multiple functions flawlessly. Sturdy Basket At the end, the simple, sturdy basket is a surprisingly versatile tool for managing the daily ebb and flow of household life. A

5 Versatile Household Items That Save Time and Money Read More »

Spring Wardrobe

Spring Wardrobe: 5 Simple Steps to a Perfectly Organized Spring Wardrobe

The transition from winter to spring is more than just a change in the calendar or wardrobe; it’s a shift in energy, a collective sigh as the world sheds its heavy layers. This same instinct to lighten and refresh should extend to the most personal of our spaces: the wardrobe. For months, it has served as a dark, crowded barracks for bulky sweaters, heavy coats, and thick fabrics. Now, as the days lengthen and the air warms, it is time to perform the essential ritual of the seasonal wardrobe switch. This is not merely a matter of tidying; it is a strategic reorganization that streamlines your daily routine, protects your clothing, and brings a sense of clarity and ease to the act of getting dressed. Emptying the Wardrobe The first and most crucial step in this transformation is the total empty-out. This is a non-negotiable act that sets the stage for all the work to come. You cannot truly assess or organize what you cannot see. Begin by taking every single item out of your wardrobe and drawers. Every shirt, every pair of trousers, every scarf must be removed and placed onto your bed. This may seem like a daunting and chaotic task, but it is the only way to begin with a truly clean slate and to get an honest, unfiltered look at the sheer volume of what you own. As you empty the wardrobe, take a moment to give the now-vacant space a thorough cleaning. Vacuum out the corners to remove dust bunnies and lint, wipe down every shelf and hanging rod with a damp cloth, and clean any mirrors. Starting with a pristine, empty space is a powerful psychological reset. Clothing Selection With your entire wardrobe laid bare, the most difficult and most liberating phase begins: the edit. This is where you must be practical, honest, and sometimes ruthless. The goal is to create a curated collection of clothes that you actually wear and love, rather than a museum of items from your past. As you pick up each individual piece, ask yourself a series of direct questions. Does this fit me properly right now? Have I worn this in the last year? Do I feel confident and comfortable when I wear it? Is it damaged, stained, or worn beyond repair? Based on your answers, sort every item into one of four distinct piles: keep, store for next season, donate, or discard. The “keep” pile is for spring-appropriate items that you genuinely love and will wear. The “store” pile is for your heavy winter essentials—the wool coats, cashmere sweaters, and flannel shirts that have served you well but have no place in the warmer months. The “donate” pile is for items that are still in good condition but no longer serve you, while the “discard” pile is for anything that is irreparably damaged. Be particularly wary of the “maybe” items. If you find yourself agonizing over a piece, place it in a box and seal it. If you have not felt the need to open that box in six months, you have your answer: it is time to donate it. Before you address the winter items destined for storage, focus on the clothes you are keeping for the current season. This is where the strategic organization begins. The fundamental principle is to group like with like. All of your shirts should be together, all of your trousers together, all of your dresses together. This simple act of categorization immediately creates a sense of order and makes finding specific items infinitely easier. You can then take this a step further by sub-categorizing within these groups. For example, within your shirt category, you can group all the t-shirts together, then the blouses, then the button-down shirts. Once your clothes are categorized, the next layer of organization is to arrange them by color. Working from light to dark within each category creates a visually calming and incredibly functional system. When you are looking for a specific white blouse, you will know exactly where to look instead of hunting through a jumble of different patterns and colors. This visual harmony reduces the mental effort of choosing an outfit and transforms your wardrobe from a source of stress into a space of serene order. Hang up the Clothes The tools you use for organization are as important as the system itself. This is the time to invest in a set of matching, high-quality hangers. A mismatched collection of wire hangers from the dry cleaner, chunky plastic hangers, and old wooden ones creates visual chaos and can damage your clothes. Wire hangers can stretch out the shoulders of garments, while bulky hangers eat up valuable rod space. Opt for slim, velvet-flocked hangers. Their slender profile can nearly double your hanging space, and their non-slip surface ensures that wide-necked blouses and silky fabrics stay put instead of sliding onto the floor. As you begin to reintroduce your spring clothes into the clean wardrobe, be strategic about placement. Your wardrobe has prime real estate—the areas at eye level and within easy reach—and less valuable space, like the high top shelves and the low-to-the-ground areas. Your most frequently worn items, such as your go-to jeans, simple t-shirts, and work blouses, should occupy this prime real estate. Items you wear less often, like formal dresses or special occasion jackets, can be placed in less accessible spots. Not everything should be hung. A general rule of thumb is to hang anything that is delicate, prone to wrinkling, or has a structured shape, such as blouses, dresses, jackets, and trousers. Sturdy items and anything that can stretch out under its own weight should be folded. This includes all of your knitwear, t-shirts, and jeans. For drawers, the most effective folding method is file-folding. Instead of stacking folded items on top of one another, you fold them into neat rectangles and “file” them vertically in the drawer, like papers in a filing cabinet. This allows you to see every

Spring Wardrobe: 5 Simple Steps to a Perfectly Organized Spring Wardrobe Read More »

pizza stone clean

How to Make Your Stained Pizza Stone Look and Cook Like New

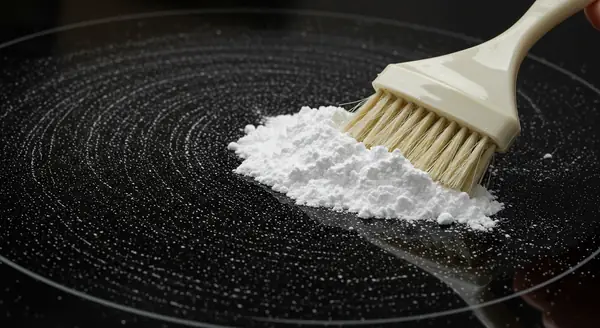
A pizza stone is a transformative tool in any home kitchen, the secret weapon for achieving a crisp, pizzeria-quality crust that a standard metal baking sheet simply cannot replicate. Its magic lies in its material—typically a porous ceramic, cordierite, or clay—which absorbs moisture from the dough and distributes heat with incredible efficiency. This very porosity, however, is the source of much confusion and anxiety when it comes to cleaning. A pizza stone does not behave like a metal pan or a ceramic dish. Its cleaning process is counterintuitive, a ritual of care where what you don’t do is far more important than what you do. Mishandling this essential tool can lead to a soapy-tasting pizza, a cracked stone, or a sticky, smoky mess. What you Should Never use 1. Soap or Detergent The first and most inviolable rule of cleaning a pizza stone is to never, under any circumstances, use soap or detergent. This cannot be overstated. The porous nature of the stone acts like a very hard sponge. If you apply soap to its surface, it will absorb the soap deep into its structure. The next time you heat the stone to the high temperatures required for making pizza, that trapped soap will heat up, release fumes, and bake its unpleasant, chemical taste directly into the bottom of your crust. No amount of rinsing can fully remove soap that has been absorbed into the ceramic. This single mistake can permanently ruin a pizza stone, relegating every future pizza to a soapy-flavored disappointment. 2. Thermal Shock The second golden rule is to avoid thermal shock at all costs. A pizza stone is a single, solid piece of ceramic that expands when heated and contracts when cooled. If this temperature change happens too quickly, the stress will cause it to crack. This means you must never plunge a hot stone into a sink of cool or even lukewarm water. The sudden, drastic temperature change will almost certainly break it in half. Similarly, you should never place a cold stone into a preheated oven. The proper practice is to always place the stone in a cold oven and allow it to preheat along with the oven itself. Special Care With these critical “don’ts” established, the correct cleaning process is a study in gentle, methodical care, focused on function over aesthetics. The goal is not to return the stone to its original, pristine beige color, but to remove any physical food debris, leaving a smooth, functional cooking surface. In fact, a well-used pizza stone is supposed to be stained. The dark, splotchy marks that develop over time are a sign of a well-seasoned stone, similar to the patina on a cast iron skillet. These stains are battle scars from countless delicious pizzas, and they do not affect the stone’s performance in any negative way. Obsessing over these cosmetic imperfections is a common beginner’s mistake. The cleaning process should always begin with a complete cool-down. After you have finished baking, simply leave the stone in the oven, turn the oven off, and let it cool down gradually with the oven. This may take several hours. Once the stone is completely cool to the touch and can be handled safely, you can remove it for cleaning. The first and primary step is a thorough dry scrape. Your goal here is to remove any raised, physical debris—the drips of burnt cheese, the patches of scorched tomato sauce, or the bits of crust that have fused to the surface. The best tool for this job is a flat, rigid scraper, such as a bench scraper or a metal spatula. Hold the scraper at a low angle and use firm pressure to shear the baked-on food from the stone’s surface. You can also use a stiff-bristled grill brush or a dedicated pizza stone brush for this task. Scrape every bit of residue off until the entire surface feels smooth to the touch, even if it is still stained. For the vast majority of cleanings, this dry scraping is the only step required. Once you have dislodged all the debris, you can simply wipe it away with a dry cloth. If you have particularly stubborn spots that the dry scrape cannot conquer, you can escalate to a gentle wet cleaning. This requires extreme caution with water. Remember, you should never soak or submerge the stone. Instead, take a soft cloth or a non-abrasive sponge, dampen it with a small amount of plain, warm water, and wring it out thoroughly. Use this damp cloth to scrub at the specific problem area. You can use a small amount of force to lift the stubborn spot. Once it is removed, use a dry cloth to wipe away any moisture immediately. Stubborn Stains For a specific, greasy stain that feels sticky or tacky, a baking soda paste is an effective next step. Baking soda is a mild alkali and a gentle abrasive that can help lift grease without damaging the stone. In a small bowl, mix a few tablespoons of baking soda with just enough water to form a thick paste. Apply this paste to the stained area and let it sit for about ten to fifteen minutes. Then, using a stiff brush or a damp cloth, scrub the area gently. The paste will help to break down and lift the grease. The most critical part of this method is the removal. You must meticulously rinse the area with a damp cloth, wiping it several times to ensure all the baking soda residue is gone. Any leftover baking soda can affect the taste of your next pizza. For a truly deep, restorative clean, some people opt to use their oven’s self-cleaning cycle. This is a high-risk, high-reward method that should be approached with caution. Place the cool, scraped pizza stone into a cool oven. Lock the oven door and run the self-cleaning cycle according to your oven’s instructions. This cycle will heat the oven to extremely high temperatures (often over 900°F or 480°C), which

How to Make Your Stained Pizza Stone Look and Cook Like New Read More »