Home Disinfecting

woman giving her friend a cleaning gift card

Cleaning Gift: The Most Thoughtful Thanksgiving Gift You Can Give

The Hostess Gift Nobody Expects but Everybody Needs Thanksgiving revolves around gathering: a packed table, handed-down recipes, and a room full of people worth being grateful for. Menus get planned, turkeys get brined, and side dishes get assigned. What rarely gets assigned is the enormous job hiding underneath all that cheer. The host of the dinner almost always absorbs the pre-holiday clean alone, and it is the one task nobody thanks them for. You have watched a friend do it. The week before guests arrive turns into a sprint of scrubbing and dusting, fueled by the quiet pressure to present a home that looks effortless. It is hours on hands and knees wiping baseboards and floors, stolen from pie-testing and quiet breaths before the happy chaos starts. This year, skip the bottle of wine and the third scented candle. Offer something that actually lightens the load: the gift of a clean home. It sounds unconventional, but a pre-Thanksgiving clean is one of the most practical and emotionally generous presents you can hand a host. It is not really about dirt. It is a transfer of time, calm, and support. Reason One: You Are Handing Back a Whole Day A genuine guest-ready clean is not a quick counter wipe. When you add up the real scope, a proper pre-hosting deep clean easily takes five to eight hours of hard physical work in an average home: Dusting: not just the coffee table but door frames, ceiling fan blades, baseboards, and window sills, easily an hour or more. Kitchen: stovetop scrubbed, appliance fronts wiped, microwave cleaned, countertops disinfected, sink shining. A solid hour of focused work at minimum. Guest bathroom: toilet, sink and faucet, streak-free mirror, washed floor. Floors: every hard surface swept and mopped, every carpet vacuumed with furniture moved, another hour or two depending on home size. Final touches: entryway glass, clutter sweeps, one last polish everywhere. A cleaning gift gives that block of hours back. Your friend can finalize the menu, bake without rushing, sit on the couch with their kids, or simply rest before hosting. You are not saving them a chore. You are giving them space to enjoy the process. Reason Two: You Are Quietening the Mental Checklist The physical labor is only half of it. Hosting anxiety runs as a loop in the background: did I dust the lampshades, is the guest bathroom presentable, does the house smell fresh? Every smudge can start to feel like a personal failing right before people arrive. There is a real well-being cost to running a home event in that headspace, and public health resources on mental health and everyday stress make the same point most of us learn the hard way: relief comes from removing burdens, not from positive thinking about them. A professionally cleaned house silences that inner monologue. Your friend walks in a day or two before Thanksgiving and the work is simply done: floors gleaming, kitchen sanitized, bathroom sparkling. Their energy shifts from presentation to purpose, from worrying about baseboard dust to being a relaxed, present host. Reason Three: It Sets Up the Whole Season Thanksgiving is the opening bell for everything that follows. A home deep-cleaned for the long weekend starts December from a clean baseline. Holiday decorating stops needing a heroic dust-and-vacuum session beforehand. Surprise drinks with friends feel easy because the house is already welcoming. One gift quietly supports months of gatherings, which is rare value for a single gesture. Two Ways to Give a Clean Home Choose based on your budget and how close you are to the host. Both routes land the same message: I see how hard you are working for everyone else, and I want to make it easier. If you want ammunition for the kitchen leg of either plan, the CDC’s guide to cleaning and disinfecting your home is a one-page refresher on doing surfaces right. Gifting approach What it looks like Best when DIY cleaning bee A few friends descend the weekend before with supplies and a playlist, splitting rooms and turning labor into a hangout Your friend would welcome company and you want a heartfelt, low-cost option Professional service A gift certificate or a coordinated booking, so the host leaves the house and returns to a spotless result You want a fully hands-off gift with zero awkwardness Professionals bring the right tools, products, and training to deep clean in a fraction of amateur time, and a booked service removes the slight weirdness of friends rummaging through your bathroom cabinets. If you go this route, a service like our deep cleaning timed for the weekend before Thanksgiving is the sweet spot, and our recurring cleaning plans make an even bigger statement: a tidy home that keeps going through December. Browse options at our pricing page, and when you are deciding who to trust, past clients say it best on our reviews page. Ready to surprise someone? Call us at (647) 424-0355 and we will help you arrange a gift that gets remembered long after the candles burn down. Frequently Asked Questions Is a cleaning service really an appropriate gift? Yes, and it keeps growing in popularity because it respects the recipient more than objects do. A cleaning gift asks for no storage space, creates no clutter, and lands at the exact moment a host needs help. Most people are genuinely touched when someone notices how hard hosting is and removes a five-to-eight-hour task from their list. When should I schedule the cleaning for the best effect? Aim for one or two days before Thanksgiving. That timing lets your friend enjoy a spotless house during the cooking marathon without risking a third-party visit on the big day itself. Book early, because the pre-holiday window fills up quickly. What if my friend is embarrassed about the state of their home? Frame it as support, not inspection. Send a message like “I want your week to be easier” rather than anything about cleanliness. Professional crews also work without judgment; a

Cleaning Gift: The Most Thoughtful Thanksgiving Gift You Can Give Read More »
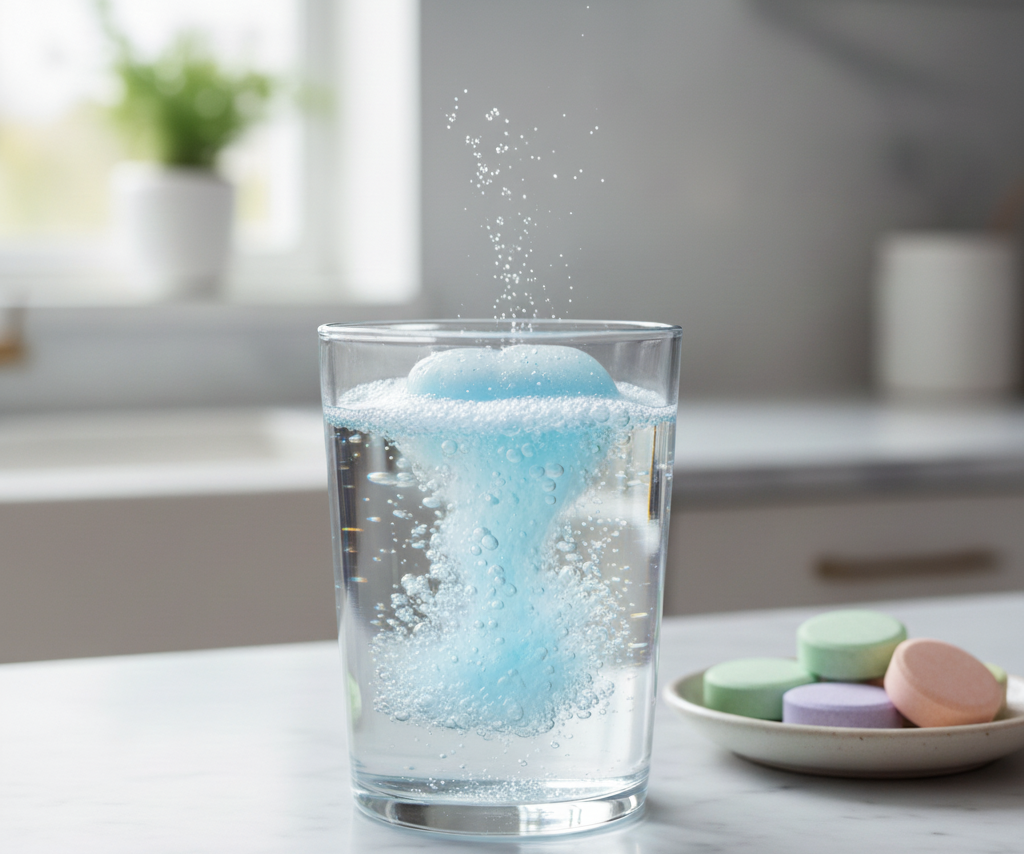
cleaning tablets

Cleaning Tablets: The Sustainable Secret to a Spotless Home

Cleaning Tablets: The Small Product Changing How We Clean Walk down any supermarket cleaning aisle and you will see a long-held belief on display: that effective cleaning comes in large, heavy, liquid-filled plastic bottles. That model, built on selling us mostly water, is quietly being overturned by a small, unassuming innovation: the cleaning tablet. Instead of shipping diluted liquid in single-use plastic, a tablet concentrates the active ingredients into a solid puck that you dissolve at home. The result is less waste, less clutter, and a routine that makes more sense for your home and the planet. Why the Liquid Bottle Model Is Broken The most glaring flaw in the traditional liquid cleaner is plastic waste. Most bottles are made from high-density polyethylene, or HDPE, and although they are recyclable in theory, a staggering share of that plastic is never recycled. It ends up in landfills, where it persists for centuries, or in waterways, where it breaks down into harmful microplastics. Canada alone throws away millions of tonnes of plastic every year, which is why the Government of Canada is working to reduce plastic waste and pollution through regulation and better product design. Then there is what is actually inside the bottle. The typical liquid surface cleaner consists of up to 95 percent water, so consumers pay to ship pre-diluted cleaner across the country, an avoidable carbon cost. At home, bulky bottles claim valuable cabinet space, spills are common, and measuring concentrates for mopping is guesswork that leads to waste or a sticky, residue-laden floor. How Cleaning Tablets Work: Just Add Water A cleaning tablet concentrates the chemistry of a liquid cleaner into a small, solid puck: the same surfactants that lift dirt and grease, plus fresheners and other active ingredients, minus the water. Rather than buying a new plastic bottle with every replacement, you keep one reusable spray bottle. Once it empties, fill it with warm water from your tap, drop in a tablet, and give it a few minutes to dissolve fully. What comes out is a fresh, effective cleaning solution made on demand at home. This simple model solves the problems of the old one: the small, paper-based packaging cuts plastic waste by over 99%, a single truckload of tablets replaces many truckloads of liquid, and a box the size of a deck of cards can stand in for a whole arsenal of bottles under the sink. Types of Cleaning Tablets for Every Room The word tablet covers a growing category of concentrated, water-activated cleaners. All-purpose and surface tablets are the most versatile: dissolve one in a spray bottle and it tackles everyday grease and grime on non-porous surfaces such as countertops, sealed stone, tile, and finished wood. Glass cleaner tablets evaporate cleanly and leave mirrors and windows streak-free. Bathroom tablets often include mild acidic components that dissolve soap scum and hard water mineral deposits in showers, tubs, sinks, and on tile. For mopping, floor tablets or dissolvable sheets drop into a bucket of water to create a perfectly portioned, no-rinse mopping solution. A separate family of tablets cleans the machines themselves. Dishwasher cleaning tablets run in an empty dishwasher to break down limescale, grease, and food residue in the filter and spray arms, improving performance. Washing machine tablets run on a hot cycle in an empty drum to dissolve soap scum, mineral buildup, and biofilm, the causes of musty odors. Garbage disposal tablets foam while the disposal runs, scrubbing the blades and chamber walls and deodorizing the unit. Tablet Types and Their Best Uses Tablet Type Where to Use It What It Fights All-purpose Spray bottle for counters, tile, sealed stone Everyday grease, grime, and spills Glass Spray bottle for mirrors and windows Smudges and film, with a streak-free finish Bathroom Spray bottle for showers, tubs, sinks Soap scum and hard water deposits Floor Mop bucket with warm water Dirt and grime with no rinsing needed Dishwasher and washer Empty appliance on a hot cycle Limescale, biofilm, and musty odors Garbage disposal Dropped in while the disposal runs Food grime on blades and chamber walls Best Practices for Getting the Most From Tablets Use a durable reusable bottle made of glass or high-grade plastic such as PET or HDPE, and rinse it out thoroughly between refills. Fill the bottle with warm water first, then drop in the tablet; adding water over the tablet causes excessive foaming. Use warm, not boiling, water, which dissolves the tablet faster and more completely. Be patient: full dissolution can take two to ten minutes, depending on the brand and water temperature. Label your bottles when you use several tablet types, so the glass cleaner never lands on the wrong surface. Are Cleaning Tablets as Effective as Liquid Cleaners? For a small puck, skepticism is fair, but modern chemistry has made these formulas just as effective as liquids, and in some cases more so. The active ingredients match those found in liquids; they are simply dehydrated into solid form and reconstituted with water when you use them. The tablet also delivers a perfect, pre-measured dose every time, keeping the solution at optimal dilution and avoiding both over-strong and weak mixes. As with any cleaning product, follow the dilution and use instructions and keep solutions out of reach of children; Health Canada’s guidance on using household products safely is a good reference for handling cleaning chemicals at home. Frequently Asked Questions Are cleaning tablets really as strong as liquid cleaners? Yes, when used as directed. The active ingredients are the same ones found in liquids, just dehydrated, and the pre-measured dose guarantees the right dilution every time, which is often stronger than a guessed pour from a bottle. Can I use any spray bottle with cleaning tablets? You can use any bottle you already own, but a durable glass or high-grade plastic bottle designed for long-term use works best. Rinse it thoroughly between refills so leftover product does not react with the new solution. How long does it take for a tablet

Cleaning Tablets: The Sustainable Secret to a Spotless Home Read More »

kitchen trash can cleaning

Trash Can Cleaning: What’s Really Lurking at the Bottom of Your Trash Can?

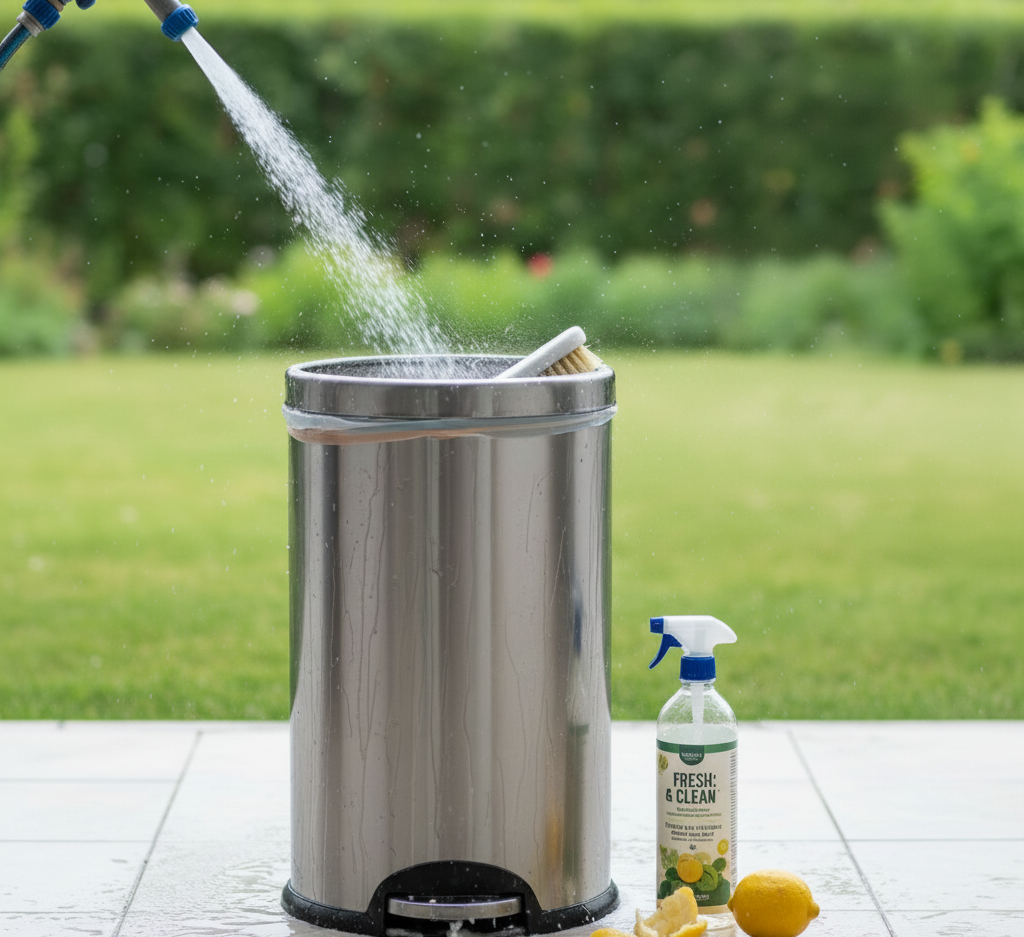
The trash can is the most thankless and hardworking fixture in any home. It is a vessel of necessity, the silent recipient of our daily waste, and the frontline in the constant battle against dirt, decay, and disorder. It is a tool so fundamental to household hygiene that it is often completely overlooked, left to its own devices in a corner of the kitchen or at the side of the house until the moment its presence becomes unavoidable, usually through a foul odor or an unpleasant discovery. Cleaning a garbage bin is not a glamorous task. There is no satisfying “before and after” reveal that you will be eager to show off. Yet, the proper maintenance and regular, thorough cleaning of your bins are among the most critical routines for a healthy, pest-free, and pleasant-smelling home. To neglect the bin is to invite problems that are far more difficult and disgusting to solve than the cleaning task itself. 1.Why so Dirty? To understand how to clean a trash can effectively, you must first understand why it gets so profoundly dirty. The problem is a combination of three factors: organic matter, moisture, and time. Every scrap of food, every used paper towel soaked in meat juice, and every discarded vegetable peeling is organic matter. Once inside the dark, contained environment of a garbage bag, this matter begins to decompose. This process is driven by bacteria, which break down the food waste and, in doing so, release a cocktail of volatile organic compounds. These compounds are what we perceive as the smell of garbage, gases like hydrogen sulfide (rotten eggs) and methane. Moisture is the accelerator for this entire process. A dry environment slows bacterial growth significantly. However, garbage is rarely dry. Leaky food containers, wet food scraps, and condensation create the perfect humid breeding ground for bacteria to thrive and multiply exponentially. This is why a small tear or leak in a garbage bag is so catastrophic. The liquid that seeps out, a substance often referred to as “leachate” or “garbage juice,” is a highly concentrated bacterial soup. It soaks into the bottom of the can, and even after the bag is removed, that residue remains, providing the seed for the next cycle of odor and grime. 2.Pests Time simply allows these processes to fester. The longer the organic matter and moisture are left to interact, the more intense the decomposition, the stronger the smell, and the more stubborn the resulting grime will be. This sticky, foul-smelling film that coats the bottom and sides of a neglected bin is a biofilm-a complex community of microorganisms that have attached themselves to the surface and to each other. It is not just dirt; it is a living, stinking ecosystem. This environment is also the perfect nursery for pests. Flies are drawn to the smell of decay to lay their eggs. In the warm, protected, and nutrient-rich environment of a garbage bin, these eggs hatch into maggots in as little as eight hours. Rodents and other scavengers are also attracted by the scent, and a can without a secure lid is an open invitation for a nightly buffet. Cleaning a trash can is a heavy-duty job that requires more than a simple sponge and some soap. You need to be prepared for a wet, messy, and smelly process. Assembling the right tools beforehand will make the job faster, more effective, and more tolerable. 3.Protection You will need protective gear. This is non-negotiable. Wear heavy-duty rubber gloves to protect your hands from bacteria and harsh cleaning agents. Safety glasses are also highly recommended to protect your eyes from splashes of dirty water and chemicals. A hose with a high-pressure nozzle is a significant advantage. The ability to spray down the bin from a distance will help dislodge caked-on grime and rinse the can effectively. If you don’t have a hose, a few large buckets of hot water will work, but it will require more effort. A long-handled, stiff-bristled brush is your primary scrubbing tool. A long handle is crucial, as it allows you to reach the bottom of the can without having to stick your head and shoulders inside. A deck brush or a toilet brush reserved exclusively for this purpose works perfectly. The sticky, greasy nature of the biofilm requires a strong degreaser. A quality dish soap is designed to cut through grease and is an excellent first-line cleaner. After cleaning, you need to sanitize. There are several options. A diluted bleach solution (about one cup of bleach per gallon of water) is highly effective at killing bacteria, mold, and viruses. For a less harsh alternative, a solution of equal parts white vinegar and water can be used. Vinegar is a natural disinfectant and deodorizer. Finally, baking soda is an excellent deodorizer and a mild abrasive that can help with scrubbing. The best place to perform this task is outdoors, on a lawn or a patch of gravel where the dirty water can drain away without staining a driveway. 4. Let’s Get to Work First, empty the trash can completely. Make sure there is no loose debris left inside. Using your hose, give the entire interior of the bin a thorough spray-down. Use the highest pressure setting to blast off as much of the loose dirt and grime as possible. Pour out the dirty water. Next, pour a generous amount of dish soap into the bottom of the can and add a few inches of the hottest water you can safely handle. Take your long-handled brush and begin scrubbing. Start with the bottom and work your way up the sides. Apply firm pressure and focus on the corners and any visible patches of caked-on grime. Don’t be afraid to put some effort into it; you are physically breaking apart that stubborn biofilm. Once you have scrubbed the entire interior, pour out the soapy, dirty water. Now it is time to sanitize and deodorize. If you are using bleach, mix your solution and pour

Trash Can Cleaning: What’s Really Lurking at the Bottom of Your Trash Can? Read More »

The Benefits of Hiring a Professional

Post-Construction Cleaning: 3 The Benefits of Hiring a Professional

Post-Construction Cleaning: The Final Step That Makes a Renovation Livable The day the contractors pack up is not the day your space is ready to live in. Between the finished drywall and the first evening on the new couch sits a layer of fine dust, sticker residue, paint splatter, and debris that no ordinary cleaning routine was built to handle. Post-construction cleaning is a specialized discipline: a top-to-bottom reclamation project that turns a hazardous worksite into a clean, breathable home. Here is what makes the job so demanding, the three-phase process professionals follow, and the equipment it takes to do it right. What Makes Construction Debris Different from Everyday Dirt Construction dust is not the soft fluff that gathers on bookshelves. It is a fine, gritty, abrasive particulate cocktail of drywall compound (gypsum), plaster, sawdust, cement powder, and silica. The particles are light enough to go airborne at the slightest disturbance, travel through HVAC systems, and settle in a uniform, ghostly layer on every surface: inside cabinets, on top of door frames, within light fixtures, on ceiling fan blades, and deep in the fibers of any existing carpet. Because this dust is a significant respiratory irritant, removing it completely is a health matter, not just an aesthetic one. Health Canada’s overview of indoor air contaminants explains why dust and construction-stage chemicals deserve serious removal, not a quick sweep. Beyond the dust, a finished job site holds stray nails, orphaned screws, wood and drywall offcuts, plastic shavings from plumbing work, and hardened blobs of caulk or adhesive. New windows, appliances, and fixtures arrive covered in protective plastic films and manufacturer stickers that leave stubborn, sticky residue. There are almost always errant paint splatters on hinges, glass, or flooring, and ladder scuffs on brand-new baseboards. A household all-purpose cleaner and a roll of paper towels will only smear this grime and risk permanent damage to expensive new surfaces. The Three-Phase Post-Construction Cleaning Process A truly effective post-construction clean is systematic, not one chaotic wipe-down. Each phase builds on the last so no detail is overlooked. Phase When it happens Main focus Rough clean During the final days of construction or right after the contractors leave Bulk debris removal, peeling protective films, first heavy vacuum pass Deep clean Once the space is free of major hazards and clutter Top-to-bottom cleaning of every surface, inside and out Final touch-up 24-48 hours after the deep clean, before furniture arrives Light vacuum, horizontal surfaces, smudge check on glass and fixtures Phase 1: The Rough Clean This stage clears the battlefield. The crew collects, removes, and properly disposes of all large trash and debris, from wood scraps and leftover materials to hardware packaging and cardboard. Large piles of drywall dust and sawdust are scraped and swept from the floors, every protective plastic film is peeled off windows, doors, appliances, and fixtures, and a heavy-duty shop-vac takes a preliminary pass over the thickest dust layers. The space still looks dirty when this phase ends, but it is now safe and accessible for detailed work. Phase 2: The Deep Clean The deep clean is the heart of the process, and it follows one guiding principle: start high and work down, so dislodged dust only ever falls onto surfaces you have not yet cleaned. Ceilings, walls, light fixtures, ceiling fans, and recessed lighting are wiped first, then the tops of door frames, window casings, and molding. Both sides of every window and glass door are cleaned, with paint splatters, caulk, and sticker residue lifted off by a professional razor scraper, while sills and tracks give up their surprising haul of sawdust. Doors are wiped completely, including hinges, knobs, and the often-forgotten top edge. Trim, baseboards, built-in shelving, and every cabinet, cupboard, and drawer are cleaned inside and out, which matters before clean dishes, food, or linens move in. In the kitchen and bathrooms, countertops are cleaned and disinfected following CDC guidance on cleaning and disinfecting your home, sinks and faucets are freed of plumber’s putty, appliances are wiped inside and out, and showers, tubs, toilets, mirrors, and chrome are polished to a shine. Floors come last: edges and corners with a vacuum crevice tool, hard surfaces vacuumed and mopped in multiple passes with fresh water, and carpets gone over with a commercial-grade vacuum in several directions to pull fine dust from the pile. Phase 3: The Final Touch-Up After the intensive deep clean, the space rests for 24-48 hours so any airborne dust stirred up during cleaning settles one last time. The final pass is deliberately light: another quick vacuum of floors and carpets, a wipe of countertops, tables, and window sills, and a close check for smudges on glass, mirrors, and shiny fixtures. The goal is a pristine, move-in-ready space that feels brand new from every angle. The Equipment a True Post-Construction Clean Requires None of this works with standard household supplies. The essential toolkit looks like this: Shop-vac with a HEPA filter: The most crucial piece. Household vacuums clog on fine dust and often exhaust microscopic particles straight back into the air, while a HEPA filter traps them permanently. A large supply of microfiber cloths: Their split fibers trap and hold dust instead of smearing it the way cotton rags and paper towels do. A-frame ladders and extension dusters: For safe, effective reach to high ceilings, fixtures, and cabinet tops. Plastic and razor-blade scrapers: For stubborn stickers, paint, and caulk without damaging new surfaces. Appropriate cleaning solutions: A kitchen degreaser, a pH-neutral floor cleaner safe for your specific new flooring, and a mineral deposit remover for bathroom fixtures. Frequently Asked Questions About Post-Construction Cleaning Can I skip the rough clean and go straight to a deep clean? No. Bulk debris and protective films have to come out first. Scrubbing around piles of nails, cardboard, and thick dust wastes effort and risks scratched or permanently stained surfaces. Why wait 24-48 hours before the final pass? Cleaning agitates fine particles into the air, where they hang for a day

Post-Construction Cleaning: 3 The Benefits of Hiring a Professional Read More »

Kettle Maintenance: A Step-by-Step Cleaning Guide Get Your Kettle Sparkling Clean for the Autumn Season

Why Your Kettle Needs a Proper Clean This Autumn The electric kettle is one of the hardest-working appliances in any kitchen, boiling water for coffee, tea, and cooking without complaint. Yet most kettles quietly suffer a creeping internal problem: limescale. Left alone, mineral crust builds up inside, slowing the boil, wasting electricity, dulling the taste of your water, and shortening the appliance’s life. The fix is simple chemistry, not hard scrubbing: a few minutes of attention each month keeps your kettle performing like new all autumn. What Limescale Is and Why It Matters In hard-water country, limescale is not a question of if but when. Hard water carries a high concentration of dissolved minerals, mainly calcium carbonate and magnesium. Those minerals are harmless to drink, but each time the water is heated they precipitate out and form a hard, chalky, off-white crust on the heating element and interior walls. Four consequences make the buildup more than cosmetic: Wasted energy and time. Scale insulates the element, forcing it to work harder and longer. A scaly kettle boils noticeably slower and burns more electricity doing it. Altered taste. Minerals leach back into fresh water with a chalky or metallic note that can ruin good tea or coffee, and broken-off flakes add grit and white floaters to your cup. Bacterial habitat. Thick deposits are rough and porous, letting microorganisms colonize the surface. Boiling kills most active bacteria in the water, but the scale itself is a separate concern for your daily cup. Shortened lifespan. An element repeatedly overheating through an insulating crust can burn out early. How to Descale a Kettle with White Vinegar Descaling works because a mild acid dissolves the alkaline crust, and the classic vinegar method is the cheapest and most effective. Fill the kettle with a half-vinegar, half-water mix of distilled white vinegar and plain water, never past the maximum fill line. For heavy buildup, let the solution sit an hour before heating so the acetic acid starts working. Bring it to a full boil: heat plus acidity accelerates the reaction, and you may watch the scale fizz and flake. After it switches off, leave the hot solution inside for at least 20 to 30 minutes, or several hours or even overnight for extremely stubborn crust. Pour it out and inspect. Most of the scale should be gone, and a non-abrasive sponge handles any patches. Finish with several cool rinses, then fill with fresh water, boil, and discard that batch to clear every trace of vinegar taste and smell. Descaling with Lemon or Citric Acid If the vinegar smell puts you off, lemon is a fragrant, equally effective alternative. Squeeze up the juice from one or two fresh lemons into the kettle, or add two tablespoons of citric acid powder from the baking or canning aisle, then fill to the max line with water. Let it sit about an hour, bring it to a full boil, and leave the hot solution for another 20 to 30 minutes. Empty, rinse thoroughly, and run one final clean-water boil, discarding it so no lemony taste lingers. Put either method on a recurring calendar slot, spaced from monthly to quarterly based on your water’s hardness. The moment a visible white film coats the bottom, start. Cleaning the Outside of the Kettle The interior is the functional priority, but the exterior deserves care, and safety comes first: always unplug before wiping. For stainless steel, use a damp microfiber cloth with a drop of dish soap, wiping along the steel’s grain; to clear fingerprints and add shine, buff with a dry cloth carrying a little white vinegar or a dab of olive oil. Plastic bodies need only a soapy damp cloth, and abrasive scrubbers will scratch and dull them. Glass cleans well with the same 50/50 vinegar solution, sprayed on and wiped with microfiber until streak-free. These are ordinary cleaning chemicals, so Health Canada’s checklist for using household chemicals safely and its broader guide to household product safety are quick, worthwhile reads. Choosing a Kettle That Stays Clean Different designs suit different routines, and maintenance effort varies by type and material. Kettle type or material What to know Stovetop The classic whistle kettle: nostalgic and simple, but slower and less energy-efficient than electric. Electric The modern standard: fast, automatic shut-off for safety, and efficient because heat applies directly to the water. Variable temperature Heats to a set point, which matters for brewing: green tea is best around 175 F (80 C), while black coffee wants water just off the boil near 205 F (96 C). Gooseneck The long, narrow spout gives the slow, controlled pour that proper coffee extraction requires; made for pour-over. Stainless body Durable, relatively light, taste-free, and easy to clean. The most popular choice, for good reason. Glass body Shows the water level and the scale buildup: a handy visual reminder to descale. Plastic body Most affordable and lightweight; generally BPA-free, but stains and holds odors more than glass or steel. Ceramic body Stylish and heat-retaining, but the heaviest and most fragile option. Daily Habits That Prevent Scale Small habits slow the crust dramatically. In hard-water areas, use filtered water: a basic carbon filter pitcher removes a significant share of the minerals that cause scale, so you descale far less often. Do not let unused water sit; empty leftovers after each use so minerals cannot settle as the water cools. And descale proactively: a quick monthly treatment beats fighting a thick shell every six months. If you would rather have every appliance and limescale-prone surface handled in one visit, Toronto Shine Cleaning’s deep cleaning service resets the whole kitchen, and a regular cleaner keeps appliances on schedule between visits. Kettle Cleaning FAQ How often should I descale my kettle? Between once a month and every few months, depending on water hardness. Start the moment you see a white film or the boil time stretches. Is water from a limescale-covered kettle safe to drink? The minerals are not harmful, but scale flavors

Kettle Maintenance: A Step-by-Step Cleaning Guide Get Your Kettle Sparkling Clean for the Autumn Season Read More »

green cleaning products

4 Incredible Tips On How To Use Non-toxic Cleaning Products

The Case Against Harsh Cleaners in Your Home Modern cleaning is sold as brightly colored liquids promising to disinfect, degrease, and deodorize, and many of us equate that sharp chemical smell with freshness. It is a paradox worth pausing on: we wave potentially hazardous chemicals through the spaces where we eat, sleep, and play in order to make them healthier. A truly clean home is not one sterilized by synthetic compounds but one free of both dirt and harmful residues. Switching to non-toxic cleaning products sacrifices no results. It returns you to simpler, smarter, safer tools that have worked for generations. Tip 1: Understand What Conventional Cleaners Cost You The argument for change runs on three tracks: health, environment, and money. Many commercial cleaners release volatile organic compounds, or VOCs, the moment you spray. Inhaled, VOCs have been linked to headaches, dizziness, respiratory problems, and long-term organ damage, and that vague word “fragrance” on a label often hides dozens of undeclared chemicals. Among them are phthalates, known endocrine disruptors. Anyone with asthma, allergies, or chemical sensitivities can react immediately. Health Canada’s overview of indoor air contaminants details VOCs and their health effects. The environmental damage follows the wipe-down. Rinsed-down-drain chemicals reach waterways, where phosphates can fuel algal blooms that disrupt aquatic ecosystems, and many synthetic compounds are not readily biodegradable, persisting for years. The economic angle is the simplest. The cleaning aisle sells a specialist for glass, another for countertops, another for floors, another for the bathroom, plus a dedicated stove degreaser. That hyper-specialized market is a marketing win, not a cleaning need. A few basic non-toxic staples do all those jobs for a fraction of the cost. Tip 2: Build a Five-Ingredient Toolkit Everything effective in a green closet comes down to ingredients you probably own. Distilled white vinegar. Acetic acid dissolves mineral deposits like hard-water stains and limescale, cuts grease, deodorizes, and disrupts the cell structure of many bacteria and molds. A 50/50 spray handles glass, mirrors, floors, and general surfaces; it also descales coffee pots and shower heads and works as a fabric softener substitute. Never use it on marble, granite, or travertine, since the acid etches and dulls stone, and keep it off waxed floors and cast iron. Baking soda. A mild alkali and gentle abrasive that absorbs and neutralizes odors rather than masking them. Its fine crystals scrub sinks, tubs, and toilets without scratching most surfaces, and paired with an acid, the fizz helps dislodge clogs and lift stubborn dirt. Sprinkle on damp surfaces or paste it with water or dish soap for stovetops and grout, boost your laundry detergent, and deodorize refrigerators, carpets, and drains. Test the paste on high-gloss finishes first. Hydrogen peroxide. A disinfectant and natural bleaching agent that breaks down into nothing but oxygen and water, killing mold, mildew, and bacteria. Spray countertops, cutting boards, or grout straight from the bottle, let it bubble for 5 to 10 minutes, then wipe; it also whitens laundry as a bleach alternative. Light degrades it, so keep the dark bottle, and test colored fabrics because of the mild bleaching effect. Castile soap. A vegetable-based true soap, traditionally from olive oil, that is fully biodegradable. As a surfactant it breaks water’s surface tension so grease and dirt rinse away. A few drops in a spray bottle or a teaspoon per mop bucket covers all-purpose cleaning, dishes, floors, and foaming hand soap. One firm rule: never combine it with vinegar in the same bottle. The acid unsaponifies the soap into a white, filmy residue, though using one after the other is fine. Lemons or citric acid. Citric acid cuts grease, disinfects, shines chrome, and freshens garbage disposals without the vinegar smell. Rub a cut lemon, mix juice with water, or combine citric powder with baking soda for a scouring powder. Like vinegar, it etches natural stone and can bleach. Tip 3: Keep Five Recipes Ready Those five ingredients replace nearly every specialized bottle under the sink. Recipe Mix and method Use it on All-purpose cleaner Equal parts white vinegar and water in a spray bottle; optional castile soap for power (shake first) and 10 to 15 drops of lemon or tea tree essential oil. General surfaces, avoiding natural stone. Glass and mirror cleaner Same 1:1 mix; spray and wipe with microfiber or a squeegee. Glass, streak-free. Heavy-duty soft scrub Baking soda plus enough castile soap for a thick paste. Sinks, tubs, tile, stubborn stovetop spots. Floor cleaner Into a gallon of hot water, stir roughly two tablespoons of castile soap, then add half a cup of vinegar. Tile, vinyl, linoleum. Drain freshener Half a cup baking soda down the drain, then half a cup vinegar; fizz 15 to 20 minutes, flush with boiling water. Kitchen and bathroom drains. Tip 4: Shop Green Cleaners Like a Detective If you prefer ready-made products, the booming “green” aisle demands scrutiny: the space is rife with greenwashing. Labels boasting “natural,” “eco-friendly,” or “botanical” carry no regulated definition, so the claim can be meaningless. Instead, check three things. Demand transparency: reputable brands list every ingredient, not just the active ones. Avoid the key offenders, especially ammonia, chlorine bleach, phthalates hidden under “fragrance,” and parabens. Then look for third-party certification such as the EPA’s Safer Choice program or the EWG Verified seal, which means reviewers examined the formula’s safety and ingredients. If you keep a bleach bottle for occasional disinfecting, follow the CDC’s rules for cleaning and disinfecting with bleach, including never mixing it with any other cleaner, and Health Canada’s guide to household chemical safety covers buying, storing, and disposing of everything in the cabinet. Non-Toxic Cleaning FAQ Are non-toxic products actually effective? When matched to the job, yes. Acid dissolves mineral scale, alkali neutralizes odors, and soap lifts grease and dirt. The catch is contact time: let solutions sit several minutes instead of expecting an instant wipe. Can I mix vinegar and baking soda in one bottle? Not for storage. They fizz into mostly water and carbon dioxide, cancelling

4 Incredible Tips On How To Use Non-toxic Cleaning Products Read More »

Washing Machine Cycles: 4 Tips Everyone Should Know For Spotless Fabrics

Stop Guessing at the Laundry Room Dial A modern washing machine is a marvel of convenience, yet its panel of cryptic dials and symbols can look like an airplane cockpit. Most people default to Normal for nearly every load and hope for the best. That habit shortchanges your clothes, your utility bills, and the machine itself: each named cycle is a calibrated recipe of temperature, agitation, and time for particular fabrics and soil levels. Reading those recipes turns laundry from guesswork into fabric care, deciding whether garments last for years or fade, shrink, and wear out early. The Three Variables Behind Every Cycle Every button adjusts one of three fundamentals, and once you see them, no dial is mysterious. Water Temperature Hot, typically 130 F (54 C) and above, is the most powerful cleaner: it attacks heavy grime, kills germs and dust mites, and lifts oily, greasy stains. The costs are energy, color fading, and real shrinkage in natural fibers like cotton and wool, so save it for sturdy, colorfast loads: whites, cotton underwear and socks, bed linens, and grime-caked work clothes. Warm, near 90 F (32 C), balances cleaning against care, handling everyday soils with less fading or shrinking, ideal for colors, synthetics, and moderately dirty loads. Cold, from 60 to 80 F (15 to 27 C), is the gentlest and most efficient setting: perfect for bleeding darks and brights, plus delicate silk, lace, and anything shrink-prone. Modern cold-water detergents close much of the cleaning gap, though heavy grease still needs heat. Spin Speed Measured in revolutions per minute, spin controls how much water the drum extracts at the end of the cycle. A high spin, 1000 to 1400 RPM or more, removes the most moisture, cutting drying time and energy on sturdy cottons and denim, but it can set deep wrinkles and punish delicates. Medium is the all-purpose compromise, often paired with Permanent Press to limit creasing in synthetics. Slow leaves clothes damp but protects hand-washable items and loosely woven sweaters, and no-spin exists for garments that should feel no centrifugal force at all. Agitation and Tumble This is the machine’s scrubbing action: the agitator’s speed and intensity on a top-loader, the drum’s tumbling pattern on a front-loader. High agitation adds friction and cleaning power for durable fabrics; low agitation swishes gently to shield fragile fibers. The Four Cycles You Will Use Most Normal (Cotton or Regular). The workhorse for everyday cotton, linen, and durable synthetics: high agitation, high spin, usually a warm default you can adjust. Its home is t-shirts, jeans, socks, underwear, towels, and sheets. Skip it for delicates and anything prone to shrinking or wrinkles. Heavy Duty. Longer wash time, stronger agitation, hot water by default, built for sturdy fabrics with serious grime: beach towels with set-in dirt, kids’ play clothes, work clothes caked in mud, durable bedding. Using it on normal loads causes needless wear, and it is far too aggressive for anything heat- or movement-sensitive. Delicates (Hand Wash). The machine imitating your hands: low agitation, short wash, slow spin, almost always cold. Lingerie, silk, lace, sheers, and loose sweaters belong here, each inside a mesh laundry bag. This gentle action will not fully clean heavily soiled items. Permanent Press (Wrinkle Control or Casual). The most useful misunderstood setting, designed for wrinkling synthetics and blends like polyester, rayon, and knits. It washes warm to relax fibers and release creases, then switches to a cool rinse and slower spin so new wrinkles never set. Use it for dress shirts, blouses, and slacks; leave aggressive cleaning jobs and true delicates alone. Specialty Cycles Worth Knowing Cycle What it does When to use it Bulky (Sheets or Bedding) Extra water saturates and rinses large items; reduced spin keeps the machine balanced. Comforters, blankets, sleeping bags, pillows. Whites A supercharged Normal: hottest water, long aggressive wash, built to pair with the bleach dispenser. Colorfast white loads that need brightening. Quick Wash (Speed or Express) Shortened wash and rinse plus a fast spin to cut drying time. Small, lightly soiled loads in a hurry. It freshens; it cannot handle stained or genuinely dirty clothes. Rinse and Spin Skips the main wash, simply rinsing the load and spinning out water. Hand-washed items needing water extraction, or stored clothes needing a rinse. Sanitize Hottest water possible, often with an internal heater, reaching temperatures that kill 99.9 percent of common household bacteria. Long and energy-intensive. When germs matter: baby clothing, cloth diapers, any bedding used during an illness, and allergen concerns. Steam Steam loosens tough stains for deep cleaning, or refreshes dry items without a full wash. Heavily soiled loads, plus de-wrinkling and deodorizing between washes. A Four-Question System for Every Load What are the fabrics? Care labels are the primary guide: mostly cottons and durable material means Normal or Heavy Duty is safe; delicates go to the Delicates cycle. How dirty is it? Everyday wear suits Normal; mud, grease, and heavy grime need Heavy Duty. A soil-level setting on many machines extends wash time within a cycle for dirtier loads. What are the colors? Whites take hot water, mixed colors prefer warm, and darks or brights need cold to prevent fading. Do wrinkles matter? Synthetic dress clothes call for Permanent Press. Mastering the dial means understanding how temperature, spin, and agitation combine and applying them on purpose: garments live longer, utility use drops, and results beat any one-size-fits-all default. Detergent choices deserve equal care: Health Canada’s page on household product safety covers laundry detergents and packets, including keeping pods away from children. And for germ control, the CDC’s guide to when and how to clean and disinfect your home explains why thorough cleaning always comes before disinfecting. Washing Machine Cycle FAQ What counts as hot water in a washing machine? Typically 130 F (54 C) and above. That range lifts oily stains and defeats germs and dust mites, which is why the Whites and Sanitize cycles lean on it. Why does Permanent Press change temperatures mid-cycle? Warm water relaxes synthetic

Washing Machine Cycles: 4 Tips Everyone Should Know For Spotless Fabrics Read More »

Maintaining a Clean Bin

Garbage Bin cleaning: 4 Tricks To Eliminate Odors And Leave It Looking Like New

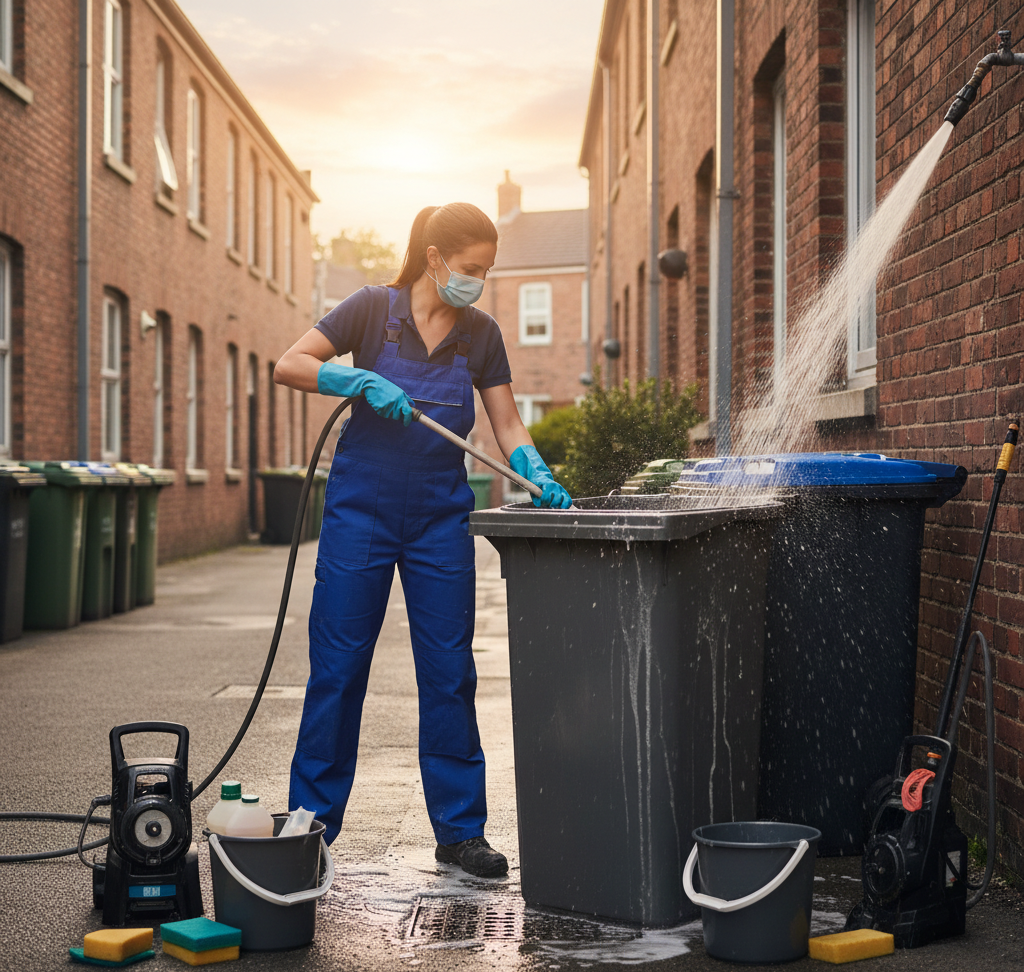
Garbage Bin Cleaning: Four Tricks That Eliminate Odors for Good The garbage bin is the hardest working, least appreciated fixture in any home, quietly collecting your waste and noticed only when a foul odor or unpleasant discovery forces the issue. Scrubbing one is not glamorous and offers no satisfying before and after photo, yet steady bin care is one of the most important routines in any healthy, pest-free, pleasant-smelling home. Ignore it and you invite problems far nastier to solve than the chore itself. Here are four tricks that banish odors for good. Why Garbage Bins Stink: Organic Matter, Moisture, and Time To clean a bin effectively, first understand why it gets so profoundly dirty: three factors working together. Food scraps, oily paper towels, and vegetable peelings are all organic matter, and once sealed in the dark cavity of a bag, bacteria begin breaking them down. That decomposition releases a cocktail of volatile organic compounds: gases like hydrogen sulfide, with its rotten-egg note, plus methane. Those are what your nose reads as garbage odor. Moisture is the accelerator: bacteria grow slowly in a dry bin, but leaky containers, wet scraps, and condensation multiply them exponentially. A torn bag makes this worse. The liquid that seeps out, known to waste handlers as leachate or garbage juice, is a concentrated bacterial soup that soaks into the plastic and re-seeds the next cycle of grime long after the bag is gone. Time lets everything fester. That sticky, foul film is a biofilm: a living community of microorganisms clinging to the surface. That warm, nutrient-rich setup also works as a pest nursery: rot attracts flies, and their eggs can hatch into maggots within as little as eight hours, while rodents and scavengers treat an unlidded bin as an open invitation to a nightly buffet. Trick 1: Gear Up and Pre-Rinse Outdoors This is a heavy-duty, wet, smelly job, so assemble the tools first and work on an outdoor lawn or gravel patch where gray water can drain. Gear is mandatory: heavy-duty rubber gloves against bacteria and harsh cleaners, plus safety glasses to guard against splash-back. A hose with a high-pressure nozzle blasts off loose grime from a safe distance; without one, a few large buckets of hot water will do the job with more elbow grease. You will also need a long-handled, stiff-bristled brush as your primary scrubbing tool, plus degreasing dish soap, a disinfectant, and baking soda. Trick 2: Degrease and Scrub to Break the Biofilm Empty the bin completely so no loose debris remains, then give the whole interior a thorough high-pressure spray-down and pour off the dirty water. The sticky biofilm is greasy, so it needs a degreaser, and a quality grease-cutting dish soap is an excellent first-line cleaner. Pour a generous amount into the bottom of the bin, add several inches of water as hot as you can safely manage, and scrub with the long-handled brush, starting at the bottom and working up the sides. The long handle lets you reach the base without putting your head inside the bin; a deck brush or a toilet brush kept only for this job works perfectly. Press firmly at the corners and caked-on patches, physically breaking apart that stubborn living film, then pour out the dirty water. Trick 3: Disinfecting Soak, Final Rinse, and Bone-Dry Now sanitize and deodorize to kill the lingering invisible bacteria behind odors. As the CDC guide to cleaning and disinfecting your home explains, surfaces should be cleaned before disinfecting so chemicals can reach the germs; your scrubbed bin is ready for that second step. The CDC’s bleach guidance confirms that properly diluted bleach kills germs effectively when used as directed. Solution How to Use It Notes Diluted bleach, about one cup of bleach per gallon of water Pour in, swirl to coat every surface, and let it sit for 10 to 15 minutes Highly effective against bacteria, mold, and viruses; rinse thoroughly afterward Equal parts white vinegar and water Mist or pour over the interior and soak roughly the same length of time A less harsh natural disinfectant and deodorizer Baking soda Sprinkle a layer into the empty bin after each bag removal Absorbs odors and moisture and doubles as a mild abrasive After the soak, dump it out and rinse until the water runs clear with no soap suds left, which is critical for bleach. Drying is the most important, most skipped step: a damp bin quickly turns musty and breeds new bacteria. Invert the bin, prop it for airflow, and let it sun-dry until bone-dry to the touch; sunlight’s UV rays act as a natural disinfectant. Trick 4: Maintenance Habits That Keep Odors Away Deep clean at least a few times a year, more often in hot climates, and let ongoing maintenance make those sessions easier and rarer: Use strong, tear-resistant bags; preventing leaks is the best way to keep the interior clean. Bag and tie everything instead of throwing loose trash into the bin. Double-bag wet or smelly waste such as meat scraps and used diapers. Squeeze moisture from food scraps and drain liquids into the sink, never the trash. Sprinkle baking soda into the empty bin after each bag run to absorb odors and minor leaks. Keep lids closed, especially outdoors, to contain odors and block rain, flies, and animals. Even a disciplined routine leaves the occasional gross-out job. Our vetted regular maid service crews handle kitchen trash and surface duty on every visit, and our deep cleaning reaches the forgotten corners around that bin. Frequently Asked Questions About Garbage Bin Cleaning How often should I clean my garbage bin? Deep clean it outdoors at least a few times a year, more in hot weather. In between, pull full bags promptly, dust the empty bin with baking soda, and keep the lid shut so moisture and pests gain no foothold. Should I use bleach or vinegar to disinfect a bin? Either works: dilute roughly one cup of bleach into a gallon of

Garbage Bin cleaning: 4 Tricks To Eliminate Odors And Leave It Looking Like New Read More »

5 Mistakes You Need To Stop Making When Using The Duster

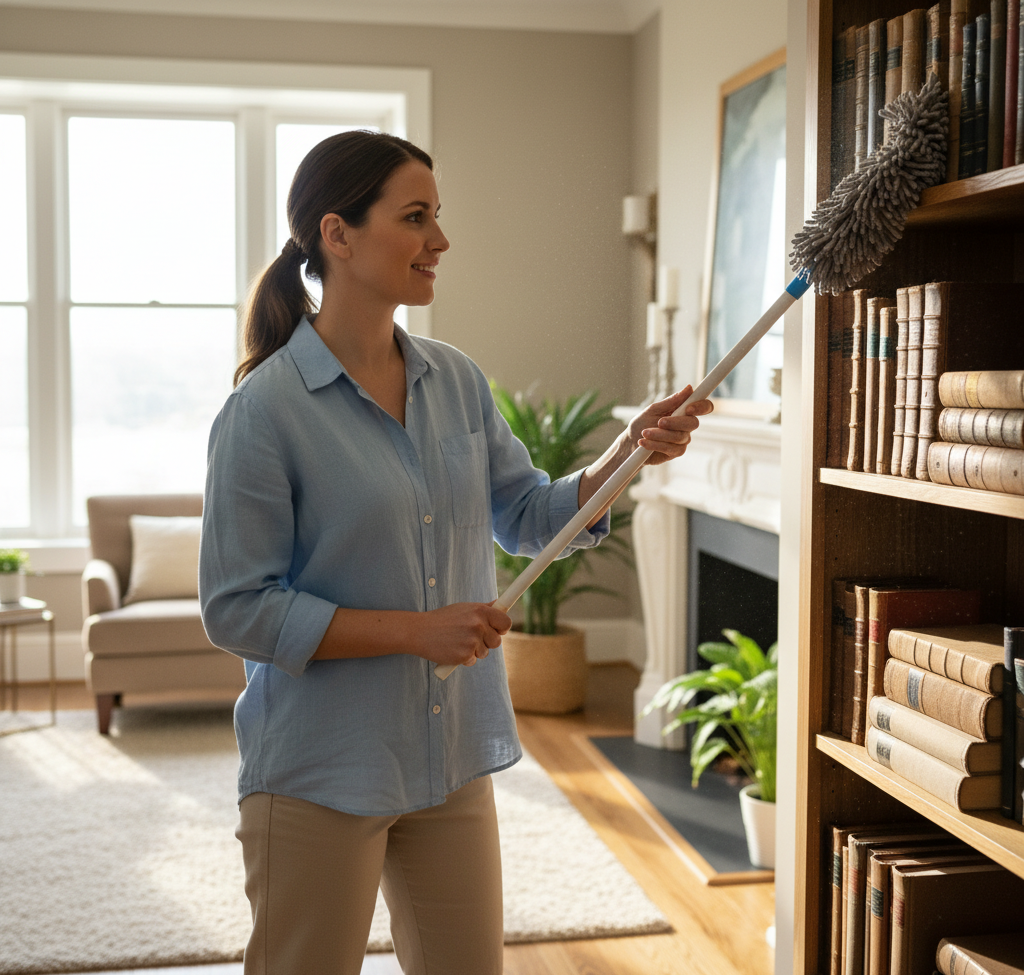
5 Mistakes You Need To Stop Making When Using The Duster Dust is an unavoidable reality of every indoor space: a shifting mix of dead skin cells, fabric fibers, pollen, pet dander, soil tracked in from outside, and even microscopic meteorite debris. It settles on every horizontal surface as a fine gray layer that dulls your home’s look and quietly degrades indoor air quality; for people with allergies or asthma it is a genuine health concern, since it harbors dust mites and other allergens. The duster is your primary weapon, but most people use it badly. The goal of effective dusting is to capture dust and remove it from the environment entirely, not to move it from one surface to another. Here are the five mistakes to stop making. Mistake 1: Trusting a Feather Duster The feather duster, usually made from ostrich, turkey, or chicken feathers on a handle, is the iconic image of dusting and the least effective tool on this list. Its feathers trap little dust; their main action is dislodging particles and sending them airborne to resettle elsewhere minutes or hours later. A high-quality ostrich feather duster performs slightly better because the fine, interlocking barbules create a minor static charge, but it still mostly displaces rather than captures. For a truly clean home, the feather duster is closer to a decorative antique than a working tool. Mistake 2: Using One Duster for Every Surface The real revolution in dusting was microfiber: a synthetic blend of polyester and polyamide (nylon) whose fibers are split into strands many times smaller than a human hair, creating enormous surface area. The split-fiber net physically traps dust, dirt, and even bacteria, and used dry, it generates a positive static charge that pulls in negatively charged dust particles. No chemical sprays are needed. The right lineup covers the whole house: Handheld microfiber dusters: the everyday workhorse for furniture, electronics, picture frames, and general surfaces, with flexible heads that bend under ceiling fan blades and on top of tall bookcases. Extendable dusters: a telescoping pole reaches ceilings, light fixtures, high corners, and cabinet tops, eliminating the stepladder and the neck and shoulder strain of overhead work. Slim or flat dusters: a long, thin profile slides under refrigerators and ovens, between cabinets, and alongside the washer and dryer, where thick layers of unseen dust and lint collect. Microfiber cloths: dry for delicate surfaces, lightly dampened for smudges and stubborn grime without streaks. Lambswool dusters: genuine sheep’s wool contains lanolin, a natural oil that together with the wool’s static charge actively attracts and holds dust instead of pushing it away, making them excellent and gentle on large flat surfaces like tables and shelves. Disposable dusters: a reusable handle with throwaway synthetic heads that trap dust by static; convenient for light, regular dusting, but less environmentally friendly and more expensive over the long term than washable microfiber. Mistake 3: Dusting in the Wrong Order Technique matters as much as the tool, and the single most important principle is to work from top to bottom, because gravity carries any dislodged dust downward. Dusting should come before anything else in a room: wipe lower surfaces and vacuum only after you finish. Start at the highest points: ceiling corners, light fixtures, and fan blades, using an extendable duster. Move down to cabinet tops, bookcases, and wall shelves, then picture frames, window sills, tables, desks, and dressers. Finish at the baseboards and only then vacuum the floor to capture whatever settled. Health Canada’s overview of indoor air contaminants and health is a good reminder that settled dust is tied to the particulates you breathe, so order and method genuinely reduce exposure. Mistake 4: Swiping Aggressively and Ignoring Tricky Surfaces Let the fibers make contact with the surface and lift the dust; aggressive swiping just sends it flying. For heavily dusted surfaces, a slow, single-direction pass works best. Then adjust by surface: Surface What to Do Instead Blinds Use a multi-pronged duster that cleans several slats at once, or close the blinds, dust the whole surface with a handheld duster, reverse the slats, and dust the other side Electronics Turn off and unplug first; TVs and computers build static fields that attract dust. Wipe screens and casings with a clean, dry microfiber cloth, blow dust from keyboards and vents with compressed air, then wipe again Delicate items A very soft, clean paintbrush or new makeup brush works as a precision duster on chandeliers, collectibles, and artificial plants, lifting dust without damage Mistake 5: Never Cleaning the Duster Itself A duster saturated with dust cannot pick up more; it simply spreads the old load around. Cleaning the tool is part of the routine, not an afterthought. The CDC’s guidance on when and how to clean and disinfect your home makes the same point about surfaces: cleaning first is what makes everything else work. Microfiber wins here, since most duster heads are removable and machine washable: wash with regular detergent but no fabric softener, which clogs the microscopic fibers and destroys the static-trapping ability, then air-dry or tumble on low heat. For a lambswool duster, spin it outdoors between your hands to release loose dust, then hand-wash in lukewarm water with mild detergent, rinse thoroughly, and air-dry. How Often Should You Dust? Dusting is continuous maintenance, not a one-time task. For most homes, thorough dusting once a week keeps levels under control. Homes with pets or allergy sufferers, neighborhoods with high pollen counts, and areas near construction need more frequent passes. A consistent routine removes the allergens and particles that affect well-being, not just the visible film. For a comprehensive clean that catches dust from crown corners to the tightest crevices, our regular maid service builds systematic dusting into every visit, and a seasonal deep cleaning clears the accumulated layers. Frequently Asked Questions About Dusting What is the best duster for allergies? A microfiber duster, used dry. Its split fibers and static charge capture dust, dander, and even bacteria rather than displacing them

5 Mistakes You Need To Stop Making When Using The Duster Read More »

cleaning front-laod washing machine

Cleaning Front-Load Washing Machine: Detailed Guide to a Sanitized Machine

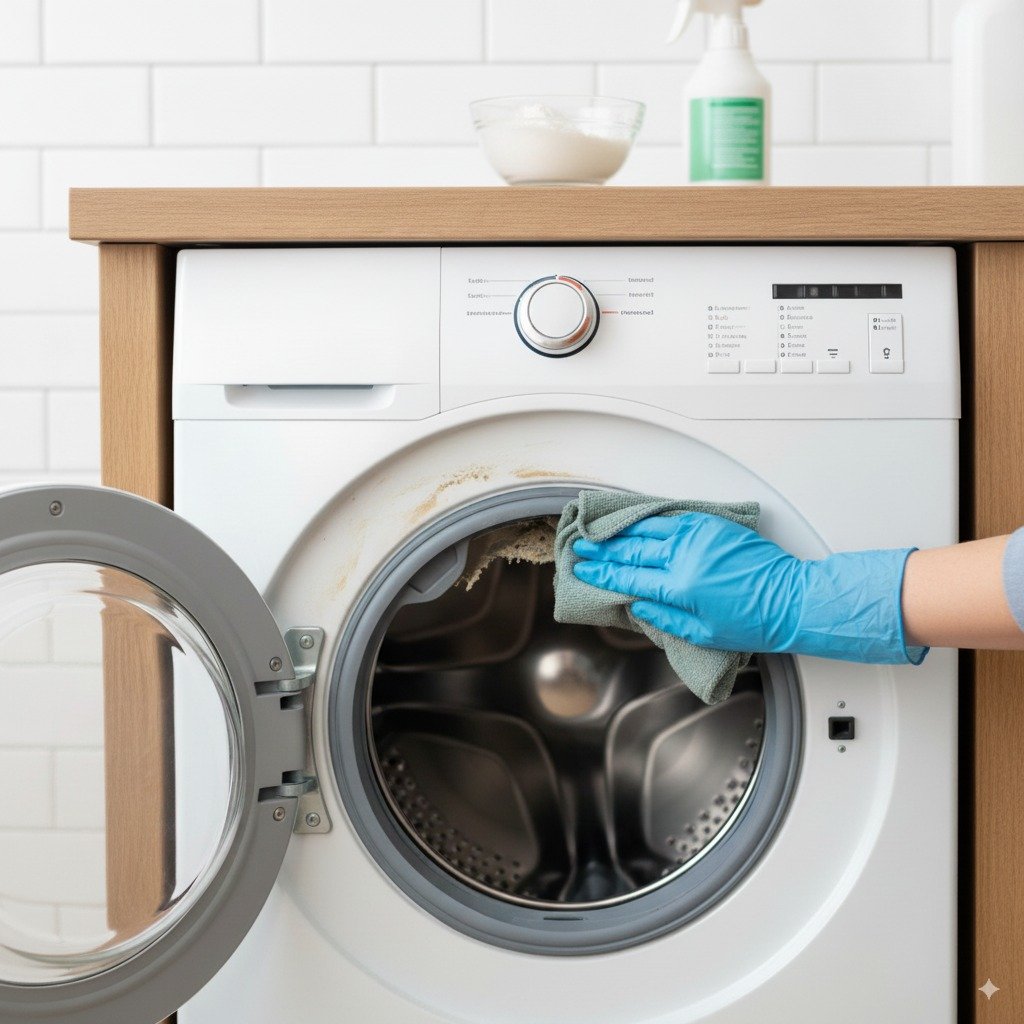
Why Front-Load Washing Machines Get Musty A front-load washer is efficient engineering: it uses less water than a top-loader, treats fabrics gently, and spins fast enough to pull extra moisture out of the load, which shortens drying time. The flip side of that design is an airtight door seal and low water levels that leave standing dampness inside the drum. Mold, mildew, and bacteria feed on leftover detergent and body soil in those damp zones and produce a sour smell that transfers to clean laundry. That odour is a maintenance flag, not a breakdown. Learning how to clean a front-load washing machine protects its performance, keeps your clothes hygienic, and adds years to the appliance. Where Grime Collects in a Front-Loader Top-loaders dry out between loads; front-loaders do not. They trap moisture in four places, and each needs its own treatment before the smell goes away. Rubber door gasket: the deep folds hold water, lint, hair, and a detergent film after every cycle. That dark, damp layer is an incubator for mold and mildew, visible as black spots and a sour smell. Drum and outer tub: the stainless drum resists buildup, but the hidden outer tub collects a slimy film of soap scum and biofilm that can break off in flakes and redeposit on clothes. Detergent dispenser drawer: undissolved detergent, fabric softener, and bleach cake up inside the drawer and its housing, feeding more mold. Drain pump filter: a trap at the bottom of the machine catches coins, buttons, lint, and hair. Left unmaintained, decomposing debris and stagnant water create a powerful, unpleasant odour. Mold spreads wherever moisture lingers, and the CDC’s mold resources explain why drying damp spots is the first line of defence. How to Deep-Clean a Front-Load Washer, Step by Step Set aside about an hour of hands-on work plus the run time for two empty cleaning cycles. Grab rubber gloves, clean cloths, a soft-bristled brush or an old toothbrush, distilled white vinegar, and chlorine bleach, then treat each problem area individually. Step 1: Scrub the gasket Mix equal parts white vinegar and water, or add half a cup of chlorine bleach to a gallon of water, and never mix vinegar and bleach together. Vinegar dissolves soap scum and discourages mold; bleach is the stronger choice once black mildew spots appear. Pull the seal back to reach the gap between gasket and drum, wipe every fold inside and out, scrub stubborn spots with the brush, rinse the area with a cloth dampened in plain water, and dry the gasket fully. Removing the moisture is what stops mildew from returning the same week. Step 2: Sanitize and descale the drum and tub With the machine empty, pour one cup of chlorine bleach into the dispenser’s bleach compartment, skip detergent, and run the hottest, longest cycle available, ideally a Tub Clean or Clean Washer setting or a heavy-duty or sanitary one. This kills the mold, mildew, and bacteria living in the drum and outer tub. Then run a second hot, long cycle with one cup of distilled white vinegar poured directly into the drum. The acid dissolves lingering residue, clears out traces of bleach, and deodorizes the machine, and the two-cycle order follows the same logic as the CDC guidance on disinfecting with bleach: sanitize first, rinse the chemistry out afterward. Step 3: Soak the dispenser drawer Pull the drawer out until it stops, then press the release tab, often marked Push, to free it completely. Soak the drawer in hot water with white vinegar for about 30 minutes, scrub every compartment including the narrow channels and undersides, and brush out the empty housing while the drawer soaks, because mold often grows on the ceiling of that cavity. Rinse, dry, and slide the drawer back in until it clicks. Step 4: Clear the drain pump filter Check your manual for the exact procedure; most front-loaders hide the filter behind a small access door at the bottom front. Lay a thick towel on the floor and keep a shallow pan close by, because trapped water escapes the moment you open it. Unscrew the cap slowly, let the water drain, and pull the filter out. Pick away lint, hair, coins, and buttons, rinse the filter under running water, wipe the housing inside, and screw the cap back tightly to prevent leaks. For many owners, this step finally kills the smell. Problem area What collects there What to use Rubber gasket Water, lint, hair, detergent film, black mildew spots Vinegar-and-water solution, or 1/2 cup chlorine bleach per gallon of water Drum and outer tub Soap scum and biofilm 1 cup bleach on a hot cycle, then 1 cup distilled white vinegar on a second hot cycle Dispenser drawer Undissolved detergent, fabric softener, bleach residue 30-minute soak in hot water and vinegar, plus a small brush Drain pump filter Coins, buttons, hair, stagnant water Running water, a towel, and a shallow pan for the spill Daily Habits That Keep a Front-Load Washer Fresh A deep clean resets the machine; small habits keep it reset. Leave the door ajar after every wash so air circulates through the drum and seal. Wipe the gasket with a dedicated cloth after the last load of the day to lift out standing water. Use only high-efficiency detergent, measured to the label. Regular detergent over-suds and leaves a residue mold feeds on, and more soap never means cleaner clothes. Move wet laundry to the dryer as soon as the cycle ends so nothing sits damp in a closed drum. Run one empty hot cycle with bleach or vinegar every month to hold buildup at bay. Front-Load Washer Cleaning FAQ How often does a front-load washer need a real deep clean? Wipe the gasket after every use and run a monthly maintenance cycle. Take the full four-step approach, including the filter and dispenser drawer, whenever odours return or every few months with heavy use. Can I clean the whole machine with vinegar alone? For general upkeep, yes. Vinegar dissolves

Cleaning Front-Load Washing Machine: Detailed Guide to a Sanitized Machine Read More »