Home Disinfecting

5 Key Areas to Deep Clean Before Winter Sets In

5 Key Areas to Deep Clean Before Winter Sets In

5 Key Areas to Deep Clean Before Winter Sets In When the temperature drops, your home becomes the center of your world. Windows stay closed, the furnace runs daily, and family time moves indoors. That is why a deep clean before winter is more than a seasonal ritual: it protects your air quality, your fabrics, and your comfort for months. These five areas make the biggest difference, and each one is easy to tackle with the right plan. 1. Improve Indoor Air Quality: Vents and Furnace Filter After months of sitting idle, your heating system collects dust, pollen, pet dander, and fine particles in the ductwork. The first time the furnace kicks on, it can blow that accumulation straight into your living space and aggravate allergies. Start by turning off the HVAC system, then vacuum each vent cover with the brush attachment. For a deeper clean, unscrew the covers and wash them in warm, soapy water, using a small brush to reach into the grilles, then vacuum as far into the duct opening as the crevice tool allows. The single most impactful task is replacing the furnace filter. A clogged filter traps fewer particles, forces the system to work harder, and raises both energy use and the risk of malfunction. A fresh filter is inexpensive, and it pays off in health and efficiency all season. Good indoor air quality supports everyday health, and clean vents and filters are the first line of defense, as the CDC notes about air quality. 2. Maximize Natural Light: Windows and Screens Dirty windows can noticeably dim a room during the darker months. Remove your window screens, lay them flat outside, scrub them with a soft-bristled brush and mild soap and water, then rinse and dry completely. Storing screens in a garage or basement during winter lets in more light and protects them from snow and ice damage. Clean the interior glass with warm water and a few drops of dish soap, finishing with a high-quality squeegee for a streak-free result. Do not skip the tracks and sills: a crevice tool clears loose debris, and a damp cloth with an old toothbrush handles the tight corners. Mold can grow where moisture collects around windows, so the CDC recommends keeping damp areas dry. 3. Sanitize Fabrics and Upholstery Comforters, flannel sheets, wool throws, and decorative blankets that have been stored all year can absorb a stale, musty odor. Launder everything according to its care label before use so your cozy essentials are fresh and free of dust mites. Curtains and drapes collect surprising amounts of dust: vacuum them top to bottom with the upholstery attachment, use a steam cleaner on durable fabrics, or machine wash when the label allows. For sofas and armchairs, remove the cushions and vacuum every seam, crack, and corner where crumbs, dust, and pet hair hide. Following basic hygiene practices keeps high-touch fabrics healthier for the whole family. 4. Prepare the Fireplace and Deep Clean Floors Before the first fire of the season, clear and wipe down the mantel, hearth, and fireplace tools so that first flame does not send a plume of dust into the room. The interior of the chimney still needs a professional sweep for safety. Then turn to the floors: carpets and area rugs become the main surfaces for play and relaxing, and a quick vacuum will not do. Vacuum slowly and methodically, making multiple passes in overlapping, perpendicular directions to agitate the pile and pull embedded grit from the fibers. Move furniture where possible to reach the dustiest corners of the room. 5. Get the Kitchen Ready for the Busy Season Winter brings hearty soups, slow-cooked stews, and holiday baking, so the kitchen deserves attention now. Deep clean the refrigerator inside and out: remove shelves and drawers, wash them in warm, soapy water, and wipe every interior surface. This also forces a useful inventory before you stock up for the holidays. Clean the oven well before the turkey goes in, using the self-cleaning function or a manual baking soda and vinegar method so it heats evenly without smoke or odors. Finally, declutter the pantry and take stock of baking supplies and staples so meal prep runs smoothly. Winter Deep Cleaning Checklist Vacuum vents and wash vent covers; replace the furnace filter. Remove, clean, and store window screens; clean glass, tracks, and sills. Launder stored bedding and throws; vacuum curtains and upholstery seams. Wipe the mantel and hearth; book a professional chimney sweep. Deep vacuum carpets with slow, overlapping passes. Clean the fridge and oven; organize the pantry. Winter Cleaning Priorities at a Glance Area Why It Matters Top Task Vents and filter First furnace run can spread dust and allergens Wash covers, replace the filter Windows and screens Maximizes scarce winter light Clean glass and store screens Fabrics and upholstery Removes dust mites and musty odors Launder bedding, vacuum sofas Fireplace and floors Prevents dust plumes and fiber wear Wipe hearth, deep vacuum carpets Kitchen Ready for holiday cooking and guests Clean fridge, oven, and pantry Frequently Asked Questions How often should I replace my furnace filter before winter? Check it monthly and replace it at least once before the heating season starts. A clogged filter makes the furnace work harder, increases energy use, and lets dust and allergens recirculate, so a fresh filter is the cheapest air quality upgrade you can make. Do I really need to clean window screens in winter? Yes. Screens trap dust and pollen all summer, and cleaning them before storage keeps grime from transferring to your glass. Storing them dry also protects the mesh from snow and ice damage and lets more natural light into the room. Can I clean my own chimney? No. The interior of the chimney should be inspected and swept by a certified professional, because built-up creosote is a fire hazard. What you can do yourself is clean the mantel, hearth, and tools before the first fire of the season. Should I hire a professional for

5 Key Areas to Deep Clean Before Winter Sets In Read More »

5 Reasons Why Hiring a Cleaning Service is the Best Form of Self-Care

The Chore Math Nobody Wants to Do The modern home is a hub of work, rest, and family life, and keeping it clean can feel like a relentless task. Dust resettles almost as soon as you wipe it, floors attract dirt overnight, and the kitchen and bathrooms demand constant attention. The weekend, which should recharge you, disappears into a chore list instead. That cycle drains stress reserves and the one resource you cannot buy back: time. A professional residential cleaning service lives in the gap between wanting a calm, spotless home and living a genuinely busy life. Here are five reasons hiring one qualifies as the best form of self-care available. Reason 1: It Hands You Back Your Weekends A cleaning service is often framed as a luxury, but it is more accurately an investment in quality of life. In a moderately sized home, sweeping, mopping, scrubbing, and dusting easily consume four, five, or more hours every week. A professional reclaims those hours for family, hobbies, exercise, or well-earned rest. The cumulative effect is profound: less burnout, better work-life balance, and a home that becomes a sanctuary you enter feeling at ease rather than confronting a to-do list. Reclaimed hours can fund movement that the CDC ties to real physical and mental benefits, and a calmer home is one of the simplest supports for everyday mental health. Reason 2: The Clean Is Deeper and Smarter Than DIY Professional cleaners bring trained technique that is difficult for an average homeowner to match. They know which products suit natural stone versus laminate, how to clean stainless steel without streaks, and the right method for stubborn soap scum on glass shower doors, which prevents costly damage from the wrong chemical or an abrasive sponge. They also arrive with commercial-grade equipment: high-powered vacuums with HEPA filters capture a far higher percentage of dust, allergens, and pet dander, improving indoor air quality for households with allergy sufferers, asthmatics, children, or pets. The process itself is systematic. Cleaners work from a detailed checklist, top to bottom so falling dust lands before floors are addressed, and side to side across each room. A standard recurring visit covers comprehensive dusting of furniture, shelves, and window sills; cleaning and disinfecting of kitchen countertops, sinks, and appliance exteriors; scrubbing toilets, showers, tubs, and vanities; plus vacuuming carpets and mopping hard floors. Reason 3: Deep Cleans and Move Days Stop Being Dreaded Homes that have gone a while without a thorough clean, and clients new to a service, often start with a deep clean, the reset button. It includes everything in a standard visit, then goes further: washing baseboards and trim, cleaning light fixtures and ceiling fans, wiping doors and frames, reaching behind and underneath furniture and appliances, scrubbing grout lines, and cleaning interior window surfaces. Specialized move services matter just as much. A move-out clean is the most exhaustive of all, performed on an empty home down to cabinet and drawer interiors, closets, the oven, and the refrigerator. It is frequently a requirement for retrieving a security deposit, and it presents the property at its best for agents and buyers. A move-in clean lets you start your new chapter in a sanitized, freshly prepared space, peace of mind before a single box is unpacked. Reason 4: Vetted People and Real Protection The biggest hesitation about letting anyone into your home is trust, and reputable companies engineer that trust deliberately. They background-check and thoroughly vet their employees, then stand behind the work with bonding and insurance. Bonding provides protection against theft, while insurance covers accidental damage during a clean, so you are working with an organization accountable for its people and its work. Customization is part of the relationship too: a good company builds a plan around your needs, priorities, and budget, whether that means a weekly, bi-weekly, or monthly visit, a focus on just the kitchen and bathrooms, or a request for eco-friendly products. You pay for what you actually need. Reason 5: Permission to Focus on What Matters Ultimately, a residential cleaning service addresses a practical need, a sanitary home, while delivering intangible returns: free time, reduced stress, and improved well-being. It is self-care with a checklist, and it protects what is likely your largest single investment. Walking into a consistently clean, fresh space frees mental and physical energy for your career, your family, and your passions, with confidence that the foundations are handled. Reclaimed hours every week, without lifting a broom A deeper, more consistent clean than a rushed DIY pass Vetted, insured professionals with real damage protection Lower daily stress and a healthier home for everyone under your roof Self-care benefit What the service delivers Reclaimed time Four or more weekly chore hours returned to you Healthier air HEPA vacuums and trained dusting cut allergens and dander Lower stress A predictable, checklist-driven home reset on your schedule Peace of mind Vetted staff, plus bonded and insured protection Book the Kindness You Deserve Toronto Shine Cleaning brings this whole philosophy to your address at 140 Yonge St Suite 285, Toronto ON M5C 1X6, serving households across the city with routine maintenance, restorative deep cleaning, and recurring maid service plans tailored to your budget, with every base laid out on the pricing page. Property owners can vouch for the results on our reviews page. Call (647) 424-0355 and treat your home, and yourself, to the upgrade. Cleaning Service Questions, Answered How often should I book a cleaning service for it to count as self-care? Most households settle into weekly, bi-weekly, or monthly visits depending on size and lifestyle. Even a monthly recurring clean prevents the deep buildup that turns DIY weekends into all-day marathons, so start where your budget is comfortable and adjust from there. What is the difference between a regular clean and a deep clean? A regular visit maintains: dusting, kitchen and bathroom surfaces, toilets, tubs, vacuuming, and mopping. A deep clean resets: baseboards, trim, light fixtures, ceiling fans, doors and frames, grout, interior windows, and

5 Reasons Why Hiring a Cleaning Service is the Best Form of Self-Care Read More »

The Power of Citric Acid

The Power of Citric Acid: Your Solution for Limescale and Grime

The Quiet Workhorse Hiding in the Baking Aisle Aisle after aisle of specialty sprays promise to blast away limescale, soap scum, and hard-water haze, most of them loaded with aggressive chemistry and perfume-strong fragrances. Meanwhile, near the flour and sugar at your grocery store, sits a white crystalline powder that quietly outperforms many of them: citric acid. Nature packs this weak organic acid into lemons and limes, and as a cleaning agent it dissolves mineral-based trouble without the corrosive punch of the strong mineral acids found in heavy-duty descalers. What makes it so useful in a house supplied with hard water is that most of the stubborn buildup we fight is mineral, not grease. Calcium and magnesium ride along in dissolved form, and when the water evaporates off a kettle wall or a shower door, those minerals stay behind as a chalky crust or a cloudy skin. Citric acid is built for exactly that job. How Chelation Does the Scrubbing for You The mechanism has a name: chelation. Citric acid molecules latch onto the calcium and magnesium ions in scale and lock them into a new structure called a chelate. Unlike the original deposit, a chelate dissolves in water, so the crust stops clinging to the surface and rinses straight down the drain. This matters for more than convenience. Power-scrubbing scale is usually a losing fight, and the abrasion can scar the surface underneath. Chemistry replaces elbow grease, and your finishes stay intact. Five Jobs It Handles Beautifully Kettles: Fill the vessel halfway, stir in one to two tablespoons of powder, bring it to a boil, then let it stand for twenty to thirty minutes while the deposits fizz apart. Pour it out and rinse with fresh water several times until the interior looks nearly new. Coffee makers: Dissolve a tablespoon or two in a full reservoir and run a brew cycle with no grounds, then run at least two more cycles with plain water so no acid taste lingers in the internal lines. Dishwashers: Start with an empty machine, add roughly half a cup to the tub floor or the main detergent dispenser, and run the longest, hottest cycle to clear scale from spray arms, filters, and walls so dishes stop coming out spotty. Showerheads: Slip a plastic bag filled with the solution over the head, secure it with a rubber band or twist tie, and soak for at least an hour, or overnight when jets spray in crooked, weakened lines. Finish with a hot rinse to flush the plumbing. Toilets: Pour about half a cup into the bowl before bed, skip the flush, and give the bowl a quick brush in the morning. Hard-water rings dissolve overnight, so stains lift without harsh fumes. In the laundry room, about a quarter cup added to the main wash chelates the minerals that make detergent fail, so whites come back brighter, colors look fresher, and stiff fabrics soften without a commercial softener. The powder can also help release rust spots from clothing. A Simple Spray for Daily Messes For general kitchen duty, dissolve one to two tablespoons in a liter of warm water in a spray bottle, shake until the crystals disappear, and you have a degreasing, de-spotting spray for countertops, sinks, and stainless faucets. Sprinkle a little on a damp cutting board, scrub, wait a few minutes, and rinse to freshen it. In the bathroom, flood the same spray over soap scum on doors, tile, and tubs and let it work for ten to fifteen minutes before a non-abrasive sponge and a rinse restore clarity to glass. Where Citric Acid Must Never Go Surface Verdict Why Marble, granite, travertine Never The acid reacts with calcium carbonate and etches the polish permanently Glass, chrome, porcelain Safe Dissolves water spots and leaves a streak-free shine Unsealed grout, brass plating Avoid Can eat into grout and strip the plating from fixtures Old, delicate antiques Test first Unknown finishes deserve a hidden-spot trial Respect the Acid Food-grade does not mean friction-free. Wear gloves during longer sessions, keep the powder out of your eyes, and flush immediately with water if contact happens. The cardinal rule: never blend citric acid with chlorine bleach, because the pair can release toxic chlorine gas. The federal hygiene guidance on cleaning and disinfecting with bleach explains why bleach deserves careful, solitary use, and the CDC’s overview of when and how to clean and disinfect at home is a good sanity check on any routine. Because it is inexpensive and biodegradable, a well-stocked jar of citric acid quietly replaces a shelf of single-purpose bottles. When Soaking Is No Longer Enough Some buildup predates your ownership of the home, and no bag-on-the-showerhead trick reaches it. That is when a deep cleaning service pays for itself: crews arrive with professional tools for the scale, grime, and neglected corners a weekend project cannot shift. Routine upkeep is cheaper still, with regular house cleaning booked on your calendar and current rates published on the pricing page (studio and one-bedroom visits start at $212.63 before HST). To talk through your home, call Toronto Shine Cleaning at (647) 424-0355. Frequently Asked Questions Is the powder the same thing as lemon juice? It is the same acid your tongue detects in citrus, just isolated as a purified white crystal, which makes it far more concentrated and measurable than juice. Why does my kettle scale so quickly? Hard water is loaded with dissolved calcium and magnesium. Every boil evaporates water and leaves a thin mineral film behind, and those layers thicken into the crust that can also sap heating efficiency and flake into your cup. Can citric acid damage my appliances? On glass, porcelain, chrome, and stainless interiors it is gentle by design, since it is a weak organic acid. The danger list is short: natural stone, unsealed grout, brass-plated fittings, and any pairing with bleach. Will it help dingy laundry? Yes, if hard water is the culprit. A quarter cup in the main wash binds the minerals

The Power of Citric Acid: Your Solution for Limescale and Grime Read More »

cleaning exhaust

How to Clean Your Kitchen Exhaust Fan: A Complete Guide

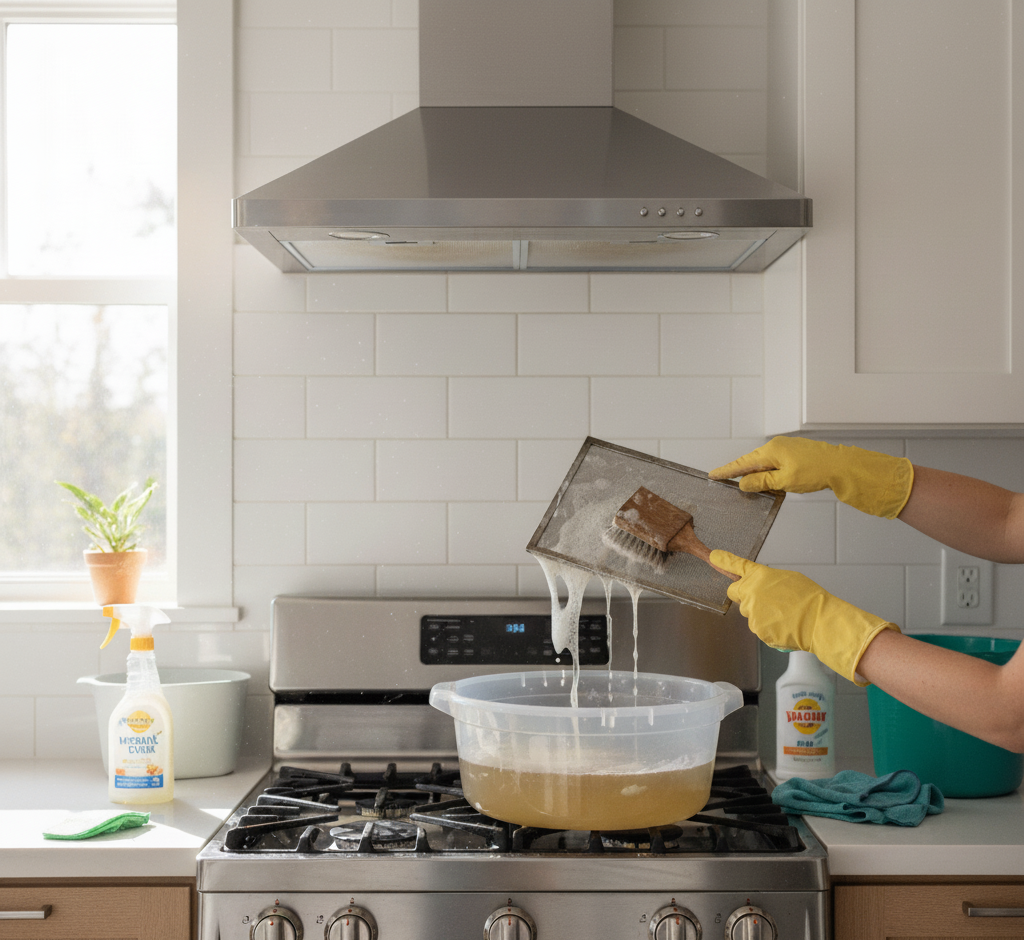
Why Your Kitchen Exhaust Fan Needs Regular Cleaning Your kitchen exhaust fan, or range hood, works harder than almost any appliance you own. Every time you cook, it pulls airborne grease, moisture, and fumes out of the kitchen, protecting your indoor air quality and stopping a sticky film from settling on walls and cabinets. But in doing that job, the fan, its filters, and the ductwork become a hidden reservoir of grimy buildup. Left alone, that grease is more than unpleasant: it is a serious fire hazard and the reason your fan slowly stops working. Cleaning the exhaust system is a maintenance task that directly affects the safety and efficiency of your kitchen. The Fire Risk Hiding in a Dirty Range Hood During frying, searing, or roasting, invisible droplets of cooking grease rise with the steam. When that warm air reaches the cooler metal surfaces of the hood, the grease condenses and clings to the filter, the fan blades, and the interior. Layer builds on layer with every meal until the coating is thick, gummy, and rancid. That residue is concentrated fuel. If a pot flares up on the stove, flames can be pulled straight into a grease-laden hood and travel through the ductwork into the walls of your home. A clean exhaust system gives smoke a safe escape route; a dirty one turns the hood into a fuse. There is also the efficiency problem: a clogged filter blocks airflow, so cooking smells linger, smoke sets off alarms, and the fan motor strains, overheats, and can burn out entirely. Old grease even attracts insects and rodents. How Often Should You Clean or Replace the Filters? How often depends on how you cook. As a general rule, clean reusable metal filters at least once a month, and every two weeks if you fry or sear often. The hood interior and fan blades need a full degreasing once or twice a year. Charcoal filters in recirculating hoods cannot be washed at all; they must be replaced, typically every three to six months, according to your appliance manual. Component Type Cleaning schedule Metal mesh or baffle filters Reusable Soak and scrub monthly; every 2 weeks for heavy frying Charcoal filter Disposable Replace every 3-6 months; never wash Hood interior and fan blades Built-in Full degrease 1-2 times per year Step-by-Step: How to Clean Your Kitchen Exhaust Fan Prepare the Workspace Safely Begin at the breaker panel: cut power to the range hood entirely rather than flipping the fan switch, so the unit cannot start while your hands are inside it. Cover the stovetop with an old towel or newspaper to catch falling grime, then gather rubber gloves, a non-abrasive scrub brush, a heavy-duty degreaser, and a bucket filled with very hot water. Clean the Metal Filters Most hoods that vent outside use reusable metal mesh or baffle filters held by a latch or slide. Fill the sink or a bucket with water as hot as your tap runs, squeeze in a generous squirt of degreasing dish soap and about half a cup of baking soda, and let the filters soak for twenty to thirty minutes, longer for heavy buildup. Scrub both sides, paying attention to the crevices of the mesh, rinse with hot water, and let the filters dry completely before reinstalling them. Replace Charcoal Filters If your hood recirculates air instead of venting outside, it uses a charcoal filter that absorbs odors. These are not designed to be washed; once saturated, they stop working, and washing ruins them. Check your manual for the correct part number and the recommended replacement interval. Degrease the Hood Interior and Fan Blades With the filters out, spray the interior surfaces generously with degreaser and let it sit for several minutes to penetrate the grease. Wipe down the inside of the hood with a non-abrasive sponge or cloth dipped in hot, soapy water, rinsing frequently, and work carefully around the light wiring and motor. The fan blades are usually the most coated part: wipe each blade, rotating the fan by hand to reach every side. Be firm enough to remove the grease but gentle enough not to bend the blades, since an unbalanced fan vibrates noisily. Finish With the Exterior For stainless steel, spray the cleaner onto a soft microfiber cloth rather than the hood itself and wipe in the direction of the grain to avoid streaks. Painted hoods only need a damp, soapy cloth. Once every piece is clean and completely dry, reinstall the filters, restore power at the breaker, and enjoy a quieter, stronger fan. Cut power at the circuit breaker before touching anything. Soak metal filters in hot water, degreasing soap, and baking soda. Replace, never wash, charcoal filters. Wipe each fan blade by hand without bending it. Polish stainless steel along the grain. Frequently Asked Questions About Exhaust Fan Cleaning Can I wash a charcoal filter? No. Charcoal filters are meant to absorb odors, and washing destroys them. Replace them every three to six months or per your manual. Why does my kitchen still smell after cooking? A grease-clogged filter blocks airflow, so the fan cannot pull odors out. Cleaning or replacing the filter usually restores performance. How do I clean between the fan blades? Rotate the blades by hand and wipe each one with a degreaser-soaked cloth, working carefully so you do not bend them and unbalance the fan. Is the grease in a range hood really a fire hazard? Yes. Cooking grease is flammable, and a stovetop flare-up can ignite buildup in the hood and ductwork. Regular cleaning keeps that risk low. Do I need to unplug the hood before cleaning? Switch off the circuit at the breaker, not just the fan switch, so the fan cannot start unexpectedly while you are working inside the hood. Let a Professional Handle the Deep Grime A greasy exhaust system is one of the toughest cleaning jobs in the home, and the moisture it removes matters for your whole house: poor kitchen ventilation

How to Clean Your Kitchen Exhaust Fan: A Complete Guide Read More »

Perfect Cleaning Schedule

Cleaning Schedule: A Room-by-Room Guide to Your Perfect Cleaning Schedule

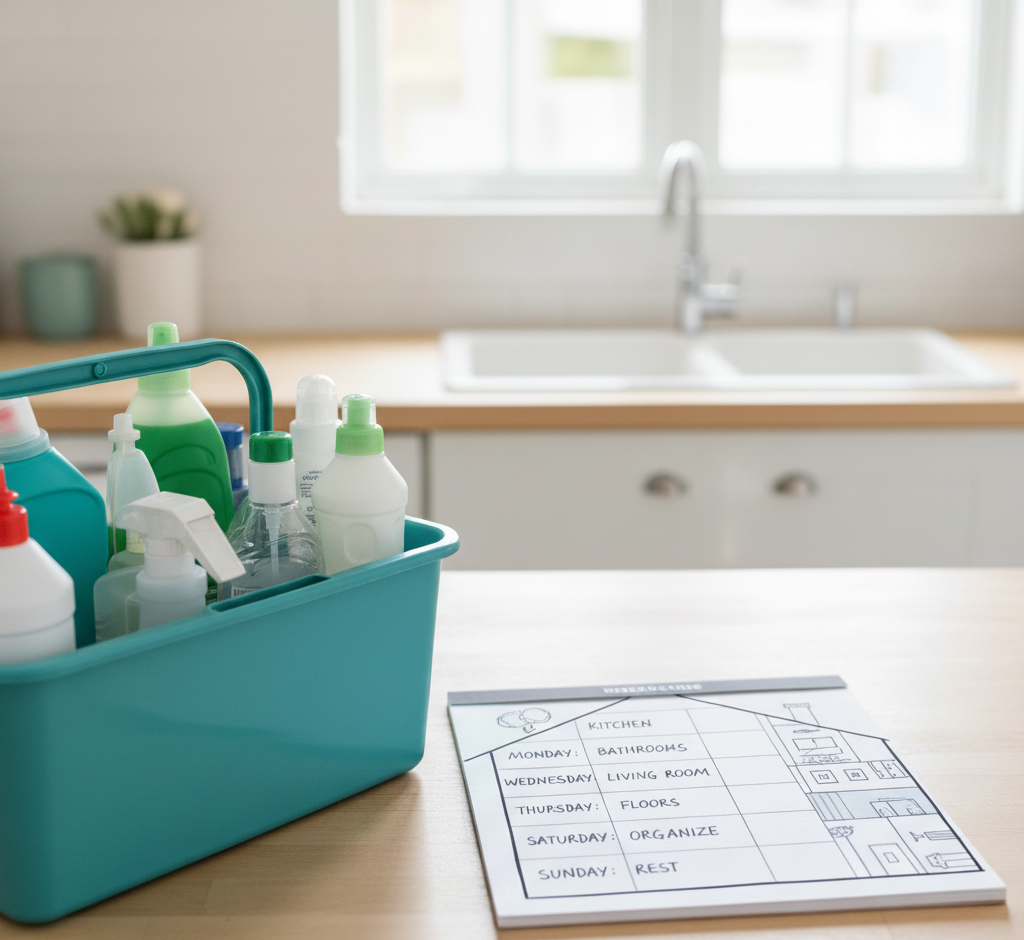
Why a Cleaning Schedule Beats Cleaning Marathons For many households, cleaning swings between two extremes: frantic multi-hour marathons before guests arrive, or weeks of ignoring the dust bunnies and sticky counters until frustration wins. This reactive approach is exhausting and inefficient. The secret to a consistently clean home is not stronger chemicals or more scrubbing; it is a simple cleaning schedule that turns one overwhelming project into small, predictable daily habits. Breaking tasks into daily, weekly, monthly, and seasonal frequencies keeps grime from ever building up to marathon levels, and it frees your weekends. Daily Habits: Fifteen to Twenty Minutes That Work Daily tasks are the foundation of the system. They take little time but have the biggest impact on how your home feels: Make the bed each morning; it takes under two minutes and instantly makes the bedroom look put together. Wipe kitchen counters and the sink after every meal so spills and crumbs never harden. Give the kitchen floor a quick sweep at day’s end so crumbs never get tracked through the house. Follow the one-load rule: wash, dry, fold, and put away a single load of laundry daily so the pile never becomes a mountain. The Weekly Reset: Bathrooms, Kitchen, and Dust The weekly clean is a deeper reset of the main living areas. You can do everything on one cleaning day or spread one or two rooms across the week, an approach called zone cleaning. Bathrooms deserve a full scrub for hygiene as much as appearance: the toilet inside and out, the shower and tub to stop soap scum before it thickens, the sink and countertops scrubbed and disinfected, the mirror polished streak-free, and the floor swept and mopped. In the kitchen, wipe down appliance exteriors including the refrigerator, dishwasher, microwave, and stovetop, clean the microwave interior by heating a bowl of water with vinegar to loosen grime, and mop the floor. Throughout the living areas and bedrooms, dust every surface, then vacuum carpets, rugs, and hard floors; regular vacuuming lifts the dust, dander, and allergens that would otherwise circulate. Monthly Projects for the Details Monthly tasks catch the slow, creeping grime that separates merely tidy homes from deeply clean ones. Wipe down baseboards, which collect dust and scuffs; clean light fixtures and ceiling fans; run an empty cleaning cycle on the washing machine to prevent soap scum and mildew; and clean the dishwasher filter to keep it performing well. Window sills and sliding door tracks also trap dirt and insects, so give them a monthly pass. Seasonal Projects: The Whole-Home Reset Every quarter, set aside time for the big jobs. Empty the refrigerator and freezer, wipe down shelves and drawers, and discard expired food. Wash windows inside and out, deep clean carpets and upholstery with a rented machine or a professional service, and organize closets and pantries while decluttering. Season-specific extras include cleaning the gutters in the fall and pressure washing the deck in the spring. Frequency Typical tasks Time tip Daily Make beds, wipe counters, quick sweep, one load of laundry Batch these into a 20-minute evening routine Weekly Bathroom scrub, appliance wipe-downs, dusting, vacuuming, mopping Assign one or two rooms per day Monthly Baseboards, light fixtures, washing machine cycle, window sills Pair with bill-paying day as a reminder Seasonal Fridge deep clean, windows, carpets, closets, gutters, deck Pick one weekend per season and book help early Make the Schedule Fit Your Life A schedule is a template, not a rigid document. If you live alone and rarely cook, the kitchen needs less attention; if you have kids and pets, daily floor care and weekly vacuuming become non-negotiable. Task batching helps some households: make Monday dusting day and Tuesday floor day so you stay focused with one set of tools. A clear schedule also makes delegation easy, since everyone in the family knows which tasks belong to which day, removing the constant negotiation about who cleans what. Above all, aim for progress, not perfection. Miss a day and simply pick it up tomorrow; because the system prevents buildup, one skipped task never snowballs into a disaster. Cleaning science supports the approach: the CDC explains that regular cleaning and disinfecting of your home removes most germs from surfaces, and that handwashing is one of the best ways to stop germs from spreading between family members. Frequently Asked Questions About Cleaning Schedules How long should daily cleaning take? Fifteen to twenty minutes is enough when you focus on the high-impact habits: making the bed, wiping counters after meals, a quick floor sweep, and one load of laundry. Is it better to clean one room a day or everything weekly? Both work. Zone cleaning, with one or two rooms per day, keeps the workload even, while a single weekly cleaning day suits people who prefer to finish everything at once. What should I clean monthly that people usually forget? Baseboards, ceiling fans and light fixtures, the washing machine drum, dishwasher filter, and window sills and sliding door tracks are the details that quietly collect grime. How do I stay consistent with a cleaning schedule? Keep tasks small and visible, pair them with existing habits such as morning coffee or evening TV, and remember that a missed day is fine as long as you resume the next day. When should I hire professional cleaners instead of doing it myself? Monthly and seasonal projects such as carpet deep cleaning, fridge resets, and whole-home refreshes are ideal to outsource, especially before holidays or when allergies act up. Keep the Schedule on Track With Professional Help The heaviest items on your schedule do not have to be DIY. Toronto Shine Cleaning’s regular cleaning service handles the weekly core clean, while our deep cleaning service covers the monthly and seasonal projects that need extra muscle. We serve homes across Toronto and the GTA, and our reviews show what consistent cleaning looks like. Call (647) 424-0355 or check our pricing to build your routine around a professional team.

Cleaning Schedule: A Room-by-Room Guide to Your Perfect Cleaning Schedule Read More »

humidifier being effective

Humidifier Cleaning: The Hidden Danger in Your Humidifier (And How to Prevent It)

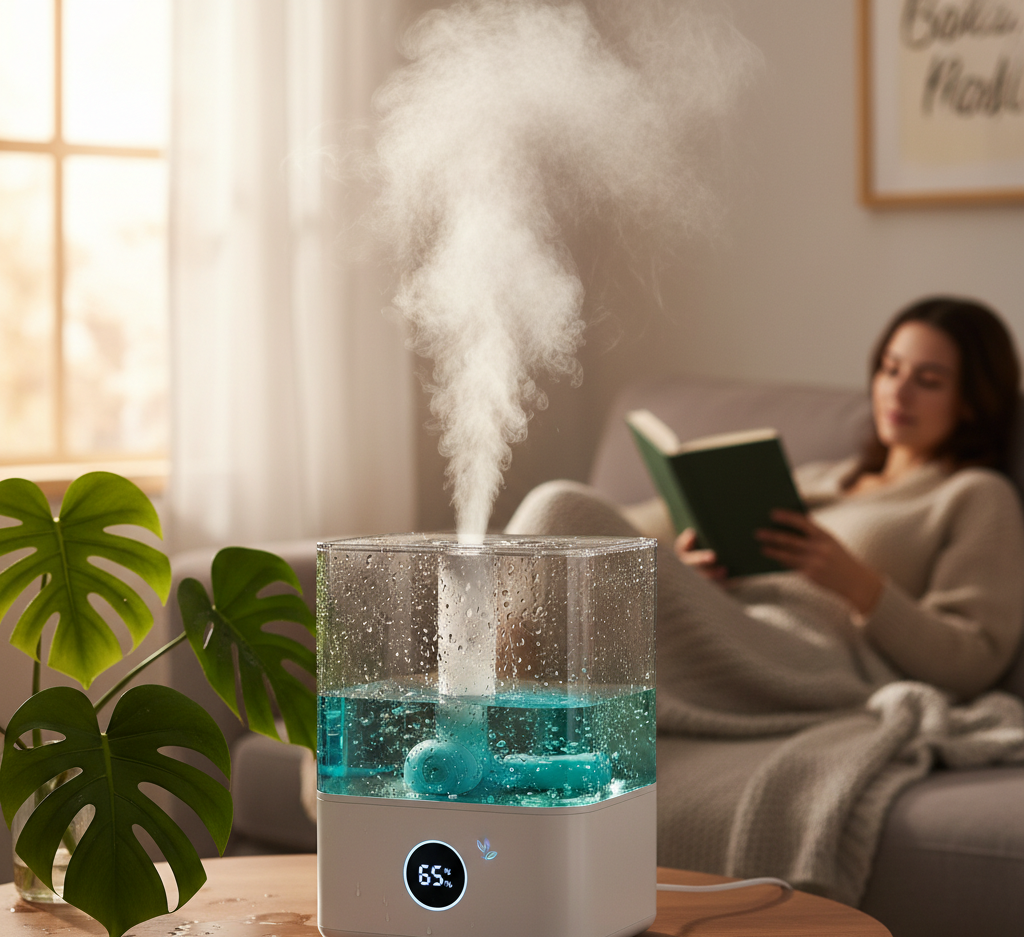
The Invisible Price of a Cozy Canadian Winter The cold does most of its indoor damage quietly. Sealed houses and running furnaces strip moisture from the air until the environment inside your walls turns drier than a desert, and your body reports the loss first: a throat that tickles all day, a voice that croaks until mid-morning, skin that feels tight and itchy, lips that chap, knuckles that crack. Add the sudden snap of static from a doorknob and wooden furniture that creaks and splits as the season drags on. The CDC’s winter weather guidance captures how thoroughly the cold season reshapes life indoors, and dry air is the part nobody shovels. The fix is one small appliance that puts water vapor back where the furnace took it out. Run properly, a humidifier turns a harsh, parched house into a comfortable one. The word “run” is doing a lot of work there, because this machine never runs clean on autopilot. Why the Number 30 to 50 Matters Indoor comfort is usually discussed through relative humidity, which compares the moisture the air holds to the maximum it could hold at that temperature. Health experts put the comfort zone between 30 and 50 percent. Cold outdoor air carries almost no water, and once you heat it indoors, the percentage collapses into single digits. Parched air behaves like a sponge, pulling moisture from your skin and from the mucous membranes lining your nose, throat, and lungs. Those membranes are your first line of defense at trapping viruses and bacteria, so when they dry out, colds and sinus trouble hit harder and linger longer. Kept properly humid, they soothe coughs and ease congestion instead, which is why humidifier season overlaps with cold and flu season. The Hidden Danger in the Tank Every humidifier carries a reservoir of standing water, and standing water at room temperature is exactly where mold, mildew, and bacteria build an empire. An uncleaned unit then does something genuinely counterproductive: it aerosolizes whatever is growing inside and broadcasts a plume of microscopic contaminants into the air your family breathes. That can flare allergies and, in some cases, trigger a respiratory illness known as humidifier fever. The CDC’s overview of mold and your health explains why inhaled mold exposure is worth taking seriously. The same page on cleaning and disinfecting with bleach doubles as a reminder that disinfectants need correct dilution and a thorough rinse. Which Machine Do You Have? Type How it works Trade-off Evaporative Fan blows air through a wet wick, releasing invisible cool mist that self-regulates as the room humidifies The wick is consumable: minerals clog it, and neglect lets it harbor mold Ultrasonic A vibrating diaphragm shatters water into a visible cool mist; very quiet, no filter to buy Anything dissolved in the water leaves with the mist, so tap water sprinkles white dust on every surface Vaporizer A heating element boils water, so the steam released is sterile and warm Uses more electricity and poses a burn risk around small children Whole-house Built into the forced-air system, holding every room at a set level automatically Costliest option, needs professional installation and upkeep If you own the ultrasonic kind, the tank is only half the story: use distilled water, because its minerals have been removed, so the mist stays pure and the dust never settles. Distilled water also stretches the life of an evaporative wick. A Routine That Takes Minutes Daily: Empty the tank, rinse it, and refill with fresh water. Never just top up old water that has been sitting. Weekly descale: Unplug, separate tank from base, and soak both with equal parts white vinegar and water for at least an hour; the acetic acid dissolves the chalky crust. Gently brush the residue away. Weekly disinfect: Swirl a mix of one teaspoon of household bleach per gallon of water in the tank, hold it for about twenty minutes, then rinse obsessively until no bleach smell survives. A 3 percent hydrogen peroxide solution works the same way. Always finish dry: Air-dry every part completely before reassembly, because a dry surface cannot grow mold. Placement and measurement seal the deal. Sit the unit on a level, water-resistant surface a few feet off the floor, away from walls, electronics, and wooden furniture, with room for airflow. Then spend a few dollars on a hygrometer, the little device that reads room humidity, so you can confirm you are inside the 30 to 50 percent band. Over-humidifying is a real mistake too: too much moisture beads on windows and walls and grows the very mold you bought the machine to outmaneuver. Breathe Easy, Live Spotless A clean humidifier protects the air you breathe; a clean home protects everything else. Toronto Shine Cleaning covers both angles with scheduled regular cleaning and seasonal deep cleaning for your home, serving neighbourhoods across the city as listed on our locations page. Call (647) 424-0355 to book, or start with an online quote at your convenience. Frequently Asked Questions How often should a humidifier be cleaned? A quick empty-rinse-refill belongs every single day, while the full descale-and-disinfect routine should happen weekly through the whole season you run the machine. What is the white powder on my shelves? That is your tap water wearing a disguise. Ultrasonic models atomize dissolved minerals along with the water, and they settle as fine dust. Switching to distilled water stops it. Can a dirty humidifier really make me sick? Yes. Standing water breeds mold and bacteria, and the mist launches them into the room air, which can trigger allergies and, in some cases, a respiratory illness called humidifier fever. Is higher humidity better if dry air is the problem? No. Above the 30 to 50 percent range, condensation forms on windows and walls and invites mold growth. A cheap hygrometer keeps you in the safe band.

Humidifier Cleaning: The Hidden Danger in Your Humidifier (And How to Prevent It) Read More »

 Professional vs. The DIY Reality duct cleaning

Professional vs. DIY Duct Cleaning: What You Need to Know Before You Start

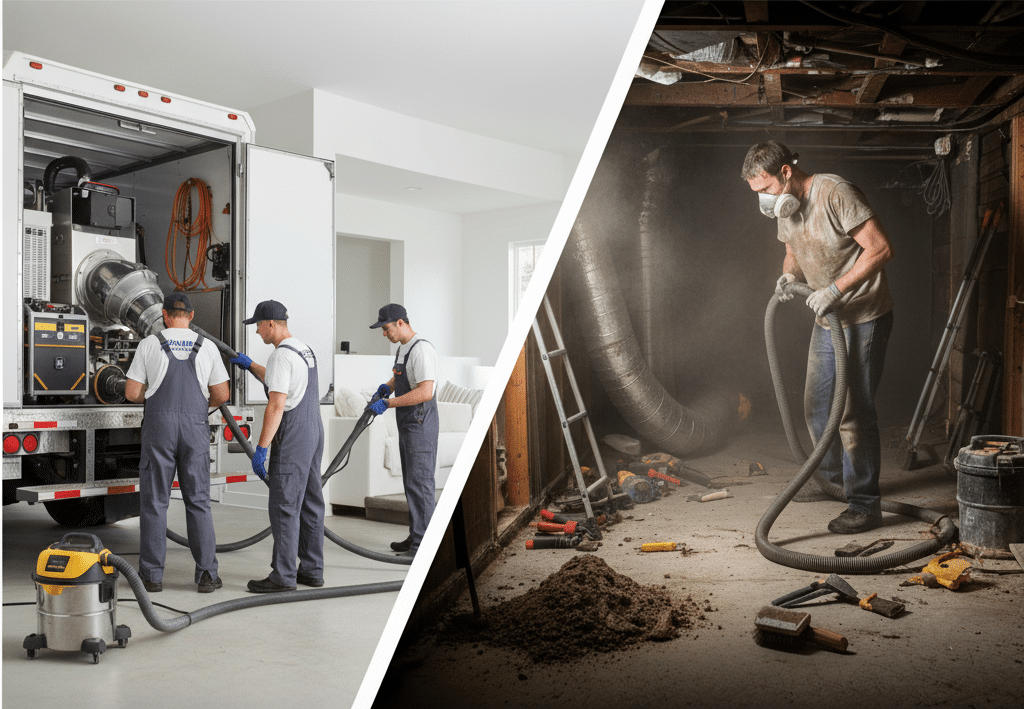
Two Jobs Wearing the Same Name Duct cleaning lives in a strange corner of home maintenance. It promises fresher air, a healthier household, and an HVAC system that stops working so hard, and when you pull a register cover and find felt-thick dust inside, the job looks as simple as pointing a vacuum hose into the wall. Except there are really two different services hiding behind one phrase. A professional whole-system decontamination and a DIY surface sweep use different equipment, aim at different targets, and finish with dramatically different results. The single most important step is deciding which one you are actually buying or building. You can do the second, if you go in clear-eyed about the risks and honest about the reach. What a Professional Crew Really Does Industrial-grade work happens inside your ducts while a truck-strength vacuum system hooks into the main trunk line near the furnace. That rig holds the entire network under negative pressure, turning your house’s airways into one giant vacuum cleaner before a single brush moves. Technicians then thread flexible tools deep through each register: high-pressure air whips that blast caked-on dust loose, and rotary brushes that scrub duct walls no hose could ever reach. Everything dislodged gets pulled toward the collection unit instead of into your living room. The at-home version borrows a shop-vac and a long brush. Without negative pressure you clean only what the hardware physically touches, which is typically the first few feet branching off each register: you are dusting the endpoints of the system, not the system itself. Real Benefits, Real Hazards The rewards of a careful DIY pass are genuine but modest: removing clumps near the grilles improves airflow into rooms, visible dust stops puffing out of the vents, and the service call you did not book stays in your pocket. The hazards are equally concrete. Debris shaken loose without suction behind it can be pushed deeper into the trunk lines, creating a blockage or surfacing later as a dust storm. Flexible ductwork, the silvery accordion hose behind your walls and ceilings, tears and punctures easily under spinning brushes and rigid vacuum tools. Rupture it inside a wall and an afternoon project becomes a costly professional repair. Dust is rarely alone in ducts. Mold, mildew, bacteria, and allergens may share the space, and the CDC’s page on mold and health spells out why stirring spores up without containment is a gamble with your air. Disturbing them can trigger allergies and respiratory flare-ups in the very rooms you hoped to improve. Expect diminishing returns: hours of labour may only make a visible dent in the dust level at the endpoints, which many owners find frustrating rather than satisfying. Assemble the Right Arsenal Tool Job it does Powerful shop-vac, ideally HEPA-filtered Sucks debris without exhausting fine dust back into your air; a household vacuum cannot handle the load Dryer-vent cleaning kit Flexible rotating brush head plus connectable rods that chuck into a power drill, the secret weapon for reaching inside Screwdriver or drill Releases the register grilles Microfiber cloths, bucket of hot soapy water Washes the grilles themselves clean Painter’s tape or cardboard Seals off every register you are not actively working New furnace filter Non-negotiable final install N95 mask (or better) and safety glasses Worn the entire time, no exceptions The Method, Step by Step Set aside several hours and move slowly. Kill the HVAC at the thermostat first so nothing stirs while you work. Tape or card over every supply and return register except the one in front of you. Unscrew that grille, scrub it in the utility sink or outside, and let it dry fully. Feed the shop-vac hose as deep into the open duct as comfort allows and start sucking. Then thread the drill-driven brush past the hose on low speed while the vacuum runs, feeding it in and pulling it out so dislodged dust meets suction immediately. Reseal the register, repeat through every supply, then the larger return ducts that carry the room’s unfiltered air. With furnace power off at the breaker, open the blower panel and vacuum the compartment with a small brush attachment, dodging wiring and fan blades. Finish by installing the new filter, uncovering every register, refitting the dried grilles, restoring power, and running the fan roughly fifteen minutes so the fresh filter catches whatever still floats. Call the Professionals When… Some conditions end the DIY conversation immediately: black splotches at the vents or a musty smell that will not quit, because agitating mold scatters spores through every room; rodents or insects nesting in the ductwork, whose droppings and remains need contained removal and sanitizing; the aftermath of a major renovation, since construction dust overwhelms a shop-vac; an old home with uncertain, fragile ducts; or a household member managing severe allergies or asthma, where anything short of a full-service clean undercuts the point. The CDC’s overview of cleaning and disinfecting at home makes the same distinction for surfaces: proper equipment, correct order, and real containment are what separate cleaning from rearranging dirt. The Middle Ground: House-Side Help A register sweep manages what is visible; it will never mimic the negative pressure of a professional rig. What a cleaning service does replicate is the rest of the dust reservoir feeding those ducts: the fabrics, floors, and corners that recirculate particles into your HVAC every day. Toronto Shine Cleaning handles that load through recurring maid service, full deep cleaning for your home, and move-in or move-out cleaning when the air should start over with you, with transparent quotes on the pricing page. Talk to us at (647) 424-0355 about what your system actually needs. Frequently Asked Questions Is DIY duct cleaning a scam? Not a scam, but a mismatch of expectation. Vacuuming the reachable few feet of each branch is real surface cleaning. Calling it duct cleaning oversells it, since most of the system stays untouched. What is the single biggest danger of doing it myself? Tearing flexible ductwork with a rigid brush

Professional vs. DIY Duct Cleaning: What You Need to Know Before You Start Read More »

Clogged Drain? 4 Tips to Fix it Without Harsh Chemicals

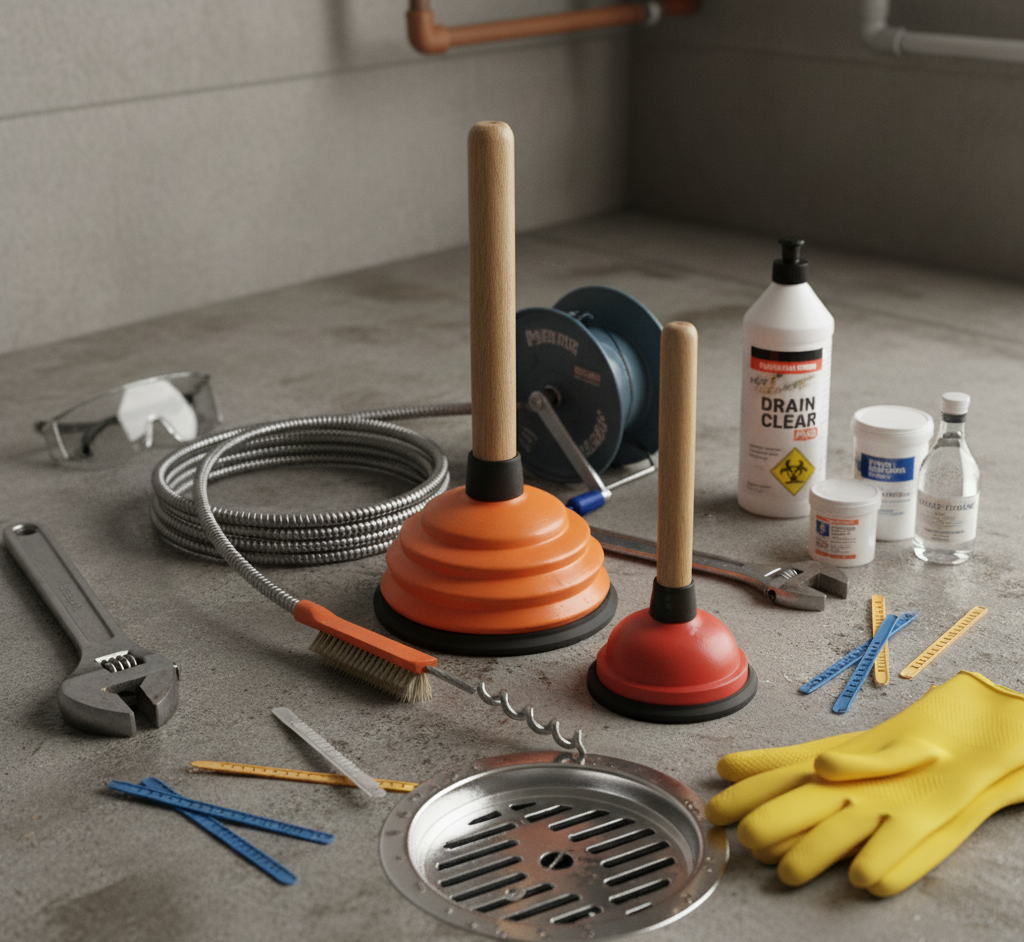
Clear a Clogged Drain the Safe Way, Without Harsh Chemicals A clogged drain rarely announces itself loudly. It starts with a gurgle, then water that takes longer to disappear, and soon you are standing in a shallow pool at the end of a shower or watching the kitchen sink back up. The instinct to grab a liquid chemical cleaner is understandable, yet it is usually the worst first move: caustic products can damage pipes and leave dangerous liquid behind if the clog survives. The smarter play is to escalate from gentle household methods to direct physical removal. Know Your Clog: Kitchen Grease Versus Bathroom Hair Drain blockages behave differently by location. The kitchen sink collects grease, fats, and oils from cooking, plus small food particles and coffee grounds. Hot grease poured down the drain travels a short distance, cools, and solidifies, coating the pipe with a sticky layer that catches debris until the flow is fully blocked. The bathroom drain battles hair: strands wash down and tangle into a net that soap scum, conditioner, and toothpaste residue cement into a dense plug. The right fix depends on which enemy you face. Why Chemical Drain Cleaners Are the Wrong First Step Most chemical uncloggers rely on sodium hydroxide, also known as lye, or sulfuric acid. These caustic substances dissolve blockages through a reaction that generates heat, which can soften PVC pipes and corrode metal pipes in older homes, leading to leaks and expensive repairs. The fumes are toxic in a poorly ventilated bathroom or kitchen, and the products kill the bacteria that septic systems need to break down waste before eventually reaching waterways. Worst of all, if the chemical fails, the pipe now holds corrosive liquid, making a later attempt with a plunger or snake a hazardous job. Health Canada’s household chemical safety guidance spells out the risks of drain cleaners and other caustic products, and its page on using household products safely is a solid reference before you buy anything else. Fix 1: Boiling Water, Then Baking Soda and Vinegar Start with the gentlest weapon, aimed squarely at grease. Boil a full kettle or pot of water and pour it down the drain in two or three stages, letting it work for a few seconds between pours so the heat melts solidified grease and flushes it through. If the water still drains slowly, pour about half a cup of baking soda down the drain, follow it with half a cup of distilled white vinegar, and immediately cover the opening with a plug or cloth so the fizzing reaction stays inside the pipe. Leave the mixture for at least an hour, or overnight for a stubborn clog, then flush with a pot of boiling water. These gentle methods are best for maintenance and slow drains. Fix 2: Plunge With the Right Tool and Technique The plunger is the tool most homes own and few use well. Know your models: the standard cup plunger suits flat surfaces such as a kitchen sink, while the flange plunger, with its smaller extension cup, seals better in a toilet and works well in bathtubs and showers. Plug the second basin of a double sink with a wet rag and block the tub or sink overflow with a damp cloth, then add enough water to cover the plunger cup, because the plunger moves water, not air. Push down gently to expel the air, then work a series of vigorous push-pull motions, emphasizing the pull, which creates the suction that dislodges the clog. After about 20 seconds, lift the plunger and test the drain, repeating as needed. Fix 3: Snake the Drain or Clean the P-Trap If plunging fails, go deeper with a drain snake, also called a hand auger. Feed the flexible cable into the drain until you feel resistance, tighten the thumbscrew, and turn the handle so the corkscrew tip breaks up the clog or latches onto it, then pull the whole mess back out. Cheap plastic zip-it strips, long barbed strips of plastic, are remarkably effective at pulling hair from bathroom drains. Still no results? The clog likely sits in the P-trap, the U-shaped pipe under the sink that holds water against sewer gas. Place a bucket underneath, unscrew the two slip nuts by hand or with channel-lock pliers, empty the trap, and scrub the gunk from inside. Check the horizontal pipe leading into the wall as well, then reassemble with the gaskets seated, hand-tighten the nuts, add a final quarter-turn with your pliers, and run water to check for leaks. Which Fix Matches Your Clog? Situation Best First Tool Escalate When Slow kitchen drain with greasy buildup Boiling water, then baking soda and vinegar Water still pools after two attempts Bathtub or shower drain full of hair Flange plunger or zip-it strip No movement after 20 seconds of plunging Sink that drains, then slowly refills Drain snake fed toward the P-trap The snake pulls nothing back Standing water beneath the sink P-trap removal with bucket and pliers Any leak after reassembly, call a plumber Prevention Is the Real Fix Never pour cooking grease, fats, or oils down the sink; collect them in a jar or can, let them solidify, and toss them in the trash. Use a mesh strainer in the kitchen sink to catch food particles and empty it into the bin. Run hot water down the drain for about a minute after washing greasy dishes. Fit the shower or tub drain with a hair-catching cover and clear it after every shower. Frequently Asked Questions Is it safe to pour boiling water down PVC pipes? For most modern plumbing, yes. The water cools quickly as it travels, and the heat is what melts the grease. If your home has very old or brittle plastic pipes, use hot tap water instead and lean on the baking soda and vinegar step. Why does my drain clog again a few weeks after I clear it? The blockage was probably pushed further down the pipe

Clogged Drain? 4 Tips to Fix it Without Harsh Chemicals Read More »

clean carpet

DIY vs. Store-Bought: What’s the Best Carpet Cleaning Solution?

DIY vs. Store-Bought: What’s the Best Carpet Cleaning Solution? Every homeowner asks this question, and the honest answer is that no single product wins for every situation. The cleaner that lifts a pet stain may do nothing for grease, and the mixture that handles a small spill is not what you need for a full-room deep clean. The best carpet cleaning solution is the right solution for the right problem, so the real skill is knowing what each type of cleaner does and when to use it. The Chemistry Behind Carpet Cleaners Commercial and homemade carpet cleaners rely on the same few families of ingredients. Surfactants break the surface tension of water so it can penetrate fibers, latch onto greasy dirt, and hold it in suspension until it is blotted or extracted away; simple dish soap is a basic surfactant. Enzymes are proteins that break down other proteins, starches, and fats, which makes them the only real answer for organic stains like blood, grass, or urine. Solvents dissolve substances that water cannot, such as grease, oil, ink, and tar. Oxidizers release oxygen that breaks the chemical bonds of colored stains; hydrogen peroxide and sodium percarbonate, the active ingredient in OxiClean, are the most common examples. Ingredient What It Breaks Down Common Example Surfactants General dirt and light grease Clear dish soap Enzymes Proteins, starches, fats Protease, amylase, lipase cleaners Solvents Oil, ink, tar, wax Rubbing alcohol, citrus degreasers Oxidizers Colored stains like wine and coffee Hydrogen peroxide, sodium percarbonate DIY Carpet Cleaning Solutions That Work White vinegar and water is the classic first response: mix equal parts distilled white vinegar and water in a spray bottle, mist the area lightly, let it sit for 5 to 10 minutes, and blot with a clean, white cloth. Vinegar is a mild acid that dissolves grime, neutralizes alkaline messes, and deodorizes, but it can set protein-based stains like eggs or blood, so skip it there. Baking soda is a mild alkali that absorbs moisture and odors: sprinkle it dry over the carpet and leave it for several hours or overnight before vacuuming, or pile it onto a wet, greasy spill and let it form a dry crust, then scrape and vacuum. For general dirt, no more than one-quarter teaspoon of clear, simple dish soap in a cup of warm water gives extra lifting power, but overuse or poor rinsing leaves a sticky residue that attracts dirt faster than before. Hydrogen peroxide at 3 percent works on tough organic stains like blood, wine, or coffee: apply a small amount, let it bubble for 10 to 15 minutes, blot, and always test it in a hidden spot first because it can mildly bleach carpet color. When to Choose a Commercial Carpet Cleaner DIY solutions are great for everyday messes, but commercial products bring targeted chemistry for hard jobs. Enzyme-based cleaners labeled for pet stains and odors are the non-negotiable choice for urine, feces, vomit, blood, and food spills, because only enzymes truly break down the odor-causing proteins. Oxidizing cleaners are the go-to for red wine, juice, coffee, and tea. Solvent-based spotters handle grease, oil, and ink. Carpet shampoos for cleaning machines come in high-traffic, pet, and oxy formulas, and it is crucial to buy one designed for your machine so excess foam cannot damage the motor. Dry carpet cleaning powders are useful for natural fiber rugs and quick freshen-ups between deep cleans. Carpets trap dust and allergens, so a thorough clean also supports better indoor air quality. Technique Matters More Than the Product Even the best carpet cleaning solution fails when technique is wrong. Act fast, because fresh spills lift far more easily than set-in ones. Blot, never rub, working from the outside of the stain inward with a clean, white cloth. Always spot test any new product on a hidden area. Do not over-saturate, because soaking can damage the carpet backing and subfloor and invite mold and mildew growth. Rinse thoroughly by blotting with plain water after treatment, since leftover residue attracts dirt and creates dark spots over time. Around pets and children, prompt cleanup is part of everyday hygiene that keeps the whole household healthier. The Best Carpet Cleaner for Every Situation General dirt and light spills: DIY white vinegar and water solution. Pet urine and organic accidents: commercial enzyme-based cleaner. Red wine, coffee, or juice: commercial oxidizing (Oxi) cleaner. Grease or oil: absorb with baking soda, then a solvent-based spotter. Full-room deep clean: machine-compatible carpet shampoo, such as a pet formula. Frequently Asked Questions Is vinegar safe for all carpets? No. Vinegar is acidic, and it can react with and set certain protein-based stains like blood or eggs. Test it in a hidden area first, and never use it on stains you cannot identify. Can I use dish soap on carpet stains? Yes, in very small amounts: no more than one-quarter teaspoon of clear dish soap in a cup of warm water. Too much soap leaves sticky residue that attracts dirt, so rinse by blotting with plain water afterward. What removes pet urine smell from carpet? An enzyme-based cleaner is the only reliable answer. Enzymes break down the uric acid crystals and proteins that cause lingering odors, while vinegar or soap only mask them temporarily. How often should I deep clean my carpets? For a typical household, an annual professional deep cleaning is recommended, with more frequent cleanings for homes with pets, children, or heavy foot traffic. Does hydrogen peroxide bleach carpets? It can. Hydrogen peroxide is an oxidizer with a mild bleaching effect, so always test it in an inconspicuous spot, such as inside a closet, before treating a visible stain. Choosing the right carpet cleaning solution is detective work: identify the stain, understand the chemistry, and match the product to the problem. For a comprehensive professional deep clean that takes the guesswork out of the equation, Toronto Shine Cleaning uses professional-grade solutions and commercial equipment to tackle any stain on any type of carpet. Explore our deep cleaning service,

DIY vs. Store-Bought: What’s the Best Carpet Cleaning Solution? Read More »

clean and sanitized house because of lysol

Lysol 101: A Guide to a Truly Hygienic Home

Lysol 101: Clean First, Disinfect Second, Every Time For more than a century, Lysol has been the name most people associate with killing germs, and its sharp scent is, for many, the very smell of a disinfected home. But the product performs only as well as the person using it understands. Lysol is not an all-purpose cleaner in the traditional sense; its primary job is not to lift dirt but to eradicate the bacteria, viruses, and fungi that live on surfaces. The difference between wiping a counter and truly disinfecting it comes down to a few rules: clean before you disinfect, respect dwell time, and save disinfection for the situations where it matters. This guide walks through the science and the correct technique. What Makes Lysol Work Most Lysol disinfectant formulas, especially the sprays, rely on a class of chemicals called quaternary ammonium compounds, commonly known as quats, with Alkyl Dimethyl Benzyl Ammonium Chloride among the most common. Picture a quat molecule as a tiny positively charged soldier. Bacteria and viruses carry a negatively charged cell wall or envelope, so the quats are drawn to them, lock on, and rupture the wall until the cell’s essential contents leak out and the microorganism dies. Many aerosol formulas also contain ethanol, an alcohol that disinfects by denaturing germ proteins. This combined attack is why the products are effective against a broad spectrum of pathogens, from cold viruses and influenza to E. coli and staphylococcus. Cleaning vs. Sanitizing vs. Disinfecting These three words are used interchangeably, but in professional cleaning they mean different things. Cleaning physically removes visible dirt and debris using soap or detergent, water, and some agitation; it lowers germ numbers but does not necessarily kill them. Sanitizing reduces bacteria on a surface to a level considered safe by public health standards, which lowers infection risk without necessarily killing all viruses and fungi. Disinfecting kills or inactivates nearly 100% of the pathogens named on the product label, and that is the primary purpose of Lysol. The rule that follows is non-negotiable: always clean before you disinfect, because a disinfectant sprayed over a layer of grime cannot reach the germs hiding underneath. The CDC’s home cleaning and disinfecting guidance treats cleaning as the essential first step in any hygiene routine. Dwell Time: The Rule That Decides Whether Disinfection Works Dwell time is the amount of time a disinfectant must stay visibly wet on a surface to kill the pathogens it claims to kill. Spray a countertop and wipe it dry immediately and you have done almost nothing; the chemistry needs minutes to rupture cell walls. The required time is printed on the label and varies by target. Common viruses and bacteria on the label require Lysol Disinfectant Spray to keep the surface wet for 3 minutes, while tougher fungi such as mold and mildew can demand up to 10 minutes. Spray until the surface is thoroughly wet, leave it alone for the full dwell time, and let it air dry completely. How to Use Common Lysol Products Correctly Hard surfaces: wipe away visible dirt first, hold the can 6-8 inches away, spray until the surface is wet rather than misted, honor the dwell time, and air dry. Rinse any food-contact surface with potable water afterward. Soft surfaces: test a small hidden area for colorfastness first, then mist the fabric lightly until it is damp rather than soaked, and let it air dry completely. Disinfecting wipes: pre-clean visibly dirty spots, use a fresh wipe, and keep the surface glistening wet for the stated time, often around 4 minutes for wipes. Use one wipe per surface area to avoid carrying germs from a doorknob to a countertop. All-purpose cleaners: for disinfection these need two passes, one to clean away visible soil and a second to wet the surface for the label’s dwell time. Where Lysol Does Not Belong Unfinished or porous wood can be discolored and damaged by the chemicals and alcohol. Natural stone such as marble, granite, or travertine can develop etching, a permanent dulling of the polished surface, so use a pH-neutral cleaner made for stone instead. Never spray disinfectant on food or directly onto electronics: spray a cloth first, wring it out, then wipe keyboards, phones, and remotes gently. Handle every product with the respect the label demands. Health Canada’s household chemical safety guidance covers safe storage, ventilation, and the rule against mixing cleaning products, which can release toxic gas. Lysol Product Quick Reference Product Best For Non-Negotiable Steps Disinfectant spray Doorknobs, switches, faucets, and fabrics Pre-clean, spray 6-8 inches away, keep wet 3-10 minutes, air dry Disinfecting wipes Quick touch-ups on hard surfaces Fresh wipe per area, keep wet about 4 minutes, air dry All-purpose cleaner Daily cleaning plus disinfection Clean first, then reapply and respect dwell time When Is Disinfecting Actually Necessary? In a healthy household, routine cleaning with soap and water is perfectly sufficient for most daily messes, since it physically removes germs from surfaces. Disinfecting everything every day is unnecessary and may contribute to chemical-resistant bacteria. Save it for the situations where it earns its keep: Frequently touched points such as door handles, light switches, tap handles, remotes, and fridge doors. When someone in the home is sick with a cold, the flu, or another contagious illness. Kitchen and bathroom surfaces prone to contamination from raw meat and bodily fluids, always after cleaning first. Handwashing remains the first line of defense, and the CDC’s handwashing guidance notes that keeping hands clean is one of the main ways to keep germs from spreading in the home. Frequently Asked Questions Can I wipe Lysol off right after spraying? No. Wiping early removes the product before the dwell time is complete, so the disinfection never happens. Spray until the surface is wet, wait the time stated on the label, and let it air dry. Do I need to disinfect my whole house every week? No. Regular cleaning with soap and water handles routine messes. Reserve disinfection for high-touch hotspots,

Lysol 101: A Guide to a Truly Hygienic Home Read More »