Tips and Tricks

cleaning tablets

Cleaning Tablets: The Sustainable Secret to a Spotless Home

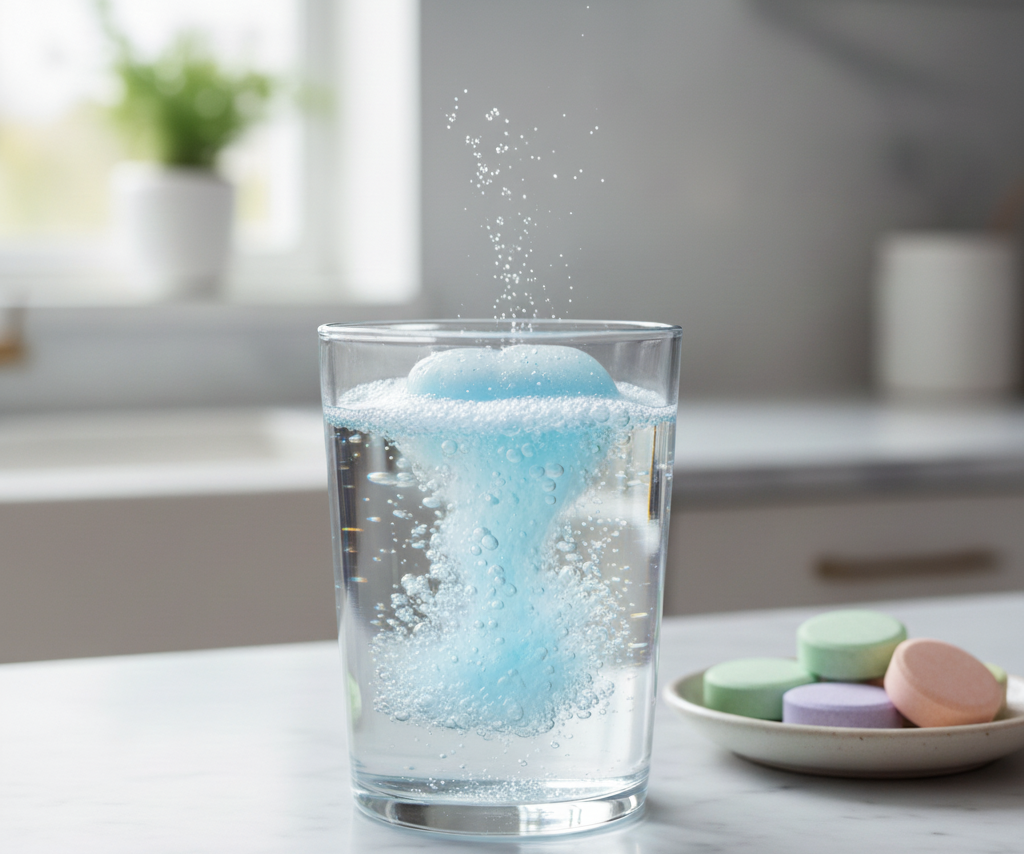
Cleaning Tablets: The Small Product Changing How We Clean Walk down any supermarket cleaning aisle and you will see a long-held belief on display: that effective cleaning comes in large, heavy, liquid-filled plastic bottles. That model, built on selling us mostly water, is quietly being overturned by a small, unassuming innovation: the cleaning tablet. Instead of shipping diluted liquid in single-use plastic, a tablet concentrates the active ingredients into a solid puck that you dissolve at home. The result is less waste, less clutter, and a routine that makes more sense for your home and the planet. Why the Liquid Bottle Model Is Broken The most glaring flaw in the traditional liquid cleaner is plastic waste. Most bottles are made from high-density polyethylene, or HDPE, and although they are recyclable in theory, a staggering share of that plastic is never recycled. It ends up in landfills, where it persists for centuries, or in waterways, where it breaks down into harmful microplastics. Canada alone throws away millions of tonnes of plastic every year, which is why the Government of Canada is working to reduce plastic waste and pollution through regulation and better product design. Then there is what is actually inside the bottle. The typical liquid surface cleaner consists of up to 95 percent water, so consumers pay to ship pre-diluted cleaner across the country, an avoidable carbon cost. At home, bulky bottles claim valuable cabinet space, spills are common, and measuring concentrates for mopping is guesswork that leads to waste or a sticky, residue-laden floor. How Cleaning Tablets Work: Just Add Water A cleaning tablet concentrates the chemistry of a liquid cleaner into a small, solid puck: the same surfactants that lift dirt and grease, plus fresheners and other active ingredients, minus the water. Rather than buying a new plastic bottle with every replacement, you keep one reusable spray bottle. Once it empties, fill it with warm water from your tap, drop in a tablet, and give it a few minutes to dissolve fully. What comes out is a fresh, effective cleaning solution made on demand at home. This simple model solves the problems of the old one: the small, paper-based packaging cuts plastic waste by over 99%, a single truckload of tablets replaces many truckloads of liquid, and a box the size of a deck of cards can stand in for a whole arsenal of bottles under the sink. Types of Cleaning Tablets for Every Room The word tablet covers a growing category of concentrated, water-activated cleaners. All-purpose and surface tablets are the most versatile: dissolve one in a spray bottle and it tackles everyday grease and grime on non-porous surfaces such as countertops, sealed stone, tile, and finished wood. Glass cleaner tablets evaporate cleanly and leave mirrors and windows streak-free. Bathroom tablets often include mild acidic components that dissolve soap scum and hard water mineral deposits in showers, tubs, sinks, and on tile. For mopping, floor tablets or dissolvable sheets drop into a bucket of water to create a perfectly portioned, no-rinse mopping solution. A separate family of tablets cleans the machines themselves. Dishwasher cleaning tablets run in an empty dishwasher to break down limescale, grease, and food residue in the filter and spray arms, improving performance. Washing machine tablets run on a hot cycle in an empty drum to dissolve soap scum, mineral buildup, and biofilm, the causes of musty odors. Garbage disposal tablets foam while the disposal runs, scrubbing the blades and chamber walls and deodorizing the unit. Tablet Types and Their Best Uses Tablet Type Where to Use It What It Fights All-purpose Spray bottle for counters, tile, sealed stone Everyday grease, grime, and spills Glass Spray bottle for mirrors and windows Smudges and film, with a streak-free finish Bathroom Spray bottle for showers, tubs, sinks Soap scum and hard water deposits Floor Mop bucket with warm water Dirt and grime with no rinsing needed Dishwasher and washer Empty appliance on a hot cycle Limescale, biofilm, and musty odors Garbage disposal Dropped in while the disposal runs Food grime on blades and chamber walls Best Practices for Getting the Most From Tablets Use a durable reusable bottle made of glass or high-grade plastic such as PET or HDPE, and rinse it out thoroughly between refills. Fill the bottle with warm water first, then drop in the tablet; adding water over the tablet causes excessive foaming. Use warm, not boiling, water, which dissolves the tablet faster and more completely. Be patient: full dissolution can take two to ten minutes, depending on the brand and water temperature. Label your bottles when you use several tablet types, so the glass cleaner never lands on the wrong surface. Are Cleaning Tablets as Effective as Liquid Cleaners? For a small puck, skepticism is fair, but modern chemistry has made these formulas just as effective as liquids, and in some cases more so. The active ingredients match those found in liquids; they are simply dehydrated into solid form and reconstituted with water when you use them. The tablet also delivers a perfect, pre-measured dose every time, keeping the solution at optimal dilution and avoiding both over-strong and weak mixes. As with any cleaning product, follow the dilution and use instructions and keep solutions out of reach of children; Health Canada’s guidance on using household products safely is a good reference for handling cleaning chemicals at home. Frequently Asked Questions Are cleaning tablets really as strong as liquid cleaners? Yes, when used as directed. The active ingredients are the same ones found in liquids, just dehydrated, and the pre-measured dose guarantees the right dilution every time, which is often stronger than a guessed pour from a bottle. Can I use any spray bottle with cleaning tablets? You can use any bottle you already own, but a durable glass or high-grade plastic bottle designed for long-term use works best. Rinse it thoroughly between refills so leftover product does not react with the new solution. How long does it take for a tablet

Cleaning Tablets: The Sustainable Secret to a Spotless Home Read More »

kitchen trash can cleaning

Trash Can Cleaning: What’s Really Lurking at the Bottom of Your Trash Can?

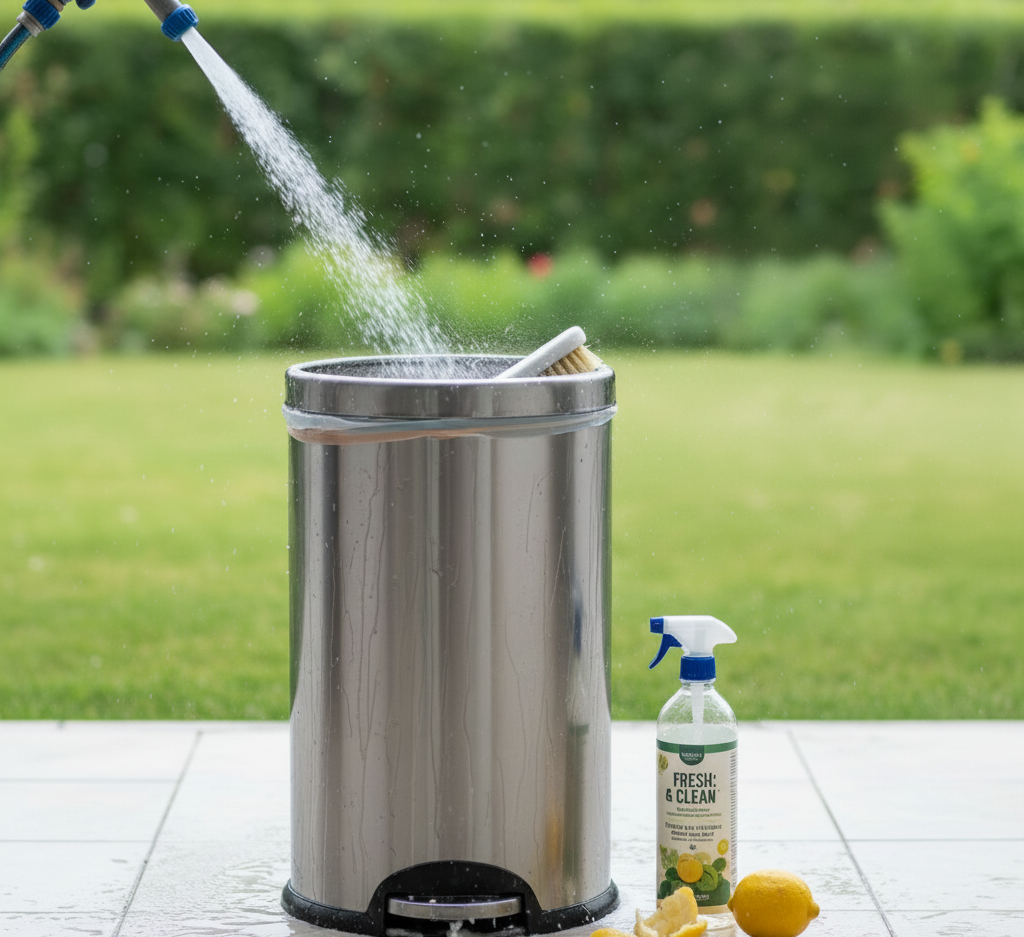
The trash can is the most thankless and hardworking fixture in any home. It is a vessel of necessity, the silent recipient of our daily waste, and the frontline in the constant battle against dirt, decay, and disorder. It is a tool so fundamental to household hygiene that it is often completely overlooked, left to its own devices in a corner of the kitchen or at the side of the house until the moment its presence becomes unavoidable, usually through a foul odor or an unpleasant discovery. Cleaning a garbage bin is not a glamorous task. There is no satisfying “before and after” reveal that you will be eager to show off. Yet, the proper maintenance and regular, thorough cleaning of your bins are among the most critical routines for a healthy, pest-free, and pleasant-smelling home. To neglect the bin is to invite problems that are far more difficult and disgusting to solve than the cleaning task itself. 1.Why so Dirty? To understand how to clean a trash can effectively, you must first understand why it gets so profoundly dirty. The problem is a combination of three factors: organic matter, moisture, and time. Every scrap of food, every used paper towel soaked in meat juice, and every discarded vegetable peeling is organic matter. Once inside the dark, contained environment of a garbage bag, this matter begins to decompose. This process is driven by bacteria, which break down the food waste and, in doing so, release a cocktail of volatile organic compounds. These compounds are what we perceive as the smell of garbage, gases like hydrogen sulfide (rotten eggs) and methane. Moisture is the accelerator for this entire process. A dry environment slows bacterial growth significantly. However, garbage is rarely dry. Leaky food containers, wet food scraps, and condensation create the perfect humid breeding ground for bacteria to thrive and multiply exponentially. This is why a small tear or leak in a garbage bag is so catastrophic. The liquid that seeps out, a substance often referred to as “leachate” or “garbage juice,” is a highly concentrated bacterial soup. It soaks into the bottom of the can, and even after the bag is removed, that residue remains, providing the seed for the next cycle of odor and grime. 2.Pests Time simply allows these processes to fester. The longer the organic matter and moisture are left to interact, the more intense the decomposition, the stronger the smell, and the more stubborn the resulting grime will be. This sticky, foul-smelling film that coats the bottom and sides of a neglected bin is a biofilm-a complex community of microorganisms that have attached themselves to the surface and to each other. It is not just dirt; it is a living, stinking ecosystem. This environment is also the perfect nursery for pests. Flies are drawn to the smell of decay to lay their eggs. In the warm, protected, and nutrient-rich environment of a garbage bin, these eggs hatch into maggots in as little as eight hours. Rodents and other scavengers are also attracted by the scent, and a can without a secure lid is an open invitation for a nightly buffet. Cleaning a trash can is a heavy-duty job that requires more than a simple sponge and some soap. You need to be prepared for a wet, messy, and smelly process. Assembling the right tools beforehand will make the job faster, more effective, and more tolerable. 3.Protection You will need protective gear. This is non-negotiable. Wear heavy-duty rubber gloves to protect your hands from bacteria and harsh cleaning agents. Safety glasses are also highly recommended to protect your eyes from splashes of dirty water and chemicals. A hose with a high-pressure nozzle is a significant advantage. The ability to spray down the bin from a distance will help dislodge caked-on grime and rinse the can effectively. If you don’t have a hose, a few large buckets of hot water will work, but it will require more effort. A long-handled, stiff-bristled brush is your primary scrubbing tool. A long handle is crucial, as it allows you to reach the bottom of the can without having to stick your head and shoulders inside. A deck brush or a toilet brush reserved exclusively for this purpose works perfectly. The sticky, greasy nature of the biofilm requires a strong degreaser. A quality dish soap is designed to cut through grease and is an excellent first-line cleaner. After cleaning, you need to sanitize. There are several options. A diluted bleach solution (about one cup of bleach per gallon of water) is highly effective at killing bacteria, mold, and viruses. For a less harsh alternative, a solution of equal parts white vinegar and water can be used. Vinegar is a natural disinfectant and deodorizer. Finally, baking soda is an excellent deodorizer and a mild abrasive that can help with scrubbing. The best place to perform this task is outdoors, on a lawn or a patch of gravel where the dirty water can drain away without staining a driveway. 4. Let’s Get to Work First, empty the trash can completely. Make sure there is no loose debris left inside. Using your hose, give the entire interior of the bin a thorough spray-down. Use the highest pressure setting to blast off as much of the loose dirt and grime as possible. Pour out the dirty water. Next, pour a generous amount of dish soap into the bottom of the can and add a few inches of the hottest water you can safely handle. Take your long-handled brush and begin scrubbing. Start with the bottom and work your way up the sides. Apply firm pressure and focus on the corners and any visible patches of caked-on grime. Don’t be afraid to put some effort into it; you are physically breaking apart that stubborn biofilm. Once you have scrubbed the entire interior, pour out the soapy, dirty water. Now it is time to sanitize and deodorize. If you are using bleach, mix your solution and pour

Trash Can Cleaning: What’s Really Lurking at the Bottom of Your Trash Can? Read More »

5 Rust Removal Tips: The Ultimate Solution for Stubborn Rust Stains

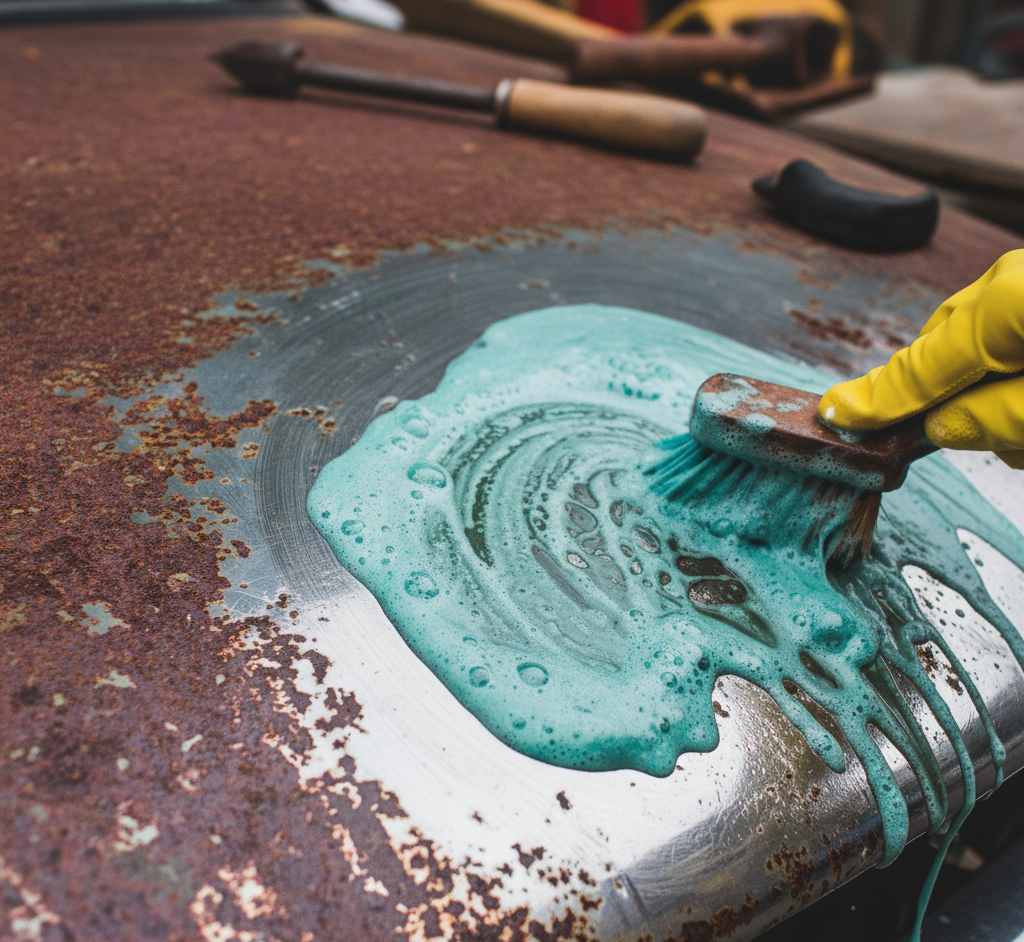
It is a slow, silent, and relentless process of decay. Rust creeps into the corners of our homes, staining our fixtures, seizing our tools, and weakening the structures we rely on. It is a familiar reddish-brown stain, the universal sign of iron’s surrender to the elements. While it may seem like a simple cosmetic issue, this form of corrosion, known as rust, is a chemical reaction that actively eats away at metal, compromising its integrity and leaving a trail of stubborn, unsightly marks in its wake. Dealing with rust is a fundamental aspect of home maintenance. It is not a battle that can be won with a single, miraculous cleaning product. It requires a deeper understanding of what it is, why and where it forms, and a strategic, two-pronged approach of prevention and removal. To control this type of corrosion is to control the very environment that allows it to thrive. What is This Corrosion? In the simplest terms, rust is the common name for iron oxide. It is the result of a chemical reaction called oxidation, which occurs when iron or its alloys, like steel, are exposed to oxygen and moisture for a prolonged period. The simple formula is: Iron + Oxygen + Water = Hydrated Iron (III) Oxide (the substance we call rust) This explains why it is so pervasive in certain areas of a home. The bathroom, with its constant humidity and water splashes, is a perfect breeding ground. The kitchen sink, the outdoor patio furniture left in the rain, the damp basement, any environment where iron-based metals meet air and water is a potential site for rust to form. The presence of salt can dramatically accelerate this process, which is why cars in regions with snowy, salted roads degrade so much faster. The key takeaway from this simple science is that if you can eliminate one of the three components, iron, oxygen, or water, you can prevent the problem. Since we cannot eliminate the metal itself or the oxygen in the air, the entire strategy of rust prevention revolves around one single, critical goal: moisture control. The Common Culprits Before you can fight it, you must know where to find it. It often appears in predictable places where moisture is a constant companion. The Bathroom: This is the epicenter of household corrosion. Stains in the toilet bowl are often caused by high iron content in the water or from the degradation of old cast-iron plumbing pipes. The metal components in the tank can also corrode and stain the bowl. Metal shower caddies, the bottoms of shaving cream cans, and bobby pins left on the ledge are common sources of these stains on porcelain and fiberglass. The drain, showerhead, and faucet fixtures can also develop issues over time. The Kitchen: Stainless steel sinks are resistant, not immune. If wet cast iron pans, steel wool, or other iron objects are left in the sink, they can cause rust stains to form on the surface. Cast iron cookware is a special case. It requires a protective layer of polymerized oil, called seasoning, to prevent it from oxidizing instantly. The racks in your dishwasher, especially if their vinyl coating becomes chipped, can expose the metal underneath, leading to spots that can stain your dishes. The Laundry Room: Metal buttons, zippers, or rivets on clothing can leave marks on other garments during a wash cycle. A forgotten nail or screw in a pocket can do the same. The Garage, Basement, and Outdoors: Hand tools made of steel are highly susceptible to corrosion if stored in a damp or humid environment. Wrought iron or steel patio furniture will corrode quickly if its protective paint coating is scratched or chipped, leading to flaky rust. The grates and body of a grill are constantly exposed to moisture and heat, making them prime candidates for the problem. 1.Prevention The easiest way to deal with corrosion is to stop it from ever starting. Prevention is about diligent moisture control and creating protective barriers. Keep Surfaces Dry: This is the most fundamental rule. Wipe down your kitchen sink after doing dishes. Squeegee the walls of your shower after use. Dry your tools before putting them away. Improve Ventilation: In moisture-prone areas like the bathroom, always use the exhaust fan during and after a shower to pull humid air out. A dehumidifier in a damp basement can make a world of difference for preventing issues on tools and stored items. Use Protective Coatings: For outdoor metal furniture, railings, and grills, a coat of corrosion-inhibiting paint is essential. Inspect these items annually and touch up any chips or scratches immediately to prevent moisture from reaching the metal. For tools, a light coating of a machine oil can create a barrier against moisture. For cast iron cookware, maintain a good layer of seasoning. Avoid Prolonged Contact: Do not leave wet metal items sitting on susceptible surfaces. This means no wet cans on the bathtub ledge, no wet cast iron pans in the sink, and no wet steel wool on the countertop. Address High-Iron Water: If the stains in your toilet and sinks are from the water itself, consider installing a water softener or an iron filter for your home’s water supply. 2.Effective Removal When rust does appear, you need the right technique for the specific surface you are cleaning. The methods range from gentle, natural solutions to more aggressive chemical and abrasive approaches. The Natural Acidic Approach (For Light to Moderate Corrosion) The principle here is simple: a mild acid can dissolve iron oxide. White Vinegar: The acetic acid in vinegar is a fantastic remover. For small items like tools, nuts, or bolts, you can submerge them in a bath of white vinegar and let them soak for several hours, or even overnight. The rust will dissolve and can be scrubbed away with a brush. Lemon Juice and Salt: For stains on less-durable surfaces, like clothing or countertops, a paste of lemon juice and salt is a great option. The salt acts as a gentle abrasive, and the citric acid in the lemon juice dissolves the unwanted buildup. Baking Soda: For a more gentle approach, a

5 Rust Removal Tips: The Ultimate Solution for Stubborn Rust Stains Read More »

doormat

5 Reasons Your Doormat Is Your Most Important Cleaning Tool

It is the most overlooked and yet one of the most hardworking items in any home. Doormat, it is a humble rectangle, a simple slab of bristly fiber or textured rubber, lying in wait at the threshold. It is the doormat, and its role is far more critical than its modest appearance suggests. The doormat is not a mere decorative accessory; it is the first line of defense in the ceaseless battle to keep a home clean. It is the silent gatekeeper, the unsung hero that single-handedly prevents a significant percentage of the dirt, grime, and pollutants of the outside world from ever crossing into your living space. Understanding the profound importance of a doormat requires an appreciation for what is being carried on the soles of our shoes. A study conducted by the University of Arizona made a startling discovery: the average shoe sole is covered in hundreds of thousands of bacteria per square inch, including E. coli. Beyond the microscopic threats, our shoes pick up everything from lawn chemicals, pesticides, and asphalt residue to common dirt, mud, dust, and pollen. Without a doormat, all of this is tracked directly onto your floors, where it is then circulated throughout your home, embedding itself in carpets and becoming airborne. A good doormat is a simple, passive, yet incredibly effective tool for trapping this unwanted material at the door. 1.Effective Doormat Not all doormats are created equal. An effective doormat is a piece of functional equipment, and its design and material composition are directly related to its performance. A flimsy, decorative mat might offer a cheerful greeting, but it will do little to stop the ingress of dirt. A truly effective doormat excels in two primary functions: scraping and absorbing. Scraping: The first job of a doormat is to physically scrape away solid particles from the bottom of shoes. This includes mud, dirt, sand, gravel, and even snow and ice. To do this, the mat needs a coarse, abrasive texture. The bristles or fibers must be stiff and resilient enough to dig into the treads of a shoe sole and dislodge the debris. Absorbing: The second job is to absorb moisture. Wet shoes are not only a slipping hazard but also track in dirty water that can stain carpets and damage hardwood floors. An effective doormat needs to have absorbent properties to trap rainwater, snowmelt, and moisture from damp ground. For this reason, the most effective entryway strategy often involves a two-mat system: a tough, scraping mat outside the door and a softer, absorbent mat inside the door. 2.Choosing the Right Material The material of a doormat is the most significant factor in its ability to perform its duties. Coir (Coco Fiber): This is the classic, traditional doormat material, and for good reason. Made from the husks of coconuts, coir is a natural, highly durable, and coarse fiber that is exceptional at scraping dirt and mud from shoes. It is also naturally resistant to mold and mildew, making it an excellent choice for an outdoor mat. Its one major weakness is that it can shed fibers and does not absorb a large amount of water, which can lead to it becoming waterlogged in very wet climates if not placed in a covered area. Rubber: Rubber doormats are the heavy-duty workhorses of the mat world. They are extremely durable, weather-resistant, and their weight helps them stay in place. Many rubber mats feature a textured or patterned surface with deep grooves designed to scrape away debris and trap it within the mat. They are excellent for scraping and are very easy to clean-a simple spray with a hose is usually all that is needed. They are not, however, absorbent. This makes them a perfect choice for an outdoor scraping mat, often in combination with an indoor absorbent mat. Synthetic Fibers (Polypropylene, Nylon, Polyester): Doormats made from synthetic fibers are a versatile and popular choice. They can be designed to be both abrasive and absorbent. Polypropylene, in particular, is a fantastic material for an all-around doormat. It is highly resistant to staining, fading, mold, and mildew, and it dries very quickly. This makes it suitable for both indoor and outdoor use. Synthetic mats are often designed with a “bi-level” construction, featuring a coarse scraping surface and deeper channels to trap dirt and water, keeping the top surface cleaner. Cotton and Microfiber: These materials are champions of absorption. A cotton or microfiber mat is the ideal choice for the inside of the entryway. After the outdoor mat has scraped off the solid debris, the indoor mat’s job is to soak up any remaining moisture and trap fine dust particles. They are soft underfoot and are typically machine washable, making them very easy to maintain. They are not, however, suitable for outdoor use, as they would quickly become saturated and take a long time to dry. Wrought Iron: While less common, cast iron or wrought iron doormats are purely functional scraping tools. Their ornate, open-scrollwork designs provide a highly effective surface for scraping mud and snow from boots. They are incredibly durable and last a lifetime. Naturally, they have zero absorbent properties and must be paired with an indoor mat. 3.The Two-Mat System The single best way to maximize the effectiveness of your doormats is to implement a two-mat system. The Outdoor Mat: This is your first line of defense. Its sole purpose is to scrape. It should be coarse, durable, and weather-resistant. Coir, rubber, or a heavy-duty synthetic mat are the best choices here. This is the mat that will take the brunt of the mud, snow, and heavy dirt. The Indoor Mat: This is your second line of defense, located just inside the door. Its primary purpose is to absorb. After the heavy debris has been removed outside, this mat’s job is to trap any remaining moisture and fine dust. Cotton, microfiber, or a softer synthetic mat are ideal for this role. This mat also provides a clean, dry place to stand while removing shoes. This tandem approach ensures that by the time a

5 Reasons Your Doormat Is Your Most Important Cleaning Tool Read More »

Kettle Maintenance: A Step-by-Step Cleaning Guide Get Your Kettle Sparkling Clean for the Autumn Season

The electric kettle is the unsung hero of the modern kitchen. It is an appliance of profound simplicity and efficiency, dedicated to the singular, noble task of boiling water quickly. It facilitates our morning coffee rituals, our afternoon tea breaks, and countless culinary preparations. Yet, for all its utility, the kettle is often subject to a slow, creeping form of internal decay that compromises its performance and the quality of the water it boils. This internal affliction is limescale, and dealing with it is the most critical aspect of kettle maintenance. Understanding Limescale If you live in an area with hard water, limescale is an inevitability. Hard water is simply water that has a high concentration of dissolved minerals, primarily calcium carbonate and magnesium. These minerals are harmless to drink, but when the water is repeatedly heated, they precipitate out of the solution and form a hard, chalky, off-white deposit on surfaces. In a kettle, this deposit builds up layer by layer on the heating element and the interior walls. At first, this buildup might seem like a purely cosmetic issue, but it has several significant and detrimental effects: Impaired Performance and Wasted Energy: Limescale acts as an insulator. The crusty layer on the heating element forces it to work harder and longer to transfer heat to the water. This means your kettle takes noticeably longer to reach a boil, and in doing so, consumes more electricity. A kettle caked in limescale is an inefficient kettle, wasting both time and money. Altered Taste: The minerals in the limescale can leach back into the water, imparting a faint, chalky, or metallic taste. This can ruin the delicate flavors of a high-quality tea or coffee. You might also notice a gritty texture or floating white flakes in your cup, which are small pieces of the scale that have broken off. Potential for Bacterial Growth: The rough, porous surface of thick limescale deposits can create a habitat for bacteria to colonize. While the boiling process will kill most active bacteria in the water, the surface of the scale itself can harbor microorganisms that you do not want in your daily beverage. Reduced Lifespan: Forcing the heating element to consistently overheat to penetrate the limescale can cause it to burn out prematurely, shortening the functional life of your appliance. The Deep Clean Cleaning the inside of a kettle is not about scrubbing. It is about chemistry. You need to use a mild acid to dissolve the alkaline mineral deposits. This process, known as descaling, is simple, effective, and can be done with basic household products. It should be performed regularly, anywhere from once a month to every few months, depending on the hardness of your water. The moment you see a visible white film forming on the bottom, it is time to descale. Method 1: The White Vinegar Method  This is the classic, most effective, and cheapest way to descale a kettle. Step 1: Create the Solution. Fill the kettle with a solution of equal parts distilled white vinegar and water. Do not fill it past the maximum fill line. A 50/50 mix is a strong and effective starting point. Step 2: Let it Soak (Optional but Recommended). For very heavy buildup, let the solution sit in the kettle for an hour before proceeding. This gives the acetic acid in the vinegar time to begin breaking down the limescale. Step 3: Bring to a Boil. Turn the kettle on and let it run through a full boiling cycle. The combination of heat and acidity will accelerate the chemical reaction that dissolves the mineral deposits. As it heats up, you may see the limescale begin to fizz and flake off. Step 4: The Big Soak. Once the kettle has boiled and switched off, leave the hot solution inside to sit for at least 20-30 minutes. For extremely stubborn scale, you can leave it for several hours or even overnight. Step 5: Empty and Inspect. Pour the vinegar solution down the sink. You should see that most, if not all, of the limescale is gone. If some stubborn patches remain, you can use a non-abrasive sponge or cloth to wipe them away. Step 6: Rinse Thoroughly. This is a critical step. Rinse the inside of the kettle with clean, cool water several times to remove any lingering scale and, most importantly, the smell and taste of vinegar. Fill it with fresh water, boil it again, and discard that water. This final boil will remove any final traces of the vinegar. Method 2: The Lemon or Citric Acid Method  For those who dislike the potent smell of vinegar, lemon juice or citric acid provides a more fragrant but equally effective alternative. Step 1: Create the Solution. You can use the juice of one or two fresh lemons or two tablespoons of citric acid powder (available in the baking or canning aisle of most grocery stores). Add this to a kettle filled with water up to the max line. Step 2: Soak and Boil. As with the vinegar method, let the solution sit for about an hour, then bring the kettle to a full boil. Step 3: Sit and Wait. Once boiled, let the hot solution sit for 20-30 minutes to finish its work. Step 4: Rinse and Repeat. Empty the kettle and rinse it thoroughly. Perform a final boil with fresh water and discard it to ensure no lemony taste remains. Cleaning the Exterior While the interior is the functional priority, the exterior also deserves attention. Always unplug the kettle before cleaning the outside. Stainless Steel: The best way to clean a stainless steel exterior is with a damp microfiber cloth and a drop of dish soap. Wipe in the direction of the grain of the steel. To remove fingerprints and add shine, you can put a small amount of white vinegar or a dab of olive oil on a clean, dry cloth and buff the surface, again, following the grain. Plastic: A simple wipe with a damp, soapy cloth is usually sufficient for a plastic kettle. Avoid using abrasive scrubbers, which

Kettle Maintenance: A Step-by-Step Cleaning Guide Get Your Kettle Sparkling Clean for the Autumn Season Read More »

green cleaning products

4 Incredible Tips On How To Use Non-toxic Cleaning Products

The promise of a clean home is often sold in the form of brightly colored liquids in spray bottles, promising to disinfect, degrease, and deodorize with unparalleled power. We associate the sharp, chemical scent of these products with the very idea of cleanliness. Yet, there is a fundamental paradox in this approach: we often use harsh, potentially hazardous chemicals in an effort to make our living spaces healthier. The truth is, a truly clean home is not one that has been sterilized with a barrage of synthetic compounds, but one that is free of both dirt and harmful residues. Transitioning to non-toxic cleaning products is not about sacrificing effectiveness for the sake of “green” ideals. It is about returning to a simpler, smarter, and safer way of cleaning. It is about understanding that the most powerful cleaning agents are often the most basic ones, the ones that have been used for generations, long before the advent of the modern chemical industry. These are the products that clean our homes without compromising the air we breathe, the surfaces our children and pets touch, or the environment beyond our walls.   1.Non-Toxic Approach The argument against conventional cleaning products is threefold, touching on our health, the environment, and our wallets. Many commercial cleaners release Volatile Organic Compounds (VOCs) into the air. When you spray an all-purpose cleaner or a glass cleaner, these compounds become airborne and can be inhaled. VOCs have been linked to a range of health issues, from headaches and dizziness to respiratory problems and long-term organ damage. The ubiquitous “fragrance” listed on many labels is often a proprietary blend of dozens of chemicals, including phthalates, which are known endocrine disruptors. For those with asthma, allergies, or chemical sensitivities, these products can be immediate triggers for adverse reactions. From an environmental perspective, the journey of these chemicals does not end when you wipe them off your counter. They are washed down the drain and enter our waterways. Ingredients like phosphates can contribute to algal blooms that disrupt aquatic ecosystems, and many other synthetic compounds are not readily biodegradable, persisting in the environment for years. At the end, there is the economic argument. A walk down the cleaning aisle reveals a hyper-specialized market: a cleaner for glass, one for countertops, another for the floor, a separate one for the bathroom, and a special degreaser for the stove. This is a marketing triumph, not a cleaning necessity. A handful of basic, non-toxic ingredients can perform all of these tasks, and more, for a fraction of the cost. 2.Non-Toxic Cleaning Toolkit Building a powerful, non-toxic cleaning arsenal is surprisingly simple and inexpensive. The following ingredients form the foundation of nearly every cleaning task in the home. Distilled White Vinegar: How it Works: Vinegar is a mild acid (acetic acid), which makes it a powerhouse for dissolving mineral deposits (like hard water stains and limescale), cutting through grease, and acting as a natural disinfectant and deodorizer. Its acidic nature disrupts the cell structure of many types of bacteria and mold. Best Uses: All-purpose surface cleaner, glass and mirror cleaner, floor cleaner, descaling coffee pots and showerheads, fabric softener substitute, and drain deodorizer. How to Use: For an all-purpose cleaner, mix a solution of 50% white vinegar and 50% water in a spray bottle. For glass, the same solution works perfectly. Caution: Never use vinegar on natural stone surfaces like marble, granite, or travertine. Its acidic properties will etch and dull the finish. Also, avoid using it on waxed surfaces or cast iron. Baking Soda  How it Works: Baking soda is a mild alkali and a gentle abrasive. It is excellent at absorbing and neutralizing odors, rather than just masking them. Its fine, crystalline structure makes it perfect for scrubbing away grime without scratching most surfaces. When combined with an acid like vinegar, it creates a fizzy reaction that can help dislodge clogs and lift stubborn dirt. Best Uses: Scouring sinks, tubs, and toilets; deodorizing refrigerators, carpets, and drains; making a soft-scrubbing paste for stovetops and tile grout; boosting laundry detergent. How to Use: Sprinkle it directly onto a damp surface and scrub, or create a paste by mixing it with a small amount of water or dish soap. Caution: While it is very gentle, be cautious when using it as a paste on delicate, high-gloss finishes, and test in an inconspicuous area first. Hydrogen Peroxide  How it Works: Hydrogen peroxide is a powerful disinfectant and a natural bleaching agent that breaks down into just oxygen and water, making it incredibly safe for the environment. It is effective at killing mold, mildew, and bacteria. Best Uses: Disinfecting countertops and cutting boards, removing stains from tile grout, whitening laundry (as a bleach alternative), and killing mold on bathroom surfaces. How to Use: Use it directly from the bottle, often by attaching a spray nozzle to the top. Spray it on a surface, let it bubble and sit for 5-10 minutes to disinfect, and then wipe clean. Caution: Store hydrogen peroxide in its original dark bottle, as light will cause it to break down and lose its effectiveness. It can have a mild bleaching effect, so test it on colored fabrics and surfaces before widespread use. Castile Soap: How it Works: Castile soap is a vegetable-based soap, traditionally made from olive oil. It is a true soap, not a synthetic detergent, and it is completely biodegradable. It is a surfactant, which means it breaks the surface tension of water, allowing it to bind with dirt and grease and wash them away. Best Uses: A gentle all-purpose cleaner, dish soap, floor cleaner, and a base for creating foaming hand soaps and DIY scrubbing pastes. How to Use: It is highly concentrated, so a little goes a long way. A few drops in a spray bottle of water or a teaspoon in a bucket of mop water is often sufficient. Caution: Do not mix Castile soap directly with vinegar. The acidic vinegar will react with the alkaline soap, causing the soap to “unsaponify” and leaving behind a white, filmy residue that is difficult to

4 Incredible Tips On How To Use Non-toxic Cleaning Products Read More »

Washing Machine Cycles: 4 Tips Everyone Should Know For Spotless Fabrics

The modern washing machine cycles is a marvel of household convenience, yet its control panel, adorned with a cryptic array of dials, buttons, and symbols, can be as intimidating as an airplane’s cockpit. Faced with this complexity, many of us default to the “Normal” cycle for nearly every load, hoping for the best. This one-size-fits-all approach, however, is a disservice to our clothes, our utility bills, and the machine itself. Each cycle is a carefully calibrated recipe of water temperature, agitation speed, and time, designed for specific fabrics and soil levels. Understanding these washing machine cycles is the key to transforming laundry from a chore of guesswork into a science of fabric care. It is the difference between clothes that last for years and clothes that fade, shrink, or wear out prematurely. 1.The Three Core Variables Before diving into the specific named cycles, it’s essential to understand the three fundamental elements that every wash cycle manipulates. Every button and dial on your machine is designed to adjust one of these three variables. Water Temperature: This is perhaps the most critical variable for both cleaning effectiveness and fabric preservation. Hot: Typically ranging from 130°F (54°C) and above, hot water is the most powerful for cleaning. It is excellent at removing heavy grime, killing germs and dust mites, and lifting stubborn stains from oil and grease. However, this power comes at a cost. Hot water is the most energy-intensive, can cause vibrant colors to fade, and can lead to significant shrinkage in natural fibers like cotton and wool. It is best reserved for durable, colorfast whites, such as cotton underwear, socks, bed linens, and heavily soiled work clothes. Warm: Sitting in the middle ground, around 90°F (32°C), warm water offers a good balance of cleaning power and fabric care. It is effective at cleaning most everyday soils and is less likely to cause significant fading or shrinking than hot water. This makes it a versatile choice for colored garments, synthetics, and moderately dirty loads. Cold: Ranging from 60°F to 80°F (15-27°C), cold water is the gentlest on fabrics and the most energy-efficient. It is the ideal choice for dark and bright colors that are prone to bleeding, as well as for delicate fabrics like silk, lace, and anything that you fear might shrink. While modern cold-water detergents have improved its cleaning power, it is not as effective on heavy grease or oil stains. Spin Speed: This determines how fast the drum rotates at the end of the wash and rinse cycles to extract water from the clothes. The spin speed is measured in revolutions per minute (RPM). High/Fast Spin: A high spin speed (1000-1400 RPM or higher) removes the maximum amount of water from a load. This significantly reduces drying time, saving both time and energy. It is best suited for sturdy fabrics like cotton and denim. The downside is that the high speed can be harsh on clothes, setting in deep wrinkles and potentially damaging more delicate items. Medium Spin: This is a good all-purpose setting that balances water extraction with fabric care. It is often paired with the Permanent Press cycle to help prevent wrinkles in synthetic fabrics. Low/Slow Spin (or No Spin): A slow spin is the gentlest option. It leaves clothes quite damp but is essential for preventing damage to delicate, hand-washable items, and loosely woven sweaters. The “No Spin” option is for the most fragile garments that should not be subjected to any centrifugal force at all. Agitation/Tumble Speed: This is the “scrubbing” action of the machine. In a top-loading machine, it refers to the speed and intensity of the agitator’s movements. In a front-loading machine, it refers to the speed and pattern of the drum’s tumbling. A high agitation level provides more friction and cleaning power for durable fabrics, while a low agitation level gently swishes clothes to protect delicate fibers. 2.The Most Common Washing Machine Cycles With the core variables understood, we can now translate the names on the dial into their specific recipes. Normal Cycle (or Cotton/Regular): This is the workhorse cycle, the default for a reason. It is designed for most everyday clothing made of cotton, linen, and durable synthetics. It typically combines a high agitation speed with a high spin speed. The default water temperature is often warm, but this is usually adjustable. It provides a robust clean for average soil levels. Use for: T-shirts, jeans, socks, underwear, towels, sheets. Avoid for: Delicate fabrics, items prone to shrinking or wrinkling. Heavy Duty Cycle: When the Normal cycle isn’t enough, Heavy Duty steps in. This cycle is designed for sturdy fabrics that are heavily soiled. It uses a longer wash time, a higher level of agitation, and typically defaults to hot water to break down serious grime. Use for: Muddy work clothes, heavily stained towels, children’s play clothes, durable bedding. Avoid for: Any fabrics that cannot withstand high heat and vigorous movement. Using this cycle unnecessarily will cause premature wear and tear on your clothes. Delicates Cycle (or Hand Wash): This cycle is the machine’s attempt to replicate the gentleness of hand washing. It uses a low agitation or tumbling speed, a short wash time, and a slow spin to protect fragile fabrics. It almost always defaults to cold water to prevent shrinking and damage. Use for: Lingerie, silk, lace, sheer fabrics, loosely woven sweaters. Always place these items in a mesh laundry bag for extra protection. Avoid for: Anything that is heavily soiled, as the gentle action may not be sufficient to clean it thoroughly. Permanent Press Cycle (or Wrinkle Control/Casual): This is one of the most useful and misunderstood cycles. It is specifically designed for synthetic and blended fabrics that are prone to wrinkling, such as polyester, rayon, and knits. The magic of this cycle is in its temperature change: it washes the clothes in warm water to relax the fibers and release wrinkles, then uses a cool rinse and a slower spin speed to prevent new wrinkles from being set in. Use for: Dress shirts, blouses, slacks, and any synthetic clothing you want to minimize ironing on. Avoid for: Heavy-duty

Washing Machine Cycles: 4 Tips Everyone Should Know For Spotless Fabrics Read More »

Maintaining a Clean Bin

Garbage Bin cleaning: 4 Tricks To Eliminate Odors And Leave It Looking Like New

The garbage bin is the most thankless and hardworking fixture in any home. It is a vessel of necessity, the silent recipient of our daily waste, and the frontline in the constant battle against dirt, decay, and disorder. It is a tool so fundamental to household hygiene that it is often completely overlooked, left to its own devices in a corner of the kitchen or at the side of the house until the moment its presence becomes unavoidable, usually through a foul odor or an unpleasant discovery. Cleaning a garbage bin is not a glamorous task. There is no satisfying “before and after” reveal that you will be eager to show off. Yet, the proper maintenance and regular, thorough cleaning of your garbage bins are among the most critical cleaning routines for a healthy, pest-free, and pleasant-smelling home. To neglect the bin is to invite problems that are far more difficult and disgusting to solve than the cleaning task itself.   1.The Anatomy of a Filthy Bin To understand how to clean a garbage bin effectively, you must first understand why it gets so profoundly dirty. The problem is a combination of three factors: organic matter, moisture, and time. Every scrap of food, every used paper towel soaked in meat juice, and every discarded vegetable peeling is organic matter. Once inside the dark, contained environment of a garbage bag, this matter begins to decompose. This process is driven by bacteria, which break down the food waste and, in doing so, release a cocktail of volatile organic compounds. These compounds are what we perceive as the smell of garbage, gases like hydrogen sulfide (rotten eggs) and methane. Moisture is the accelerator for this entire process. A dry environment slows bacterial growth significantly. However, garbage is rarely dry. Leaky food containers, wet food scraps, and condensation create the perfect humid breeding ground for bacteria to thrive and multiply exponentially. This is why a small tear or leak in a garbage bag is so catastrophic. The liquid that seeps out, a substance often referred to as “leachate” or “garbage juice,” is a highly concentrated bacterial soup. It soaks into the bottom of the bin, and even after the bag is removed, that residue remains, providing the seed for the next cycle of odor and grime. Time simply allows these processes to fester. The longer the organic matter and moisture are left to interact, the more intense the decomposition, the stronger the smell, and the more stubborn the resulting grime will be. This sticky, foul-smelling film that coats the bottom and sides of a neglected bin is a biofilm-a complex community of microorganisms that have attached themselves to the surface and to each other. It is not just dirt; it is a living, stinking ecosystem. This environment is also the perfect nursery for pests. Flies are drawn to the smell of decay to lay their eggs. In the warm, protected, and nutrient-rich environment of a garbage bin, these eggs hatch into maggots in as little as eight hours. Rodents and other scavengers are also attracted by the scent, and a bin without a secure lid is an open invitation for a nightly buffet. 2.The Tools for the Task Cleaning a garbage bin is a heavy-duty job that requires more than a simple sponge and some soap. You need to be prepared for a wet, messy, and smelly process. Assembling the right tools beforehand will make the job faster, more effective, and more tolerable. Protective Gear: This is non-negotiable. Wear heavy-duty rubber gloves to protect your hands from bacteria and harsh cleaning agents. Safety glasses are also highly recommended to protect your eyes from splashes of dirty water and chemicals. A Hose with a High-Pressure Nozzle: The ability to spray down the bin from a distance is a significant advantage. A high-pressure nozzle will help dislodge caked-on grime and rinse the bin effectively. If you don’t have a hose, a few large buckets of hot water will work, but it will require more effort. A Long-Handled, Stiff-Bristled Brush: This is your primary scrubbing tool. A long handle is crucial, as it allows you to reach the bottom of the bin without having to stick your head and shoulders inside. A deck brush or a toilet brush reserved exclusively for this purpose works perfectly. Degreasing Dish Soap: The sticky, greasy nature of the biofilm requires a strong degreaser. A quality dish soap is designed to cut through grease and is an excellent first-line cleaner. A Disinfectant: After cleaning, you need to sanitize. There are several options. A diluted bleach solution (about one cup of bleach per gallon of water) is highly effective at killing bacteria, mold, and viruses. For a less harsh alternative, a solution of equal parts white vinegar and water can be used. Vinegar is a natural disinfectant and deodorizer. Baking Soda: This is an excellent deodorizer and a mild abrasive that can help with scrubbing. 3.The Deep Cleaning Method The best place to perform this task is outdoors, on a lawn or a patch of gravel where the dirty water can drain away without staining a driveway. Empty the Bin Completely: Make sure there is no loose debris left inside. The Pre-Rinse: Using your hose, give the entire interior of the bin a thorough spray-down. Use the highest pressure setting to blast off as much of the loose dirt and grime as possible. Pour out the dirty water. The Degreasing Scrub: Pour a generous amount of dish soap into the bottom of the bin and add a few inches of the hottest water you can safely handle. Take your long-handled brush and begin scrubbing. Start with the bottom and work your way up the sides. Apply firm pressure and focus on the corners and any visible patches of caked-on grime. Don’t be afraid to put some effort into it; you are physically breaking apart that stubborn biofilm. Once you have scrubbed the entire interior, pour out the soapy, dirty water. The Disinfecting Soak: Now it is time to sanitize and deodorize. If

Garbage Bin cleaning: 4 Tricks To Eliminate Odors And Leave It Looking Like New Read More »

a clean and organized garage

Garage Cleaning: 5 Effective Strategies to Keep Your Garage Organized

The garage is the forgotten room. It is the one space in the home that is allowed to descend into a state of organized, and then disorganized, chaos. It begins as a home for your car, a place for your tools. But slowly, inevitably, it becomes the household’s dumping ground. It is the final destination for items that have no other place: the broken lawnmower, the half-empty cans of paint, the boxes from a move that happened five years ago, the sporting equipment for a hobby long since abandoned. Before you know it, parking a car inside is a distant memory, and finding a specific screwdriver requires an archaeological dig. Cleaning the garage is not like cleaning a kitchen. It is not a simple task of wiping surfaces and mopping floors. It is a project. It is an act of reclamation, of taking back a significant portion of your home’s square footage and returning it to a state of function and purpose. It is a process that can feel overwhelming, but when broken down into a systematic, manageable plan, it is entirely achievable. This is not about a quick tidy-up; this is about a full-scale reset. 1.Preparation and Strategy Before a single box is moved, the project must be planned. The single biggest mistake people make when tackling a garage is underestimating the scope of the job. This is not a two-hour task. For the average cluttered garage, you need to dedicate an entire weekend. Block it out on your calendar. Arrange for kids or pets to be elsewhere. Treat it with the seriousness of a home renovation project, because in many ways, it is. The second part of preparation is gathering your supplies. Going into this battle unarmed is a recipe for frustration and failure. You will need a specific set of tools for sorting, and another for the deep cleaning that will follow. For Sorting and Decluttering: Heavy-Duty Trash Bags: You will generate more trash than you think. Get more bags than you think you will need. Sturdy Boxes or Bins: These will be for items you intend to keep, donate, or sell. A Labeling System: A thick permanent marker and either labels or masking tape are essential. Every box must be clearly marked with its intended destination. For Cleaning: Safety Gear: At a minimum, you need heavy-duty work gloves to protect your hands from dirt, sharp objects, and chemicals. A dust mask is also critical, as you will be kicking up years of dust, dirt, and potentially mold spores. Safety glasses are a good idea, especially when sweeping and dealing with chemicals. Broom and Dustpan: A stiff-bristled push broom is ideal for the large floor surface. Shop-Vac: A standard household vacuum is no match for a garage. A shop-vac can handle everything from fine dust and sawdust to dead leaves, cobwebs, and small debris. Buckets: You will need at least one large bucket for your cleaning solution. Scrub Brushes: A long-handled deck brush is excellent for the floor, and a smaller, handheld stiff brush is good for corners and stubborn spots. Cleaning Agents: A heavy-duty degreaser is non-negotiable for tackling oil and fluid stains on the concrete floor. You may also want a powdered concrete cleaner or a simple, strong all-purpose cleaner. Rags and Sponges: A large supply of old rags is necessary for wiping down surfaces and for the final detailing. 2.Evacuation and Purge The most effective, albeit intimidating, method for decluttering a garage is to remove everything. Every single item must come out. The goal is to get the garage completely empty, creating a blank canvas for the deep clean and a forcing mechanism for decision-making. Wait for a clear, dry day and use your driveway as a staging area. As you pull items out, immediately begin sorting them into four distinct categories. This is where your boxes and labels come into play. Keep: This category is exclusively for items that you use, need, and that belong in the garage. Be ruthless. If you haven’t used a tool in over a year, do you really need to keep it? Is that box of old cables for electronics you no longer own providing any value? The garage is functional space, not a museum of past projects. Donate/Sell: These are items that are in good, usable condition but no longer serve a purpose for you. Old sporting equipment, tools you have duplicates of, functional but unused garden supplies. Place these directly into designated boxes. Once a box is full, tape it shut and label it. This prevents you from second-guessing your decisions. Trash/Recycle: This will likely be your largest category. Be prepared to fill several bags. This includes broken tools, expired chemicals, dried-up paint, rotten wood, and anything that is simply junk. Pay close attention to hazardous waste. Old paint, motor oil, pesticides, and other chemicals cannot simply be thrown in the regular trash. Check with your local municipality for hazardous waste drop-off locations and procedures. Group these items together for a separate, responsible disposal run. Relocate: You will inevitably find things that do not belong in the garage. Kitchen appliances, sentimental photo albums, out-of-season clothing. These items have been stored in the garage out of convenience, not logic. Put them in a “Relocate” box to be moved to their proper place inside the house later. Do not get sidetracked by taking them inside now; stay focused on the garage purge. As you work, you will be tempted to create a “maybe” pile. Resist this urge. Indecision is the enemy of progress. If you truly cannot decide on an item, place it in a single “quarantine box.” Seal the box and write a date on it six months in the future. If you have not needed to open that box by that date, take the entire unopened box directly to a donation center. 3.The Deep Clean With the garage completely empty, you can now see the true state of the space. It is time for the top-to-bottom clean. This is a fundamental principle of cleaning: start high and work your way

Garage Cleaning: 5 Effective Strategies to Keep Your Garage Organized Read More »

essential window cleaning tools

7 Essential Window Cleaning Tools Every Home Needs

7 Essential Window Cleaning Tools for Streak-Free Glass A spray bottle of blue liquid and a roll of paper towels will never give you a professional finish. That approach mostly moves dirt around, leaves a static-attracting residue, and deposits lint on the glass. Professional window cleaning tools are not complicated, but each one is designed to work with the others to remove dirt and water completely and efficiently. Here are the seven essentials every home needs. 1. Squeegee The squeegee is the heart of the operation and the single most important tool in the kit. A professional squeegee has a comfortable handle, a metal channel that holds the blade perfectly straight, and a soft, pliable rubber blade with a sharp, square edge. A nicked or rounded blade leaves streaks no matter how good your technique is. A 10 or 12 inch squeegee is a versatile starting point for most homes. 2. Scrubber or T-Bar Before the squeegee can dry the glass, the window must be scrubbed. The applicator, also known as a scrubber or T-bar, holds a removable microfiber sleeve that carries a significant amount of cleaning solution. Its texture agitates and lifts grime without scratching the glass. Choose a scrubber a couple of inches wider than your squeegee so every pass gets full coverage. 3. Bucket Any bucket can hold water, but professionals use a rectangular bucket wide enough to fully submerge the scrubber and squeegee, so the tools are evenly wetted. Many have side clips that keep your tools out of the dirty water and ready for use, which makes the whole process cleaner and more organized. 4. Soap The cleaning solution is a lesson in simplicity. The goal is not a mountain of suds, which are hard to remove and leave a film. Professionals use highly concentrated, biodegradable soaps that add slip to the water so the squeegee glides smoothly. For home use, a few drops of clear dish soap in a gallon of cool water is enough to break surface tension and lift grease. Too much soap causes streaks, because the water does the cleaning and the soap is only there to help. 5. Microfiber Cloths Microfiber cloths are the detailing tools that separate a good job from a perfect one. They are highly absorbent and, most importantly, lint-free. Keep at least two: one for wiping frames and sills before you start, and a completely dry one for wiping the squeegee blade between strokes and detailing the edges of the pane when you finish. 6. Scraper For paint overspray, dried bug residue, or adhesive, a proper window scraper holds a single-edge razor blade at a safe angle. The absolute rule is that the glass must be wet: using a scraper on dry glass guarantees scratches. On a wet, lubricated surface it removes the most resilient grime without leaving a mark. 7. Extension Pole For windows out of reach, an extension pole is a much safer alternative to a ladder. Professional scrubber and squeegee handles attach securely to the pole, letting you clean second-story windows from the ground while improving safety and speed. Falls are a leading cause of injury, and the CDC tracks fall data for good reason, so reducing ladder use around the home is smart. Window Cleaning Technique That Works Wet the glass with the scrubber, working the solution over the whole pane. Scrub away the dirt, then remove the dirty water with the squeegee. Wipe the squeegee blade with a dry microfiber cloth after each pass. Detail the edges of the pane and wipe the sill to finish. Keeping window sills and tracks dry also prevents mold from growing around windows, where moisture tends to collect. Window Cleaning Tools at a Glance Tool Role Pro Tip Squeegee Removes water and solution from glass Keep the rubber blade sharp and square Scrubber or T-bar Wets and scrubs the glass surface Pick one wider than the squeegee Bucket Holds solution and tools Use side clips to keep tools out of dirty water Soap Adds slip for a smooth glide A few drops of clear dish soap per gallon Microfiber cloths Detail frames, edges, and sills Keep one dry for blade and edge work Scraper Removes paint, bugs, and adhesive Only use on wet glass Extension pole Reaches upper windows safely Safer than a ladder for second-story panes Frequently Asked Questions What is the best homemade window cleaning solution? A few drops of clear dish soap in a gallon of cool water. It breaks surface tension and lifts grease without creating the heavy suds that leave film and streaks on glass. How often should windows be cleaned? Interior windows every one to two months, and exterior windows at least twice a year, more often in spring and fall when pollen and dust are heaviest. Why do my windows streak after cleaning? Streaks usually come from a nicked squeegee blade, too much soap, or drying the glass with a linty cloth. Check the blade, cut the soap, and finish with a dry microfiber cloth. Can I clean second-story windows without a ladder? Yes. An extension pole with a scrubber and squeegee attachment lets you reach upper panes from the ground, which is safer and faster than balancing on a ladder. Every tool in this system has a purpose, and together they produce a result that consumer products cannot match. For a flawless finish without the hassle, Toronto Shine Cleaning uses this exact system of professional-grade window cleaning tools so your windows are impeccably clean every time. Pair it with a deep cleaning service, book regular maid service, review our pricing, or contact us at (647) 424-0355 from any of our locations.

7 Essential Window Cleaning Tools Every Home Needs Read More »