Tips and Tricks

Hot Tub Cleaning: Get Perfectly Balanced Hot Tub Water Every Time

The hot tub is a unique and cherished feature of a home, a vessel of relaxation and hydrotherapy that promises to melt away the stresses of the day. It is a place of quiet solitude under the stars or a centerpiece for social gatherings with friends and family. But this luxury comes with a non-negotiable responsibility. A hot tub is not a “set it and forget it” appliance like a refrigerator or a dishwasher. It is a small, self-contained, and highly active body of water, a delicate ecosystem that requires consistent, diligent maintenance to remain a source of pleasure and not become a source of murky, unsanitary, and potentially hazardous problems. The Chemistry of Water To own a hot tub is to become a part-time water chemist. The warm, bubbling environment that is so inviting to us is also the perfect breeding ground for bacteria, algae, and other microorganisms. The key to a clean, safe, and enjoyable hot tub experience is not about performing a massive, hours-long cleaning session once a year. It is about a regular, simple, and consistent routine of testing, balancing, and sanitizing. Understanding the fundamentals of this routine is the most important aspect of hot tub ownership. The foundation of hot tub care is water chemistry, and the three most important pillars of that chemistry are alkalinity, pH, and the sanitizer level. These three elements are interconnected, and a problem with one will inevitably affect the others. The first step for any hot tub owner is to get comfortable with testing the water, which should be done at least two or three times a week, or more often with heavy use. The most common method is with test strips, which are simple, color-coded strips of paper that you dip into the water for a few seconds. The first level you should check and adjust is the total alkalinity. Alkalinity is the water’s ability to resist changes in pH. It acts as a buffer, a stabilizing force that prevents the pH level from swinging wildly. The ideal range for total alkalinity in a hot tub is typically between 80 and 120 parts per million (ppm). If your alkalinity is too low, the pH will be unstable and can drop suddenly, making the water corrosive. If it is too high, it can cause the pH to drift upward, leading to cloudy water and scale formation. You can raise the alkalinity with a product often called “Alkalinity Increaser” (sodium bicarbonate) and lower it with a pH decreaser (sodium bisulfate). Always adjust the alkalinity first, before you address the pH. Alkalinity Once your alkalinity is in the correct range, you can adjust the pH. The pH is the measure of how acidic or basic your water is, on a scale of 0 to 14. A pH of 7 is neutral. The ideal range for a hot tub is between 7.4 and 7.6. This is not an arbitrary number; it is slightly alkaline to match the natural pH of the human eye, which is why it is the most comfortable for bathers. If the pH is too low (acidic), the water can be corrosive to the hot tub’s components, like the heater and the pump seals, and it can be irritating to the skin. If the pH is too high (basic), it will cause the sanitizer to become sluggish and ineffective, lead to cloudy water, and promote the formation of scale on the shell and in the plumbing. You can raise the pH with a “pH Increaser” (sodium carbonate) and lower it with a “pH Decreaser” (sodium bisulfate). Only after both the alkalinity and pH are properly balanced can you effectively manage the sanitizer. The sanitizer is the chemical that actively kills bacteria and other harmful microorganisms in the water. The two most common types of sanitizer are chlorine and bromine. Chlorine is fast-acting and a powerful oxidizer, but it can have a stronger chemical smell and is less stable in the hot, high-pH environment of a spa. Bromine is more stable at higher temperatures and has a less noticeable odor, making it a very popular choice for hot tubs. It also has the unique ability to be reactivated by “shocking” the water. The ideal level for chlorine is between 1 and 3 ppm, and for bromine, it is between 3 and 5 ppm. You must maintain these levels at all times to ensure the water is safe for bathing. Hot Tub Filters Even with a perfectly maintained sanitizer level, the water will accumulate other unwanted waste products over time. Soaps, lotions, deodorants, and organic matter from bathers build up in the water, creating a food source for bacteria and making the water cloudy and unpleasant. To combat this, you need to “shock” your hot tub on a regular basis, typically once a week. Shocking is the practice of adding a large dose of an oxidizer to the water. This does several things: it breaks down all the organic waste, it kills any resistant bacteria, and in a bromine spa, it reactivates the used bromine ions, turning them back into effective sanitizer. Always shock the spa with the cover off and the jets running to allow it to circulate properly and to let the gasses vent. Beyond the daily and weekly chemical maintenance, the hot tub has other physical components that require regular attention. The most important of these is the filter. The filter is the kidney of your hot tub, constantly working to remove small particles, hair, and debris from the water. A dirty, clogged filter cannot do its job, which will result in cloudy water and will put a strain on your pump. The filter cartridges should be removed and rinsed with a garden hose at least once a week. The goal is to spray the debris out from between the pleats of the filter. Every few months, the filter needs a deep clean. This involves soaking it overnight in a specialized filter cleaning solution to break down

Hot Tub Cleaning: Get Perfectly Balanced Hot Tub Water Every Time Read More »

Bathroom Cabinet

How to Organize Your Bathroom Cabinet: A Step-by-Step Guide

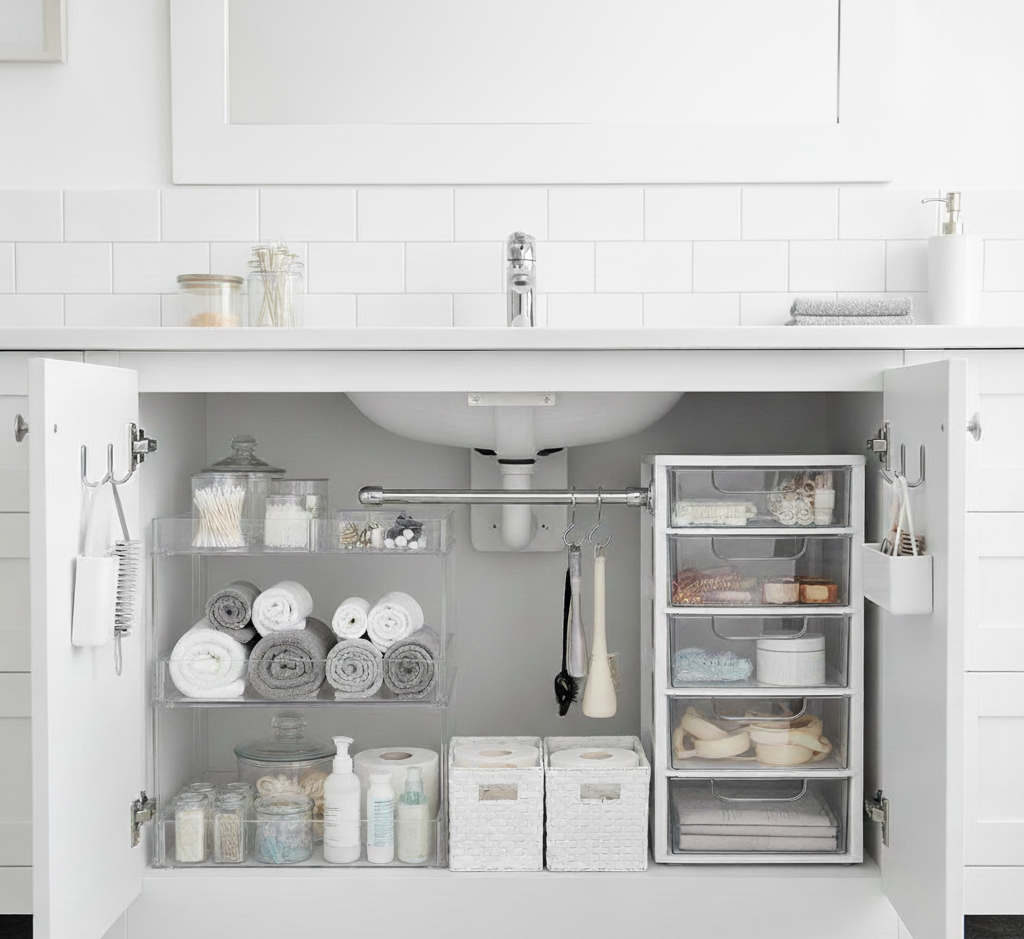
Why Your Bathroom Cabinet Needs a System, Not Just a Tidy Your bathroom cabinet holds the first tools you reach for in the morning and the last ones at night, yet in many homes it is the most chaotic corner of the house. Half-empty toothpaste tubes, expired medications, stray hair ties, and sticky drips from bottles that leaked months ago all pile up until a quick search for a bandage turns into a five-minute dig. That friction is small, but you feel it twice a day. Organizing this space is not merely tidying up; it is a full system reset that turns a frustrating cupboard into a calm, efficient part of your routine. The project needs more than ten spare minutes and good intentions. It demands a methodical approach, a dose of honesty, and a clear vision for how the cabinet should function day to day. Step 1: Gather Supplies and Empty the Cabinet Completely Start with preparation, not with the shelves themselves. Diving in without a plan usually creates a bigger mess than the one you started with, so gather everything you need first: A trash bag for the items you will discard. A box for products that belong in another room. An all-purpose cleaner and a few microfiber cloths. Small clear bins, drawer dividers, or a turntable. At least one hour of unhurried time. Then remove every single item, with no exceptions. Lay everything out on a towel on the floor or a nearby counter so you see the full inventory in one glance. This blank slate forces a conscious decision about each object that wants to return, and it is the only way to clean the cabinet itself properly. Step 2: Sort Into Keep, Toss, and Relocate Work through the pile and sort every item into one of three groups: keep, throw away, or relocate. Be ruthless, because the trash pile is usually the largest. Expired medications can be ineffective or even dangerous, so check the date on every bottle, and take old prescriptions to a pharmacy take-back program instead of flushing them; Health Canada explains safe disposal of prescription drugs. Expired cosmetics and skincare can harbor bacteria and irritate your skin, so toss them along with rusty razors, stretched-out hair ties, crusted nail polish, and sunscreen from two summers ago. Products in good condition that you rarely touch, such as bulk cotton balls or a large first aid kit, belong in the relocate pile: move them to a linen closet or return them to the family member who owns them. Only the items you genuinely use on a regular basis earn a place back in the cabinet. Step 3: Deep Clean the Empty Cabinet With the cabinet bare, spray the shelves, back wall, and door interior with your all-purpose cleaner and wipe every surface with a clean microfiber cloth. Give sticky rings left by bottles and dried toothpaste drips extra attention, since this is your one chance to get the interior truly pristine. Let everything dry completely before you add anything back. If cleaning products live in this cabinet or under the sink, store them the way Health Canada recommends for household chemical safety: labeled, sealed, and out of reach of children. Step 4: Group Like Items and Claim Prime Real Estate Before anything goes back, organize the keep pile into categories: all dental care together, all skincare together, all hair products together. Grouping first is the foundation of the new system. Small clear acrylic bins give each category a home and let you see everything at a glance instead of rummaging through opaque containers. In a deep cabinet, a turntable or Lazy Susan keeps less frequent items such as face masks and weekly treatments reachable with a spin, so nothing is forgotten in the dark back corners. The most important rule is prime real estate: the items you reach for every morning and night, your toothbrush, toothpaste, face wash, and daily moisturizer, belong at eye level near the front. Travel sizes and special occasion makeup go on higher shelves or toward the back. Use the inside of the door as well: small magnetic strips hold bobby pins, tweezers, and nail clippers, while stick-on acrylic pods keep cotton swabs and hair ties within easy reach. On tall shelves, a freestanding shelf riser creates a second level for small items. Cabinet Zones at a Glance Zone What Goes There Best Container Daily dental care Toothbrush, toothpaste, floss Small clear bin at eye level Everyday skincare Face wash, moisturizer, daily sunscreen Front of the prime shelf Hair and styling Brushes, ties, light styling products Door pods or drawer divider Weekly treatments Face masks, exfoliators Turntable toward the back Travel and backup Toiletries, extra soap High shelf or linen closet Step 5: Maintain the System With Two Simple Habits An organized cabinet is not a one-time achievement; it is a system that needs a small amount of upkeep. Put each product back in its designated home immediately after use, which takes only seconds. Follow the one-in, one-out rule: when a new bottle of face wash arrives, the old one should already be finished and discarded, so half-empty bottles never accumulate again. Then schedule a quick five-minute reset once a month to straighten anything that has strayed and wipe down spills before they become sticky rings. Frequently Asked Questions How often should I reorganize my bathroom cabinet? Do a full empty-and-sort twice a year, such as when the clocks change, plus a five-minute monthly tidy. Seasonal reviews catch expired sunscreen and old medications before they pile up. Can I throw expired medication in the garbage? The safest option is a pharmacy take-back program, which accepts unused and expired drugs any day of the year. Never flush medicines down the toilet or sink, and if no take-back option exists, contact your pharmacy or municipality for guidance. How do I stop products from leaking and making a mess? Wipe bottle necks and threads before returning them, store liquids upright inside bins,

How to Organize Your Bathroom Cabinet: A Step-by-Step Guide Read More »

 Professional vs. The DIY Reality duct cleaning

Professional vs. DIY Duct Cleaning: What You Need to Know Before You Start

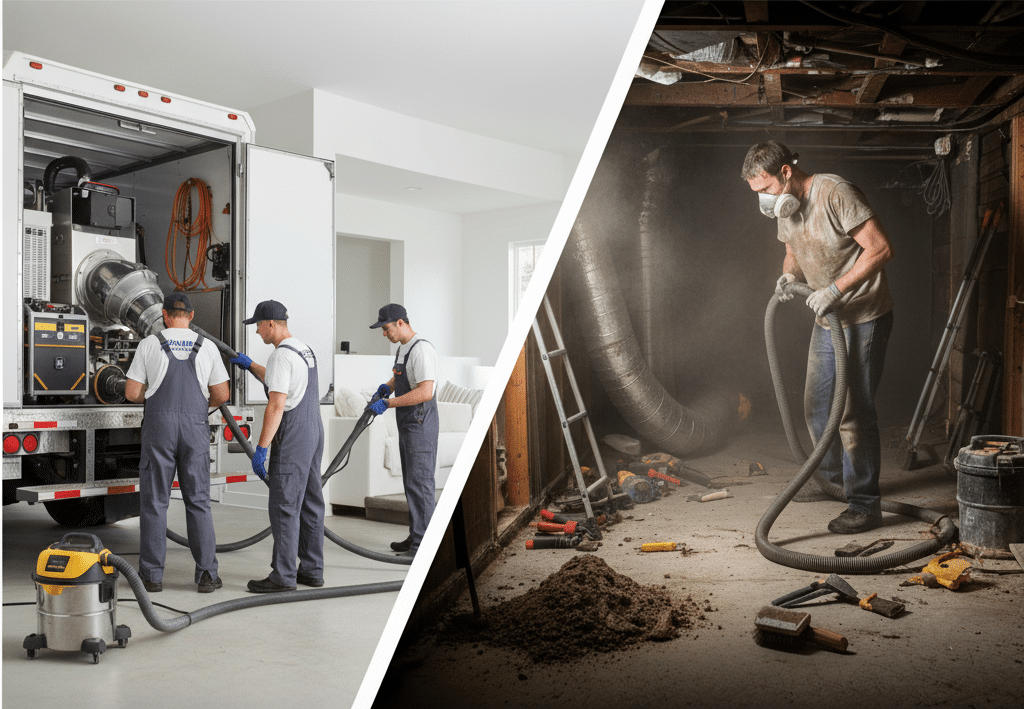
The topic of duct cleaning exists in a strange and often misunderstood corner of home maintenance. It is a service that promises cleaner air, a healthier home, and improved HVAC efficiency. It is also a task that, when you see the dust and debris that can accumulate around your floor and wall registers, seems like it should be a straightforward cleaning job. The temptation to tackle it yourself is strong. After all, how hard can it be to stick a vacuum hose down a vent? This is where a crucial distinction must be made. There is professional air duct cleaning, and then there is DIY duct cleaning. They are not the same thing. They do not use the same tools, they do not achieve the same results, and they do not have the same goals. A professional service is a whole-system decontamination. A DIY job is a surface-level dust removal. Understanding this difference is the most important step in deciding whether to attempt this project yourself. It is a task that can be done, but it must be approached with a healthy dose of realism, a clear understanding of the risks, and the right set of tools.  Professional vs. The DIY Reality Professional duct cleaning is a heavy-duty industrial process that takes place inside your home. The core of the service is the use of a massive, powerful vacuum system that connects directly to your home’s main duct lines near the furnace. This system creates a powerful negative pressure, essentially turning your entire ductwork system into a giant vacuum cleaner. While this vacuum is running, the technicians use long, flexible tools, high-pressure air whips and rotating brushes, that are inserted deep into the ductwork from each register. These tools agitate and dislodge all the caked-on dust and debris from the interior surfaces of the ducts. The negative pressure ensures that all this loosened debris is immediately sucked out of the system and into the collection unit, without being released into your home. The DIY reality is a scaled-down, simplified version of this. You do not have access to a vacuum that can create negative pressure throughout the entire system. Your primary tools will be a standard shop-vac and a long, flexible brush. This means you can only clean what you can physically reach, which is typically the first several feet of the ductwork branching off from each register. You are not cleaning the entire system; you are cleaning the endpoints. The goal is to remove the visible dust and debris that accumulates in the most accessible parts of the ducts. The Risks and Rewards of a DIY Approach Before you begin, it is essential to weigh the potential benefits against the very real risks. The Potential Rewards: Improved Airflow: By removing the clumps of dust and debris that can accumulate near the registers, you can improve the flow of air into your rooms. Reduced Visible Dust: It will certainly clean the registers themselves and the visible portion of the duct, reducing the amount of dust that gets blown out into the immediate vicinity. Cost Savings: The most obvious benefit is avoiding the cost of a professional service. The Significant Risks: Making the Problem Worse: Without the negative pressure of a professional system, there is a risk that you will simply dislodge debris that is deeper in the system and push it further down into the main trunk lines, potentially creating a blockage or simply leaving it to be blown out later. Damaging Your Ductwork: This is a major concern, especially in homes with flexible ductwork (the silver, accordion-style hoses). A spinning brush or even a sharp vacuum attachment can easily tear or puncture these ducts. If this happens inside a wall or ceiling, you have created a significant problem that will require a costly professional repair. Health Hazards: Your ducts can contain more than just dust. They can harbor mold, mildew, bacteria, and other allergens. Agitating these contaminants without a proper containment system can release them into your home’s air, potentially triggering allergic reactions or respiratory issues. Limited Effectiveness: After hours of work, you may find that you have only made a small dent in the overall dust level of the system, leading to a frustrating and unsatisfying result. DIY Duct Cleaning Toolkit If you have weighed the risks and decided to proceed, you will need more than just your household vacuum. A Powerful Shop-Vac: This is non-negotiable. A standard vacuum cleaner is not designed for this type of debris. You will need a shop-vac with a long, flexible hose. Ideally, it should be equipped with a HEPA filter to trap the fine dust particles and prevent them from being exhausted back into your air. A Dryer Vent Cleaning Kit: This is the secret weapon for a DIY job. These kits, designed for cleaning out dryer ducts, consist of a flexible, rotating brush head and a series of connectable rods that can be attached to a power drill. This is what you will use to agitate the dust inside the ducts. A Screwdriver or Power Drill: For removing the register covers (grilles). Microfiber Cloths and a Bucket of Soapy Water: For cleaning the register grilles themselves. Painter’s Tape or Cardboard: For temporarily sealing off registers. A New Furnace Filter: You must replace your filter at the end of this process. Safety Gear: This is absolutely essential. Wear a high-quality dust mask (an N95 or better is recommended) and safety glasses at all times. The Step-by-Step Guide to a Surface-Level Duct Clean This process is methodical and should be done with care and patience. Plan to dedicate several hours to the job. Preparation is Key: Go to your thermostat and turn off your HVAC system completely. This is a critical safety step to ensure the system does not kick on while you are working. Have your brand-new furnace filter ready to be installed at the very end. Seal Your Registers: To minimize the amount of dust that blows back into your home, you need to seal the registers you are not currently working on. Go to

Professional vs. DIY Duct Cleaning: What You Need to Know Before You Start Read More »

Clogged Drain? 4 Tips to Fix it Without Harsh Chemicals

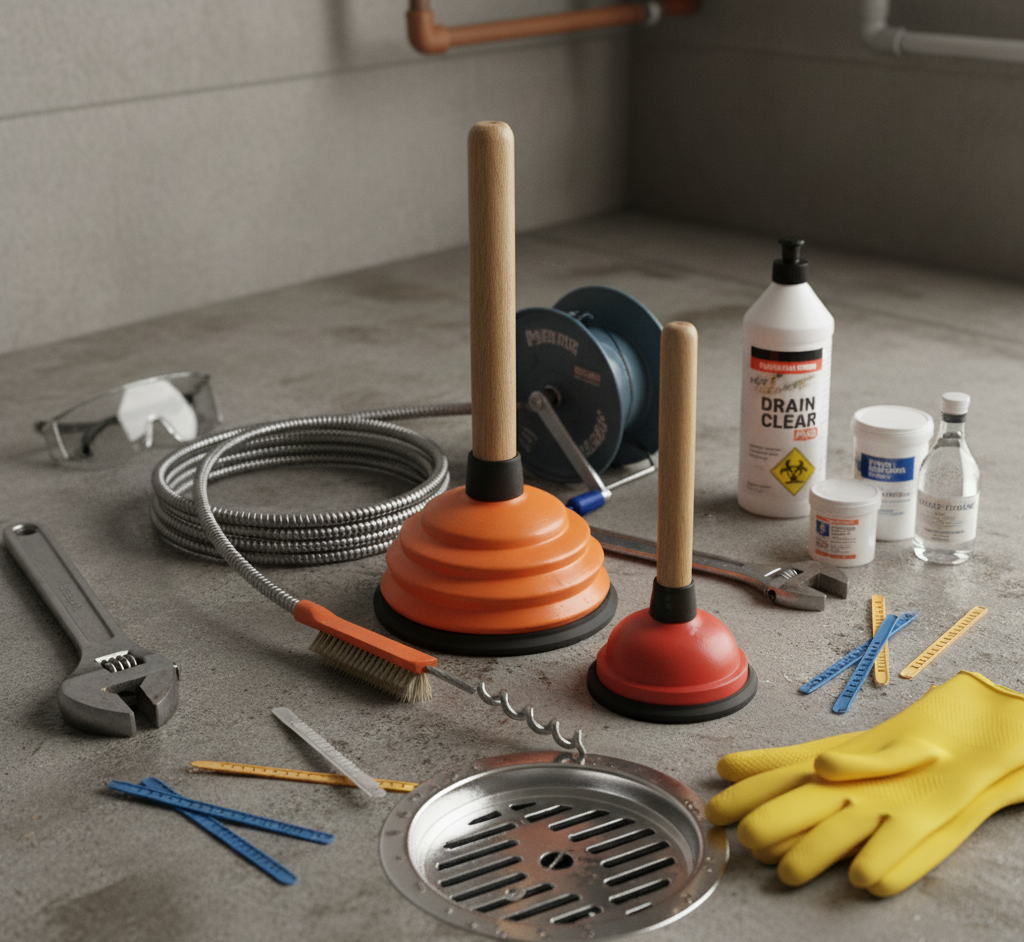
Clear a Clogged Drain the Safe Way, Without Harsh Chemicals A clogged drain rarely announces itself loudly. It starts with a gurgle, then water that takes longer to disappear, and soon you are standing in a shallow pool at the end of a shower or watching the kitchen sink back up. The instinct to grab a liquid chemical cleaner is understandable, yet it is usually the worst first move: caustic products can damage pipes and leave dangerous liquid behind if the clog survives. The smarter play is to escalate from gentle household methods to direct physical removal. Know Your Clog: Kitchen Grease Versus Bathroom Hair Drain blockages behave differently by location. The kitchen sink collects grease, fats, and oils from cooking, plus small food particles and coffee grounds. Hot grease poured down the drain travels a short distance, cools, and solidifies, coating the pipe with a sticky layer that catches debris until the flow is fully blocked. The bathroom drain battles hair: strands wash down and tangle into a net that soap scum, conditioner, and toothpaste residue cement into a dense plug. The right fix depends on which enemy you face. Why Chemical Drain Cleaners Are the Wrong First Step Most chemical uncloggers rely on sodium hydroxide, also known as lye, or sulfuric acid. These caustic substances dissolve blockages through a reaction that generates heat, which can soften PVC pipes and corrode metal pipes in older homes, leading to leaks and expensive repairs. The fumes are toxic in a poorly ventilated bathroom or kitchen, and the products kill the bacteria that septic systems need to break down waste before eventually reaching waterways. Worst of all, if the chemical fails, the pipe now holds corrosive liquid, making a later attempt with a plunger or snake a hazardous job. Health Canada’s household chemical safety guidance spells out the risks of drain cleaners and other caustic products, and its page on using household products safely is a solid reference before you buy anything else. Fix 1: Boiling Water, Then Baking Soda and Vinegar Start with the gentlest weapon, aimed squarely at grease. Boil a full kettle or pot of water and pour it down the drain in two or three stages, letting it work for a few seconds between pours so the heat melts solidified grease and flushes it through. If the water still drains slowly, pour about half a cup of baking soda down the drain, follow it with half a cup of distilled white vinegar, and immediately cover the opening with a plug or cloth so the fizzing reaction stays inside the pipe. Leave the mixture for at least an hour, or overnight for a stubborn clog, then flush with a pot of boiling water. These gentle methods are best for maintenance and slow drains. Fix 2: Plunge With the Right Tool and Technique The plunger is the tool most homes own and few use well. Know your models: the standard cup plunger suits flat surfaces such as a kitchen sink, while the flange plunger, with its smaller extension cup, seals better in a toilet and works well in bathtubs and showers. Plug the second basin of a double sink with a wet rag and block the tub or sink overflow with a damp cloth, then add enough water to cover the plunger cup, because the plunger moves water, not air. Push down gently to expel the air, then work a series of vigorous push-pull motions, emphasizing the pull, which creates the suction that dislodges the clog. After about 20 seconds, lift the plunger and test the drain, repeating as needed. Fix 3: Snake the Drain or Clean the P-Trap If plunging fails, go deeper with a drain snake, also called a hand auger. Feed the flexible cable into the drain until you feel resistance, tighten the thumbscrew, and turn the handle so the corkscrew tip breaks up the clog or latches onto it, then pull the whole mess back out. Cheap plastic zip-it strips, long barbed strips of plastic, are remarkably effective at pulling hair from bathroom drains. Still no results? The clog likely sits in the P-trap, the U-shaped pipe under the sink that holds water against sewer gas. Place a bucket underneath, unscrew the two slip nuts by hand or with channel-lock pliers, empty the trap, and scrub the gunk from inside. Check the horizontal pipe leading into the wall as well, then reassemble with the gaskets seated, hand-tighten the nuts, add a final quarter-turn with your pliers, and run water to check for leaks. Which Fix Matches Your Clog? Situation Best First Tool Escalate When Slow kitchen drain with greasy buildup Boiling water, then baking soda and vinegar Water still pools after two attempts Bathtub or shower drain full of hair Flange plunger or zip-it strip No movement after 20 seconds of plunging Sink that drains, then slowly refills Drain snake fed toward the P-trap The snake pulls nothing back Standing water beneath the sink P-trap removal with bucket and pliers Any leak after reassembly, call a plumber Prevention Is the Real Fix Never pour cooking grease, fats, or oils down the sink; collect them in a jar or can, let them solidify, and toss them in the trash. Use a mesh strainer in the kitchen sink to catch food particles and empty it into the bin. Run hot water down the drain for about a minute after washing greasy dishes. Fit the shower or tub drain with a hair-catching cover and clear it after every shower. Frequently Asked Questions Is it safe to pour boiling water down PVC pipes? For most modern plumbing, yes. The water cools quickly as it travels, and the heat is what melts the grease. If your home has very old or brittle plastic pipes, use hot tap water instead and lean on the baking soda and vinegar step. Why does my drain clog again a few weeks after I clear it? The blockage was probably pushed further down the pipe

Clogged Drain? 4 Tips to Fix it Without Harsh Chemicals Read More »

clean carpet

DIY vs. Store-Bought: What’s the Best Carpet Cleaning Solution?

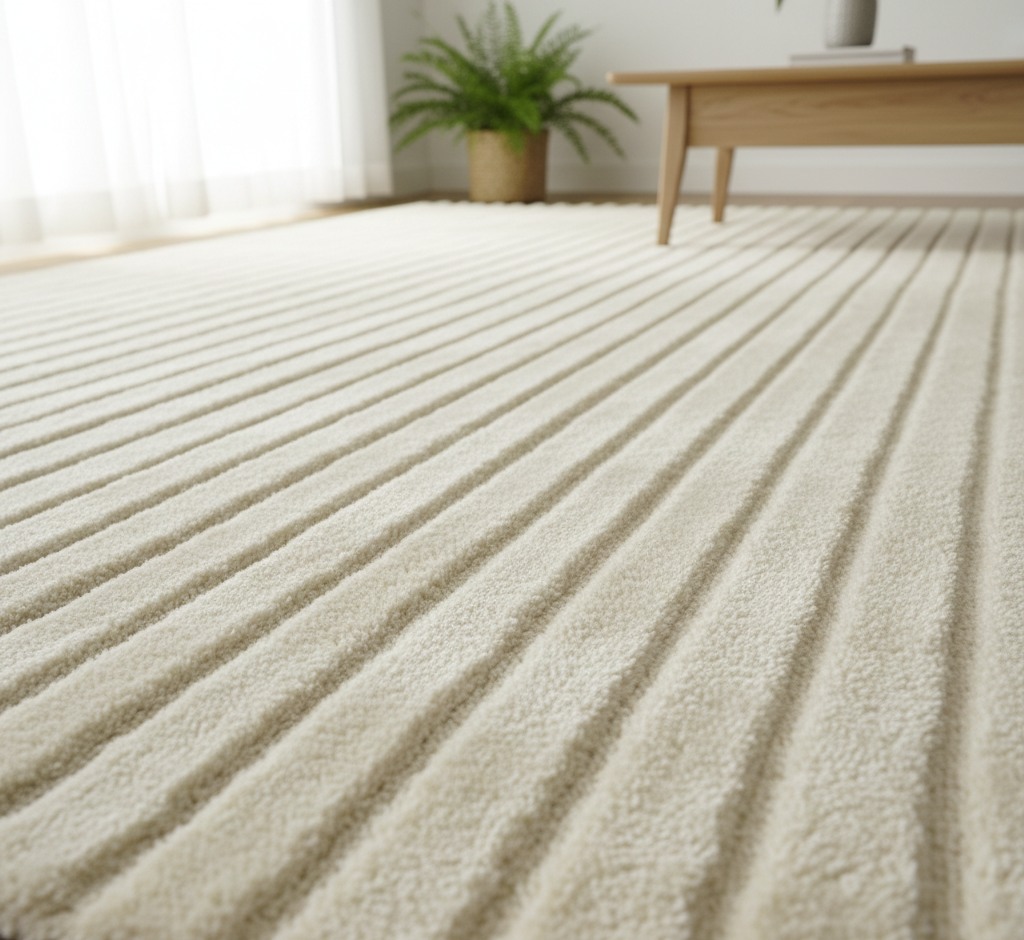
DIY vs. Store-Bought: What’s the Best Carpet Cleaning Solution? Every homeowner asks this question, and the honest answer is that no single product wins for every situation. The cleaner that lifts a pet stain may do nothing for grease, and the mixture that handles a small spill is not what you need for a full-room deep clean. The best carpet cleaning solution is the right solution for the right problem, so the real skill is knowing what each type of cleaner does and when to use it. The Chemistry Behind Carpet Cleaners Commercial and homemade carpet cleaners rely on the same few families of ingredients. Surfactants break the surface tension of water so it can penetrate fibers, latch onto greasy dirt, and hold it in suspension until it is blotted or extracted away; simple dish soap is a basic surfactant. Enzymes are proteins that break down other proteins, starches, and fats, which makes them the only real answer for organic stains like blood, grass, or urine. Solvents dissolve substances that water cannot, such as grease, oil, ink, and tar. Oxidizers release oxygen that breaks the chemical bonds of colored stains; hydrogen peroxide and sodium percarbonate, the active ingredient in OxiClean, are the most common examples. Ingredient What It Breaks Down Common Example Surfactants General dirt and light grease Clear dish soap Enzymes Proteins, starches, fats Protease, amylase, lipase cleaners Solvents Oil, ink, tar, wax Rubbing alcohol, citrus degreasers Oxidizers Colored stains like wine and coffee Hydrogen peroxide, sodium percarbonate DIY Carpet Cleaning Solutions That Work White vinegar and water is the classic first response: mix equal parts distilled white vinegar and water in a spray bottle, mist the area lightly, let it sit for 5 to 10 minutes, and blot with a clean, white cloth. Vinegar is a mild acid that dissolves grime, neutralizes alkaline messes, and deodorizes, but it can set protein-based stains like eggs or blood, so skip it there. Baking soda is a mild alkali that absorbs moisture and odors: sprinkle it dry over the carpet and leave it for several hours or overnight before vacuuming, or pile it onto a wet, greasy spill and let it form a dry crust, then scrape and vacuum. For general dirt, no more than one-quarter teaspoon of clear, simple dish soap in a cup of warm water gives extra lifting power, but overuse or poor rinsing leaves a sticky residue that attracts dirt faster than before. Hydrogen peroxide at 3 percent works on tough organic stains like blood, wine, or coffee: apply a small amount, let it bubble for 10 to 15 minutes, blot, and always test it in a hidden spot first because it can mildly bleach carpet color. When to Choose a Commercial Carpet Cleaner DIY solutions are great for everyday messes, but commercial products bring targeted chemistry for hard jobs. Enzyme-based cleaners labeled for pet stains and odors are the non-negotiable choice for urine, feces, vomit, blood, and food spills, because only enzymes truly break down the odor-causing proteins. Oxidizing cleaners are the go-to for red wine, juice, coffee, and tea. Solvent-based spotters handle grease, oil, and ink. Carpet shampoos for cleaning machines come in high-traffic, pet, and oxy formulas, and it is crucial to buy one designed for your machine so excess foam cannot damage the motor. Dry carpet cleaning powders are useful for natural fiber rugs and quick freshen-ups between deep cleans. Carpets trap dust and allergens, so a thorough clean also supports better indoor air quality. Technique Matters More Than the Product Even the best carpet cleaning solution fails when technique is wrong. Act fast, because fresh spills lift far more easily than set-in ones. Blot, never rub, working from the outside of the stain inward with a clean, white cloth. Always spot test any new product on a hidden area. Do not over-saturate, because soaking can damage the carpet backing and subfloor and invite mold and mildew growth. Rinse thoroughly by blotting with plain water after treatment, since leftover residue attracts dirt and creates dark spots over time. Around pets and children, prompt cleanup is part of everyday hygiene that keeps the whole household healthier. The Best Carpet Cleaner for Every Situation General dirt and light spills: DIY white vinegar and water solution. Pet urine and organic accidents: commercial enzyme-based cleaner. Red wine, coffee, or juice: commercial oxidizing (Oxi) cleaner. Grease or oil: absorb with baking soda, then a solvent-based spotter. Full-room deep clean: machine-compatible carpet shampoo, such as a pet formula. Frequently Asked Questions Is vinegar safe for all carpets? No. Vinegar is acidic, and it can react with and set certain protein-based stains like blood or eggs. Test it in a hidden area first, and never use it on stains you cannot identify. Can I use dish soap on carpet stains? Yes, in very small amounts: no more than one-quarter teaspoon of clear dish soap in a cup of warm water. Too much soap leaves sticky residue that attracts dirt, so rinse by blotting with plain water afterward. What removes pet urine smell from carpet? An enzyme-based cleaner is the only reliable answer. Enzymes break down the uric acid crystals and proteins that cause lingering odors, while vinegar or soap only mask them temporarily. How often should I deep clean my carpets? For a typical household, an annual professional deep cleaning is recommended, with more frequent cleanings for homes with pets, children, or heavy foot traffic. Does hydrogen peroxide bleach carpets? It can. Hydrogen peroxide is an oxidizer with a mild bleaching effect, so always test it in an inconspicuous spot, such as inside a closet, before treating a visible stain. Choosing the right carpet cleaning solution is detective work: identify the stain, understand the chemistry, and match the product to the problem. For a comprehensive professional deep clean that takes the guesswork out of the equation, Toronto Shine Cleaning uses professional-grade solutions and commercial equipment to tackle any stain on any type of carpet. Explore our deep cleaning service,

DIY vs. Store-Bought: What’s the Best Carpet Cleaning Solution? Read More »

Cleaning Patios and Decks: 5 Essential Tips for Cleaning Your Patio Before the Snow

Why Patio and Deck Cleaning Is a Pre-Winter Must Your patio or deck is an outdoor living room used all summer, but unlike indoor rooms it fights the elements all season: rain, sun, falling leaves, bird droppings, and the slow creep of mold, mildew, and algae. By late fall that exposure leaves a welcoming space grimy, stained, and sometimes slippery enough to be hazardous. Cleaning it before the snow arrives protects the surface through winter and prepares it for spring. The approach is systematic: clear, assess, clean with the right product for the material, rinse properly, and protect. Tip 1: Clear Everything, Then Sweep Before a single drop of cleaner lands, evacuate the space: move the furniture, grill, planters, umbrellas, and outdoor rugs off the deck or patio. Clearing the area is not just about access: it reveals the algae patch under a planter, the grease splatters near the grill, and the true scale of the job. With the space bare, sweep thoroughly with a stiff-bristled push broom, paying special attention to the corners and the gaps between deck boards where leaves and grit hide. Loose debris is abrasive, so this sweep prevents scratching later. Tip 2: Identify the Surface and the Problem Now that the deck is bare and swept, look closely. Is it wood, composite, or a hardscape of concrete, pavers, or natural stone, and what exactly are you fighting? Dark, blackish spots usually mean mold. Green, slimy patches are algae, a genuine slipping hazard. Dark circular stains mark where planters sat for months. Sticky, greasy film collects around the barbecue. Mold and algae thrive wherever moisture lingers, and the CDC’s overview of mold explains why damp spots around the home should be cleaned up and their cause fixed. Your surface type and stain type decide which cleaner you need, so match the product to the material instead of reaching for the first spray on the shelf. Tip 3: Match the Cleaner to the Material Wooden decks need cleaning power balanced with protection. Start with the gentlest option: a mild pH-neutral soap such as dish soap in a bucket of warm water, scrubbed with a soft-bristle brush and rinsed thoroughly. For embedded dirt, algae, and mold, oxygen bleach, also sold as sodium percarbonate, is the right call: unlike chlorine bleach, which is harsh on wood fibers and harmful to surrounding plants, it releases oxygen ions that break down grime without damaging the wood. Wet the whole deck with plain water first so the solution is not absorbed unevenly, apply it with a mop or garden sprayer, let it dwell for 10-15 minutes without drying, then scrub with the grain and rinse. Composite decks are marketed as low-maintenance, not no-maintenance: mold can feed on the organic fillers inside the material. A soft-bristle brush with mild soap handles routine dirt, and one part white vinegar mixed with two parts water treats mold. Skip abrasive pads and metal brushes, which scratch and dull the finish. Concrete, pavers, and stone tolerate more aggressive methods. A degreaser handles oil and grease spots from the grill or car on concrete: apply it, let it penetrate, scrub, and rinse or pressure wash away. Pull weeds and moss from paver joints before you clean. Natural stone such as flagstone or slate demands the most caution: never use acid-based cleaners such as muriatic acid, which etch the surface permanently. Test any product on a hidden spot first and use a pH-neutral cleaner designed for natural stone. Surface by Surface Cleaner Guide Surface Recommended Cleaner Avoid Wooden deck pH-neutral soap, then oxygen bleach for mold and algae Chlorine bleach and aggressive blasting Composite deck Mild soap; one part vinegar to two parts water for mold Abrasive pads and metal brushes Concrete patio Degreaser for oil spots, pressure washer for grime Nothing in particular, it is durable Brick and stone pavers Degreaser plus hand-pulled weeds from joints A jet stream that washes out jointing sand Natural stone pH-neutral cleaner made for stone Any acid-based cleaner, including muriatic acid Tip 4: Treat the Pressure Washer as a Rinse, Not a Weapon Used carelessly, a pressure washer does real damage: a stream set too powerful or held too close gouges wood, raises the grain, and leaves a fuzzy, splintered surface. If you use one, keep the pressure at no more than 1200 PSI for softwoods such as pine, fit a wide 40-degree fan tip, hold the nozzle at least a foot away, and keep moving in long sweeps. The cleaner lifts the grime; the washer only washes it away. On pavers, aim carefully so the stream does not blast the jointing sand out from between the stones. Tip 5: Dry, Inspect, and Protect Before Winter After rinsing, let the entire area dry completely, which can take a full day or more. Then inspect your work for missed spots and needed repairs, such as popped nails on a deck or a cracked paver. A clean wooden deck is a vulnerable deck, so fall is the time to stain or seal it: a quality sealer keeps moisture from penetrating and causing rot and blocks the sun’s UV rays, which turn wood gray and brittle. Some natural stone and paver installations also benefit from a sealer that resists stains. Moisture management matters indoors just as much, and Health Canada’s guidance on humidity and mould explains why fixing moisture problems promptly prevents growth. Frequently Asked Questions Can I clean my deck with bleach? Chlorine bleach is harsh on wood fibers and harmful to nearby plants, so oxygen bleach is the safer choice for mold and algae on a wooden deck. Reserve chlorine bleach for indoor jobs where the label permits it. Is power washing bad for wood decks? Only when it is misused. Keep the pressure at about 1200 PSI or less for softwoods, use a wide 40-degree fan tip, stay at least a foot away, and keep the nozzle moving. Use the washer to rinse after a chemical cleaner, not to blast dirt

Cleaning Patios and Decks: 5 Essential Tips for Cleaning Your Patio Before the Snow Read More »

Stop Wasting Money: 4 How a Clean Dryer Pays for Itself

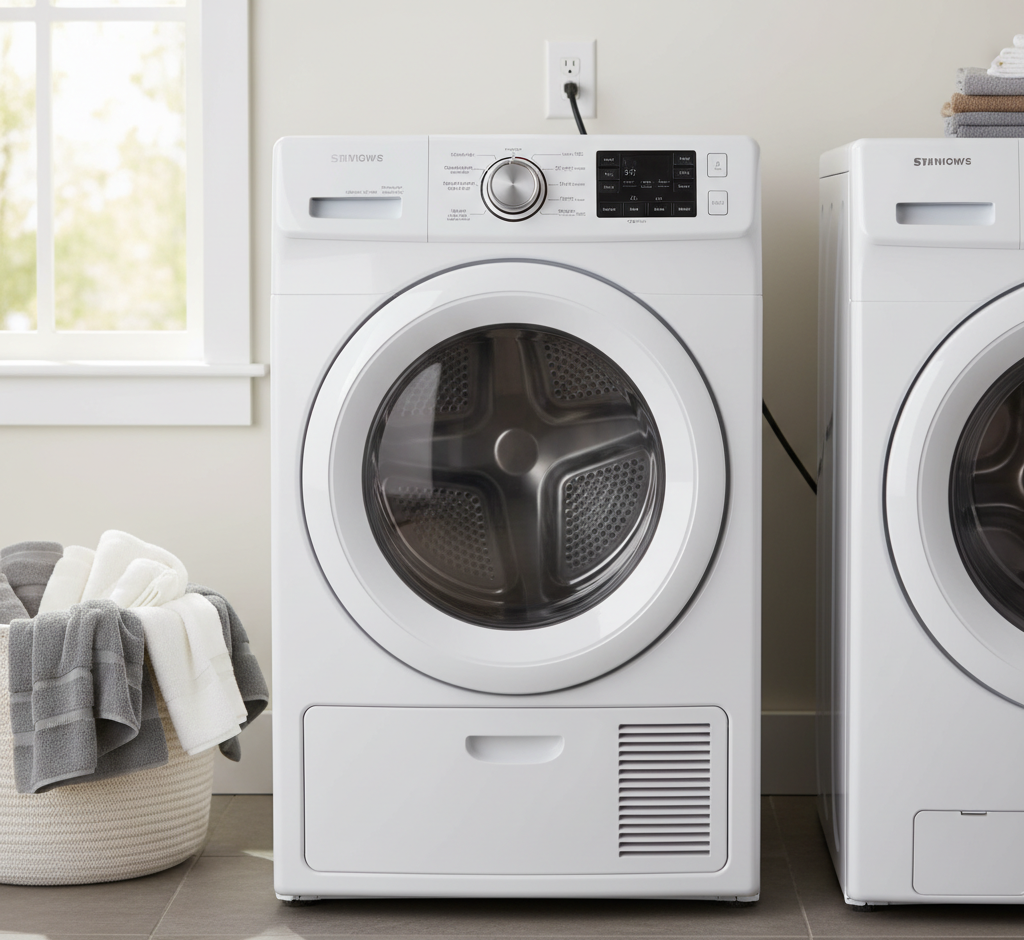
It is the final act in the theater of laundry, the warm and tumbling conclusion to a cyclical chore. It is the clothes dryer, and in the hierarchy of household appliances, it is perhaps the most taken for granted. We entrust it with our wet clothes, press a button, and return later to find them dry, soft, and ready to be worn. This simple, reliable function masks a powerful and potentially dangerous system. A dryer is not just a gentle, warm box; it is a machine that combines intense heat with a constant flow of air to perform its task. And the byproduct of this process-lint-is the root of nearly every problem a dryer will ever face. 1.Do Not Neglect To neglect a clothes dryer is not just to invite inefficiency and shortened appliance life; it is to court a genuine fire hazard. Proper, regular cleaning of your dryer is not a matter of aesthetics. It is one of the most critical and often overlooked safety procedures in the entire home. Understanding how works, where its weaknesses lie, and how to perform a few simple maintenance tasks can transform it from a hidden risk into the efficient, reliable workhorse it was designed to be. At its core, a clothes dryer is a simple system. A heating element (either gas or electric) heats the air. A fan pulls this hot air into a rotating drum, where it tumbles with your wet clothes, causing the water to evaporate. The fan then pushes this hot, moist, lint-filled air out of the dryer and through a duct system to the exterior of your home. The key to this entire process is uninterrupted airflow. Anything that obstructs this flow of air forces the machine to work harder and run hotter, creating a dangerous and inefficient situation. The primary, and constant, source of this obstruction is lint. Lint is simply the collection of tiny fibers that shed from our clothes during the drying process. These fibers are highly flammable-essentially a form of super-dried tinder. and they are carried by the exhaust air. While some of this lint is caught by the primary filter, a significant amount makes it past, settling in the ductwork and building up over time. The consequences of neglecting this simple system are serious and threefold. First and most importantly is fire safety. This is the most critical reason for regular cleaning. The U.S. Fire Administration reports that thousands of residential fires are caused by clothes dryers each year, with the leading cause being a “failure to clean.” When lint accumulates in the vent system, the dryer cannot exhaust hot air properly. This causes heat to build up. If the temperature gets high enough, it can ignite the highly combustible lint, leading to a fast-spreading and devastating fire that often starts hidden within the walls of your home. 2.Inefficient Dryer Second is energy efficiency and cost. A clogged dryer is an inefficient dryer. When airflow is restricted, it takes much, much longer for your clothes to dry. A load that should take 45 minutes might take an hour and a half. During this entire time, the dryer is consuming a significant amount of electricity or gas. A clean dryer uses less energy, which means a lower utility bill. Proper maintenance is a direct investment that pays for itself in energy savings. Third is appliance longevity and clothing care. The strain of running hotter and longer takes a toll on the dryer‘s components, particularly the heating element and the blower motor. This leads to premature wear and tear and costly repairs. Furthermore, the excessive heat and prolonged tumbling time are damaging to your clothes, causing them to shrink, fade, and wear out faster. Proper dryer care is not complicated. It consists of two primary tasks: one that must be done with every single use, and another that should be done periodically. 3.Lint Protection Screen The first task is to clean the lint screen after every single load. This is the simplest, fastest, and most important habit you can develop. The lint screen is your first line of defense. A clogged screen immediately restricts airflow, forcing the dryer to work harder and creating the conditions for overheating. Even a thin layer of lint can reduce efficiency. After every load, pull out the lint screen. Use your fingers to peel the layer of lint off the screen and dispose of it in the trash. About once a month, you should deep clean the screen itself. Dryer sheets and fabric softeners can leave behind an invisible, waxy film on the mesh screen that further restricts airflow, even when the visible lint is gone. Take the screen to a sink and scrub it gently with a soft brush, hot water, and a little dish soap. Rinse it thoroughly and let it dry completely before putting it back in the dryer. You can test your screen by pouring a small amount of water onto it; if the water pools instead of passing through easily, it needs to be washed. The second task is to clean the dryer vent and duct system annually. This is the more involved, but critically important, deep cleaning that removes the lint your screen could not catch. This should be done at least once a year, or more often if you have a large family and do a lot of laundry. You will need a specialized dryer vent cleaning kit. These are readily available at hardware stores and typically consist of a flexible, rotating brush that can be attached to a power drill, along with several connectable rods to reach the full length of your duct. Before you do anything, unplug your electric dryer or shut off the gas supply to your gas dryer. Carefully move the machine away from the wall to give yourself room to work.. Disconnect the flexible transition hose that connects the back of the dryer to the duct in the wall. Reach into the hole at the back of the dryer where you disconnected the hose and manually pull out any clumps of lint. Use a vacuum with a hose attachment to clean it out as thoroughly as possible. The flexible hose is often a

Stop Wasting Money: 4 How a Clean Dryer Pays for Itself Read More »

Liquid vs. Powder vs. Pods: A Complete Detergent Breakdown

Detergent is the unsung workhorse of our household chores, a chemical marvel we rely on multiple times a week, yet give very little thought to. It sits in a bottle, a box, or a tub, a wall of promises in the supermarket aisle, each brand claiming brighter whites, bolder colors, and more stain-fighting power than the last. It is laundry detergent, and for most of us, our interaction with it is limited to a ritual of unthinking measurement, a capful, a scoop, a tossed-in pod, followed by the push of a button. But this simple act belies the complex science and crucial choices involved in getting our clothes truly clean. The right detergent, used correctly, can preserve the life of our garments, save us money, and deliver a level of clean we thought was only possible in commercials. The wrong detergent, or the right one used incorrectly, can do the exact opposite, leaving clothes dingy, irritating our skin, and even damaging our washing machines. To master the art of laundry is to first understand the powerful tool at the heart of the process: the detergent itself.  Soap vs. Detergent To appreciate the modern detergent, we must first understand what it is not: it is not soap. For millennia, soap was the world’s primary cleaning agent. Made from natural fats and oils combined with an alkali, soap is a fantastic cleaner in the right conditions. However, it has one major, fatal flaw: it reacts poorly with the minerals present in hard water. When soap molecules encounter the calcium and magnesium ions in hard water, they bind together to form an insoluble, waxy precipitate known as soap scum. This is the same stuff that creates a ring in the bathtub. In laundry, it leaves a dingy, graying film on clothes and can build up inside the washing machine. The modern laundry detergent was invented as a direct solution to this problem. Detergents are synthetic, man-made compounds engineered in a lab to be immune to the effects of hard water. Their molecules are designed not to bind with minerals, allowing them to focus entirely on their primary job: removing dirt. This fundamental difference is why we use detergents for our laundry and not bars of soap. How Detergent Actually Works The magic of detergent lies in a specific type of molecule called a surfactant. The word itself comes from “surface active agent,” and that is precisely what it does. Imagine a surfactant molecule as being shaped like a tadpole, with a distinct head and a tail. The head is hydrophilic, which means it is attracted to water. The tail is hydrophobic (or lipophilic), meaning it repels water but is strongly attracted to oil, grease, and dirt. When you add detergent to your wash, millions of these surfactant molecules get to work. The hydrophobic tails seek out and attach themselves to the oily, greasy dirt on your clothes, burrowing into the grime. Meanwhile, the hydrophilic heads are trying to stay in the water. As the washing machine agitates, the water molecules pull on the hydrophilic heads, and this pulling action, combined with the agitation, literally lifts the dirt and grease right off the fabric fibers. The surfactants then form tiny spheres around the dirt particles, called micelles, with the greasy tails pointing inward, trapping the dirt, and the watery heads pointing outward. This keeps the dirt suspended in the wash water, preventing it from redepositing back onto your clean clothes before it is all rinsed away. But modern detergents are more than just surfactants. They are complex formulas containing several key ingredients: Enzymes: These are biological catalysts, like tiny Pac-Men, designed to break down specific types of stains. Protease targets protein-based stains (like grass and blood), amylase targets starches, and lipase targets fats and oils. This is why enzymatic detergents are so effective at stain removal. Builders: These are agents that soften the water by binding to the hardness minerals, allowing the surfactants to work even more effectively. Optical Brighteners: These are compounds that absorb ultraviolet light and re-emit it as visible blue light. This doesn’t actually remove stains, but it cleverly tricks our eyes into seeing whites as “whiter” and colors as brighter. Polymers: These special ingredients can help trap dirt in the water or create a protective layer on fabrics to help prevent future stains from setting in. Choosing the Right Detergent for You The sheer variety of detergents can be overwhelming. The choice can be simplified by breaking it down into three main categories: form, machine type, and specialty formula. 1. Liquid vs. Powder vs. Pods Liquid Detergent: This is the most popular form in many parts of the world, and for good reason. It is versatile, easy to measure, and dissolves well in all water temperatures, including cold. Liquids are particularly effective on greasy, oily stains, as they can be applied directly to the stain as a pre-treater. The main downsides are the heavy, plastic-intensive packaging and the tendency for users to pour with a heavy hand, leading to overuse. Powder Detergent: This is the classic, budget-friendly champion. On a per-load basis, powder is almost always the cheapest option. It is excellent at lifting mud and ground-in dirt, making it a great choice for families with kids or for work clothes. Its cardboard packaging is also more environmentally friendly. The drawbacks are that it can sometimes fail to dissolve completely in very cold water, leaving a chalky residue, and it can be a bit messy to measure. Pods/Packs: These are the peak of convenience. Perfectly pre-measured, you simply toss one into the drum and you are done. There is no mess and no guesswork. They are fantastic for those who tend to overuse liquid detergent. However, this convenience comes at a premium price; pods are by far the most expensive option per load. Their formulation is also fixed, meaning you cannot adjust the amount for a very small or lightly soiled load. Safety is also a major concern, as their small, colorful appearance can be dangerously appealing to children and pets. 2. High-Efficiency

Liquid vs. Powder vs. Pods: A Complete Detergent Breakdown Read More »

wet cleaning wipes

Wet Wipes: 5 Why Wipes Aren’t the Best Solution

The convenience wet wipes is undeniable. It sits on the counter, in the car, in a handbag, a small, sealed packet promising a swift and simple solution to life’s messes. It is the wet wipe, and in the space of a few short decades, it has become one of the most ubiquitous and relied-upon products in modern life. From wiping a baby’s bottom to removing stubborn makeup, from sanitizing a shopping cart handle to a quick clean of a dusty dashboard, the wet wipe presents itself as the ultimate tool of immediate, portable cleanliness. But this convenience comes at a steep, and often hidden, price. The very qualities that make the wet wipe so appealing-its strength, its moisture, its disposability-are the same qualities that contribute to a cascade of environmental, infrastructural, and even personal health problems. The story of the wet wipe is a classic tale of a modern convenience with profound and unintended consequences. To truly understand its impact, we must look beyond the clean surface it leaves behind and examine the journey it takes after its single, fleeting use. What Are Wet Wipes Actually Made Of? The most significant misconception about wet wipes is what they are made of. We use them much like paper towels or toilet paper, and so we assume they are, in fact, a form of paper. This could not be further from the truth. If you have ever tried to tear a wet wipe, you know it has a surprising, fabric-like strength. This is because the vast majority of wet wipes are not made from paper at all, but from non-woven fabrics composed of plastic resins like polyester and polypropylene. These are the same materials used to make clothing, ropes, and plastic bottles. They are chosen for their durability and their ability to remain strong when saturated with liquid. This is precisely why they are so effective at scrubbing. However, it is also why they are an environmental disaster. Unlike paper, which is made from wood pulp and biodegrades relatively quickly, these plastic fibers do not break down in any meaningful timeframe. A single wet wipe can persist in the environment for hundreds of years, slowly breaking apart not into organic matter, but into smaller and smaller plastic fragments known as microplastics. The “Flushable” Myth This brings us to the most damaging myth perpetuated by the industry: the “flushable” wipe. Many brands market their wipes as safe to flush, creating the impression that they will simply disintegrate like toilet paper once they enter the plumbing system. This is a catastrophic falsehood. Toilet paper is specifically designed to have very short fibers that lose all their structural integrity almost immediately upon contact with water. Wet wipes are designed to do the exact opposite. When flushed, they do not break down. They travel through the pipes intact, where they snag on imperfections, catch on other debris, and begin to form the foundation of clogs. In the municipal sewer systems, this problem scales up to a monstrous degree. Here, the flushed wipes combine with the fats, oils, and grease (FOG) that are improperly poured down drains from household kitchens. The strong plastic fibers of the wipes act as a durable net, binding with the congealing fats to create colossal, rock-hard masses known as “fatbergs.” These blockages, which can grow to be the size of a bus and weigh several tons, are a plague on modern cities. They cause raw sewage to back up into streets and homes, require enormous and expensive efforts to break apart with high-pressure water jets and manual labor, and place an incredible strain on our aging water infrastructure. Every single time a “flushable” wipe is flushed, it becomes a potential building block for the next fatberg. The problem is not just contained to the sewers. During periods of heavy rainfall, sewer systems can overflow, discharging this toxic slurry directly into our rivers and oceans. Here, the wet wipes emerge, carpeting riverbeds and washing up on beaches in what is now grimly referred to as a “wet wipe reef.” They are frequently mistaken for food by marine animals and birds, leading to internal blockages and death. The Problem with the Bin Even when disposed of correctly in a trash can, the problems do not disappear. Because they are made of plastic, they end up in landfills where they will sit for centuries without biodegrading. They contribute to the ever-growing mountain of single-use plastic waste that is a hallmark of our disposable culture. Furthermore, the cleaning solutions and preservatives they are soaked in can leach into the soil and groundwater over time. The Cost to Our Health and Skin The convenience of a wet wipe can also come at a cost to our skin. In order to keep the wipes moist and free of mold and bacteria within their packaging, they are saturated in a solution that often contains a cocktail of chemicals, including preservatives, fragrances, and surfactants. Preservatives like parabens and methylisothiazolinone are necessary to prevent the growth of microbes, but they are also known skin irritants and allergens for many people. The “fragrance” listed on a package is often a proprietary blend of dozens of chemicals that do not have to be disclosed individually, and these are common triggers for dermatitis and allergic reactions. For personal hygiene, particularly on sensitive areas, the constant use of wet wipes can disrupt the skin’s natural microbiome, the community of beneficial bacteria that protects our skin. The chemical and physical action of wiping can strip away the skin’s natural protective oils, leading to dryness, irritation, and a compromised moisture barrier. From a cleaning perspective, wipes often provide an illusion of clean rather than a true removal of dirt and germs. Without a rinsing action, they often just smear bacteria and grime across a surface rather than lifting it away. A proper cleaning process involves a cleaning agent to loosen dirt and a cloth or sponge that can be rinsed out, physically removing the contaminants from

Wet Wipes: 5 Why Wipes Aren’t the Best Solution Read More »

Distilled Water: 5 Simple Secrets on How to Use Distilled Water

The secret to a perfect, streak-free clean is not found in a bottle of expensive, high-tech cleaning solution. It is not achieved through a special microfiber cloth woven with miraculous fibers, nor is it the result of a secret scrubbing technique passed down through generations. The real secret to a flawless, residue-free finish is something far more fundamental and surprisingly simple. It is the water itself. More specifically, it is the absence of minerals in that water. The single most transformative, yet overlooked, tool in any advanced cleaning arsenal is a simple jug of distilled water. We are conditioned to see water as a simple cleaning agent, but the water that flows from our taps is far from pure. It is a complex liquid, carrying a dissolved cargo of minerals and trace elements from its journey through the ground and pipes. The most common of these are calcium and magnesium, the primary culprits behind “hard water.” When you clean a surface with tap water and it evaporates, it leaves these microscopic mineral deposits behind. This is the root cause of nearly every common cleaning frustration: the hazy film on your hardwood floors, the stubborn white spots on your shower door, the frustrating streaks on your windows, and the cloudy residue on your stainless steel appliances. You can scrub and polish for hours, but if you are using tap water, you are fighting a battle against an invisible enemy that you are simultaneously reapplying with every wipe. Distilled water is the elegant solution to this problem. It is water that has been purified back to its most basic, elemental state: pure H₂O. By understanding what it is and how it works, you can elevate your cleaning from a chore of constant frustration to a science of predictable, perfect results. What Exactly Is Distilled Water, and Why Does It Matter? The process of distillation is a simple act of separation. Regular water is boiled into steam. As the water turns into a gas, it leaves behind everything that is not water: minerals, salts, heavy metals, and other contaminants. This pure water vapor is then collected and condensed back into its liquid form. The result is water that is stripped of all its baggage, a true “blank slate.” This purity is precisely what makes it a secret weapon for cleaning. Because distilled water contains no dissolved solids, when it evaporates, it leaves absolutely nothing behind. There are no minerals to create spots, no salts to leave a film. It dries completely clean. This unique property gives it two significant advantages in a cleaning context: It Prevents Residue: As mentioned, it eliminates the source of spots and streaks. This is its most obvious and celebrated benefit. It Is a More Effective Cleaner: Because distilled water is free of dissolved minerals, it is chemically “hungry.” It has a greater capacity to dissolve and absorb other substances, like dirt and soap, making it a more effective solvent than tap water. This means you often need less cleaning solution to achieve the same result. Key Applications for Distilled Water in Your Home Switching to distilled water for specific tasks is a small change that yields disproportionately large results. Here are the most impactful ways to incorporate it into your cleaning routine. 1. The Ultimate Streak-Free Window and Mirror Cleaner This is the classic and most transformative use. For a truly professional, invisible finish on glass, distilled water is non-negotiable. The Problem: The minerals in tap water are the primary cause of streaks on windows and mirrors. No matter how well you squeegee, as the last microscopic droplets of water dry, they leave mineral deposits behind, creating a faint but frustrating haze. The Solution: Create your own professional-grade glass cleaner. In a clean spray bottle, mix a solution of 50% distilled water and 50% distilled white vinegar. The vinegar acts as a powerful cleaning agent, cutting through grease and grime, while the distilled water ensures that once you wipe or squeegee it away, the surface will dry to a perfectly clear, spot-free shine. This simple, cheap solution will outperform almost any commercial glass cleaner on the market. 2. Flawless Stainless Steel and Chrome Stainless steel appliances are notorious for showing every fingerprint and water spot. Distilled water is the key to winning this battle. The Problem: Wiping down stainless steel with a cloth dampened with tap water is a recipe for frustration. As the water dries, it leaves behind a constellation of mineral spots that mar the finish. The Solution: For routine cleaning, simply dampen a clean microfiber cloth with distilled water and wipe the appliance, always following the direction of the grain. For a final polish, use a second, completely dry microfiber cloth to buff the surface. The absence of minerals means no spots will form as it dries. For greasy fingerprints, you can add a single drop of dish soap to your damp cloth, then “rinse” with a separate cloth dampened with only distilled water before buffing dry. The same principle applies to chrome faucets and fixtures in the kitchen and bathroom. 3. A Haze-Free Finish for Hardwood and Laminate Floors If your hard-surface floors look dull and cloudy even after mopping, the culprit is likely a buildup of mineral residue from your tap water. The Problem: Over time, mopping with tap water (even with a floor cleaner) can leave behind a cumulative, hazy film that dulls your floor’s natural shine. The Solution: This is especially effective with a spray mop system. Fill the mop’s reservoir with mostly distilled water and a small splash (a few tablespoons) of white vinegar. The vinegar helps to break down any existing film, while the distilled water ensures no new film is created. The result is a floor that is truly clean, without the dulling residue that compromises its appearance. 4. Spot-Cleaning Carpets and Upholstery Without Leaving a Ring Have you ever cleaned a small spot on your carpet, only to be left with a noticeable ring or outline after it dries? That ring is often caused

Distilled Water: 5 Simple Secrets on How to Use Distilled Water Read More »