Tips and Tricks

Uses for Coarse Salt

Coarse Salt: 10 Surprising Uses for Coarse Salt in Home Cleaning

In the search for effective and non-toxic cleaning solutions, one of the most powerful tools is often already sitting in the kitchen pantry. Coarse salt, whether it is kosher salt, sea salt, or rock salt, is a remarkably versatile and inexpensive mineral with properties that extend far beyond flavoring food. Its utility as a cleaning agent is rooted in its fundamental physical and chemical characteristics. The crystalline structure of salt makes it an excellent natural abrasive, capable of scouring away grime without being as harsh as many commercial powders. Furthermore, salt is a desiccant, meaning it absorbs water and, by extension, moisture-laden messes. It also has mild antibacterial and deodorizing properties, making it a multi-functional powerhouse for a wide range of household chores. 1.Cast Iron Pans Perhaps the most classic and celebrated use for coarse salt in cleaning is on cast iron cookware. Maintaining the seasoned surface of a cast iron skillet is crucial; harsh soaps and detergents can strip away this protective, non-stick layer that has been built up over time. Salt provides the perfect solution. To clean a warm skillet after cooking, simply pour a generous amount of coarse salt into the pan. Using a folded paper towel or a stiff brush, scrub the salt around the pan. The salt’s abrasive texture will lift away stuck-on food particles and absorb any excess oil without damaging the seasoning. Once the pan is clean, the dirty salt can be discarded, and the pan can be wiped clean with a cloth. A thin layer of oil can then be applied to reinforce the seasoning, leaving the skillet ready for its next use. This method not only cleans but also helps to manage rust spots that may begin to form. 2.Kitchen Utensils This same abrasive quality makes coarse salt an exceptional cleaner for other kitchen items, particularly wooden cutting boards and butcher blocks. These surfaces, being porous, can harbor bacteria and absorb odors from foods like garlic and onion. To deep clean and deodorize a wooden board, sprinkle it liberally with coarse salt. Then, take half a lemon and use it as a scrubber, squeezing slightly as you work the salt into the wood in a circular motion. The salt acts as a scouring agent to lift away fine particles of food and stains, while the citric acid in the lemon juice acts as a natural disinfectant and bleach, brightening the wood and neutralizing odors. Let this salty, lemony paste sit on the board for ten to fifteen minutes before scraping it off and rinsing the board thoroughly with hot water. This process leaves the cutting board sanitized, deodorized, and visually refreshed. 3.Fat Removal Coarse salt is also highly effective at tackling grease. For greasy pots, pans, or baking dishes, sprinkling salt onto the greasy areas can make cleanup significantly easier. The salt absorbs a good portion of the grease, so when you wipe it out with a paper towel, you remove a large amount of the mess before even introducing soap and water. This pre-cleaning step can reduce the amount of grease going down your drain and make the final wash much quicker. This principle also applies to grease spills on fabric. If you get an oily splatter on your clothing or a tablecloth, immediately cover the spot with a pile of coarse salt. Let it sit for an hour or so to draw the oil out of the fibers. Afterwards, brush off the salt and treat any remaining stain before laundering as usual. 4.Red Wine Stain removal is another area where salt’s properties shine. For the dreaded red wine spill on a carpet or upholstery, salt can be a first line of defense. After blotting the spill with a clean cloth to absorb as much liquid as possible, cover the entire stain with a thick layer of coarse salt. The salt will begin to draw the wine out of the fibers, and you may see it turn pink as it works. Leave the salt to dry completely, which may take several hours or even overnight. Once it is dry and caked, you can simply vacuum it all up. While it may not remove a very old or heavily set-in stain completely, it is incredibly effective on fresh spills and can significantly reduce the severity of the stain. 5.Cleaning Inside the kitchen, coarse salt can be used to clean and deodorize in less obvious ways. The inside of a coffee pot or a thermos can develop brown stains from coffee and tea tannins that are difficult to scrub. To remove these, fill the carafe with a handful of coarse salt and about a cup of crushed ice. Swirl the mixture vigorously for a few minutes. The ice provides a hard medium that forces the abrasive salt crystals against the interior walls of the carafe, effectively scouring away the stains. For particularly stubborn stains, adding a bit of lemon juice or vinegar to the mix can provide an acidic boost to the cleaning power. After swirling, let the mixture sit for about half an hour, then rinse thoroughly. This method is a safe and effective way to restore clarity to a glass coffee pot without using harsh chemicals. 6.Deodorizing The power of salt extends to cleaning drains and garbage disposals. To freshen a smelly kitchen drain, pour about half a cup of coarse salt down the drain, followed by a quart of very hot water. The salt helps to dislodge grease and food particles that can get trapped and cause odors. For a garbage disposal, the combination of ice and salt works wonders. Pour a cup of salt and a couple of cups of ice cubes into the disposal and run it until the grinding sound stops. The ice and salt work together to freeze and scour away built-up grime and sludge from the blades and the walls of the disposal, sharpening the blades in the process. Following this with a few lemon or orange peels will leave the disposal and

Coarse Salt: 10 Surprising Uses for Coarse Salt in Home Cleaning Read More »

Clear Snow Safely and Effectively

Snow Cleaning: How to Clear Snow Safely and Effectively

The serene beauty of a fresh snowfall is quickly followed by the practical necessity of snow cleaning. This essential winter chore is not just about maintaining appearances; it is a fundamental task for ensuring safety, accessibility, and the protection of property. A path left uncleared becomes a hazardous sheet of ice, a driveway blocked by a snowbank can trap a vehicle, and the sheer weight of accumulated snow can pose a structural threat. Proper snow cleaning is a proactive engagement with winter weather, requiring the right tools, a sound strategy, and a respect for the physical demands of the job. Without an effective approach to snow cleaning, the winter season can become a period of constant struggle and potential danger. Shovel The cornerstone of any manual snow cleaning operation is the shovel. Yet, the term “shovel” encompasses a range of tools designed for specific purposes, and choosing the correct one is the first step toward efficiency. The classic scoop shovel, with its deep blade, is built for lifting and throwing snow, making it suitable for clearing out tight spaces or moving deep drifts. For larger, flatter areas like driveways and long sidewalks, a snow pusher is a far superior tool. Its wide, curved blade is designed to skim along the surface, pushing a large volume of snow with each pass, which drastically reduces the need for lifting and alleviates strain on the back. Many modern shovels feature ergonomic designs, with bent shafts that encourage a more upright posture, further mitigating the risk of injury during the strenuous task of snow cleaning. The choice of blade material is also significant. Lightweight plastic blades are less likely to damage wooden decks or stone pavers, while heavy-duty metal blades, often fitted with a steel wear strip, excel at breaking through compacted snow and ice. Snow Blower For those who contend with large areas or consistently heavy snowfall, mechanical assistance in the form of a snow blower transforms the nature of snow cleaning. These machines are broadly categorized into single-stage and two-stage models. A single-stage blower employs a fast-spinning auger that makes direct contact with the pavement, scooping up snow and ejecting it through a discharge chute in a single motion. These units are relatively lightweight and easy to maneuver, making them an excellent choice for paved driveways and moderate snowfalls. In contrast, a two-stage snow blower is a more powerful and complex machine designed for heavy-duty snow cleaning. Its auger breaks up heavy, wet, or compacted snow and feeds it into a separate high-speed impeller, which then propels the snow out of the chute. This dual-action process allows two-stage blowers to handle deep snow drifts and throw the snow much farther, a crucial feature for clearing long driveways where snow placement is a key concern. This level of mechanical power makes the challenge of intensive snow cleaning far more manageable. Ice Chopper Even the most thorough snow cleaning effort can leave behind a slick surface of compacted snow or ice. This is where de-icing becomes a critical final step. An ice chopper, with its heavy steel blade, is invaluable for breaking up thick, stubborn ice that other tools cannot dislodge. After the bulk of the material has been removed, applying a de-icing agent can melt the remaining layer and prevent refreezing. Rock salt, or sodium chloride, is the most common and economical choice. It works by creating a brine solution that lowers the freezing point of water, effectively melting the ice. However, its effectiveness diminishes in very cold temperatures, and it can be corrosive to concrete and harmful to plants. Alternatives like calcium chloride and magnesium chloride work at much lower temperatures and are generally considered safer for concrete and vegetation. For households with pets, it is vital to use a specifically formulated pet-safe ice melt, as common de-icers can be toxic to animals. A comprehensive snow cleaning plan must include a strategy for ice management. Injuries The methodology behind snow cleaning is as vital as the equipment. The timing of your efforts can significantly impact the difficulty of the task. It is far less arduous to clear a few inches of snow two or three times during a major storm than it is to confront a single, deep accumulation of heavy, compacted snow afterward. Waiting too long allows the snow to settle and bond to the surface, making the job much harder. An early and frequent approach is the hallmark of an efficient snow cleaning strategy. When the time comes to shovel, proper physical technique is essential for preventing injury. The power for lifting should come from the legs, not the back. This means bending at the knees and hips while keeping the back straight and core muscles engaged. Whenever possible, push the snow rather than lifting it. If lifting is necessary, keep the shovel close to your body and avoid twisting your torso to throw the snow; instead, pivot your entire body by moving your feet. The repetitive nature of snow cleaning makes taking regular breaks essential to prevent overexertion. Garage A systematic approach to the physical layout of the job is also crucial. Before starting, identify where the cleared snow will be piled. It is imperative that these piles do not obstruct sightlines for drivers at the end of a driveway or at street corners. Piling snow against a building’s foundation can introduce moisture and lead to leaks as it melts. Furthermore, ensure that storm drains are not blocked, as this can cause significant flooding during a thaw. For those using a snow blower, working with the wind is a simple but effective tactic, preventing the discharged snow from blowing back onto cleared areas or into your face. A well-executed snow cleaning job is one that is done with foresight. Roof The responsibility of snow cleaning is not limited to ground-level surfaces. The weight of heavy snow on a roof can pose a serious structural risk. A roof rake, which is a wide blade attached to a long, telescoping

Snow Cleaning: How to Clear Snow Safely and Effectively Read More »

How to Unclog Your Shower Head: Fixing Weak Water Pressure

A shower head is more than a simple bathroom fixture; it is the source of a daily ritual, a cascade of water that can awaken the senses or wash away the stresses of the day. When it functions properly, the stream is full, consistent, and directed. Over time, however, this reliable flow can diminish into a weak, sputtering, and erratic spray. Jets that once produced a perfect stream may become completely blocked, while others shoot water at odd angles, creating a less than satisfying experience. This decline in performance is not a sign that the fixture needs to be replaced, but rather a clear indication that it is in desperate need of a thorough cleaning. The culprit behind this gradual degradation is almost always an accumulation of mineral deposits, soap scum, and biofilm that clog the tiny nozzles from the inside out. Hard Water The primary cause of this blockage is hard water, a common issue in many municipal water systems. Hard water is characterized by a high concentration of dissolved minerals, predominantly calcium and magnesium. As water passes through the shower head and the residual moisture evaporates, these minerals are left behind. They precipitate out of the solution and form a hard, chalky substance known as limescale, or calcium carbonate. This scale builds up layer by layer, slowly constricting the openings of the nozzles, much like plaque in an artery. The process is slow and often goes unnoticed until the water pressure is significantly impacted. In addition to these mineral deposits, soap scum, which is a reaction between soap and the minerals in hard water, can contribute to the blockage, creating a gummy, resilient film. Compounding this issue is the dark, damp, and warm environment inside the shower head, which is an ideal breeding ground for bacteria and other microorganisms to form a slimy layer called biofilm. This organic matter can further clog the jets and introduce a subtle but persistent hygienic concern. Fortunately, restoring a shower head to its former glory is a straightforward maintenance task that requires minimal tools and common household ingredients. The most effective and widely used method involves using the acidic properties of white distilled vinegar to dissolve the mineral buildup. Acetic acid, the active component in vinegar, reacts with the alkaline calcium carbonate deposits in a chemical process that breaks them down into water-soluble calcium acetate and carbon dioxide gas. This reaction effectively melts away the stubborn scale without the need for harsh, abrasive scrubbing that could damage the fixture’s finish. The simplest way to apply this treatment is the immersion bag method. To do this, you will need a sturdy plastic bag large enough to envelop the shower head, a rubber band or zip tie to secure it, and enough white distilled vinegar to fully submerge the face of the fixture. The process The process begins by carefully pouring the vinegar into the plastic bag. Then, lift the bag up and over the shower head, ensuring that all the nozzles and the faceplate are completely immersed in the liquid. Secure the bag tightly around the shower arm with the rubber band or zip tie, making it snug enough to hold the weight of the vinegar and prevent any leaks. The shower head should then be left to soak. For light buildup, a few hours may be sufficient, but for more heavily calcified fixtures, it is best to leave it overnight. During this time, you may even notice small bubbles forming as the acid reacts with the limescale, a visible sign that the cleaning process is working. After the soaking period is complete, carefully remove the bag and pour the used vinegar down the drain. The next step is to flush out all the loosened debris. Turn on the hot water and let it run through the shower head for a few minutes. You should immediately notice an improvement in the flow and spray pattern. To address any remaining stubborn clogs, an old toothbrush can be used to gently scrub the faceplate and nozzles. For the most persistent blockages within individual jets, a small pin, a paperclip, or even a toothpick can be used to carefully poke into the opening and dislodge the softened mineral plug. For a more comprehensive cleaning, or in cases where the bag method is not sufficient to resolve severe blockages, it may be necessary to remove the shower head completely. This allows for a deeper soak that can clean not just the nozzles, but the internal components as well, including the often-overlooked filter screen. To remove the fixture, you will typically need an adjustable wrench or a pair of pliers. It is crucial to wrap the connecting nut with a cloth or a rag before applying the tool to prevent scratching or marring the finish. Turn the nut counter-clockwise to loosen it from the shower arm. Once it is detached, you can inspect the inside for any large pieces of debris. Pay close attention to the small mesh screen, or washer, located at the connection point, as this is designed to trap sediment and can become heavily clogged, severely restricting water flow. This screen can be removed and scrubbed clean with a toothbrush. Immersion With the shower head removed, it can be fully submerged in a bowl or bucket filled with white vinegar. This ensures the vinegar penetrates all the internal chambers for a truly thorough cleaning. After soaking for several hours or overnight, use a toothbrush to scrub both the exterior nozzles and the interior threads and chambers. Once it is clean, rinse it thoroughly with fresh water. Before reattaching the fixture, it is good practice to clean the threads on the shower arm and apply new plumber’s tape, also known as Teflon tape. Wrap the tape clockwise around the threads three to four times to create a secure, watertight seal that will prevent leaks. Then, screw the shower head back onto the arm, first by hand and then giving it a final quarter-turn with the

How to Unclog Your Shower Head: Fixing Weak Water Pressure Read More »

Understanding Acetone: A Guide to the Powerful Cleaning Solvent

What Makes Acetone a Powerful Cleaning Solvent Acetone is a potent organic solvent that dissolves residues most household cleaners cannot touch: oils, greases, dried paint, varnish, lacquer, permanent ink, and stubborn adhesives. Chemically, it is a polar aprotic solvent, so it attacks both greasy, non-polar materials and many polar substances. It also evaporates very quickly, which means it can do its job and vanish, usually leaving a clean, dry, residue-free surface behind. That speed and strength are exactly why acetone demands respect: it is indiscriminate, so you need to know where it helps and where it will do damage. Top Cleaning Jobs for Acetone Paint and Finish Removal Splatters of dried latex or oil-based paint on hard, non-porous materials such as glass, tile, or bare metal are no match for acetone. It breaks down the polymer binders that hold paint together, liquefying the coating so it can be wiped away. The same chemistry makes acetone the standard choice for cleaning paint brushes, roller covers, and spray gun components used with lacquers and enamels. It can also strip varnish or polyurethane from metal hardware and lift old, yellowed lacquer from brass fixtures. Expect to apply it, give it a few minutes to work, and then scrape or wipe off the softened layers. Adhesive and Residue Removal Most nail polish removers list acetone as their active ingredient because it dissolves the tough acrylic polymers in nail lacquer. The same principle defeats cyanoacrylate, better known as super glue: a small dab, carefully applied, dissolves the bond on skin or countertops. Acetone also penetrates the gummy residue left behind by stickers, labels, and tape, cutting through the stickiness until it wipes clean. Heavier challenges such as contact cement or construction adhesive usually need several applications plus some mechanical scraping. Workshop Degreasing Before welding, painting, or powder-coating a metal part, any trace of oil or wax can ruin the bond or finish. Acetone cuts through petroleum-based grime and flashes off fast, leaving a clean substrate. Mechanics use it on automotive parts, machinery, and tools to dissolve grime and tar that would otherwise require heavy scrubbing. On a concrete garage floor, it can lift deep oil stains, but only when you pull the dissolved oil up with an absorbent material; used carelessly, acetone can drive the stain deeper into the porous concrete. Remove nail polish spills from hard surfaces. Break super glue bonds on skin and countertops. Dissolve sticker, label, and tape residue. Clean brushes and rollers after lacquer or enamel projects. Prep metal parts before painting or welding. Where Acetone Causes Damage Acetone dissolves many common plastics, including polystyrene (styrofoam), ABS found in electronics housings and car interiors, acrylic (Plexiglas), and polycarbonate. Contact can soften, warp, cloud, or fully dissolve these materials, and even brief exposure can cause solvent crazing, a web of fine surface cracks. High-density polyethylene (HDPE) and polypropylene generally resist the solvent, so they are the usual choice for acetone containers. Finished wood is another casualty: acetone strips shellac, varnish, lacquer, and polyurethane, dries out the wood fibers, and can lift veneers or damage laminates, so it should never touch wooden furniture, flooring, or cabinetry unless a full refinishing is planned. Some fabrics are equally vulnerable. Acetate, triacetate, and modacrylic fibers can literally dissolve, creating holes, while cotton, wool, and silk usually survive but may lose dye. Material Acetone reaction Safe to clean? Polystyrene, ABS, acrylic, polycarbonate Softens, warps, clouds, or dissolves No; test a hidden area first HDPE and polypropylene Resists the solvent Yes Finished wood and veneers Strips finish, dries fibers Only for refinishing Acetate, triacetate, modacrylic fabric Dissolves; can create holes No Cotton, wool, silk Usually safe; dye may run Spot-test first Acetone Safety: Flammability, Ventilation, and Gear Acetone is extremely flammable with a very low flash point, so vapors can catch fire at room temperature when they meet a spark or flame some distance away. Ignition sources include pilot lights on water heaters, the spark of a refrigerator motor kicking on, and static electricity. Work with strong ventilation: open windows and doors and use a fan to push fumes outside, or work outdoors whenever possible. Protect your skin with butyl rubber or nitrile gloves; latex gloves break down quickly, and direct contact can defat the skin, causing dryness, irritation, and cracking. Wear splash-proof goggles, and in enclosed spaces or during long sessions use a respirator with an organic vapor cartridge, since concentrated fumes can irritate the respiratory tract and cause dizziness and headaches. Health Canada’s household chemical safety tips cover flammable and corrosive products such as paint thinners, and its household products guidance explains safe use and storage around the home. How to Apply Acetone the Right Way For small stains, pour the acetone onto a clean white cloth or cotton ball instead of directly onto the surface; that controls the amount and stops it from spreading to nearby vulnerable materials. Blot the stain from the outside edge inward so it does not create a larger ring, and avoid rubbing, which can push the stain deeper or damage the surface texture. Afterward, wipe the area with a cloth dampened with water and mild detergent, rinse with a clean, damp cloth, and dry thoroughly. Test any new surface or fabric in an inconspicuous spot first, such as an inner seam. Frequently Asked Questions About Acetone Can I use acetone on plastic surfaces? Only on plastics known to resist it, such as HDPE and polypropylene. Most others, including polystyrene, ABS, acrylic, and polycarbonate, will soften, cloud, or dissolve, so always test an unseen area first. Will acetone ruin wood furniture? Yes. It strips the finish, dries out the wood fibers, and can lift veneers. Reserve it for refinishing projects where removing the old finish is the whole point. Is acetone safe on fabrics and carpets? Fabrics made of acetate, triacetate, or modacrylic fibers can dissolve, and dyes on natural fibers may bleed. Spot-test an inconspicuous area before treating any stain. Is nail polish remover the same as pure acetone?

Understanding Acetone: A Guide to the Powerful Cleaning Solvent Read More »

Cleaning Products for Your Natural Stone

Natural Stone: Choosing the Right Cleaning Products for Your Natural Stone

Natural stone surfaces bring an unparalleled elegance and timeless durability to any space. However, their porous nature demands a mindful approach to cleaning and maintenance. Using the wrong products can lead to irreversible damage, such as dulling, etching, and staining. Understanding the specific needs of your stone, whether it be granite, marble, travertine, or limestone, is paramount to preserving its beauty for years to come. The cornerstone of proper natural stone care is the consistent use of pH-neutral cleaners. Harsh, acidic, or alkaline chemicals can react with the minerals in the stone, compromising its integrity and finish. Simple Mixture For daily cleaning of all-natural stone surfaces, the most recommended and safest solution is a simple mixture of warm water and a few drops of mild, pH-neutral dish soap. This gentle combination is effective at removing everyday dirt, grease, and grime without harming the stone or its sealer. After wiping the surface with this solution using a soft, microfiber cloth, it is crucial to rinse the area thoroughly with clean water and dry it completely with another soft cloth. This prevents soap scum buildup, which can leave a dull film on the surface over time, and averts water spots. When a more potent cleaning is required, particularly for disinfection, a solution of equal parts water and 70% isopropyl alcohol can be used. This mixture is effective at killing bacteria and germs without being abrasive or acidic. Spray the solution onto the surface, let it sit for a few minutes, and then wipe it clean with a damp cloth before drying thoroughly. This is an excellent option for kitchen countertops where food preparation occurs. It is imperative to know which products to avoid. Acidic substances are the primary adversary of natural stone, especially calcareous stones like marble, travertine, and limestone. These stones are primarily composed of calcium carbonate, which reacts vigorously with acids, leading to etching, a chemical burn that appears as a dull spot on the surface. Common household cleaners that contain vinegar, lemon juice, or other citrus-based ingredients should never be used on these stones. Likewise, harsh chemicals such as bleach and ammonia can degrade the sealer and dull the stone’s surface over time. Abrasive powders or creams are also to be avoided as they can scratch the stone. Granite Granite, being a siliceous stone, is generally more resistant to acids than its calcareous counterparts. However, repeated exposure to acidic substances can still weaken the sealer and eventually lead to damage. Therefore, it is best to adhere to pH-neutral cleaning practices for granite as well, ensuring its longevity and lustrous appearance. Marble is particularly susceptible to damage due to its soft and porous nature. Spills, especially from acidic liquids like wine, coffee, or fruit juice, should be blotted up immediately with a soft cloth. Wiping the spill can spread it further. After blotting, clean the area with a mild soap and water solution, rinse, and dry. For tougher organic stains on light-colored marble, a poultice made from hydrogen peroxide and an absorbent material like baking soda can be effective. Travertine Travertine and limestone share a similar composition to marble and thus require comparable care. Their surfaces are often characterized by small pits and fissures, which can trap dirt. Regular dusting with a dry microfiber cloth is beneficial to prevent the accumulation of abrasive particles. When cleaning, use a pH-neutral cleaner and ensure the surface is rinsed and dried thoroughly to prevent water from settling in the pores. For deep cleaning textured travertine, an alkaline-based cleaner may be necessary to lift embedded grime. In cases of efflorescence, a white, powdery deposit that can appear on the surface, it is crucial to use a non-acidic cleaner to remove the salt residue without harming the stone. Beyond daily cleaning, the most critical aspect of natural stone care is sealing. A sealer acts as a protective barrier, penetrating the pores of the stone to inhibit the absorption of liquids and prevent staining. There are two primary types of sealers: impregnating (or penetrating) and topical. Sealants Impregnating sealers are absorbed into the stone, filling the pores from within. They do not alter the appearance of the stone and allow it to “breathe,” meaning water vapor can still escape. This is particularly important for outdoor applications or in wet environments. Topical sealers, on the other hand, form a protective film on the surface of the stone. While they can provide a glossy finish and some protection against scratches, they are more prone to wear and tear and can trap moisture, potentially leading to discoloration. For most residential applications, an impregnating sealer is the preferred choice for its durability and natural look. The frequency of sealing depends on the type of stone and its usage. A simple water test can determine if it’s time to reseal. Place a few drops of water on the surface and observe. If the water beads up, the sealer is still effective. If the water is absorbed into the stone, leaving a dark spot, it’s time to reapply the sealer. As a general guideline, highly porous and frequently used stones like marble in a busy kitchen may need to be sealed every six to twelve months. Denser stones like granite can often go one to two years or even longer between sealing. For stubborn stains that have penetrated the stone, a poultice is an effective remedy. A poultice is a paste-like substance made from an absorbent material and a chemical solvent, which is applied to the stain to draw it out. The type of poultice depends on the nature of the stain. Stains For oil-based stains, a poultice made from baking soda and acetone or a commercial degreaser is effective. Mix the ingredients to a peanut butter-like consistency, apply it to the stain in a thick layer, cover it with plastic wrap, and tape the edges. Allow it to sit for 24 to 48 hours as it dries, which is the mechanism by which it pulls the stain from the stone. For organic stains like coffee

Natural Stone: Choosing the Right Cleaning Products for Your Natural Stone Read More »

The Power of Citric Acid

The Power of Citric Acid: Your Solution for Limescale and Grime

In the world of cleaning, there’s citric acid, and countless products that promise miraculous results, often based on complex chemical formulations and strong scents. Yet, hiding in plain sight, often in the baking aisle of the grocery store, is a simple, effective, and remarkably versatile compound: citric acid. This white crystalline powder, derived naturally from citrus fruits like lemons and limes, is a powerhouse cleaner that can tackle some of the most stubborn household problems, particularly those related to mineral deposits and hard water. Its strength lies in its chemical nature as a weak organic acid, which allows it to dissolve grime, limescale, and soap scum without the corrosive intensity of stronger mineral acids. Chelation The primary mechanism that makes citric acid so effective is a process called chelation. In areas with hard water, the water is rich in dissolved minerals, primarily calcium and magnesium. When this water evaporates, it leaves behind a chalky, crusty residue known as limescale. This is the buildup you see inside your kettle, on your showerheads, and as a cloudy film on your glassware. Citric acid works by binding to these mineral ions, forming a compound called a chelate. This new compound is water-soluble, meaning the stubborn, stuck-on mineral deposit is transformed into something that can be easily rinsed away. This is a far more effective approach than simply trying to scrub the deposit off, which is often a losing battle and can damage the surface underneath. Kettle One of the most satisfying applications for citric acid is restoring a kettle caked with mineral deposits. Over time, the inside of a kettle can become layered with a thick, white scale that not only looks unpleasant but can also impair its heating efficiency and flake off into your water. To effortlessly clean it, simply fill the kettle about halfway with water, add one to two tablespoons of citric acid powder, and bring it to a boil. Once it has boiled, turn it off and let the solution sit for twenty to thirty minutes. You will often be able to see the limescale fizzing and dissolving. After the waiting period, pour out the solution and rinse the kettle thoroughly with fresh water a few times. The interior will be left sparkling clean, looking almost new, with no scrubbing required. This same principle applies perfectly to automatic coffee makers, which also suffer from internal mineral buildup that can slow down the brewing process and affect the taste of your coffee. To descale a coffee machine, fill the water reservoir with your normal amount of water and dissolve a tablespoon or two of citric acid into it. Run a full brewing cycle with this solution (without any coffee grounds). Afterwards, run at least two more full cycles with only fresh, plain water to ensure all traces of the acid are rinsed out of the machine’s internal components. Dishwasher This descaling power extends to the workhorse of the kitchen, the dishwasher. A dishwasher in a hard water area can quickly become inefficient as its spray arms, filter, and interior walls get coated in a film of limescale and soap scum. This not only looks grimy but can prevent the machine from cleaning your dishes properly, leaving them spotty and cloudy. To deep clean your dishwasher, ensure it is completely empty. Pour about half a cup of citric acid powder into the bottom of the machine, or place it in the main detergent dispenser. Then, run the dishwasher on its hottest, longest cycle. The hot water will activate the acid, which will circulate throughout the entire system, dissolving mineral deposits from the jets, pipes, and walls, leaving the stainless steel interior gleaming and helping the appliance run more efficiently. Beyond descaling appliances, citric acid makes an excellent all-purpose cleaning spray for various kitchen surfaces. To create a general cleaning solution, dissolve one to two tablespoons of citric acid powder in about a liter of warm water in a spray bottle. Shake it well until the crystals are fully dissolved. This spray is fantastic for cutting through grease and grime on countertops, cleaning sinks, and shining up stainless steel faucets and appliances. It effectively removes water spots and leaves a streak-free shine. It can also be used to disinfect and deodorize cutting boards. Simply sprinkle a small amount of the powder onto a damp board, scrub with a sponge, let it sit for a few minutes, and then rinse thoroughly. However, a critical word of caution is necessary here: because it is an acid, this solution should never be used on natural stone surfaces like marble, granite, or travertine. The acid will react with the calcium carbonate in the stone, causing permanent etching and dulling the finish. Bathroom Moving from the kitchen to the bathroom, citric acid proves its worth against the relentless duo of soap scum and limescale. Soap scum, the grimy film that builds up on shower doors, tiles, and bathtubs, is formed when the fatty acids in soap react with the mineral ions in hard water. Citric acid is uniquely suited to tackle both components of this problem. Using your prepared spray solution, generously coat the affected surfaces. Let it sit for ten to fifteen minutes to allow the acid time to break down the deposits. Then, scrub with a non-abrasive sponge or brush and rinse well with water. For shower doors plagued by cloudy water spots, this method will restore clarity and shine. Showerheads are another common casualty of hard water, becoming clogged with limescale until the water sprays out in uneven, weak jets. To clean a clogged showerhead without removing it, fill a plastic bag with your citric acid and water solution, submerge the showerhead completely in the liquid, and secure the bag in place with a rubber band or twist tie. Leave it to soak for at least an hour, or even overnight for severe buildup. After soaking, remove the bag and run the shower on hot for a minute to flush out any remaining

The Power of Citric Acid: Your Solution for Limescale and Grime Read More »

cleaning exhaust

How to Clean Your Kitchen Exhaust Fan: A Complete Guide

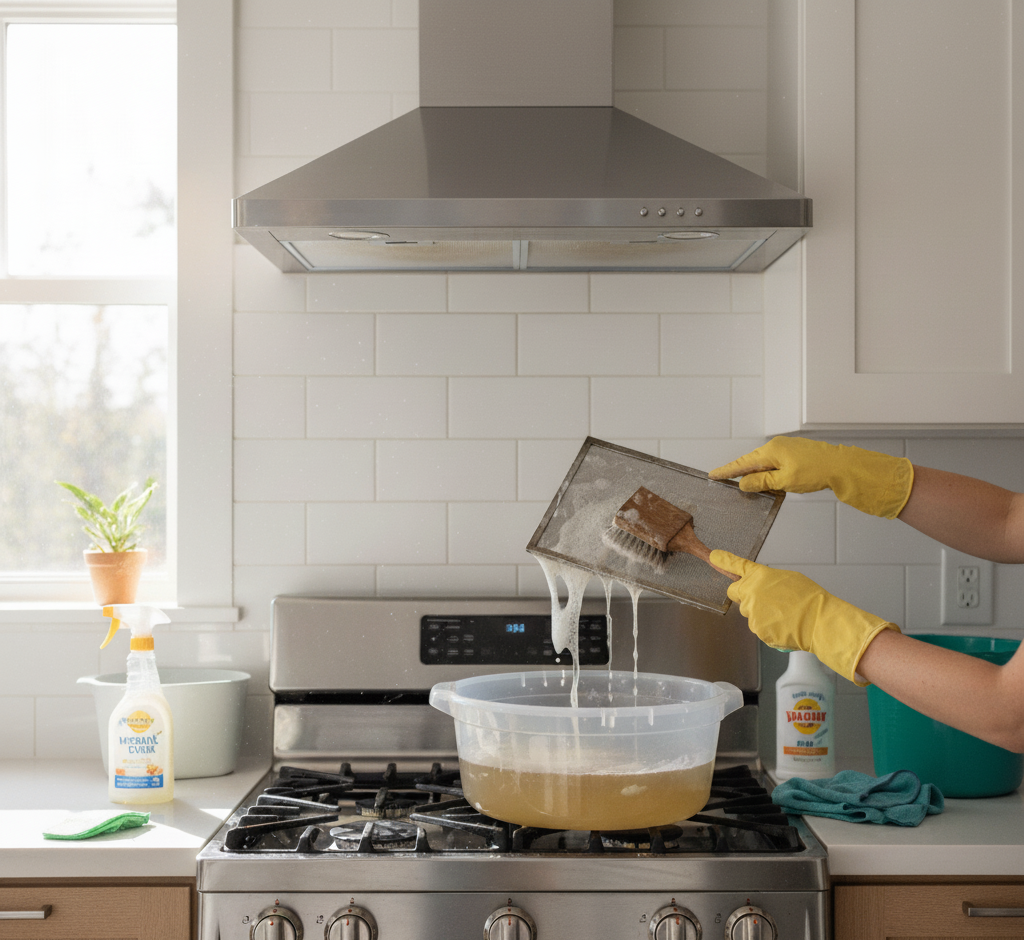
Why Your Kitchen Exhaust Fan Needs Regular Cleaning Your kitchen exhaust fan, or range hood, works harder than almost any appliance you own. Every time you cook, it pulls airborne grease, moisture, and fumes out of the kitchen, protecting your indoor air quality and stopping a sticky film from settling on walls and cabinets. But in doing that job, the fan, its filters, and the ductwork become a hidden reservoir of grimy buildup. Left alone, that grease is more than unpleasant: it is a serious fire hazard and the reason your fan slowly stops working. Cleaning the exhaust system is a maintenance task that directly affects the safety and efficiency of your kitchen. The Fire Risk Hiding in a Dirty Range Hood During frying, searing, or roasting, invisible droplets of cooking grease rise with the steam. When that warm air reaches the cooler metal surfaces of the hood, the grease condenses and clings to the filter, the fan blades, and the interior. Layer builds on layer with every meal until the coating is thick, gummy, and rancid. That residue is concentrated fuel. If a pot flares up on the stove, flames can be pulled straight into a grease-laden hood and travel through the ductwork into the walls of your home. A clean exhaust system gives smoke a safe escape route; a dirty one turns the hood into a fuse. There is also the efficiency problem: a clogged filter blocks airflow, so cooking smells linger, smoke sets off alarms, and the fan motor strains, overheats, and can burn out entirely. Old grease even attracts insects and rodents. How Often Should You Clean or Replace the Filters? How often depends on how you cook. As a general rule, clean reusable metal filters at least once a month, and every two weeks if you fry or sear often. The hood interior and fan blades need a full degreasing once or twice a year. Charcoal filters in recirculating hoods cannot be washed at all; they must be replaced, typically every three to six months, according to your appliance manual. Component Type Cleaning schedule Metal mesh or baffle filters Reusable Soak and scrub monthly; every 2 weeks for heavy frying Charcoal filter Disposable Replace every 3-6 months; never wash Hood interior and fan blades Built-in Full degrease 1-2 times per year Step-by-Step: How to Clean Your Kitchen Exhaust Fan Prepare the Workspace Safely Begin at the breaker panel: cut power to the range hood entirely rather than flipping the fan switch, so the unit cannot start while your hands are inside it. Cover the stovetop with an old towel or newspaper to catch falling grime, then gather rubber gloves, a non-abrasive scrub brush, a heavy-duty degreaser, and a bucket filled with very hot water. Clean the Metal Filters Most hoods that vent outside use reusable metal mesh or baffle filters held by a latch or slide. Fill the sink or a bucket with water as hot as your tap runs, squeeze in a generous squirt of degreasing dish soap and about half a cup of baking soda, and let the filters soak for twenty to thirty minutes, longer for heavy buildup. Scrub both sides, paying attention to the crevices of the mesh, rinse with hot water, and let the filters dry completely before reinstalling them. Replace Charcoal Filters If your hood recirculates air instead of venting outside, it uses a charcoal filter that absorbs odors. These are not designed to be washed; once saturated, they stop working, and washing ruins them. Check your manual for the correct part number and the recommended replacement interval. Degrease the Hood Interior and Fan Blades With the filters out, spray the interior surfaces generously with degreaser and let it sit for several minutes to penetrate the grease. Wipe down the inside of the hood with a non-abrasive sponge or cloth dipped in hot, soapy water, rinsing frequently, and work carefully around the light wiring and motor. The fan blades are usually the most coated part: wipe each blade, rotating the fan by hand to reach every side. Be firm enough to remove the grease but gentle enough not to bend the blades, since an unbalanced fan vibrates noisily. Finish With the Exterior For stainless steel, spray the cleaner onto a soft microfiber cloth rather than the hood itself and wipe in the direction of the grain to avoid streaks. Painted hoods only need a damp, soapy cloth. Once every piece is clean and completely dry, reinstall the filters, restore power at the breaker, and enjoy a quieter, stronger fan. Cut power at the circuit breaker before touching anything. Soak metal filters in hot water, degreasing soap, and baking soda. Replace, never wash, charcoal filters. Wipe each fan blade by hand without bending it. Polish stainless steel along the grain. Frequently Asked Questions About Exhaust Fan Cleaning Can I wash a charcoal filter? No. Charcoal filters are meant to absorb odors, and washing destroys them. Replace them every three to six months or per your manual. Why does my kitchen still smell after cooking? A grease-clogged filter blocks airflow, so the fan cannot pull odors out. Cleaning or replacing the filter usually restores performance. How do I clean between the fan blades? Rotate the blades by hand and wipe each one with a degreaser-soaked cloth, working carefully so you do not bend them and unbalance the fan. Is the grease in a range hood really a fire hazard? Yes. Cooking grease is flammable, and a stovetop flare-up can ignite buildup in the hood and ductwork. Regular cleaning keeps that risk low. Do I need to unplug the hood before cleaning? Switch off the circuit at the breaker, not just the fan switch, so the fan cannot start unexpectedly while you are working inside the hood. Let a Professional Handle the Deep Grime A greasy exhaust system is one of the toughest cleaning jobs in the home, and the moisture it removes matters for your whole house: poor kitchen ventilation

How to Clean Your Kitchen Exhaust Fan: A Complete Guide Read More »

Perfect Cleaning Schedule

Cleaning Schedule: A Room-by-Room Guide to Your Perfect Cleaning Schedule

Why a Cleaning Schedule Beats Cleaning Marathons For many households, cleaning swings between two extremes: frantic multi-hour marathons before guests arrive, or weeks of ignoring the dust bunnies and sticky counters until frustration wins. This reactive approach is exhausting and inefficient. The secret to a consistently clean home is not stronger chemicals or more scrubbing; it is a simple cleaning schedule that turns one overwhelming project into small, predictable daily habits. Breaking tasks into daily, weekly, monthly, and seasonal frequencies keeps grime from ever building up to marathon levels, and it frees your weekends. Daily Habits: Fifteen to Twenty Minutes That Work Daily tasks are the foundation of the system. They take little time but have the biggest impact on how your home feels: Make the bed each morning; it takes under two minutes and instantly makes the bedroom look put together. Wipe kitchen counters and the sink after every meal so spills and crumbs never harden. Give the kitchen floor a quick sweep at day’s end so crumbs never get tracked through the house. Follow the one-load rule: wash, dry, fold, and put away a single load of laundry daily so the pile never becomes a mountain. The Weekly Reset: Bathrooms, Kitchen, and Dust The weekly clean is a deeper reset of the main living areas. You can do everything on one cleaning day or spread one or two rooms across the week, an approach called zone cleaning. Bathrooms deserve a full scrub for hygiene as much as appearance: the toilet inside and out, the shower and tub to stop soap scum before it thickens, the sink and countertops scrubbed and disinfected, the mirror polished streak-free, and the floor swept and mopped. In the kitchen, wipe down appliance exteriors including the refrigerator, dishwasher, microwave, and stovetop, clean the microwave interior by heating a bowl of water with vinegar to loosen grime, and mop the floor. Throughout the living areas and bedrooms, dust every surface, then vacuum carpets, rugs, and hard floors; regular vacuuming lifts the dust, dander, and allergens that would otherwise circulate. Monthly Projects for the Details Monthly tasks catch the slow, creeping grime that separates merely tidy homes from deeply clean ones. Wipe down baseboards, which collect dust and scuffs; clean light fixtures and ceiling fans; run an empty cleaning cycle on the washing machine to prevent soap scum and mildew; and clean the dishwasher filter to keep it performing well. Window sills and sliding door tracks also trap dirt and insects, so give them a monthly pass. Seasonal Projects: The Whole-Home Reset Every quarter, set aside time for the big jobs. Empty the refrigerator and freezer, wipe down shelves and drawers, and discard expired food. Wash windows inside and out, deep clean carpets and upholstery with a rented machine or a professional service, and organize closets and pantries while decluttering. Season-specific extras include cleaning the gutters in the fall and pressure washing the deck in the spring. Frequency Typical tasks Time tip Daily Make beds, wipe counters, quick sweep, one load of laundry Batch these into a 20-minute evening routine Weekly Bathroom scrub, appliance wipe-downs, dusting, vacuuming, mopping Assign one or two rooms per day Monthly Baseboards, light fixtures, washing machine cycle, window sills Pair with bill-paying day as a reminder Seasonal Fridge deep clean, windows, carpets, closets, gutters, deck Pick one weekend per season and book help early Make the Schedule Fit Your Life A schedule is a template, not a rigid document. If you live alone and rarely cook, the kitchen needs less attention; if you have kids and pets, daily floor care and weekly vacuuming become non-negotiable. Task batching helps some households: make Monday dusting day and Tuesday floor day so you stay focused with one set of tools. A clear schedule also makes delegation easy, since everyone in the family knows which tasks belong to which day, removing the constant negotiation about who cleans what. Above all, aim for progress, not perfection. Miss a day and simply pick it up tomorrow; because the system prevents buildup, one skipped task never snowballs into a disaster. Cleaning science supports the approach: the CDC explains that regular cleaning and disinfecting of your home removes most germs from surfaces, and that handwashing is one of the best ways to stop germs from spreading between family members. Frequently Asked Questions About Cleaning Schedules How long should daily cleaning take? Fifteen to twenty minutes is enough when you focus on the high-impact habits: making the bed, wiping counters after meals, a quick floor sweep, and one load of laundry. Is it better to clean one room a day or everything weekly? Both work. Zone cleaning, with one or two rooms per day, keeps the workload even, while a single weekly cleaning day suits people who prefer to finish everything at once. What should I clean monthly that people usually forget? Baseboards, ceiling fans and light fixtures, the washing machine drum, dishwasher filter, and window sills and sliding door tracks are the details that quietly collect grime. How do I stay consistent with a cleaning schedule? Keep tasks small and visible, pair them with existing habits such as morning coffee or evening TV, and remember that a missed day is fine as long as you resume the next day. When should I hire professional cleaners instead of doing it myself? Monthly and seasonal projects such as carpet deep cleaning, fridge resets, and whole-home refreshes are ideal to outsource, especially before holidays or when allergies act up. Keep the Schedule on Track With Professional Help The heaviest items on your schedule do not have to be DIY. Toronto Shine Cleaning’s regular cleaning service handles the weekly core clean, while our deep cleaning service covers the monthly and seasonal projects that need extra muscle. We serve homes across Toronto and the GTA, and our reviews show what consistent cleaning looks like. Call (647) 424-0355 or check our pricing to build your routine around a professional team.

Cleaning Schedule: A Room-by-Room Guide to Your Perfect Cleaning Schedule Read More »

woman preparing the house for Halloween

Halloween Cleaning: The Secret to a Stress-Free Halloween? A Pre-Holiday Clean.

Why a Pre-Halloween Clean Makes the Holiday Easier Halloween planning usually centers on costumes, candy, pumpkins, and decorations, but the step that makes everything else work is a pre-holiday clean. A targeted cleaning session that moves from the outside of your home inward prepares your walkway, entryway, and main rooms for trick-or-treaters, guests, and decorations. It is not just about tidiness: clearing wet leaves and clutter prevents slips, a wiped-down kitchen makes treat prep safer, and a dust-free living room shows off your spooky decor instead of hiding it. Start Outside: Walkway, Porch, and Front Door The exterior is where the Halloween experience begins, so it deserves the first pass. The walkway, porch, and front door form the stage for the whole evening and the first point of contact for every visitor. Clear the Walkway and Porch In October, the path to your door is often covered with fallen leaves, twigs, and mud. Damp leaves make the path genuinely slippery, a real risk for small children in bulky costumes moving around in the dark. Sweep the entire walkway from the sidewalk to the front steps, then spray it with a garden hose to wash away residual grime. On the porch, remove leftover summer items such as empty planters, garden tools, and worn-out mats, then sweep the whole surface, paying attention to corners where dust and spiderwebs collect. Real webs usually just look neglected, so clear them away to make room for the fake ones. Wipe Down the Door, Windows, and Lights The front door is the centerpiece of the evening. Wipe it down with a damp cloth and warm water with a few drops of dish soap to remove fingerprints and summer dust, and clean the door handle and hardware while you are at it. Windows beside the entry deserve the same attention, since clean glass makes silhouettes, clings, and lighting effects pop; a half-and-half spray of white vinegar and water, wiped with a microfiber cloth or squeegee, does the job. Wipe railings and handrails too, because parents and kids will grip them in the dark. Finally, dust the exterior light fixtures, where built-up dirt and dead insects can dim the glow, and replace any burned-out bulbs so the path and your best decorations stay visible. Sweep leaves and debris from the whole walkway. Clear summer planters, tools, and worn mats from the porch. Wash the front door, handle, windows, and railings. Dust light fixtures and check every bulb. Clean the doormat and the floor beneath it. Inside: Entryway and Main Living Areas Inside, start with the entryway, which faces a constant parade of opening doors on Halloween night. Clear clutter like shoes, bags, and mail so there is a wide, safe path for groups of excited children. Take the doormat outside and scrub it with soap and water if it is a durable outdoor style, or vacuum it well if it is an indoor mat, and clean the floor underneath, which traps surprising amounts of grit. This is also the moment to place a boot tray by the door for wet footwear in the months ahead. From there, move to the living areas visible from the front door: dust the mantel, bookshelves, and tables where candy bowls will sit, then vacuum floors and upholstery. Removing dust and allergens now means better indoor air quality once the decorations go up and the windows stay closed for winter. Kitchen and Bathroom Prep for Guests and Treats The kitchen becomes the command center for Halloween treats, so clear the countertops and wipe them down with a sanitizing cleaner before any baking or candy prep begins. The CDC’s food safety basics start with keeping hands and surfaces clean, and its cleaning and disinfecting guidance explains when to go beyond a simple wipe. Take the chance to sort through the refrigerator, discarding old leftovers to make room for party platters and drinks. The guest bathroom deserves a quick seasonal refresh: shine the mirror, scrub the sink and toilet, wipe the countertop, and put out fresh hand towels with a full supply of soap and toilet paper. Clean the Decorations and Their Storage Space Before carrying bins up from the basement or garage, sweep the floor and wipe the shelves where they were stored so you do not track old dust into clean rooms. As you unpack, give each item a quick wipe: plastic pumpkins, ceramic figures, and other hard decorations gather a layer of dust in storage, and fabric pieces such as throws and wall hangings freshen up in the dryer on a no-heat air cycle. Area Pre-Halloween focus Why it matters Walkway and porch Sweep leaves, hose off grime Prevents slips in the dark Front door and windows Wipe surfaces, clean glass Clean backdrop for decor Entryway Declutter, clean doormat Safe path, less dirt tracked in Living areas Dust and vacuum Better air quality before winter Kitchen and bathroom Sanitize counters, stock supplies Safe treat prep, happy guests Frequently Asked Questions About Halloween Cleaning How early should I clean before Halloween? Aim for the weekend before, so the house is ready for decorating, costume try-ons, and any early parties, with a quick touch-up on the day itself. Is cleaning the walkway really necessary? Yes. Wet leaves and debris are a slipping hazard for children in bulky costumes moving in the dark, and a clear path also makes your home look inviting. What if I am not hosting a party? The essentials stay the same: safe walkways, a clean entry for trick-or-treaters, a tidy kitchen for candy, and a stocked bathroom. Skip only the extra party prep. How do I clean decorations that sat in storage? Wipe hard items such as plastic pumpkins and ceramic figures with a damp cloth, and freshen fabric pieces in the dryer on an air-only cycle to remove dust. Should I clean before or after decorating? Clean first, then decorate. A dust-free base makes the decorations look better and keeps you from wiping around fragile pieces later. Get

Halloween Cleaning: The Secret to a Stress-Free Halloween? A Pre-Holiday Clean. Read More »

humidifier being effective

Humidifier Cleaning: The Hidden Danger in Your Humidifier (And How to Prevent It)

A humidifier is essential because it’s the invisible antagonist of the Canadian winter, an adversary that arrives not with a blizzard, but with the first click of the heater. It’s dry air, and its effects are as predictable as the fall of leaves in October. It manifests as a persistent tickle in the throat, a morning voice that sounds raspy and strained. It is the reason our skin feels tight and itchy, our lips chap, and our knuckles crack. It is the culprit behind the surprising, sharp zap of a static shock from a doorknob and the reason our wooden furniture can creak and even crack over time. In our quest to create warm, sealed sanctuaries against the cold, we inadvertently strip our indoor environment of its most essential atmospheric component: moisture. The Solution The solution to this pervasive dryness is a simple, yet profoundly effective, appliance: the humidifier. It is a machine dedicated to the straightforward task of reintroducing water vapor into the air, and in doing so, it can transform a harsh, uncomfortable indoor climate into a healthy, comfortable, and pleasant one. But a humidifier is not a passive appliance. It is an active participant in the quality of the air you breathe, and its ownership comes with a critical responsibility. A clean, well-maintained humidifier is a powerful tool for health and wellness. A neglected one can become the exact opposite, a device that disperses not soothing moisture, but a plume of microscopic contaminants. To appreciate the importance of a humidifier, one must first understand the concept of relative humidity. This is a measure of the amount of water vapor in the air, expressed as a percentage of the maximum amount the air could hold at a given temperature. Health experts generally agree that the ideal indoor relative humidity for human comfort and health is between 30 and 50 percent. During a cold winter, the air outside holds very little moisture. When we bring that air into our homes and heat it, its relative humidity plummets, often falling into the single digits, creating an environment that is drier than a desert. This parched air acts like a sponge, drawing moisture from every available source. It pulls it from our skin, leading to dryness and exacerbating conditions like eczema. It pulls it from the delicate mucous membranes lining our respiratory tract, from our nose and throat down to our lungs. This can dry them out, impairing their ability to trap viruses and bacteria, which is one reason colds and sinus infections can feel so much worse in the winter. Proper humidity keeps these membranes moist and healthy. It can also help soothe a cough and relieve congestion, making a humidifier an indispensable tool during cold and flu season. The Right Choice The most fundamental choice you will make is the type of humidifier that best suits your needs, and each operates on a different principle. The most common and traditional type is the evaporative humidifier. This device works on a simple principle, using a fan to blow air through a wet, absorbent filter, often called a wick. The water evaporates from the wick and is released into the room as a fine, invisible cool mist. These models are often self-regulating; as the humidity in the room increases, the rate of evaporation from the wick naturally slows down. Their main drawback is that the wick is a consumable item. It must be replaced regularly, as it can become clogged with mineral deposits and can potentially harbor mold if not maintained. A more modern and increasingly popular option is the ultrasonic humidifier. These machines are known for being exceptionally quiet. They use a small, vibrating diaphragm, a nebulizer, that moves at an ultrasonic frequency. These high-frequency vibrations break the water in the reservoir into microscopic droplets, which are then released into the air as a visible, cool mist. A major advantage of ultrasonic models is that they do not use a filter, reducing ongoing replacement costs. However, they have one significant potential downside that is directly tied to your water source, which we will address later. Vaporizer For those who prefer a warm mist, there is the vaporizer, or steam humidifier. This type of machine is the simplest of all. It contains a heating element that boils the water, creating steam that is then released into the room. The primary advantage of a vaporizer is that the boiling process kills any bacteria, mold, or other microorganisms that might be present in the water, ensuring the mist it produces is sterile. This warm mist can be particularly soothing for coughs and congestion. The trade-offs are that these models consume more electricity to heat the water, and they present a potential burn risk, making them a less ideal choice for homes with small children. At the end, there is the whole-house, or central, humidifier. This is not a portable appliance, but a system that is integrated directly into your home’s forced-air heating and cooling system. It automatically adds moisture to the air as it is being heated and distributed throughout your home, maintaining a consistent, pre-set level of humidity in every room. While this is the most convenient and hands-off solution, it is also the most expensive and typically requires professional installation and maintenance. Regardless of which type of humidifier you choose, one non-negotiable truth unites them all: they must be kept scrupulously clean. A humidifier’s reservoir of still, room-temperature water is the perfect environment for the growth of mold, mildew, and bacteria. If the machine is not cleaned regularly, it will aerosolize these contaminants along with the water vapor, broadcasting a plume of potentially harmful microorganisms directly into the air you breathe. This can trigger allergies, and in some cases, lead to a respiratory illness sometimes called “humidifier fever.” Cleaning The cleaning routine is a simple but critical two-part process of descaling and disinfecting. The first step, which should be done weekly, is descaling. This addresses the mineral buildup, or limescale,

Humidifier Cleaning: The Hidden Danger in Your Humidifier (And How to Prevent It) Read More »