Wall Cleaning

Best Ways To Clean Window Screens And Make Them Look Like New

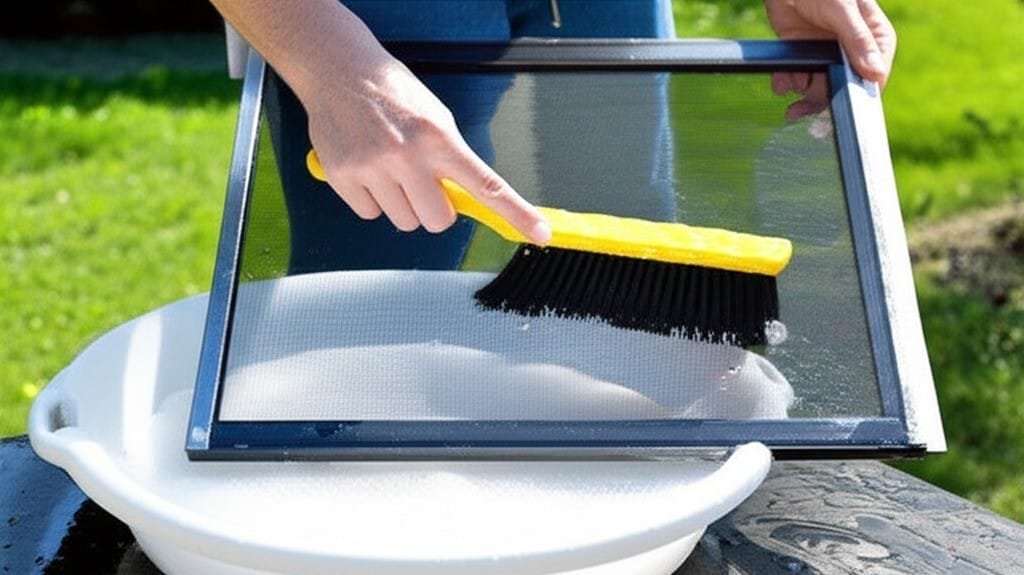
To begin cleaning your window screens, assemble your equipment. Professional results depend on having the right tools on hand. You will need a pair of buckets, a high-quality squeegee fitted with a sharp, flexible rubber blade, a strip applicator, several clean microfiber cloths, a soft-bristled brush, a garden hose with an adjustable spray nozzle, and your preferred cleaning solution. A simple yet highly effective solution can be made by mixing a gallon of cool water with just a few drops of dish soap in one bucket. The aim is for a slightly soapy mixture, not a foam; excessive soap will leave a residue on the glass that proves difficult to remove and subsequently attracts more dirt. The second bucket should contain only clean water for rinsing your tools. For interior work, a spray bottle filled with the same solution is more practical. For stubborn stains like mineral deposits, you might also require distilled white vinegar or a pad of fine #0000 grade steel wool. 1.Remove The Screen The most crucial first step, one that is fundamental to a lasting clean, is to address the window screens. Cleaning the glass first is a futile effort, as reinstalling dirty window screens will instantly coat your pristine windows with a fresh layer of dust and grime. Begin by carefully removing all the window screens from their frames. Take note of their fastening mechanisms; some utilize plunger bolts, while others have tension springs or clips. It is a good practice to label each of the window screens with a small piece of masking tape indicating its specific location (e.g., “Dining Room, Right”) to prevent confusion during reinstallation, as sizes can vary subtly. For window screens that have only a light coating of dust and loose debris, a dry cleaning method is often sufficient. Lay the screen on a flat, protected surface like a drop cloth or lean it securely against a wall. Use a soft-bristled brush or the brush attachment of your vacuum cleaner to gently go over the entire surface. This action will dislodge loose particles from the mesh of the window screens without the need for water. This is the fastest way to refresh window screens that are not heavily soiled. For window screens burdened with caked-on dirt, pollen, or greasy buildup, a wet cleaning is unavoidable. Move the window screens to a suitable outdoor location like a driveway or lawn. Start with a gentle pre-rinse using the garden hose on a low-pressure setting. A powerful jet of water can easily stretch, tear, or otherwise damage the delicate mesh material or even dent the frames of the window screens. In a bucket, mix a solution of warm water and a small amount of mild dish soap. Submerge a soft-bristled brush in this soapy water and gently scrub both sides of the screen. Use light, consistent pressure and work in systematic, overlapping motions. Pay close attention to the frames surrounding the mesh, as these channels are notorious for trapping dirt. After you have thoroughly scrubbed the window screens, rinse them completely with the hose. It is vital to wash away all soap residue, as any lingering film will act as a magnet for new dirt. To check, run a clean finger across the mesh; it should not feel slippery. 2.Dry Completely Once cleaned, the window screens must be dried completely. Lean them against a wall, fence, or outdoor furniture in a location that gets good air circulation and, ideally, some sun. Do not rush this step. Allowing the window screens to air dry thoroughly is critical. Reinstalling damp or wet window screens can trap moisture within the window frame and track, creating an ideal environment for mold and mildew to grow, which can cause damage and potential health issues. The time it takes for your window screens to dry is the perfect opportunity to clean the rest of the window assembly. With the window screens set aside to dry, direct your attention to the window tracks, sills, and frames. This often-neglected area makes a significant impact on the final look and functionality of your windows. Open the window fully to expose the tracks. Use a vacuum cleaner with a crevice tool attachment to suction out all the loose dirt, cobwebs, dead insects, and other accumulated debris. For stubborn, compacted dirt, use a stiff, dry brush or a putty knife to loosen it from the corners and channels before vacuuming. Following the dry removal, perform a wet cleaning. Dip a small, firm brush, like an old toothbrush, into your cleaning solution and scrub the tracks meticulously. Use a microfiber cloth to wipe out the loosened grime and suds. To reach into tight corners, you can wrap the cloth around the tip of a flathead screwdriver. Wipe down the entire window frame and sill, both inside and out, with a damp cloth, and then dry everything thoroughly with a clean, dry cloth.   3.Cleaning The Windows Now, you can proceed to clean the exterior glass. If the windows are exceptionally dirty, a quick rinse with the hose will remove the outermost layer of grit, preventing you from scratching the glass with your applicator. Submerge your strip applicator in the soapy water, wring out the excess, and wash the entire glass surface. Be methodical, working from edge to edge to ensure the entire pane is wet and scrubbed, loosening all the dirt. The squeegee is your tool for a streak-free finish. Before your first pull, use a microfiber cloth to wipe a narrow, one-inch vertical strip down one side of the pane. This “dry edge” allows the squeegee to start on a dry surface, preventing it from skipping. Place the squeegee at the top of the window, overlapping onto this dry strip. Angle the blade at about 30 degrees to the glass, apply light, even pressure, and pull it straight down in one continuous, smooth motion. After every single pull, wipe the rubber blade clean with a cloth. This is not optional; a dirty blade

Best Ways To Clean Window Screens And Make Them Look Like New Read More »

cobwebs being cleaned

Spider Webs: How to Completely Get Rid of the Webs That Appear Out of Nowhere in August

The arrival of August in Canada brings a specific, almost magical, change to the morning light. Spiders and their webs, the sun sits lower, and the air holds a hint of the coolness to come. This new light, combined with the morning dew, reveals something that has been building all summer but has remained largely invisible: a sudden, pervasive network of spider webs. They appear on porch railings, stretch between shrubs, frame every window, and cling to the eaves of the house. It can feel like an overnight invasion, a silken siege on your property. This phenomenon is not your imagination. Late summer is the peak season for many species of orb-weavers and other spiders. They have spent the spring and summer growing to maturity, and August is when their populations, and therefore their webs, are at their most numerous and conspicuous. Understanding how to manage this seasonal surge requires a systematic approach that addresses both the existing webs and the conditions that invite them. 1.Complete Removal The first step is a thorough and methodical removal of all visible webs. For the exterior of your home, your primary tool should be a long-handled duster or a clean broom with soft bristles. The goal is not simply to tear the webs down, but to capture them. A simple swipe will often break the web, leaving sticky anchor points and strands behind that will quickly collect dust and debris. Instead, use a gentle, rolling or twisting motion. Press the head of the broom or duster into the center of the web and rotate it. The silk will adhere to the bristles, winding around the tool like cotton candy. This technique removes the bulk of the web cleanly and often catches the spider along with it. Work your way systematically around the perimeter of your home. Pay close attention to corners, under eaves, around porch lights, window frames, door frames, and beneath deck railings. These are all prime locations for spiders as they offer shelter and are high-traffic areas for the flying insects they prey on. 2.Hose For webs that are particularly stubborn or in hard-to-reach places, a garden hose with a high-pressure nozzle can be effective. A strong jet of water will dislodge the webs and wash away the residue. However, this method is less precise and can sometimes just push the webs into other areas. Be mindful of spraying water directly into vents, under siding, or at window seals, as this can lead to moisture problems. A pressure washer can also be used, but it requires extreme caution. Use the lowest possible pressure setting and a wide-angle fan tip. High pressure can strip paint, damage wood, and force water behind your siding, causing significant and costly damage. For most residential situations, a standard hose is the safer and more appropriate choice. 3.Dish Soap After the initial removal, you will likely notice a faint, sticky residue where the web’s main anchor points were attached. This residue is what new spiders will often use as a foundation for their own webs. Cleaning this off is a crucial step in preventing a quick return. For painted surfaces, siding, and window frames, a simple solution of warm water with a small amount of dish soap is effective. Use a sponge or a soft-bristled brush to gently scrub the areas. For glass, a standard window cleaner or a solution of equal parts water and white vinegar will remove the residue and leave the surface streak-free. This follow-up cleaning might seem tedious, but it removes the “scent trails” and structural remnants that signal a viable web location to other spiders. 4.Vacuum Cleaner The interior of your home requires a more delicate touch. The single most effective tool for removing indoor spider webs is a vacuum cleaner with its hose and attachments. The crevice tool is perfect for reaching into the corners where walls meet the ceiling, along baseboards, and behind furniture. The brush attachment is ideal for more delicate surfaces like lampshades, curtains, and bookshelves. The power of the vacuum ensures you are not just removing the web, but also the spider and, most importantly, any unseen egg sacs. An egg sac can contain hundreds of spiderlings, and simply dusting it away can cause it to rupture, releasing them into the room. Vacuuming contains the problem entirely. Make it a habit to use the vacuum attachments to trace the upper and lower perimeters of every room during your regular cleaning routine. This proactive measure will catch new webs before they become noticeable. Areas that are often overlooked include basements, garages, and attics. These quiet, cluttered, and often damp spaces are ideal habitats for spiders. A thorough vacuuming of these areas, moving boxes and storage containers to get into the corners, is essential for controlling the indoor population. 5.Prevention Once the existing webs are gone, the focus must shift entirely to prevention. Removing webs is a temporary solution; creating an environment that is unattractive to spiders is the long-term goal. This strategy begins with controlling their food source: insects. Most insects are attracted to light, particularly bright, white light. The classic porch light is a nightly buffet for moths, gnats, and other flying creatures, which in turn attracts spiders who build their webs nearby to catch this easy prey. A simple and highly effective change is to switch your exterior bulbs to yellow “bug lights” or sodium vapor lights. These bulbs emit a wavelength of light that is far less visible and attractive to most insects. This single change can dramatically reduce the number of insects congregating around your doors and windows, and consequently, the number of spiders setting up camp. Alternatively, consider installing motion-activated security lights instead of lights that stay on all night. The light will only come on when needed, creating a less reliable food source for the spiders. 6.Block The next line of defense is to physically block their entry into your home. Spiders are masters of finding small openings. Conduct a detailed

Spider Webs: How to Completely Get Rid of the Webs That Appear Out of Nowhere in August Read More »

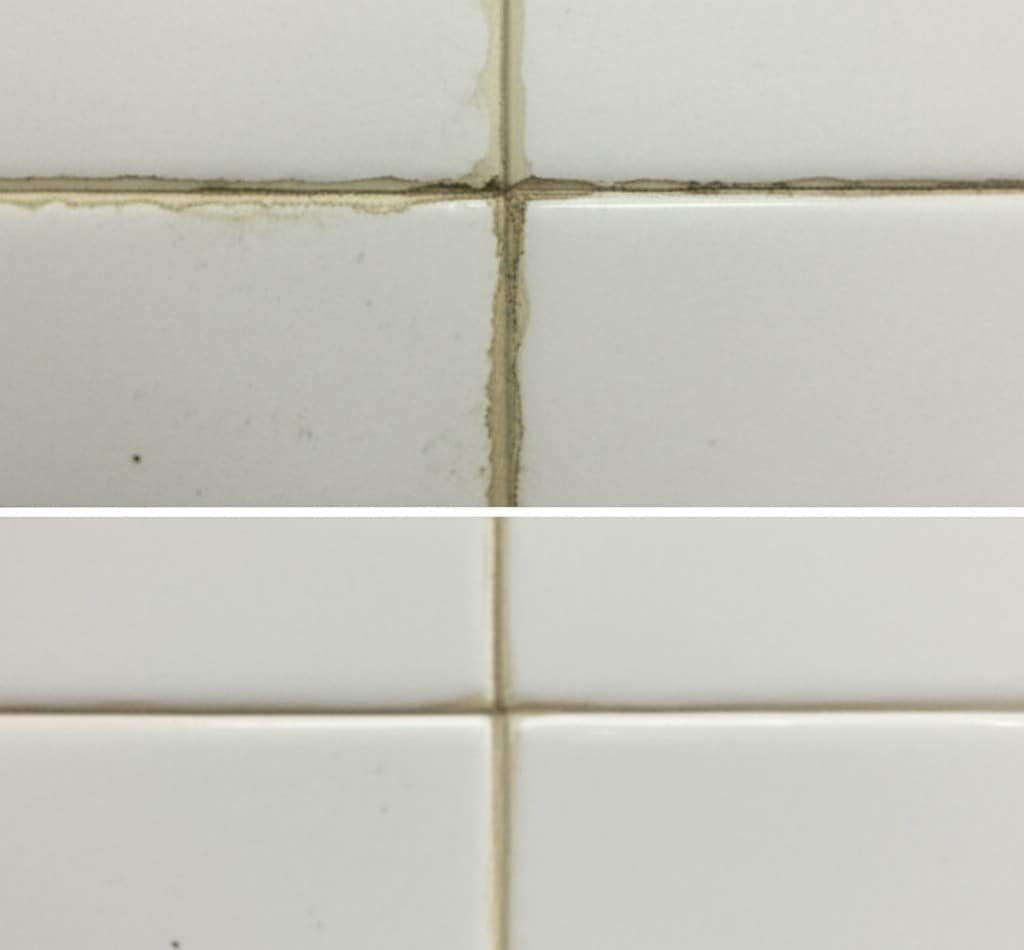
before and after grouting

Grout Cleaning: Essential Products for a Sparkling Home

Grout Cleaning: Essential Products for a Sparkling Home Grout lines lock your tiles in place, but their porous, cement-based composition makes them a magnet for water, dirt, soap scum, and oils. Over time, that absorption causes discoloration, staining, and the growth of mold and mildew. Cleaning grout properly means penetrating those pores to lift embedded grime, and the right products make all the difference. Prepare Before You Clean Before any intensive cleaning, ensure good ventilation by opening windows and doors and using a fan, because commercial cleaners and even vinegar can produce irritating fumes in a confined space. Wear waterproof gloves and safety glasses or goggles to protect your skin and eyes, and good airflow protects indoor air quality. Then clean the tile surface itself: sweep or vacuum loose debris, and mop with warm water and a pH-neutral cleaner, because applying grout cleaner to dirty tiles simply pushes surface dirt into the lines. DIY Grout Cleaning Products For routine maintenance and light discoloration, a baking soda paste is the best starting point. Baking soda is a mild abrasive that scrubs away surface stains without scratching tile or eroding grout. Make a thick paste with water, apply it to the lines, let it sit for 10 to 15 minutes, and scrub with a stiff-bristled grout brush in a circular motion. Never use a wire brush, which is too harsh. For stubborn dirt and soap scum, spray the paste with equal parts white vinegar and water; the fizzing reaction helps dislodge dirt from deep in the pores. Let it bubble for several minutes, then scrub and rinse. Skip vinegar on natural stone tiles like marble, travertine, or limestone, because the acid can etch and dull the surface, and always test in an inconspicuous area first. Hydrogen Peroxide for Mold and Mildew For mold, mildew, or grout that has yellowed, hydrogen peroxide is the more effective agent. Make a paste with baking soda and hydrogen peroxide instead of water, let it sit for at least 15 minutes so the oxidizing action can work, then scrub and rinse. For stronger whitening, apply 3 percent hydrogen peroxide directly to the lines. Unlike chlorine bleach, it is less harsh and does not produce toxic fumes, making it a safer choice for deep cleaning. Mold in damp areas like showers can affect health, and the CDC advises removing mold promptly and preventing moisture buildup. Steam Cleaning A handheld steam cleaner uses high-pressure, high-temperature steam to blast away dirt, kill mold, and sanitize without chemicals. The heat loosens embedded grime and the pressure forces it out of the pores. Move the nozzle slowly along the lines and wipe away the loosened dirt with a clean cloth. Steam is safe for most tile types, including ceramic, porcelain, and granite, but avoid it on loose or crumbling grout, where the pressure could dislodge sections. Commercial Grout Cleaners: Alkaline and Acidic When DIY methods fall short, commercial grout cleaners are formulated for the job. Alkaline cleaners, with a high pH, break down organic stains like grease, soap scum, and grime, and are generally safer for most tile and grout. Acidic cleaners, with a low pH, remove mineral deposits such as rust, efflorescence, and hard water stains, but they are powerful and can severely damage natural stone. Always wear full protective gear, ventilate the room, and never mix an acidic cleaner with an alkaline cleaner or one containing bleach, because the reaction can release toxic gas. Why Chlorine Bleach Is a Bad Idea Chlorine bleach whitens grout temporarily, but it erodes the grout structure, making it more porous and prone to future staining. It can also strip color from colored grout and damage tile glaze, and leftover residue can react with other cleaners later. Oxygenated bleach, a powder activated by water, is a much safer and more effective alternative for whitening. Rinse, Dry, and Seal Rinsing is never optional. Leftover cleaner dries into a sticky film that attracts dirt faster than before, so rinse with a sponge and clean water, changing the water often, then dry completely. Sealing is the single most important step for long-term results. Wait at least 24 hours after cleaning so the grout is fully dry, then apply a penetrating sealer with a brush-tip applicator, tracing the lines carefully and wiping any excess off the tile face. One or two coats are typical, and the sealer needs 24 to 48 hours to cure, during which the area should stay dry and free of traffic. Clean, dry surfaces are also the foundation of good hygiene in bathrooms and kitchens. Essential Grout Cleaning Products Baking soda for a gentle scrubbing paste. White vinegar for extra fizzing power on stubborn soil, never on natural stone. Hydrogen peroxide for mold, mildew, and whitening. A stiff-bristled grout brush, never a wire brush. A handheld steam cleaner for chemical-free deep cleaning. Alkaline and acidic commercial cleaners for tough or mineral-based stains. A penetrating grout sealer to protect your work. Grout Cleaning Products at a Glance Product Best For Caution Baking soda paste Light stains, routine maintenance Use a grout brush, not a wire brush White vinegar Soap scum and stubborn soil Never on marble, travertine, or limestone Hydrogen peroxide Mold, mildew, yellowed grout Test on a hidden area first Steam cleaner Chemical-free deep cleaning Avoid loose or crumbling grout Alkaline cleaner Grease, soap scum, grime Follow dwell time instructions Acidic cleaner Rust, efflorescence, hard water Never mix with bleach or alkaline cleaners Penetrating sealer Long-term protection Wait 24 hours after cleaning, cure 24 to 48 hours Frequently Asked Questions Can I use vinegar to clean grout? Yes, on ceramic or porcelain grout: equal parts white vinegar and water react with a baking soda paste to lift stubborn soil. Do not use vinegar on natural stone tiles like marble, travertine, or limestone, because the acid can etch them. How do I whiten yellowed grout? Make a paste with baking soda and 3 percent hydrogen peroxide, let it sit for at least 15 minutes, scrub

Grout Cleaning: Essential Products for a Sparkling Home Read More »

housekeeper deep cleaning

Deep Cleaning Services in Toronto, We Do It Right!

Deep Cleaning Services in Toronto: The Complete Reset Your Home Needs A regular cleaning keeps surfaces tidy, but the grime that accumulates below the surface quietly builds up over the months. That is the domain of specialized deep cleaning services in Toronto. Unlike standard housekeeping, a deep clean is a comprehensive, methodical process that tackles dirt in every often-overlooked, hidden corner of your home: a fundamental reset that restores your space to a truly pristine state. What Makes a Deep Clean Different? Professional deep cleaning focuses on a thorough, top-to-bottom reset of every room, targeting buildup that routine visits simply do not reach. It goes far beyond the surface and into the details: grease on cabinet fronts, dust in air vents, limescale on fixtures, and grime in grout lines. The scope demands expertise and specialized equipment, and more and more Toronto homeowners and businesses are investing in it, whether for a spring reset or as part of ongoing maintenance. For a fuller breakdown of what a session covers, see our guide to deep cleaning services in Toronto. Kitchen Deep Cleaning: Degreasing and Appliance Interiors In kitchens, the work is all about degreasing and disinfecting, starting inside your cupboards. Crews empty cupboards and pantries to inspect for spills, sticky residue, forgotten food, and signs of pests, then degrease and sanitize every interior surface. Handles and cabinet fronts get attention too, because repeated hand contact leaves a sticky film. Appliances receive treatment they almost never get at home: Oven: racks soaked, interior carbon buildup scrubbed, door glass cleaned for a like-new view. Stovetop: grates and burner caps removed and cleaned, boiled-over residue scrubbed from the surface. Range: pulled out so the sides, the floor behind it, and the wall are reached and wiped clean. Refrigerator and freezer: emptied, shelves and drawers washed, door gaskets detailed with a small brush, condenser coils vacuumed of dust to support efficiency and lifespan. Small appliances: toaster crumb trays emptied, coffee makers and kettles descaled, microwave interiors scrubbed, including the often-splattered ceiling. Bathroom Deep Cleaning: Soap Scum, Limescale, and Grout Bathrooms are scrubbed and sanitized top to bottom, dissolving soap scum and body residue from tubs and showers with specialized agents made for stubborn film. Shower doors and glass enclosures are cleaned until streak-free, the tracks at the base are cleared of accumulated gunk, and tiles and grout lines are meticulously scrubbed to lift mildew and dirt from porous grout. Stubborn mold and mildew in damp bathrooms are common culprits, and the CDC’s guidance on mold and your health explains why proper removal matters. Health Canada also recommends keeping indoor humidity low and fixing moisture sources so mould cannot take hold in the first place. Fixtures get their shine back as limescale and mineral deposits are removed from faucets and showerheads, and chrome is polished. Toilets are cleaned inside the bowl and across the entire exterior, from the tank lid and handle to the seat, hinges, base, and surrounding floor, plus the often-ignored overflow hole inside the tank, flushed clean with disinfectant. Vanity and medicine cabinets are emptied and wiped inside, and exhaust fan covers are removed and washed, because a dusty fan cannot ventilate properly and traps the humidity that leads to mildew. Living Areas and Bedrooms: A Top-to-Bottom Reset Crews work from the ceiling down to the floor in every room. Cobwebs are removed from corners and ceiling edges, light fixtures and ceiling fan blades are dusted, and the tops of bookcases, wardrobes, and cabinets are reached. Walls are spot-cleaned of scuffs and splatters, and baseboards, door frames, window frames, and switch plates are hand-wiped one by one. The process continues behind and beneath the obvious. Furniture is moved so the floors underneath are reached, and upholstery is vacuumed with crevice tools to extract dust, skin cells, and allergens from fabric. Wood furniture is polished, lampshades and blinds are dusted, and the air system itself is addressed: vents and grilles are vacuumed and wiped, and HVAC return air covers are pulled and dusted out. Professional crews rely on HEPA-filter vacuums that capture microscopic allergens rather than recirculating them, and steam cleaners that sanitize without harsh chemicals. When Toronto Homes Need a Deep Clean Most Deep cleaning requests tend to follow life events: Moving into or out of a home, when deposits and first impressions are at stake. Post-renovation cleanup after the construction dust settles in every crack. Seasonal refreshes, especially the annual spring clean. Before hosting an event or gathering, such as a wedding at home or the holidays. Preparing a space for a new baby or toddler who will crawl across every floor. Allergy season, when dust, dander, and pollen accumulate indoors. How to Choose a Professional Deep Cleaning Company Not all services are created equal, so choose carefully. Look for a company that offers a range of deep cleaning options with a detailed, transparent list of what each package includes. Prioritize experienced, trained professionals who understand the right products and techniques for different surfaces, and verify that the company is insured and bonded to protect your home and belongings. What to check Why it matters Transparent scope and checklist You can compare packages and know what is covered before booking. Trained, vetted crew Correct products and techniques protect finishes instead of damaging them. Insurance and bonding Toronto Shine carries a $1,000,000 insurance policy and a $10,000 accidental breakage and surety bond. Flat, upfront pricing Our deep clean starts at $270.38 before HST for a studio or one-bedroom, shown on our pricing page. Deep Cleaning Service FAQs What is included in a deep cleaning service in Toronto? A full reset of each room: kitchen cabinets and appliances inside and out, bathrooms degreased and descaled with grout scrubbed, walls spot-cleaned, baseboards and switch plates wiped, vents dusted, furniture moved, and floors and carpets thoroughly cleaned. How is deep cleaning different from regular housekeeping? Regular visits maintain cleanliness on visible surfaces. A deep clean restores the areas maintenance skips, which is why many homes pair

Deep Cleaning Services in Toronto, We Do It Right! Read More »

August cleaning preparation

How To Prepare For August Cleaning: 7 Steps Fast and Easy

August cleaning is a specific kind of reset, the air in Toronto during August carries a distinct weight. This is the month where summer hits its peak just before beginning its slow retreat. Inside your home, the evidence of a season lived to its fullest is everywhere. Preparing for the August cleaning isn’t just about tidying; it’s about resetting the home after months of high activity and preparing it for the shift into autumn. The purpose of a dedicated August cleaning is to systematically remove the specific grime of summer and create a clean foundation for the indoor months to come. 1.HVAC A critical first step in any thorough August cleaning is addressing the air your family breathes. With windows open for weeks, allergens, city dust, and pollen have infiltrated every room. Your HVAC system has been in constant use, and its filter is the first line of defense. Changing it is a non-negotiable starting point for your August cleaning. A clogged, grey filter is not only inefficient but also circulates the very particles you want to remove. Once replaced, use a vacuum with a brush attachment to clean all intake and outtake vents. This foundational task sets the stage for the rest of your August cleaning, ensuring the air moving through your home is as clean as possible. 2.Windows and Doors Now, turn your attention to the windows and doors. The screens have been interceptors of bugs, leaves, and dirt all summer. A proper August cleaning demands they be removed and washed. A soft brush, mild soap, and a gentle spray from a garden hose will dislodge the grime. While they dry, focus on the window tracks and sills. These channels are graveyards for dust and insects. Vacuum the loose debris and use an old toothbrush to scrub the caked-on dirt. This level of detail is a hallmark of a successful August cleaning. Washing the glass, inside and out, on an overcast day will prevent streaking and let pristine light into your newly refreshed space. Completing this part of the August cleaning makes an immediate, visible difference to the brightness of your home. 3.The Floors The floors hold the story of summer. Sand from The Beaches, soil from the garden, and grass from the park have been ground into every surface. A deep floor treatment is non-negotiable for a proper August cleaning. For hard floors, a thorough mopping, perhaps even twice in high-traffic areas, is required to lift the settled-in dirt. For carpets and area rugs, this is the time for a deep extraction clean. Renting or owning a carpet cleaner is essential for this part of the August cleaning, as it pulls out the deep-set allergens and grit that a standard vacuum cannot reach. The murky water you dispose of is proof of the effectiveness of this task. Moving furniture to clean underneath is a vital step in a comprehensive August cleaning; the dust and lost items accumulated over three months need to be addressed. This aspect of the August cleaning removes the literal grit of the season from your home. 4.Fat in the Kitchen The kitchen August cleaning is a project in itself. The refrigerator has been a revolving door of summer treats and barbecue ingredients. Empty it completely. Wash all shelves and drawers in warm, soapy water. Wipe the interior with a food-safe cleaner, checking expiration dates as you go. The exterior and handles, covered in fingerprints, also need attention. Summer cooking often involves more frying and grilling, leaving a sticky film of grease on cabinets, the backsplash, and especially the range hood. A good degreaser is your best tool for this part of the August cleaning. Spray it on, let it work for a few minutes, then wipe clean. Don’t forget the hidden areas during your August cleaning; pull out the oven and stove to clean the sides and the floor underneath, which are magnets for crumbs and grease. This part of the August cleaning is about health as much as it is about aesthetics. 5.Sofa Cushion Your living room August cleaning should focus on soft surfaces where dust and dander settle. If your sofa cushion covers are machine-washable, now is the time to launder them. For all other upholstery, a meticulous vacuuming with the correct attachment is key. Go into every seam and crevice. For a deeper refresh, sprinkling baking soda over the fabric, letting it sit to absorb odors, and then vacuuming it up is a great technique to include in your August cleaning schedule. All throw blankets and pillows should be washed or cleaned according to their care tags. Dusting is another crucial element. Use a damp microfiber cloth to trap dust, not just move it. The goal of this August cleaning is to touch every surface, including the tops of picture frames, ceiling fan blades, and lamp shades. This comprehensive dusting is what makes an August cleaning so effective. Think of this as resetting the comfort zones of your home with your August cleaning. 6.Bathroom The bathroom August cleaning targets the buildup from summer humidity and increased traffic. Go beyond the basic wipe-down and scrub the grout lines on the floor and in the shower where soap scum and mineral deposits have accumulated. A paste of baking soda and vinegar is an effective, natural solution. Wash the shower curtain and its liner. The exhaust fan cover, likely caked with dust, should be removed and cleaned to ensure it can effectively pull moisture from the air. A successful August cleaning restores these high-use spaces to a state of hygienic freshness. Take the time to empty and wipe out medicine cabinets and vanities, organizing the contents as you go. 7.The Summer Gear A key part of the August cleaning process is managing the transition of seasonal items. The summer gear pool toys, beach chairs, inflatable rafts needs to be cleaned, deflated, and stored properly to protect it for next year. The barbecue grill deserves a deep clean after a season of heavy

How To Prepare For August Cleaning: 7 Steps Fast and Easy Read More »

housekeeper

What Is A Housekeeper – 3 Reasons Why You Should Hire

A housekeeper is far more than just someone who cleans your home. While the primary image that comes to mind might be someone with a vacuum or a dust cloth, the reality of a professional housekeeper’s role is much broader, encompassing a comprehensive approach to home management and the overall well-being of a living space. They are individuals entrusted with maintaining the order, cleanliness, and functionality of a household, often serving as a crucial backbone for busy individuals and families. It’s about creating and sustaining an environment where you can truly thrive, not just exist. Think of a housekeeper not as a visitor who performs a single task, but as a dedicated manager of your domestic environment. Their responsibilities extend well beyond surface-level tidiness. They delve into the intricate details of what makes a house feel like a home  a place of comfort, peace, and efficiency. This often includes a wide array of duties that can be customized to suit specific household needs, but generally covers everything from meticulous cleaning to organizational tasks and even light household management. They are experts in ensuring that every corner of your home is not just clean, but cared for, reflecting an understanding of proper maintenance and the nuances of different materials and surfaces. 1.Light and Heavy Cleaning For instance, their cleaning duties are exhaustive. This isn’t just a quick sweep or a superficial wipe-down. A professional housekeeper engages in deep cleaning protocols for kitchens and bathrooms, sanitizing surfaces, scrubbing grout, polishing fixtures, and ensuring these critical areas are hygienic and sparkling. They handle floor care with precision, knowing the right methods for hardwood, tile, carpet, or laminate, ensuring longevity and shine. Dusting isn’t limited to visible surfaces; it extends to baseboards, light fixtures, ceiling fans, blinds, and intricate decor, preventing the buildup of allergens and maintaining a fresh atmosphere. Vacuuming and mopping are performed thoroughly, reaching under furniture and into corners that are often overlooked in daily tidying. Laundry management is also a common duty, involving washing, drying, folding, ironing, and putting away clothes, linens, and towels, ensuring that your wardrobe and household textiles are always fresh and ready. They make beds with an eye for detail, turning a simple chore into an act of creating a welcoming sanctuary. Beyond the immediate act of cleaning, a housekeeper is also an organizational wizard. They help in reducing clutter, creating systems for storage, and maintaining order in common areas, closets, and pantries. This proactive approach to organization means less time spent searching for items and more time enjoying a harmonious living space. They might assist with tidying up children’s play areas, ensuring toys are stored properly, or organizing bookshelves and filing systems. It’s about creating a flow in the home that makes daily living smoother and less stressful. This often involves an intuitive understanding of how a household operates and anticipating what areas might become disorganized, intervening before chaos takes hold. Furthermore, a housekeeper often takes on light household management responsibilities. This can include managing household supplies, ensuring that cleaning products, toiletries, and even certain pantry staples are always stocked. They might run light errands, such as dropping off dry cleaning or picking up groceries. For homes with pets, they might assist with basic pet care, like feeding or tidying up pet areas. They can also oversee plant care, ensuring your indoor greenery thrives. In some cases, especially in larger homes, a housekeeper might coordinate with other service providers, such as plumbers, electricians, or gardeners, ensuring maintenance schedules are met and issues are addressed promptly. They act as a central point of contact, ensuring the home functions like a well-oiled machine, even when you are not present to manage every detail yourself. The distinction between a “cleaner” and a “housekeeper” is critical. A cleaner typically comes for a few hours, performs specific cleaning tasks, and then leaves. Their focus is solely on the immediate cleanliness of the space. A housekeeper, on the other hand, often has a more encompassing and ongoing relationship with the household. They are involved in the continuous upkeep, proactive organization, and management of the home’s daily rhythm. They build an intimate understanding of the home’s needs, its inhabitants’ preferences, and the specific routines that keep everything running smoothly. This level of dedication and involvement fosters a deeper sense of trust and partnership, where the housekeeper becomes an invaluable asset to the household’s operational efficiency and overall peace. 2.Making Up For Lost Time So, why should you consider hiring a housekeeper? The reasons are multifaceted and profoundly impactful on your daily life. Primarily, it’s about reclaiming your time. In today’s fast-paced world, time is arguably our most precious commodity. Juggling demanding careers, family responsibilities, social obligations, and personal pursuits leaves very little room for the arduous and often relentless demands of household chores. The hours spent on cleaning, organizing, and maintaining a home can quickly accumulate, eating into weekends, evenings, and any potential moments of relaxation. Hiring a housekeeper liberates these hours, allowing you to dedicate them to activities that genuinely enrich your life – spending quality time with loved ones, pursuing hobbies, engaging in personal development, exercising, or simply enjoying uninterrupted rest. Imagine coming home after a long day not to a list of chores, but to a clean, organized, and welcoming sanctuary, ready for you to unwind. This isn’t just about saving time; it’s about investing in your personal well-being and life satisfaction. Beyond time, hiring a housekeeper significantly reduces stress and mental load. The burden of an untidy or disorganized home can weigh heavily on one’s mind, creating a constant hum of anxiety and guilt. The mental energy expended on planning cleaning schedules, remembering what needs to be done, or feeling overwhelmed by accumulated mess is immense. A housekeeper takes this entire burden off your shoulders. The peace of mind that comes from knowing your home is being professionally cared for, consistently and thoroughly, is immeasurable. It eliminates potential arguments or frustrations over chore distribution in shared living spaces and

What Is A Housekeeper – 3 Reasons Why You Should Hire Read More »

protective items for cleaning the house

Why do You Need Protection To Clean Your House? – 6 Essential Items

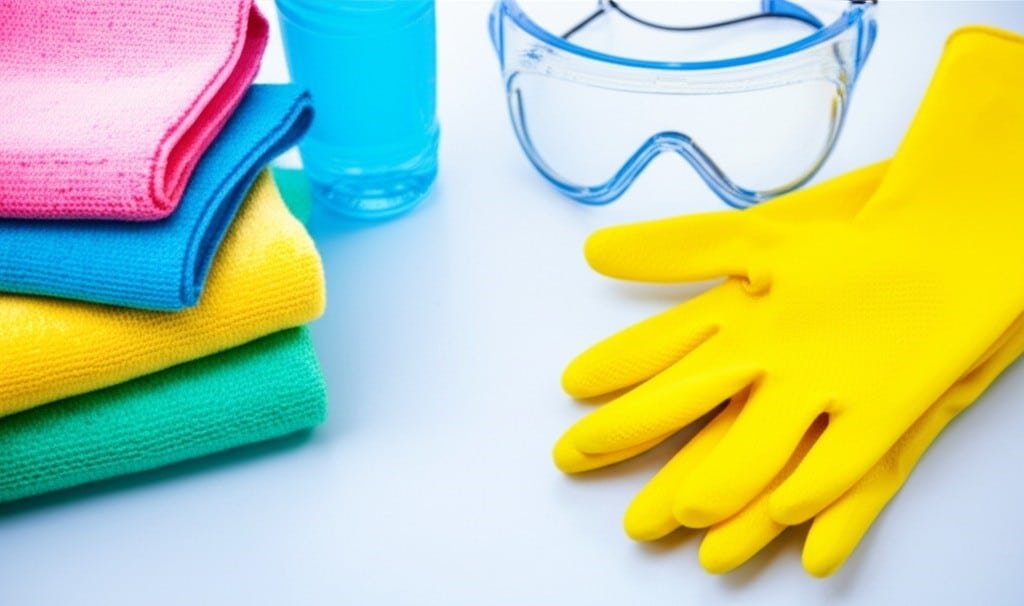
Cleaning your home without protection can be dangerous. It’s a battle against dust, dirt, germs, and clutter. In this battle, we arm ourselves with an arsenal of tools: powerful chemical sprays, abrasive sponges, powerful vacuum cleaners, and microfiber cloths. However, amidst the focus on eliminating dirt from our surroundings, one critical element is often overlooked: protecting the combatant. The cleaning process exposes individuals to a variety of occupational hazards, ranging from the seemingly minor, such as dry skin, to the extremely serious, such as chemical burns, respiratory distress, and lasting physical injuries. Wearing a full complement of protective gear is not a sign of over-meticulousness; it’s the hallmark of a smart, safe, and professional approach to a task that involves direct contact with chemicals, biological contaminants, and significant physical exertion. 1.Gloves The most immediate and constant point of contact in any cleaning endeavor is the hands. They are the primary instruments, manipulating cloths, holding spray bottles, and scrubbing surfaces. The skin, our body’s largest organ, provides a remarkable natural barrier, but it is a barrier with limits. Continuous exposure to water, a universal solvent, systematically strips away the skin’s protective layer of sebum, leading to dehydration, redness, painful cracking, and a compromised ability to defend against infection. Introduce cleaning chemicals into this equation, and the risks escalate dramatically. Detergents, degreasers, disinfectants, and acidic or alkaline solutions can induce contact dermatitis, trigger severe allergic reactions, and, in the case of concentrated agents like oven cleaners or drain unblockers, inflict serious chemical burns. Therefore, gloves are not an optional accessory; they are an indispensable piece of personal protective equipment. A truly prepared cleaning kit contains multiple types of gloves for different applications. For light-duty tasks requiring high dexterity, such as wiping down countertops, polishing fixtures, or handling soiled laundry, disposable gloves are the superior choice. Nitrile gloves are often preferred over latex due to their superior chemical resistance and the prevalence of latex allergies. They provide a reliable shield against germs and chemicals for short-term use and can be discarded immediately, which is a crucial step in preventing cross-contamination between different areas of the home, like the kitchen and the bathroom. For more demanding jobs, a pair of heavy-duty, reusable gloves is required. Tasks like washing dishes in very hot water, scrubbing floors with strong detergents, or cleaning a mold-affected area call for the robust protection of thick rubber or PVC gloves. These are more durable, less prone to tearing, and often feature longer cuffs that extend up the forearm, providing a crucial defense against splashes. Opting for a pair with a flock lining can significantly increase comfort by absorbing perspiration, allowing them to be worn for longer periods without discomfort. Proper care extends the life and safety of these gloves. After each use, they must be rinsed thoroughly while still on the hands, washed with soap and water, then removed and allowed to air dry completely, both inside and out, to inhibit the growth of bacteria and mold within them. 2.Ventilation As we move from contact hazards to airborne ones, the protection of the respiratory system becomes paramount. Many of the most effective cleaning products achieve their results through chemical reactions that release fumes and volatile organic compounds (VOCs) into the air. When a cleaner is sprayed, it is aerosolized, creating a fine mist of chemical droplets that are easily inhaled. The acrid scent of bleach, the sharp, pungent odor of ammonia-based glass cleaners, or the powerful fumes from a self-cleaning oven cycle are all indicators of airborne chemicals that can irritate the delicate mucous membranes of the nose, throat, and lungs. For individuals with asthma, allergies, or other respiratory sensitivities, this exposure can trigger wheezing, coughing, and shortness of breath. Even for those without pre-existing conditions, chronic, long-term inhalation of these fumes can contribute to a range of health problems. The first line of defense is always ventilation. Opening windows and doors to create a cross-breeze and using an exhaust fan can significantly dilute the concentration of airborne chemicals. However, ventilation alone is not always sufficient, especially in enclosed spaces like small bathrooms or when dealing with particularly potent substances or large amounts of particulates. In these cases, respiratory protection is essential. For tasks that kick up a lot of dust, pet dander, or debris, such as sweeping a dusty garage, deep-cleaning carpets, or clearing out a long-neglected storage area a well-fitting N95 respirator is the appropriate choice. Unlike a simple dust mask, an N95 is certified to filter out at least 95 percent of fine airborne particles, providing meaningful protection against allergens and irritants that can penetrate deep into the lungs. When working with aggressive chemicals known to produce harmful vapors, such as certain solvents, paint strippers, or heavy-duty oven cleaners, a more advanced respirator is warranted. An elastomeric half-mask respirator with interchangeable cartridges designed to filter organic vapors offers a much higher level of protection. It is also a vital piece of safety knowledge that mixing certain household cleaners can create lethal gases. The most infamous combination, bleach and ammonia, produces toxic chloramine gas, while mixing bleach with acidic cleaners can release chlorine gas. Proper respiratory protection, coupled with unwavering adherence to the rule of never mixing cleaning products, is a foundational principle of household safety. 3.Safety Glasses The eyes, with their delicate and irreplaceable tissues, are uniquely vulnerable to cleaning-related injuries. A single misdirected splash of a chemical cleaner can cause immediate, intense pain and has the potential to inflict permanent corneal damage and vision loss. These incidents can happen with surprising ease: a toilet brush flicking contaminated water upwards, an aerosol spray nozzle sputtering unexpectedly, or gravity pulling droplets down as you clean a surface overhead, like a showerhead or a ceiling fan. Standard eyeglasses or sunglasses offer minimal protection, as splashes can easily enter from the sides, top, or bottom. The gold standard for eye protection during cleaning is a pair of safety goggles. Goggles are designed to form a seal around the eye

Why do You Need Protection To Clean Your House? – 6 Essential Items Read More »

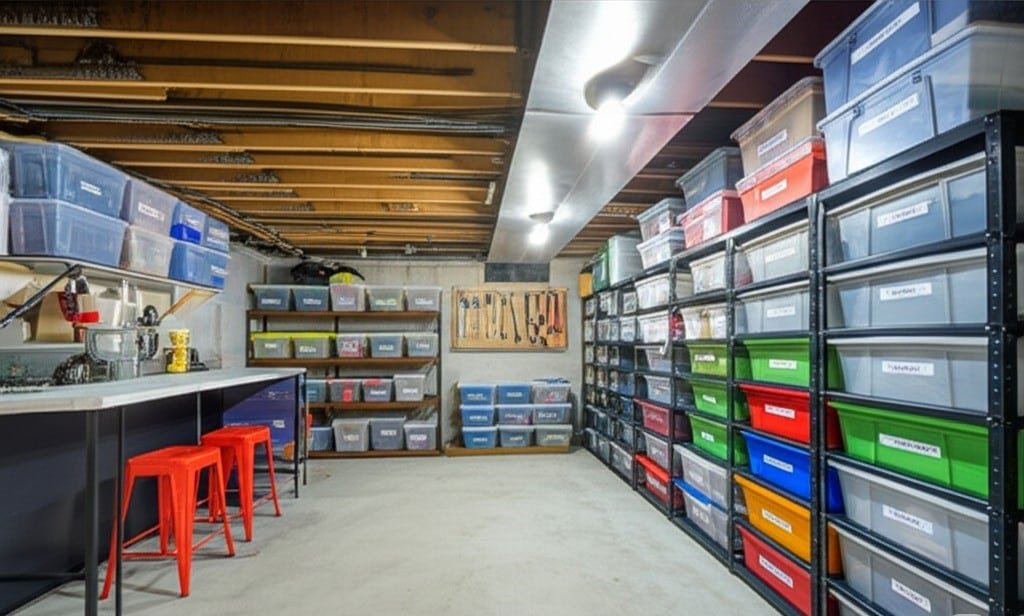
7 Best Tips To Make Your Basement Spotless

Begin by ensuring your safety. Basements often have poor ventilation. Open any available windows and doors. Utilize fans to circulate air. Adequate lighting is crucial; if built-in lighting is insufficient, bring in portable work lights. Equip yourself with heavy-duty gloves, an N95 respirator mask to protect against dust, mold spores, and other airborne particles, and safety glasses. Wear sturdy, closed-toe shoes to protect your feet. Be mindful of potential pests like spiders, insects, or signs of rodents. Exercise caution around electrical outlets and wiring, especially in damp conditions. 1.Cleaning Tools Gather your cleaning supplies. You will need heavy-duty trash bags, sorting boxes or bins, labels, and markers. For cleaning, assemble an all-purpose cleaner, a disinfectant, a specific mold and mildew remover, a degreaser if you have oily stains, and a concrete cleaner for unsealed floors. If you have basement windows, glass cleaner will be necessary. For any wooden elements, have wood polish on hand. Tools should include a vacuum cleaner with crevice and brush attachments, a shop vac for larger debris or potential water, a mop and bucket, a selection of scrub brushes (various sizes and stiffness levels), plenty of rags or microfiber cloths, sponges, and a squeegee. A step ladder will be essential for reaching high areas. A utility knife can be useful for breaking down boxes. A broom and dustpan are standard. Consider having a dehumidifier ready to run after cleaning and an air purifier to improve air quality. Before diving in, clear a workspace. Move items to create a pathway and an area to sort. Walk through the basement to identify problem areas  visible mold, signs of pests, water stains, or areas of extreme clutter. Define what you want to achieve with this cleaning: is it primarily decluttering, a deep sanitizing clean, or preparing the space for organization? To make the task less daunting, divide the basement into manageable zones, such as a storage section, laundry area, and any recreational or workshop spaces. 2.Boxes Method The first major phase is decluttering. Employ a systematic approach, such as the four-container method. Designate areas or use large boxes for: “Keep” (items that will remain in the basement or be stored properly), “Donate/Sell” (items in good, usable condition that you no longer need), “Trash/Recycle” (items that are broken, expired, damaged beyond repair, or no longer serve a purpose), and “Relocate” (items that belong in other parts of your home). Address categories of items methodically. Go through old furniture. Assess its condition and usefulness. If it’s structurally sound but unwanted, consider donation or selling. If damaged, arrange for disposal. Tackle boxes of stored items one by one. This is often the most time-consuming part. Be honest with yourself about whether you truly need each item. For clothing, sort through anything stored in the basement. Remove items that are outgrown, no longer in style, damaged, or haven’t been worn in years. Donate usable clothing and discard the rest. The same applies to children’s toys; broken or unused toys can be discarded or donated. Sift through any paperwork. Old bills, manuals for discarded appliances, and outdated documents can often be recycled. Ensure you shred any documents containing sensitive personal information. Hobby supplies and sports equipment should be evaluated. If hobbies are no longer pursued or equipment is broken or outdated, decide whether to keep, sell, donate, or discard. Holiday decorations are a common basement inhabitant. Inspect them for damage. Discard broken ornaments or lights. Consolidate decorations into well-sealed containers. Go through tools and hardware. Organize what you keep and dispose of broken or rusted tools. Be cautious with old paints, solvents, and chemicals. Check your local municipality’s guidelines for hazardous waste disposal; never pour these items down the drain or put them in regular trash. Dealing with sentimental items requires a gentle but firm approach. Acknowledge the emotional attachment, but also recognize that keeping everything can lead to overwhelming clutter. Set a limit, perhaps one or two clearly labeled boxes for true keepsakes. For items you feel nostalgic about but don’t have space for, consider taking photographs as a memento before letting them go. Once sorting is complete, focus on removing the unwanted items. Schedule a bulk trash pickup with your municipality for large items if necessary. Make trips to local donation centers with items designated for donation. For very large decluttering projects, renting a small dumpster for a weekend might be a practical solution. 3.Accessories With the clutter removed, you can begin the deep cleaning of all surfaces. Start from the top down.Use a long-handled duster or a vacuum cleaner with a brush attachment to remove cobwebs and dust from the ceiling, corners, and along the tops of walls. Pay attention to light fixtures and any exposed ductwork or pipes. For general wall dusting, a microfiber mop with a clean, dry pad works well, or use a large microfiber cloth. If walls are visibly grimy or stained (and are painted with washable paint), you may need to wash them. Mix a mild solution of all-purpose cleaner or a few drops of dish soap in a bucket of warm water. Always spot-test in an inconspicuous area first to ensure the paint or surface isn’t damaged. Use one sponge or cloth to wash and another rinsed in clean water to wipe away any detergent residue. Work in sections.If you encounter mold or mildew on ceilings or walls, address this carefully. For small, contained areas, use a dedicated mold and mildew remover. Ensure the area is well-ventilated, and you are wearing your PPE (gloves, mask, eye protection). Spray the cleaner onto the affected area, let it sit according to the product instructions, and then wipe or scrub clean. For extensive mold growth (larger than a few square feet), it is advisable to consult a professional mold remediation service. The type of flooring will dictate your cleaning method.For concrete floors, which are common in basements, begin with a thorough sweeping to remove loose dirt and debris. Follow up with a shop vac, using the crevice

7 Best Tips To Make Your Basement Spotless Read More »

various cleaning tools

13 Essential Cleaning Tools Every Home Needs

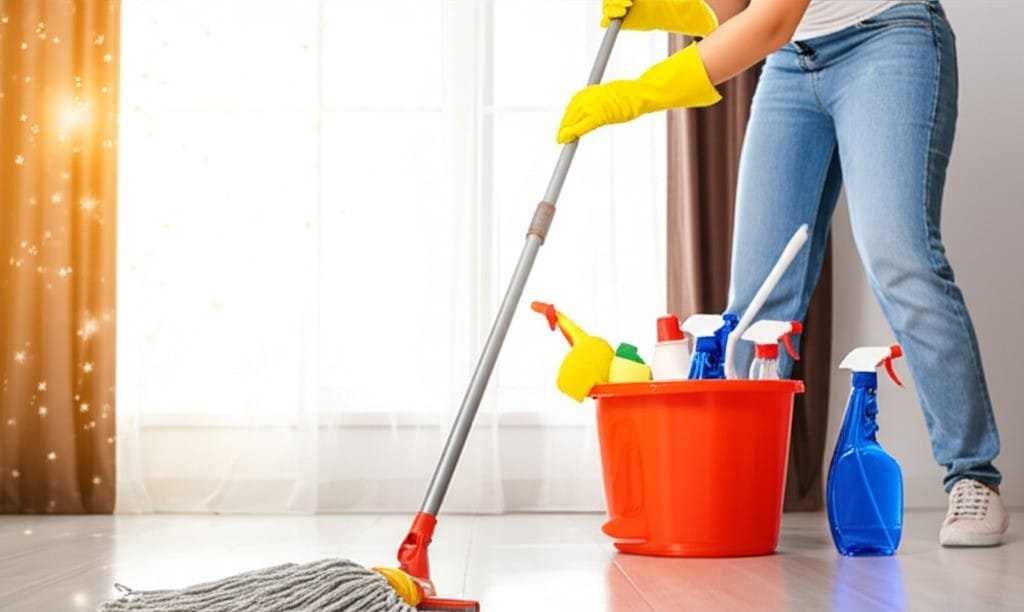
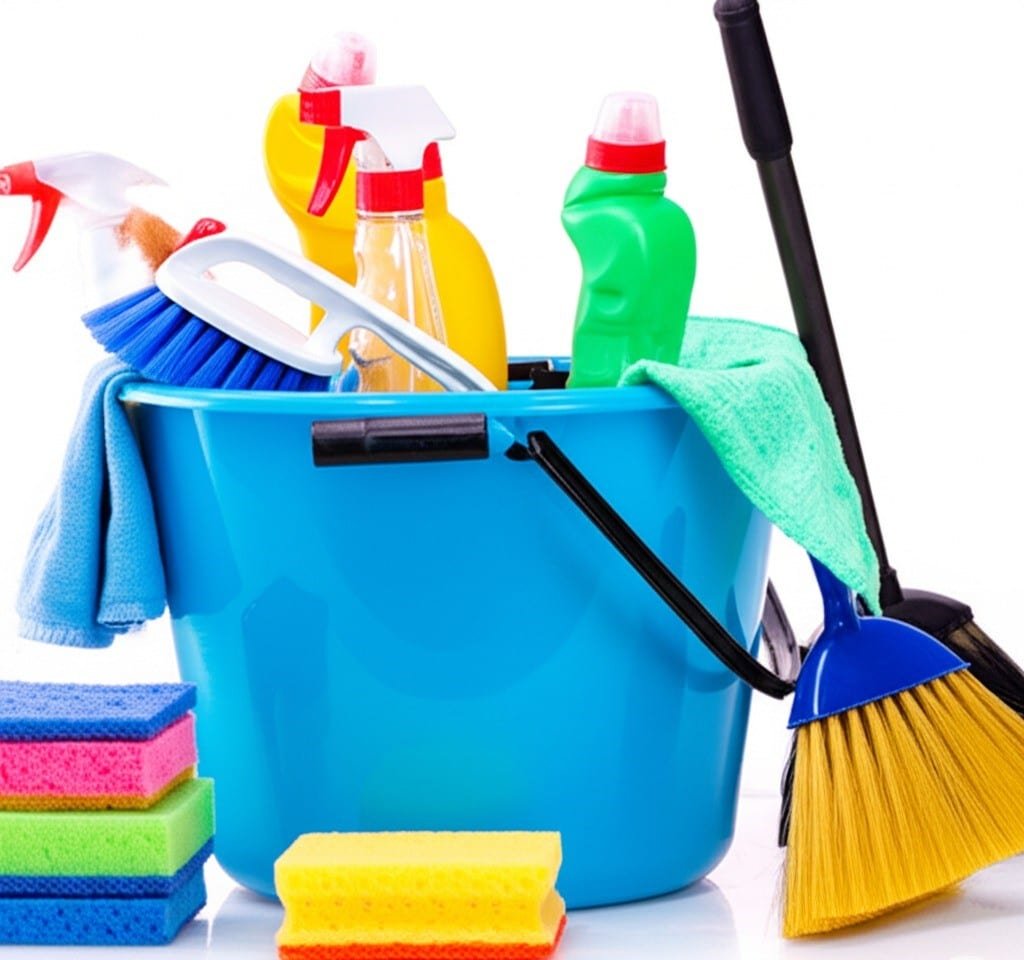
A truly clean home starts with the right collection of essential cleaning tools. These implements are the backbone of any effective cleaning routine, transforming chores from overwhelming burdens into manageable tasks. Without the correct cleaning tools, even the best intentions can fall short, leaving behind dirt, germs, and frustration. Investing in a quality set of these items will pay dividends in time saved and the satisfaction of a spotless living space. 1.Microfiber Cloths Microfiber cloths are indispensable cleaning tools in any modern cleaning arsenal. Their finely woven synthetic fibers, typically a blend of polyester and polyamide, are engineered to trap dust, dirt, bacteria, and absorb liquids far more effectively than traditional cotton rags, which often just push dirt around. These versatile cleaning tools come in various weaves and textures; some feature a tighter weave perfect for polishing glass and mirrors to a streak-free shine, while others have a plusher, terry-cloth like texture designed for general surface wiping, dusting, or scrubbing tougher grime from countertops and appliances. The electrostatic charge generated by the fibers actively attracts and holds onto dust particles. Because they can be laundered and reused hundreds of times (if cared for correctly – avoid fabric softener and high heat which can damage the fibers), they are also an economical and environmentally sound choice among your collection of cleaning tools. Properly caring for these cloths ensures they remain exceptionally effective cleaning tools for a long time, outperforming disposable wipes in both cost and performance. 2.Sponges Sponges, in their various forms, remain vital cleaning tools, especially for tasks requiring absorbency and a bit of scrubbing action for dislodging food particles and grime. You’ll find cellulose sponges, derived from wood pulp, which are highly absorbent and excellent for wiping spills from countertops and tables; they are also often biodegradable. Then there are scrub sponges, which are dual-purpose cleaning tools combining a soft, absorbent sponge on one side with a more abrasive scouring pad on the other, ideal for tackling stuck-on food on pots, pans, and oven interiors. It’s crucial to select non-scratch scrub sponges for delicate surfaces like non-stick cookware, glass cooktops, or ceramic dishes to prevent damage. Due to their porous and often damp nature, sponges can become breeding grounds for bacteria, so regular disinfection (e.g., microwaving a damp sponge for a minute, or running it through a dishwasher cycle) and timely replacement are key to keeping these ubiquitous cleaning tools hygienic and effective. An off-smell is a clear indicator that a sponge needs replacing. 3.Sprays Reusable spray bottles are fundamental cleaning tools for anyone looking to customize their cleaning solutions, dilute concentrates, or embrace DIY green cleaning recipes. Having a set of clearly labeled, sturdy spray bottles, preferably made from chemical-resistant plastic like HDPE, allows for efficient and safe application of specific cleaners for different tasks – one for all-purpose cleaning, another for glass, one for disinfecting, and so on. An adjustable nozzle, offering settings from a fine mist (ideal for covering large areas or delicate plants) to a direct stream (perfect for targeting specific stains or reaching into crevices), significantly enhances their versatility as cleaning tools. These are simple yet absolutely essential cleaning tools for any well-equipped cleaning kit, promoting both economy by allowing bulk purchase of concentrates and environmental responsibility by reducing single-use plastic waste. 4.Cleaning Brushes For grime that clings stubbornly to surfaces and resists gentler methods, scrub brushes are the go-to manual cleaning tools. A well-rounded set should include various sizes, shapes, and bristle stiffness to tackle diverse challenges. A large, stiff-bristled utility brush is excellent for heavy-duty scrubbing on durable surfaces like concrete floors, tile, or outdoor furniture. A narrow grout brush, characterized by its very stiff, often angled bristles, is a specialized cleaning tool designed specifically to dislodge mold, mildew, and embedded dirt from tile grout lines in kitchens and bathrooms. Smaller detail brushes, which can even include repurposed toothbrushes, are perfect cleaning tools for getting into nooks and crannies around faucets, drain openings, and window tracks. These manual cleaning tools provide the necessary mechanical action – the ‘elbow grease’ – that some messes require, lifting dirt that chemical cleaners alone cannot. No bathroom cleaning kit is complete without a dedicated toilet brush and holder, a truly essential set of cleaning tools for maintaining hygiene and cleanliness in one of the most critical areas of the home. The brush itself needs to have stiff, durable bristles capable of effectively scrubbing the toilet bowl surface, especially under the rim where bacteria and stains can accumulate; many modern designs include a specialized under-rim lip brush for this purpose. The holder is equally important, as it keeps this important cleaning tool stored discreetly and, ideally, facilitates proper drying to prevent the growth of bacteria and unpleasant odors. Look for holders with ventilation or designs that suspend the brush head, rather than allowing it to sit in contaminated water. Regular cleaning and disinfection of both the brush and holder are paramount. 5.Broom And Dustpan The classic broom and dustpan set remains one of the most basic yet indispensable cleaning tools for maintaining hard floors, from hardwood and laminate to tile and vinyl. Whether sweeping up daily crumbs in the kitchen, tracked-in dirt in the entryway, or dust bunnies in the hallway, these fundamental cleaning tools are the first line of defense against loose debris. Brooms with flagged (split-ended) bristles are better for fine dust on smooth indoor surfaces, while unflagged, stiffer bristles tackle larger debris. An angled broom head helps reach into corners and along baseboards more effectively. A crucial feature of a good dustpan is a thin rubber lip that sits flush against the floor, ensuring all swept debris is collected efficiently without leaving that frustrating line of dirt behind. Long-handled dustpans offer ergonomic benefits by reducing bending. For many households, these are among the most frequently used cleaning tools. 6.Mop And Bucket For washing and sanitizing hard floors after sweeping, a mop and bucket are non-negotiable cleaning tools. The market offers a variety of options to suit different needs and floor types. Traditional string mops are known for their absorbency but can be bulky. Flat mops, often featuring washable and reusable microfiber pads, are increasingly popular and are excellent cleaning tools for

13 Essential Cleaning Tools Every Home Needs Read More »

clean shower walls

How to Keep Your Shower Walls Shining – 5 Best Tips You Need to Know

Dealing with dirty shower walls is a common household challenge. Over time, these surfaces accumulate a variety of residues, from soap scum and hard water minerals to mold and mildew, diminishing the overall cleanliness and appeal of your bathroom. Understanding what causes these issues and how to address them effectively can transform your shower from a source of frustration into a sparkling clean space. 1.Mold and Mildew The main culprits for dirty shower walls are soap scum, hard water stains, and biological growths like mold and mildew. Soap scum is a reaction between the fatty acids in bar soap and minerals in tap water, such as calcium and magnesium. This reaction forms an insoluble, sticky, and often grayish or whitish film that adheres tightly to shower surfaces. If left untreated, layers of soap scum can build up on shower walls, becoming increasingly difficult to remove. Hard water stains, on the other hand, are mineral deposits left behind as water evaporates. They usually appear as chalky white spots or a cloudy film, particularly noticeable on darker tiles or glass. Calcium carbonate and magnesium carbonate are the main components of these deposits. Mold and mildew are fungi that thrive in warm, humid environments with poor air circulation, making showers an ideal breeding ground for them. Mold usually appears as a superficial, powdery growth, while mildew can penetrate deeper and present as black, green, or even pink spots, often in grout lines or corners. These spots are not only unsightly, but can also cause health problems for some people. Before beginning the cleaning process, proper preparation is essential for both effectiveness and safety. Start by clearing the shower area of all items. Remove shampoo bottles, conditioner, body wash, loofahs, razors, and any other accessories. This gives you unobstructed access to all wall surfaces. Next, gather your cleaning supplies. You will need a suitable cleaning solution, which could be a homemade mixture or a commercial product, contained in a spray bottle if it’s a liquid. Arm yourself with appropriate tools for scrubbing, such as non-abrasive sponges, soft cloths, microfiber towels, or scrub brushes with varying bristle stiffness depending on your wall material. An old toothbrush or a specialized grout brush is invaluable for cleaning grout lines. For rinsing, your showerhead will suffice, or you can use a bucket of water. Protecting yourself is also crucial. Wear waterproof gloves to shield your hands from cleaning agents and grime. Consider safety glasses to protect your eyes from splashes, especially when using spray cleaners or dealing with strong chemicals. Ensure good ventilation in the bathroom by turning on the exhaust fan, opening a window, or both. This helps to dissipate fumes from cleaning products and aids in drying. Choosing the right cleaner depends on the type of grime you are tackling and the material of your shower walls. For general cleaning and tackling soap scum and mild hard water stains, a solution of equal parts white vinegar and warm water is often effective. The acetic acid in vinegar helps to dissolve soap scum and mineral deposits. For more scrubbing power, particularly on tougher soap scum, a paste made from baking soda and a small amount of water can be used as a mild abrasive. Another popular homemade option involves mixing white vinegar with a squirt of liquid dish soap; the dish soap helps to cut through grease and allows the vinegar to cling better to vertical surfaces. For mold and mildew, hydrogen peroxide can be sprayed directly onto affected areas and allowed to sit. 2.Specific Products For Shower Walls If you opt for commercial cleaners, many products are available, formulated specifically for bathrooms. There are cleaners designed to target soap scum, others for hard water stains, and some that focus on killing mold and mildew. All-purpose bathroom cleaners can also be effective for regular maintenance. Always read the product label carefully, paying attention to the instructions for use, recommended dwell times, and any safety warnings. It is particularly important to check if a commercial cleaner is safe for your specific shower wall material. The material of your shower walls determines the types of cleaning products and tools you can safely use. Ceramic and porcelain tiles are generally very durable and can withstand most cleaning agents and vigorous scrubbing. However, the grout between tiles is porous and can stain or corrode if repeatedly treated with harsh or acidic cleaners. Fiberglass and acrylic shower surrounds are more sensitive; they can be scratched by abrasive cleaners or harsh cleaning tools, such as steel wool or stiff-bristled brushes. For these surfaces, opt for non-abrasive cleaners and soft sponges or cloths. Natural stone tiles, such as marble, granite, limestone or travertine, require special care. These materials are often porous and can be corroded or damaged by acidic cleaners, such as vinegar or lemon juice, as well as harsh alkaline cleaners, such as bleach. For natural stone, it is best to use pH-neutral cleaners that are specifically designed for stone surfaces. Always test any new cleaning product on a small, inconspicuous area first to ensure it won’t damage or discolor the material on your shower walls. 3.Timing The Time Once prepared and with your chosen cleaner ready, you can begin the cleaning process. Start by wetting the shower walls with warm water using the showerhead or a cup. This initial rinse helps to loosen surface dirt and allows the cleaner to adhere more effectively. Next, apply your cleaning solution. If using a spray, apply it generously to all wall surfaces, starting from the top and working your way down. This method prevents streaks and ensures that dirty solution doesn’t run over already cleaned areas. Allow the cleaner to dwell on the walls for the recommended time – this is a critical step. For mild cleaning, 5-10 minutes might be sufficient, but for heavy soap scum or mildew, you may need to let the cleaner sit for 15-30 minutes, or even longer for some commercial products. Dwell time allows the active ingredients in

How to Keep Your Shower Walls Shining – 5 Best Tips You Need to Know Read More »