Wall Cleaning

Understanding Acetone: A Guide to the Powerful Cleaning Solvent

What Makes Acetone a Powerful Cleaning Solvent Acetone is a potent organic solvent that dissolves residues most household cleaners cannot touch: oils, greases, dried paint, varnish, lacquer, permanent ink, and stubborn adhesives. Chemically, it is a polar aprotic solvent, so it attacks both greasy, non-polar materials and many polar substances. It also evaporates very quickly, which means it can do its job and vanish, usually leaving a clean, dry, residue-free surface behind. That speed and strength are exactly why acetone demands respect: it is indiscriminate, so you need to know where it helps and where it will do damage. Top Cleaning Jobs for Acetone Paint and Finish Removal Splatters of dried latex or oil-based paint on hard, non-porous materials such as glass, tile, or bare metal are no match for acetone. It breaks down the polymer binders that hold paint together, liquefying the coating so it can be wiped away. The same chemistry makes acetone the standard choice for cleaning paint brushes, roller covers, and spray gun components used with lacquers and enamels. It can also strip varnish or polyurethane from metal hardware and lift old, yellowed lacquer from brass fixtures. Expect to apply it, give it a few minutes to work, and then scrape or wipe off the softened layers. Adhesive and Residue Removal Most nail polish removers list acetone as their active ingredient because it dissolves the tough acrylic polymers in nail lacquer. The same principle defeats cyanoacrylate, better known as super glue: a small dab, carefully applied, dissolves the bond on skin or countertops. Acetone also penetrates the gummy residue left behind by stickers, labels, and tape, cutting through the stickiness until it wipes clean. Heavier challenges such as contact cement or construction adhesive usually need several applications plus some mechanical scraping. Workshop Degreasing Before welding, painting, or powder-coating a metal part, any trace of oil or wax can ruin the bond or finish. Acetone cuts through petroleum-based grime and flashes off fast, leaving a clean substrate. Mechanics use it on automotive parts, machinery, and tools to dissolve grime and tar that would otherwise require heavy scrubbing. On a concrete garage floor, it can lift deep oil stains, but only when you pull the dissolved oil up with an absorbent material; used carelessly, acetone can drive the stain deeper into the porous concrete. Remove nail polish spills from hard surfaces. Break super glue bonds on skin and countertops. Dissolve sticker, label, and tape residue. Clean brushes and rollers after lacquer or enamel projects. Prep metal parts before painting or welding. Where Acetone Causes Damage Acetone dissolves many common plastics, including polystyrene (styrofoam), ABS found in electronics housings and car interiors, acrylic (Plexiglas), and polycarbonate. Contact can soften, warp, cloud, or fully dissolve these materials, and even brief exposure can cause solvent crazing, a web of fine surface cracks. High-density polyethylene (HDPE) and polypropylene generally resist the solvent, so they are the usual choice for acetone containers. Finished wood is another casualty: acetone strips shellac, varnish, lacquer, and polyurethane, dries out the wood fibers, and can lift veneers or damage laminates, so it should never touch wooden furniture, flooring, or cabinetry unless a full refinishing is planned. Some fabrics are equally vulnerable. Acetate, triacetate, and modacrylic fibers can literally dissolve, creating holes, while cotton, wool, and silk usually survive but may lose dye. Material Acetone reaction Safe to clean? Polystyrene, ABS, acrylic, polycarbonate Softens, warps, clouds, or dissolves No; test a hidden area first HDPE and polypropylene Resists the solvent Yes Finished wood and veneers Strips finish, dries fibers Only for refinishing Acetate, triacetate, modacrylic fabric Dissolves; can create holes No Cotton, wool, silk Usually safe; dye may run Spot-test first Acetone Safety: Flammability, Ventilation, and Gear Acetone is extremely flammable with a very low flash point, so vapors can catch fire at room temperature when they meet a spark or flame some distance away. Ignition sources include pilot lights on water heaters, the spark of a refrigerator motor kicking on, and static electricity. Work with strong ventilation: open windows and doors and use a fan to push fumes outside, or work outdoors whenever possible. Protect your skin with butyl rubber or nitrile gloves; latex gloves break down quickly, and direct contact can defat the skin, causing dryness, irritation, and cracking. Wear splash-proof goggles, and in enclosed spaces or during long sessions use a respirator with an organic vapor cartridge, since concentrated fumes can irritate the respiratory tract and cause dizziness and headaches. Health Canada’s household chemical safety tips cover flammable and corrosive products such as paint thinners, and its household products guidance explains safe use and storage around the home. How to Apply Acetone the Right Way For small stains, pour the acetone onto a clean white cloth or cotton ball instead of directly onto the surface; that controls the amount and stops it from spreading to nearby vulnerable materials. Blot the stain from the outside edge inward so it does not create a larger ring, and avoid rubbing, which can push the stain deeper or damage the surface texture. Afterward, wipe the area with a cloth dampened with water and mild detergent, rinse with a clean, damp cloth, and dry thoroughly. Test any new surface or fabric in an inconspicuous spot first, such as an inner seam. Frequently Asked Questions About Acetone Can I use acetone on plastic surfaces? Only on plastics known to resist it, such as HDPE and polypropylene. Most others, including polystyrene, ABS, acrylic, and polycarbonate, will soften, cloud, or dissolve, so always test an unseen area first. Will acetone ruin wood furniture? Yes. It strips the finish, dries out the wood fibers, and can lift veneers. Reserve it for refinishing projects where removing the old finish is the whole point. Is acetone safe on fabrics and carpets? Fabrics made of acetate, triacetate, or modacrylic fibers can dissolve, and dyes on natural fibers may bleed. Spot-test an inconspicuous area before treating any stain. Is nail polish remover the same as pure acetone?

Understanding Acetone: A Guide to the Powerful Cleaning Solvent Read More »

5 Reasons Why Hiring a Cleaning Service is the Best Form of Self-Care

Why hire a specialized cleaning service? The modern home is a hub of activity, a place of work, rest, and family life. Yet, maintaining its cleanliness can feel like a relentless, never-ending task. The dust settles almost as soon as it’s wiped away, the floors seem to attract dirt, and the kitchen and bathrooms demand constant attention. For many, the weekend, which should be a time for relaxation and recharging, is instead consumed by a long list of chores. This constant cycle of cleaning can become a significant source of stress and a drain on our most valuable resource: time. It is in this gap between the desire for a clean, peaceful environment and the reality of a busy life that a residential house cleaning service finds its purpose, offering not just a service, but a solution to a pervasive modern problem. 1.Quality of Life Hiring a professional cleaning service is often viewed as a luxury, but it is more accurately described as an investment in your quality of life. Consider the hours spent each week sweeping, mopping, scrubbing, and dusting. For a moderately sized home, this can easily add up to four, five, or even more hours. A professional service reclaims those hours for you, handing them back to be spent on what truly matters. This could mean more time with family, pursuing a hobby, exercising, or simply enjoying a well-deserved rest. The cumulative effect of this reclaimed time is profound, reducing burnout and allowing for a better work-life balance. It transforms the home from a place of constant obligation into a true sanctuary, a space you can enter after a long day and immediately feel at ease, rather than being confronted with a list of tasks that need doing. 2.Quality of Cleanliness Beyond the gift of time, there is the undeniable difference in the quality of the clean itself. A professional cleaner brings a level of expertise and efficiency that is difficult for the average homeowner to replicate. They are trained in the most effective methods and understand the specific needs of different surfaces. They know which products to use on natural stone versus laminate, how to clean stainless steel without leaving streaks, and the best techniques for removing stubborn soap scum from glass shower doors. This knowledge prevents costly damage that can result from using the wrong chemical or an abrasive sponge on a delicate surface. Furthermore, professional services come equipped with commercial-grade tools and supplies that are often more powerful and effective than standard consumer products. Their high-powered vacuums with HEPA filters can capture a significantly higher percentage of dust, allergens, and pet dander, leading to improved indoor air quality. This is particularly beneficial for households with allergy sufferers, asthmatics, children, or pets. The result is not just a home that looks clean, but one that feels and is, on a microscopic level, healthier. The process of a professional clean is systematic and thorough. Cleaners typically work with a detailed checklist, ensuring that no area is overlooked. They employ methodical strategies, such as cleaning from top to bottom to ensure dust and debris fall downwards before the floors are addressed, and working from one side of a room to the other. This structured approach guarantees consistency and completeness. A standard recurring clean will typically involve a comprehensive dusting of all surfaces, including furniture, shelves, and window sills; cleaning and disinfecting kitchen countertops, sinks, and appliance exteriors; scrubbing toilets, showers, tubs, and bathroom vanities; and vacuuming carpets and mopping hard floors. This regular maintenance keeps the home at a consistent level of cleanliness, preventing the deep buildup of grime. 3.Deep Cleaning For homes that have gone some time without a thorough cleaning or for clients new to a service, a deep clean is often recommended. This is a far more intensive and detailed service that addresses the areas often missed in a regular routine. A deep clean will include all the tasks of a standard clean but will go much further. It can involve washing baseboards and trim, cleaning light fixtures and ceiling fans, wiping down doors and door frames, cleaning behind and underneath furniture and appliances, scrubbing grout lines, and cleaning the interior of windows. This is the reset button for your home, tackling the accumulated dirt and dust in every nook and cranny, and establishing a new baseline of clean that makes subsequent maintenance easier. Specialized services like move-in and move-out cleanings are another critical offering. Preparing a home for sale or ensuring a new home is pristine before you unpack is an enormous task on top of the already stressful process of moving. A move-out clean is designed to leave the property in immaculate condition for the next occupants, often a requirement for retrieving a security deposit. This is the most exhaustive clean of all, performed on an empty home. Every interior surface is addressed, including the inside of all cabinets, drawers, closets, the oven, and the refrigerator. It ensures the home is presented in its best possible light, which can be a significant factor for real estate agents and potential buyers. Conversely, a move-in clean provides immense peace of mind, sanitizing the space and ensuring you are starting your new chapter in a fresh, thoroughly cleaned environment. 4.Trust and Security One of the most significant barriers for people considering a cleaning service is the idea of trust and security. Inviting someone into your personal space requires confidence in their professionalism and integrity. This is why reputable cleaning companies place such a high emphasis on their hiring and training processes. They conduct background checks on their employees and ensure they are thoroughly vetted. Furthermore, professional services are bonded and insured. Bonding provides protection against theft, while insurance covers any accidental damage that might occur to your property during the cleaning process. This comprehensive protection offers homeowners the peace of mind that they are working with a trustworthy organization that stands behind its work and its people. The relationship with a cleaning service is

5 Reasons Why Hiring a Cleaning Service is the Best Form of Self-Care Read More »

Perfect Cleaning Schedule

Cleaning Schedule: A Room-by-Room Guide to Your Perfect Cleaning Schedule

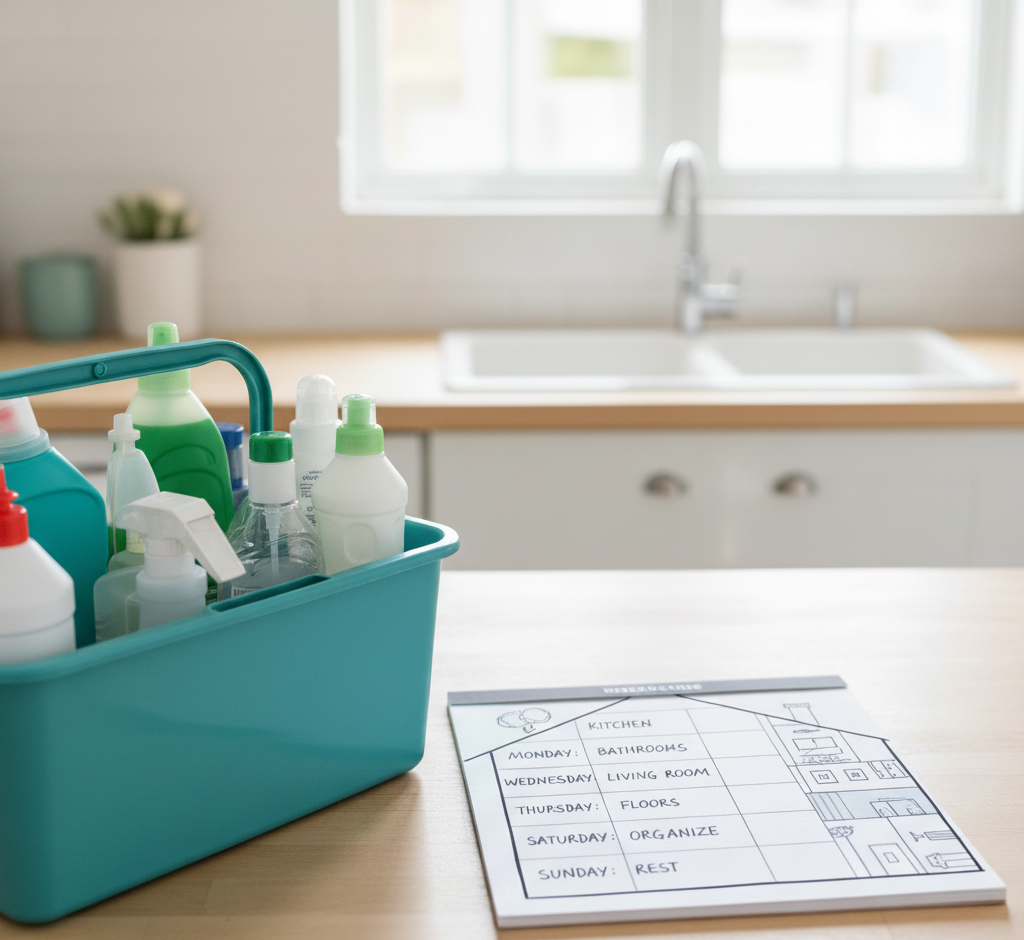
Why a Cleaning Schedule Beats Cleaning Marathons For many households, cleaning swings between two extremes: frantic multi-hour marathons before guests arrive, or weeks of ignoring the dust bunnies and sticky counters until frustration wins. This reactive approach is exhausting and inefficient. The secret to a consistently clean home is not stronger chemicals or more scrubbing; it is a simple cleaning schedule that turns one overwhelming project into small, predictable daily habits. Breaking tasks into daily, weekly, monthly, and seasonal frequencies keeps grime from ever building up to marathon levels, and it frees your weekends. Daily Habits: Fifteen to Twenty Minutes That Work Daily tasks are the foundation of the system. They take little time but have the biggest impact on how your home feels: Make the bed each morning; it takes under two minutes and instantly makes the bedroom look put together. Wipe kitchen counters and the sink after every meal so spills and crumbs never harden. Give the kitchen floor a quick sweep at day’s end so crumbs never get tracked through the house. Follow the one-load rule: wash, dry, fold, and put away a single load of laundry daily so the pile never becomes a mountain. The Weekly Reset: Bathrooms, Kitchen, and Dust The weekly clean is a deeper reset of the main living areas. You can do everything on one cleaning day or spread one or two rooms across the week, an approach called zone cleaning. Bathrooms deserve a full scrub for hygiene as much as appearance: the toilet inside and out, the shower and tub to stop soap scum before it thickens, the sink and countertops scrubbed and disinfected, the mirror polished streak-free, and the floor swept and mopped. In the kitchen, wipe down appliance exteriors including the refrigerator, dishwasher, microwave, and stovetop, clean the microwave interior by heating a bowl of water with vinegar to loosen grime, and mop the floor. Throughout the living areas and bedrooms, dust every surface, then vacuum carpets, rugs, and hard floors; regular vacuuming lifts the dust, dander, and allergens that would otherwise circulate. Monthly Projects for the Details Monthly tasks catch the slow, creeping grime that separates merely tidy homes from deeply clean ones. Wipe down baseboards, which collect dust and scuffs; clean light fixtures and ceiling fans; run an empty cleaning cycle on the washing machine to prevent soap scum and mildew; and clean the dishwasher filter to keep it performing well. Window sills and sliding door tracks also trap dirt and insects, so give them a monthly pass. Seasonal Projects: The Whole-Home Reset Every quarter, set aside time for the big jobs. Empty the refrigerator and freezer, wipe down shelves and drawers, and discard expired food. Wash windows inside and out, deep clean carpets and upholstery with a rented machine or a professional service, and organize closets and pantries while decluttering. Season-specific extras include cleaning the gutters in the fall and pressure washing the deck in the spring. Frequency Typical tasks Time tip Daily Make beds, wipe counters, quick sweep, one load of laundry Batch these into a 20-minute evening routine Weekly Bathroom scrub, appliance wipe-downs, dusting, vacuuming, mopping Assign one or two rooms per day Monthly Baseboards, light fixtures, washing machine cycle, window sills Pair with bill-paying day as a reminder Seasonal Fridge deep clean, windows, carpets, closets, gutters, deck Pick one weekend per season and book help early Make the Schedule Fit Your Life A schedule is a template, not a rigid document. If you live alone and rarely cook, the kitchen needs less attention; if you have kids and pets, daily floor care and weekly vacuuming become non-negotiable. Task batching helps some households: make Monday dusting day and Tuesday floor day so you stay focused with one set of tools. A clear schedule also makes delegation easy, since everyone in the family knows which tasks belong to which day, removing the constant negotiation about who cleans what. Above all, aim for progress, not perfection. Miss a day and simply pick it up tomorrow; because the system prevents buildup, one skipped task never snowballs into a disaster. Cleaning science supports the approach: the CDC explains that regular cleaning and disinfecting of your home removes most germs from surfaces, and that handwashing is one of the best ways to stop germs from spreading between family members. Frequently Asked Questions About Cleaning Schedules How long should daily cleaning take? Fifteen to twenty minutes is enough when you focus on the high-impact habits: making the bed, wiping counters after meals, a quick floor sweep, and one load of laundry. Is it better to clean one room a day or everything weekly? Both work. Zone cleaning, with one or two rooms per day, keeps the workload even, while a single weekly cleaning day suits people who prefer to finish everything at once. What should I clean monthly that people usually forget? Baseboards, ceiling fans and light fixtures, the washing machine drum, dishwasher filter, and window sills and sliding door tracks are the details that quietly collect grime. How do I stay consistent with a cleaning schedule? Keep tasks small and visible, pair them with existing habits such as morning coffee or evening TV, and remember that a missed day is fine as long as you resume the next day. When should I hire professional cleaners instead of doing it myself? Monthly and seasonal projects such as carpet deep cleaning, fridge resets, and whole-home refreshes are ideal to outsource, especially before holidays or when allergies act up. Keep the Schedule on Track With Professional Help The heaviest items on your schedule do not have to be DIY. Toronto Shine Cleaning’s regular cleaning service handles the weekly core clean, while our deep cleaning service covers the monthly and seasonal projects that need extra muscle. We serve homes across Toronto and the GTA, and our reviews show what consistent cleaning looks like. Call (647) 424-0355 or check our pricing to build your routine around a professional team.

Cleaning Schedule: A Room-by-Room Guide to Your Perfect Cleaning Schedule Read More »

woman preparing the house for Halloween

Halloween Cleaning: The Secret to a Stress-Free Halloween? A Pre-Holiday Clean.

Why a Pre-Halloween Clean Makes the Holiday Easier Halloween planning usually centers on costumes, candy, pumpkins, and decorations, but the step that makes everything else work is a pre-holiday clean. A targeted cleaning session that moves from the outside of your home inward prepares your walkway, entryway, and main rooms for trick-or-treaters, guests, and decorations. It is not just about tidiness: clearing wet leaves and clutter prevents slips, a wiped-down kitchen makes treat prep safer, and a dust-free living room shows off your spooky decor instead of hiding it. Start Outside: Walkway, Porch, and Front Door The exterior is where the Halloween experience begins, so it deserves the first pass. The walkway, porch, and front door form the stage for the whole evening and the first point of contact for every visitor. Clear the Walkway and Porch In October, the path to your door is often covered with fallen leaves, twigs, and mud. Damp leaves make the path genuinely slippery, a real risk for small children in bulky costumes moving around in the dark. Sweep the entire walkway from the sidewalk to the front steps, then spray it with a garden hose to wash away residual grime. On the porch, remove leftover summer items such as empty planters, garden tools, and worn-out mats, then sweep the whole surface, paying attention to corners where dust and spiderwebs collect. Real webs usually just look neglected, so clear them away to make room for the fake ones. Wipe Down the Door, Windows, and Lights The front door is the centerpiece of the evening. Wipe it down with a damp cloth and warm water with a few drops of dish soap to remove fingerprints and summer dust, and clean the door handle and hardware while you are at it. Windows beside the entry deserve the same attention, since clean glass makes silhouettes, clings, and lighting effects pop; a half-and-half spray of white vinegar and water, wiped with a microfiber cloth or squeegee, does the job. Wipe railings and handrails too, because parents and kids will grip them in the dark. Finally, dust the exterior light fixtures, where built-up dirt and dead insects can dim the glow, and replace any burned-out bulbs so the path and your best decorations stay visible. Sweep leaves and debris from the whole walkway. Clear summer planters, tools, and worn mats from the porch. Wash the front door, handle, windows, and railings. Dust light fixtures and check every bulb. Clean the doormat and the floor beneath it. Inside: Entryway and Main Living Areas Inside, start with the entryway, which faces a constant parade of opening doors on Halloween night. Clear clutter like shoes, bags, and mail so there is a wide, safe path for groups of excited children. Take the doormat outside and scrub it with soap and water if it is a durable outdoor style, or vacuum it well if it is an indoor mat, and clean the floor underneath, which traps surprising amounts of grit. This is also the moment to place a boot tray by the door for wet footwear in the months ahead. From there, move to the living areas visible from the front door: dust the mantel, bookshelves, and tables where candy bowls will sit, then vacuum floors and upholstery. Removing dust and allergens now means better indoor air quality once the decorations go up and the windows stay closed for winter. Kitchen and Bathroom Prep for Guests and Treats The kitchen becomes the command center for Halloween treats, so clear the countertops and wipe them down with a sanitizing cleaner before any baking or candy prep begins. The CDC’s food safety basics start with keeping hands and surfaces clean, and its cleaning and disinfecting guidance explains when to go beyond a simple wipe. Take the chance to sort through the refrigerator, discarding old leftovers to make room for party platters and drinks. The guest bathroom deserves a quick seasonal refresh: shine the mirror, scrub the sink and toilet, wipe the countertop, and put out fresh hand towels with a full supply of soap and toilet paper. Clean the Decorations and Their Storage Space Before carrying bins up from the basement or garage, sweep the floor and wipe the shelves where they were stored so you do not track old dust into clean rooms. As you unpack, give each item a quick wipe: plastic pumpkins, ceramic figures, and other hard decorations gather a layer of dust in storage, and fabric pieces such as throws and wall hangings freshen up in the dryer on a no-heat air cycle. Area Pre-Halloween focus Why it matters Walkway and porch Sweep leaves, hose off grime Prevents slips in the dark Front door and windows Wipe surfaces, clean glass Clean backdrop for decor Entryway Declutter, clean doormat Safe path, less dirt tracked in Living areas Dust and vacuum Better air quality before winter Kitchen and bathroom Sanitize counters, stock supplies Safe treat prep, happy guests Frequently Asked Questions About Halloween Cleaning How early should I clean before Halloween? Aim for the weekend before, so the house is ready for decorating, costume try-ons, and any early parties, with a quick touch-up on the day itself. Is cleaning the walkway really necessary? Yes. Wet leaves and debris are a slipping hazard for children in bulky costumes moving in the dark, and a clear path also makes your home look inviting. What if I am not hosting a party? The essentials stay the same: safe walkways, a clean entry for trick-or-treaters, a tidy kitchen for candy, and a stocked bathroom. Skip only the extra party prep. How do I clean decorations that sat in storage? Wipe hard items such as plastic pumpkins and ceramic figures with a damp cloth, and freshen fabric pieces in the dryer on an air-only cycle to remove dust. Should I clean before or after decorating? Clean first, then decorate. A dust-free base makes the decorations look better and keeps you from wiping around fragile pieces later. Get

Halloween Cleaning: The Secret to a Stress-Free Halloween? A Pre-Holiday Clean. Read More »

woman giving her friend a cleaning gift card

Cleaning Gift: The Most Thoughtful Thanksgiving Gift You Can Give

Thanksgiving is a holiday centered on the beautiful, simple act of gathering. It’s about the warmth of a crowded table, gifts, the familiar comfort of shared recipes, and the expression of gratitude for the people in our lives. We plan menus, we brine turkeys, and we coordinate who will bring which dessert. But beneath this joyful preparation lies a silent, often stressful, and monumental task that almost always falls on the host: the pre-Thanksgiving deep clean. We have all felt it. The week before the guests arrive is a frantic race against the clock. It is a period of scrubbing, dusting, and mopping, driven by the quiet but intense pressure to present a home that is not just tidy, but impeccably clean. It is a labor of love, but it is labor nonetheless. It is hours spent on hands and knees, wiping baseboards and scrubbing floors, when that time could be spent perfecting a pie crust or simply taking a moment to breathe before the happy chaos begins. This year, consider a different kind of contribution. Instead of offering to bring another side dish that will crowd the refrigerator, think about giving a gift that truly serves the person you are thankful for. Consider giving the gift of a clean home. It may sound unconventional, but a pre-Thanksgiving cleaning, whether performed by you or a professional service, is one of the most thoughtful, practical, and profoundly impactful gifts you can possibly give a friend who is hosting. It is a gesture that transcends a simple present; it is a gift of time, of peace of mind, and of genuine, functional support. The Gift of Time In our busy lives, time is the most precious and non-renewable resource we have. During the holiday season, this becomes acutely apparent. The host of a Thanksgiving dinner is not just cooking a single meal; they are orchestrating a major event. Their to-do list is a marathon of planning, shopping, chopping, and baking. The last thing they have is a surplus of free hours. Let’s be honest about what a true guest-ready clean entails. It is not a quick wipe of the counters. It is a comprehensive, top-to-bottom effort. The Dusting: This means getting not just the coffee table, but the tops of the door frames, the ceiling fan blades, the baseboards, and the window sills. It is a detailed, meticulous job that can easily take an hour or more. The Kitchen Deep Clean: The kitchen is the heart of Thanksgiving, and it needs the most intensive work. This involves scrubbing the stovetop, wiping down the fronts of all appliances, cleaning the microwave, disinfecting the countertops, and making sure the sink is sparkling. This is a solid hour of focused work, at minimum. The Bathroom Scrub: The guest bathroom needs to be pristine. This means scrubbing the toilet, cleaning the sink and faucet, wiping down the mirror until it is streak-free, and washing the floor. The Floors: Every hard-surface floor in the main living areas needs to be thoroughly swept and mopped. Every carpet needs to be vacuumed, including moving furniture to get the dust bunnies hiding underneath. This can easily consume another hour or two, depending on the size of the home. The Final Touches: Cleaning entryway glass, tidying up clutter, and giving everything a final polish. When you add it all up, a proper pre-hosting deep clean can easily take five to eight hours of hard, physical work. By giving the gift of a cleaning, you are handing your friend an entire day of their life back. That is a day they can now use to finalize their menu, to bake a dessert without rushing, to spend time with their children who are excited for the holiday, or, most importantly, to simply sit down with a cup of tea and mentally prepare for the joy of hosting, rather than the stress of it. You are not just saving them a chore; you are giving them the space to enjoy the process. The Gift of Peace of Mind The physical labor of cleaning is only half the battle. For any host, the mental load can be even more exhausting. The pressure to have a “perfect” home is a real and often unspoken source of anxiety. Every dust bunny in the corner, every smudge on the window, and every crumb under the dining table can feel like a personal failing when you are about to welcome people into your home. This “hosting anxiety” creates a mental checklist that runs on a constant loop in a host’s mind. Did I remember to dust the lampshades? Is the guest bathroom clean enough? Does the house smell fresh? This internal monologue is a significant source of stress that detracts from the true spirit of the holiday. When you give the gift of a clean home, you are silencing that nagging voice. You are taking a huge, stressful item off their mental checklist and completely erasing it. Imagine the profound sense of relief your friend will feel, walking into their home a day or two before Thanksgiving to find that it is already done. The floors are gleaming. The kitchen is sanitized and ready for the culinary marathon. The bathroom is sparkling. This gift allows your friend to transition their focus from the presentation of their home to the purpose of the gathering. They can channel all their energy into what truly matters: the food, the conversation, and the connection with their loved ones. They can be a present, relaxed, and joyful host, not a frazzled, exhausted one who is secretly worrying about whether a guest noticed the dust on the baseboards. You are not just cleaning their house; you are clearing their mind. A Foundation for the Entire Holiday Season Thanksgiving in many ways is the official kick-off to the entire winter holiday season. The festivities of November flow directly into the preparations for December. A deep clean for Thanksgiving is therefore not just a gift for a single day; it is a foundational gift that keeps on

Cleaning Gift: The Most Thoughtful Thanksgiving Gift You Can Give Read More »

5 Rust Removal Tips: The Ultimate Solution for Stubborn Rust Stains

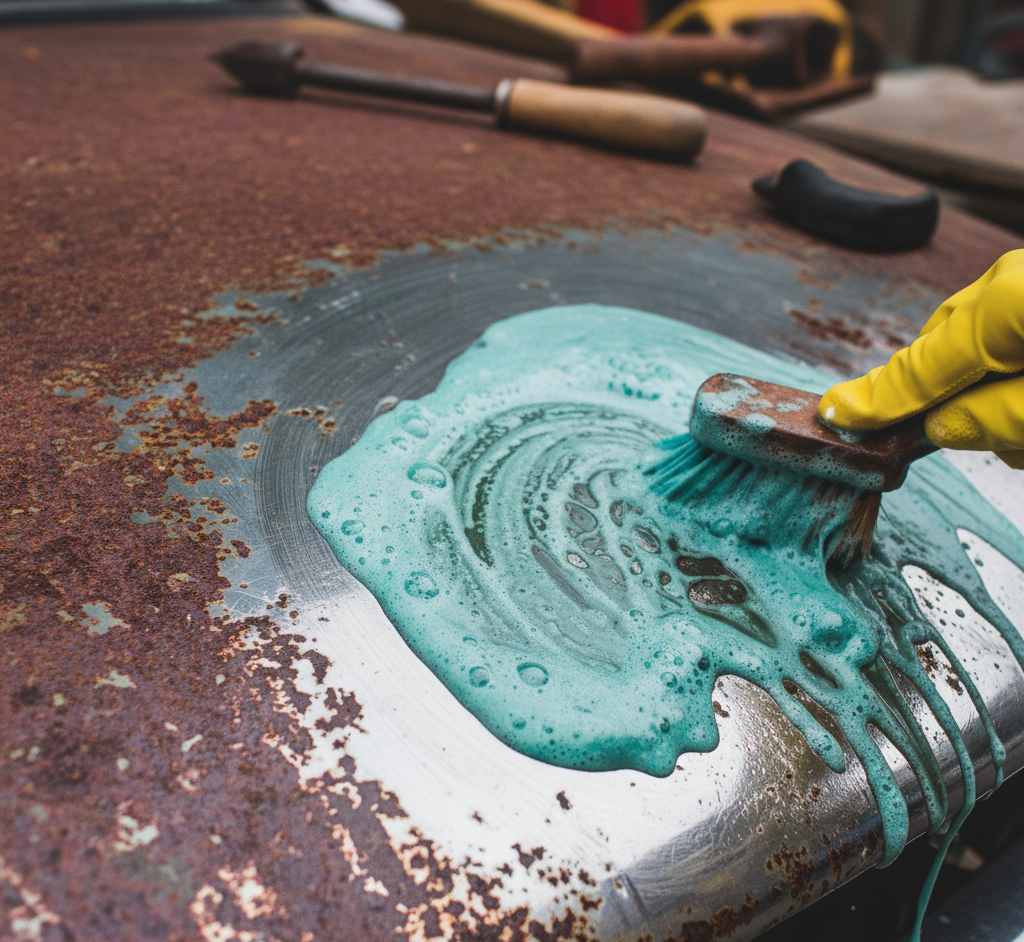
Rust Is Eating Your Metal, and a Sponge Alone Will Not Stop It Rust creeps into bathrooms, kitchens, garages, and patios without warning, staining fixtures, seizing tools, and quietly weakening the metal you depend on. The familiar reddish-brown mark is more than cosmetic. Rust is an active chemical reaction that eats away at metal and leaves discoloration ordinary scrubbing cannot lift. Controlling it takes two coordinated moves: eliminating the conditions that let it form, and matching the right removal technique to the surface you are cleaning. What Rust Actually Is In everyday terms, iron oxide is what we call rust. It appears through oxidation, whenever iron or a steel alloy stays in contact with oxygen and water too long. Add salt and the process accelerates: vehicles in cities with salted winter roads deteriorate faster. The recipe is always the same: metal, oxygen, moisture. You cannot remove the object or the air, so every effective prevention plan comes down to one goal: moisture control. Where Rust Attacks a Home Bathrooms. The epicenter. Toilet bowl rings usually trace back to iron in the supply water or aging cast iron pipes, and corroding parts inside the tank add their own marks. Wet shower caddies, the damp base of a shaving cream can, and a stray bobby pin all stain porcelain and fiberglass, while drains, shower heads, and faucets corrode over time. Kitchens. A stainless sink resists rust but is not immune: leave a wet cast iron pan or a soaked pad of steel wool in the basin and marks follow. Cast iron cookware depends on its seasoning, a layer of polymerized oil, or it oxidizes almost on contact with air. Chipped vinyl on a dishwasher rack exposes metal that can spot your clean dishes. Laundry rooms. Metal buttons, zippers, and rivets transfer marks onto other garments mid-cycle, as does a forgotten nail or screw in a pocket. Garages, basements, patios. Steel hand tools corrode fast in damp storage. Paint-scratched wrought iron or steel patio furniture starts flaking, and grill grates endure a constant cycle of heat and moisture. Tip 1: Stop Rust Before It Starts The cheapest repair is the one you never need. Keep surfaces dry: wipe the kitchen sink after the dishes, run a squeegee over shower walls after use, and dry tools before storage. Run the bathroom exhaust fan during and after showers, and put a dehumidifier in a damp basement. Coat outdoor furniture, railings, and grills in corrosion-inhibiting paint, inspect those pieces yearly, and touch up chips immediately. A light film of machine oil shields tools, and a maintained seasoning layer shields cast iron. Never park wet metal on susceptible surfaces: no damp cans on the tub ledge, no pans soaking overnight in the sink, no wet steel wool on the counter. If fixtures keep staining after cleaning, the water may be the culprit, and a water softener or iron filter on the house supply is worth considering. Tip 2: Dissolve Light to Moderate Rust with Natural Acids Mild acid dissolves iron oxide, which makes your pantry a capable workshop. Soak small items, like tools, nuts, and bolts, in white vinegar for several hours or overnight, then brush off the dissolved corrosion. On gentler surfaces such as fabric or countertops, work in a paste of lemon juice and salt: citric acid breaks the buildup down while the salt acts as a mild abrasive. For the mildest option, spread baking soda into a thick paste with water, let it sit a few hours, then scrub. And for light surface rust on a knife, halve a potato, dip the cut end in dish soap or baking soda, and rub hard, because potatoes carry oxalic acid that dissolves the layer. Tip 3: Scrub Heavy Corrosion Off Durable Metal When buildup is thick and flaky, physical abrasion wins, but it scratches, so reserve it for surfaces where the finish is irrelevant, like old tools or grill grates. A wire brush, sandpaper, steel wool, or even foil crumpled into a ball will strip oxidation away. Start with a little water or oil as lubricant, move from coarse grit to fine, then wash, dry, and coat the bare metal right away or the rust returns immediately. Tip 4: Reach for Chemical Removers on Stubborn Cases Commercial products use stronger acids, typically oxalic or phosphoric, to dissolve corrosion faster than pantry remedies. Bar Keepers Friend, powered by oxalic acid, handles porcelain and stainless steel, and gel and spray formulas exist for heavy-duty jobs. Treat them as the powerful chemicals they are: gloves on, eyes protected, air moving, and the manufacturer’s label followed exactly. Health Canada’s page on using household chemicals safely covers buying, storing, and handling acidic cleaners around family. Tip 5: Match the Method to the Surface Different materials demand different tactics, and the wrong one can make a stain permanent. Surface Best removal method Watch out for Clothing and fabric Lemon juice and salt first; if that fails, a commercial laundry stain remover made for rust. Never chlorine bleach. It reacts with iron oxide and can set the stain forever. The CDC’s guide to disinfecting with bleach also warns against mixing it with other cleaners. Porcelain and ceramic sinks, tubs, toilets A wet pumice scouring stick lifts reddish rings without scratching the glaze, or use a Bar Keepers Friend and water paste. Metal scrapers that gouge the finish. Concrete garage floors and driveways Trisodium phosphate (TSP) solution worked in with a stiff brush lifts the discoloration. Gloves and ventilation when handling TSP. Small steel tools, nuts, bolts Overnight vinegar soak, then brush. Dry and oil the metal after soaking. Grill grates, old hand tools Abrasive scrubbing, coarse to fine. Coat cleaned metal immediately. Rust Removal FAQ How long should something soak in vinegar to remove rust? Several hours handles light corrosion; overnight works through heavier buildup. Scrub off the softened residue, rinse, and dry the item completely. Will baking soda remove rust? On mild cases, yes. A thick baking soda-and-water paste left for

5 Rust Removal Tips: The Ultimate Solution for Stubborn Rust Stains Read More »

The Benefits of Hiring a Professional

Post-Construction Cleaning: 3 The Benefits of Hiring a Professional

Post-Construction Cleaning: The Final Step That Makes a Renovation Livable The day the contractors pack up is not the day your space is ready to live in. Between the finished drywall and the first evening on the new couch sits a layer of fine dust, sticker residue, paint splatter, and debris that no ordinary cleaning routine was built to handle. Post-construction cleaning is a specialized discipline: a top-to-bottom reclamation project that turns a hazardous worksite into a clean, breathable home. Here is what makes the job so demanding, the three-phase process professionals follow, and the equipment it takes to do it right. What Makes Construction Debris Different from Everyday Dirt Construction dust is not the soft fluff that gathers on bookshelves. It is a fine, gritty, abrasive particulate cocktail of drywall compound (gypsum), plaster, sawdust, cement powder, and silica. The particles are light enough to go airborne at the slightest disturbance, travel through HVAC systems, and settle in a uniform, ghostly layer on every surface: inside cabinets, on top of door frames, within light fixtures, on ceiling fan blades, and deep in the fibers of any existing carpet. Because this dust is a significant respiratory irritant, removing it completely is a health matter, not just an aesthetic one. Health Canada’s overview of indoor air contaminants explains why dust and construction-stage chemicals deserve serious removal, not a quick sweep. Beyond the dust, a finished job site holds stray nails, orphaned screws, wood and drywall offcuts, plastic shavings from plumbing work, and hardened blobs of caulk or adhesive. New windows, appliances, and fixtures arrive covered in protective plastic films and manufacturer stickers that leave stubborn, sticky residue. There are almost always errant paint splatters on hinges, glass, or flooring, and ladder scuffs on brand-new baseboards. A household all-purpose cleaner and a roll of paper towels will only smear this grime and risk permanent damage to expensive new surfaces. The Three-Phase Post-Construction Cleaning Process A truly effective post-construction clean is systematic, not one chaotic wipe-down. Each phase builds on the last so no detail is overlooked. Phase When it happens Main focus Rough clean During the final days of construction or right after the contractors leave Bulk debris removal, peeling protective films, first heavy vacuum pass Deep clean Once the space is free of major hazards and clutter Top-to-bottom cleaning of every surface, inside and out Final touch-up 24-48 hours after the deep clean, before furniture arrives Light vacuum, horizontal surfaces, smudge check on glass and fixtures Phase 1: The Rough Clean This stage clears the battlefield. The crew collects, removes, and properly disposes of all large trash and debris, from wood scraps and leftover materials to hardware packaging and cardboard. Large piles of drywall dust and sawdust are scraped and swept from the floors, every protective plastic film is peeled off windows, doors, appliances, and fixtures, and a heavy-duty shop-vac takes a preliminary pass over the thickest dust layers. The space still looks dirty when this phase ends, but it is now safe and accessible for detailed work. Phase 2: The Deep Clean The deep clean is the heart of the process, and it follows one guiding principle: start high and work down, so dislodged dust only ever falls onto surfaces you have not yet cleaned. Ceilings, walls, light fixtures, ceiling fans, and recessed lighting are wiped first, then the tops of door frames, window casings, and molding. Both sides of every window and glass door are cleaned, with paint splatters, caulk, and sticker residue lifted off by a professional razor scraper, while sills and tracks give up their surprising haul of sawdust. Doors are wiped completely, including hinges, knobs, and the often-forgotten top edge. Trim, baseboards, built-in shelving, and every cabinet, cupboard, and drawer are cleaned inside and out, which matters before clean dishes, food, or linens move in. In the kitchen and bathrooms, countertops are cleaned and disinfected following CDC guidance on cleaning and disinfecting your home, sinks and faucets are freed of plumber’s putty, appliances are wiped inside and out, and showers, tubs, toilets, mirrors, and chrome are polished to a shine. Floors come last: edges and corners with a vacuum crevice tool, hard surfaces vacuumed and mopped in multiple passes with fresh water, and carpets gone over with a commercial-grade vacuum in several directions to pull fine dust from the pile. Phase 3: The Final Touch-Up After the intensive deep clean, the space rests for 24-48 hours so any airborne dust stirred up during cleaning settles one last time. The final pass is deliberately light: another quick vacuum of floors and carpets, a wipe of countertops, tables, and window sills, and a close check for smudges on glass, mirrors, and shiny fixtures. The goal is a pristine, move-in-ready space that feels brand new from every angle. The Equipment a True Post-Construction Clean Requires None of this works with standard household supplies. The essential toolkit looks like this: Shop-vac with a HEPA filter: The most crucial piece. Household vacuums clog on fine dust and often exhaust microscopic particles straight back into the air, while a HEPA filter traps them permanently. A large supply of microfiber cloths: Their split fibers trap and hold dust instead of smearing it the way cotton rags and paper towels do. A-frame ladders and extension dusters: For safe, effective reach to high ceilings, fixtures, and cabinet tops. Plastic and razor-blade scrapers: For stubborn stickers, paint, and caulk without damaging new surfaces. Appropriate cleaning solutions: A kitchen degreaser, a pH-neutral floor cleaner safe for your specific new flooring, and a mineral deposit remover for bathroom fixtures. Frequently Asked Questions About Post-Construction Cleaning Can I skip the rough clean and go straight to a deep clean? No. Bulk debris and protective films have to come out first. Scrubbing around piles of nails, cardboard, and thick dust wastes effort and risks scratched or permanently stained surfaces. Why wait 24-48 hours before the final pass? Cleaning agitates fine particles into the air, where they hang for a day

Post-Construction Cleaning: 3 The Benefits of Hiring a Professional Read More »

a clean and organized garage

Garage Cleaning: 5 Effective Strategies to Keep Your Garage Organized

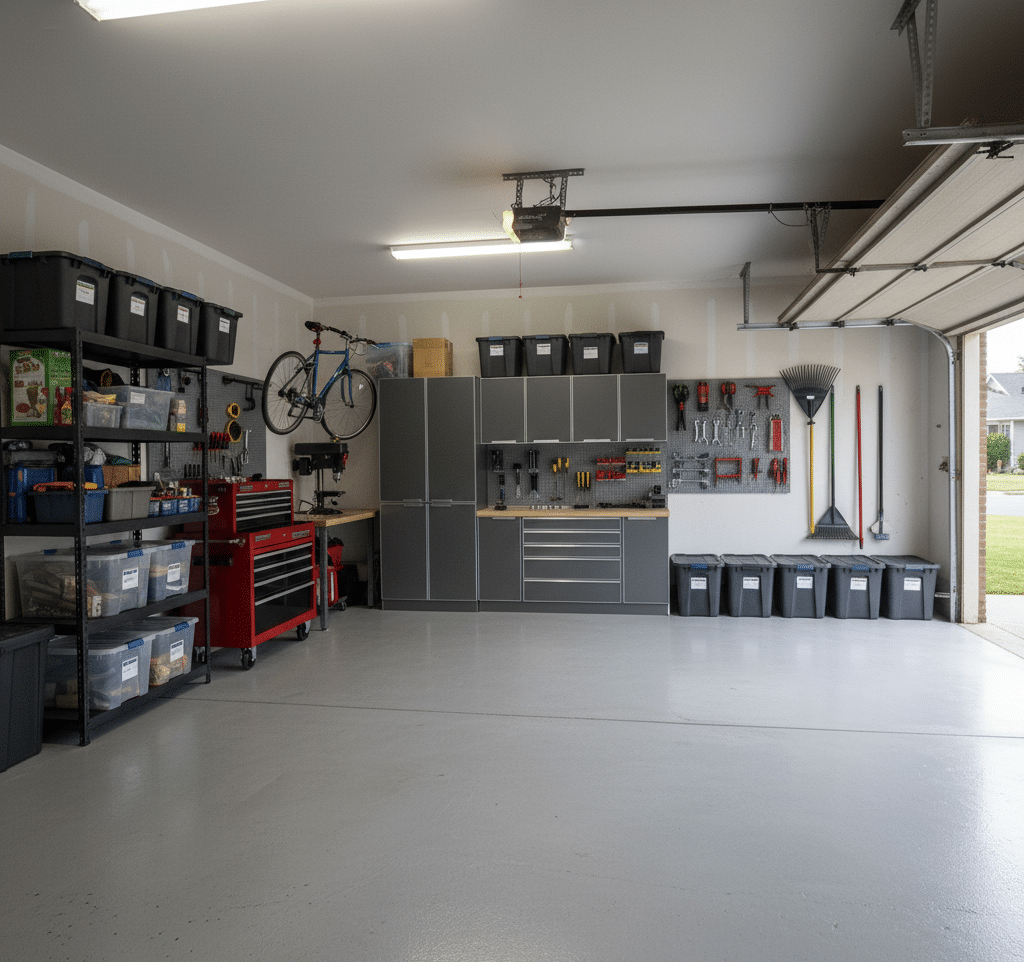
The garage is the forgotten room. It is the one space in the home that is allowed to descend into a state of organized, and then disorganized, chaos. It begins as a home for your car, a place for your tools. But slowly, inevitably, it becomes the household’s dumping ground. It is the final destination for items that have no other place: the broken lawnmower, the half-empty cans of paint, the boxes from a move that happened five years ago, the sporting equipment for a hobby long since abandoned. Before you know it, parking a car inside is a distant memory, and finding a specific screwdriver requires an archaeological dig. Cleaning the garage is not like cleaning a kitchen. It is not a simple task of wiping surfaces and mopping floors. It is a project. It is an act of reclamation, of taking back a significant portion of your home’s square footage and returning it to a state of function and purpose. It is a process that can feel overwhelming, but when broken down into a systematic, manageable plan, it is entirely achievable. This is not about a quick tidy-up; this is about a full-scale reset. 1.Preparation and Strategy Before a single box is moved, the project must be planned. The single biggest mistake people make when tackling a garage is underestimating the scope of the job. This is not a two-hour task. For the average cluttered garage, you need to dedicate an entire weekend. Block it out on your calendar. Arrange for kids or pets to be elsewhere. Treat it with the seriousness of a home renovation project, because in many ways, it is. The second part of preparation is gathering your supplies. Going into this battle unarmed is a recipe for frustration and failure. You will need a specific set of tools for sorting, and another for the deep cleaning that will follow. For Sorting and Decluttering: Heavy-Duty Trash Bags: You will generate more trash than you think. Get more bags than you think you will need. Sturdy Boxes or Bins: These will be for items you intend to keep, donate, or sell. A Labeling System: A thick permanent marker and either labels or masking tape are essential. Every box must be clearly marked with its intended destination. For Cleaning: Safety Gear: At a minimum, you need heavy-duty work gloves to protect your hands from dirt, sharp objects, and chemicals. A dust mask is also critical, as you will be kicking up years of dust, dirt, and potentially mold spores. Safety glasses are a good idea, especially when sweeping and dealing with chemicals. Broom and Dustpan: A stiff-bristled push broom is ideal for the large floor surface. Shop-Vac: A standard household vacuum is no match for a garage. A shop-vac can handle everything from fine dust and sawdust to dead leaves, cobwebs, and small debris. Buckets: You will need at least one large bucket for your cleaning solution. Scrub Brushes: A long-handled deck brush is excellent for the floor, and a smaller, handheld stiff brush is good for corners and stubborn spots. Cleaning Agents: A heavy-duty degreaser is non-negotiable for tackling oil and fluid stains on the concrete floor. You may also want a powdered concrete cleaner or a simple, strong all-purpose cleaner. Rags and Sponges: A large supply of old rags is necessary for wiping down surfaces and for the final detailing. 2.Evacuation and Purge The most effective, albeit intimidating, method for decluttering a garage is to remove everything. Every single item must come out. The goal is to get the garage completely empty, creating a blank canvas for the deep clean and a forcing mechanism for decision-making. Wait for a clear, dry day and use your driveway as a staging area. As you pull items out, immediately begin sorting them into four distinct categories. This is where your boxes and labels come into play. Keep: This category is exclusively for items that you use, need, and that belong in the garage. Be ruthless. If you haven’t used a tool in over a year, do you really need to keep it? Is that box of old cables for electronics you no longer own providing any value? The garage is functional space, not a museum of past projects. Donate/Sell: These are items that are in good, usable condition but no longer serve a purpose for you. Old sporting equipment, tools you have duplicates of, functional but unused garden supplies. Place these directly into designated boxes. Once a box is full, tape it shut and label it. This prevents you from second-guessing your decisions. Trash/Recycle: This will likely be your largest category. Be prepared to fill several bags. This includes broken tools, expired chemicals, dried-up paint, rotten wood, and anything that is simply junk. Pay close attention to hazardous waste. Old paint, motor oil, pesticides, and other chemicals cannot simply be thrown in the regular trash. Check with your local municipality for hazardous waste drop-off locations and procedures. Group these items together for a separate, responsible disposal run. Relocate: You will inevitably find things that do not belong in the garage. Kitchen appliances, sentimental photo albums, out-of-season clothing. These items have been stored in the garage out of convenience, not logic. Put them in a “Relocate” box to be moved to their proper place inside the house later. Do not get sidetracked by taking them inside now; stay focused on the garage purge. As you work, you will be tempted to create a “maybe” pile. Resist this urge. Indecision is the enemy of progress. If you truly cannot decide on an item, place it in a single “quarantine box.” Seal the box and write a date on it six months in the future. If you have not needed to open that box by that date, take the entire unopened box directly to a donation center. 3.The Deep Clean With the garage completely empty, you can now see the true state of the space. It is time for the top-to-bottom clean. This is a fundamental principle of cleaning: start high and work your way

Garage Cleaning: 5 Effective Strategies to Keep Your Garage Organized Read More »

5 Mistakes You Need To Stop Making When Using The Duster

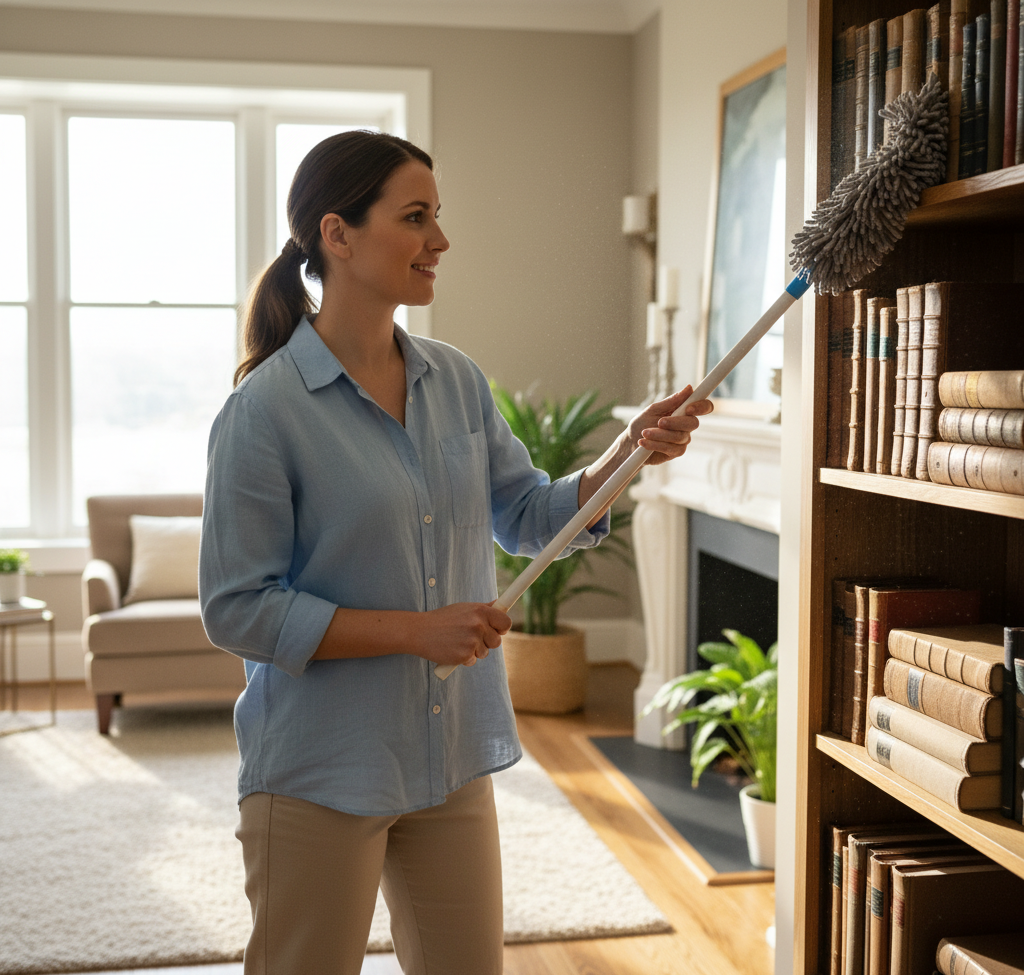
5 Mistakes You Need To Stop Making When Using The Duster Dust is an unavoidable reality of every indoor space: a shifting mix of dead skin cells, fabric fibers, pollen, pet dander, soil tracked in from outside, and even microscopic meteorite debris. It settles on every horizontal surface as a fine gray layer that dulls your home’s look and quietly degrades indoor air quality; for people with allergies or asthma it is a genuine health concern, since it harbors dust mites and other allergens. The duster is your primary weapon, but most people use it badly. The goal of effective dusting is to capture dust and remove it from the environment entirely, not to move it from one surface to another. Here are the five mistakes to stop making. Mistake 1: Trusting a Feather Duster The feather duster, usually made from ostrich, turkey, or chicken feathers on a handle, is the iconic image of dusting and the least effective tool on this list. Its feathers trap little dust; their main action is dislodging particles and sending them airborne to resettle elsewhere minutes or hours later. A high-quality ostrich feather duster performs slightly better because the fine, interlocking barbules create a minor static charge, but it still mostly displaces rather than captures. For a truly clean home, the feather duster is closer to a decorative antique than a working tool. Mistake 2: Using One Duster for Every Surface The real revolution in dusting was microfiber: a synthetic blend of polyester and polyamide (nylon) whose fibers are split into strands many times smaller than a human hair, creating enormous surface area. The split-fiber net physically traps dust, dirt, and even bacteria, and used dry, it generates a positive static charge that pulls in negatively charged dust particles. No chemical sprays are needed. The right lineup covers the whole house: Handheld microfiber dusters: the everyday workhorse for furniture, electronics, picture frames, and general surfaces, with flexible heads that bend under ceiling fan blades and on top of tall bookcases. Extendable dusters: a telescoping pole reaches ceilings, light fixtures, high corners, and cabinet tops, eliminating the stepladder and the neck and shoulder strain of overhead work. Slim or flat dusters: a long, thin profile slides under refrigerators and ovens, between cabinets, and alongside the washer and dryer, where thick layers of unseen dust and lint collect. Microfiber cloths: dry for delicate surfaces, lightly dampened for smudges and stubborn grime without streaks. Lambswool dusters: genuine sheep’s wool contains lanolin, a natural oil that together with the wool’s static charge actively attracts and holds dust instead of pushing it away, making them excellent and gentle on large flat surfaces like tables and shelves. Disposable dusters: a reusable handle with throwaway synthetic heads that trap dust by static; convenient for light, regular dusting, but less environmentally friendly and more expensive over the long term than washable microfiber. Mistake 3: Dusting in the Wrong Order Technique matters as much as the tool, and the single most important principle is to work from top to bottom, because gravity carries any dislodged dust downward. Dusting should come before anything else in a room: wipe lower surfaces and vacuum only after you finish. Start at the highest points: ceiling corners, light fixtures, and fan blades, using an extendable duster. Move down to cabinet tops, bookcases, and wall shelves, then picture frames, window sills, tables, desks, and dressers. Finish at the baseboards and only then vacuum the floor to capture whatever settled. Health Canada’s overview of indoor air contaminants and health is a good reminder that settled dust is tied to the particulates you breathe, so order and method genuinely reduce exposure. Mistake 4: Swiping Aggressively and Ignoring Tricky Surfaces Let the fibers make contact with the surface and lift the dust; aggressive swiping just sends it flying. For heavily dusted surfaces, a slow, single-direction pass works best. Then adjust by surface: Surface What to Do Instead Blinds Use a multi-pronged duster that cleans several slats at once, or close the blinds, dust the whole surface with a handheld duster, reverse the slats, and dust the other side Electronics Turn off and unplug first; TVs and computers build static fields that attract dust. Wipe screens and casings with a clean, dry microfiber cloth, blow dust from keyboards and vents with compressed air, then wipe again Delicate items A very soft, clean paintbrush or new makeup brush works as a precision duster on chandeliers, collectibles, and artificial plants, lifting dust without damage Mistake 5: Never Cleaning the Duster Itself A duster saturated with dust cannot pick up more; it simply spreads the old load around. Cleaning the tool is part of the routine, not an afterthought. The CDC’s guidance on when and how to clean and disinfect your home makes the same point about surfaces: cleaning first is what makes everything else work. Microfiber wins here, since most duster heads are removable and machine washable: wash with regular detergent but no fabric softener, which clogs the microscopic fibers and destroys the static-trapping ability, then air-dry or tumble on low heat. For a lambswool duster, spin it outdoors between your hands to release loose dust, then hand-wash in lukewarm water with mild detergent, rinse thoroughly, and air-dry. How Often Should You Dust? Dusting is continuous maintenance, not a one-time task. For most homes, thorough dusting once a week keeps levels under control. Homes with pets or allergy sufferers, neighborhoods with high pollen counts, and areas near construction need more frequent passes. A consistent routine removes the allergens and particles that affect well-being, not just the visible film. For a comprehensive clean that catches dust from crown corners to the tightest crevices, our regular maid service builds systematic dusting into every visit, and a seasonal deep cleaning clears the accumulated layers. Frequently Asked Questions About Dusting What is the best duster for allergies? A microfiber duster, used dry. Its split fibers and static charge capture dust, dander, and even bacteria rather than displacing them

5 Mistakes You Need To Stop Making When Using The Duster Read More »

getting ready for fall cleaning

September Cleaning: 7 Quick And Easy Steps To Get Ready For Fall

Why September Is the Month to Reset Your Home In Canada, September closes out summer and opens the long indoor season. The house needs more than a dust-off: it needs a cleanout that removes the clutter and grime of the warm months and readies every room for the weeks when windows stay shut and family time moves inside. A systematic September cleaning pays off twice, once in a healthier, calmer home right away and again in easier living all winter. Work in order, from planning and decluttering through room-by-room detail, and the whole project becomes manageable instead of overwhelming. Plan the Project Before You Spray Anything Start by scheduling time blocks for each area or task type, which turns a mountain into a list of afternoon-sized steps. Then take inventory of your supplies so you are never hunting for a bottle mid-task. Microfiber cloths, a vacuum with attachments, a mop, buckets, and protective gloves All-purpose cleaner, disinfectant, glass cleaner, bathroom cleaner, and floor cleaner Eco-friendly, non-toxic products if children, pets, or allergy sufferers live in the house Declutter First With the Three-Box Method Every room gets sorted before any cleaning starts, using three boxes: keep and organize, donate or sell, and trash or recycling. Begin with summer gear, so beach equipment, garden decorations, and warm-weather clothes get packed away. Work through clothing, toys, books, and stationery; clear the pantry and refrigerator of expired food and regroup what stays; gather papers and magazines into categories; and rotate the wardrobe so autumn layers sit at the front. Fewer objects means less dust to chase and fewer surfaces to wipe. When you finish, deliver the donation box the same week so it does not become clutter again. Kitchen Deep Clean for the Season The kitchen earns the most attention because it feeds everyone. Clean the oven interior and its grease and residue, wash the microwave inside and out, and empty the refrigerator fully, wiping shelves and drawers with mild soap and water. Run the dishwasher on a vinegar cycle to clear deposits and odours. Wipe cabinets and drawers inside and out, scrub countertops and backsplashes, disinfect the sink and faucets, and freshen the garbage disposal. Finish by mopping or steaming the floor. Bathrooms, Bedrooms, and Living Areas Bathrooms Scrub toilets, showers, and tubs, and attack the tile grout where mold and mildew settle. Wash or replace the shower curtain and liner, clean mirrors and light fixtures, disinfect every contact point from faucets to doorknobs and switches, then wash and disinfect the floor. Toss expired products from the medicine cabinet while you are in there. Excess moisture is what invites bathroom mold in the first place, and Health Canada’s advice on reducing humidity, moisture, and mould is worth applying to every damp room before winter closes the house up. Bedrooms Launder all sheets, duvets, and blankets along with the curtains. Vacuum the mattress and flip or rotate it to extend its life. Dust furniture, light fixtures, and ceiling fans, vacuum or mop including under the bed, and rebuild the closets with the seasonal clothing swap you prepped during decluttering. Living spaces Dust every piece of furniture, electronic, and decorative item, vacuum or shampoo the upholstery, clean the windows and the blinds or curtains covering them, and refresh the floors. Give extra passes to remote controls, light switches, and doorknobs, the surfaces everyone touches and nobody cleans. Entryways, Laundry Room, and the Spots Everyone Forgets Hallways and entryways take the first hit from outdoors, so clear shoe racks and coat hooks, wipe scuff marks off the walls, and vacuum or mop deeply to lift tracked-in mud and debris. In the laundry room, wipe the washer and dryer exteriors, scrub the dryer lint trap thoroughly for efficiency and fire safety, wash the utility sink, and organize detergents. Then walk the house for the overlooked list: Area September task Why it matters before winter Windows Clean inside and out Maximizes the weak natural light of the darker months HVAC filters Clean or replace Indoor air quality suffers once windows stay closed, and Health Canada’s overview of indoor air contaminants explains the health stakes Walls, baseboards, doors, and frames Wash away marks and dust Trapped grime ages fast under winter heating Light fixtures and ceiling fans Dust and wash Dull fixtures dim every room Trash cans and small appliances Disinfect bins; wash toaster, coffee maker, kettle Odours build quickly in closed-up houses Patio furniture, barbecue, bikes, garden tools Clean, then store Protects equipment through freeze-thaw weather Carpets and rugs Deep clean Removes summer grit before winter traffic grinds it in Maintenance: Keep the Reset From Slipping The September clean buys you a fresh baseline; daily habits defend it. Reinforce quick mini-cleaning sessions after dinner, hold a weekly schedule that rotates deeper tasks room by room, and do a seasonal check-in each quarter to adjust for what the new weather demands. Smart storage solutions protect your organization gains, and delegating tasks among household members keeps the workload shared instead of dumped on one person. September Cleaning FAQ How long does a full September cleanup take? Most homes need several sessions across one or two weekends once you plan, declutter, and clean room by room. Time-blocking the rooms in advance keeps any single day from feeling impossible. Should carpets really be cleaned in the fall? Yes. Summer drags in dirt and allergens that settle deep into pile, and a clean carpet improves indoor air for the months when windows barely open and foot traffic moves indoors. What is the one step people skip most? Replacing heating and air conditioning filters. It is quick, cheap, and it does more for winter air quality than any surface scrub. When should I outsource the whole project? If the season’s cleanout lands in one packed weekend, a professional deep clean handles the rooms and details while you handle everything else. Pair it with a move-in or move-out service if the fall also brings a lease change. Treat the September reset as an investment

September Cleaning: 7 Quick And Easy Steps To Get Ready For Fall Read More »