A front-load washing machine is a marvel of modern engineering. It uses less water, is gentler on clothes, and its high-speed spin cycle extracts more moisture, reducing drying time. For all its benefits, however, it possesses a significant flaw that many owners discover too late: the tendency to develop a persistent, musty odor that can transfer to clean laundry. This smell is not a sign that your machine is broken; it is a sign that it needs a thorough cleaning. The very design that makes it so efficient, the airtight door seal and lower water usage, creates a perfect breeding ground for mold, mildew, and bacteria fed by soap scum and body soil.
Understanding how to properly clean your front-load washer is not just about eliminating odors; it’s about maintaining the machine’s performance, ensuring the hygiene of your clothes, and extending the appliance’s lifespan. A regular, deep cleaning routine is a non-negotiable part of owning a front-loader.
Understanding the Problem Areas
Before diving into the cleaning process, it’s essential to identify the key components that harbor grime and odor. Unlike top-loaders that are constantly exposed to air, front-loaders trap moisture in several key places.
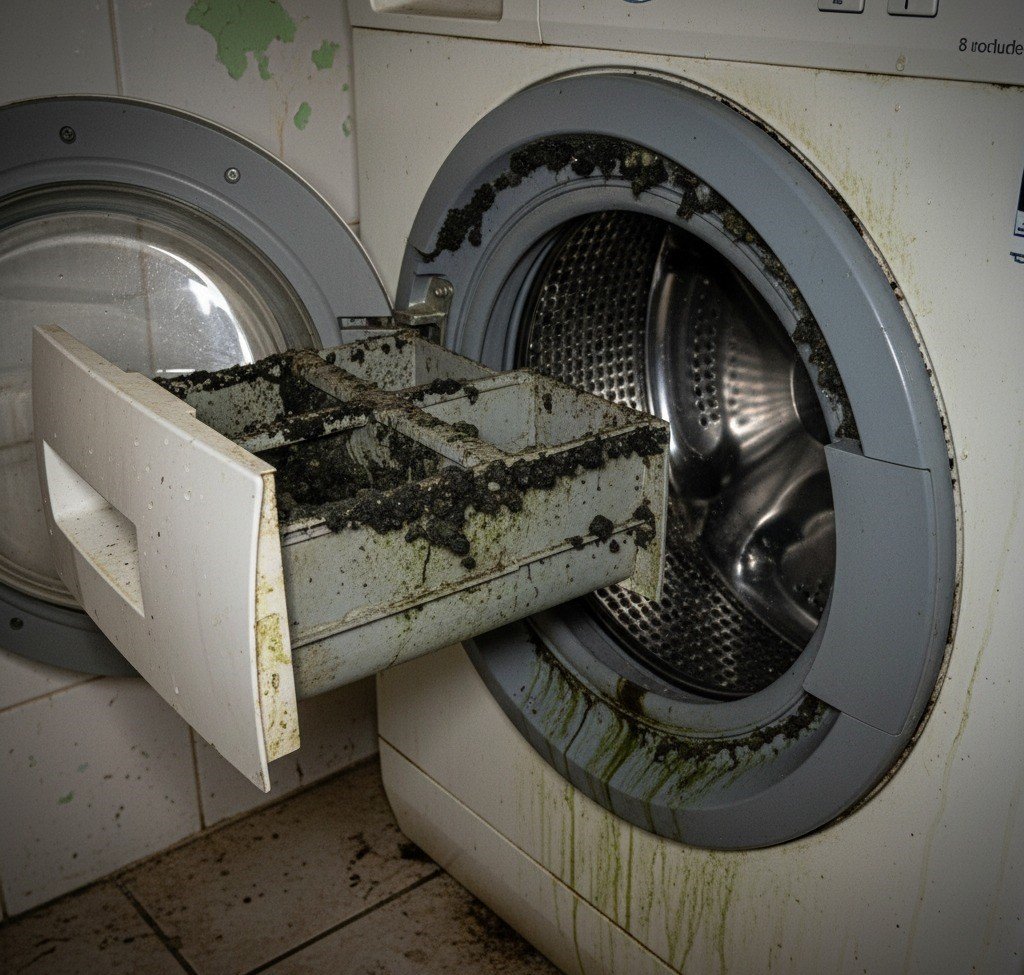
The Gasket (The Rubber Door Seal): This is the primary culprit. The flexible rubber seal, with its deep folds, traps water, lint, hair, and detergent residue after every cycle. This dark, damp, and nutrient-rich environment is an ideal incubator for mold and mildew, which manifests as black spots and a sour smell.
The Drum and Tub: While the stainless-steel drum itself is resistant to buildup, the outer, unseen tub that holds the water can accumulate a slimy film of soap scum and biofilm. This residue can break off in flakes and redeposit onto your clothes.
The Detergent Dispenser Drawer: Over time, undissolved detergent, fabric softener, and bleach can build up in the dispenser drawer and its housing. This sticky residue can also become a food source for mold.
The Filter/Drain Pump Trap: At the bottom of every front-load washer is a small trap designed to catch foreign objects like coins, buttons, lint, and hair before they reach the drain pump. If this filter is not cleaned regularly, the trapped, decomposing debris and stagnant water will create a powerful, unpleasant odor.
The Comprehensive Cleaning Process
To thoroughly clean your machine, you need to address each of these problem areas individually. Set aside about an hour of active time for this process, plus the time for the machine to run its cleaning cycles.
1. Clean the Gasket
This is the most hands-on part of the job and provides the most immediate results.
Preparation: Mix a solution of either equal parts white vinegar and water, or a solution of one gallon of water with a half-cup of chlorine bleach. Never mix vinegar and bleach. Vinegar is excellent for dissolving soap scum and killing mold, while bleach is a powerful disinfectant for stubborn mildew. For general maintenance, vinegar is often sufficient. If you see visible black mold, bleach is more effective. Wear rubber gloves to protect your hands.
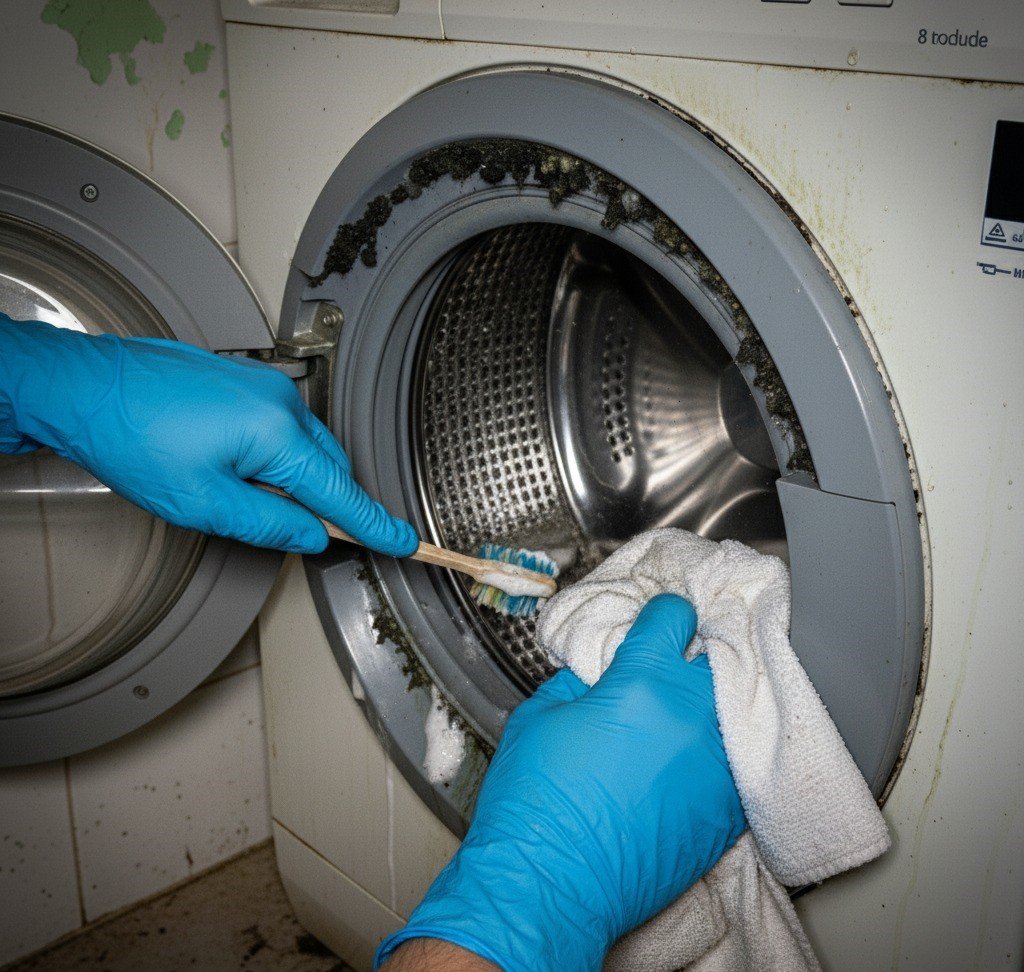
Application: Dip a clean cloth or sponge into your chosen solution. Gently pull back the rubber gasket, exposing the area between the seal and the drum. You will likely find a surprising amount of gunk. Meticulously wipe down the entire surface of the gasket, both inside and out. Pay close attention to the deep folds and the underside.
Scrubbing: For stubborn mold spots or caked-on residue, use a soft-bristled brush (an old toothbrush works perfectly) dipped in the solution to scrub the affected areas. Be firm but not so aggressive as to damage the rubber.
Rinsing and Drying: Once the gasket is clean, use a separate cloth dampened with plain water to wipe away any remaining cleaning solution. Finally, and this is a crucial step, dry the gasket completely with a clean, dry towel. Removing all moisture is key to preventing immediate regrowth of mildew.
2. Clean the Drum and Tub
This two-cycle process will clean the parts of your machine you can’t see.
Cycle 1 (The Sanitizing Cycle): Start with an empty machine. Pour one cup of chlorine bleach directly into the detergent dispenser’s bleach compartment. Do not add any detergent. Run the washing machine on the hottest, longest cycle available. Many modern machines have a dedicated “Tub Clean” or “Clean Washer” cycle; use this if available. If not, a “Heavy Duty” or “Sanitary” cycle with the highest temperature setting will work. The bleach will kill any mold, mildew, and bacteria lurking in the drum and the outer tub.
Cycle 2 (The Descaling Cycle): After the bleach cycle is complete, it’s time to remove soap scum and mineral deposits. Pour one cup of distilled white vinegar directly into the drum or into the detergent dispenser. Again, run the machine on the hottest, longest cycle. The vinegar’s acidity will dissolve any lingering residue, deodorize the machine, and help to clear out any remaining traces of bleach. This two-step process ensures you are sanitizing and descaling without creating dangerous chemical reactions.
3. Clean the Detergent Dispenser Drawer
This component is often overlooked but can be a significant source of buildup.
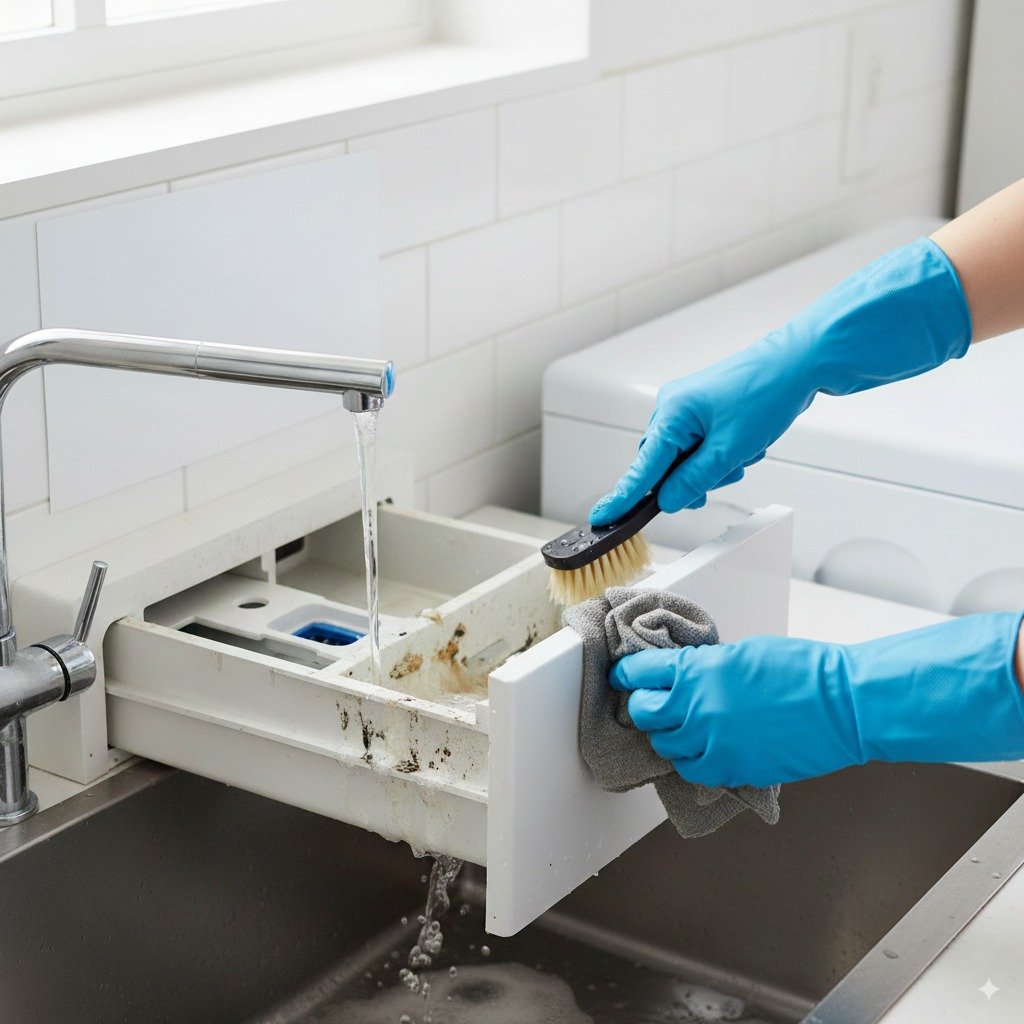
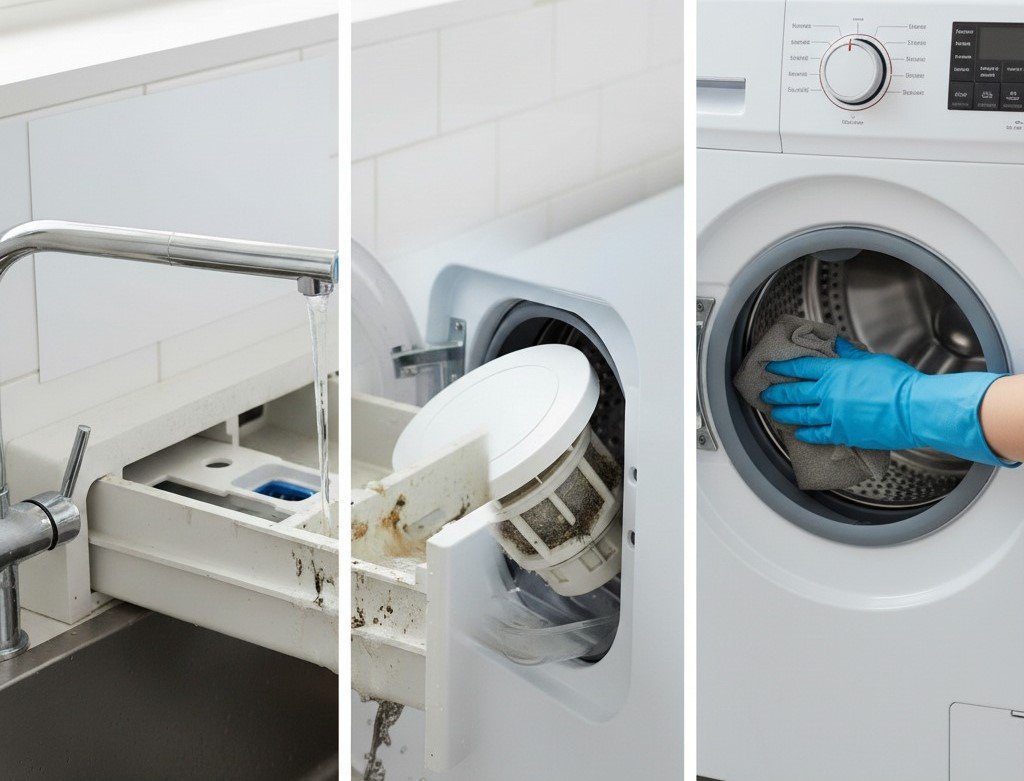
Removal: Pull the dispenser drawer out as far as it will go. There is usually a release tab or button (often marked “Push”) on the back of the drawer that you can press to remove it completely from the machine.
Soaking: Take the drawer to a sink and soak it in hot water and white vinegar for about 30 minutes. This will help to loosen any caked-on detergent and fabric softener.
Scrubbing: Use a small brush to scrub all the compartments of the drawer, removing any residue. Pay attention to the small channels and the underside of the components.
Cleaning the Housing: While the drawer is soaking, use your brush and cleaning solution to scrub inside the drawer housing on the machine itself. Mold can often grow on the “ceiling” of this cavity.
Rinsing and Drying: Rinse the drawer thoroughly with warm water, dry it completely, and slide it back into place until it clicks.
4. Clean the Filter/Drain Pump Trap
This is arguably one of the most important steps for odor elimination and machine maintenance. Check your machine’s manual for the exact location and procedure, but it’s generally straightforward.
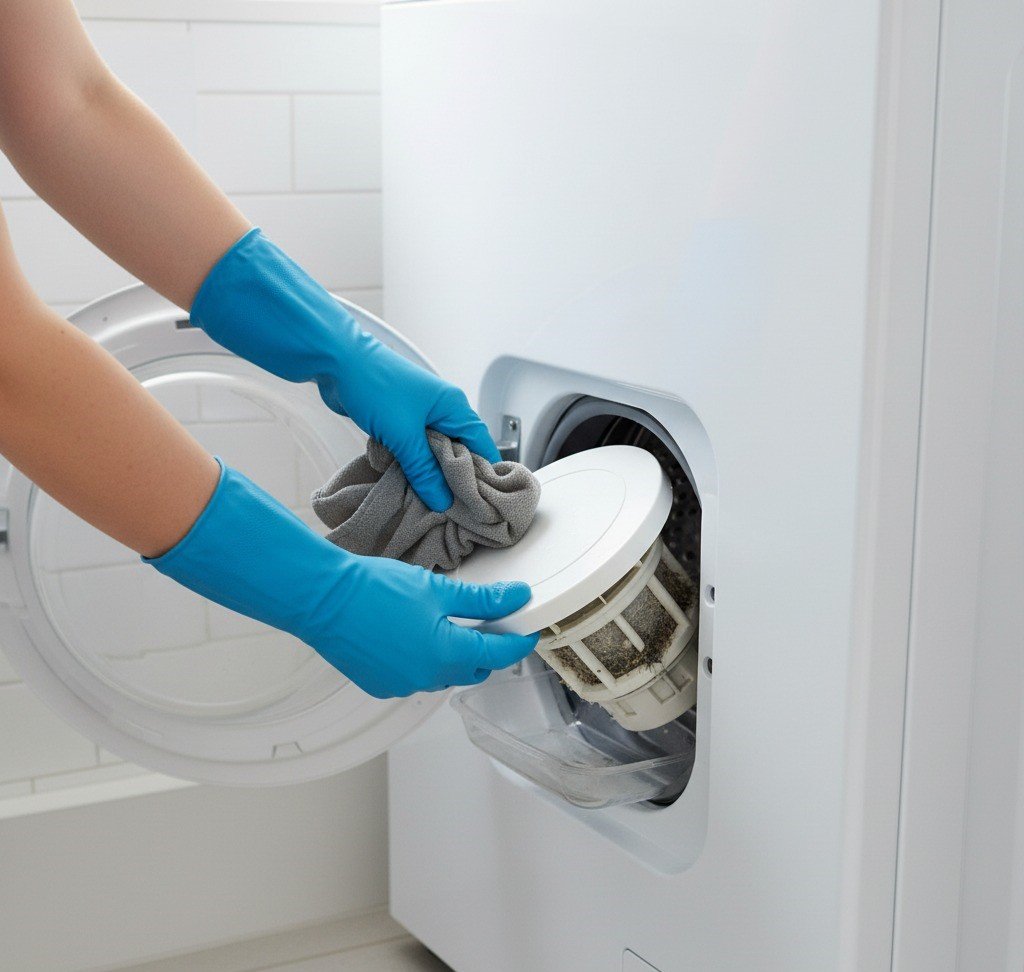
Locate the Filter: The filter is usually located behind a small access door on the bottom-front of the washing machine.
Prepare for Water: Place a thick towel on the floor and have a shallow pan or tray ready. When you open the filter, a small amount of trapped water will drain out.
Drain and Remove: Slowly and carefully unscrew the filter cap. Allow the water to drain into your pan. Once the water has stopped flowing, you can fully remove the filter.
Clean the Filter: Pull out any lint, hair, coins, buttons, or other debris. You may be shocked at what you find. Rinse the filter thoroughly under running water. Use a paper towel to wipe out the inside of the filter housing on the machine.
Replace Securely: Screw the filter back into place, ensuring it is tightened securely to prevent leaks. Close the access door.
Preventative Maintenance
After your deep clean, the goal is to prevent the problem from returning. Integrating these simple habits into your laundry routine will make a world of difference.
Leave the Door Ajar: After every single wash, leave the washing machine door open. This allows air to circulate inside the drum and gasket, drying out residual moisture and preventing the growth of mold and mildew.
Wipe the Gasket: Keep a dedicated cloth handy and give the gasket a quick wipe-down after your last load of the day. This removes any standing water from the folds.
Use the Right Detergent, in the Right Amount: Only use detergent specifically formulated for High-Efficiency (HE) machines. These detergents are low-sudsing. Regular detergents create too many suds, which can leave a residue that feeds mold. Furthermore, use only the amount recommended by the detergent manufacturer. Using more does not make your clothes cleaner; it just creates more buildup.
Remove Wet Clothes Promptly: Don’t let wet laundry sit in the machine for hours. Transfer clothes to the dryer as soon as the cycle is finished to prevent a damp, stagnant environment from developing.
Run a Monthly Cleaning Cycle: You don’t need to do the full, hands-on deep clean every time. Once a month, run an empty hot cycle with either bleach or vinegar to maintain a clean interior and keep buildup at bay.
A front-load washing machine is a significant investment that, when properly cared for, provides years of excellent service. The musty odor is not an inherent flaw but a correctable issue that arises from its high-efficiency design. By understanding the problem areas, the gasket, drum, dispenser, and filter, and committing to a routine of deep cleaning and preventative maintenance, you can ensure your machine remains fresh, efficient, and hygienic. Your clothes will come out smelling clean, not musty, and your washer will continue to perform at its best.
For those times when life gets too busy or when a machine has been neglected and requires a professional touch to restore it, the expert services of Toronto Shine Cleaning can handle the deep cleaning for you. Addressing everything from the gasket and drum to the hidden filter, a professional service ensures your front-load washer is returned to a pristine, odor-free condition.


