Cleaning Checklist

Sticker Removal

Sticker Removal: 5 Expert Tips For Removing Stickers From Different Types of Surfaces

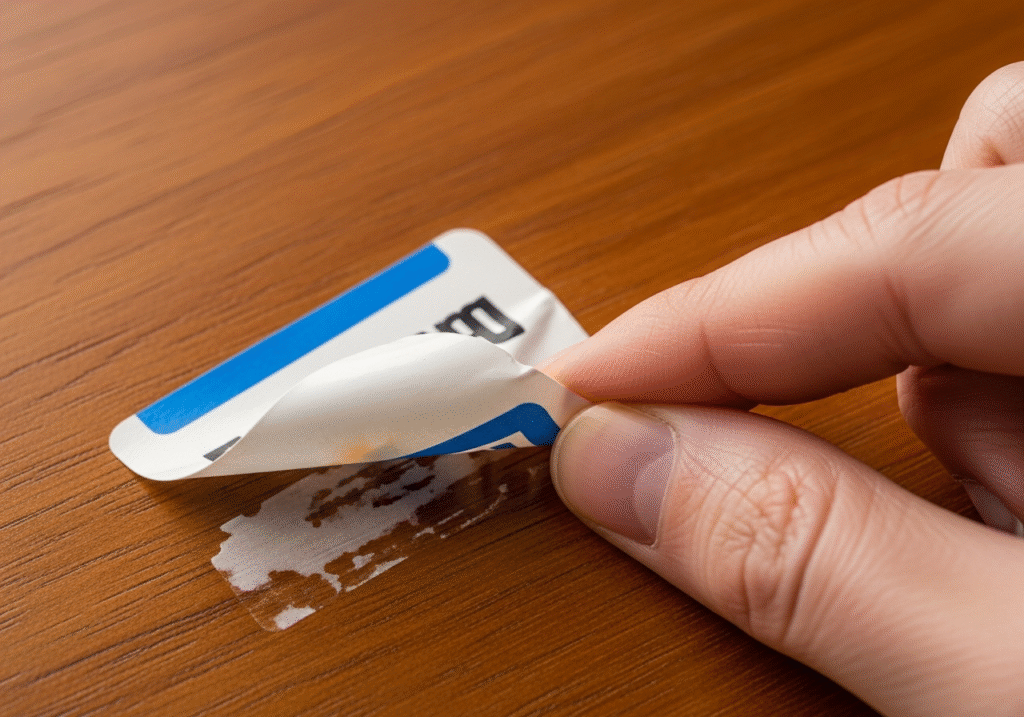
Sticker Removal: 5 Expert Tips for Every Type of Surface Nothing kills the joy of a new purchase like the price tag glued to its face. Peel it and you get one of two disasters: the paper tears and leaves a fuzzy white layer, or the sticker comes off but deposits gummy residue that turns grey within days. Adhesives are polymers that bond to a surface, so the winning method softens, dissolves, or lifts that bond without harming what sits underneath. Match the technique to the material and any sticker surrenders without a scratch. Assemble your sticker removal kit: Hair dryer for warming labels on glass, ceramic, metal, and car paint. Cooking oil or isopropyl alcohol for dissolving gummy adhesive. Plastic scraper or plastic razor blades for lifting laminated labels. White vinegar for sun-baked paper labels and price tags. Duct tape and a rubber eraser for delicate surfaces like paper and shoe soles. Tip 1: Start with Heat on Glass, Ceramic, and Metal Resist clawing at the corner: picking separates the paper from the adhesive and leaves exposed glue that is harder to shift. Instead, warm the sticker with a hair dryer on medium heat for about a minute. Heat softens the adhesive polymer so it lets go of the surface while clinging to the label backing; lift a corner slowly and the sticker often peels away as one clean sheet. Heat is the safest first move on hard non-porous items like glass and ceramic, and essential for car decals and laptop lids where solvents could damage paint or electronics. Tip 2: Dissolve Stubborn Glue with Oil or Alcohol Most sticker glues are lipid-based, so cooking oil or even peanut butter loosens them: like dissolves like. Score the sticker so oil penetrates, apply a layer, and wait about twenty minutes; the fats dilute the adhesive until it slides off, and soap and water remove the film. Oil is safe for glass and plastics, but never on unsealed wood or porous stone, which soak it up and stain. Isopropyl alcohol breaks adhesive bonds that oil cannot touch and evaporates instantly, so it is safe for electronics when applied to a cloth rather than sprayed. Alcohol is a paint thinner, though, and can strip painted or varnished finishes, so spot-test in a hidden corner first. Tip 3: Bring Out a Plastic Scraper for Laminated Labels Waterproof plastic-coated labels shrug off oil, water, and vinegar from the top, so attack from the edges. A plastic razor blade or scraper is the right tool: harder than the adhesive but softer than the surface beneath, it slips under the rim and lifts without gouging. Metal blades scratch glass and dig into plastic; they belong only on wet glass at a shallow angle, with a steady hand. For many stubborn labels on jars or new appliances, a set of plastic scrapers pays for itself. Tip 4: Use Vinegar, Acetone, and Tape for the Tough Cases White vinegar: soak a paper towel and lay it over the sticker for thirty minutes to rehydrate the paper and soften sun-baked glue, ideal for price tags on glassware and mugs. Acetone, usually sold as nail polish remover, dissolves almost any adhesive in seconds, but treat it as the nuclear option: it melts plastic on contact, so keep it off storage bins and eyeglass frames. Use it only on glass, unpainted metal, or unfinished ceramic. For the thin dark smear on delicate items like book covers, skip liquids: wrap duct tape around your fingers, sticky side out, and dab until the residue transfers off. Tip 5: Match Your Method to Wood, Shoe Soles, and Car Paint On varnished wood, heat can damage the finish, oil stains the grain, alcohol dissolves lacquer, and water raises the grain, so use mineral spirits or a furniture cleaner on a soft cloth; on raw unfinished wood, fine-grit sandpaper may be the only stain-free option. On new shoe soles, skip moisture and roll residue off with a rubber eraser or crepe block: friction balls the adhesive up for easy brushing. On car paint, never touch the clear coat with a razor blade: soften dealership decals with a hair dryer, lift with a plastic tool, and treat residue with a clay bar or an automotive adhesive remover, since household solvents permanently cloud the finish. Sticker Removal Method at a Glance Surface Best method Never use Glass, ceramic, metal Heat, then oil or vinegar soak Metal scrapers on dry glass Plastic and electronics Hair dryer, isopropyl alcohol on a cloth Acetone, which melts plastic Varnished wood Mineral spirits or furniture cleaner Oil, heat, or alcohol on the finish Shoe soles and leather Rubber eraser or crepe block Liquids that stain the upper Car paint Hair dryer, plastic tool, clay bar Razor blades and nail polish remover Paper and book covers Duct tape dabbing Any liquid or heat What about Ghost Marks After the Sticker Is Gone? That ghost is usually sun fade: the area under the sticker stayed protected while the surrounding surface yellowed, and on wood or fabric the difference is often permanent. On glass or plastic, the adhesive may have reacted with the material, and a mild polishing compound or baking soda paste can blend the mark away. Whenever you work with solvents or removers, follow the Government of Canada’s guidance on using household chemicals safely, and in a small room or closed garage, ventilate and take fresh-air breaks the way Health Canada advises for solvent-based products. Frequently Asked Questions What is the safest way to remove a sticker from a laptop? Warm the sticker with a hair dryer for a minute, lift an edge slowly, then rub residue gently with an alcohol-dampened cloth. Never spray liquid on the device or use acetone, which melts plastic shells. How do I get sticker residue off glass without scratching it? Heat the sticker, remove what you can, and soak residue with cooking oil or hot vinegar for twenty to thirty minutes. A plastic scraper lifts what remains,

Sticker Removal: 5 Expert Tips For Removing Stickers From Different Types of Surfaces Read More »

tidying the bedroom in 5 minutes

How to Clean Your Room in 5 Minutes: A Step-by-Step Routine for Busy Mornings

Why a Five-Minute Room Clean Works Better Than You Think A messy bedroom is often the first casualty of a busy week. When deadlines pile up and energy runs low, clothes cover the chair, mugs crowd the nightstand, and the bed stays tangled. That visual clutter keeps the brain in work mode, so the room meant for rest starts to feel like unfinished business. Most people assume fixing it demands an entire afternoon of sorting and scrubbing, so they postpone the job until the mess looks impossible. In reality, a focused five-minute reset can turn the room around. It is not a deep clean; it is a quick rescue that clears the floor, calms the surfaces, and restores a feeling of control before you rush out the door. What You Need Before the Timer Starts Speed depends on preparation. Decide in advance where every type of clutter will go so you never pause to make decisions mid-clean. This is not the moment for perfect organization; it is a rescue mission with three simple tools: A large trash bag for wrappers, receipts, empty bottles, and anything broken. A laundry hamper, emptied before you begin, for every piece of clothing sitting on the floor. A relocation basket, any bin or box, for objects that belong in other rooms. Keep the three vessels within reach. The instant you leave the room to return a mug to the kitchen, the plan falls apart: the dishwasher, the television, or a buzzing phone will pull you off course. The Five-Minute Routine, Minute by Minute Follow the order below and resist the urge to skip ahead. Each step prepares the next, and the room looks dramatically different by the end. Minute Task Goal 1 Collect trash Remove everything that signals neglect 2-3 Clear floor textiles into the hamper Expose the floor completely 4 Make the bed Anchor the room in order 5 Tidy surfaces, then open the curtains Leave only essentials in view Minute 1: Trash Only Garbage is the easiest category because nothing sentimental is attached to it. Scan for snack wrappers, used tissues, price tags, empty water bottles, and receipts, and break down stray cardboard boxes on the spot. Sixty seconds of ruthless discarding instantly lifts the room’s hygiene and removes the items that suggest neglect. Minutes 2-3: Attack the Floordrobe The mound of half-worn clothes on the rug is the biggest visual offender in any bedroom. There is no time to sniff shirts and judge freshness; anything resting on the floor goes into the hamper, no exceptions. Seeing the carpet again makes the space feel larger and clears the obstacle course underfoot. If a pile of clean clothes is waiting to be put away, fold it once and set it neatly on the chair or the foot of the bed. A tidy stack reads as deliberate, while a sprawled pile reads as chaos. Minute 4: Smooth the Bed The bed is the focal point of the room, and a made bed signals that everything else is under control. You do not need hospital corners: pull the duvet up over the pillows, smooth out the wrinkles, and prop the pillows upright. In about forty-five seconds you create a large, calm surface that balances the busyness around it. Minute 5: Surface Triage and Fresh Air Nightstands, dressers, and desks attract wandering clutter: coffee mugs that drifted in from the kitchen, mail that never made it out of the hallway, tools that wandered in from the garage. Sweep every foreign object into the relocation basket and set it outside the door to be sorted later. Leave only the essentials: a lamp, a book, a clock. Finish by opening the curtains or blinds; natural light and moving air make a room feel cleaner than any spray can. Why Short Resets Beat Weekend Marathons Brief, frequent resets outperform occasional marathons because they stop the buildup before it starts. A daily sweep keeps the bedroom liveable, lowers the stress of sleeping beside a to-do list, and frees your weekend for the jobs that truly matter. It is the same logic behind our regular maid service: steady upkeep beats heroic catch-up sessions. When the whole home needs attention, our team covers everything from bathrooms to baseboards. Frequently Asked Questions How do I clean my room in 5 minutes when it is very messy? Work in the fixed order: trash first, then floor clothes, then the bed, then surfaces. Do not reorganize, do not leave the room, and do not aim for perfect decisions. Speed and visible results are the only goals. What should I do with clothes that are not dirty? Anything that sat on the floor goes in the hamper to keep the room honest. Clean clothes still waiting for a home can be folded once and stacked on a chair or the foot of the bed until you have time to hang them. Can a 5-minute clean replace a deep clean? No. The quick reset handles visible clutter, while a deep clean removes dust, allergens, and grime from carpets, mattresses, and hidden surfaces. The CDC notes that regular cleaning with soap or detergent removes most germs from surfaces, while disinfection is only needed when someone in the home is sick. How often should I reset my room? Daily is best, ideally first thing in the morning or just before bed. A one-minute nightly sweep of surfaces and floors keeps the room from ever reaching the point where five minutes cannot fix it. When Five Minutes Is Not Enough The five-minute reset has honest limits. It will not lift the dust from a ceiling fan, pull allergens out of a mattress, or refresh window tracks; those jobs take time and proper tools. Damp, poorly aired rooms also invite dust mites and mould, which Health Canada links to moisture problems, so periodic vacuuming, washing, and airing still matter. When the grime has settled in and a quick tidy no longer feels like enough, book a deep cleaning service from Toronto

How to Clean Your Room in 5 Minutes: A Step-by-Step Routine for Busy Mornings Read More »

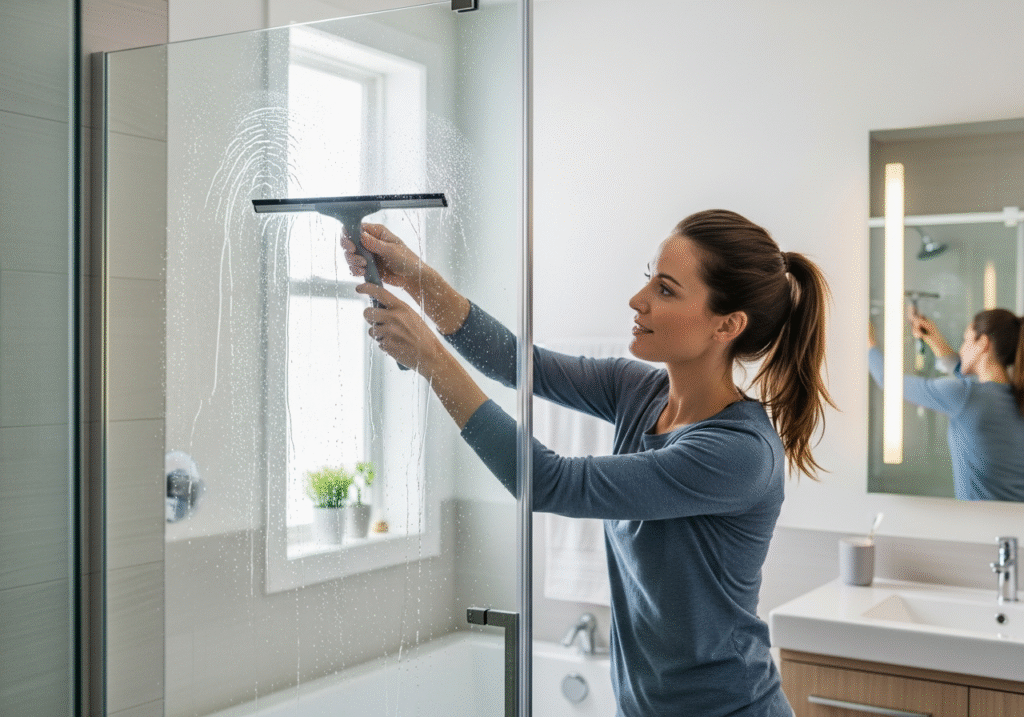
Woman using a squeegee in the bathroom to prevent mold.

Preventing Shower Mold: Daily Habits You Should Adopt to Fight Fungi

Why Shower Mold Keeps Coming Back, and What Actually Stops It The bathroom is meant to be the cleanest room in the house, yet it is the one place fungus fights you around the clock. Warm steam, low light, and a steady supply of soap scum, dead skin cells, and body oils create perfect conditions for shower mold to take root in grout and caulk. Dark fuzzy spots on tile lines are not just cosmetic: mold is a living organism that spreads, feeds on surface residue, and can eventually reach the drywall and insulation behind the tile, where damage costs thousands to repair. The good news is that shower mold is predictable. Once you understand what it needs, a handful of daily habits can starve it out before it ever appears. Know Your Enemy: What Shower Mold Actually Is Shower mold is a fungus that reproduces by releasing microscopic spores, which float through the air until they find a hospitable surface. Your bathroom offers everything a colony needs: steam-driven moisture, dim light, and a constant buffet of organic residue. The pinkish-orange slime around drains and shampoo bottles is often mistaken for mold, but it is a bacterium called Serratia marcescens that thrives in the same damp conditions yet is far easier to wipe away. True shower mold is black, dark green, or brown, with root structures called hyphae that dig into grout and silicone caulk. That is why a scrubbed spot returns in the exact same place three days later: you removed the visible bloom and left the roots alive underneath. Why Bleach Makes Grout Mold Worse Reaching for chlorine bleach is the standard reflex, but on porous surfaces it is a trap. Bleach kills surface mold on non-porous materials like glass and glazed tile. On grout and caulk, its chemical structure stops it from soaking in deep enough to reach the hyphae: it bleaches out the pigment so the stain disappears, while the water in the solution soaks into the cement and feeds the roots left behind. The colony regenerates, often stronger and more resistant than before. And never mix vinegar and bleach; the reaction releases toxic chlorine gas, a far deadlier hazard than anything living on your tiles. Cleaners That Kill Mold at the Root A deep kill on porous surfaces takes chemistry that penetrates. White distilled vinegar is a mild acid that seeps into microscopic pores, attacks fungal cell membranes, and ruptures them. Spray it undiluted, let it dwell for at least an hour, then scrub with a baking soda paste to lift the dead growth. Hydrogen peroxide is a scent-free alternative that oxidizes mold and helps whiten stains. Remedy Works best on How to use it White distilled vinegar, undiluted Porous grout and caulk Spray and let sit for at least one hour, then scrub Baking soda paste Dead mold lodged in pores Apply after the vinegar soak and agitate Hydrogen peroxide, 3 percent Surfaces and stubborn stains Spray directly; fizzes as it oxidizes and whitens Chlorine bleach Glass and glazed tile only Do not rely on it for grout or caulk; it cannot reach the roots The Caulk Problem and the Safety Basics The hardest battleground is the silicone caulk sealing the tub-to-wall joint and shower corners. As adhesion fails over time, microscopic pockets trap water and mold grows from the back side. If black spots sit inside the caulk itself, no scrubbing or soaking can reach them: cut the infected bead out completely with a razor knife, sterilize and dry the channel, and apply fresh mold-resistant silicone. Compromised caulk also lets water leak toward wall studs and invites rot alongside the fungus. When disturbing dry mold, wear gloves and preferably an N95 respirator, because scrubbing releases thousands of spores into a small enclosed room. High spore concentrations can trigger asthma and respiratory inflammation, a risk documented in CDC mold and health resources. Run the exhaust fan and open a window so spores and fumes leave the house. Daily Habits That Starve Mold Out Mold requires moisture, so depriving it of water is the most effective control strategy. A five-minute routine after every shower does more than any bottle of remover: Squeegee walls and glass after each shower so standing water cannot evaporate into hours of high humidity. Run the exhaust fan during the shower and for at least 30 minutes afterward; in a fanless bathroom a dehumidifier is mandatory, holding relative humidity below 50 percent, the level at which mold struggles to reproduce. Store bottles, razors, and loofahs on a hanging caddy or wire rack so water drains instead of pooling underneath. Wash the plastic curtain liner in hot water with towels for scrubbing action, or replace it; a moldy hem re-contaminates clean tiles. Switch from bar soap, which leaves talc and fatty-acid scum, to liquid body wash, which leaves less residue. Wipe weekly with a pH-neutral cleaner so body oils and skin cells never accumulate into a food supply. Keeping humidity down is the goal of Health Canada’s guidance on reducing moisture and mould. When to Call the Professionals If a colony spreads to the ceiling, the grout is deeply stained, or the affected area exceeds about ten square feet, a threshold at which the EPA suggests professional remediation, stop scrubbing. Toronto Shine Cleaning brings industrial steamers and enzymatic cleaners that outperform consumer products, plus experience with Canadian winters, when homes sealed in winter turn bathrooms into humidity traps. Book a deep clean starting at $270.38 for a studio or one-bedroom before HST and pair it with a recurring regular cleaning plan so mold never gets a second foothold. For the full room-by-room reset, our deep cleaning service covers the bathroom thoroughly. Shower Mold FAQ How can I stop shower mold from growing between cleanings? Remove its two requirements: water and food. Squeegee after every shower, run the fan 30 minutes afterward, and wipe walls weekly with a pH-neutral cleaner so soap scum never builds up. Does vinegar kill mold better than

Preventing Shower Mold: Daily Habits You Should Adopt to Fight Fungi Read More »

Woman unsure whether to put a blanket in the washing machine.

Blankets Washing: 9 Laundry Mistakes That Destroy Blanket Fibers

Why Blanket Care Deserves More Than a Quick Spin Blankets are the most personal textiles in the house: we sleep under them, drag them to the sofa, and share them with pets. Sheets get washed weekly, yet blankets drift into neglect, collecting dead skin, body oils, dust mites, and pet dander. That buildup mats the fibers, flattens the loft, and cuts warmth. Restoring softness takes a method matched to the material, because treating a wool heirloom like a fleece throw is a recipe for ruin. The 9 Laundry Mistakes That Destroy Blanket Fibers Drying fleece on high heat, which melts the plastic fiber tips into a rough, scratchy texture. Adding fabric softener to fleece, which coats the fibers in waxy buildup that traps dirt. Washing wool with heat and agitation, which felts the fiber scales and shrinks the blanket. Wringing or hanging wet wool, which breaks the fibers or stretches the shape. Drying down without dryer balls, leaving wet clumps that mildew inside the fill. Washing a heavy weighted blanket in a standard machine, risking motor damage. Dry cleaning electric blankets, since solvents can dissolve the wire insulation. Blasting cotton on high heat, which can shrink a king-size blanket to queen size. Storing any blanket damp or sealed in plastic, an open invitation to mould. Fleece and Microfiber: Cold Water, No Softener, No High Heat Most everyday throws are synthetic fleece or microfiber: durable and warm, but magnets for hair, lint, and static. The two classic mistakes are heat and fabric softener. Fleece is essentially plastic; a hot dryer slightly melts and fuses the fiber tips, leaving a rough feel that never recovers. Fabric softener lays a waxy film over the fibers that traps soil and reduces breathability. Wash in cold water with a mild detergent and run an extra rinse so no soap residue remains. Wool and Down: Respect the Fill Wool is a protein fiber, and its surface carries tiny overlapping scales, much like human hair. It shrugs off odours naturally, so it needs fewer washes, but heat, moisture, and churning lock those scales together in a process called felting. One cycle can turn a draping blanket into a stiff mat. Use the wool cycle or hand wash in a tub with a lanolin-based detergent. Never wring: press out the water, roll the blanket in heavy towels, and lay it flat to dry, since hanging wet wool stretches it out of shape. Down comforters and duvet inserts fail for the opposite reason: too little agitation while drying. Wet down collapses into dense clumps, and if the blanket is not tumbled thoroughly it develops mildew inside the fill. Use a down detergent, then dry with tennis balls or wool dryer balls so the clumps get pounded apart. Skipping that step leaves hard lumps and a flat, cold blanket. Weighted and Electric Blankets: Respect the Hardware Weighted blankets are filled with glass beads or plastic pellets stitched into pockets, and a typical adult version weighs fifteen to twenty pounds. Running one through a standard residential washer can throw the drum off balance or strain the motor, so anything over twenty pounds belongs in a commercial laundromat machine. Plastic pellets survive washing but melt in a hot dryer, so air dry instead. If the inner lining rips, escaping beads can damage the machine. Electric blankets are washable on most modern models once the control cord is detached, because the wiring is insulated against water but not against the twisting of a spin cycle. Use the gentlest cycle and warm water, and never dry clean them: the solvents can dissolve the insulation and create a fire hazard. Dry on low, finish by air drying, and confirm the blanket is fully dry before plugging it in. Cotton, Stains, and Storage: The Quiet Killers Cotton blankets and quilts seem low maintenance until they shrink. Wet cotton fibers swell, and high-heat drying locks in the contraction, which is how a king-size blanket becomes a queen-size one. Wash cotton in cool or warm water, dry on low until slightly damp, and air dry the rest of the way. A soaked quilt is heavy, so support its weight when lifting it from the washer. For stains, blot instead of rubbing, since a spill on a thick blanket soaks in rather than passing through. An enzyme cleaner handles organic stains like sweat by digesting the proteins ordinary soap cannot. Storage is where many blankets die: fold them only when bone dry, use breathable cotton bags rather than airtight plastic, and skip mothballs in favour of cedar blocks or lavender sachets. The CDC explains that mould grows on fabric wherever moisture lingers, and Health Canada points to uncontrolled humidity as the main driver of mould and dust mites in the home. Quick Reference Card by Blanket Material Material Wash Dry Key warning Fleece Cold water Low heat only Heat fuses tips; skip softener Wool Cold, wool cycle Lay flat, never wrung Heat and churning felt the blanket Down Warm water Tumble with dryer balls Damp clumps mildew inside the fill Cotton Cool or warm Low, finish air dried Hot drying shrinks king to queen Weighted Cold, if the machine fits Air dry only Over 20 lb needs a commercial washer Frequently Asked Questions About Washing Blankets How often should I wash my blankets? A top sheet protects the bed blanket from skin contact, so it can go several months between washes. Living room throws touch skin, hair, and pets directly, so wash those monthly. Can I put a weighted blanket in my washing machine? Only if the blanket’s weight fits the machine’s rated capacity, usually fifteen to twenty pounds or less at home. Heavier blankets need commercial machines, and the fill must be air dried. Why does my fleece blanket feel rough after drying? High heat fused the synthetic fiber tips. The damage is permanent, so switch to low or no heat and wash in cold water with an extra rinse from now on. Do wool blankets really

Blankets Washing: 9 Laundry Mistakes That Destroy Blanket Fibers Read More »

Bronze Pot Care 101: 5 Amazing Tips For Caring For Your Brass Pots And Pans

Why Bronze Cookware Is Worth the Extra Care Bronze pots have cooked meals for thousands of years, from the kitchens of ancient India to medieval Europe, and they are enjoying a revival today. Known as Kansa in South Asian traditions, bronze is valued for its heat retention, its reported wellness benefits, and its quiet beauty. Owning it is a relationship rather than a convenience: bronze asks for understanding, gentle cleaning, and patience, and it rewards that effort with decades of loyal service. Since the brass pot question comes up so often, let us settle the difference first, because the two metals demand very similar care. Bronze vs. Brass vs. Copper: Know Your Alloy Bronze is mostly copper with about twelve to fifteen percent tin and small additions of other metals for hardness. Brass is copper with zinc, and pure copper contains no alloy partner at all. Those few percentage points change everything: bronze is harder and far more corrosion-resistant than copper alone, and it shows a muted golden-brown warmth instead of the brassy yellow of zinc alloys. A bronze pot does not warp, chip, or degrade under normal kitchen conditions, which is why many families treat theirs as heirlooms. Metal Alloy partner Signature trait Bronze About 12-15% tin Hard, corrosion-resistant, golden-brown Brass Zinc Bright yellow, softer Copper None Soft, red, dents easily Tip 1: Match the Pot to the Food You Cook Bronze has enormous thermal mass: it does not heat as fast as copper or aluminum, but once hot it holds and radiates warmth evenly, making it ideal for slow simmering, dum-style cooking, rice, and boiled milk. Many cooks insist milk boiled in bronze turns out sweeter and creamier because the gentle, steady heat prevents scorching. The catch is chemistry. Copper, the main ingredient, reacts with acidic foods such as tomatoes, vinegar, lemon juice, wine, and tamarind, dissolving trace metal into the dish. Small amounts cause a bitter metallic taste; larger exposures over time are a real health concern. Health Canada explains that copper cookware sold in Canada is generally coated precisely because the bare metal can transfer into food, especially acidic food. Unlined bronze should stay with neutral cooking, and pots used for sour curries need a tin lining, a sacrificial layer known as kalai that must be reapplied by an artisan as it wears away. Tip 2: Wash by Hand and Dry It Immediately A dishwasher is the fastest way to ruin bronze. Abrasive detergents and hot, humid cycles strip the lustre, leave a dull grey finish, and can pit the surface. Wash bronze by hand, and understand that soap and water alone will not keep it beautiful: the metal oxidizes over time, darkening to brown or developing greenish spots called verdigris. A uniform dark patina is prized on antiques, but green verdigris is toxic and must be removed before cooking. Skip commercial metal polishes, which are often too harsh and can leave residues that are unsafe for food vessels. As Health Canada’s household product guidance reminds us, following the intended use of every product matters. The traditional cleaners live in the pantry: Tamarind pulp, whose tartaric acid dissolves copper oxide and restores the bright metal. A cut lemon dipped in coarse salt, which combines acidity with gentle abrasion. Wood ash, the historic scouring agent for heavy tarnish. Specialized powders such as Pitambari, made with dolomite and mild acids. Scrub vigorously, rinse thoroughly, and dry at once. Water droplets left to air dry leave permanent spots and invite fresh oxidation, so towel the pot completely dry before it goes back on the shelf. Tip 3: Store Bronze So the Pieces Protect Each Other Stacking bronze pots saves space but invites trouble. A nested stack can weigh fifty pounds or more, straining cabinet shelves, and the friction between pots scratches the finish. Lay a cloth or paper towel between nested vessels. The protection matters even more for kalai-lined pots: tin is soft, and a deep scratch exposes the copper underneath, making the pot unsafe for acidic cooking until it is re-tinned. Tip 4: Know Your Dining Ware From Your Cookware Not every bronze piece is built for the stove. Traditional Kansa dining plates and bowls use a higher copper-to-tin ratio, often around 78:22, which makes the alloy brittle but resonant; struck, it rings like a bell. These pieces resist tarnish longer than cooking grade, but they can crack over a high flame. Cooking pots, by contrast, are formulated to flex with thermal expansion. Knowing which you own prevents the destruction of expensive teapots and serving bowls that were never meant to touch a burner. Tip 5: Buy Once and Keep It for Generations Compare lifespans and the argument writes itself: a non-stick pan degrades in three to five years, while a bronze pot is measured in centuries. Tarnish can be polished away, a rare dent can be hammered back, and a worn tin lining can be renewed. That is why old bronze keeps reappearing in antique markets, cleaned up and returned to service. In a kitchen full of disposables, bronze is a commitment to buying once and keeping forever. Frequently Asked Questions About Bronze Pot Care Is it safe to cook every day in a bronze pot? Yes, for neutral foods such as rice, milk-based dishes, and most vegetables. Acidic ingredients should only go into pots with an intact tin lining, because bare bronze can release copper into the food. How do I remove green spots from bronze? Green verdigris is oxidized copper and must be cleaned before cooking. Rub the spots with a lemon half dipped in coarse salt or a tamarind paste, rinse well, and dry the pot immediately. Can I put bronze cookware in the dishwasher? Never. Dishwasher detergents and heat strip the finish, leaving the metal dull grey and possibly pitted. Bronze is always hand washed and towel dried right away. My pot’s tin lining is wearing thin. What should I do? Stop cooking acidic food in it until a skilled artisan reapplies

Bronze Pot Care 101: 5 Amazing Tips For Caring For Your Brass Pots And Pans Read More »

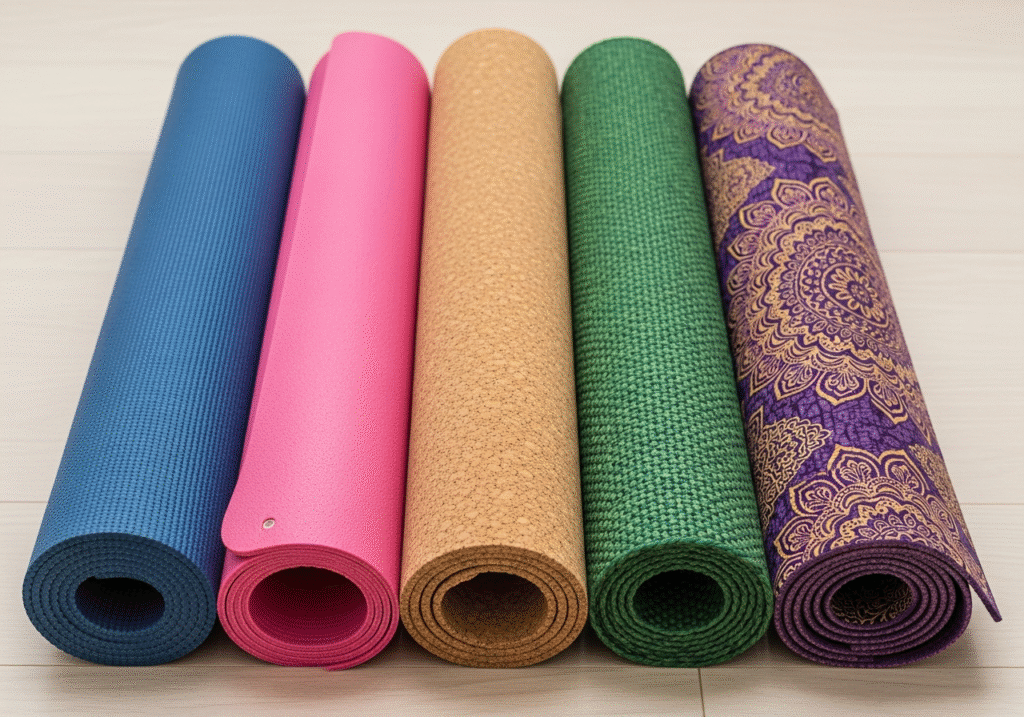
How to Clean a Yoga Mat: The Ultimate Guide for PVC, Rubber, and Cork

Why Your Yoga Mat Needs a Real Cleaning Routine A yoga mat is a sanctuary of grip and stability, but it is also a sponge for sweat, dead skin cells, oils, and whatever dust the floor offers. Every class presses your hands, feet, and face into a surface soaked with the previous sessions’ biology, and warm, humid conditions turn that foam into a breeding ground for bacteria and fungi. Cleaning a mat is not cosmetics: it is hygiene that prevents skin infections, neutralizes odours, and extends the life of the mat. The CDC warns that germs like MRSA can spread in athletic settings through contaminated surfaces and shared items, which is why mats used in studios deserve attention between every class. Fortunately, the right routine is simple once you know your material. PVC, Rubber, and Cork: Know Your Mat’s Structure Mats divide into two camps. Open-cell mats are porous: they absorb sweat so they stay grippy when wet, but that also pulls bacteria deep into the core. Closed-cell mats are impermeable: sweat pools on top, they wipe down easily, but they feel slipperier in a hot class. PVC and TPE mats are usually closed-cell, while natural rubber is open-cell and thirsty; cork mats pair a textured cork surface with a rubber or TPE base and respond best to gentle, low-moisture care. Identify yours before choosing a cleaner, because soaking an open-cell mat improperly can waterlog it until it rots from the inside. Material Cell structure Best cleaning approach PVC or TPE Closed-cell Daily spray wipe; occasional tub soak Natural rubber Open-cell, absorbent Mild soap or enzyme cleaner; short soak only Cork surface Natural top layer Damp cloth wipe; avoid long soaks How to Clean a Yoga Mat After Every Session After each practice, remove surface bacteria and oils before they dry into a sticky film. The most effective daily solution is simple: mix three parts distilled water with one part white vinegar in a spray bottle. The mild acid dissolves grease and kills odours without damaging the polymer structure of most mats. Essential oils such as tea tree or lavender can be added, but only sparingly: oils are slippery, and too much residue turns the next session into a sliding hazard. Spritz lightly over the mat and wipe it with a damp microfiber cloth; the friction dislodges the debris. When and How to Deep Clean a Yoga Mat A light spray stops working once grime builds up. These signs mean it is time for a deeper wash: A persistent smell that reappears the moment you unroll the mat. Visible darkening where your hands and feet land. A slippery or sticky film that wiping does not remove. For closed-cell PVC and TPE mats, the bathtub method is thorough and safe. Fill the tub with warm water and a single teaspoon of mild dish soap; too much soap is the most common mistake, because residue hides inside foam and reactivates mid-class as a slip hazard. Submerge the mat for fifteen to twenty minutes, then squeeze it gently or step on it with bare feet to work the suds through the texture. Drain and rinse repeatedly, refilling with fresh water until squeezing produces no bubbles at all. Dry Your Mat the Right Way Drying is where most mats are ruined. A saturated mat can take twenty-four to forty-eight hours to dry, and using it damp invites mildew. The burrito method speeds things up: lay the wet mat flat on a large dry towel, roll both together tightly, and kneel or step on the roll to press water from the mat into the towel. Repeat with a second towel if needed, then hang the mat in a cool, well-ventilated room. Never dry a mat in direct sunlight: ultraviolet rays break down rubber and plastic bonds until the surface turns brittle and flaky. Never roll a damp mat for storage: the dark, moist interior is where mould thrives. Health Canada recommends controlling indoor humidity and drying damp items promptly to keep mould and dust mites at bay. Extra Care for Natural Rubber and Cork Mats Natural rubber asks for a gentler protocol. Vinegar, which suits many synthetics, can slowly dry out and degrade rubber over time, so reach for a heavily diluted gentle soap, or an enzymatic cleaner built to break down the proteins in sweat rather than dissolving them chemically. Rubber also drinks water readily: keep soaks brief, because a waterlogged mat can tear under its own weight when lifted. Machine washing is rarely worth the risk, even when a manufacturer calls a thin travel mat washable: agitation can stretch, tear, or delaminate the foam, a soaked mat can knock the washer off balance, and a tumble dryer will melt or warp it instantly. Prevention: Keep the Mat Cleaner Between Washes Personal hygiene does most of the work. Practicing with clean hands and bare feet cuts the oil and dirt that reach the surface, and covering the mat with a microfiber yoga towel absorbs sweat before it touches the foam. Towels go straight into the laundry after class, which turns deep cleaning from a monthly chore into a seasonal one. If a mat still smells after washing, bacteria have reached deep into the foam; a vinegar soak or a night in the freezer helps only temporarily. When the surface pits, flakes, or keeps its smell after a deep clean, the material has degraded past the point of sanitation and replacement is the only option. Frequently Asked Questions About Cleaning Yoga Mats How often should I clean my yoga mat? Wipe it down after every session with the spray, and deep clean it in the tub about once a month. Studio mats used several times a week deserve it even more often. Can I put a yoga mat in the washing machine? It is risky. Agitation can stretch, tear, or delaminate the foam, and a soaked mat is heavy enough to damage the washer during the spin cycle. Hand washing and air drying are

How to Clean a Yoga Mat: The Ultimate Guide for PVC, Rubber, and Cork Read More »

Woman using a stainless steel pan for cooking.

How to Make Your Old Stainless Steel Look Brand New Again

How to Make Old Stainless Steel Cookware Look Brand New Walk into any professional kitchen and you will see the same thing: a wall of gleaming stainless steel. Chefs choose this metal because it sears beautifully, shrugs off acidic sauces, and survives decades of abuse. Yet in home kitchens, the same pans often end up dull, rainbow stained, or crusted with burnt-on carbon, then shoved to the back of a cupboard. Here is the good news: most of that damage is cosmetic, not structural. With a few simple techniques, old stainless steel cookware can look brand new again, and stay that way for years. Why Stainless Steel Loses Its Shine Stainless steel is an alloy of iron, chromium, and nickel. The chromium forms an invisible oxide layer that protects the metal from rust, which is what makes it “stainless.” Heavy use changes how that layer reflects light. High heat thickens the oxide, producing the familiar blue, gold, and purple “heat tint” inside pans. Meanwhile, hard water leaves raised white calcium spots, burnt food becomes black carbon crust, and careless habits can even create permanent pits. Understanding each flaw matters, because the cure depends on the cause. Clean Daily the Right Way: Deglaze and Avoid Thermal Shock The easiest mess to remove is the one you tackle while the pan is still warm. Right after cooking, add a splash of water, wine, or stock to the still hot pan. The liquid hisses and bubbles up, freeing the caramelized fond from the surface with zero scrubbing, a trick professional cooks use every service. For normal washing, warm soapy water and a sponge handle the rest, since modern dish soap is a surfactant that breaks down grease. One warning: never plunge a scorching hot pan into cold water. That thermal shock can warp the metal and ruin the flat base that makes contact with your burner. Give the pan a few minutes so it is only warm when it meets the water, then rinse and dry it right away so water spots never form. Remove Burnt-On Carbon and Restore the Finish For stubborn carbon deposits, make a paste of baking soda and water and scrub gently. When the buildup is severe, a powdered cleanser containing oxalic acid is the gold standard for stainless steel: the acid breaks down the stain while the fine powder polishes without dulling the shine. Always follow the label directions and store chemical cleaners out of reach of children, since even everyday products need careful handling, as Health Canada reminds us. Heat tint dissolves even faster. Swirl a splash of white vinegar around the rainbow-colored interior, rinse, and dry, and the silver returns instantly. Raised white spots on the base are calcium carbonate from boiling hard water, and vinegar removes those too. True pitting, however, is different: tiny divots appear when salt is added to cold water, because salt crystals sitting on the steel corrode the chromium. Always salt water only after it reaches a rolling boil, so the crystals dissolve immediately. Let the pan cool until warm, then deglaze or soak it briefly. Wash with warm soapy water and a soft sponge. Scrub carbon buildup with a baking soda paste. Swirl vinegar to erase heat tint and hard water spots. Rinse, dry immediately, and buff with a microfiber cloth. Common Stainless Steel Problems and Their Fixes Problem Cause Fix Rainbow discoloration Chromium oxide layer thickened by high heat Splash of white vinegar, then rinse and dry Black burnt-on carbon Overheated food residue Baking soda paste or an oxalic acid cleanser Raised white spots Calcium carbonate from hard water Wipe with vinegar to dissolve the scale Tiny pits in the metal Salt added to cold water Cannot be polished out; salt water only at a rolling boil Keep Cookware Looking New for Decades Prevention beats restoration. Stainless steel conducts heat poorly on its own, so quality pans are clad with an aluminum or copper core, and they need a slow preheat. Test readiness with the water drop trick: when a few drops form a dancing bead instead of sizzling away, the pan is ready. Add oil right before the food, listen for a sharp sizzle, and resist the urge to flip meat early. Food releases naturally once the browning crust forms, so forcing it only tears the meat and leaves residue behind. Heat tint is harmless and safe to cook on, but avoiding a screaming-hot empty pan keeps the finish bright. Unlike non-stick coatings, which degrade within three to five years, a quality multi-clad stainless pan is a lifetime purchase, and minor scratches are simply the patina of use. Frequently Asked Questions Is the rainbow tint on my stainless steel pan dangerous? No. Heat tint is a harmless thickening of the protective chromium oxide layer, and the pan stays perfectly safe to cook on. A splash of vinegar removes the discoloration if you find it unsightly. Can I use steel wool or harsh scouring pads on stainless steel? Yes, stainless is tough enough to survive scrubbing that would destroy non-stick pans, but use mild abrasives first. Start with a baking soda paste, then an oxalic acid cleanser, and reserve aggressive scouring for the worst carbon buildup. Why does my pan have small pits that vinegar will not remove? Those divots are likely pitting from salt crystals sitting on cold steel, which corrodes the chromium. The damage is permanent, so always add salt once the water is at a rolling boil. Is it safe to simmer acidic sauces in stainless steel? Yes. Stainless steel is non-reactive, so you can cook tomato sauce or a wine reduction for hours without any metallic taste, which is why professionals prefer it for these dishes. Your cookware is not the only thing in your kitchen that deserves this level of care. When countertops, backsplashes, and cabinet fronts need the same thorough attention, a professional deep cleaning can reset the whole room, while a regular cleaning service keeps it that way between holiday meals.

How to Make Your Old Stainless Steel Look Brand New Again Read More »

organizing a kitchen pantry

Cleaning The Pantry: 5 Expensive Mistakes You Are Making with Pantry Storage

The pantry is the engine room of the kitchen. It is the repository of potential meals, the fuel station for the family, and, all too often, the most chaotic space in the entire home. A disorganized pantry is not merely an aesthetic annoyance; it is a source of daily friction that wastes money, time, and mental energy. When you cannot see what you have, you inevitably buy duplicates, leading to a cycle of waste where expired cans of beans and stale crackers accumulate in the dark corners of deep shelves. Cooking becomes a chore because locating the necessary ingredients requires an excavation process. Furthermore, a cluttered pantry is a haven for pests, from pantry moths to ants, which thrive in the undisturbed debris of open packages. Transforming this space from a graveyard of good intentions into a streamlined, functional asset requires more than just buying a few plastic bins; it requires a systematic approach to inventory management and spatial planning. 1.Evacuation The process of organizing a pantry must begin with a total evacuation. There is no halfway measure here. Attempting to organize shelf by shelf results in simply shuffling the clutter from one side to the other. You must remove every single item-every spice jar, every cereal box, and every bag of flour-and place them on the kitchen table or counters. This reveals the true volume of your inventory and, more importantly, exposes the physical state of the pantry itself. Once the shelves are bare, you will likely find rings of sticky syrup, scattered grains of rice, and layers of dust. This is the moment to perform a deep clean. Vacuum the corners to remove any cobwebs or insect larvae. Wash the shelves with warm soapy water or a vinegar solution to cut through any grease or sticky residues. If you have wire shelving, pay attention to the undersides of the wires where grime collects. The space must be pristine before anything returns to it; you cannot build a system of order on a foundation of dirt. With the inventory exposed on your counters, the auditing phase begins. This is often the most painful part of the process because it forces you to confront waste. You must be ruthless. Check every expiration date. Spices that have been sitting since the last decade have lost their potency and should be discarded. The half-empty bag of stale chips, the hardened brown sugar, and the tea bags you bought on a whim and never drank must go. This purge is essential to create the negative space required for a functional system. If you find unexpired food that you know realistically you will not eat, donate it to a food bank immediately. Do not put it back in the pantry out of guilt; it will simply expire there later. 2.Categorization Once you have reduced the volume of items, the next step is categorization. Think of your pantry like a grocery store. Stores are navigated by zones-baking, breakfast, dinner, snacks, beverages. You must replicate this logic. Group all baking ingredients together: flour, sugar, baking powder, vanilla, chocolate chips. Group the breakfast items: oats, cereal, syrup, pancake mix. Group the dinner staples: pasta, rice, jarred sauces, canned vegetables. By creating these zones, you reduce the cognitive load of cooking. When you are making a cake, you only need to look at the baking zone. You are not hunting for vanilla extract behind a box of crackers. The most controversial but effective step in pantry organization is decanting. This involves removing food from its original commercial packaging and placing it into matching, airtight containers. Many people view this as an unnecessary aesthetic choice, but it is functionally superior for several reasons. First, commercial packaging is designed to sell the product, not to store it efficiently. Boxes are often half-empty, taking up unnecessary space. Bags are difficult to seal, leading to staleness and spills. Second, uniform containers stack and fit together like a puzzle, maximizing every inch of shelf space. Square or rectangular containers are mathematically more efficient than round ones, which leave gaps of “dead space” between them. Third, clear containers provide an instant visual inventory. You can see exactly how much rice or pasta you have left without opening a box, which simplifies grocery shopping. Finally, airtight containers are the only true defense against pantry moths and weevils, which can chew through cardboard and thin plastic. 3.Identification When selecting containers, consistency is key. Investing in a modular system where the lids are interchangeable and the bases stack securely prevents the “avalanche” effect common in messy pantries. For heavy items like flour and sugar, ensure the containers have wide openings so you can scoop directly out of them with a measuring cup. Labeling is non-negotiable. While you might think you can tell the difference between all-purpose flour and bread flour by sight, you will eventually make a mistake. Use a label maker, a chalk marker, or simple masking tape to identify the contents and, crucially, to note the expiration date on the bottom or back of the container. If you have cooking instructions-like the water-to-grain ratio for quinoa-cut that part of the box out and tape it to the back of the container. The architecture of your shelves dictates where items should live. The prime real estate is the area between your waist and your eye level. This is where your high-use items should go-the daily cereals, the dinner staples, and the snacks. Items that are heavy, like bulk bags of rice, cases of water, or large appliances, should go on the floor or the bottom shelf to prevent injury when lifting. Light items, like paper towels or extra napkins, and rarely used items, like the turkey roaster or holiday-specific sprinkles, should go on the highest shelves. If you have young children, place their approved snacks on a low shelf they can reach independently. This empowers them and keeps them from climbing the shelving units. 4.Facilitators Deep pantries present a specific challenge: things get lost in

Cleaning The Pantry: 5 Expensive Mistakes You Are Making with Pantry Storage Read More »

Storage Ornaments: 8 Amazing Tips For Storing Christmas Decorations Efficiently

Why Smart Christmas Decoration Storage Pays Off The week after the holidays has a particular feel: the guests are gone, the anticipation has faded, and the house that sparkled in December now looks tired and cluttered. Taking the tree down is nobody’s favorite chore, so most of us rush, cramming lights into grocery bags and piling wreaths into the basement corner. That haste has a price, paid next November when you unpack crushed ornaments, knotted lights, and a flattened artificial tree. Efficient Christmas storage protects the money invested in your decor and keeps the holiday magic easy to reach. These eight tips will carry your decorations safely through the off season. Tip 1: Audit Everything Before You Pack It Away Storage starts with a ruthless purge, not a box. As you pull ornaments off the tree and garlands off the banister, check the condition of every item. A light string that flickered all season or has a dead section will not fix itself in the attic, so recycle it now. Ornaments with cracked caps, shattered glass, or a style you no longer love should be donated or tossed. Storing broken or unwanted items wastes space and guarantees you will sort through the same junk next year. Keep only what is functional and brings you joy. Tips 2 and 5: Trees, Wreaths, and Garlands Need Structure The artificial tree is the biggest item you store, and its original cardboard box rarely survives more than one season. Cardboard weakens with moisture and attracts pests, and fighting a fluffy tree back into its factory box is a losing battle. A dedicated canvas tree bag is moisture resistant and roomy enough to hold the sections without crushing needles, and binding each section with cinch straps or old belts shrinks the bundle dramatically. With enough ceiling height, upright storage bags let the tree stand tall all year, so you skip most of the fluffing next December. Wreaths and garlands are the opposite problem: bulky and airy, they flatten under heavy boxes. Hard-shell wreath containers preserve the shape, or hang wreaths on a simple hook in the garage or basement. Coil garlands into a clear bin, or wrap them around a coat hanger, but never let them get compressed. Tips 3 and 4: Protect Ornaments and Tame the Lights Throwing every bauble into one giant bin is a recipe for heartbreak. Fragile glass and ceramic ornaments need individual protection: plastic cups glued to a sheet of cardboard make crush-proof cells for round ornaments, egg cartons cradle small baubles, and bubble wrap is essential for heavy or irregular keepsakes. Then group ornaments by color, theme, or room, so the set for the dining room tree lives in its own labeled box and you never unpack everything to decorate one corner. For lights, the enemy is entropy. Never wind a strand around your arm and drop the coil in a box, because it will tangle as it relaxes. Instead, cut notches in a flat piece of cardboard, wind the strand tautly around it, and plug the male end into the female end to lock it. Masking tape labeled “Mantel” or “Tree Bottom” saves hours of testing next year. Tips 6 and 7: Textiles, Bins, and Labels Stockings, tree skirts, holiday pillows, and table runners face a biological enemy: fabric attracts dust mites, moths, and mildew, especially with food crumbs still in the fibers. Launder or dry-clean everything first, then vacuum-seal bags compress bulky textiles while sealing out moisture and insects. Without vacuum bags, latching plastic bins with a silica gel packet inside are the next best thing. Opaque bins hide their contents, so switch to clear plastic bins and label with detail: “Christmas” is useless, while “Living Room: Stockings, Mantle Lights, and Nutcrackers” is helpful. Load by logic: the items you need first, like Advent calendars and the door wreath, go in last so they sit at the front of the stack, and number the bins so nothing goes missing. Christmas Storage Cheat Sheet Item Best Storage Method Mistake to Avoid Artificial tree Canvas tree bag, sections bound with straps Reusing the original cardboard box Glass ornaments Cups glued to cardboard, egg cartons, bubble wrap Throwing everything loose into one bin Light strings Taut wind on a notched cardboard spool Winding around your arm and dropping in a box Wreaths and garlands Hard-shell containers or hanging hooks Stacking heavy boxes on top Stockings and pillows Laundered, then vacuum-sealed Storing dirty fabric in cardboard Everything Clear bins with specific labels, numbered Opaque bins marked only “Christmas” Your 8-Step Packing Sequence Audit every item and purge broken lights and ornaments first. Bind tree sections with straps and slide them into a canvas bag. Wrap fragile baubles in cups, egg cartons, or bubble wrap. Group ornaments by color, theme, or room in labeled boxes. Wind light strands on cardboard spools and label each plug. Box wreaths in hard shells; coil garlands without compression. Launder textiles, then vacuum-seal or bin them with silica gel. Load bins so first-needed items sit at the front and top. Frequently Asked Questions Can I store Christmas lights by wrapping them around my arm? No, that coil relaxes into knots as soon as it hits the box. Wind each strand tautly around a notched cardboard spool and plug the ends together instead. Are cardboard boxes fine for storing decorations? They are risky long-term. Cardboard weakens with moisture and invites pests, so clear plastic latching bins with silica gel packets are safer, especially in a basement. Should I wash stockings and tree skirts before storing them? Yes, launder or dry-clean textiles first. Food crumbs attract moths, while vacuum-sealed clean fabric stays fresh all year. What is the best way to store fragile glass ornaments? Give each bauble its own cell: plastic cups glued to cardboard for round ornaments, egg cartons for small ones, and bubble wrap for irregular or heavy pieces, then group them by room in labeled boxes. Tip 8: Finish With a Clean House Reset

Storage Ornaments: 8 Amazing Tips For Storing Christmas Decorations Efficiently Read More »

Woman making a to-do list for January after the holiday season.

The January Reset: 8 Essential Tasks to Recover from the Holidays

The January Reset: 8 Essential Tasks to Recover From the Holidays January in Canada is a stark transition: festive lights down, hosting adrenaline gone, and the coldest, darkest stretch of the year arrived. Your home shifts from hosting mode into defense mode, because dry air, road salt, and wasted heat all attack at once. This reset list is a strategic plan for your home’s most vulnerable season, not just a cleaning schedule. 1. Take Down the Tree and Recover From the Holidays Takedown is the first priority, beyond boxing ornaments. By the first week of January, a real tree is usually a dehydrated fire hazard, dropping debris that embeds in carpets and scratches hardwood. Bag the tree before hauling it out, then vacuum with the hose attachment, never the beater bar, which jams on needles. Pull needles out of baseboards, vents, and deep rug pile, label boxes by room as you pack, and toss any light string that failed this year. 2. Win the War on Road Salt January is when salting trucks are busiest, and your entryway floors suffer most. The white crust on boots is calcium chloride or sodium chloride, highly alkaline and abrasive: on hardwood it eats through the polyurethane finish and stains the fibers grey, and on tile it degrades the grout. Wet mopping just spreads the brine, so neutralize it with one cup of vinegar per gallon of warm water, whose acidity breaks the salt bonds. Rinse boot trays in a utility sink, and enforce a no-shoes-past-the-mat policy, your flooring’s best defense all month. 3. Manage Indoor Air Quality and Humidity The house is sealed tight and the furnace runs around the clock, circulating air that grows drier and dustier by the day. Ideal winter humidity sits between 30% and 40%: any lower, and hardwood shrinks and cracks while static pulls dust onto every surface; any higher, and condensation forms inside windows, inviting mold on the sills. Run a humidifier if needed but clean it weekly so it does not spray bacteria, and change the furnace filter, since a clogged one restricts airflow and recirculates allergens. Health Canada’s guidance on indoor air contaminants and health covers the topic in detail. 4. Cut the Dust: Coils, Fans, and Vents With the furnace blasting, convection piles dust onto door frames, fan blades, and refrigerator coils. Vacuum the coils: coated in dust, the fridge cannot shed heat, so the compressor runs longer, wasting energy and shortening its life. Bathroom fans matter too: ventilation is the only exit for shower moisture in a sealed house, and a grille clogged with fuzz traps humidity, inviting mildew on cold exterior walls. 5. Detox the Kitchen After December The kitchen carries the scars of December excess. Purge the refrigerator ruthlessly: bin anything past its date or looking questionable, then scrub the shelves in hot soapy water until every sticky residue is gone. If the oven skipped its pre-turkey scrub, avoid the high-heat self-clean: with sealed windows the fumes have nowhere to escape, so hand-scrub with a baking soda paste instead. Scrub the dishwasher filter too, since it processed a season of grease and gravy. 6. Check Safety Systems Carbon monoxide kills silently, and the danger peaks each winter as furnaces, water heaters, and gas stoves overwork behind sealed windows. Test every CO detector and smoke alarm now, and clear snow and ice off external vents, including the dryer duct and furnace exhaust; a blocked flue can push deadly CO back indoors. Finally, vacuum the dryer vent hose: dry air breeds static and lint ignites easily. 7. Refresh Winter Gear and Declutter One In, One Out The laundry room needs attention too, since coats, scarves, and mittens sponge up sweat, street grime, and bacteria yet rarely get washed. Launder down coats with tennis balls to re-fluff the fill, wash hats and scarves, and treat cuff salt stains with vinegar before the fibers are damaged. December also left a flood of new gifts, so apply the one-in-one-out rule: for every new sweater, donate an old one; for every new toy, take out a broken one. Clutter gathers dust and blocks heat flow, so take on one closet or drawer weekly. The January Reset Checklist Bag and remove the tree, then vacuum needles with the hose attachment. Neutralize entryway salt with a vinegar and water solution. Keep indoor humidity between 30% and 40%; clean the humidifier weekly. Vacuum fridge coils, bathroom fan grilles, and change the furnace filter. Purge the fridge and clean the oven with a baking soda paste. Test CO detectors and clear snow from exterior vents. Wash winter gear and treat salt stains quickly. Declutter with the one-in-one-out rule, one closet a week. January Home Risks at a Glance Threat Damage If Ignored Fast Fix Dry indoor air Shrinking hardwood, heavy static dust Humidifier, cleaned weekly, aiming for 30-40% Road salt Grey stains in finish, ruined grout Vinegar-water wash and no shoes past the mat Clogged furnace filter Overheating furnace, recirculated allergens Fresh filter early in the month Dusty fridge coils Longer compressor runs, wasted energy Vacuum coils at the back or bottom Blocked vents Carbon monoxide backing into the home Clear snow and ice; vacuum dryer hose lint Humid bathroom Mildew on cold walls Clean exhaust fan grille Frequently Asked Questions Why is 30-40% indoor humidity recommended in a Canadian winter? Below that range, hardwood shrinks and static electricity builds; above it, condensation forms on windows and mold can grow on sills. That band keeps both problems away. Can I vacuum pine needles with a regular upright vacuum? Not with a spinning brush running; the beater bar jams on needles and the motor can overheat. Switch to the hose attachment or a hard-floor setting instead. Is the oven self-clean cycle safe in January? In a tightly sealed winter home it is a poor choice, since the high-heat cycle releases fumes with nowhere to escape. Manual cleaning with a baking soda paste protects your indoor air. How do I remove road

The January Reset: 8 Essential Tasks to Recover from the Holidays Read More »