Cleaning Checklist

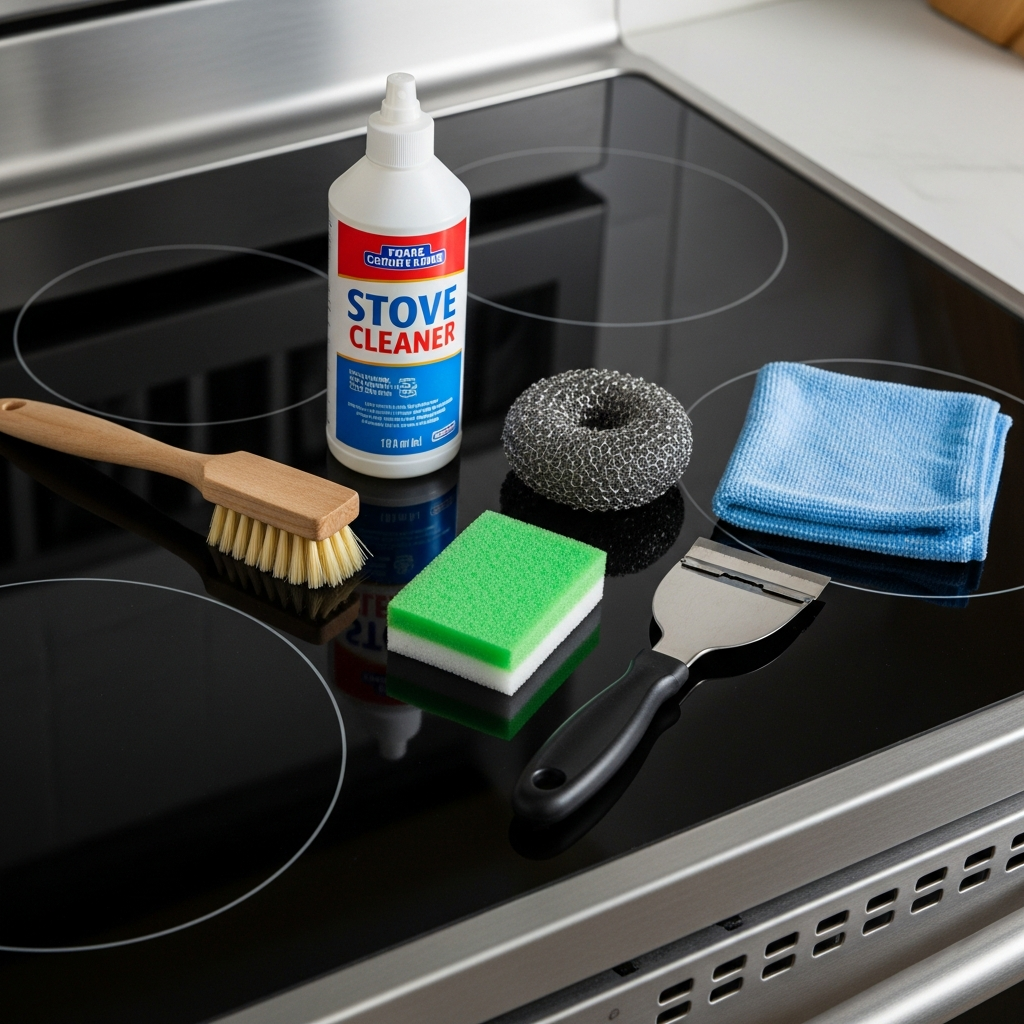
Make Your Stove Look New Again with These Simple Tools

A Stove Collects More Filth Than Any Appliance You Touch Daily Every splatter of oil and dropped crumb lands on the stove and hardens into something nearly as tough as the metal beneath it. A grease-laden cooktop is a fire hazard, and blocked burner ports throw heat unevenly. Most people also clean it wrong, grinding abrasive pads across delicate glass or spraying electronics. The fix is matching each surface, glass, cast iron, enamel, or coil, to the right chemistry and force. Glass-Ceramic Cooktops: Use a Blade, Not a Scrub Pad Burnt-on food is the real enemy on a glass top, and sugary spills need instant attention because they pit the glass as they cool. The rough side of an ordinary sponge acts like sandpaper on glass-ceramic, leaving micro-scratches that dull the finish and then trap dirt. The correct tool is a razor blade scraper held at about forty-five degrees, shearing carbon off safely. Keep the glass wet with cleaner or baking soda paste as lubricant, then buff dry with a microfiber cloth. Cast Iron Grates: Let Ammonia Fumes Do the Scrubbing Gas ranges bake grease into porous cast iron, and the grates’ corners shred sponges. Hand-scrubbing burns an afternoon and rarely finishes the job. Instead, seal the grates in a heavy-duty garbage bag with a splash of ammonia and wait twenty-four hours, opening the bag outdoors because the fumes are strong. Ammonia breaks the bond between carbonized food and the iron, so grime wipes off with almost no scrubbing. Rinse and dry the grates completely, warming them briefly in the oven, because bare iron rusts fast. And never combine ammonia with bleach-based products: CDC bleach guidance warns that mixing cleaners releases dangerous vapors. Burner Ports, Igniters, and the Blue Flame Test A yellow flame instead of steady blue, or endless clicking, means clogged ports. Clear the tiny holes gently with a straightened paper clip, careful not to snap the tip off inside. Burner caps and heads soak fine in warm soapy water, but the ceramic igniter nub must stay dry; a damp or cleaner-smeared igniter cannot spark until it has dried out. On reassembly, confirm every cap sits flat; an askew cap produces a dangerous, flaring flame. Electric Coils: The Drip Pans Are the Real Problem Coil stoves are the most modular design in any kitchen, and the coils mostly self-clean by burning residue off. The shallow pans underneath catch everything else, and a carbonized pan becomes a smoke generator every time the stove turns on. Never line them with aluminum foil, a shortcut that traps heat and can melt wiring. Drip pans are cheap: replace rusted or hopelessly caked ones, or boil salvageable pans in water with vinegar. Coils pull straight out, but never submerge their electrical contacts. Control Panels: Pull the Knobs, Spare the Circuit Board Knobs and buttons are the most touched, least cleaned parts of a range. Grease hardens behind the knobs into glue, so pull them off and degrease the stems; wiping around them packs dirt deeper. On digital panels, never spray cleaner at the screen, because liquid seeping behind the bezel can short the board. Spray the cloth, then wipe, and when disinfecting surfaces follow the CDC’s basics for cleaning and disinfecting your home: remove soil first, then respect the stated contact time. The Oven Interior: Skip the Self-Clean Cycle Self-cleaning sounds effortless, but it incinerates soil by pushing the cavity past 900 degrees F, and the aftermath is smoky and risky. That heat can fry sensitive control boards, and fumes from burning coated racks or polymerized grease are toxic to pets, birds especially. A manual clean is safer: spread a baking soda paste over the interior, leave it overnight so the alkali breaks down grease, then mist vinegar over the dried paste. The foaming reaction lifts grime for a nylon brush and preserves the appliance. Racks, Door Glass, and the Range Hood Oven racks are too big for the sink, so use the bathtub: towels down, racks on top, covered with hot water plus dissolved dishwasher detergent. Enzymes chew through proteins and fats over hours, and burnt residue then wipes off with a sponge. The brown film on the door window is polymerized grease; the glass is tempered, so paste plus a kept-wet razor handles stubborn patches. Streaks between the two panes need full door disassembly, which most people sensibly skip. Above the cooktop, clogged hood filters dump grease back onto cabinets. Wash metal mesh filters monthly in a boiling degreaser soak; charcoal filters in ventless hoods must simply be replaced. Prevention Beats Every Method Above Wipe spills while warm, before carbonization locks them in, and remove sugar from glass tops instantly, since it contracts while cooling and can tear the surface. If you line the oven floor, use a correctly sized liner rather than foil, because foil blocking vents can cause carbon monoxide buildup. The whole science is alkaline cleaners on fatty soils, gentle blades on delicate glass, and dwell time: rushed jobs push people toward pads and knives that scratch permanently. For layers beyond DIY, a scheduled deep clean of the kitchen resets hood, oven, and everything between, the same approach that anchors an end-of-tenancy visit before a deposit deadline. Surface Use this Never do this Glass cooktop Razor at 45 degrees, wet paste Scrub with the rough sponge side Cast iron grates Sealed bag with ammonia, 24 hours Leave rinsed grates damp Drip pans Boiling vinegar soak, or replace Line with aluminum foil Oven interior Overnight paste, vinegar mist Rely on 900 degree self-clean fumes Controls and screen Cleaner sprayed onto the cloth Spray directly at the bezel Frequently Asked Questions Can I use baking soda and vinegar on every part of the stove? The paste is gentle enough for oven walls, door glass, and rims, and the vinegar mist lifts what the paste loosened. Exceptions: electrical areas, where liquid belongs on a cloth, and stone surrounds, where acid dulls the finish. Why is my gas burner flame yellow

Make Your Stove Look New Again with These Simple Tools Read More »

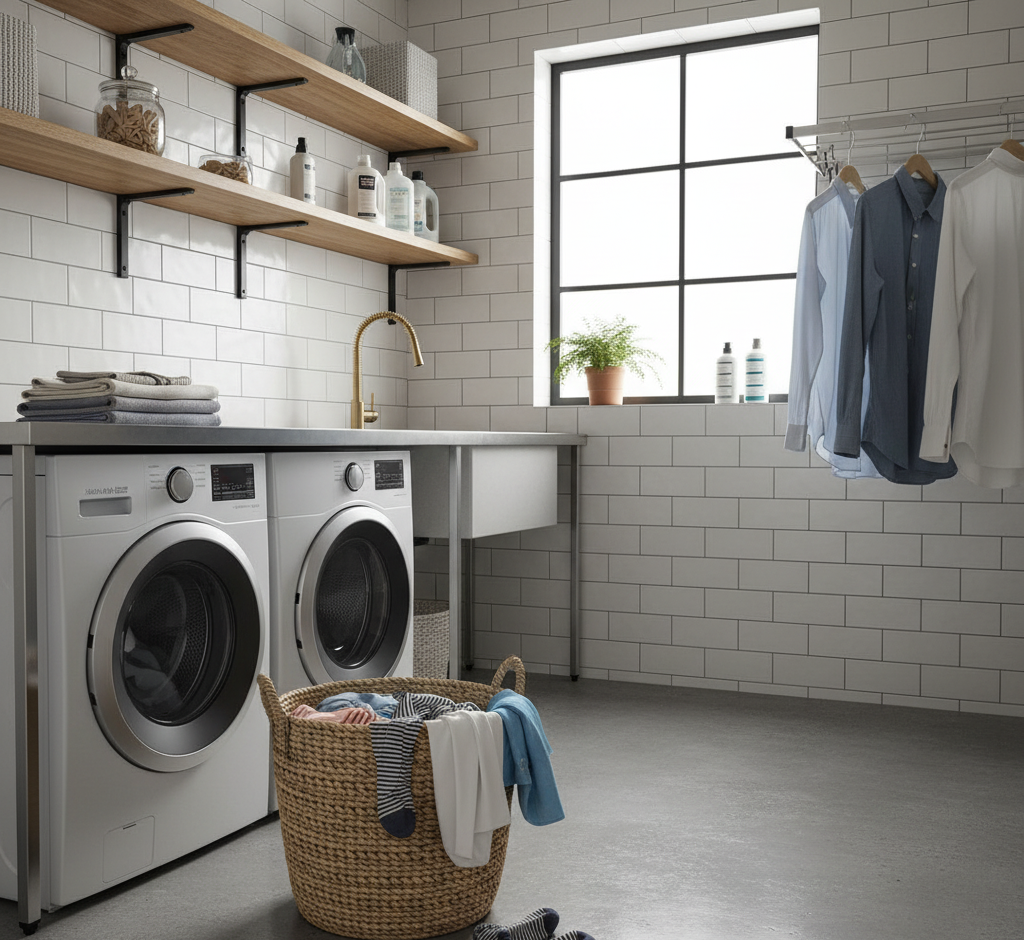
laundry basket in the laundry room

Washing Clothes: 10 Mistakes You Need to Stop Making When Washing Your Clothes

The act of washing clothes is often dismissed as a mundane necessity, a background task that requires little thought beyond separating whites from colors and pressing a button. However, this perceived simplicity is deceptive. Laundry is a chemical and mechanical process that involves a delicate balance of water temperature, agitation, chemical agents, and fabric types. When this balance is disrupted by habitual errors, the consequences are expensive and frustrating. Clothes fade prematurely, fibers break down, elastic snaps, and mysterious holes appear in favorite garments. Furthermore, the appliances themselves, often significant financial investments, suffer from misuse, leading to mechanical failures and mold growth. To truly care for a wardrobe and maintain the efficiency of a household, one must unlearn the common practices that have likely been passed down through generations or assumed out of convenience. 1.First Mistake The first critical error occurs long before the start button is pressed, during the sorting phase. Most people operate under the assumption that sorting is purely a chromatic exercise-keeping red socks away from white shirts to prevent pink underwear. While preventing dye transfer is important, sorting by fabric weight and texture is arguably more critical for the physical preservation of the garments. A washing machine cleans through agitation; clothes rub against each other to dislodge soil. When you mix heavy, abrasive fabrics like denim jeans with delicate materials like silk or fine cotton, you are effectively creating a sandpaper effect. The heavy items thrash against the lighter ones, causing micro-abrasions that manifest as pilling, holes, and a general loss of softness. Furthermore, the texture of fabrics dictates their lint behavior. Washing lint-shedding items, such as heavy cotton towels, with lint-attracting fabrics, like synthetic leggings or corduroy, results in a visual disaster that makes dark clothes look permanently dirty. 2.Individual Preparation Once the piles are sorted, the preparation of individual garments is often neglected. This mechanical oversight leads to tearing and stretching. The rule for hardware is simple yet frequently confused: zippers must be closed, and buttons must be open. A zipper left unzipped is essentially a flexible saw blade loose in the drum. As it spins, the metal teeth can snag on lace, scratch the surface of other fabrics, and even chip the interior paint of the washing machine. Conversely, buttoned shirts suffer from the opposite problem. When a shirt is wet, it is heavy. If it is buttoned up, the centrifugal force of the spin cycle pulls aggressively at the threads holding the buttons, distorting the buttonholes and causing buttons to pop off. Pockets also require vigilant inspection. A stray tissue can disintegrate and cover an entire load in white confetti, while heavier objects like coins can bypass the seal and damage the drain pump. 3.Detergent The application of detergent is the area most rife with misconceptions. Decades of marketing have convinced consumers that more foam equals more cleaning power. In reality, the opposite is true for modern high-efficiency machines. These appliances use very little water, relying on friction to clean. When you use too much detergent, you generate a massive volume of suds that acts as a cushion between the clothes, preventing the necessary friction that scrubs away dirt. The clothes simply float in a bubble bath, emerging with their stains intact. Worse, the rinse cycle cannot remove this excess chemical load. The result is a layer of soap residue left on the fibers, which acts as a magnet for dirt and skin oils, creating a breeding ground for bacteria and leading to the “sour” smell often associated with old towels. 4.Fabric Softener Compound this issue with the habitual use of fabric softener, and you have a recipe for textile ruin. Fabric softener works by coating fibers with a layer of lipid-based chemicals to force them to feel slick. While this feels nice instantly, it functionally destroys the utility of absorbent fabrics. Towels coated in softener lose their ability to wick water; they simply push moisture around the skin. Athletic wear, engineered to breathe and wick sweat, becomes clogged and sealed by these waxy deposits, trapping body odors deep within the weave. A simple substitution of white vinegar in the rinse cycle can soften fabrics by stripping away detergent residue and neutralizing static without leaving a damaging coating behind. 5.Amount The physical loading of the machine also requires a specific balance. There is a tendency to stuff the drum to capacity to minimize the number of loads, but a packed machine is a useless machine. For the chemistry of the detergent to work, it must dissolve and circulate. For the mechanical action to work, clothes must have room to tumble. A solid brick of wet fabric in the center of the drum will never get clean. Conversely, washing a single heavy item is a mechanical hazard. A lone wet blanket creates a severe imbalance during the spin cycle, causing the drum to bang violently against the chassis, wearing out the suspension and bearings. 6.Water Temperature selection is another variable where habit often overrides logic. The default to cold water for everything, driven by eco-consciousness, is noble but insufficient for sanitation. While cold water is excellent for preventing shrinkage and protecting dyes, it often lacks the thermal energy required to activate the enzymes in detergents that target heavy oils. Bed sheets and towels, which are reservoirs for dead skin and dust mites, require hot water to be truly sanitized. A cold wash for these items is merely a rinse. However, using hot water indiscriminately is equally damaging, as it sets protein-based stains like blood and sweat into the fabric permanently. A nuanced understanding of temperature-hot for sanitation, warm for average soil, and cold for delicate protection-is necessary. 7.Stains When stains do occur, the immediate reaction is often the wrong one. The instinct to rub a spill vigorously is a destructive reflex. Rubbing drives the stain deeper into the yarn and abrades the surface of the fabric, often causing color loss that is more noticeable than the stain itself. The correct technique is

Washing Clothes: 10 Mistakes You Need to Stop Making When Washing Your Clothes Read More »

Paperwork Organization

Paperwork Organization: 7 Steps to Organizing Your Important Documents

Accumulation of paperwork is arguably the most stressful type of disorder found in the modern home. Unlike a sink full of dishes or a basket of dirty laundry, which represent simple, repetitive chores, a pile of paperwork represents a stack of unmade decisions. Each envelope, receipt, and flyer carries a potential obligation, a deadline, or a piece of information that might be needed in some hypothetical future. This ambiguity is what makes paper so difficult to manage. We let it accumulate on kitchen counters, dining tables, and entry consoles not because we are lazy, but because we are afraid of making the wrong choice. We fear throwing away something vital, yet we lack the immediate energy to process it. Organizing your paperwork is therefore less about tidiness and more about establishing a workflow that allows you to manage your life with confidence and efficiency. It is about moving from a state of reactive anxiety to one of proactive control. 1.Look For All The Papers To begin the process of organizing your paperwork, you must first understand the scope of the problem. You cannot organize a clutter problem in piecemeal fashion; you must attack it in its entirety. This means gathering every scrap of loose paper from every corner of your house. You must look inside junk drawers, check the bottom of work bags, clear off the refrigerator door, and empty the glove compartment of your car. Bring everything to a large, central surface, such as a dining room table. This step is often visually overwhelming, but it is necessary. Seeing the sheer volume of paper in one location breaks the illusion that you can simply “tidy up” a little bit at a time. It forces you to confront the reality of the accumulation and provides the psychological leverage needed to be ruthless in your sorting. 2.Triage Once you have your mountain of paper, the next phase is the triage. This is a rapid-fire sorting process where you make quick decisions based on the immediate nature of the document. You are not filing yet; you are simply categorizing. Create three distinct piles: Trash, Action, and Archive. The Trash pile should be the largest. It includes junk mail, expired coupons, flyers for services you will never use, and envelopes from opened mail. Be aggressive here. If the information is readily available online, you generally do not need the physical paper. As you sort, keep a shredder or a dedicated bag for shredding nearby. Any document containing personal information like your name, address, social security number, or financial details that goes into the trash must be shredded to protect against identity theft. This includes credit card offers and old bank statements. The Action pile is for documents that require you to do something. This is your “active” paperwork. It includes bills that need to be paid, forms that need a signature, invitations that require an RSVP, or documents that you need to read or review. This pile represents your current to-do list. The mistake many people make is filing these items away too quickly, where they are forgotten until a deadline is missed. Action items need to remain visible but contained. The Archive pile is for documents that require no immediate action but must be kept for future reference. These are your tax returns, medical records, insurance policies, property deeds, and vehicle registration papers. This pile will eventually move to your filing cabinet or long-term storage solution. You may also encounter a category of sentimental items-cards, letters, children’s drawings. Do not let these derail your progress. Place them in a separate box to be dealt with later. Attempting to reminisce while organizing administrative papers is the fastest way to lose momentum. 3.Desk Organizers With the sorting complete and the trash removed, you can focus on setting up the Action system. Since these papers need to be accessed frequently, they should not be hidden in a drawer. A desktop sorter, a tiered wall file, or a dedicated tray system works best. The goal is to categorize the action required. You might have sections labeled “To Pay,” “To Read,” and “To File.” The “To File” section acts as a holding area for items you have processed-the bill has been paid, the form signed-but have not yet had time to move to the permanent archive. This system prevents active papers from being scattered across flat surfaces. However, a system is only as good as the habits that support it. You must designate a specific time each week to process the Action file. During this weekly session, you pay the bills, sign the forms, and move the completed items to the “To File” section. The Archive is the backbone of your home organization. This is where your permanent records live. Whether you choose a traditional metal filing cabinet, a series of plastic file boxes, or binders, the structure of your filing system should be intuitive. Avoid over-complicating your categories. If you create a folder for every single utility provider, you will end up with a drawer full of thin, floppy files that are hard to navigate. Instead, use broad categories such as “Home,” “Auto,” “Financial,” “Medical,” and “Personal.” Inside the “Auto” category, you can keep everything related to your vehicles-repair logs, insurance, and registration. Inside “Home,” you can store mortgage documents, renovation contracts, and appliance warranties. This broad approach reduces the mental friction of deciding where a document belongs. When you are looking for something later, you simply have to ask yourself the general category it falls under. 4.Labeling Labeling is a critical component of a functional archive. Handwritten scribbles on manila folder tabs are often illegible and discouraging. Use a label maker or write in large, bold block letters. A neat, clearly labeled file is more likely to be used correctly. Furthermore, consider the physical flow of your files. Arranging them alphabetically is the most standard method, but you might prefer arranging them by frequency of use, with the most accessed files at the front.

Paperwork Organization: 7 Steps to Organizing Your Important Documents Read More »

entryway for winter dirt and salt

How to Set Up Your Entryway for Winter Muck and Salt – 6 Professional Tips

The Entryway Is Your Home’s First Line of Defense Against Winter Muck When November settles over Canada, the entryway stops being a pretty threshold and becomes a work zone. Wet leaves, mud, melting frost, and the first applications of road salt all arrive on the soles of boots within seconds of every trip outside. Anything you fail to trap at the door gets tracked deeper, staining carpet, scratching hardwood, and leaving a permanent gritty film on every surface. A purpose-built winter entryway is not decoration. It is containment, and it protects the floors you have already paid for. Here are six professional setups that make the muck season manageable. Tip 1: Put a Real Scraping Mat Outside the Door Everything starts with an exterior mat whose one job is aggressive scraping. A thin decorative welcome mat cannot handle clumps of mud, snow, and gravel; a Canadian winter needs a workhorse. Coir coconut fiber, heavy-duty rubber with deep grooves, and synthetic turf designs all shrug off freezing temperatures and moisture without cracking or rotting, and their texture nudges people into a proper shoe wipe. Shake the mat out often, and give it a hard hose-down before the deep freeze so its scraping surface stays sharp rather than cemented with old mud. Tip 2: Let the Interior Mat Absorb What the First Mat Misses Inside, the second mat plays a different role: soaking up moisture and trapping the fine grit and salt dust that slips past the scraper. Size matters. Choose one long enough that a person can step fully onto it, close the door, and kick off shoes without touching clean floor. High-absorbency cotton or microfiber surfaces pull up a surprising volume of water, and a non-slip rubber backing prevents dangerous slips while keeping trapped dampness off your flooring. Vacuum this mat daily through the high-traffic season, then shake it or launder it weekly. A saturated, filthy mat absorbs nothing; it just becomes a launchpad for the mess. Tip 3: Give Soaking Boots a Containment Zone Even a double-mat system loses to truly drenched footwear. A boot tray, a shallow plastic or rubber basin with a raised lip, catches melting snow, mud drips, and salty brine before any of it meets your floor. That single habit saves polyurethane finishes from salt stripping and keeps grout lines from slowly crumbling. Rinse and wipe the tray often: boots left sitting in days-old brine just reabsorb the corrosive water you were trying to keep out. Tip 4: Build a Complete Unloading Station Think through the whole arrival ritual, not just the floor. A small sturdy bench beside the boot tray lets people sit while wrestling stiff winter boots, instead of hopping and stamping slush onto clean boards. Strong hooks mounted above the mat zone catch dripping jackets and scarves so wet outerwear sheds its moisture inside your one easy-to-clean area rather than onto carpets and furniture further in. The essentials of a working station: A low bench or stool rated for repeated sitting Heavy hooks for coats, backpacks, and leashes Baskets for hats, gloves, and mufflers The boot tray, sized to the household’s shoe volume A hook or shelf for the daily bag, keys, and pass Tip 5: Dissolve Salt Film, Then Rinse, in That Order The defensive line will be breached, and how you respond decides whether floors survive the season. Act fast: salt attracts moisture, and once it dissolves into brine it can dull and strip the protective finish on hardwood, then creep into porous grout on tile and slowly crack it. Never mop a gritty floor first; that is like scrubbing with sandpaper, grinding sharp particles into the clear coat. Vacuum with a hard-floor head or sweep with a soft broom to lift dry grit, then work the salt marks with a damp, not wet, mop, because excess water swells and warps hardwood and laminate. For routine mopping of tile and sealed stone, a diluted pH-neutral cleaner lifts grime without attacking grout. For stubborn white haze, dissolve the alkaline deposits with one cup of white vinegar per gallon of warm water, then follow immediately with a second pass using a clean mop head and plain water to rinse. Dissolve, then rinse: skipping the rinse just re-deposits a new film as it dries. Store any vinegar or salt-removal solution carefully and follow the federal guidance on household chemical safety about labels, storage, and never mixing products. Tip 6: Keep Dedicated Cleaning Tools in the Front Closet Cleanup happens when supplies are five seconds away. Park a small dustpan and brush, a roll of paper towels or a designated muck cloth, and a spray bottle of your salt solution right in the entry closet so spills get wiped before they set. Use the same effort to organize the closet itself: room for bulky parkas without bursting doors, a shelf for boots mid-dry, and bins for the endless parade of toques and gloves. A tidy closet keeps the whole zone calm, because a clean entryway is an organized entryway. Your Winter Entryway Kit at a Glance Component Job Best picks Maintenance Outdoor mat Scrape heavy debris Coir, grooved rubber, turf Shake often; hose before freeze Indoor mat Absorb water, trap fine grit Cotton or microfiber, rubber backing Vacuum daily; wash weekly Boot tray Contain meltwater and brine Plastic or rubber with raised lip Wipe and rinse frequently Bench and hooks Safe unloading of people and coats Sturdy, wipeable surfaces Declutter weekly Tool caddy Instant spill response Dustpan, cloths, salt spray Restock as used The CDC’s overview of cleaning and disinfecting household surfaces reinforces the same sequence you need at the door: remove the gross stuff first, then clean the surface itself. Winter Entryway FAQ How big should an indoor winter mat be? Long enough that both feet land fully on it and you still have room to shut the door and remove shoes. A small rug that slides aside when kicked is worse than useless in slush season. Will road salt ruin hardwood

How to Set Up Your Entryway for Winter Muck and Salt – 6 Professional Tips Read More »

Woman cleaning the counter with pH-neutral products next to her.

Understanding pH-Neutral Cleaners: The Complete Guide

What pH-Neutral Cleaners Are and Why Your Surfaces Thank You for Them Somewhere between the vinegar bottle and the oven degreaser sits the most important concept in household chemistry: a balanced pH. Master it and you move from aggressive scrubbing that quietly damages finishes to gentle, sustainable maintenance that keeps stone, wood, and tile looking new for decades. This guide explains what a pH-neutral cleaner actually does, exactly where it is essential, where it fails, and how to use one like a professional. The pH Scale in Plain Language The pH scale measures how acidic or alkaline a water-based solution is, running from 0 to 14. Pure water sits at 7, dead center, and is the model of neutral. Below 7 lands acid, with vinegar and lemon juice as the classic household examples. Above 7 is alkaline, also called basic, a club that includes bleach, ammonia, and most oven degreasers. The further a product strays from 7, the more chemically reactive and potentially caustic it becomes. That reactivity is a double-edged sword: it is what lets strong cleaners dissolve hard water stain or cut heavy grease, and it is also what ruins surfaces that never stood a chance against them. Health Canada’s resource on using household products safely makes the same point about reading labels and respecting product strength. What a Neutral Cleaner Actually Does A pH-neutral soap is a surfactant formulated to sit at or very near 7. It lifts dirt, oils, and grime off a surface and suspends them so they can be wiped away, without trying to dissolve, etch, or strip the material underneath. Its action is mechanical, breaking the bond between soil and surface rather than attacking the surface itself. Think of it as the do-no-harm principle of cleaning: the default choice for any material that a strong acid or alkali would permanently damage. Natural Stone: The Strongest Case for pH 7 Marble, limestone, travertine, and onyx bring luxury into a home and extraordinary vulnerability with them. These stones are largely calcium carbonate, which reacts violently with acid. Even a “natural” splash of vinegar on a marble counter sets off a reaction that dissolves a microscopic layer of stone. The result, called etching, looks like a dull whitish stain but is physical damage that no wipe can undo; removing it means professional re-honing and polishing. Alkaline cleaners are less dramatic but still wrong, dulling the finish and working into pores over time. A pH-neutral cleaner is the only recommended routine product for these calcium-based stones. Granite etches far less readily, yet harsh chemicals degrade the sealant that protects it from stains, so neutral soap remains the wisest daily choice. Floors, Leather, and Fabrics The same preservation logic protects your floors. A sealed hardwood floor is defended by its finish, not the wood beneath, and repeated washes with high-alkaline cleaners slowly strip that polyurethane layer. The floor may look clean today while growing duller and thinner with every mop. A properly diluted pH-neutral floor cleaner lifts soil off the finish without eating it. Manufacturers of luxury vinyl tile and laminate almost universally specify neutral cleaners for the same reason: harsh chemistry clouds or embrittles the factory wear layer, permanently marring the look and often voiding the warranty. Leather, a natural skin kept supple by its own oils, reacts the same way to alkaline soaps by drying, cracking, and fading, while delicate upholstery and clothing respond far better to a neutral spot-cleaning solution. Professionals follow that order of force: start with the gentlest method that can work. Where pH-Neutral Cleaners Hit Their Limits Neutral products are masters of maintenance, not miracle workers. Three common jobs need something else: Hard water stains and soap scum. These are alkaline mineral deposits of calcium and magnesium, so an acidic cleaner is required to break the bonds. Baked-on stovetop or oven grease. Polymerized oil needs a moderately alkaline degreaser; a neutral soap simply lacks the power. Disinfecting. Neutral soaps clean but do not inherently kill germs. Countertops touched by raw meat or a bathroom during flu season need a dedicated disinfectant applied after cleaning, as the CDC’s home cleaning and disinfecting guidance describes. Strong chemistry also demands respect: never blend cleaning products, and store them per Health Canada’s household chemical safety rules, since mix-ups like combining bleach with other cleaners can release toxic gas. Smart Technique: Dilute, Two-Bucket, Microfiber Most neutral cleaners ship as concentrates, so dilute exactly to the label. Too much product leaves a sticky film that attracts fresh dirt, the opposite of the goal. For floors, the two-bucket method keeps things honest: one bucket holds cleaning solution, the second holds clean rinse water, so the mop never redistributes what it lifted. On countertops, pair the cleaner with a quality microfiber cloth whose fibers trap soil instead of pushing it around. Lift the dirt, remove it, leave nothing behind but a clean surface. The sensible arsenal is small: a neutral workhorse for the vast majority of daily and weekly tasks, plus acidic and alkaline specialists reserved for the specific problems that truly need them. Which Cleaner for Which Surface Surface or soil Right chemistry Why Marble, limestone, travertine, onyx pH-neutral Acids etch calcium carbonate instantly Granite and sealed stone pH-neutral Protects the stain-blocking sealant Sealed hardwood, LVT, laminate pH-neutral, diluted Spares the wear layer and the warranty Leather, upholstery, delicates pH-neutral Keeps natural oils and dyes intact Hard water and soap scum Mildly acidic Alkaline minerals dissolve in acid Baked-on grease Mildly alkaline degreaser Saponifies polymerized oils Germ-sensitive counters Clean, then disinfect Neutral soap lifts soil, not pathogens pH-Neutral Cleaner FAQ How do I know if a cleaner is truly pH-neutral? The label should say pH neutral or pH 7. If it does not, contact the manufacturer; a generic “all surface” claim is not a promise, since many multi-purpose products lean alkaline. Is a diluted neutral cleaner safe for everyday mopping? Yes, and it is the recommended routine for sealed floors and stone. Use weak solution, a well-rinsed mop

Understanding pH-Neutral Cleaners: The Complete Guide Read More »

6 Reasons Why Dry Cleaning is The Safest Option For Your Most Important Clothes

The term “dry cleaning” is one of the more misleading phrases in common use, as the process is neither dry nor, strictly speaking, just cleaning. It is a complex and highly specialized method of garment care that involves sophisticated machinery, a deep understanding of fabric science, and the precise application of chemical solvents. The core principle that separates dry cleaning from traditional laundering is the absence of water. Instead of H2O, garments are submerged in and cleaned with a liquid solvent that is specifically chosen for its ability to dissolve oils and greases without damaging delicate, water-sensitive fibers like silk, wool, rayon, or intricately constructed pieces like tailored suits and formal gowns. Water can cause these natural fibers to shrink, distort, or lose their color, but a solvent can lift away stains and soil while leaving the garment’s structure and feel intact. The entire journey of a garment through a dry cleaning facility is a multi-step procedure that combines skilled human touch with advanced technology. 1.Diagnostic The process begins the moment a customer brings a garment to the counter. This initial interaction is a crucial diagnostic step. The customer might point out specific stains, and a knowledgeable cleaner will inquire about the source of the stain, as this information dictates the treatment. Following this, the garment undergoes its first inspection. A trained professional examines it meticulously, not just for the stains pointed out by the customer, but for any others that may be less obvious. They also check the integrity of the garment, noting any loose buttons, open seams, or pre-existing damage. This is also when the care label is read and assessed. The care label is a legal directive from the manufacturer, and the cleaner must adhere to its instructions. Finally, each garment is tagged. This is a critical organizational step. A small, numbered tag or a barcode is affixed to an inconspicuous seam, ensuring that the piece can be tracked throughout the entire process and correctly reassembled with its owner’s order at the end. 2.Stain Removal Before the main cleaning cycle can begin, the garment moves to what is arguably the most artful and skill-intensive stage of the process: pre-treatment, also known as “spotting.” This is where a specialist, the spotter, addresses individual stains. Working at a specialized station called a spotting board, which provides steam, vacuum, and a variety of chemical agents, the spotter acts as a fabric chemist. They must identify both the type of fabric and the nature of the stain to select the correct chemical agent and technique. Stains are broadly categorized; for example, oil-based stains like grease or salad dressing require different solvents than protein-based stains like blood or egg, or tannin-based stains like wine, coffee, or juice. The spotter uses a “steam gun” to apply steam and heat to help loosen the stain, and various chemical solutions are carefully applied, tamped with a small brush, and then flushed out with more steam. A vacuum pedal on the spotting board suctions away the loosened stain and excess moisture, preventing a ring from forming on the fabric. This targeted treatment is essential because the general cleaning cycle might not be sufficient to remove stubborn, set-in stains. 3.Dry Clean Once pre-treated, the garments are ready for the main event: the cleaning machine itself. A modern dry cleaning machine looks very much like an oversized front-loading washing machine, but its internal workings are far more complex. It is a sealed, self-contained system that performs the washing, rinsing, and drying cycles all in one unit. Garments are sorted by color, weight, and fabric type and then loaded into the machine’s drum. The door is sealed, and the machine begins its cycle by filling the drum with the chosen solvent. Historically, the most common solvent was perchlorethylene, or “perc,” a powerful and effective degreaser. However, due to environmental and health concerns, the industry has increasingly shifted towards more eco-friendly alternatives like hydrocarbon solvents, liquid silicone, or even pressurized liquid carbon dioxide. As the drum tumbles the clothes gently, the solvent circulates through the fabric, lifting away body oils, grime, and the loosened stains from the pre-treatment stage. This “wash” cycle is typically much gentler than a water-based wash to protect the delicate garments. After the wash cycle, the machine drains the used solvent and begins an extraction cycle, spinning at high speed to remove the majority of the solvent from the clothes, much like a washing machine’s spin cycle removes water. The used solvent is not discarded; it is pumped through a series of filters to remove the collected dirt and impurities and is then distilled. This purification and recycling process is a key feature of the closed-loop system, allowing the expensive solvent to be reused for many cycles, which is both economically and environmentally necessary. 4.Drying Following the extraction, the machine enters the drying phase. A current of warm air is gently tumbled through the clothes to evaporate any remaining solvent from the fabric. This is not the high heat of a conventional dryer. The temperature is carefully controlled to be just high enough to turn the liquid solvent into a vapor without damaging the clothes. This solvent-laden warm air is then drawn out of the drum and passed over cooling coils. As the air cools, the solvent vapor condenses back into its pure liquid form, is collected, and returned to the main solvent tank for reuse. This vapor recovery system is incredibly efficient, recapturing nearly all of the solvent so that very little escapes into the atmosphere. Once the cycle is complete and the sensors detect no remaining solvent fumes, the machine’s door unlocks, and the garments emerge clean, completely dry, and with only a faint, sterile scent that quickly dissipates. 5.Finishes The journey is not over yet. The clean garments are immediately inspected again. Any stains that were not fully removed during the process are noted. These stubborn spots may require “post-spotting,” where the spotter applies more specialized techniques to the now-clean fabric. Once

6 Reasons Why Dry Cleaning is The Safest Option For Your Most Important Clothes Read More »

Sofa Cleaning: From Simple Vacuuming to Deep Stain Removal

Sofa Cleaning: From Simple Vacuuming to Deep Stain Removal A clean sofa is fundamental to a clean home. Over time, this central piece of furniture collects dust, allergens, food crumbs, and body oils that degrade the fabric and affect indoor air quality. Regular cleaning preserves the sofa’s appearance, extends its lifespan, and keeps the living space healthier for your family. Before any cleaning begins, identify your sofa’s material and check the manufacturer’s care tag, usually found under the cushions. Decode the Care Tag Before You Clean Most sofas carry a cleaning code. The code W means water-based cleaners are safe. S means only a solvent-based, water-free cleaner should be used. WS or SW means either works. An X code means the fabric should only be vacuumed; no water or solvents at all. Following these codes prevents irreversible damage like discoloration and shrinkage, and if the tag is missing, spot-test your chosen solution on a small, inconspicuous area first. Care code Meaning Example products W Water-based cleaners are safe Mild dish soap with warm water S Solvent-based cleaner only Dry-cleaning solvent, no water WS or SW Water-based or solvent-based Either type, test first X Vacuum only Upholstery brush attachment Start with a Thorough Vacuum The first step in any sofa cleaning routine is vacuuming with an upholstery attachment and crevice tool. Remove all cushions, vacuum the base of the sofa, and pay close attention to seams and corners where debris gathers. For fabric sofas, loosen dried-on dirt with a stiff brush first. Weekly vacuuming is the key maintenance practice: it prevents the abrasive dirt particles that wear down fabric fibers over time. DIY Deep Cleaning with Natural Mixtures For a fabric sofa with a W or WS code, a small amount of mild dish soap in warm water makes an effective general cleaner, and equal parts white vinegar and water is a popular natural alternative. Test on a hidden spot, apply sparingly with a microfiber cloth, and blot or scrub gently with a soft-bristled brush. Do not oversaturate: excessive moisture can cause water damage, mildew, or water marks. Finish by wiping away soap residue with a clean, damp cloth. Baking soda is a powerful deodorizer. Sprinkle it over the whole sofa, let it sit for 20 to 30 minutes or a few hours, then vacuum it up with a brush attachment. For tougher stains, make a paste of baking soda and a little water, apply it for 15 to 30 minutes, and wipe it away with a damp cloth before blotting dry. Steam Cleaning for a Deep Sanitization Steam cleaning, also known as hot water extraction, injects hot water and cleaning solution into the upholstery, then immediately extracts the dirty water with a powerful vacuum. It dislodges dirt, dust mites, and allergens, making it especially valuable in homes with allergy sufferers, children, or pets. Check the cleaning code first, start with the lowest heat setting, and avoid over-wetting. Professional equipment extracts a higher percentage of moisture, which means faster drying and less risk of mold or mildew. Stain Removal: Act Fast and Blot, Never Rub Addressing spills promptly is the most effective way to stop them becoming permanent. The golden rule is to blot, never rub: rubbing pushes the substance deeper into the fibers and spreads the stain. Use a clean, dry cloth to absorb as much liquid as possible. Water stains: blot with a mix of white vinegar and water. Grease stains: sprinkle cornstarch or baking soda, wait about 30 minutes, then vacuum. Wine or ink: use a commercial upholstery stain remover or a tested DIY mix. Stubborn marks: a baking soda paste, or hydrogen peroxide with dish soap, tested on a hidden area. Different Fabrics, Different Rules Leather sofas should not be cleaned with water-based solutions unless the manufacturer says so. Wipe them with a microfiber cloth dampened with a leather cleaner or mild soap and water, then apply a leather conditioner to prevent drying and cracking. Suede needs a suede brush, brushing in the direction of the nap, and a diluted vinegar and water solution blotted onto stains. Velvet should be treated with a soft brush and no harsh scrubbing. For deep-set stains on delicate fabrics, professional cleaning is the safest option. DIY cleaning works well for routine maintenance and light stains, but the wrong product or technique can cause discoloration, shrinkage, or water rings, and household machines often leave residue that attracts more dirt or leave the fabric overly wet. Professionals identify the fabric type, use industrial-strength extraction with higher temperatures and stronger suction, and can apply fabric protectors against future spills. The CDC’s home cleaning guidance explains how routine cleaning of soft surfaces keeps homes healthier, Health Canada’s household chemical safety page covers safe use and storage of cleaning products, and its mould guidance is worth reading if a sofa ever gets over-wet. After any deep clean, let the sofa air-dry completely, speeding things up with open windows or fans. Never use direct heat like a hairdryer, which can damage some fabrics. Once dry, fluff the fibers with a soft brush. Maintain the result by vacuuming regularly, flipping and rotating cushions, using throws or covers in homes with children and pets, and keeping the sofa out of direct sunlight to prevent fading. Professionals recommend a deep clean at least once a year, and more often with pets or heavy use. Toronto Shine Cleaning can handle that deep clean for you, bonded and insured with a $1,000,000 policy and a $10,000 breakage and surety bond. Call (647) 424-0355, compare our cleaning prices, or book a deep home cleaning that covers upholstery and more. A regular maid service keeps dust from settling in the first place, and we serve all GTA locations. Frequently Asked Questions What do the letters on my sofa care tag mean? W means water-based cleaners are safe, S means solvent-based cleaners only, WS or SW means either type works, and X means vacuum only. Sticking to the code prevents discoloration and shrinkage. If

Sofa Cleaning: From Simple Vacuuming to Deep Stain Removal Read More »

Air Quality Through Cleaning

Breathe Easy This Winter: Improving Indoor Air Quality Through Cleaning

Breathe Easy Indoors: The Winter Cleaning Plan for Better Air Quality As autumn fades and the first hard frost arrives, Canadian homes instinctively seal themselves: windows shut, furnace roars, and the crisp outdoor air gets locked away. Staying warm comes with an invisible cost. With no natural ventilation, dust, allergens, pollutants, and microbes accumulate indoors until the air you breathe all winter is the stalest of the year. Health Canada’s overview of indoor air contaminants documents the range of irritants that build up in closed homes. Poor indoor air can mean dry eyes and scratchy throats at best, and triggered allergies, asthma attacks, or respiratory infections at worst. The fix is not a gadget. It is a cleaning strategy tuned to how winter houses actually work. What Winter Dust Is Really Made Of Dust is not simply dirt. It is a constantly circulating cocktail, and forced-air heating is its delivery service: every blast of warm air stirs settled particles back into your lungs’ reach. A typical winter dust load includes: Microscopic flakes of human skin Pet dander from cats, dogs, and the occasional visitor Textile fibers shed by clothing, bedding, and upholstery Outdoor pollen and pollution that infiltrated before the snow Mold spores and dust mite debris from damp corners Controlling that mix takes systematic, deliberate dusting, performed weekly rather than in heroic quarterly bursts. Dust From the Ceiling Down, Every Week Work top to bottom and gravity does half the job: dust knocked loose from high surfaces settles onto lower ones that have not been cleaned yet, instead of landing on furniture you just finished. Start at ceiling fans, light fixtures, and the tops of bookcases and wardrobes. Move to eye level: window sills, picture frames, mirrors, and television fronts. Finish with tables, desks, coffee tables, baseboards, and floor registers. A quality microfiber cloth, dry for light passes or slightly damp for a deeper grab, traps particles in its fibers rather than launching them back into the air. For electronics, which attract dust through static, use an anti-static duster or a barely damp cloth, and unplug devices first. Vents, Ducts, and the Filter That Runs Everything Your air circulation system is both the dust highway and the easiest checkpoint. Before the furnace enters overtime, vacuum and wipe every return and supply register; the hair and grit you pull off them is usually startling. During the heating season, check the furnace filter monthly and replace it every one to three months depending on filter type, pets, and dust load. A clean filter keeps airflow efficient and captures particulates before they recirculate. If you have moved into an older home with unknown duct history, finished a dusty renovation, or share the house with severe allergy or asthma sufferers or multiple pets, periodic professional air duct cleaning removes years of built-up debris and mold spores from the whole ventilation system, improving both air quality and heating performance. Vacuuming: The Deep Clean Your Floors Secretly Need Carpets and rugs act as passive air filters, trapping dust, dirt, and allergens in their fibers. Neglect them and they saturate, releasing the payload with every footstep. Vacuum all carpeted areas at least weekly, more often in high-traffic zones, homes with kids or heavy-shedding pets, or households where anyone has allergies. A vacuum with a true HEPA filter captures 99.97 percent of particles down to 0.3 microns, including dust mite waste, pollen, dander, mold spores, and some bacteria, instead of exhausting them right back into the room. Do not stop at floors: run the upholstery attachment over sofas, armchairs, and fabric headboards, where skin flakes and dander hide in plain sight. Curtains, Blinds, and the Condensation Problem Window treatments are the most overlooked dust magnets in winter. Where cold glass meets warm indoor air, condensation forms a slightly damp film that grabs airborne particles, and damp fabric can also grow mold. Health Canada’s moisture and mould guidance is blunt about the principle: fix dampness fast or it fixes you. Vacuum curtains with the upholstery attachment, wipe blinds with a damp microfiber cloth, and wash curtain fabrics according to their care labels. The room looks brighter and the air tastes lighter afterward. Humidifiers: Great for Dry Air, Dangerous If Neglected Canadian heating seasons are brutally dry, and humidifiers ease cracked skin, scratchy noses, and irritated airways. The catch is that a reservoir of stagnant water is an ideal nursery for mold and bacteria, which the unit then sprays directly into your air. Clean the humidifier every few days per the manufacturer’s instructions, use distilled water rather than tap to limit mineral deposits that can go airborne, and empty and thoroughly dry the tank whenever the unit sits idle. Health Canada’s page on household product safety flags exactly this cleaning failure with cool-mist units. Done properly, the humidifier helps; done lazily, it harms. A Honest Note About Houseplants Some plants do absorb airborne toxins, but their real-world impact in a home is overstated: the plant volume needed to measurably clean a living room would turn it into a botanical garden. Mechanical filtration and a diligent cleaning routine do more per square foot than any fern. Winter Air Quality Schedule Frequency Task Payoff Weekly Top-down dusting with microfiber Less airborne particulate Weekly (plus) HEPA vacuum carpets, rugs, upholstery Trapped allergens stay trapped Monthly Check furnace filter and registers Efficient, cleaner circulation Every few days Humidifier scrub and rinse Mold never establishes Seasonally Curtains, blinds, and vent wipe-down Resets the dust reservoir Every few years Professional duct cleaning if flagged Whole-system particulate removal Indoor Air Quality FAQ How often should I dust to actually improve air quality? Weekly, at minimum, working high to low with microfiber. Dust that sits becomes a reservoir that your furnace re-suspends on every cycle, so consistency beats intensity. Do HEPA vacuums make a measurable difference? Yes for allergy households: the filter holds 99.97 percent of particles down to 0.3 microns inside the canister instead of venting fine dust out the back of a standard vacuum.

Breathe Easy This Winter: Improving Indoor Air Quality Through Cleaning Read More »

Uses for Coarse Salt

Coarse Salt: 10 Surprising Uses for Coarse Salt in Home Cleaning

In the search for effective and non-toxic cleaning solutions, one of the most powerful tools is often already sitting in the kitchen pantry. Coarse salt, whether it is kosher salt, sea salt, or rock salt, is a remarkably versatile and inexpensive mineral with properties that extend far beyond flavoring food. Its utility as a cleaning agent is rooted in its fundamental physical and chemical characteristics. The crystalline structure of salt makes it an excellent natural abrasive, capable of scouring away grime without being as harsh as many commercial powders. Furthermore, salt is a desiccant, meaning it absorbs water and, by extension, moisture-laden messes. It also has mild antibacterial and deodorizing properties, making it a multi-functional powerhouse for a wide range of household chores. 1.Cast Iron Pans Perhaps the most classic and celebrated use for coarse salt in cleaning is on cast iron cookware. Maintaining the seasoned surface of a cast iron skillet is crucial; harsh soaps and detergents can strip away this protective, non-stick layer that has been built up over time. Salt provides the perfect solution. To clean a warm skillet after cooking, simply pour a generous amount of coarse salt into the pan. Using a folded paper towel or a stiff brush, scrub the salt around the pan. The salt’s abrasive texture will lift away stuck-on food particles and absorb any excess oil without damaging the seasoning. Once the pan is clean, the dirty salt can be discarded, and the pan can be wiped clean with a cloth. A thin layer of oil can then be applied to reinforce the seasoning, leaving the skillet ready for its next use. This method not only cleans but also helps to manage rust spots that may begin to form. 2.Kitchen Utensils This same abrasive quality makes coarse salt an exceptional cleaner for other kitchen items, particularly wooden cutting boards and butcher blocks. These surfaces, being porous, can harbor bacteria and absorb odors from foods like garlic and onion. To deep clean and deodorize a wooden board, sprinkle it liberally with coarse salt. Then, take half a lemon and use it as a scrubber, squeezing slightly as you work the salt into the wood in a circular motion. The salt acts as a scouring agent to lift away fine particles of food and stains, while the citric acid in the lemon juice acts as a natural disinfectant and bleach, brightening the wood and neutralizing odors. Let this salty, lemony paste sit on the board for ten to fifteen minutes before scraping it off and rinsing the board thoroughly with hot water. This process leaves the cutting board sanitized, deodorized, and visually refreshed. 3.Fat Removal Coarse salt is also highly effective at tackling grease. For greasy pots, pans, or baking dishes, sprinkling salt onto the greasy areas can make cleanup significantly easier. The salt absorbs a good portion of the grease, so when you wipe it out with a paper towel, you remove a large amount of the mess before even introducing soap and water. This pre-cleaning step can reduce the amount of grease going down your drain and make the final wash much quicker. This principle also applies to grease spills on fabric. If you get an oily splatter on your clothing or a tablecloth, immediately cover the spot with a pile of coarse salt. Let it sit for an hour or so to draw the oil out of the fibers. Afterwards, brush off the salt and treat any remaining stain before laundering as usual. 4.Red Wine Stain removal is another area where salt’s properties shine. For the dreaded red wine spill on a carpet or upholstery, salt can be a first line of defense. After blotting the spill with a clean cloth to absorb as much liquid as possible, cover the entire stain with a thick layer of coarse salt. The salt will begin to draw the wine out of the fibers, and you may see it turn pink as it works. Leave the salt to dry completely, which may take several hours or even overnight. Once it is dry and caked, you can simply vacuum it all up. While it may not remove a very old or heavily set-in stain completely, it is incredibly effective on fresh spills and can significantly reduce the severity of the stain. 5.Cleaning Inside the kitchen, coarse salt can be used to clean and deodorize in less obvious ways. The inside of a coffee pot or a thermos can develop brown stains from coffee and tea tannins that are difficult to scrub. To remove these, fill the carafe with a handful of coarse salt and about a cup of crushed ice. Swirl the mixture vigorously for a few minutes. The ice provides a hard medium that forces the abrasive salt crystals against the interior walls of the carafe, effectively scouring away the stains. For particularly stubborn stains, adding a bit of lemon juice or vinegar to the mix can provide an acidic boost to the cleaning power. After swirling, let the mixture sit for about half an hour, then rinse thoroughly. This method is a safe and effective way to restore clarity to a glass coffee pot without using harsh chemicals. 6.Deodorizing The power of salt extends to cleaning drains and garbage disposals. To freshen a smelly kitchen drain, pour about half a cup of coarse salt down the drain, followed by a quart of very hot water. The salt helps to dislodge grease and food particles that can get trapped and cause odors. For a garbage disposal, the combination of ice and salt works wonders. Pour a cup of salt and a couple of cups of ice cubes into the disposal and run it until the grinding sound stops. The ice and salt work together to freeze and scour away built-up grime and sludge from the blades and the walls of the disposal, sharpening the blades in the process. Following this with a few lemon or orange peels will leave the disposal and

Coarse Salt: 10 Surprising Uses for Coarse Salt in Home Cleaning Read More »

Clear Snow Safely and Effectively

Snow Cleaning: How to Clear Snow Safely and Effectively

The serene beauty of a fresh snowfall is quickly followed by the practical necessity of snow cleaning. This essential winter chore is not just about maintaining appearances; it is a fundamental task for ensuring safety, accessibility, and the protection of property. A path left uncleared becomes a hazardous sheet of ice, a driveway blocked by a snowbank can trap a vehicle, and the sheer weight of accumulated snow can pose a structural threat. Proper snow cleaning is a proactive engagement with winter weather, requiring the right tools, a sound strategy, and a respect for the physical demands of the job. Without an effective approach to snow cleaning, the winter season can become a period of constant struggle and potential danger. Shovel The cornerstone of any manual snow cleaning operation is the shovel. Yet, the term “shovel” encompasses a range of tools designed for specific purposes, and choosing the correct one is the first step toward efficiency. The classic scoop shovel, with its deep blade, is built for lifting and throwing snow, making it suitable for clearing out tight spaces or moving deep drifts. For larger, flatter areas like driveways and long sidewalks, a snow pusher is a far superior tool. Its wide, curved blade is designed to skim along the surface, pushing a large volume of snow with each pass, which drastically reduces the need for lifting and alleviates strain on the back. Many modern shovels feature ergonomic designs, with bent shafts that encourage a more upright posture, further mitigating the risk of injury during the strenuous task of snow cleaning. The choice of blade material is also significant. Lightweight plastic blades are less likely to damage wooden decks or stone pavers, while heavy-duty metal blades, often fitted with a steel wear strip, excel at breaking through compacted snow and ice. Snow Blower For those who contend with large areas or consistently heavy snowfall, mechanical assistance in the form of a snow blower transforms the nature of snow cleaning. These machines are broadly categorized into single-stage and two-stage models. A single-stage blower employs a fast-spinning auger that makes direct contact with the pavement, scooping up snow and ejecting it through a discharge chute in a single motion. These units are relatively lightweight and easy to maneuver, making them an excellent choice for paved driveways and moderate snowfalls. In contrast, a two-stage snow blower is a more powerful and complex machine designed for heavy-duty snow cleaning. Its auger breaks up heavy, wet, or compacted snow and feeds it into a separate high-speed impeller, which then propels the snow out of the chute. This dual-action process allows two-stage blowers to handle deep snow drifts and throw the snow much farther, a crucial feature for clearing long driveways where snow placement is a key concern. This level of mechanical power makes the challenge of intensive snow cleaning far more manageable. Ice Chopper Even the most thorough snow cleaning effort can leave behind a slick surface of compacted snow or ice. This is where de-icing becomes a critical final step. An ice chopper, with its heavy steel blade, is invaluable for breaking up thick, stubborn ice that other tools cannot dislodge. After the bulk of the material has been removed, applying a de-icing agent can melt the remaining layer and prevent refreezing. Rock salt, or sodium chloride, is the most common and economical choice. It works by creating a brine solution that lowers the freezing point of water, effectively melting the ice. However, its effectiveness diminishes in very cold temperatures, and it can be corrosive to concrete and harmful to plants. Alternatives like calcium chloride and magnesium chloride work at much lower temperatures and are generally considered safer for concrete and vegetation. For households with pets, it is vital to use a specifically formulated pet-safe ice melt, as common de-icers can be toxic to animals. A comprehensive snow cleaning plan must include a strategy for ice management. Injuries The methodology behind snow cleaning is as vital as the equipment. The timing of your efforts can significantly impact the difficulty of the task. It is far less arduous to clear a few inches of snow two or three times during a major storm than it is to confront a single, deep accumulation of heavy, compacted snow afterward. Waiting too long allows the snow to settle and bond to the surface, making the job much harder. An early and frequent approach is the hallmark of an efficient snow cleaning strategy. When the time comes to shovel, proper physical technique is essential for preventing injury. The power for lifting should come from the legs, not the back. This means bending at the knees and hips while keeping the back straight and core muscles engaged. Whenever possible, push the snow rather than lifting it. If lifting is necessary, keep the shovel close to your body and avoid twisting your torso to throw the snow; instead, pivot your entire body by moving your feet. The repetitive nature of snow cleaning makes taking regular breaks essential to prevent overexertion. Garage A systematic approach to the physical layout of the job is also crucial. Before starting, identify where the cleared snow will be piled. It is imperative that these piles do not obstruct sightlines for drivers at the end of a driveway or at street corners. Piling snow against a building’s foundation can introduce moisture and lead to leaks as it melts. Furthermore, ensure that storm drains are not blocked, as this can cause significant flooding during a thaw. For those using a snow blower, working with the wind is a simple but effective tactic, preventing the discharged snow from blowing back onto cleared areas or into your face. A well-executed snow cleaning job is one that is done with foresight. Roof The responsibility of snow cleaning is not limited to ground-level surfaces. The weight of heavy snow on a roof can pose a serious structural risk. A roof rake, which is a wide blade attached to a long, telescoping

Snow Cleaning: How to Clear Snow Safely and Effectively Read More »