Decoration

screen

Screen Cleaning: A Step-by-Step Guide to Cleaning Your Laptop and TV Screens

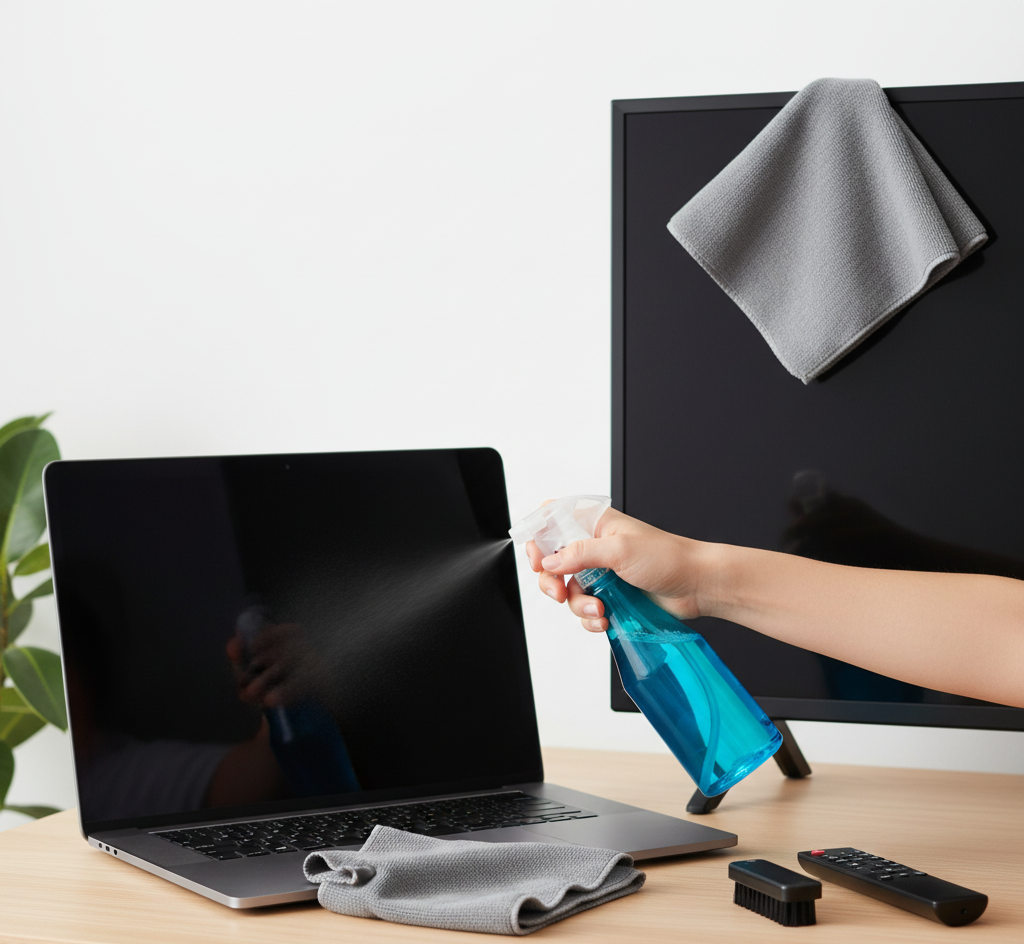
Screen Cleaning: A Step-by-Step Guide for Laptop and TV Screens Television, laptop, and monitor screens are our windows to work and entertainment, and they are magnets for dust, fingerprints, smudges, and the occasional sneeze. Keeping them clean is not just about looks: a clear display is easier on the eyes and more pleasant to use. Modern screens are delicate, often coated with anti-glare and anti-reflective layers, so the wrong tools or chemicals can cause scratches, stripped coatings, or streaks that are worse than the original smudges. This guide walks through what to avoid, the safest cleaning steps, and how to handle the frame, stand, and remote. Toronto Shine Cleaning can handle the rest of your home; call (647) 424-0355 for a deep cleaning service. What You Should Never Use on a Screen The most important lesson is what to keep away from your display. Never use cleaning solutions containing harsh chemicals such as ammonia, alcohol, acetone, or toluene. These ingredients, common in general-purpose glass cleaners, strip the delicate anti-glare and anti-reflective coatings and leave a cloudy, hazy finish. Health Canada’s household chemical safety guidance is a good reminder to read labels and use products only where they belong. Also skip paper towels, tissues, and facial tissue: their wood-pulp fibers are abrasive enough to leave fine micro-scratches, and they shed lint. Rough fabrics such as dish towels, t-shirts, and terry cloth are equally risky. Technique matters as much as tools. Never press hard on a screen, because pressure can damage the liquid crystals or pixels underneath and cause permanent dark spots. Never spray liquid directly onto a display: gravity pulls it into the bezel, where it can reach internal electronics and short out the device. Always apply moisture to the cloth first, never to the screen. Prepare the Screen Before You Clean Turn the device completely off and unplug it. This is a safety measure, and it is practical too: a black, unlit screen makes dust and smudges far easier to see than a bright display does. Let the screen cool to room temperature first, since cleaning a warm screen can cause streaking. Screen Cleaning Rules to Remember Always start dry: remove dust with a dry microfiber cloth before introducing any moisture. Work in one direction: broad, light strokes from a top corner beat scrubbing in circles every time. Never spray the screen: liquid belongs on the cloth, never on the display or its edges. Finish with a dry buff: a second, completely dry microfiber pass removes streaks and lingering moisture. Stay gentle: if a mark will not lift with light pressure, reach for a better solution, never more force. Step 1: Start With a Dry Microfiber Cloth For most cleaning sessions, a large, clean, dry microfiber cloth is all you need. Microfiber strands are far finer than a human hair, which makes them exceptionally soft, and dry fibers create a natural static charge that attracts and traps dust instead of pushing it around. Starting from a top corner, wipe the screen in broad, sweeping motions with light, even pressure; avoid scrubbing in small circles. This single step safely removes about ninety percent of the grime that builds up on a typical screen. Step 2: Add Distilled Water for Stubborn Smudges When fingerprints and oily smudges resist a dry wipe, introduce the smallest amount of moisture. The safest liquid is distilled or deionized water: tap water contains minerals such as calcium and magnesium that leave a chalky residue or streaks as they evaporate. Lightly dampen a clean microfiber cloth until it is barely moist, never wet, and repeat the same gentle sweeping motions. If you can wring drops out of the cloth, it is too wet. Step 3: Remove Greasy Marks With a Gentle Solution For greasy buildup that distilled water cannot shift, use a commercial screen cleaning spray formulated without harsh chemicals, or make your own with equal parts distilled water and plain white vinegar. The mild acetic acid cuts through the oils left by fingerprints. Apply the solution to the cloth, never to the screen, then follow immediately with a second, completely dry microfiber cloth. This final buff removes lingering moisture and prevents streaks, leaving a clear, uniform finish. The CDC’s home cleaning guidance includes electronics such as touch screens and remote controls and recommends following the manufacturer’s instructions for these delicate surfaces. Don’t Forget the Frame, Stand, and Remote Glossy plastic frames and stands respond well to the same routine: a dry microfiber cloth for dust, and a barely damp cloth with distilled water for smudges. Remote controls deserve special attention because they are among the most handled items in a home. Remove the batteries first, then wipe the whole remote with a cloth moistened in a 50/50 mix of isopropyl alcohol and water, working a cotton swab into the gaps around the buttons. Let everything dry completely before reinstalling the batteries. Screen Cleaning Cheat Sheet Surface Tool Solution Light dust on any screen Dry microfiber cloth None needed Fingerprints and smudges Barely damp microfiber cloth Distilled or deionized water Greasy marks Damp microfiber cloth plus dry buff 50/50 distilled water and white vinegar Plastic frame and stand Microfiber cloth Distilled water Remote control Cloth and cotton swabs 50/50 isopropyl alcohol and water Frequently Asked Questions Can I use Windex or glass cleaner on my TV screen? No. Glass cleaners contain ammonia and other harsh chemicals that strip the anti-reflective coating and leave a permanent haze. Stick to a dry or barely damp microfiber cloth, and use distilled water or a screen-specific cleaner for stubborn marks. Is it safe to use rubbing alcohol on screens? Not on the display itself, because alcohol can damage the coating. It is fine on the remote control and other plastic accessories when diluted to about 50 percent with water, as long as the device is unplugged and the batteries are removed. Can I use a paper towel on my laptop screen? Avoid it. Paper products contain abrasive wood fibers that cause

Screen Cleaning: A Step-by-Step Guide to Cleaning Your Laptop and TV Screens Read More »

cooper pan

How to Clean Copper Pans and Remove Tarnish for a Brilliant Shine

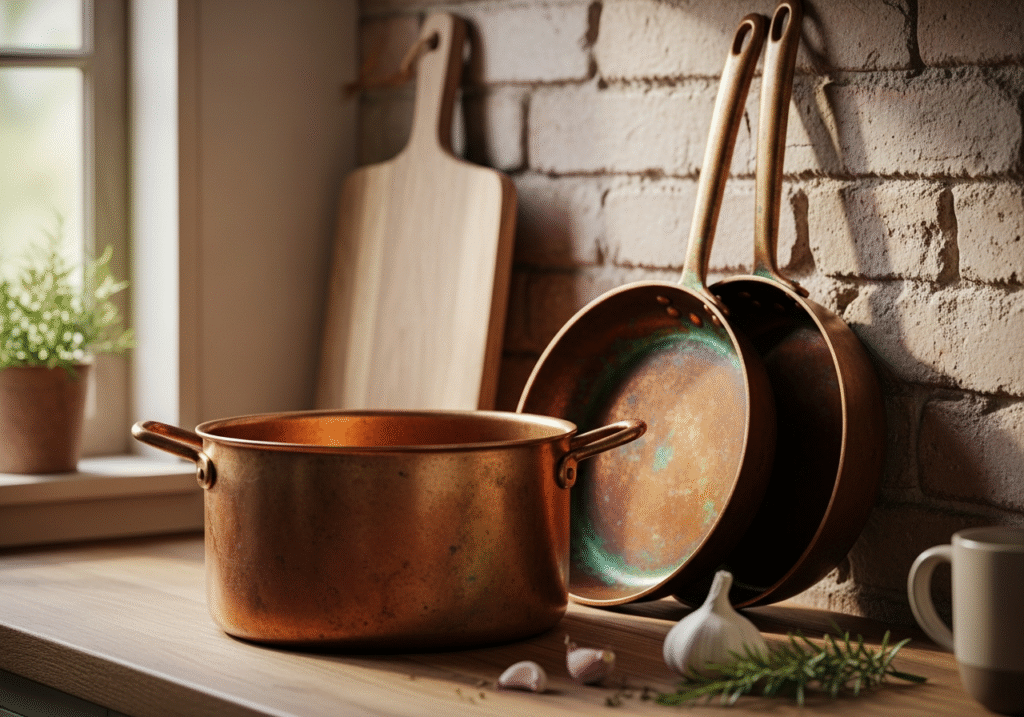
Copper pans is the jewel of the kitchen, prized by professional chefs and passionate home cooks alike for its exceptional performance and stunning, undeniable beauty. Its ability to conduct heat with unparalleled speed and precision makes it a responsive and intuitive tool, allowing for nuanced control that is simply unattainable with other materials. Beyond its remarkable function, a set of gleaming copper pans hanging from a pot rack is a statement piece, an aesthetic centerpiece that lends a warm, fiery glow to any kitchen. Yet, this beauty and performance come with a responsibility. Copper is a reactive metal, and its brilliant, rose-gold luster is susceptible to the natural process of oxidation, which results in a dull, sometimes greenish-brown film known as tarnish. Cleaning copper is therefore not just a matter of hygiene, but a rewarding ritual of restoration, a process of bringing a magnificent tool back to its original, brilliant glory. Copper Pans A crucial aspect to understand before beginning any cleaning process is that a copper pan is often two distinct entities that require separate care. The stunning exterior is, of course, the signature copper. The interior cooking surface, however, is almost always lined with a non-reactive metal, most commonly stainless steel or, in more traditional and vintage pans, tin. This lining is essential because copper itself can react with acidic foods like tomatoes or vinegar, potentially leaching into your meal and affecting its taste. Therefore, you must approach the cleaning as two separate jobs: one for the durable interior and another for the delicate, reactive exterior. 1.Interior Cooking Surface Let us first address the interior cooking surface. If your pan is lined with stainless steel, which is the most common and durable option in modern copper cookware, the cleaning process is straightforward and robust. For daily washing after cooking, simple dish soap and warm water applied with a non-abrasive sponge or cloth are all that is needed. If you have stubborn, burnt-on food particles, resist the urge to attack them with steel wool. Instead, fill the pan with an inch of water, add a single drop of dish soap, and gently heat it on the stove for a few minutes. This will soften and loosen the residue, allowing it to be scrubbed away with minimal effort. Stainless steel can also develop a rainbow-like, iridescent discoloration known as heat tint. While harmless, it can be unsightly. To remove it, a paste made from a powdered cleanser like Bar Keepers Friend and a little water is remarkably effective. Apply the paste, scrub gently with a soft sponge, and rinse thoroughly to restore the steel’s brilliant silver shine. If your pan has a tin lining, much greater care must be taken. Tin is a very soft metal and can be easily scratched, which will compromise the surface. For tin-lined pans, only use soft cloths, warm water, and mild soap. Never use abrasive cleaners or scouring pads, and avoid overly aggressive scrubbing. 2.Copper Exterior With the interior handled, the focus shifts to the main event: restoring the copper exterior. This is fundamentally a chemical process, one that requires a mild acid to react with and dissolve the copper oxide that forms the tarnish. This chemical action is often combined with a very gentle abrasive to help lift the dissolved tarnish away from the surface. Fortunately, some of the most effective and safest cleaners for this task can be created from simple, inexpensive ingredients found right in your kitchen. The most classic and widely used method involves the powerful combination of lemon and salt. The citric acid in the lemon is the chemical powerhouse that breaks down the tarnish, while the fine crystals of salt act as a gentle but effective scrubbing agent. The application is beautifully simple. Slice a fresh lemon in half and dip the cut, fleshy side into a small bowl of kosher or table salt, ensuring it is well-coated. Then, simply take this salted lemon half and begin scrubbing the exterior of the copper pan in a firm, circular motion. You will see the tarnish begin to disappear almost instantly, a satisfying transformation that reveals the bright, clean copper underneath. For more control or for larger pans, you can squeeze the juice of a lemon into a bowl, mix it with a few tablespoons of salt to form a paste, and apply this paste with a soft cloth. Continue scrubbing until the entire surface is clean, then rinse the pan thoroughly with warm water. The final step, which is absolutely critical for a perfect, lasting finish, is to dry the pan immediately and completely with a soft, clean cloth, like a microfiber towel. Any water droplets left to air dry will create new spots and begin the tarnishing process anew, undoing all of your hard work. 3.Ketchup Another surprisingly effective and readily available acidic cleaner is ketchup. While it may seem like an unlikely candidate, ketchup contains both vinegar (acetic acid) and tomato concentrate (which also has a degree of acidity), providing the mild chemical action needed to break down light tarnish. This method is best for maintenance cleaning or for pans that are only slightly dulled rather than heavily oxidized. Simply smear a thin layer of ketchup all over the copper surface, ensuring complete coverage. Let it sit for ten to thirty minutes, allowing the acids time to work. Then, simply wipe it off with a soft cloth and rinse well with warm water. The tarnish should be gone, and the pan will be noticeably brighter and warmer in tone. 4.Vinegar, Salt and Flour For more heavy-duty, set-in tarnish that has built up over time, a more potent paste made from white vinegar, salt, and flour is an excellent solution. The flour in this mixture plays a crucial role; it acts as a thickener, creating a paste that allows the acidic vinegar and abrasive salt to cling to the vertical surfaces of the pan for an extended period, giving them more time to work their magic. In

How to Clean Copper Pans and Remove Tarnish for a Brilliant Shine Read More »

Basic Things You Should Get Rid of at Home This Spring

Spring Declutter Checklist: 7 Basic Things You Should Get Rid of at Home This Spring

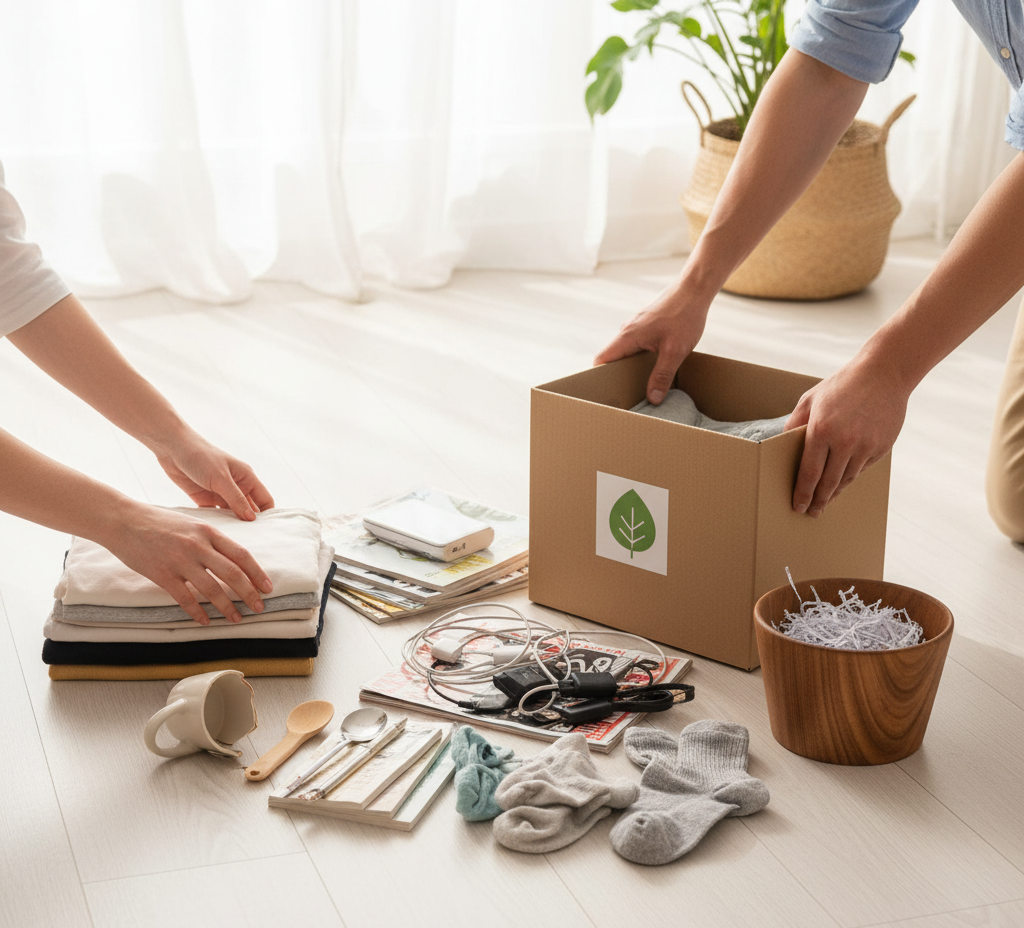
Spring Declutter Checklist: 7 Basic Things to Get Rid of This Season Spring arrives with longer days and brighter light, and that light exposes the dust, piles, and excess that winter hid. True spring cleaning cannot begin with a mop: it begins with subtraction. You cannot clean clutter, and organizing excess only shuffles it into new piles. Work through this room-by-room checklist to clear out what has served its purpose, then finish with a deep clean that leaves your home lighter, brighter, and healthier. When the scrubbing is done, Toronto Shine Cleaning can handle the details; call (647) 424-0355. Golden Rules for a Faster, Easier Declutter Work one zone at a time: finish the entryway before touching the wardrobe so every room has a clear end point. Sort into four piles: keep, toss, donate, and recycle, and move each finished pile out of the house the same day. Apply the one-year test: if you did not use it, wear it, or reach for it in the past year, it has already earned its exit. 1. Entryway: Winter Gear and Homeless Items The entryway bears the brunt of winter: thick parkas, wool scarves, heavy boots, and the salty grit tracked in from the road. Audit every coat and pair of boots before storing them. A broken zipper, cracked sole, or missing glove mate means the item should not be stored; you would only defer the decision until November. Clear the flat surfaces of flyers, loose batteries, keys to unknown locks, and dried-out lip balms so the entryway flows again. 2. Wardrobe: Clothes for a Life You No Longer Live The seasonal switch is a chance to confront what you actually wear. If a sweater stayed folded through January and February, it is unlikely to earn its place next year. Inspect spring and summer clothes as you unpack them: elastic degrades, and white fabrics yellow in storage. A sundress that does not fit or a stained t-shirt is not a virtue to keep. Culling now reduces the friction of getting dressed every morning. 3. Kitchen: Pantry, Fridge, and Container Drawer Winter cooking leaves relics: spices bought for holiday meals, specialty flour for cookies, and jars of heavy sauce. By spring, much of it is stale or forgotten. Rock-hard brown sugar, scentless dried herbs, and three-year-old sprinkles are trash, not assets. Clear the dregs from the refrigerator door for better airflow and room for fresh produce. Then tackle the container drawer: any container without a matching lid, and any lid without a container, gets recycled on the spot. 4. Bathroom: Expired Products and Old Remedies The medicine cabinet and vanity hide expired chemistry. Check dates on everything: last summer’s sunscreen has likely lost its efficacy, mascara and liquid makeup harbor bacteria, and expired medications lose potency and can become chemically unstable. Dispose of medications responsibly through a pharmacy take-back program rather than flushing them. A streamlined counter with only current products creates a calmer morning routine. 5. Living Areas: Paper Piles and Tech Graveyard Winter hibernation breeds doom piles: stacks of mail, catalogs, and school papers. Spring, often tax season, is the deadline. Most manuals, bills, and statements live digitally now, so shred the paper copies and stop feeding the dust collectors, since Health Canada notes that dust and dust mites collect in fabrics, carpets, and anywhere dust accumulates. Then recycle the cables you cannot identify, broken headphones, and remote controls for devices long gone. If you have not used a piece of tech in a year, let it go. 6. Linen Closet: Towels and Sheets You Do Not Use Scarcity thinking keeps scratchy towels and threadbare sheets in the closet “just in case,” but we reach for the same few favorites every time. An overstuffed closet also blocks air circulation and turns musty. Donate old towels to animal shelters, discard sheets with snapped elastic, and keep only linens you actually use and love. 7. Garage and Shed: Broken Tools and Winter Debris Winter turned the garage into a dumping ground. Clear broken snow shovels, empty bags of road salt, and outgrown winter sports gear before you can reach the lawnmower and bicycles. Inspect patio furniture and planters too: a cracked pot from the freeze-thaw cycle or a rusted chair will only annoy you all summer. Spring Declutter Checklist at a Glance Zone Toss or Donate If Outcome Entryway Broken zippers, cracked soles, single gloves Clear hooks and floor space Wardrobe Unworn this winter, stained, or ill-fitting Faster morning decisions Kitchen Stale spices, old condiments, lidless containers Better airflow, fresh ingredients Bathroom Expired meds, old sunscreen, used-up cosmetics Calmer, safer routine Living areas Paper piles, orphan cables, dead tech Less dust, less visual noise Linens Scratchy towels, sheets with broken elastic Fresh, breathable closet Garage and shed Broken shovels, empty salt bags, cracked planters Room for summer gear Frequently Asked Questions How do I decide what to throw away during a spring declutter? Ask whether you used the item in the past year and whether it still works or fits. If it is expired, broken beyond repair, or stored only out of guilt, let it go. When in doubt, donate items in good condition rather than keeping them “just in case.” Should I declutter before or after cleaning? Always declutter first. Moving boxes and piles reveals dust, scuffs, and grime that were hidden, so cleaning after decluttering gives you a genuinely fresh result. Decluttering is the demolition phase; cleaning is the reconstruction phase. How long should a full spring declutter take? Plan one session per zone, roughly two to three hours for the wardrobe and one hour each for the entryway, kitchen, bathroom, linens, and garage. Spread the zones across a weekend or one evening per room so the job stays manageable. What should I do with items that are too worn to donate? Recycle what you can: textiles in poor condition can go to textile recycling bins, electronics to municipal e-waste depots, and medications to pharmacy take-back programs. For anything left,

Spring Declutter Checklist: 7 Basic Things You Should Get Rid of at Home This Spring Read More »

Detergent and Warm Water: 3 Amazing Tips on how to Clean Your Entire House With this Simple Mixture

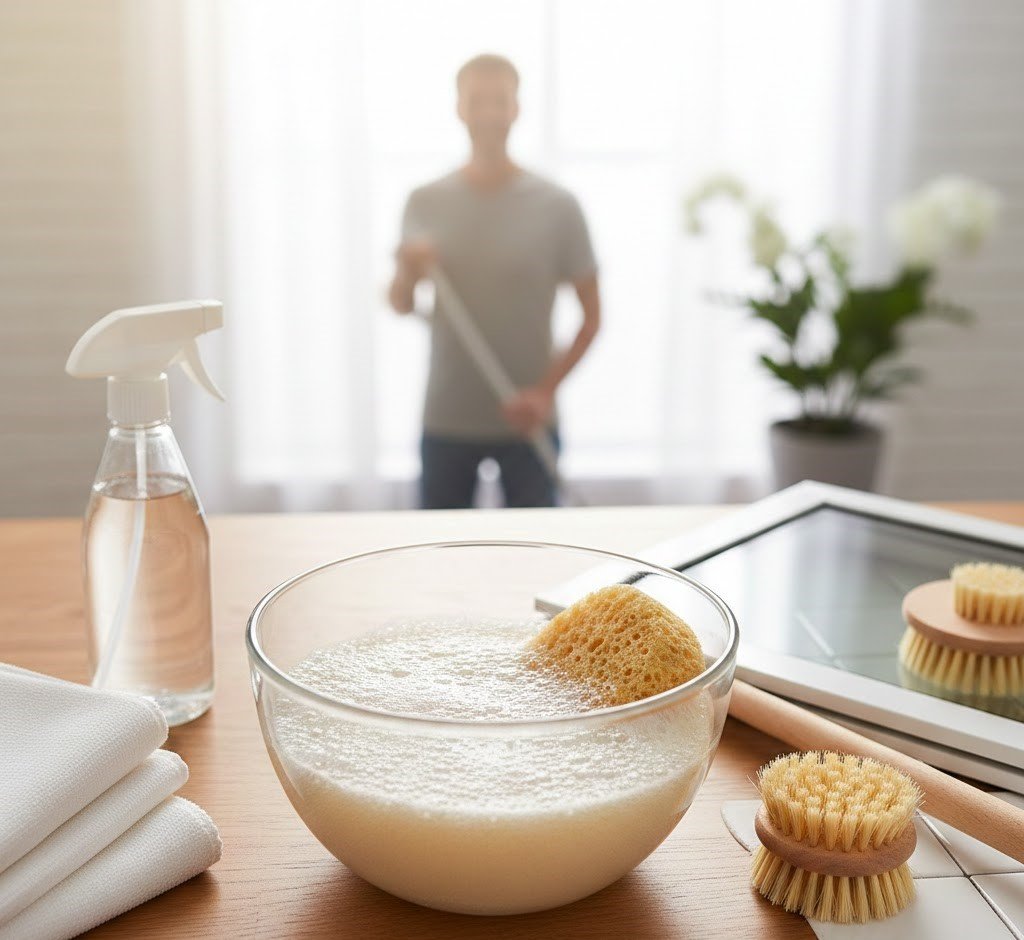
Detergent and Warm Water: The Cleaning Duo That Does It All Shelves full of specialty sprays make it easy to forget that the most reliable cleaner in any home costs pennies per bucket. Detergent and warm water tackle an astonishing range of household grime through simple chemistry, and understanding how the pair works turns a habit into a deliberate tool. Warm water provides the energy to loosen dirt while detergent provides the mechanism to lift and trap grease, which makes the solution stronger than the sum of its parts. Here are three ways to put the mixture to work across the whole house. Why the Chemistry Works So Well Heat gives water an edge. Warm water molecules move faster than cold ones, so they agitate and break down sugar crystals, salt rings, and other common messes, and warmth melts fats and oils that cold water only smears around. Picture a greasy plate under the tap: cold water makes the fat congeal and slide, while warm water melts it off in seconds. The detergent brings the real genius: dish soap contains surfactants, two sided molecules with a hydrophilic head that loves water and a lipophilic tail that loves oil. When soap meets greasy water, the tails latch onto the oil droplets while the heads face outward, forming tiny spheres called micelles that trap the grease and rinse it away down the drain. Surfactants also break the surface tension that makes water bead up, so the solution spreads, penetrates tiny crevices, and lifts dirt that plain water simply flows over. Tip 1: Clean Counters, Cabinets, and Walls the Gentle Way For daily kitchen duty, a cloth barely damp with diluted dish soap in warm water often beats stronger sprays. It lifts food residue, light grease spatters, and sticky fingerprints from laminate, quartz, and sealed stone with no chemical smell or streaky film. The same solution is a hero on cabinet fronts, where aerosolized cooking grease builds a sticky film that resists all purpose cleaners: wipe with a warm, soapy cloth that has been wrung out well and the grime dissolves. Walls, baseboards, and door frames also respond beautifully to the mixture, which lifts scuffs, fingerprints, and accumulated dust without harming the paint finish. Tip 2: Mop Floors Without the Sticky Residue Vinyl, linoleum, and ceramic tile floors respond well to a bucket of warm water with just a little detergent. Restraint is the rule: use the detergent sparingly, because too much requires endless rinsing, and wring the mop out thoroughly so excess water never seeps into grout or floor seams. Done right, the method lifts dirt and footprints while leaving none of the dull, sticky film that some specialized floor cleaners deposit. In entryways and kitchens, where winter salt and cooking splatter land daily, a quick warm water mop keeps the finish from dulling and cuts down the buildup that heavy scrubbing has to fight later. It is an economical routine that keeps high traffic flooring looking fresh between deeper professional treatments. Tip 3: Blot Out Carpet and Upholstery Stains Many fresh food and drink spills on carpets or upholstery respond to a first line of defense made from a highly diluted solution of clear dish soap and warm water. Dip a clean cloth into the soapy water and gently blot the stain, working from the outside in to avoid spreading it. Always test the method on an inconspicuous area first, then blot the spot afterward with a cloth wet with clean water to rinse and lift out soap residue. This gentle approach often lifts the spill completely without resorting to aggressive carpet stain removers, though CDC guidance on cleaning your home is a useful reminder that surfaces should always be cleaned before any sanitizing or disinfecting step is considered. Where This Simple Mixture Does Not Belong Knowing the limits of detergent and warm water is as important as understanding its strengths. Keep the bucket away from these surfaces: Unsealed wood floors and furniture, where water causes swelling, warping, and staining. Natural unsealed stone such as marble or travertine, where soapy water can seep into the porous surface and darken it. Delicate fabrics like silk and velvet, which can spot permanently and need professional care. Electronics and wiring of any kind; water and electricity never mix. For everything else, the duo is safe, effective, and economical. Handling any cleaning product responsibly still matters, and Health Canada’s tips for using household chemicals safely cover buying, storing, and disposing of cleaners, which keeps the whole household protected. Detergent and Warm Water by the Job Household job Right mixture Why it works Counters and cabinet fronts Weak dish soap solution, well wrung cloth Surfactants trap grease, no chemical smell Vinyl, linoleum, tile floors Small amount of detergent per bucket Lifts dirt without sticky residue Walls, baseboards, door frames Mild soapy water, damp cloth Removes scuffs and dust, paint stays safe Carpet and upholstery spills Diluted clear dish soap, blotting Breaks the stain, rinse blot clears soap Frequently Asked Questions About Cleaning With Soap and Water Why does warm water clean better than cold? Warm water molecules carry more kinetic energy, which helps break down sugar and salt messes, and the warmth melts fats and oils so they release from surfaces instead of congealing and smearing. What makes dish soap dissolve grease? Dish soap contains surfactants with water loving heads and oil loving tails; the tails grab the grease, the heads face the water, and the resulting micelles hold the oil suspended until it rinses away. Can I use detergent and warm water on hardwood floors? No, unsealed wood should never be cleaned with water because it can swell, warp, and stain; use products made for wood floors or ask a professional for advice. Is soapy water safe for marble countertops? Natural stone is porous, and soap and water can seep in and darken or stain marble and travertine, so stick to stone specific cleaners for those surfaces. When is a professional clean better than

Detergent and Warm Water: 3 Amazing Tips on how to Clean Your Entire House With this Simple Mixture Read More »

Valentine's Day and cleaning home

Valentine’s Day: 5 Essential Cleaning Tasks You Should do Before February 14th

Valentine’s Day is a holiday that carries a heavy weight of expectation. We are culturally conditioned to view February 14th as a litmus test for our relationships, a day defined by grand gestures, expensive dinners, and tangible gifts. The traditional narrative involves escaping the home-fleeing to a high-end restaurant or a boutique hotel-to find romance. However, there is a shifting trend toward “staying in.” Whether driven by a desire for privacy, the comfort of home, or simply the exhaustion of navigating crowded venues, many couples are choosing to celebrate within their own four walls. This shift changes the dynamic of the holiday entirely. When the home becomes the venue, the state of the home becomes the atmosphere. You cannot create a romantic, intimate vibe in a space that is cluttered, dusty, or chaotic. In this context, cleanliness is not just a chore; it is the foundation of romance. It is the invisible architecture that allows connection to happen without distraction. Peace of Mind To understand why a clean home is the ultimate aphrodisiac, one must look at the psychology of relaxation. It is biologically difficult to be intimate or relaxed when the brain is processing “visual noise.” Clutter, dirty dishes, and laundry piles serve as visual cues for work. They remind us of the to-do list. When you sit on the sofa to enjoy a glass of wine with your partner, but your eye catches a dust bunny rolling across the floor or a stack of bills on the coffee table, your cortisol levels spike. You are pulled out of the moment and back into the grind of daily management. A pristine home silences this noise. It creates a neutral, serene canvas where the only focus is on the person sitting next to you. It signals that the “work” of the household is paused, granting permission for the “play” of the relationship to begin. 1.Bedroom The bedroom is the sanctuary of Valentine’s Day, yet it is often the room that suffers the most from “lived-in” syndrome. We tend to let the master bedroom become a catch-all for the things we don’t want guests to see in the living room. Piles of clothes on the chair, a nightstand crowded with charging cables and water glasses, and bedding that has lost its crispness all conspire to kill the mood. Transforming this space requires a hotel-level approach to detail. It starts with the bed itself. Laundering the sheets, duvet cover, and pillowcases is non-negotiable. There is a tactile luxury to sliding into a bed that smells fresh and feels crisp. Beyond the linens, the floors need to be cleared. Vacuuming under the bed-a place where dust accumulates undisturbed for months-improves the air quality of the room, removing that subtle, stale scent that often lingers in bedrooms. Clearing the surfaces of the dresser and nightstands allows for the addition of mood lighting, such as candles or a dimmer lamp, without creating a fire hazard or looking cluttered. 2.Bathroom The bathroom creates a different set of challenges. If you are planning a romantic bath or simply want to get ready for the evening in a pleasant environment, the bathroom must be impeccable. Nothing destroys a romantic illusion faster than a ring around the tub, a toothpaste-splattered mirror, or a trash can that hasn’t been emptied. A “spa-level” clean involves scrubbing the grout to remove any mildew, polishing the chrome fixtures until they gleam, and ensuring that the towels are fluffy and fresh. It is about removing the evidence of daily biological maintenance to create a space of pampering. The sensory experience of the bathroom-the smell of soap rather than damp towels, the shine of the tiles-sets the tone for self-care and mutual appreciation. 3. Kitchen and Dining Area For those planning a romantic dinner at home, the kitchen and dining area become the stage. Cooking a meal together can be incredibly romantic, but cooking in a dirty kitchen is stressful. If the sink is full of the morning’s coffee mugs and the stove is covered in last night’s grease splatters, the cooking process becomes a battle against the mess. A pre-Valentine’s deep clean of the kitchen ensures that you have a clean slate. It involves degreasing the stovetop, wiping down the cabinet fronts, and ensuring the dishwasher is empty and ready to receive the dirty dishes as you cook. This logistical preparation allows the evening to flow smoothly. Furthermore, the dining table needs to be reclaimed. In many homes, the table serves as a desk, a mail sorting station, or a laundry folding area. Clearing it completely and polishing the surface allows you to set the table properly, perhaps with a tablecloth, candles, and the “good” china. It signals that this meal is different; it is an occasion. 4.Lighting and Scent Lighting and scent are the final touches of a romantic atmosphere, but they rely heavily on cleanliness to be effective. You cannot light a room beautifully if the light bulbs are coated in dust or if the glass shades are filmy. Dust diffuses light, making a room feel dimmer and dingier. Wiping down light fixtures and cleaning windows allows for a sparkle that mimics a high-end venue. Similarly, scent is powerful. Many people try to mask household odors with heavy perfumes or scented candles. However, the smell of “Vanilla Cupcake” layered over the smell of a full garbage bin or a musty carpet creates a cloying, unpleasant aroma. True freshness comes from removing the source of the odor first. Deep cleaning the carpets, taking out the trash, and scrubbing the sink drains ensures that the air is neutral. Once the air is clean, the subtle scent of fresh flowers or a high-quality candle can actually shine without competing with the funk of the house. Acts of Service There is also the concept of “Acts of Service” as a love language. For many people, seeing their partner scrubbing the floor or taking the initiative to deep clean the bathroom is a profound expression of

Valentine’s Day: 5 Essential Cleaning Tasks You Should do Before February 14th Read More »

Sticker Removal

Sticker Removal: 5 Expert Tips For Removing Stickers From Different Types of Surfaces

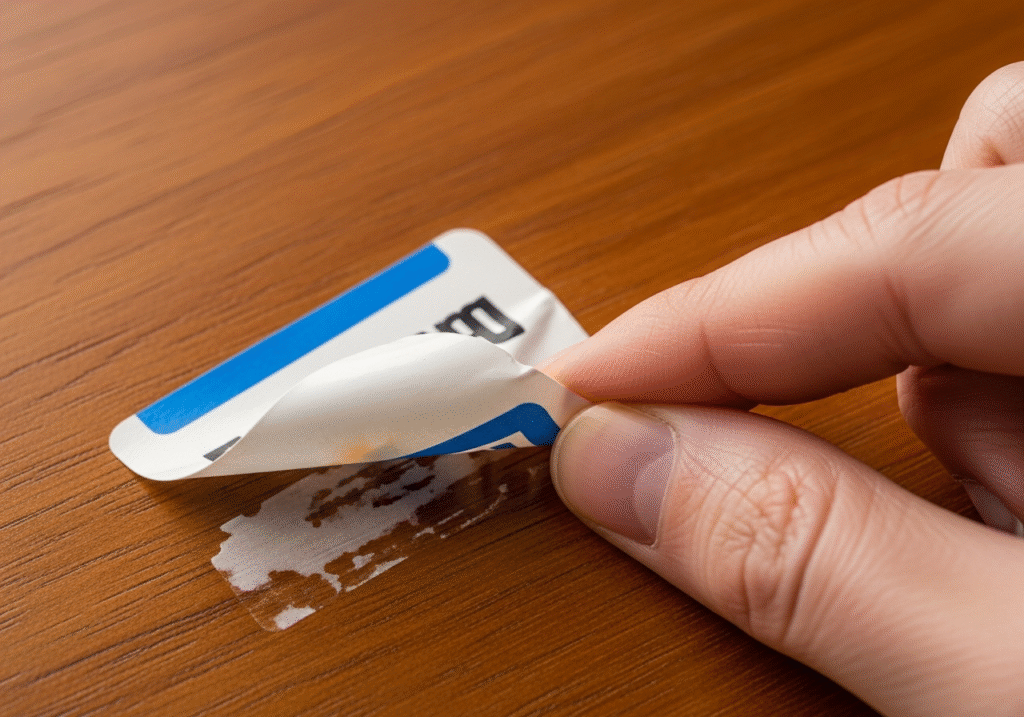
Sticker Removal: 5 Expert Tips for Every Type of Surface Nothing kills the joy of a new purchase like the price tag glued to its face. Peel it and you get one of two disasters: the paper tears and leaves a fuzzy white layer, or the sticker comes off but deposits gummy residue that turns grey within days. Adhesives are polymers that bond to a surface, so the winning method softens, dissolves, or lifts that bond without harming what sits underneath. Match the technique to the material and any sticker surrenders without a scratch. Assemble your sticker removal kit: Hair dryer for warming labels on glass, ceramic, metal, and car paint. Cooking oil or isopropyl alcohol for dissolving gummy adhesive. Plastic scraper or plastic razor blades for lifting laminated labels. White vinegar for sun-baked paper labels and price tags. Duct tape and a rubber eraser for delicate surfaces like paper and shoe soles. Tip 1: Start with Heat on Glass, Ceramic, and Metal Resist clawing at the corner: picking separates the paper from the adhesive and leaves exposed glue that is harder to shift. Instead, warm the sticker with a hair dryer on medium heat for about a minute. Heat softens the adhesive polymer so it lets go of the surface while clinging to the label backing; lift a corner slowly and the sticker often peels away as one clean sheet. Heat is the safest first move on hard non-porous items like glass and ceramic, and essential for car decals and laptop lids where solvents could damage paint or electronics. Tip 2: Dissolve Stubborn Glue with Oil or Alcohol Most sticker glues are lipid-based, so cooking oil or even peanut butter loosens them: like dissolves like. Score the sticker so oil penetrates, apply a layer, and wait about twenty minutes; the fats dilute the adhesive until it slides off, and soap and water remove the film. Oil is safe for glass and plastics, but never on unsealed wood or porous stone, which soak it up and stain. Isopropyl alcohol breaks adhesive bonds that oil cannot touch and evaporates instantly, so it is safe for electronics when applied to a cloth rather than sprayed. Alcohol is a paint thinner, though, and can strip painted or varnished finishes, so spot-test in a hidden corner first. Tip 3: Bring Out a Plastic Scraper for Laminated Labels Waterproof plastic-coated labels shrug off oil, water, and vinegar from the top, so attack from the edges. A plastic razor blade or scraper is the right tool: harder than the adhesive but softer than the surface beneath, it slips under the rim and lifts without gouging. Metal blades scratch glass and dig into plastic; they belong only on wet glass at a shallow angle, with a steady hand. For many stubborn labels on jars or new appliances, a set of plastic scrapers pays for itself. Tip 4: Use Vinegar, Acetone, and Tape for the Tough Cases White vinegar: soak a paper towel and lay it over the sticker for thirty minutes to rehydrate the paper and soften sun-baked glue, ideal for price tags on glassware and mugs. Acetone, usually sold as nail polish remover, dissolves almost any adhesive in seconds, but treat it as the nuclear option: it melts plastic on contact, so keep it off storage bins and eyeglass frames. Use it only on glass, unpainted metal, or unfinished ceramic. For the thin dark smear on delicate items like book covers, skip liquids: wrap duct tape around your fingers, sticky side out, and dab until the residue transfers off. Tip 5: Match Your Method to Wood, Shoe Soles, and Car Paint On varnished wood, heat can damage the finish, oil stains the grain, alcohol dissolves lacquer, and water raises the grain, so use mineral spirits or a furniture cleaner on a soft cloth; on raw unfinished wood, fine-grit sandpaper may be the only stain-free option. On new shoe soles, skip moisture and roll residue off with a rubber eraser or crepe block: friction balls the adhesive up for easy brushing. On car paint, never touch the clear coat with a razor blade: soften dealership decals with a hair dryer, lift with a plastic tool, and treat residue with a clay bar or an automotive adhesive remover, since household solvents permanently cloud the finish. Sticker Removal Method at a Glance Surface Best method Never use Glass, ceramic, metal Heat, then oil or vinegar soak Metal scrapers on dry glass Plastic and electronics Hair dryer, isopropyl alcohol on a cloth Acetone, which melts plastic Varnished wood Mineral spirits or furniture cleaner Oil, heat, or alcohol on the finish Shoe soles and leather Rubber eraser or crepe block Liquids that stain the upper Car paint Hair dryer, plastic tool, clay bar Razor blades and nail polish remover Paper and book covers Duct tape dabbing Any liquid or heat What about Ghost Marks After the Sticker Is Gone? That ghost is usually sun fade: the area under the sticker stayed protected while the surrounding surface yellowed, and on wood or fabric the difference is often permanent. On glass or plastic, the adhesive may have reacted with the material, and a mild polishing compound or baking soda paste can blend the mark away. Whenever you work with solvents or removers, follow the Government of Canada’s guidance on using household chemicals safely, and in a small room or closed garage, ventilate and take fresh-air breaks the way Health Canada advises for solvent-based products. Frequently Asked Questions What is the safest way to remove a sticker from a laptop? Warm the sticker with a hair dryer for a minute, lift an edge slowly, then rub residue gently with an alcohol-dampened cloth. Never spray liquid on the device or use acetone, which melts plastic shells. How do I get sticker residue off glass without scratching it? Heat the sticker, remove what you can, and soak residue with cooking oil or hot vinegar for twenty to thirty minutes. A plastic scraper lifts what remains,

Sticker Removal: 5 Expert Tips For Removing Stickers From Different Types of Surfaces Read More »

tidying the bedroom in 5 minutes

How to Clean Your Room in 5 Minutes: A Step-by-Step Routine for Busy Mornings

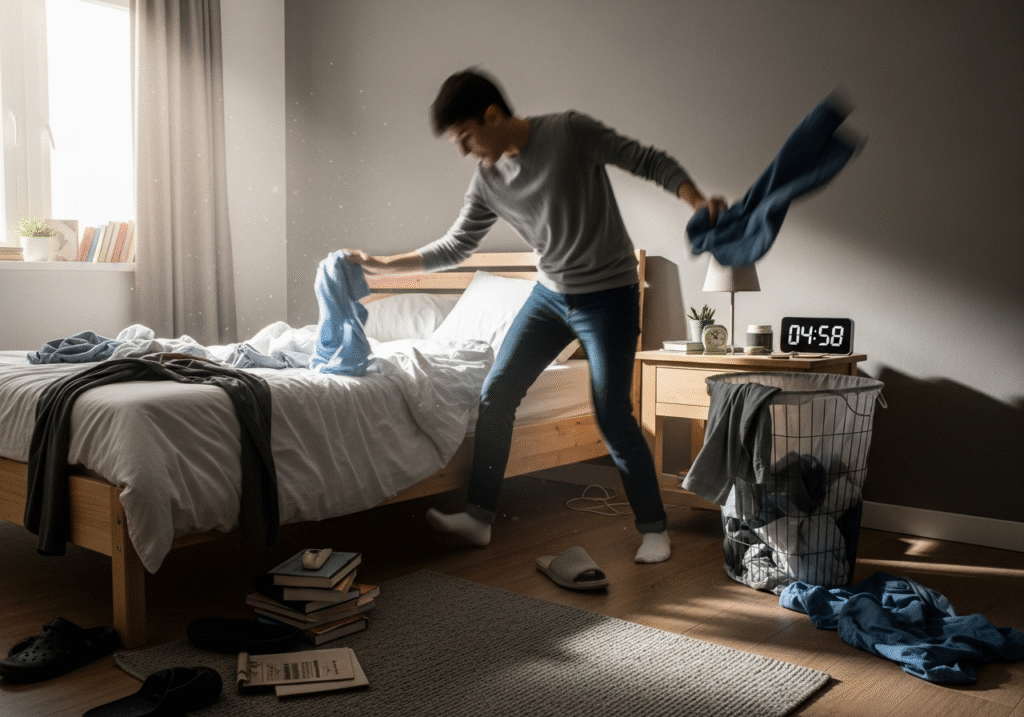
Why a Five-Minute Room Clean Works Better Than You Think A messy bedroom is often the first casualty of a busy week. When deadlines pile up and energy runs low, clothes cover the chair, mugs crowd the nightstand, and the bed stays tangled. That visual clutter keeps the brain in work mode, so the room meant for rest starts to feel like unfinished business. Most people assume fixing it demands an entire afternoon of sorting and scrubbing, so they postpone the job until the mess looks impossible. In reality, a focused five-minute reset can turn the room around. It is not a deep clean; it is a quick rescue that clears the floor, calms the surfaces, and restores a feeling of control before you rush out the door. What You Need Before the Timer Starts Speed depends on preparation. Decide in advance where every type of clutter will go so you never pause to make decisions mid-clean. This is not the moment for perfect organization; it is a rescue mission with three simple tools: A large trash bag for wrappers, receipts, empty bottles, and anything broken. A laundry hamper, emptied before you begin, for every piece of clothing sitting on the floor. A relocation basket, any bin or box, for objects that belong in other rooms. Keep the three vessels within reach. The instant you leave the room to return a mug to the kitchen, the plan falls apart: the dishwasher, the television, or a buzzing phone will pull you off course. The Five-Minute Routine, Minute by Minute Follow the order below and resist the urge to skip ahead. Each step prepares the next, and the room looks dramatically different by the end. Minute Task Goal 1 Collect trash Remove everything that signals neglect 2-3 Clear floor textiles into the hamper Expose the floor completely 4 Make the bed Anchor the room in order 5 Tidy surfaces, then open the curtains Leave only essentials in view Minute 1: Trash Only Garbage is the easiest category because nothing sentimental is attached to it. Scan for snack wrappers, used tissues, price tags, empty water bottles, and receipts, and break down stray cardboard boxes on the spot. Sixty seconds of ruthless discarding instantly lifts the room’s hygiene and removes the items that suggest neglect. Minutes 2-3: Attack the Floordrobe The mound of half-worn clothes on the rug is the biggest visual offender in any bedroom. There is no time to sniff shirts and judge freshness; anything resting on the floor goes into the hamper, no exceptions. Seeing the carpet again makes the space feel larger and clears the obstacle course underfoot. If a pile of clean clothes is waiting to be put away, fold it once and set it neatly on the chair or the foot of the bed. A tidy stack reads as deliberate, while a sprawled pile reads as chaos. Minute 4: Smooth the Bed The bed is the focal point of the room, and a made bed signals that everything else is under control. You do not need hospital corners: pull the duvet up over the pillows, smooth out the wrinkles, and prop the pillows upright. In about forty-five seconds you create a large, calm surface that balances the busyness around it. Minute 5: Surface Triage and Fresh Air Nightstands, dressers, and desks attract wandering clutter: coffee mugs that drifted in from the kitchen, mail that never made it out of the hallway, tools that wandered in from the garage. Sweep every foreign object into the relocation basket and set it outside the door to be sorted later. Leave only the essentials: a lamp, a book, a clock. Finish by opening the curtains or blinds; natural light and moving air make a room feel cleaner than any spray can. Why Short Resets Beat Weekend Marathons Brief, frequent resets outperform occasional marathons because they stop the buildup before it starts. A daily sweep keeps the bedroom liveable, lowers the stress of sleeping beside a to-do list, and frees your weekend for the jobs that truly matter. It is the same logic behind our regular maid service: steady upkeep beats heroic catch-up sessions. When the whole home needs attention, our team covers everything from bathrooms to baseboards. Frequently Asked Questions How do I clean my room in 5 minutes when it is very messy? Work in the fixed order: trash first, then floor clothes, then the bed, then surfaces. Do not reorganize, do not leave the room, and do not aim for perfect decisions. Speed and visible results are the only goals. What should I do with clothes that are not dirty? Anything that sat on the floor goes in the hamper to keep the room honest. Clean clothes still waiting for a home can be folded once and stacked on a chair or the foot of the bed until you have time to hang them. Can a 5-minute clean replace a deep clean? No. The quick reset handles visible clutter, while a deep clean removes dust, allergens, and grime from carpets, mattresses, and hidden surfaces. The CDC notes that regular cleaning with soap or detergent removes most germs from surfaces, while disinfection is only needed when someone in the home is sick. How often should I reset my room? Daily is best, ideally first thing in the morning or just before bed. A one-minute nightly sweep of surfaces and floors keeps the room from ever reaching the point where five minutes cannot fix it. When Five Minutes Is Not Enough The five-minute reset has honest limits. It will not lift the dust from a ceiling fan, pull allergens out of a mattress, or refresh window tracks; those jobs take time and proper tools. Damp, poorly aired rooms also invite dust mites and mould, which Health Canada links to moisture problems, so periodic vacuuming, washing, and airing still matter. When the grime has settled in and a quick tidy no longer feels like enough, book a deep cleaning service from Toronto

How to Clean Your Room in 5 Minutes: A Step-by-Step Routine for Busy Mornings Read More »

Bronze Pot Care 101: 5 Amazing Tips For Caring For Your Brass Pots And Pans

Why Bronze Cookware Is Worth the Extra Care Bronze pots have cooked meals for thousands of years, from the kitchens of ancient India to medieval Europe, and they are enjoying a revival today. Known as Kansa in South Asian traditions, bronze is valued for its heat retention, its reported wellness benefits, and its quiet beauty. Owning it is a relationship rather than a convenience: bronze asks for understanding, gentle cleaning, and patience, and it rewards that effort with decades of loyal service. Since the brass pot question comes up so often, let us settle the difference first, because the two metals demand very similar care. Bronze vs. Brass vs. Copper: Know Your Alloy Bronze is mostly copper with about twelve to fifteen percent tin and small additions of other metals for hardness. Brass is copper with zinc, and pure copper contains no alloy partner at all. Those few percentage points change everything: bronze is harder and far more corrosion-resistant than copper alone, and it shows a muted golden-brown warmth instead of the brassy yellow of zinc alloys. A bronze pot does not warp, chip, or degrade under normal kitchen conditions, which is why many families treat theirs as heirlooms. Metal Alloy partner Signature trait Bronze About 12-15% tin Hard, corrosion-resistant, golden-brown Brass Zinc Bright yellow, softer Copper None Soft, red, dents easily Tip 1: Match the Pot to the Food You Cook Bronze has enormous thermal mass: it does not heat as fast as copper or aluminum, but once hot it holds and radiates warmth evenly, making it ideal for slow simmering, dum-style cooking, rice, and boiled milk. Many cooks insist milk boiled in bronze turns out sweeter and creamier because the gentle, steady heat prevents scorching. The catch is chemistry. Copper, the main ingredient, reacts with acidic foods such as tomatoes, vinegar, lemon juice, wine, and tamarind, dissolving trace metal into the dish. Small amounts cause a bitter metallic taste; larger exposures over time are a real health concern. Health Canada explains that copper cookware sold in Canada is generally coated precisely because the bare metal can transfer into food, especially acidic food. Unlined bronze should stay with neutral cooking, and pots used for sour curries need a tin lining, a sacrificial layer known as kalai that must be reapplied by an artisan as it wears away. Tip 2: Wash by Hand and Dry It Immediately A dishwasher is the fastest way to ruin bronze. Abrasive detergents and hot, humid cycles strip the lustre, leave a dull grey finish, and can pit the surface. Wash bronze by hand, and understand that soap and water alone will not keep it beautiful: the metal oxidizes over time, darkening to brown or developing greenish spots called verdigris. A uniform dark patina is prized on antiques, but green verdigris is toxic and must be removed before cooking. Skip commercial metal polishes, which are often too harsh and can leave residues that are unsafe for food vessels. As Health Canada’s household product guidance reminds us, following the intended use of every product matters. The traditional cleaners live in the pantry: Tamarind pulp, whose tartaric acid dissolves copper oxide and restores the bright metal. A cut lemon dipped in coarse salt, which combines acidity with gentle abrasion. Wood ash, the historic scouring agent for heavy tarnish. Specialized powders such as Pitambari, made with dolomite and mild acids. Scrub vigorously, rinse thoroughly, and dry at once. Water droplets left to air dry leave permanent spots and invite fresh oxidation, so towel the pot completely dry before it goes back on the shelf. Tip 3: Store Bronze So the Pieces Protect Each Other Stacking bronze pots saves space but invites trouble. A nested stack can weigh fifty pounds or more, straining cabinet shelves, and the friction between pots scratches the finish. Lay a cloth or paper towel between nested vessels. The protection matters even more for kalai-lined pots: tin is soft, and a deep scratch exposes the copper underneath, making the pot unsafe for acidic cooking until it is re-tinned. Tip 4: Know Your Dining Ware From Your Cookware Not every bronze piece is built for the stove. Traditional Kansa dining plates and bowls use a higher copper-to-tin ratio, often around 78:22, which makes the alloy brittle but resonant; struck, it rings like a bell. These pieces resist tarnish longer than cooking grade, but they can crack over a high flame. Cooking pots, by contrast, are formulated to flex with thermal expansion. Knowing which you own prevents the destruction of expensive teapots and serving bowls that were never meant to touch a burner. Tip 5: Buy Once and Keep It for Generations Compare lifespans and the argument writes itself: a non-stick pan degrades in three to five years, while a bronze pot is measured in centuries. Tarnish can be polished away, a rare dent can be hammered back, and a worn tin lining can be renewed. That is why old bronze keeps reappearing in antique markets, cleaned up and returned to service. In a kitchen full of disposables, bronze is a commitment to buying once and keeping forever. Frequently Asked Questions About Bronze Pot Care Is it safe to cook every day in a bronze pot? Yes, for neutral foods such as rice, milk-based dishes, and most vegetables. Acidic ingredients should only go into pots with an intact tin lining, because bare bronze can release copper into the food. How do I remove green spots from bronze? Green verdigris is oxidized copper and must be cleaned before cooking. Rub the spots with a lemon half dipped in coarse salt or a tamarind paste, rinse well, and dry the pot immediately. Can I put bronze cookware in the dishwasher? Never. Dishwasher detergents and heat strip the finish, leaving the metal dull grey and possibly pitted. Bronze is always hand washed and towel dried right away. My pot’s tin lining is wearing thin. What should I do? Stop cooking acidic food in it until a skilled artisan reapplies

Bronze Pot Care 101: 5 Amazing Tips For Caring For Your Brass Pots And Pans Read More »

Fragrance with natural products at home

Natural Fragrance: How to Scent Your Home Using Only Natural Products

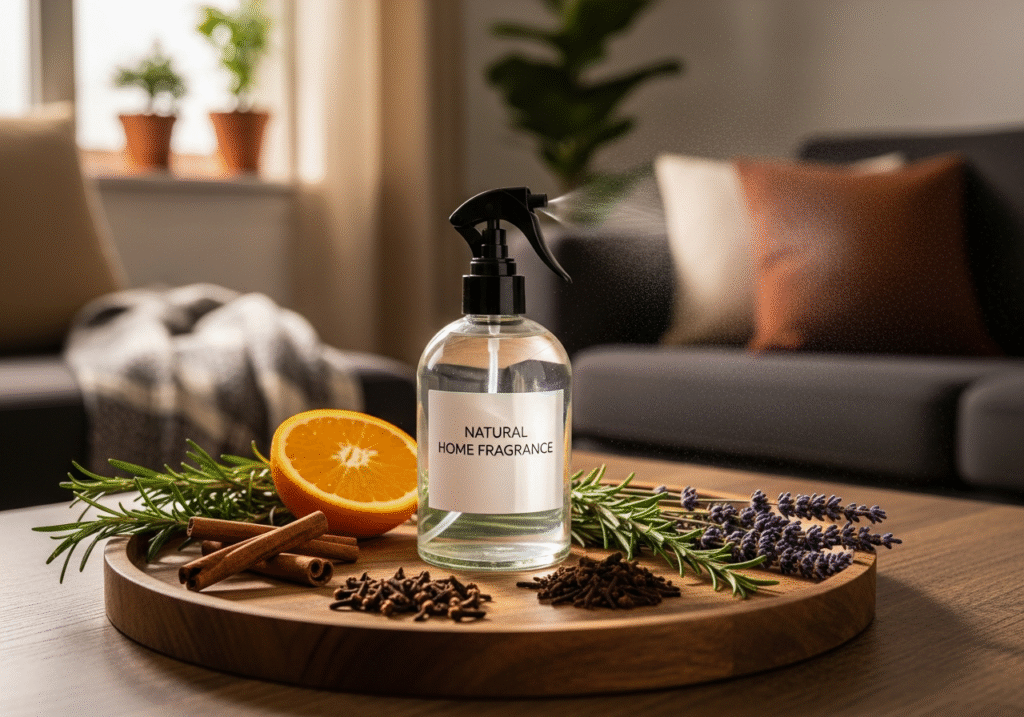
The olfactory experience of a home is arguably its most defining characteristic. While we often obsess over the visual elements of interior design-the color of the walls, the texture of the rugs, the arrangement of furniture-it is the scent of a space that hits us first and lingers longest in our memory. For decades, the standard approach to managing home fragrance has been chemical warfare. We plug in synthetic warmers that promise “Ocean Breeze” or “Linen Fresh,” we spray aerosols that mask odors with heavy, artificial perfumes, and we burn candles made of paraffin wax that release soot into the air we breathe. While these products might effectively cover up the smell of last night’s dinner or a damp dog, they often do so at the cost of indoor air quality. They coat the nasal passages with volatile organic compounds and create a flat, one-dimensional scent profile that feels sterile and manufactured. A truly inviting home, however, smells alive. Shifting to natural room fragrances is not just a health-conscious decision; it is an aesthetic upgrade that introduces complexity, freshness, and a genuine connection to the botanical world into your living space. Synthetic Fragrances To understand the superiority of natural fragrance, one must first appreciate the biological connection between scent and the brain. The olfactory bulb is directly linked to the limbic system, the ancient part of the brain responsible for emotion and memory. This is why the smell of pine can instantly transport you to a winter forest, or the scent of lavender can induce a physical sensation of relaxation. Synthetic fragrances attempt to mimic these molecules, but they often lack the subtle chemical nuances of the real thing. A real lemon contains hundreds of different chemical compounds that create its zest; a synthetic lemon scent might contain only a handful. The brain registers the difference. Natural fragrances, derived from essential oils, herbs, fruits, and spices, interact with our biology in a way that feels grounding rather than overpowering. They evolve in the air, changing slightly as they evaporate, creating a dynamic atmosphere that feels fresh and clean rather than perfumed and heavy. Steam One of the most accessible and effective methods of natural scenting is the stovetop simmer pot. This technique relies on the basic physics of evaporation and steam. By simmering water filled with aromatic ingredients, you release their essential oils into the air, carried by the humidity of the steam. This method is particularly powerful because it addresses two winter problems at once: dry air and stale odors. The beauty of the simmer pot lies in its versatility and its use of kitchen scraps. You do not need to buy expensive ingredients; the peels of an orange or a lemon, which would otherwise be composted, are packed with limonene, a potent aromatic compound. Combine these citrus peels with a cinnamon stick, a few whole cloves, and a sprig of rosemary in a small saucepan of water. As the water gently bubbles, it breaks down the cellular structure of the plants, releasing a warm, spicy, and clean scent that permeates even large open-concept spaces. Unlike a candle, which burns locally, the steam from a simmer pot travels with the airflow of the house, reaching into corners and upper floors. It is a ritualistic act of cooking that results in a home that smells welcoming and seasoned. Reed Diffusers For a more passive, constant fragrance, the reed diffuser is a staple, yet the commercial versions are often filled with mineral oils and synthetic solvents. Creating a natural version at home allows you to control the intensity and the purity of the ingredients. The mechanics of a reed diffuser rely on capillary action. The reeds are porous; they draw the liquid up through microscopic channels to the top, where it evaporates into the room. To make this work naturally, you need a carrier oil that is thin enough to travel up the reed. Safflower oil or sweet almond oil are excellent choices as they are light and odorless. You mix this base oil with a high concentration of essential oils-perhaps a blend of eucalyptus and peppermint for a bathroom, or bergamot and cedarwood for a living area. A splash of high-proof alcohol, like vodka, acts as a binding agent that thins the oil slightly and aids in evaporation. The result is a subtle, background scent that doesn’t assault the nose but simply exists in the space, lending it a signature character. Alcohol The fabric of our homes-the curtains, the sofas, the rugs-often traps odors that are difficult to remove with air fresheners alone. For these surfaces, a natural linen spray is the solution. Water and oil do not mix, so simply dropping essential oils into a spray bottle of water results in the oil floating on top and clogging the nozzle. To create a stable emulsion without synthetic chemicals, you again turn to high-proof alcohol or witch hazel. These solvents disperse the oil into tiny droplets that remain suspended in the mixture. When sprayed onto linen or upholstery, the alcohol evaporates almost instantly, leaving the essential oil molecules clinging to the fabric fibers. A spray made with lavender and chamomile is perfect for misting pillows before bed, creating a sensory cue for sleep. A blend of lemon and tea tree oil, both known for their antibacterial properties, works wonders on a sofa that has seen too much pet traffic, neutralizing the odor at the source rather than masking it. Baking Soda However, adding scent is only half the battle. A truly fresh-smelling home requires the neutralization of bad odors. This is where the chemistry of baking soda becomes invaluable. Bad smells, such as those from garbage, compost, or sweat, are often acidic in nature. Baking soda (sodium bicarbonate) is a base. When it comes into contact with these acidic odors, it neutralizes them chemically, turning them into inert, odorless salts. A small jar of baking soda mixed with a few drops of lemon essential oil, placed at the bottom

Natural Fragrance: How to Scent Your Home Using Only Natural Products Read More »

Storage Ornaments: 8 Amazing Tips For Storing Christmas Decorations Efficiently

Why Smart Christmas Decoration Storage Pays Off The week after the holidays has a particular feel: the guests are gone, the anticipation has faded, and the house that sparkled in December now looks tired and cluttered. Taking the tree down is nobody’s favorite chore, so most of us rush, cramming lights into grocery bags and piling wreaths into the basement corner. That haste has a price, paid next November when you unpack crushed ornaments, knotted lights, and a flattened artificial tree. Efficient Christmas storage protects the money invested in your decor and keeps the holiday magic easy to reach. These eight tips will carry your decorations safely through the off season. Tip 1: Audit Everything Before You Pack It Away Storage starts with a ruthless purge, not a box. As you pull ornaments off the tree and garlands off the banister, check the condition of every item. A light string that flickered all season or has a dead section will not fix itself in the attic, so recycle it now. Ornaments with cracked caps, shattered glass, or a style you no longer love should be donated or tossed. Storing broken or unwanted items wastes space and guarantees you will sort through the same junk next year. Keep only what is functional and brings you joy. Tips 2 and 5: Trees, Wreaths, and Garlands Need Structure The artificial tree is the biggest item you store, and its original cardboard box rarely survives more than one season. Cardboard weakens with moisture and attracts pests, and fighting a fluffy tree back into its factory box is a losing battle. A dedicated canvas tree bag is moisture resistant and roomy enough to hold the sections without crushing needles, and binding each section with cinch straps or old belts shrinks the bundle dramatically. With enough ceiling height, upright storage bags let the tree stand tall all year, so you skip most of the fluffing next December. Wreaths and garlands are the opposite problem: bulky and airy, they flatten under heavy boxes. Hard-shell wreath containers preserve the shape, or hang wreaths on a simple hook in the garage or basement. Coil garlands into a clear bin, or wrap them around a coat hanger, but never let them get compressed. Tips 3 and 4: Protect Ornaments and Tame the Lights Throwing every bauble into one giant bin is a recipe for heartbreak. Fragile glass and ceramic ornaments need individual protection: plastic cups glued to a sheet of cardboard make crush-proof cells for round ornaments, egg cartons cradle small baubles, and bubble wrap is essential for heavy or irregular keepsakes. Then group ornaments by color, theme, or room, so the set for the dining room tree lives in its own labeled box and you never unpack everything to decorate one corner. For lights, the enemy is entropy. Never wind a strand around your arm and drop the coil in a box, because it will tangle as it relaxes. Instead, cut notches in a flat piece of cardboard, wind the strand tautly around it, and plug the male end into the female end to lock it. Masking tape labeled “Mantel” or “Tree Bottom” saves hours of testing next year. Tips 6 and 7: Textiles, Bins, and Labels Stockings, tree skirts, holiday pillows, and table runners face a biological enemy: fabric attracts dust mites, moths, and mildew, especially with food crumbs still in the fibers. Launder or dry-clean everything first, then vacuum-seal bags compress bulky textiles while sealing out moisture and insects. Without vacuum bags, latching plastic bins with a silica gel packet inside are the next best thing. Opaque bins hide their contents, so switch to clear plastic bins and label with detail: “Christmas” is useless, while “Living Room: Stockings, Mantle Lights, and Nutcrackers” is helpful. Load by logic: the items you need first, like Advent calendars and the door wreath, go in last so they sit at the front of the stack, and number the bins so nothing goes missing. Christmas Storage Cheat Sheet Item Best Storage Method Mistake to Avoid Artificial tree Canvas tree bag, sections bound with straps Reusing the original cardboard box Glass ornaments Cups glued to cardboard, egg cartons, bubble wrap Throwing everything loose into one bin Light strings Taut wind on a notched cardboard spool Winding around your arm and dropping in a box Wreaths and garlands Hard-shell containers or hanging hooks Stacking heavy boxes on top Stockings and pillows Laundered, then vacuum-sealed Storing dirty fabric in cardboard Everything Clear bins with specific labels, numbered Opaque bins marked only “Christmas” Your 8-Step Packing Sequence Audit every item and purge broken lights and ornaments first. Bind tree sections with straps and slide them into a canvas bag. Wrap fragile baubles in cups, egg cartons, or bubble wrap. Group ornaments by color, theme, or room in labeled boxes. Wind light strands on cardboard spools and label each plug. Box wreaths in hard shells; coil garlands without compression. Launder textiles, then vacuum-seal or bin them with silica gel. Load bins so first-needed items sit at the front and top. Frequently Asked Questions Can I store Christmas lights by wrapping them around my arm? No, that coil relaxes into knots as soon as it hits the box. Wind each strand tautly around a notched cardboard spool and plug the ends together instead. Are cardboard boxes fine for storing decorations? They are risky long-term. Cardboard weakens with moisture and invites pests, so clear plastic latching bins with silica gel packets are safer, especially in a basement. Should I wash stockings and tree skirts before storing them? Yes, launder or dry-clean textiles first. Food crumbs attract moths, while vacuum-sealed clean fabric stays fresh all year. What is the best way to store fragile glass ornaments? Give each bauble its own cell: plastic cups glued to cardboard for round ornaments, egg cartons for small ones, and bubble wrap for irregular or heavy pieces, then group them by room in labeled boxes. Tip 8: Finish With a Clean House Reset

Storage Ornaments: 8 Amazing Tips For Storing Christmas Decorations Efficiently Read More »