What to Put in Your Cleaning Caddy for a Faster, More Efficient Clean
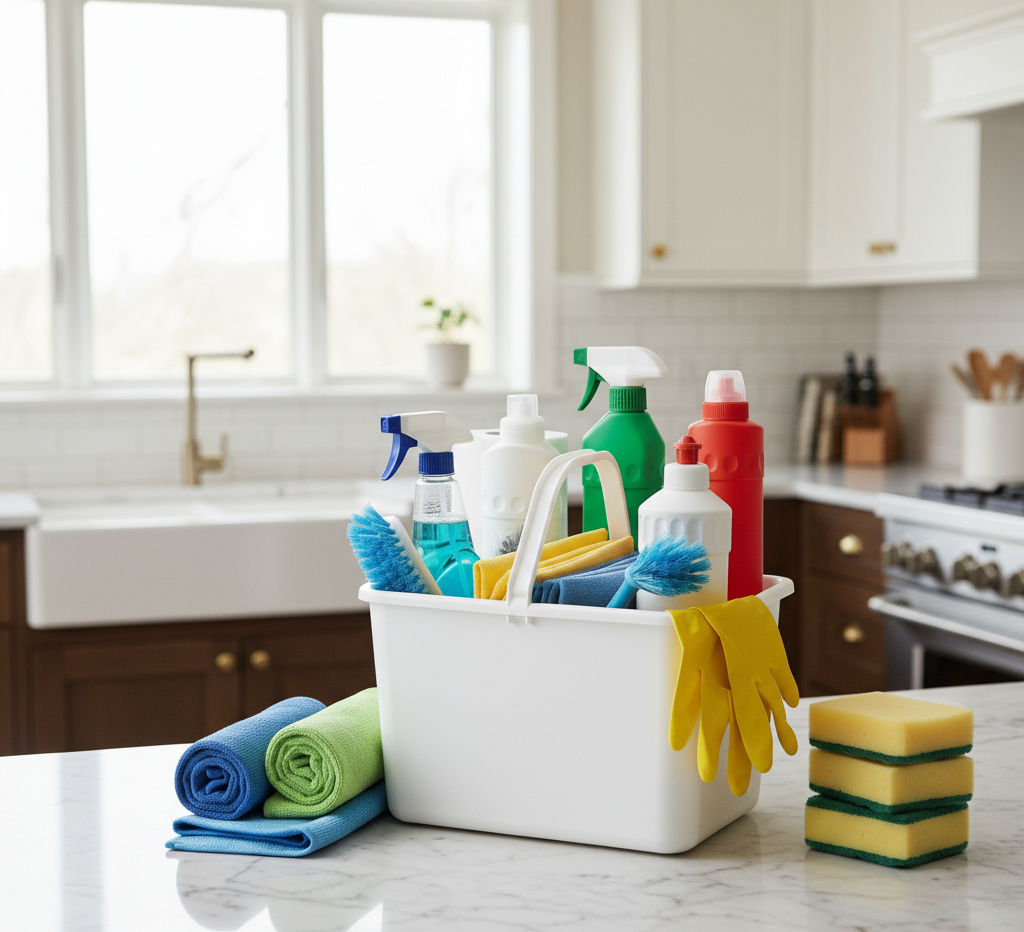
In the realm of household management, using an organized cleaning caddy is the key to maintaining a clean and comfortable living space efficiently, without allowing chores to consume all of your free time. One of the most common drains on efficiency during cleaning is the constant, fragmented movement back and forth across the house. We start cleaning a bathroom, only to realize the glass cleaner is under the kitchen sink; we begin dusting the living room, but the microfiber cloths are in the laundry room cupboard. This constant search for tools breaks your momentum, increases physical fatigue, and turns what should be a quick task into a prolonged, frustrating ordeal. The ultimate solution to this problem is a simple, highly functional tool: the cleaning caddy. A well-stocked, thoughtfully organized cleaning caddy is a portable system that houses all of your essential products and tools in one place, allowing you to glide seamlessly from room to room with everything you need within arm’s reach. The Best Option The first step in establishing this system is choosing the correct physical container. A cleaning caddy must be durable, practical, and easy to maintain. While woven wicker baskets or metal wire containers can look attractive on a shelf, they are poor choices for active use. Wicker is porous and will readily absorb any accidental chemical spills, leading to warping, staining, and permanent odors. Metal wire baskets can rust when exposed to moisture and do not offer protection from dripping bottles. The ideal caddy is constructed from a heavy-duty, high-impact plastic. Plastic is completely non-porous, highly resistant to chemical wear, and can be easily washed out in the sink if a bottle leaks. Look for a caddy with a sturdy, comfortable handle located in the center, which allows you to carry a heavy load without straining your wrist. The interior layout should feature deep compartments to keep spray bottles upright and prevent them from tipping over as you move. Some caddies also feature smaller, shallow compartments or a removable tray, which is perfect for organizing small, detailed tools like scrub brushes, scrapers, and sponges, keeping them from getting lost at the bottom of the larger sections. Once you have selected your caddy, the focus shifts to curating its contents. The goal is to build a versatile, streamlined collection of products and tools that can handle eighty percent of common cleaning tasks, rather than stuffing the caddy with a dozen single-purpose chemical sprays. A crowded caddy is a heavy and inefficient one. The fluid portion of your caddy should consist of three primary, highly versatile sprays, along with one concentrated liquid. Organizing 1.Cleaners The first essential fluid is a high-quality all-purpose cleaner. This is your primary weapon for general surface cleaning, suitable for countertops, dusty shelves, painted woodwork, baseboards, and cabinet fronts. Look for a pH-neutral formula that is safe for a wide range of materials, or mix your own using a gentle, plant-based concentrate and water. The second spray is a dedicated glass and mirror cleaner. This is crucial for achieving a streak-free finish on windows, mirrors, chrome fixtures, and glass cabinet panels. A simple 50/50 mixture of white vinegar and water in a spray bottle is a fantastic, non-toxic alternative that performs exceptionally well on glass. The third spray is a mild, acidic tub and tile cleaner. This product is specifically formulated to tackle the unique challenges of the bathroom: soap scum, water spots, and light mineral deposits. The acid works to break down these alkaline bonds, making them easy to wipe away. The final liquid in your caddy should be a small squeeze bottle of concentrated dish soap. Dish soap is a highly underestimated cleaning agent, prized for its gentle nature and powerful degreasing capabilities. A single drop of dish soap mixed with warm water can tackle greasy stovetops, spot-clean dirty walls, wash delicate items, and even act as a gentle prep for scrubbing out sinks. By keeping these four liquids in your caddy, you are equipped to clean almost any surface in your home. 2.Mechanical Tools The mechanical tools in your caddy are just as important as the chemical sprays, and the undisputed king of these tools is the microfiber cloth. Microfiber is a synthetic fabric with split fibers that create a massive surface area on a microscopic level. When used dry, these fibers generate a static charge that attracts and traps dust, rather than just pushing it into the air. When damp, they can lift and hold onto grease, moisture, and dirt with remarkable efficiency. To prevent cross-contamination—such as using the same cloth that cleaned the toilet to wipe down the kitchen counter—you must implement a strict, color-coded microfiber system within your caddy. Assign a specific color to each zone of your home. For example, use blue cloths exclusively for glass, mirrors, and reflective surfaces, as their smooth weave prevents streaks. Green cloths can be designated for the kitchen and food preparation areas. Yellow cloths are perfect for dry dusting in living areas and bedrooms. Pink or red cloths should be reserved strictly for high-germ zones in the bathroom, such as the toilet and sink basin. Keep a stack of clean, folded cloths of each color in one compartment of your caddy, along with a small, breathable bag to hold the dirty cloths as you work. This visual system ensures that your cleaning remains hygienic and safe. 3.Detailing Tools Beside the cloths, your caddy should house a collection of specialized scrubbing and detailing tools. A non-scratch scrub sponge is essential for tackling stubborn spots on countertops and dishes. A stiff-bristled utility brush is necessary for scrubbing grout lines, shower corners, and textured surfaces. For the ultimate detailed work, keep an old toothbrush in your caddy. Its small, narrow head and comfortable handle allow you to apply precise pressure to tight, hard-to-reach areas, such as the crevice around the base of a faucet, the tracks of sliding shower doors, and the seams of cabinet doors. Another invaluable but often overlooked tool
What to Put in Your Cleaning Caddy for a Faster, More Efficient Clean Read More »