Fall Cleaning

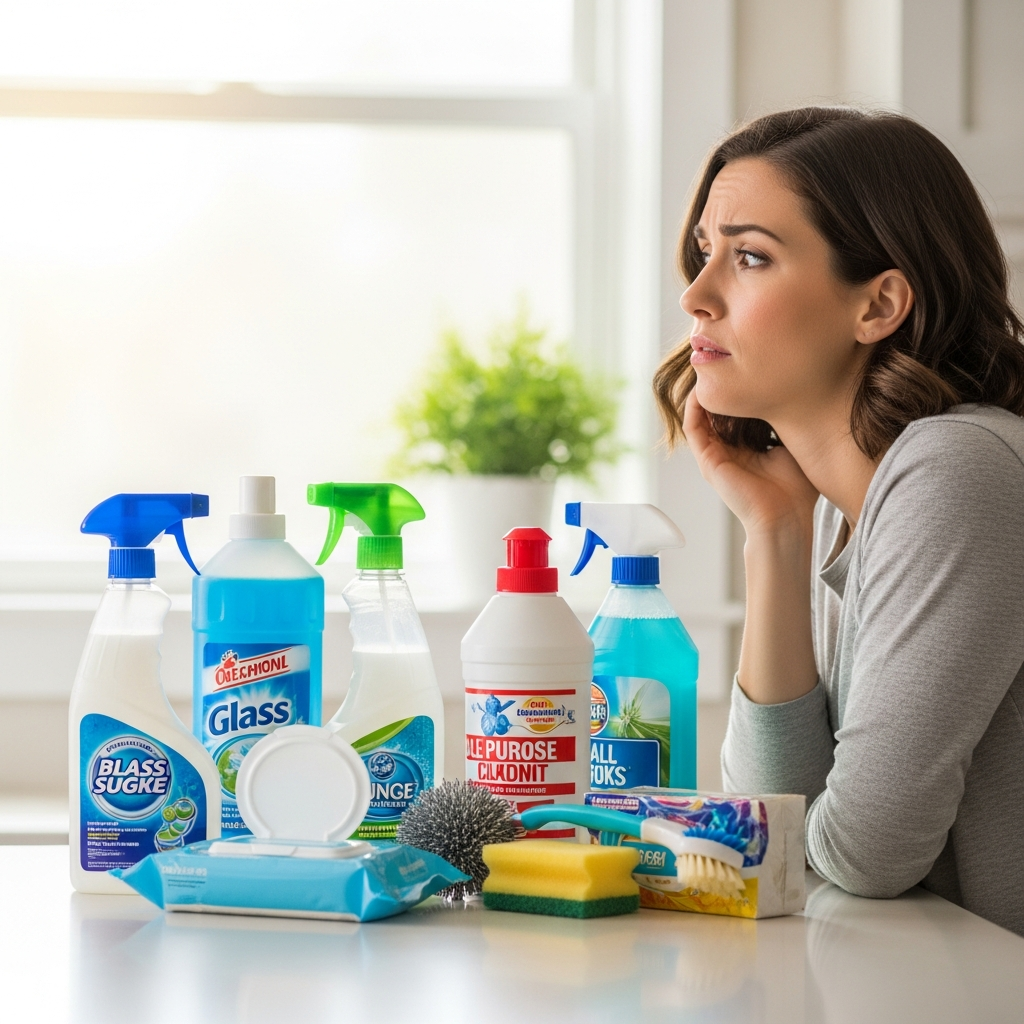
woman needing to organize the house for holiday guests

5 Ways to Organize Your Home to Accommodate Extra Guests

Five Ways to Organize Your Home Before Guests Arrive Around the holidays, a house stops being a private space built around daily routines and turns semi-public, arranged for hospitality and celebration. The change creates real logistical problems: occupancy can double or triple, familiar pathways become choke points, and the ordinary visual noise of family life needs to disappear so the home reads as welcoming. Hosting successfully requires structural reorganization, plus the empathy to walk each room the way a guest will. The Five Zones at a Glance Entryway: clear the funnel every coat, bag, and pair of boots passes through. Guest room: take the space back from its overflow-storage role. Bathroom: stock it so nothing has to be hunted for. Kitchen: zone the traffic and reset the refrigerator. Living area: rearrange for conversation, lighting, and fragile-proofing. 1. Clear the Bottleneck: The Entryway Every guest enters through one narrow, high-traffic point. Winter visitors arrive layered in bulky coats, wet boots, scarves, and bags, and the classic error is letting the host family’s own gear fill the rack before anyone arrives. Purge the front closet a week out, moving household cold-weather items to a garage, basement, or bedroom closet so primary storage stands empty for visitors. Swap flimsy wire hangers for sturdy ones, and borrow a garment rack for large groups. A standard mat cannot absorb a party’s worth of snow, mud, and salt, so add generous rubber boot trays to corral slush. Clear the entry table so a guest can set down a purse or gift. 2. Turn the Storage Room Back Into a Guest Room For eleven months, guest rooms quietly mutate into overflow storage for decorations, off-season clothes, and old exercise bikes. That debris must leave entirely before visitors land, not simply be shoved to one corner. Clear the closet fully and empty two dresser drawers plus a section of hanging space; nobody should spend a week in a suitcase. Then stage the bedside: check the outlet behind the nightstand and add a power strip at reachable height. Launder all bedding beforehand, including duvet covers and mattress protectors, because linens stored for a year carry a musty staleness the moment they are unpacked. 3. Make the Bathroom Intuitive Guests cannot casually explore a bathroom the way they breeze through a hallway, so this room must be intuitive and spotless. Stock toilet paper generously so running out never triggers a search. Provide ample towels in a distinct color, ending guesswork about whose is whose. Stash your own toiletries in drawers or the cabinet so the counter offers clear real estate for a visitor’s products, and clear the tub edge of old bottles. Tidiness here reads as hospitality, and it starts with real cleanliness: the CDC’s checklist for when and how to clean and disinfect your home is a handy pre-guest reference for high-touch surfaces. 4. Zone the Kitchen Around Traffic The kitchen becomes the social hub, and guests naturally congregate there, blocking the cook’s triangle between stove, sink, and refrigerator. Head it off with a self-service station far from the work zones: a drinks table with glassware, ice, and beverages on a sideboard, plus a snack zone on the island or in the living area. Then maximize the workspace itself. Clear every counter of appliances not needed for the menu, because counter space becomes the scarcest resource during prep. Treat the refrigerator as a logistics problem: declutter condiment graveyards, old leftovers, and expired items to open voids for the turkey and sides, raise or remove shelves for tall bottles and platters, and group similar items in clear bins so guests serve themselves without excavating the back shelves. 5. Reshape the Living Area for Conversation Most living rooms face a television; a hosting living room should face itself, with seating rearranged into conversational clusters. Then remove the fragile and the superfluous: with small children visiting, lift delicate collectibles and heirlooms to higher shelves, and clear the coffee table of decor so cups and plates have room. Lighting is an organizing tool too: check every lamp for a working bulb and favor soft, layered light rather than harsh overheads that feel clinical. And if the hauling and rearranging feels like a workout, it counts as one: the CDC’s overview of the benefits of physical activity is good permission to move boxes guilt-free. The Organization Table: Room, Fix, Timing Room Core fix Best timing Entryway Empty the closet, add boot trays, clear surfaces Week before arrival Guest room Remove stored items, clear drawers, check outlets Laundry early, staging the day before Bathroom Guest towel color, visible paper, bare counters Scrub mid-week, restock day-of Kitchen Self-serve stations, appliance eviction, fridge reset Reset 48 hours before cooking Living area Conversation layout, valuables high, coasters out Same day as arrival Why a Deep Clean Comes Before the Decor None of these strategies works in a dirty house, because tidying a grimy space is just rearranging clutter. Washing guest-room walls, scrubbing bathrooms, and degreasing the kitchen creates the fresh canvas that makes organization visible, and that labor exceeds the hours most hosts can spare. The fix is dividing the work: Toronto Shine Cleaning provides the professional deep cleaning before the event, and you keep the hosting. Typical deep cleaning rates before HST start from $270.38 for a studio or one-bedroom and $393.75 for a two-bedroom, rising to $441 for three bedrooms and $527.63 for four, itemized on our pricing page. Follow the reset with a recurring regular housekeeping visit so the home settles back into rhythm, or call (647) 424-0355 for a quote sized to your rooms. Frequently Asked Questions How far ahead should guest prep start? Two weeks out: purge the entry closet, empty the guest room, and launder bedding. One week out: the deep clean and kitchen appliance eviction. The last day or two: bathroom restocking, the fridge reset, and seating. What if I have no guest room? Apply the same logic to whatever you have. A cleared bedroom corner or a pull-out sofa

5 Ways to Organize Your Home to Accommodate Extra Guests Read More »
Grill Cleaning A Masterclass in Barbecue Grill Maintenance

Grill Cleaning: A Masterclass in Barbecue Grill Maintenance

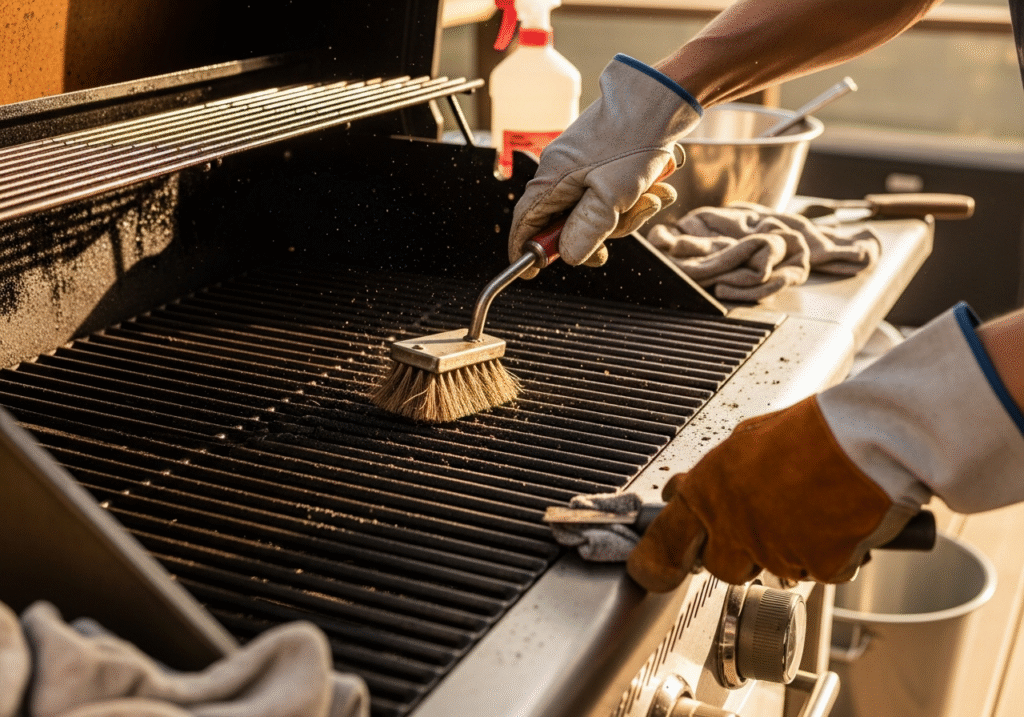
Grill Maintenance: The Cleaning Habits That Save Your Barbecue The barbecue anchors summer entertaining, yet once guests drift inside, most grills are abandoned to cool in the dark, caked in rendered fat, burnt marinades, and ash. A grill is a serious cooking appliance like any stove, except it lives outdoors in the weather and runs hot enough to carbonize food debris into a cement-like crust. Keeping one clean is food safety, fire prevention, and flavor protection at once. Burn the Myth That a Dirty Grill Adds Flavor Grill residue has nothing in common with skillet seasoning: polymerized oil bonded smooth versus a crust of carbonized food waste, rancid grease, and soot that turns fat into an acrid, bitter smoke coating fresh steaks with the taste of old burnt meals. Heating that sludge also produces polycyclic aromatic hydrocarbons and heterocyclic amines, carcinogenic chemical compounds. Start Every Deep Clean With the Fuel The real hazard lurking inside a neglected barbecue is a grease fire. Rendered fat drips past the burners into a tray or catch cup at the bottom, and months of cookouts turn that reservoir into flammable sludge; if a flare-up ignites it, the whole belly of the grill can burn in a way water struggles to tame. Scrape the tray or swap its disposable liner at every deep clean; it is the single step that prevents the leading cause of grill-related property damage. Grates, Deflectors, and Burners Grates by material. Porcelain-coated cast iron is high-maintenance: once the coating chips, water reaches the iron and the grate dies from inside, so clean it with a soft brass brush or nylon scrubber, never harsh steel. Stainless bars shrug off heavy work with a wire brush or scraper. A wire-brush warning. Bristles snap off, cling to the surface, and can be swallowed with the next meal, an ingestion that becomes a severe medical emergency. Coil-style scrubbers, wooden scrapers that wear into the grate shape, and a crumpled foil ball gripped in tongs clean well without shedding. Flavorizer bars and heat tents. These angled shields protect the burners and catch grease and ash first. Remove and scrape them, because a thick coat of black-and-white debris works as insulation, and high searing temperatures stop being reachable. Rusting or crumbling bars cannot be cleaned back to life; replacing them is cheap insurance for the burners underneath. Burner tubes. Clogged ports leave one side roaring while the other barely simmers. Watch for spiders too: propane draws them in, and the webs they weave inside the venturi tubes, where air and gas mix, can push flame backward into a flashback that erupts behind the control panel. Clear each tube with a bottle-style brush and open the ports with a paperclip until the flame runs steady and blue. The Lid, the Firebox, and the Exterior Black material flaking off the inside of the hood is rarely paint. It is built-up carbonized grease and smoke that heat expansion has begun to peel; chip the deposit off with a putty knife until the metal feels smooth. Inside the firebox, scrape residue down into the grease trough so it can be discarded, since leftover material invites rodents and insects between cooks. Outdoors, stainless panels show water spots and surface rust, so work a specialized stainless cleaner across them, wiping with the grain, and keep harsh abrasives away from enamel or painted bodies, which mostly need warm soapy water. How Often, and Why Winter Decides Everything Plan a genuine deep clean at minimum twice a year, when the season opens and closes, and shift to quarterly if you cook through winter. The fall reset matters most: grease left in the box through cold, damp months plus trapped moisture breeds mold and accelerates corrosion, so a dirty grill opened in spring arrives with a fuzzy ecosystem on the bars. Treat that growth as urgent, because eating mold is a genuine health risk. Charcoal kettles carry an extra chemical trap. Ash pulls moisture from the air, and wet ash reacts into potassium hydroxide, lye, a caustic compound that corrodes steel from beneath, so a lingering pile quietly eats the bowl, chokes the vents, and hardens into a plug that seizes the One-Touch cleaning system. Empty fully extinguished ash after every session, and scrape the bitter, smoke-producing creosote glaze off interior walls. A Season-by-Season Maintenance Map Interval Task Why it matters Every cook Brush hot grates; empty cold ash from kettles Stops fresh residue baking into carbon Monthly in season Check and scrape grease trays and liners Prevents the reservoir fire risk Twice yearly Full teardown: bars, burners, lid, firebox, shell Restores searing heat, catches rust early Before winter Deep clean, dry, cover, fresh liner Blocks mold, lye-forming ash, corrosion Spring reopen Clear webs, inspect ports, test flame Avoids flashback and uneven zones Barbecues are serious money, and the corrosive mix of animal fats, salt, and sugary marinades can finish a neglected unit’s burners and firebox in as little as three years, where maintained grills routinely serve for fifteen or twenty. After the work, the CDC’s handwashing guidance is a fair standard for the scrub-down, and its overview of how mold grows explains why a damp, covered grill invites springtime colonies. When the Grime Outgrows the Weekend When the season’s reset arrives, Toronto Shine Cleaning goes beyond vacuuming and dusting: book a deep cleaning around your grilling calendar, keep the house current with a regular maid service, and see the neighborhoods we cover across Toronto. We are bonded and insured, and a whole-home refresh before the next cookout starts at (647) 424-0355. Frequently Asked Questions Should a grill be cleaned hot or cold? Split the jobs. Food debris comes off best while the grate is hot, at the start or end of a cook. Anything involving scrapers, degreasers, or disassembly belongs to a cold unit with the propane disconnected, and charcoal ash must be fully extinguished before you empty it. Are wire grill brushes dangerous? They can be. Shed bristles stick to the cooking surface

Grill Cleaning: A Masterclass in Barbecue Grill Maintenance Read More »

a clean gutter in winter

Gutter Cleaning: Why Gutter Cleaning is the Most Critical Winter Prep Task

Your Gutters Are the Drainage System Your Home Depends On A house stays dry only when water is managed well. The roof sheds rain, but the gutter system carries that water away from the structure, and most homeowners ignore it until something visible goes wrong: a waterfall over the front door, a dark siding stain, or a damp basement corner. By then, the fix costs far more than routine maintenance. Gutter cleaning is one of the most protective seasonal chores, yet also one of the most postponed, because working at roofline height is difficult and dangerous for the average homeowner. What Actually Happens When Gutters Clog Leaves and twigs turn an open trough into a dam. Rain runoff carries shingle granules and fine dust that mix with decomposing leaves into heavy sludge. That wet muck adds weight to the fascia boards holding the gutters, pulling the system away from the house and ruining the pitch, the angle that lets water flow toward the downspout. Once the pitch is gone, water pools even after debris removal, breeding mosquitoes and speeding up rust. The most serious damage shows up at the foundation. A gutter carries roof water six to ten feet away from the home’s perimeter. When the trough is blocked, overflow falls beside the foundation walls, saturating the soil and building hydrostatic pressure that pushes water through cracks and porous concrete. Most wet basements trace to surface water that was never diverted, and waterproofing costs far more than routine cleaning. Ice Dams and Pests Are Built in Autumn In Canadian winters, a clogged gutter is the main ingredient in an ice dam. Snow melts on the warmer upper roof, runs toward the eaves, and meets a trough full of frozen debris. Meltwater cannot escape, so it refreezes into an ice wall, and the next round backs up under the shingles, seeps through nail holes, soaks insulation, and rots sheathing before staining interior ceilings. Cleaning the troughs in late autumn, after the leaves drop but before the first hard freeze, gives meltwater a clear path out. A gutter stuffed with rotting leaves is a compost bin twenty feet up. That damp organic layer attracts carpenter ants, mosquitoes, and rodents, and birds nest in sheltered corners. Once pests establish themselves at the roofline, they chew through fascia boards and soffit vents to reach the warm attic. Regular cleaning removes their food source and nesting material. How Often Should You Clean Your Gutters? Season Best timing Main debris Extra checks Spring After trees finish dropping seeds Maple keys, buds, blossom litter Clear downspout openings Autumn After leaves fall, before first freeze Deciduous leaves Hose-test downspouts, check anchors Pine properties Quarterly, year-round Pine needles Needles mat and bypass most guards Twice a year is the minimum for most homes: spring catches dense debris like maple keys that pack tightly into downspouts, and autumn handles the leaf volume. Pines add year-round work, since needles mat together, resist water flow, and corrode aluminum and copper. Government guidance agrees that eavestroughs and downspouts should be maintained twice a year, noting that most flood damage from clogged gutters is preventable. Why DIY Gutter Cleaning Carries Real Risk Ladder accidents send thousands of people to emergency rooms every year during home maintenance. A ladder needs firm, level ground, rare in garden beds and on sloped driveways, and it must sit at roughly the one-to-four angle so it neither slides at the base nor tips backward. Leaning a ladder against the metal trough dents thin aluminum, and moving it every few feet all afternoon causes the fatigue that leads to falls. Professional crews use standoff arms that rest on the wall or roof, protecting the worker and the gutter. The Government of Canada flood preparedness guidance recommends keeping gutters clear and draining well away from the foundation, work best left to someone trained to handle heights. Tools and Technique That Do the Job Right Heavy gloves, because the sludge at the bottom holds bacteria and mold spores A bucket hook and flexible gutter scoop, so debris never touches the siding Safety glasses, because dried debris shatters and insects scatter when disturbed A hose test on every downspout, listening for water to exit freely at the bottom A plumber’s snake or high-pressure nozzle for internal downspout clogs Gutter Guards Reduce Work but Do Not Eliminate It Quality guards cut cleaning frequency and block large leaves, but they are not maintenance-free. Fine sediment, roof grit, and pine needles still penetrate the mesh or pile on top, forming a layer that water skips over entirely. The sludge then builds inside a covered gutter, and cleaning it means removing and reinstalling the guards. Treat guards as a filter: every filter clogs eventually, so protected homes still need inspection. The fascia board is tied directly to the trough. Overflow wicks water backward behind the metal and rots the wood that anchors the entire system, and a gutter that pulls away from the house needs carpentry repairs, not just scooping. Overflow also causes tiger striping, black vertical streaks where runoff carrying asphalt chemicals and dirt stains the metal face; the marks bake into the paint and are nearly impossible to remove. Regular cleaning prevents the overflow, protecting curb appeal as much as the structure. Once the roofline is handled, give the interior the same protection. A seasonal deep cleaning service in Toronto removes the dust and allergens that winter sealing traps indoors, while an ongoing regular cleaning plan maintains everyday surfaces. Toronto Shine Cleaning serves homes across Toronto and the GTA with transparent pricing for regular and deep cleans. Frequently Asked Questions About Gutter Cleaning How often should gutters be cleaned? Twice a year is the minimum: once in spring for seeds and buds, once in autumn for leaves. Properties under pine trees often need quarterly service because needles mat together and clog quickly. When is the best time to clean gutters before winter? Late autumn, after the leaves finish falling but before the first hard

Gutter Cleaning: Why Gutter Cleaning is the Most Critical Winter Prep Task Read More »

Dangerous to Your Health: 5 Common Products That are Dangerous For Your Daily Life

Are Everyday Cleaning Products Dangerous to Your Health? Your home feels like the safe place, sealed off from city pollution. Inside many Toronto houses the opposite is true: the sprays under the sink can make indoor air more toxic than the air outside. Health Canada warns that household chemical products can cause poisonings, burns, fires and explosions when handled unsafely. A strong chemical smell is not proof of clean. Here is what five everyday products actually do, and the simpler habits that keep homes safe. Five Common Products Dangerous to Your Health 1. Bleach Bleach, the sodium hypochlorite default against mold, mildew and bathroom grime, is corrosive enough to burn skin and eyes on contact, and it is highly volatile. In a closed shower stall or small bathroom, its fumes react with organic matter and form chlorinated volatile organic compounds that immediately inflame the mucous membranes of the throat and lungs, especially dangerous with respiratory conditions. The deadliest habit is mixing: bleach plus ammonia, which lives in urine and many glass cleaners, generates chloramine gas, and bleach plus an acidic cleaner releases chlorine gas. Both can lead to hospitalization or worse. 2. Ammonia Glass and Window Cleaners Ammonia is why glass cleaner dries fast without streaks, and why it demands respect. It hunts moisture, so inhaled ammonia attacks the eyes, throat and lungs directly. High concentrations cause chemical burns in the respiratory tract and aggravate chronic conditions like asthma. Trigger-sprays aerosolize it into a fine mist that lingers in your breathing zone. That sharp odor is a warning signal, not evidence the glass needs you. 3. Fragrance, Air Fresheners and Fabric Deodorizers The word fragrance, or parfum, on a label is a regulatory loophole: scents count as trade secrets, so the hundreds of chemicals behind the scent are never listed. The cocktail commonly includes phthalates, added to make scents linger, which are known endocrine disruptors that mimic hormones and can interfere with reproductive development over long-term exposure. Air fresheners and fabric sprays do not clean anything. Some release agents that deaden your nerves or coat nasal passages with oily film; others bury odors under volatile organic compounds tied to headaches, dizziness and fatigue. Aerosol propellants add flammable lung irritants. The Government of Canada’s household products safety hub lists hazards in everyday cleaning items. 4. Oven Cleaners and Drain Openers Oven cleaners are built on lye, or sodium hydroxide, which strips baked-on grease by turning it into soap. That same reaction destroys living tissue: splashes cause severe burns and permanent blindness. Spraying a warm oven vaporizes the lye into a toxic cloud that fills the kitchen. Drain openers burn through hair and grease clogs with concentrated sulfuric acid or lye, generating intense heat that can damage old pipes; if a plumber later snakes a surviving clog, the splash-back is caustic. 5. Disinfectant Wipes and Sprays Quaternary ammonium compounds, the quats behind most disinfectant wipes and sprays, kill germs well, but they are powerful lung irritants. Growing evidence suggests frequent exposure can cause asthma even in otherwise healthy users. Quats also leave a residue, and a child who touches a wiped table then sucks their fingers is ingesting a pesticide. Blanketing whole rooms instead of high-touch points adds chemical load and feeds antibiotic resistance. Two Traps Behind Friendly Labels Carpet cleaners and upholstery shampoos bring their own risks. Many spot removers rely on perchloroethylene, a dry-cleaning solvent that is a neurotoxin and a classified carcinogen, and across a large floor it keeps off-gassing for days or weeks. Naphthalene, the mothball chemical in some carpet cleaners, releases fumes that can cause confusion, nausea and liver damage. Fibers trap all of it and release it back with every step and sit. Green labels deserve the same skepticism. The word natural is largely unregulated in cleaning products, and a green bottle can still carry allergens like limonene, a citrus oil that reacts with ozone in your air to form formaldehyde, a known carcinogen. Concentrated plant-based detergents can still irritate skin and lungs. Read the ingredient list, not the leaf on the label. The Real Risk Is the Daily Total Toxicologists call the running tally your body burden. One spray does little; a weekly ritual of glass cleaner, floor polish, counter spray, toilet cleaner and air freshener becomes a chemical soup the body must filter. When that load stays high, chronic inflammation, skin conditions and respiratory sensitivity can follow. Children and pets pay the most because smaller bodies and faster metabolisms process the same exposure less efficiently. Safer Swaps That Still Clean The most effective cleaner is usually the simplest: mechanical action. Removing dirt beats masking it. Instead of Reach for Why it works Everyday surface sprays Microfiber cloth, water and real scrubbing Fibers trap dirt and pathogens, removing more bacteria than a light chemical wipe, with no residue left behind Bleach on general surfaces Hydrogen peroxide Disinfects without chlorine fumes or toxic residue Commercial limescale removers White vinegar A mild acid that dissolves mineral deposits and soap scum without off-gassing Scouring powders Baking soda Gentle physical abrasion for sinks, tubs and baked-on messes Ventilation and Protection: The Free Upgrades Even safe cleaners need discipline. Health Canada’s page on using household chemicals safely covers the buying, use and storage rules that prevent accidents, and these habits carry it into daily practice: Ventilate. Never clean a sealed room: open a window and run the exhaust fan, especially in small bathrooms where fume levels spike fastest. Protect your skin. It is the body’s largest organ and absorbs chemicals readily, so glove up around degreasers and solvents and wear a mask for concentrated products. Remove, don’t mask. The goal is neutral air and residue-free surfaces, not a perfume cloud that signals a fresh chemical dose. Frequently Asked Questions Is it really dangerous to mix cleaning products? Yes. Bleach plus ammonia releases chloramine gas, and bleach plus any acidic cleaner releases chlorine gas. Both react within seconds in a closed room and can lead to hospitalization. Use one product

Dangerous to Your Health: 5 Common Products That are Dangerous For Your Daily Life Read More »

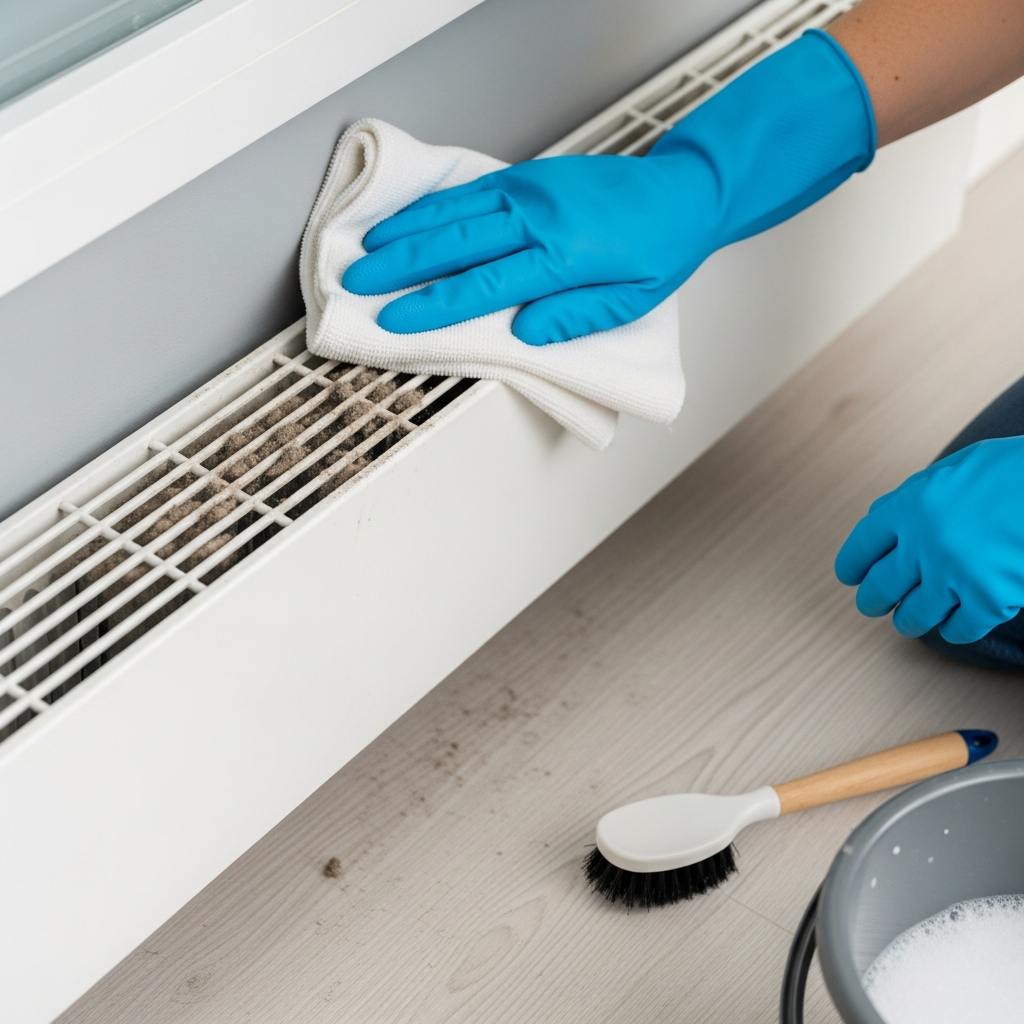
Baseboard Heaters routine day

Baseboard Heaters: The Step-by-Step Heater Cleaning Routine

Why Baseboard Heaters Need a Cleaning Routine Baseboard heaters keep many Toronto apartments and older homes warm, especially where forced-air ductwork could never be retrofitted. They sit at floor level under windows, out of sight until autumn’s first cold snap switches them on and fills the room with the sharp smell of scorched dust. That odor means the units are clogged, wasting electricity and blowing combustion particles back into your air. This routine protects your lungs, your hydro bill and your fire safety. How a Quiet Metal Box Collects Trouble These heaters are passive convection engines with no blower fan, just a heating element inside a metal pipe wrapped in aluminum fins. Room air is drawn into the bottom of the housing, crosses the hot element and exits at the top, because warm air rises and cool air falls. That silent loop acts like a floor-height vacuum, pulling in fur, skin flakes, lint and dust. The fins are the weak point. Hundreds of thin, sharp aluminum plates sit close together for surface area, and the tight gaps wedge debris in place. Over months the buildup packs into a gray mat that insulates the metal, so the unit runs longer and harder to reach the set temperature. Three costs of a neglected heater Money. A dust-coated exchanger loses heat to itself, and longer run cycles show up as a spike in your electricity bill: part of your heating budget literally warms lint. Air quality. That October burning smell is dust and hair actually carbonizing on the element. The convection loop suspends those fine particles and combustion byproducts in your breathing zone, hitting asthma and allergy sufferers hardest. Health Canada’s overview of indoor air contaminants covers particulate sources at home. Safety. Lint is highly flammable. Most dust merely chars, but fur clumps, paper or curtain edges on the element can ignite, often unnoticed behind sofas or drapes. The dark, warm interior also invites mold and pests through spring and summer. Health Canada’s guidance on mould and household moisture explains why hidden damp spots matter. Step-by-Step Baseboard Heater Cleaning Routine Step 1: Kill the power and prove it Turn the circuit off at the main breaker panel, never just the thermostat, because a sudden temperature drop can fire the element while your hands are inside. Sweep a voltage detector across the unit to confirm it is dead. Aluminum fins bend under a fingertip or careless vacuum nozzle, and flattened fins block airflow completely at that spot. Step 2: Remove the cover and start dry Pry off the faceplate; difficulty varies by model. Attack the dust dry: water on packed dust turns it into mud that no crevice tool can lift. A strong vacuum with a crevice nozzle pulls debris from between the fins without dragging plastic across them; a soft brush handles the cover. Step 3: Blow out the core, strategically Compressed air clears the matted fuzz wedged near the heating rod, but it launches a dust cloud. Hold the vacuum nozzle at the blast zone to catch the plume, aim parallel to the fins from back to front, and wear a mask, then vacuum the floor afterward. Step 4: Degrease the sticky buildup Kitchen units collect a film of airborne cooking grease, and bathroom units gather hairspray residue plus humidity rust. Wipe the faceplate and fin tops with a damp cloth and mild degreaser, on a dead unit only, and never spray the core, where shock and corrosion risks live. A soft toothbrush dipped in solution can free greasy fins if you dry the area thoroughly before power returns. Step 5: Comb, repaint and clear the zone An inexpensive fin comb, borrowed from air-conditioner service, straightens crushed blades and returns lost heat output. Steel housings rust in damp rooms; sand the spots and repaint only with heat-rated metal paint, since standard paint peels and smells. Never coat the element or fins themselves: paint insulates them and burns off as toxic fumes. Because swapping a whole unit means hiring an electrician, refurbishing yellowed covers outdoors with high-heat enamel is the smart money. Give the unit room: manufacturers want at least 12 inches clear in front and 6 inches above. Blocked covers trap heat, trip the thermal safety limit switch and ruin furniture, and drapes resting on a heater act as a lid and fire hazard; hem floor-length panels above the intake. Electric vs Hydronic Baseboards Aspect Electric Hydronic Heat source Element inside the pipe Hot water from a central boiler through copper pipe Cool-down Stops when the thermostat does Stays warm longer after shutdown Surface heat Element gets hot enough to scorch debris Lower surface temperature, slightly safer against fire Service note Test the breaker before touching fins No shock risk in the fins, but green corrosion on copper means a slow leak and a plumber visit Their fins clog the same way, so the routine above applies to both types. Tune the Rest of the System Two details finish the job. Old bi-metal thermostats are inaccurate and cycle the unit violently, and each start-stop pulse stirs dust into the element; digital or smart models hold steadier heat and schedule warm-up for when someone is home. Watch the wall above each heater too: soot ghosting, carbonized dust plated onto drywall, resists scrubbing once set and needs stain-blocking primer and repaint, so regular cleaning is the only prevention. Frequently Asked Questions Why does my heater smell like burning when I switch it on? Autumn’s first runs carbonize the dust and fur that settled on the element over summer. A mild smell fading within a day or two is that residue; a strong or lasting odor means heavy buildup, so cut breaker power and clean the fins first. Can a dirty baseboard heater really start a fire? Yes, if enough ignitable material reaches the element. Dense lint, paper or drapery fabric resting on the heating rod can catch fire, often behind furniture where a smolder goes unnoticed. Clearances of 12 inches in front and

Baseboard Heaters: The Step-by-Step Heater Cleaning Routine Read More »

entryway for winter dirt and salt

How to Set Up Your Entryway for Winter Muck and Salt – 6 Professional Tips

The Entryway Is Your Home’s First Line of Defense Against Winter Muck When November settles over Canada, the entryway stops being a pretty threshold and becomes a work zone. Wet leaves, mud, melting frost, and the first applications of road salt all arrive on the soles of boots within seconds of every trip outside. Anything you fail to trap at the door gets tracked deeper, staining carpet, scratching hardwood, and leaving a permanent gritty film on every surface. A purpose-built winter entryway is not decoration. It is containment, and it protects the floors you have already paid for. Here are six professional setups that make the muck season manageable. Tip 1: Put a Real Scraping Mat Outside the Door Everything starts with an exterior mat whose one job is aggressive scraping. A thin decorative welcome mat cannot handle clumps of mud, snow, and gravel; a Canadian winter needs a workhorse. Coir coconut fiber, heavy-duty rubber with deep grooves, and synthetic turf designs all shrug off freezing temperatures and moisture without cracking or rotting, and their texture nudges people into a proper shoe wipe. Shake the mat out often, and give it a hard hose-down before the deep freeze so its scraping surface stays sharp rather than cemented with old mud. Tip 2: Let the Interior Mat Absorb What the First Mat Misses Inside, the second mat plays a different role: soaking up moisture and trapping the fine grit and salt dust that slips past the scraper. Size matters. Choose one long enough that a person can step fully onto it, close the door, and kick off shoes without touching clean floor. High-absorbency cotton or microfiber surfaces pull up a surprising volume of water, and a non-slip rubber backing prevents dangerous slips while keeping trapped dampness off your flooring. Vacuum this mat daily through the high-traffic season, then shake it or launder it weekly. A saturated, filthy mat absorbs nothing; it just becomes a launchpad for the mess. Tip 3: Give Soaking Boots a Containment Zone Even a double-mat system loses to truly drenched footwear. A boot tray, a shallow plastic or rubber basin with a raised lip, catches melting snow, mud drips, and salty brine before any of it meets your floor. That single habit saves polyurethane finishes from salt stripping and keeps grout lines from slowly crumbling. Rinse and wipe the tray often: boots left sitting in days-old brine just reabsorb the corrosive water you were trying to keep out. Tip 4: Build a Complete Unloading Station Think through the whole arrival ritual, not just the floor. A small sturdy bench beside the boot tray lets people sit while wrestling stiff winter boots, instead of hopping and stamping slush onto clean boards. Strong hooks mounted above the mat zone catch dripping jackets and scarves so wet outerwear sheds its moisture inside your one easy-to-clean area rather than onto carpets and furniture further in. The essentials of a working station: A low bench or stool rated for repeated sitting Heavy hooks for coats, backpacks, and leashes Baskets for hats, gloves, and mufflers The boot tray, sized to the household’s shoe volume A hook or shelf for the daily bag, keys, and pass Tip 5: Dissolve Salt Film, Then Rinse, in That Order The defensive line will be breached, and how you respond decides whether floors survive the season. Act fast: salt attracts moisture, and once it dissolves into brine it can dull and strip the protective finish on hardwood, then creep into porous grout on tile and slowly crack it. Never mop a gritty floor first; that is like scrubbing with sandpaper, grinding sharp particles into the clear coat. Vacuum with a hard-floor head or sweep with a soft broom to lift dry grit, then work the salt marks with a damp, not wet, mop, because excess water swells and warps hardwood and laminate. For routine mopping of tile and sealed stone, a diluted pH-neutral cleaner lifts grime without attacking grout. For stubborn white haze, dissolve the alkaline deposits with one cup of white vinegar per gallon of warm water, then follow immediately with a second pass using a clean mop head and plain water to rinse. Dissolve, then rinse: skipping the rinse just re-deposits a new film as it dries. Store any vinegar or salt-removal solution carefully and follow the federal guidance on household chemical safety about labels, storage, and never mixing products. Tip 6: Keep Dedicated Cleaning Tools in the Front Closet Cleanup happens when supplies are five seconds away. Park a small dustpan and brush, a roll of paper towels or a designated muck cloth, and a spray bottle of your salt solution right in the entry closet so spills get wiped before they set. Use the same effort to organize the closet itself: room for bulky parkas without bursting doors, a shelf for boots mid-dry, and bins for the endless parade of toques and gloves. A tidy closet keeps the whole zone calm, because a clean entryway is an organized entryway. Your Winter Entryway Kit at a Glance Component Job Best picks Maintenance Outdoor mat Scrape heavy debris Coir, grooved rubber, turf Shake often; hose before freeze Indoor mat Absorb water, trap fine grit Cotton or microfiber, rubber backing Vacuum daily; wash weekly Boot tray Contain meltwater and brine Plastic or rubber with raised lip Wipe and rinse frequently Bench and hooks Safe unloading of people and coats Sturdy, wipeable surfaces Declutter weekly Tool caddy Instant spill response Dustpan, cloths, salt spray Restock as used The CDC’s overview of cleaning and disinfecting household surfaces reinforces the same sequence you need at the door: remove the gross stuff first, then clean the surface itself. Winter Entryway FAQ How big should an indoor winter mat be? Long enough that both feet land fully on it and you still have room to shut the door and remove shoes. A small rug that slides aside when kicked is worse than useless in slush season. Will road salt ruin hardwood

How to Set Up Your Entryway for Winter Muck and Salt – 6 Professional Tips Read More »

Woman cleaning the counter with pH-neutral products next to her.

Understanding pH-Neutral Cleaners: The Complete Guide

What pH-Neutral Cleaners Are and Why Your Surfaces Thank You for Them Somewhere between the vinegar bottle and the oven degreaser sits the most important concept in household chemistry: a balanced pH. Master it and you move from aggressive scrubbing that quietly damages finishes to gentle, sustainable maintenance that keeps stone, wood, and tile looking new for decades. This guide explains what a pH-neutral cleaner actually does, exactly where it is essential, where it fails, and how to use one like a professional. The pH Scale in Plain Language The pH scale measures how acidic or alkaline a water-based solution is, running from 0 to 14. Pure water sits at 7, dead center, and is the model of neutral. Below 7 lands acid, with vinegar and lemon juice as the classic household examples. Above 7 is alkaline, also called basic, a club that includes bleach, ammonia, and most oven degreasers. The further a product strays from 7, the more chemically reactive and potentially caustic it becomes. That reactivity is a double-edged sword: it is what lets strong cleaners dissolve hard water stain or cut heavy grease, and it is also what ruins surfaces that never stood a chance against them. Health Canada’s resource on using household products safely makes the same point about reading labels and respecting product strength. What a Neutral Cleaner Actually Does A pH-neutral soap is a surfactant formulated to sit at or very near 7. It lifts dirt, oils, and grime off a surface and suspends them so they can be wiped away, without trying to dissolve, etch, or strip the material underneath. Its action is mechanical, breaking the bond between soil and surface rather than attacking the surface itself. Think of it as the do-no-harm principle of cleaning: the default choice for any material that a strong acid or alkali would permanently damage. Natural Stone: The Strongest Case for pH 7 Marble, limestone, travertine, and onyx bring luxury into a home and extraordinary vulnerability with them. These stones are largely calcium carbonate, which reacts violently with acid. Even a “natural” splash of vinegar on a marble counter sets off a reaction that dissolves a microscopic layer of stone. The result, called etching, looks like a dull whitish stain but is physical damage that no wipe can undo; removing it means professional re-honing and polishing. Alkaline cleaners are less dramatic but still wrong, dulling the finish and working into pores over time. A pH-neutral cleaner is the only recommended routine product for these calcium-based stones. Granite etches far less readily, yet harsh chemicals degrade the sealant that protects it from stains, so neutral soap remains the wisest daily choice. Floors, Leather, and Fabrics The same preservation logic protects your floors. A sealed hardwood floor is defended by its finish, not the wood beneath, and repeated washes with high-alkaline cleaners slowly strip that polyurethane layer. The floor may look clean today while growing duller and thinner with every mop. A properly diluted pH-neutral floor cleaner lifts soil off the finish without eating it. Manufacturers of luxury vinyl tile and laminate almost universally specify neutral cleaners for the same reason: harsh chemistry clouds or embrittles the factory wear layer, permanently marring the look and often voiding the warranty. Leather, a natural skin kept supple by its own oils, reacts the same way to alkaline soaps by drying, cracking, and fading, while delicate upholstery and clothing respond far better to a neutral spot-cleaning solution. Professionals follow that order of force: start with the gentlest method that can work. Where pH-Neutral Cleaners Hit Their Limits Neutral products are masters of maintenance, not miracle workers. Three common jobs need something else: Hard water stains and soap scum. These are alkaline mineral deposits of calcium and magnesium, so an acidic cleaner is required to break the bonds. Baked-on stovetop or oven grease. Polymerized oil needs a moderately alkaline degreaser; a neutral soap simply lacks the power. Disinfecting. Neutral soaps clean but do not inherently kill germs. Countertops touched by raw meat or a bathroom during flu season need a dedicated disinfectant applied after cleaning, as the CDC’s home cleaning and disinfecting guidance describes. Strong chemistry also demands respect: never blend cleaning products, and store them per Health Canada’s household chemical safety rules, since mix-ups like combining bleach with other cleaners can release toxic gas. Smart Technique: Dilute, Two-Bucket, Microfiber Most neutral cleaners ship as concentrates, so dilute exactly to the label. Too much product leaves a sticky film that attracts fresh dirt, the opposite of the goal. For floors, the two-bucket method keeps things honest: one bucket holds cleaning solution, the second holds clean rinse water, so the mop never redistributes what it lifted. On countertops, pair the cleaner with a quality microfiber cloth whose fibers trap soil instead of pushing it around. Lift the dirt, remove it, leave nothing behind but a clean surface. The sensible arsenal is small: a neutral workhorse for the vast majority of daily and weekly tasks, plus acidic and alkaline specialists reserved for the specific problems that truly need them. Which Cleaner for Which Surface Surface or soil Right chemistry Why Marble, limestone, travertine, onyx pH-neutral Acids etch calcium carbonate instantly Granite and sealed stone pH-neutral Protects the stain-blocking sealant Sealed hardwood, LVT, laminate pH-neutral, diluted Spares the wear layer and the warranty Leather, upholstery, delicates pH-neutral Keeps natural oils and dyes intact Hard water and soap scum Mildly acidic Alkaline minerals dissolve in acid Baked-on grease Mildly alkaline degreaser Saponifies polymerized oils Germ-sensitive counters Clean, then disinfect Neutral soap lifts soil, not pathogens pH-Neutral Cleaner FAQ How do I know if a cleaner is truly pH-neutral? The label should say pH neutral or pH 7. If it does not, contact the manufacturer; a generic “all surface” claim is not a promise, since many multi-purpose products lean alkaline. Is a diluted neutral cleaner safe for everyday mopping? Yes, and it is the recommended routine for sealed floors and stone. Use weak solution, a well-rinsed mop

Understanding pH-Neutral Cleaners: The Complete Guide Read More »

5 Reasons Why Hiring a Cleaning Service is the Best Form of Self-Care

The Chore Math Nobody Wants to Do The modern home is a hub of work, rest, and family life, and keeping it clean can feel like a relentless task. Dust resettles almost as soon as you wipe it, floors attract dirt overnight, and the kitchen and bathrooms demand constant attention. The weekend, which should recharge you, disappears into a chore list instead. That cycle drains stress reserves and the one resource you cannot buy back: time. A professional residential cleaning service lives in the gap between wanting a calm, spotless home and living a genuinely busy life. Here are five reasons hiring one qualifies as the best form of self-care available. Reason 1: It Hands You Back Your Weekends A cleaning service is often framed as a luxury, but it is more accurately an investment in quality of life. In a moderately sized home, sweeping, mopping, scrubbing, and dusting easily consume four, five, or more hours every week. A professional reclaims those hours for family, hobbies, exercise, or well-earned rest. The cumulative effect is profound: less burnout, better work-life balance, and a home that becomes a sanctuary you enter feeling at ease rather than confronting a to-do list. Reclaimed hours can fund movement that the CDC ties to real physical and mental benefits, and a calmer home is one of the simplest supports for everyday mental health. Reason 2: The Clean Is Deeper and Smarter Than DIY Professional cleaners bring trained technique that is difficult for an average homeowner to match. They know which products suit natural stone versus laminate, how to clean stainless steel without streaks, and the right method for stubborn soap scum on glass shower doors, which prevents costly damage from the wrong chemical or an abrasive sponge. They also arrive with commercial-grade equipment: high-powered vacuums with HEPA filters capture a far higher percentage of dust, allergens, and pet dander, improving indoor air quality for households with allergy sufferers, asthmatics, children, or pets. The process itself is systematic. Cleaners work from a detailed checklist, top to bottom so falling dust lands before floors are addressed, and side to side across each room. A standard recurring visit covers comprehensive dusting of furniture, shelves, and window sills; cleaning and disinfecting of kitchen countertops, sinks, and appliance exteriors; scrubbing toilets, showers, tubs, and vanities; plus vacuuming carpets and mopping hard floors. Reason 3: Deep Cleans and Move Days Stop Being Dreaded Homes that have gone a while without a thorough clean, and clients new to a service, often start with a deep clean, the reset button. It includes everything in a standard visit, then goes further: washing baseboards and trim, cleaning light fixtures and ceiling fans, wiping doors and frames, reaching behind and underneath furniture and appliances, scrubbing grout lines, and cleaning interior window surfaces. Specialized move services matter just as much. A move-out clean is the most exhaustive of all, performed on an empty home down to cabinet and drawer interiors, closets, the oven, and the refrigerator. It is frequently a requirement for retrieving a security deposit, and it presents the property at its best for agents and buyers. A move-in clean lets you start your new chapter in a sanitized, freshly prepared space, peace of mind before a single box is unpacked. Reason 4: Vetted People and Real Protection The biggest hesitation about letting anyone into your home is trust, and reputable companies engineer that trust deliberately. They background-check and thoroughly vet their employees, then stand behind the work with bonding and insurance. Bonding provides protection against theft, while insurance covers accidental damage during a clean, so you are working with an organization accountable for its people and its work. Customization is part of the relationship too: a good company builds a plan around your needs, priorities, and budget, whether that means a weekly, bi-weekly, or monthly visit, a focus on just the kitchen and bathrooms, or a request for eco-friendly products. You pay for what you actually need. Reason 5: Permission to Focus on What Matters Ultimately, a residential cleaning service addresses a practical need, a sanitary home, while delivering intangible returns: free time, reduced stress, and improved well-being. It is self-care with a checklist, and it protects what is likely your largest single investment. Walking into a consistently clean, fresh space frees mental and physical energy for your career, your family, and your passions, with confidence that the foundations are handled. Reclaimed hours every week, without lifting a broom A deeper, more consistent clean than a rushed DIY pass Vetted, insured professionals with real damage protection Lower daily stress and a healthier home for everyone under your roof Self-care benefit What the service delivers Reclaimed time Four or more weekly chore hours returned to you Healthier air HEPA vacuums and trained dusting cut allergens and dander Lower stress A predictable, checklist-driven home reset on your schedule Peace of mind Vetted staff, plus bonded and insured protection Book the Kindness You Deserve Toronto Shine Cleaning brings this whole philosophy to your address at 140 Yonge St Suite 285, Toronto ON M5C 1X6, serving households across the city with routine maintenance, restorative deep cleaning, and recurring maid service plans tailored to your budget, with every base laid out on the pricing page. Property owners can vouch for the results on our reviews page. Call (647) 424-0355 and treat your home, and yourself, to the upgrade. Cleaning Service Questions, Answered How often should I book a cleaning service for it to count as self-care? Most households settle into weekly, bi-weekly, or monthly visits depending on size and lifestyle. Even a monthly recurring clean prevents the deep buildup that turns DIY weekends into all-day marathons, so start where your budget is comfortable and adjust from there. What is the difference between a regular clean and a deep clean? A regular visit maintains: dusting, kitchen and bathroom surfaces, toilets, tubs, vacuuming, and mopping. A deep clean resets: baseboards, trim, light fixtures, ceiling fans, doors and frames, grout, interior windows, and

5 Reasons Why Hiring a Cleaning Service is the Best Form of Self-Care Read More »

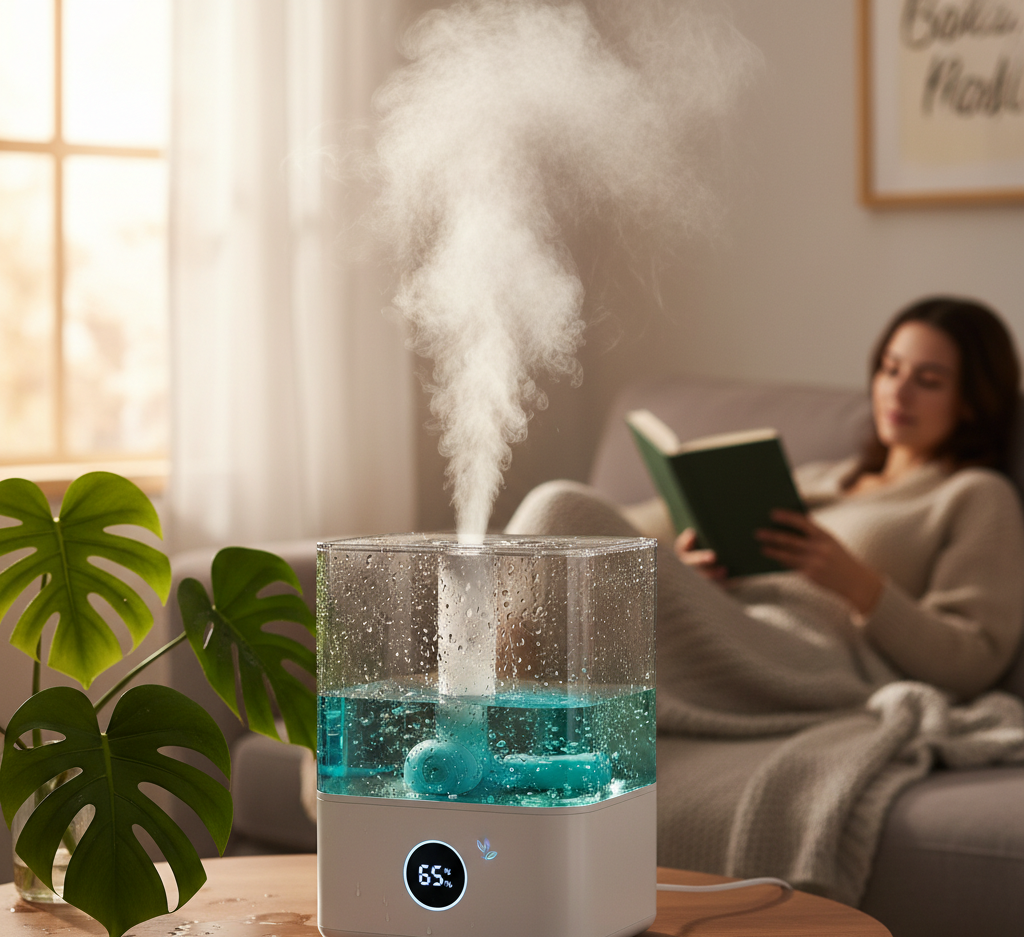
humidifier being effective

Humidifier Cleaning: The Hidden Danger in Your Humidifier (And How to Prevent It)

The Invisible Price of a Cozy Canadian Winter The cold does most of its indoor damage quietly. Sealed houses and running furnaces strip moisture from the air until the environment inside your walls turns drier than a desert, and your body reports the loss first: a throat that tickles all day, a voice that croaks until mid-morning, skin that feels tight and itchy, lips that chap, knuckles that crack. Add the sudden snap of static from a doorknob and wooden furniture that creaks and splits as the season drags on. The CDC’s winter weather guidance captures how thoroughly the cold season reshapes life indoors, and dry air is the part nobody shovels. The fix is one small appliance that puts water vapor back where the furnace took it out. Run properly, a humidifier turns a harsh, parched house into a comfortable one. The word “run” is doing a lot of work there, because this machine never runs clean on autopilot. Why the Number 30 to 50 Matters Indoor comfort is usually discussed through relative humidity, which compares the moisture the air holds to the maximum it could hold at that temperature. Health experts put the comfort zone between 30 and 50 percent. Cold outdoor air carries almost no water, and once you heat it indoors, the percentage collapses into single digits. Parched air behaves like a sponge, pulling moisture from your skin and from the mucous membranes lining your nose, throat, and lungs. Those membranes are your first line of defense at trapping viruses and bacteria, so when they dry out, colds and sinus trouble hit harder and linger longer. Kept properly humid, they soothe coughs and ease congestion instead, which is why humidifier season overlaps with cold and flu season. The Hidden Danger in the Tank Every humidifier carries a reservoir of standing water, and standing water at room temperature is exactly where mold, mildew, and bacteria build an empire. An uncleaned unit then does something genuinely counterproductive: it aerosolizes whatever is growing inside and broadcasts a plume of microscopic contaminants into the air your family breathes. That can flare allergies and, in some cases, trigger a respiratory illness known as humidifier fever. The CDC’s overview of mold and your health explains why inhaled mold exposure is worth taking seriously. The same page on cleaning and disinfecting with bleach doubles as a reminder that disinfectants need correct dilution and a thorough rinse. Which Machine Do You Have? Type How it works Trade-off Evaporative Fan blows air through a wet wick, releasing invisible cool mist that self-regulates as the room humidifies The wick is consumable: minerals clog it, and neglect lets it harbor mold Ultrasonic A vibrating diaphragm shatters water into a visible cool mist; very quiet, no filter to buy Anything dissolved in the water leaves with the mist, so tap water sprinkles white dust on every surface Vaporizer A heating element boils water, so the steam released is sterile and warm Uses more electricity and poses a burn risk around small children Whole-house Built into the forced-air system, holding every room at a set level automatically Costliest option, needs professional installation and upkeep If you own the ultrasonic kind, the tank is only half the story: use distilled water, because its minerals have been removed, so the mist stays pure and the dust never settles. Distilled water also stretches the life of an evaporative wick. A Routine That Takes Minutes Daily: Empty the tank, rinse it, and refill with fresh water. Never just top up old water that has been sitting. Weekly descale: Unplug, separate tank from base, and soak both with equal parts white vinegar and water for at least an hour; the acetic acid dissolves the chalky crust. Gently brush the residue away. Weekly disinfect: Swirl a mix of one teaspoon of household bleach per gallon of water in the tank, hold it for about twenty minutes, then rinse obsessively until no bleach smell survives. A 3 percent hydrogen peroxide solution works the same way. Always finish dry: Air-dry every part completely before reassembly, because a dry surface cannot grow mold. Placement and measurement seal the deal. Sit the unit on a level, water-resistant surface a few feet off the floor, away from walls, electronics, and wooden furniture, with room for airflow. Then spend a few dollars on a hygrometer, the little device that reads room humidity, so you can confirm you are inside the 30 to 50 percent band. Over-humidifying is a real mistake too: too much moisture beads on windows and walls and grows the very mold you bought the machine to outmaneuver. Breathe Easy, Live Spotless A clean humidifier protects the air you breathe; a clean home protects everything else. Toronto Shine Cleaning covers both angles with scheduled regular cleaning and seasonal deep cleaning for your home, serving neighbourhoods across the city as listed on our locations page. Call (647) 424-0355 to book, or start with an online quote at your convenience. Frequently Asked Questions How often should a humidifier be cleaned? A quick empty-rinse-refill belongs every single day, while the full descale-and-disinfect routine should happen weekly through the whole season you run the machine. What is the white powder on my shelves? That is your tap water wearing a disguise. Ultrasonic models atomize dissolved minerals along with the water, and they settle as fine dust. Switching to distilled water stops it. Can a dirty humidifier really make me sick? Yes. Standing water breeds mold and bacteria, and the mist launches them into the room air, which can trigger allergies and, in some cases, a respiratory illness called humidifier fever. Is higher humidity better if dry air is the problem? No. Above the 30 to 50 percent range, condensation forms on windows and walls and invites mold growth. A cheap hygrometer keeps you in the safe band.

Humidifier Cleaning: The Hidden Danger in Your Humidifier (And How to Prevent It) Read More »

Hot Tub Cleaning: Get Perfectly Balanced Hot Tub Water Every Time

Own a Spa, Become a Part-Time Water Chemist A hot tub is the most social square footage in many Canadian backyards: stargazing after a long day, laughter that carries over the jets, aching muscles surrendered to hydrotherapy. But unlike a refrigerator, a spa never runs on autopilot. It is a sealed basin of warm, constantly circulating water, which means it is a small living ecosystem. Left alone, that same warmth that feels wonderful on your skin is a five-star resort for bacteria, algae, and every microorganism that thrives in heat. The difference between a sanctuary and a murky hazard is not heroic spring weekends of scrubbing. It is a short, boring, repeatable routine of testing, balancing, and sanitizing. Set the Chemistry in the Right Order Three pillars hold a spa together: total alkalinity first, pH second, sanitizer third. Disturb one and the others drift, so work the order faithfully. Test two to three times weekly with the color-coded dip strips, and more often when the tub sees heavy use. Total alkalinity: this measures how well the water resists pH swings, a buffer that keeps chemistry from lurching. Hold it between 80 and 120 parts per million. Too low and pH can crash suddenly into corrosive territory; too high and pH creeps upward, clouding the water and forming scale. Sodium bicarbonate lifts it; a pH-down product based on sodium bisulfate brings it back. pH: on the familiar 0 to 14 scale, with 7 neutral, a spa wants 7.4 to 7.6. That number is not arbitrary: it sits near the natural pH of the human eye, which is why it feels gentle on bathers. Acidic water gnaws at heater elements and pump seals and stings skin; alkaline water makes sanitizer sluggish, turns the water cloudy, and crusts scale onto the shell. Sodium carbonate raises pH, sodium bisulfate lowers it. Sanitizer: only once the first two are balanced can chlorine or bromine do its job. Chlorine oxidizes fast and hard but smells stronger and destabilizes in hot water; aim for 1 to 3 ppm. Bromine tolerates heat better, stays quieter on the nose, and gets recharged by oxidizing, which makes it a spa favorite; hold 3 to 5 ppm. Either way, the level must stay in range whenever anyone soaks. The CDC’s guidance on bleach and disinfection is a solid refresher on why sanitizer contact times and dilutions are never something to eyeball. Shock the Water, Then Let It Vent Even perfectly sanitized water collects the residue of bathing itself: lotions, deodorants, soaps, and organic matter that feed bacteria and haze the surface. Once a week, dose the tub with an oxidizer, a habit called shocking. The big dose breaks down that waste, finishes off resistant microbes, and in a bromine spa reactivates spent bromine ions back into working sanitizer. Run the jets and leave the cover off while you do it so the water circulates and the gases escape; trapped chemical vapor chews up the underside of the cover over time, a point the general CDC advice on cleaning and disinfecting at home reinforces for any strong product. The Hardware That Keeps Water Clear Component Routine Why it matters Filter cartridge Hose-rinse between the pleats weekly; deep-soak in a filter-cleaning solution overnight every few months; replace roughly once a year Clogged media clouds water and strains the pump Cover Wash with mild soap, then treat with a UV-protective vinyl conditioner; prop it open after shocking It traps heat, blocks debris, and slows sunlight from burning off sanitizer Shell At refill only: soft cloth with a vinegar-and-water solution, or a dedicated spa shell cleaner for stubborn stains Abrasive pads and powders permanently scratch acrylic The Quarterly Reset No matter how disciplined you are, dissolved solids and spent chemicals eventually saturate the water until balancing turns into a chore of chasing numbers. Every three to four months, drain and refill. Before pulling the plug, run a pipe flush or biofilm remover through the jets for several hours to dislodge the unseen slime colonizing the plumbing. Then kill power at the circuit breaker, a genuine safety step, before draining by pump or built-in valve. Wipe the empty shell, rinse away every trace of cleaner, and refill with the hose tucked into the filter compartment so air leaves the lines instead of locking the pump dry. Restore power, bring the water up to temperature, and rebuild the chemistry in its faithful order: alkalinity, then pH, then sanitizer. Two Pools of Maintenance, One Standard Spa care proves what house care has always proven: small, scheduled routines beat heroic rescues. When your home needs its own quarterly reset, Toronto Shine Cleaning’s deep cleaning service reaches the built-up grime behind appliances, fixtures, and baseboards; rates start at $270.38 for a studio or one-bedroom and appear in full on the pricing page, alongside what neighbours say about our crews. Book a visit or ask a water-chemistry question of your own at (647) 424-0355. Frequently Asked Questions Why fix alkalinity before pH? Alkalinity is the buffer that anchors pH. Balance the pH first and an unstable buffer will knock it off again within days, wasting chemicals and leaving bathers in corrosive or scale-forming water. Chlorine or bromine: which sanitizer should I choose? Chlorine works faster and costs less but loses stability in hot water and smells more assertive. Bromine thrives at spa temperatures, stays nearly odorless, and regenerates when you shock, which is why many owners prefer it. How long can water sit before I must change it? Roughly three to four months under normal use. Dissolved solids accumulate until no amount of product keeps the water balanced, and a fresh fill plus shell clean resets the system. Can I use kitchen scrubbers on the acrylic shell? Never. Steel wool and scouring powders leave fine scratches that harbor bacteria and dull the gloss. A soft cloth with vinegar and water handles ordinary scale, and dedicated spa cleaners handle the rest.

Hot Tub Cleaning: Get Perfectly Balanced Hot Tub Water Every Time Read More »