Fall Cleaning

Cleaning Oven Racks

Cleaning Oven Racks: A Step-by-Step Guide to Oven Rack Maintenance

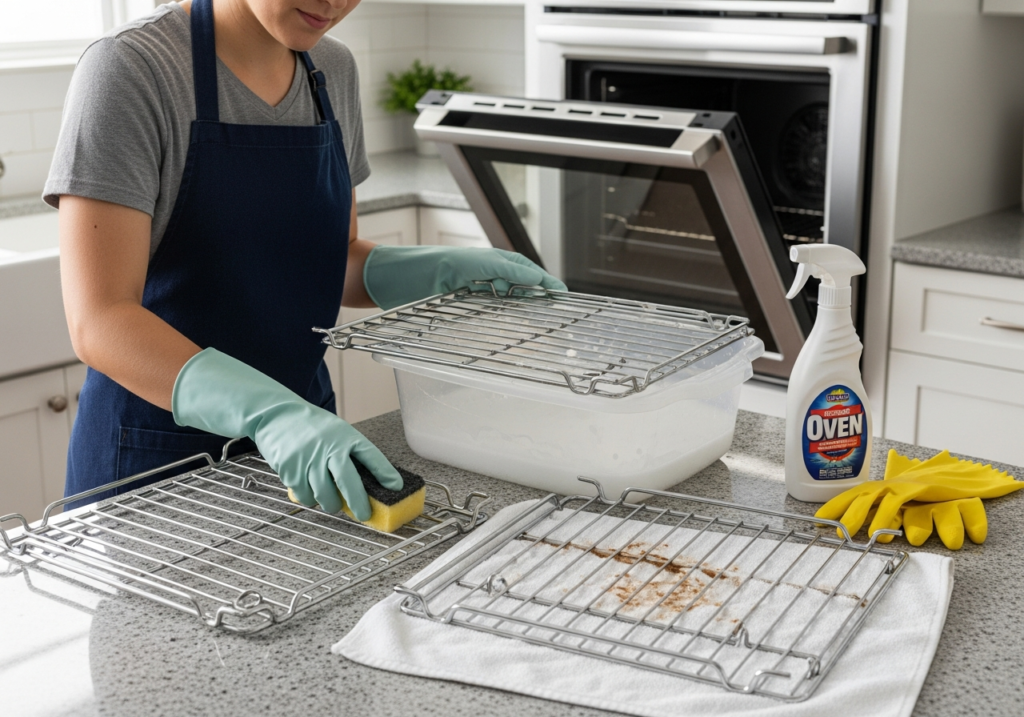
How to Clean Oven Racks: A Step-by-Step Oven Rack Maintenance Guide Oven racks are the silent victims of every roast, lasagna, and baking tray. They catch the drips, splatters, and overflows, and the oven’s heat bakes those spills into a hard, carbonized coating. Cleaning oven racks is one of the most disliked chores in any kitchen, but the difficulty is mostly caused by the wrong methods. Restoring your racks to a silver shine does not require brute force; it requires the right chemistry and enough time. Why Oven Racks Get So Hard to Clean The black coating on a dirty rack is not simply dirt. It is a combination of polymerized fats and carbonized sugars. When oil or food juices hit hot metal, they change chemically and bond to the surface, and repeated heating cycles cure that bond. This is why a quick wipe with a soapy sponge does nothing. The geometry of the rack, a series of parallel bars and cross-braces, also makes mechanical scrubbing tedious, since a scouring pad cannot wrap around the thin wires. Never Leave Racks in During the Self-Clean Cycle The most important rule of oven rack maintenance is what not to do: do not leave the racks in the oven during the self-clean cycle. That cycle uses extreme temperatures, often exceeding 900 degrees Fahrenheit, to incinerate food residue into ash. While the porcelain enamel of the oven walls can withstand this heat, the chrome plating on standard racks cannot. The high heat oxidizes the chrome, turning the racks a dull, permanent blue or gold, and it strips the natural lubricity of the metal so the racks become rough and hard to slide. Remove the racks and clean them separately, always. Oven Rack Cleaning Methods That Work Depending on how dirty your racks are, one of these methods will fit your situation: Bathtub soak with powdered dishwasher or laundry detergent Ammonia fumes in a sealed trash bag Baking soda and vinegar paste Dryer sheet soak for sticky residue The Bathtub Soak Method This technique needs no scrubbing, only a bathtub. Place an old towel or two in the bottom of the tub to protect the surface, lay the racks flat on the towels, and fill the tub with the hottest water your tap allows until the racks are fully submerged. Dissolve a generous cup of powdered dishwasher detergent or a high-quality laundry detergent in the water. These powders contain enzymes that break down proteins and starches and degreasers that attack fats. Let the racks soak overnight. The dwell time is the active ingredient: the enzymes and surfactants dissolve the bond between the carbonized food and the chrome. In the morning the water will likely be murky brown, and a sponge or soft brush will wipe the softened grime straight off. Rinse thoroughly and dry before returning the racks to the oven. The Ammonia Trash Bag Method For racks coated in baked-on grease that defies soaking, ammonia fumes are the heavy-duty option. Place the racks in a heavy-duty trash bag, add about two cups of household ammonia (the liquid does not need to touch the racks), and seal the bag tightly with a knot or duct tape. Leave it for twenty-four hours in a well-ventilated spot such as a garage or outdoors, since ammonia fumes are potent. When you open the bag, keep your face away from the opening. The grime will be soft and gummy and can be sprayed off with a garden hose or wiped away with hot soapy water. Follow Health Canada’s household chemical safety advice for safe handling, ventilation, and storage of ammonia and other cleaning chemicals. Baking Soda and Vinegar, Plus the Dryer Sheet Trick For a non-toxic approach, place the racks on a towel in the tub or a large utility sink, coat them liberally with baking soda, and spray white vinegar over the powder. The fizzing lifts the dirt, then you add hot water to cover the racks and let them sit overnight. The next day, scrub with a scouring pad or a ball of aluminum foil. For sticky, gummy residue rather than hard carbon, lay half a dozen dryer sheets over warm water in the tub, soak for a few hours, then use the sheets themselves as the scrubbing tool. The CDC’s home cleaning guidance is a good reminder that cleaning with the right products removes most germs and grime before any disinfecting step. Method Best For Effort Time Detergent bathtub soak Heavy mixed food buildup Very low Overnight Ammonia trash bag Stubborn baked-on grease Low 24 hours Baking soda and vinegar Moderately dirty racks Medium Overnight Dryer sheet soak Sticky, gummy residue Low A few hours Oven Rack Maintenance Tips After a deep clean, racks can feel dry and screech when they slide. Fix this by rubbing a paper towel with a small amount of vegetable or canola oil along the side rails and the corresponding ridges inside the oven wall. This restores the glide and prevents friction damage. Prevention beats marathon cleaning sessions. Spot-clean racks as soon as the oven cools after a spill, before the mess bakes on again. When roasting something that might drip, place a baking sheet on the rack below to catch the fallout; the sheet is far easier to clean than the wire rack. For ongoing kitchen upkeep, a regular cleaning service keeps ovens and stovetops under control between deep cleans. Oven Rack Cleaning FAQ Can I leave oven racks in during the self-clean cycle? No. The extreme heat, often exceeding 900 degrees Fahrenheit, oxidizes chrome plating and leaves racks permanently discolored and rough. Always remove them first. Is the ammonia method safe indoors? Only with strict ventilation. Keep the sealed bag in a garage, outdoors, or another very well-ventilated area, wear gloves, and keep your face away from the opening when you open the bag. How often should oven racks be cleaned? Spot-clean after spills and do a full soak two to four times a year, or whenever the

Cleaning Oven Racks: A Step-by-Step Guide to Oven Rack Maintenance Read More »
Fabric Softener Sheets: 5 Things You Should Never Put in the Dryer with a Softener Sheet

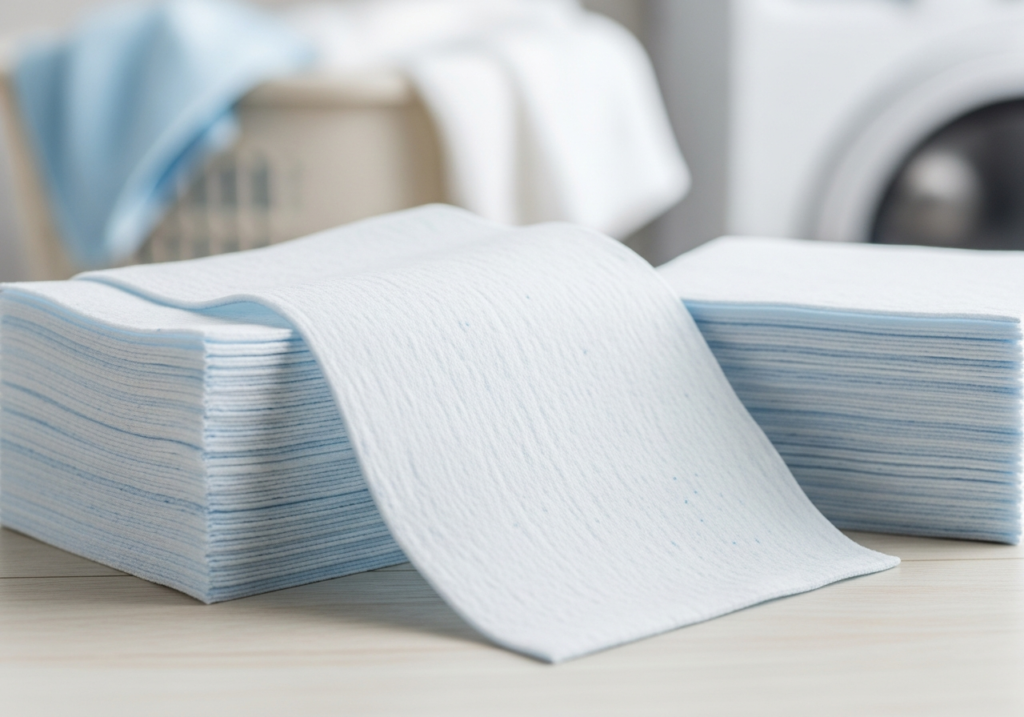
Fabric Softener Sheets Make Clothes Smell Fresh, but Five Common Loads Should Never Meet One Dryer sheets are the sensory definition of laundry done in many Toronto homes. That mountain-air or lavender scent, the crackle-free sweater, the softness against your skin: all of it comes from a single mechanism that also explains why some items belong nowhere near one. A softener sheet is a synthetic non-woven carrier coated with a heat-activated blend of stearic acid (a fatty acid often rendered from animal fats), clay fillers, and concentrated fragrance. In a cool laundry room the coating sits solid. Once the drum heats up, the wax melts, and every time the sheet brushes a tumbling garment it deposits a thin lubricating film onto the fibers. That film is not dirt, and it is not conditioning in any biological sense. It is residue by design. The coating carries positively charged ions that cancel the negative electrical charge building up as polyester and nylon rub together in dry heat, which is why the sheets work so well against winter static. The trapped fragrance lasts longer than detergent scent because it goes on at the end of the cycle and never gets rinsed. The catch is the same waxy layer, and it is exactly the wrong thing for the following five items. 1. Bath Towels Stearic acid is hydrophobic, so every sheet-dried towel picks up a water-repelling glaze. Over repeated cycles the film accumulates inside the terry loops until the towel feels plush yet simply slides moisture across your skin instead of absorbing it. Once that happens you usually need to strip the fabric with hot water and vinegar to dissolve the built-up residue and bring the absorbency back. 2. Sweat-Wicking Athletic Wear Performance fabrics move moisture through a mechanical weave: tiny channels that pull sweat off your skin so it can evaporate. Softener residue fills those micropores, which is why makers of technical gear almost universally advise against fabric softeners. Two things follow. Your yoga pants and running shirts stop wicking and leave you clammy mid-workout, and they develop a permanent gym odor because sweat, dead skin, and bacteria get sealed under a layer of wax and silicone that your next wash cycle cannot reach. The garment can come out of the machine smelling musty while technically clean. 3. Flame-Resistant Children’s Sleepwear Kids’ sleepwear sold in Canada is legally required to resist flame, achieved through specific synthetic fibers or chemical treatments. A softener coating is emulsified fat, and fat burns. Draping flame-resistant pajamas in a flammable film undermines the very property that keeps them safe. Most sheet boxes print a warning against use on children’s sleepwear, and that fine print gets ignored far more often than it should. 4. Any Other Flame-Resistant Garment The same warning label extends beyond pajamas to any garment labeled flame resistant, including work-adjacent fabrics and FR loungewear. The logic does not change with the size of the wearer: the coating’s fuel load works against the treatment, so treat the whole category as off-limits. 5. Microfiber Cleaning Cloths Microfiber picks up dust and holds it through split synthetic fibers acting mechanically, almost like thousands of tiny hooks. Glaze those fibers and the cloth loses its grip on dirt, which is why cleaning cloths should be strictly kept away from sheets and liquid softeners alike. If your drawer of cloths has been running through the same dryer cycle as your sweatshirts, that explains why they push dust around instead of collecting it. What the Coating Does to the Dryer Itself The film lands on the drum, the lint screen, and the moisture sensors, not just the laundry. A screen coated in invisible wax looks clean but blocks airflow, so the machine works harder, energy costs creep up, and the motor runs hotter. Test a screen by running water over it: if the water beads and pools instead of passing through the mesh, scrub it with dish soap and a brush. The two small metal strips inside the drum that tell the dryer when clothes are dry fail the same way once coated, causing over-dried loads or damp ones, and anyone who uses sheets regularly should wipe those sensors with rubbing alcohol from time to time. When a Sheet Makes Sense and What Replaces One Sheets still earn their place on everyday cotton and synthetic blends where static is the real problem. For every load on the never list, an alternative keeps the laundry soft without the film: Wool dryer balls beat the load gently apart, improving airflow and shortening drying time with zero chemistry. A foil ball tossed in the drum discharges static without leaving any coating behind. Used sheets still have jobs: wiping baseboards and blinds, since the antistatic trace slows the next layer of dust, or loosening burnt casserole crust overnight. Load Use a sheet? Why Everyday cottons and blends Yes Static control and softness are the point Bath towels No Wax blocks absorbency Wicking gym clothes No Pores clog, odor gets trapped Flame-resistant sleepwear No Coating is flammable Microfiber cloths No Residue kills the grip on dust Keeping every fabric on the right cycle is one half of laundry care; the other half is the dust, lint traps, and surfaces around the machines. Our team handles both during a deep cleaning, and you can reach Toronto Shine Cleaning at (647) 424-0355 to book. For ongoing upkeep between resets, our regular maid service keeps the laundry room and the rest of the house on schedule, and past clients share their experiences on our reviews page. The CDC’s guidance on when and how to clean and disinfect your home is a useful reference for deciding which laundry-area surfaces need more than a wipe, and starting from clean hands never hurts when you are sorting damp loads. Fabric Softener Sheet Questions Can I fix towels that have lost their absorbency? Yes, in most cases. Strip them in hot water with white vinegar to break down the accumulated fatty-acid film, skip

Fabric Softener Sheets: 5 Things You Should Never Put in the Dryer with a Softener Sheet Read More »

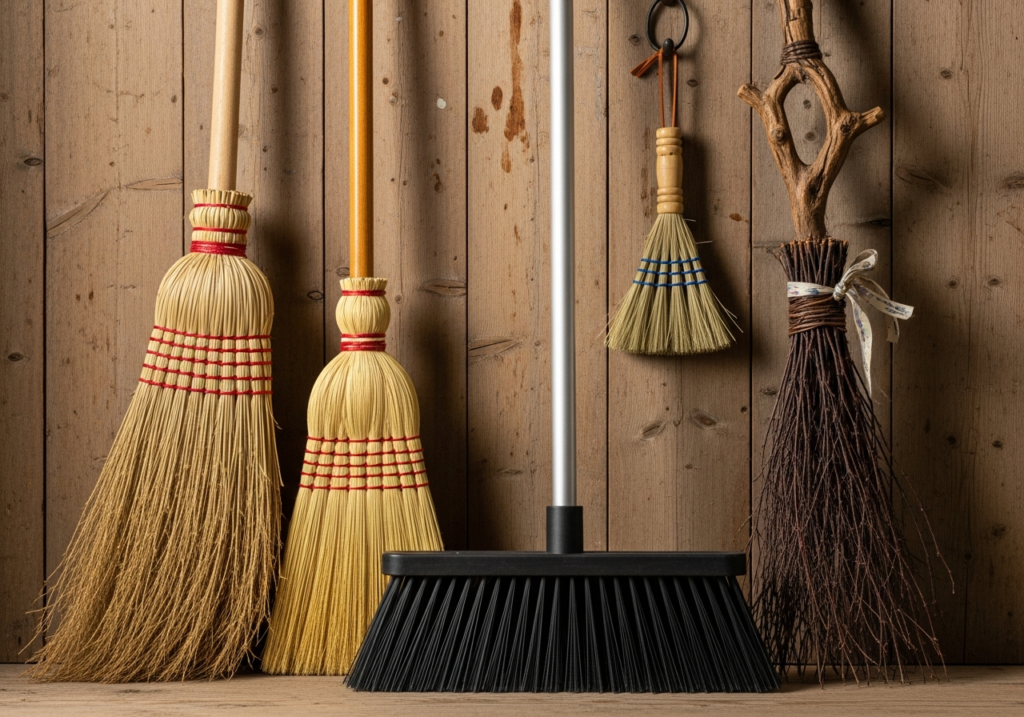
several different brooms

Let’s Compare 6 Different Types of Brooms so You Know The Best Ways To Use Them

Comparing Six Types of Brooms so Every Floor in Your Home Gets the Right Bristle A broom looks like the simplest tool in the closet: fibers on a stick. That assumption is why so many floors get swept badly, finishes get scratched, and backs get sore. The category has evolved into a genuine taxonomy of bristle stiffness, head geometry, and fiber material, and a carpenter would no more drive a finishing nail with a sledgehammer than use a coarse straw sweeper on polished hardwood. Here is how the six common types compare and where each one belongs. Corn Broom: The Outdoor Workhorse Made from the natural fibers of the sorghum plant, the traditional corn broom is heavy, stiff, and rough, and it is built for high-friction environments: concrete patios, sidewalks, garage floors, barns. Rigid straw shoves wet leaves, gravel, and light snow like a rake and a sweeper combined. Bringing one indoors is nearly always a mistake. The stiff bristles can micro-scratch laminate and hardwood finishes, the broom sheds its own fibers into the mess it is cleaning, and without fine split ends it leaves silt and dust behind while moving the big debris. Synthetic Angle Broom: The Kitchen Standard Indoors, plastic or nylon angle brooms rule. The head is cut on a diagonal so one corner comes to a sharp point, which matters because rooms are full of corners: the junction where baseboard meets cabinet is where dust bunnies live, and a flat head cannot reach it. The bristles are flagged, meaning their tips are frayed into tiny hairs that multiply the surface area into a dense web, trapping flour, pet dander, and fine dust instead of launching it into the air. This tool works with a gentle pull stroke, not a forceful push. Push Broom: For Wide Open Floors Upright sweeping twists the waist and tires the shoulder across big areas, so basements, driveways, and warehouses call for a push brush: a wide rectangular block head, typically from eighteen to thirty-six inches, on an angled handle. You thrust forward using leg power and body weight. Fine versions have dense soft fibers for dust on smooth concrete; coarse versions have thick stiff bristles for mulch and rocks on asphalt. Many modern designs run dual bristles, a stiff inner core for heavy debris bordered by soft fringe that catches the dust line, finishing the job in one pass. Rubber Broom: The Pet Hair Solution A rubber head with molded nubbins or thick flexible fingers solves the problem ordinary brooms cannot: pet hair. Bristles generate static that makes fur fly away or ride over the broom, while rubber creates friction that grips hair and pulls it out of a rug’s weave, including strands a vacuum may leave behind. Most heads add a squeegee edge for liquid spills and soapy tile scrubbing, and the rubber surface can be rinsed and sanitized, unlike straw, which absorbs moisture and bacteria. Whisk Broom: Handheld Spot Duty A handleless handheld version of a traditional broom, the whisk forces you close to the work, which is precisely the point. Stair treads, car upholstery, spilled potting soil on a bench: small localized messes reward the direct pressure a short brush allows. It usually pairs with a dustpan into a single spot-cleaning unit rather than serving as a whole-room tool. Dust Mop: The Broom’s Flat Cousin Technically not a broom, but central to any dry-flooring conversation. A wide flat head draped in cotton or microfiber loops glides instead of flicking, attracting and holding dust rather than launching it. The reason gyms, hospitals, and long hallways use them, and the reason a home with lots of hardwood should too: grit is what scratches a wood finish, and a dust mop lifts it while bristles may just drag it sideways across the boards. Type Best on Avoid on Corn Concrete, patios, garage, snow Hardwood and laminate Angle (nylon) Kitchens, corners, smooth floors Heavy outdoor debris Push Basements, driveways, warehouses Tight furnished rooms Rubber Pet hair on carpet and tile Nothing, it is the generalist Whisk Stairs, cars, workbench spills Whole-room sweeping Dust mop Hardwood, hallways, daily grit Wet messes and heavy debris Maintain the Broom and Store It Upside Down A dirty tool cannot clean a floor, and a broom with curled bristles cannot sweep. Three habits keep any of the six working: Comb trapped hair and lint out of synthetic bristles by hand, or the broom just redistributes old dirt. Keep natural straw dry to prevent rot and mold, a real house-health concern covered by the CDC’s guidance on mold and the conditions that let it grow. Never rest a broom on its bristles: the handle’s weight curls them permanently and kills the flick. Hang it head-up instead. Which broom suits your floors is really a question about the floors themselves, and a sweeping plan answers only the loose debris. Dust packed into corners, grime bonded to finish, and allergens settled in soft furnishings wait for a proper reset, which is what our deep cleaning service delivers across the city; see our locations page for coverage, or call Toronto Shine Cleaning at (647) 424-0355. Sweeping also quietly counts as movement: the CDC’s overview of the benefits of physical activity credits chores like mopping and raking toward weekly exercise, and a recurring maid visit keeps your baseline clean between your own passes. Broom Buying Questions Which broom is best for pet hair? The rubber broom. Its friction grips fur that repels off nylon or straw bristles, and it drags hair out of carpet pile and rug weave where a vacuum often misses. Can I use my porch corn broom on hardwood? No. Its stiff sorghum bristles are too abrasive for finished wood and can leave micro-scratches, plus they push fine dust rather than trapping it. Use a flagged angle broom or dust mop instead. Why does my broom leave streaks of dust behind? Likely flagged tips matted with hair or a bristle face curled from storing it standing on its

Let’s Compare 6 Different Types of Brooms so You Know The Best Ways To Use Them Read More »

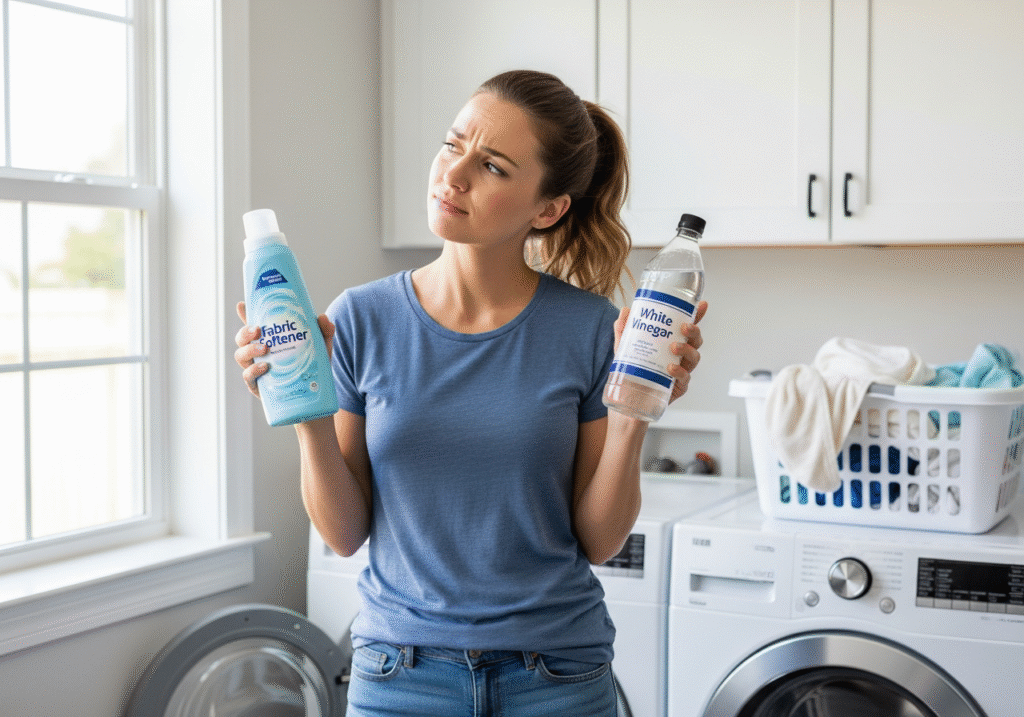
Fabric Softener vs. Vinegar: Which is Better for Your Laundry?

Fabric Softener vs. Vinegar: Which Is Better for Your Laundry? Fabric softener has been sold to us as the final step of clean laundry: the silky feel, the lingering scent, the static-free pull from the dryer. But softener is not a cleaning agent at all. It is a conditioning product that coats every fiber in a thin chemical layer, and that coating has consequences for towels, athletic wear, your washing machine, and sensitive skin. White vinegar, the old-fashioned alternative, takes a completely different approach. Comparing how each one works on your specific loads is the only way to decide which belongs in your laundry routine. How Fabric Softener Works: Softness Comes from a Coating Softeners rely on cationic surfactants, positively charged molecules that cling to the negatively charged surface of wet fabric and leave behind a lubricating film of fatty acids or silicones. Think of it as a thin wax layer that survives the rinse cycle. That film delivers the obvious benefits: cotton and linen feel plush again instead of stiff, the coating conducts away the static that builds up in dry winter air, fragrance is trapped in microscopic capsules that burst as you move, and wrinkles relax enough to cut down on ironing. The trade-off starts when you consider what else that layer touches. The Hidden Costs: Towels, Sportswear, and Kids’ Sleepwear The waxy residue that makes a towel feel soft also makes it repel water. Softener on bath towels waterproofs the terry loops, so the fabric pushes water around your skin instead of absorbing it, and the only fix is stripping the buildup with vinegar and hot water. Athletic wear suffers even more: performance fabrics wick sweat through engineered micropores, and softener residue fills those pores, trapping sweat and bacteria inside the weave. The garment stops wicking, and the trapped bacteria create a musty perma-stink that detergent cannot reach in later washes, which is why sportswear makers universally warn against softeners. There is also a safety angle most people miss: children’s flame-resistant sleepwear loses some of its fire resistance when coated in softener residue, which is why the bottles carry warning labels about sleepwear and flame-resistant fabrics. Microfiber cleaning cloths lose their electrostatic grab and stop picking up dust, and the buildup eventually dulls bright colors and leaves whites looking grey or yellow while attracting extra lint. What Softener Does to Your Washing Machine The washer pays a hidden price. In the cool damp environment of the machine, softener fats and silicones congeal into a sludge that repair technicians call scrud, which coats the outer tub and drain lines and becomes a breeding ground for mold and mildew. It can confuse sensors, restrict the drain pump, and leave black flakes on your next load, and front-loading machines are the most vulnerable. If your laundry room smells sour no matter what you wash, softener buildup is a prime suspect. Using softener means committing to a much more rigorous machine-cleaning schedule to keep that biology in check. Sensitive Skin and the Environment Softener fragrances and preservatives are among the leading triggers of contact dermatitis, and for people with eczema, the residue left on clothing can mean itching and rashes on the very garments meant to feel luxurious. Environmentally, many formulas rely on quaternary ammonium compounds that break down slowly and can harm aquatic life once they reach waterways, while single-use dryer sheets add non-recyclable polyester waste to landfills. Whatever you choose for your laundry, follow label directions and keep products stored safely out of reach, since the Government of Canada stresses that household chemical products need careful handling and storage. What Vinegar Does in the Rinse Cycle White distilled vinegar is the opposite philosophy. Its mild acidity strips away detergent residue and the mineral deposits left by hard water, relaxing fibers back to their natural softness without adding any coating. Towels rinsed with vinegar stay thirsty, sportswear keeps its wicking pores open, and the acetic acid smell evaporates completely as clothes dry, so nothing lingers on the fabric. Vinegar will not deliver the slippery plushness or perfume of commercial softener, but it restores fabric the way the manufacturer intended. In the dryer, wool dryer balls complete the natural routine: the felted balls bounce between garments, physically softening fibers and separating loads for better airflow, which shortens drying time and cuts static with no chemicals at all, and they last for years. Which Load Gets What: A Simple Laundry Strategy The smartest approach is to stop treating softener as an every-load default and match the product to the fabric: Never use softener on towels, microfiber cloths, or any performance or athletic wear. Skip it on children’s sleepwear and anything labeled flame-resistant. Use vinegar in the rinse cycle for towels, sportswear, and everyday cottons. Reserve softener for occasional loads of sheets, blankets, or casual clothing where you value the feel and scent. Laundry load Best choice Why Bath towels Vinegar rinse Keeps terry loops absorbent Athletic and performance wear Vinegar rinse Keeps wicking pores open, prevents perma-stink Microfiber cleaning cloths Vinegar rinse or nothing Preserves electrostatic dust pickup Kids’ sleepwear No softener ever Protects flame resistance Cotton sheets and casual clothes Softener occasionally Softness and scent, low functional cost As Health Canada’s household products guidance explains, even everyday laundry items deserve a look at their risks, so read your softener and detergent labels and match each product to the load. Frequently Asked Questions Does vinegar really make clothes soft? Yes, in a different way than softener. The mild acid strips detergent and mineral buildup that makes fibers stiff, so fabric returns to its natural texture. It will not feel as slippery as a softener-coated garment, but towels stay absorbent and the vinegar smell disappears once the load is dry. Why does my washing machine smell even though I use softener? Softener residue congeals in the tub and drain lines into a sludge called scrud, which breeds mold and mildew, especially in front-loaders. Switch to vinegar rinses for most loads, and run

Fabric Softener vs. Vinegar: Which is Better for Your Laundry? Read More »

Mugs, Thermal Bottles, and Travel Mugs

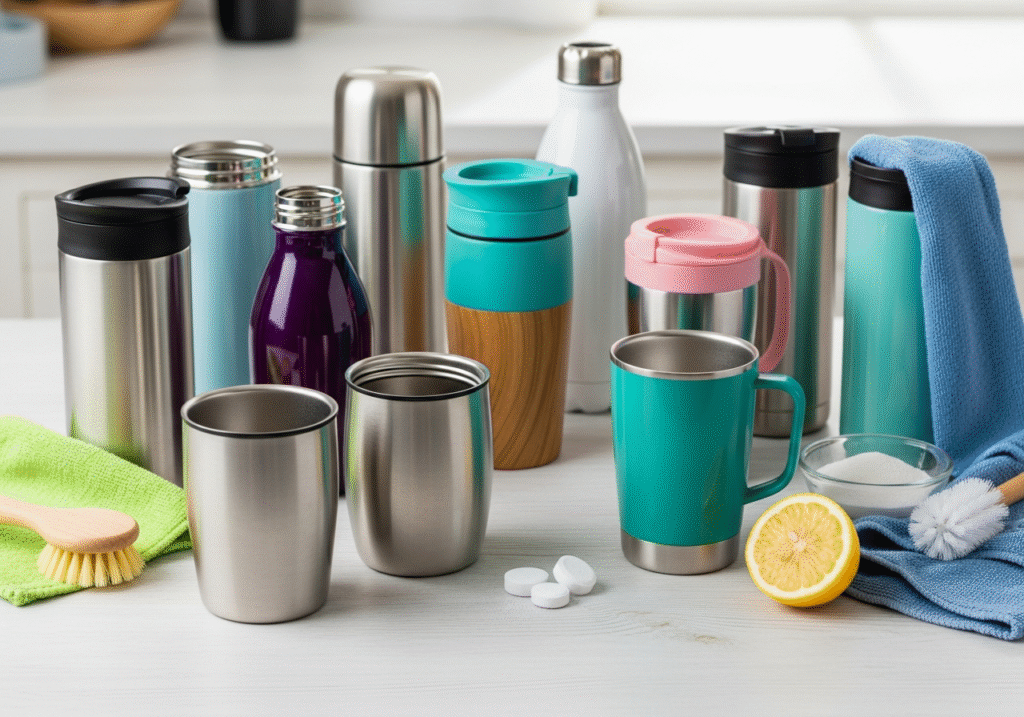
3 Smart and Effective Ways to Clean Mugs, Thermal Bottles, and Travel Mugs

Why Coffee Mugs and Insulated Bottles Need More Than a Soap Swish Your morning coffee or afternoon tea lives in the same vessel day after day, so the wear creeps up slowly. A white ceramic cup grows a brown haze on its inner wall. The steel liner of a thermos turns dull and blotchy. A tired, sour smell starts to follow every sip. Ordinary dishwashing barely touches that film, which is why the stain keeps coming back. Restoring these everyday vessels to a fresh, neutral state takes the right method rather than more scrubbing muscle. Method 1: Build the Daily Rinse Habit Good hygiene for drinkware begins the moment you finish the drink. A quick but thorough rinse with hot water right after the last sip washes away most residue before it can dry and set, and that single habit sharply reduces how often a serious deep clean becomes necessary. For routine washing, a soft sponge or a bottle brush with a non-scratch head plus a little mild dish soap and warm water does the job. Keep steel wool and harsh scouring pads away from printed mug exteriors and insulated interiors, because they carve microscopic scratches that cling to even more stain down the road. Plain ceramic and glass mugs usually survive the dishwasher, yet most vacuum-insulated bottles and travel mugs do not: machine heat and aggressive detergents attack the vacuum seal that keeps drinks hot and can dull exterior finishes too. Method 2: Turn Pantry Staples Into Stain Removers Three common kitchen items handle what soap cannot. For an everyday lift, mix baking soda into a thick paste, scrub it inside the mug, and for heavier film let it sit for 20 to 30 minutes before brushing and rinsing; baking soda also draws out lingering stale coffee odors. For a narrow-neck thermos no sponge can reach, pour in several tablespoons of coarse kosher or sea salt, then add crushed ice until the bottle is roughly a quarter full, or swap the ice for a few thick lemon wedges. Cap it tightly and shake hard for a few minutes. The grit scours the walls while the ice or fruit tumbles it into every corner, and lemon acid lends its own cleansing and deodorizing punch. Rinse with hot water until no salt remains. When hard water leaves chalky spots next to the coffee haze, white vinegar is the answer. Half-fill the vessel with vinegar, top it off with hot water, and soak for at least an hour, or overnight for the most set-in deposits, then wash normally with a brush to sweep off loosened particles. The sharp vinegar smell is strong at first but disappears entirely after a good rinse, leaving the interior fresh and odor-free. Method 3: Drop in a Denture Cleaning Tablet The easiest deep-clean trick sits in the dental care aisle. Denture tablets are built to dissolve stubborn stains and kill odor-causing bacteria gently, with no abrasion, and their fizz translates beautifully to drinkware. Drop in one or two tablets, fill the mug or thermos with warm water, and leave it be. When the bubbling stops, roughly 30 minutes later, pour, give the inside a light pass with a bottle brush, and rinse well. This works especially well on complex travel mug lids and the shaped bottoms of tall bottles. Never Skip the Lid Persistent odors usually hide in the lid rather than the cup. Leak-proof designs pack push buttons, sliders, and rubber or silicone gaskets, and every seam traps old coffee, cream, and sugar until bacteria and mold move in and produce a sour stink. The CDC’s guidance on cleaning and disinfecting your home underscores that regular cleaning of everyday items is the first line of defense against germs, and its mold overview notes that mold flourishes wherever moisture collects, which a sealed, damp gasket provides in miniature. To fix the problem, take the lid completely apart. Most modern ones release with small tabs that pop out the inner mechanism, and seals can be eased from their grooves. Soak all pieces for about 30 minutes in warm soapy water or diluted vinegar, then scrub every thread, groove, and opening with a straw brush or an old toothbrush. Rinse meticulously and let everything air-dry fully before reassembly, because even a little trapped water invites mustiness. Dry It and Store It Open After washing, let mugs and bottles air-dry completely, upside down on a rack, before they go back to the cupboard. With a thermos or travel mug, the golden rule is to store it with the lid off. Keeping the body and cap separate lets air circulate, so any last trace of moisture evaporates and closed-up smells never develop. Rinse with hot water right after the last sip Deep clean the inside once a week Separate the lid and brush every seal Dry fully, then store with the cap off Quick Reference: Matching the Method to the Mess Method Best for Typical time Immediate hot rinse Every use, every vessel Seconds Baking soda paste Light stains and stale odors 20 to 30 minutes Salt plus ice or lemon shake Narrow thermos necks A few minutes of shaking Vinegar soak Hard water film plus coffee haze 1 hour to overnight Denture tablet Lid parts and tall bottle bases About 30 minutes Mug and Travel Mug Cleaning FAQ Can insulated bottles go in the dishwasher? Most should not. Machine heat and strong detergents can break the vacuum seal between the double walls, and once that seal fails the bottle stops keeping drinks hot or cold. Exterior powder coatings may also peel or fade, and lid gaskets tend to hold water and soap residue that later flavors your coffee. How often does a travel mug need a deep clean? A weekly round using the baking soda, salt-shake, vinegar, or tablet method, paired with an immediate rinse after every drink and a thorough dry between uses, keeps almost any vessel fresh enough that no emergency scrubbing is ever required. Why does

3 Smart and Effective Ways to Clean Mugs, Thermal Bottles, and Travel Mugs Read More »

Sticker Removal

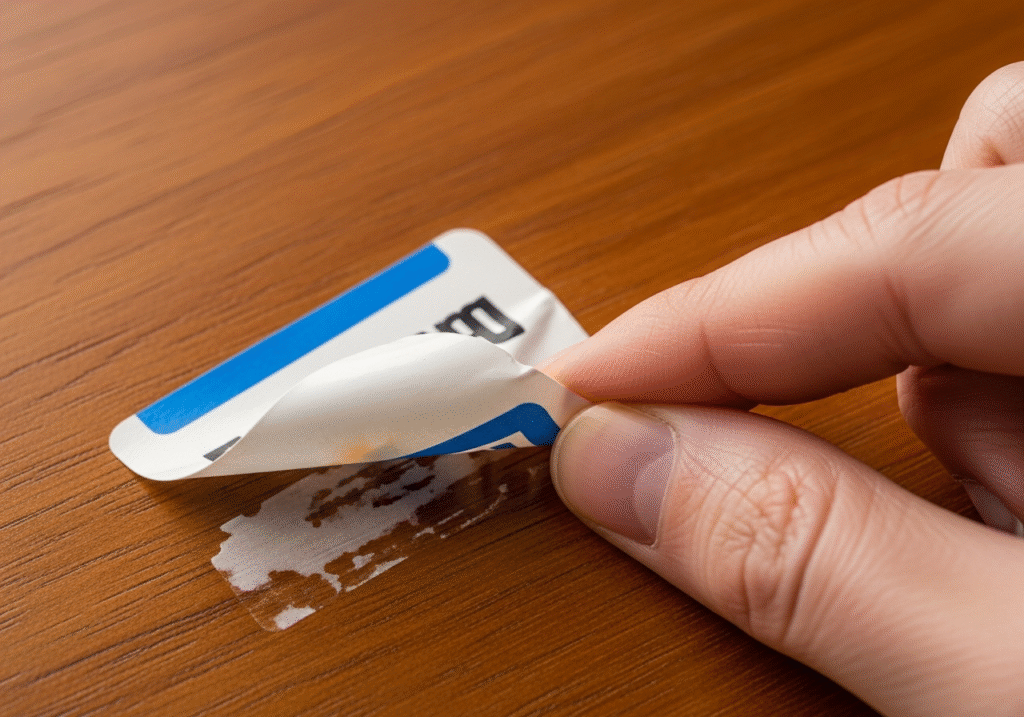
Sticker Removal: 5 Expert Tips For Removing Stickers From Different Types of Surfaces

Sticker Removal: 5 Expert Tips for Every Type of Surface Nothing kills the joy of a new purchase like the price tag glued to its face. Peel it and you get one of two disasters: the paper tears and leaves a fuzzy white layer, or the sticker comes off but deposits gummy residue that turns grey within days. Adhesives are polymers that bond to a surface, so the winning method softens, dissolves, or lifts that bond without harming what sits underneath. Match the technique to the material and any sticker surrenders without a scratch. Assemble your sticker removal kit: Hair dryer for warming labels on glass, ceramic, metal, and car paint. Cooking oil or isopropyl alcohol for dissolving gummy adhesive. Plastic scraper or plastic razor blades for lifting laminated labels. White vinegar for sun-baked paper labels and price tags. Duct tape and a rubber eraser for delicate surfaces like paper and shoe soles. Tip 1: Start with Heat on Glass, Ceramic, and Metal Resist clawing at the corner: picking separates the paper from the adhesive and leaves exposed glue that is harder to shift. Instead, warm the sticker with a hair dryer on medium heat for about a minute. Heat softens the adhesive polymer so it lets go of the surface while clinging to the label backing; lift a corner slowly and the sticker often peels away as one clean sheet. Heat is the safest first move on hard non-porous items like glass and ceramic, and essential for car decals and laptop lids where solvents could damage paint or electronics. Tip 2: Dissolve Stubborn Glue with Oil or Alcohol Most sticker glues are lipid-based, so cooking oil or even peanut butter loosens them: like dissolves like. Score the sticker so oil penetrates, apply a layer, and wait about twenty minutes; the fats dilute the adhesive until it slides off, and soap and water remove the film. Oil is safe for glass and plastics, but never on unsealed wood or porous stone, which soak it up and stain. Isopropyl alcohol breaks adhesive bonds that oil cannot touch and evaporates instantly, so it is safe for electronics when applied to a cloth rather than sprayed. Alcohol is a paint thinner, though, and can strip painted or varnished finishes, so spot-test in a hidden corner first. Tip 3: Bring Out a Plastic Scraper for Laminated Labels Waterproof plastic-coated labels shrug off oil, water, and vinegar from the top, so attack from the edges. A plastic razor blade or scraper is the right tool: harder than the adhesive but softer than the surface beneath, it slips under the rim and lifts without gouging. Metal blades scratch glass and dig into plastic; they belong only on wet glass at a shallow angle, with a steady hand. For many stubborn labels on jars or new appliances, a set of plastic scrapers pays for itself. Tip 4: Use Vinegar, Acetone, and Tape for the Tough Cases White vinegar: soak a paper towel and lay it over the sticker for thirty minutes to rehydrate the paper and soften sun-baked glue, ideal for price tags on glassware and mugs. Acetone, usually sold as nail polish remover, dissolves almost any adhesive in seconds, but treat it as the nuclear option: it melts plastic on contact, so keep it off storage bins and eyeglass frames. Use it only on glass, unpainted metal, or unfinished ceramic. For the thin dark smear on delicate items like book covers, skip liquids: wrap duct tape around your fingers, sticky side out, and dab until the residue transfers off. Tip 5: Match Your Method to Wood, Shoe Soles, and Car Paint On varnished wood, heat can damage the finish, oil stains the grain, alcohol dissolves lacquer, and water raises the grain, so use mineral spirits or a furniture cleaner on a soft cloth; on raw unfinished wood, fine-grit sandpaper may be the only stain-free option. On new shoe soles, skip moisture and roll residue off with a rubber eraser or crepe block: friction balls the adhesive up for easy brushing. On car paint, never touch the clear coat with a razor blade: soften dealership decals with a hair dryer, lift with a plastic tool, and treat residue with a clay bar or an automotive adhesive remover, since household solvents permanently cloud the finish. Sticker Removal Method at a Glance Surface Best method Never use Glass, ceramic, metal Heat, then oil or vinegar soak Metal scrapers on dry glass Plastic and electronics Hair dryer, isopropyl alcohol on a cloth Acetone, which melts plastic Varnished wood Mineral spirits or furniture cleaner Oil, heat, or alcohol on the finish Shoe soles and leather Rubber eraser or crepe block Liquids that stain the upper Car paint Hair dryer, plastic tool, clay bar Razor blades and nail polish remover Paper and book covers Duct tape dabbing Any liquid or heat What about Ghost Marks After the Sticker Is Gone? That ghost is usually sun fade: the area under the sticker stayed protected while the surrounding surface yellowed, and on wood or fabric the difference is often permanent. On glass or plastic, the adhesive may have reacted with the material, and a mild polishing compound or baking soda paste can blend the mark away. Whenever you work with solvents or removers, follow the Government of Canada’s guidance on using household chemicals safely, and in a small room or closed garage, ventilate and take fresh-air breaks the way Health Canada advises for solvent-based products. Frequently Asked Questions What is the safest way to remove a sticker from a laptop? Warm the sticker with a hair dryer for a minute, lift an edge slowly, then rub residue gently with an alcohol-dampened cloth. Never spray liquid on the device or use acetone, which melts plastic shells. How do I get sticker residue off glass without scratching it? Heat the sticker, remove what you can, and soak residue with cooking oil or hot vinegar for twenty to thirty minutes. A plastic scraper lifts what remains,

Sticker Removal: 5 Expert Tips For Removing Stickers From Different Types of Surfaces Read More »

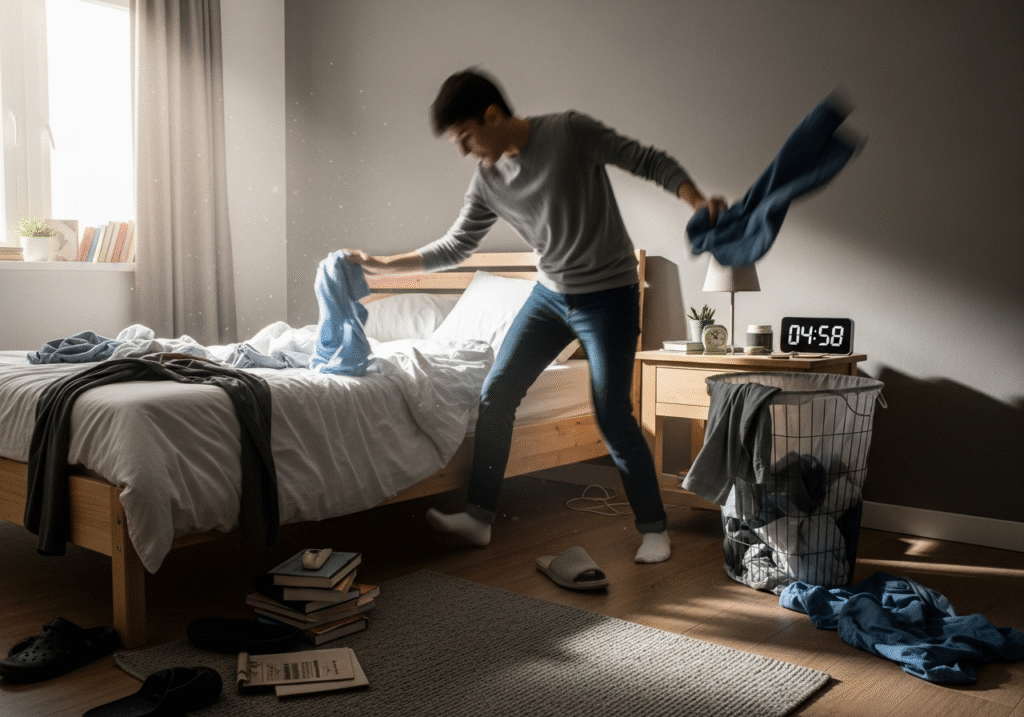
tidying the bedroom in 5 minutes

How to Clean Your Room in 5 Minutes: A Step-by-Step Routine for Busy Mornings

Why a Five-Minute Room Clean Works Better Than You Think A messy bedroom is often the first casualty of a busy week. When deadlines pile up and energy runs low, clothes cover the chair, mugs crowd the nightstand, and the bed stays tangled. That visual clutter keeps the brain in work mode, so the room meant for rest starts to feel like unfinished business. Most people assume fixing it demands an entire afternoon of sorting and scrubbing, so they postpone the job until the mess looks impossible. In reality, a focused five-minute reset can turn the room around. It is not a deep clean; it is a quick rescue that clears the floor, calms the surfaces, and restores a feeling of control before you rush out the door. What You Need Before the Timer Starts Speed depends on preparation. Decide in advance where every type of clutter will go so you never pause to make decisions mid-clean. This is not the moment for perfect organization; it is a rescue mission with three simple tools: A large trash bag for wrappers, receipts, empty bottles, and anything broken. A laundry hamper, emptied before you begin, for every piece of clothing sitting on the floor. A relocation basket, any bin or box, for objects that belong in other rooms. Keep the three vessels within reach. The instant you leave the room to return a mug to the kitchen, the plan falls apart: the dishwasher, the television, or a buzzing phone will pull you off course. The Five-Minute Routine, Minute by Minute Follow the order below and resist the urge to skip ahead. Each step prepares the next, and the room looks dramatically different by the end. Minute Task Goal 1 Collect trash Remove everything that signals neglect 2-3 Clear floor textiles into the hamper Expose the floor completely 4 Make the bed Anchor the room in order 5 Tidy surfaces, then open the curtains Leave only essentials in view Minute 1: Trash Only Garbage is the easiest category because nothing sentimental is attached to it. Scan for snack wrappers, used tissues, price tags, empty water bottles, and receipts, and break down stray cardboard boxes on the spot. Sixty seconds of ruthless discarding instantly lifts the room’s hygiene and removes the items that suggest neglect. Minutes 2-3: Attack the Floordrobe The mound of half-worn clothes on the rug is the biggest visual offender in any bedroom. There is no time to sniff shirts and judge freshness; anything resting on the floor goes into the hamper, no exceptions. Seeing the carpet again makes the space feel larger and clears the obstacle course underfoot. If a pile of clean clothes is waiting to be put away, fold it once and set it neatly on the chair or the foot of the bed. A tidy stack reads as deliberate, while a sprawled pile reads as chaos. Minute 4: Smooth the Bed The bed is the focal point of the room, and a made bed signals that everything else is under control. You do not need hospital corners: pull the duvet up over the pillows, smooth out the wrinkles, and prop the pillows upright. In about forty-five seconds you create a large, calm surface that balances the busyness around it. Minute 5: Surface Triage and Fresh Air Nightstands, dressers, and desks attract wandering clutter: coffee mugs that drifted in from the kitchen, mail that never made it out of the hallway, tools that wandered in from the garage. Sweep every foreign object into the relocation basket and set it outside the door to be sorted later. Leave only the essentials: a lamp, a book, a clock. Finish by opening the curtains or blinds; natural light and moving air make a room feel cleaner than any spray can. Why Short Resets Beat Weekend Marathons Brief, frequent resets outperform occasional marathons because they stop the buildup before it starts. A daily sweep keeps the bedroom liveable, lowers the stress of sleeping beside a to-do list, and frees your weekend for the jobs that truly matter. It is the same logic behind our regular maid service: steady upkeep beats heroic catch-up sessions. When the whole home needs attention, our team covers everything from bathrooms to baseboards. Frequently Asked Questions How do I clean my room in 5 minutes when it is very messy? Work in the fixed order: trash first, then floor clothes, then the bed, then surfaces. Do not reorganize, do not leave the room, and do not aim for perfect decisions. Speed and visible results are the only goals. What should I do with clothes that are not dirty? Anything that sat on the floor goes in the hamper to keep the room honest. Clean clothes still waiting for a home can be folded once and stacked on a chair or the foot of the bed until you have time to hang them. Can a 5-minute clean replace a deep clean? No. The quick reset handles visible clutter, while a deep clean removes dust, allergens, and grime from carpets, mattresses, and hidden surfaces. The CDC notes that regular cleaning with soap or detergent removes most germs from surfaces, while disinfection is only needed when someone in the home is sick. How often should I reset my room? Daily is best, ideally first thing in the morning or just before bed. A one-minute nightly sweep of surfaces and floors keeps the room from ever reaching the point where five minutes cannot fix it. When Five Minutes Is Not Enough The five-minute reset has honest limits. It will not lift the dust from a ceiling fan, pull allergens out of a mattress, or refresh window tracks; those jobs take time and proper tools. Damp, poorly aired rooms also invite dust mites and mould, which Health Canada links to moisture problems, so periodic vacuuming, washing, and airing still matter. When the grime has settled in and a quick tidy no longer feels like enough, book a deep cleaning service from Toronto

How to Clean Your Room in 5 Minutes: A Step-by-Step Routine for Busy Mornings Read More »

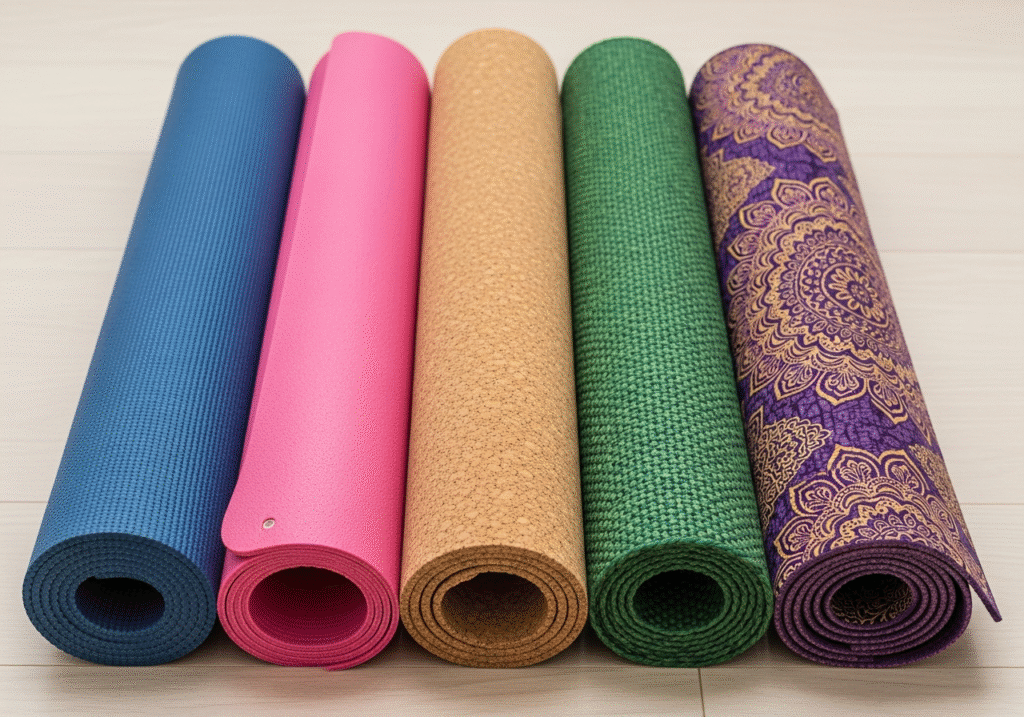
How to Clean a Yoga Mat: The Ultimate Guide for PVC, Rubber, and Cork

Why Your Yoga Mat Needs a Real Cleaning Routine A yoga mat is a sanctuary of grip and stability, but it is also a sponge for sweat, dead skin cells, oils, and whatever dust the floor offers. Every class presses your hands, feet, and face into a surface soaked with the previous sessions’ biology, and warm, humid conditions turn that foam into a breeding ground for bacteria and fungi. Cleaning a mat is not cosmetics: it is hygiene that prevents skin infections, neutralizes odours, and extends the life of the mat. The CDC warns that germs like MRSA can spread in athletic settings through contaminated surfaces and shared items, which is why mats used in studios deserve attention between every class. Fortunately, the right routine is simple once you know your material. PVC, Rubber, and Cork: Know Your Mat’s Structure Mats divide into two camps. Open-cell mats are porous: they absorb sweat so they stay grippy when wet, but that also pulls bacteria deep into the core. Closed-cell mats are impermeable: sweat pools on top, they wipe down easily, but they feel slipperier in a hot class. PVC and TPE mats are usually closed-cell, while natural rubber is open-cell and thirsty; cork mats pair a textured cork surface with a rubber or TPE base and respond best to gentle, low-moisture care. Identify yours before choosing a cleaner, because soaking an open-cell mat improperly can waterlog it until it rots from the inside. Material Cell structure Best cleaning approach PVC or TPE Closed-cell Daily spray wipe; occasional tub soak Natural rubber Open-cell, absorbent Mild soap or enzyme cleaner; short soak only Cork surface Natural top layer Damp cloth wipe; avoid long soaks How to Clean a Yoga Mat After Every Session After each practice, remove surface bacteria and oils before they dry into a sticky film. The most effective daily solution is simple: mix three parts distilled water with one part white vinegar in a spray bottle. The mild acid dissolves grease and kills odours without damaging the polymer structure of most mats. Essential oils such as tea tree or lavender can be added, but only sparingly: oils are slippery, and too much residue turns the next session into a sliding hazard. Spritz lightly over the mat and wipe it with a damp microfiber cloth; the friction dislodges the debris. When and How to Deep Clean a Yoga Mat A light spray stops working once grime builds up. These signs mean it is time for a deeper wash: A persistent smell that reappears the moment you unroll the mat. Visible darkening where your hands and feet land. A slippery or sticky film that wiping does not remove. For closed-cell PVC and TPE mats, the bathtub method is thorough and safe. Fill the tub with warm water and a single teaspoon of mild dish soap; too much soap is the most common mistake, because residue hides inside foam and reactivates mid-class as a slip hazard. Submerge the mat for fifteen to twenty minutes, then squeeze it gently or step on it with bare feet to work the suds through the texture. Drain and rinse repeatedly, refilling with fresh water until squeezing produces no bubbles at all. Dry Your Mat the Right Way Drying is where most mats are ruined. A saturated mat can take twenty-four to forty-eight hours to dry, and using it damp invites mildew. The burrito method speeds things up: lay the wet mat flat on a large dry towel, roll both together tightly, and kneel or step on the roll to press water from the mat into the towel. Repeat with a second towel if needed, then hang the mat in a cool, well-ventilated room. Never dry a mat in direct sunlight: ultraviolet rays break down rubber and plastic bonds until the surface turns brittle and flaky. Never roll a damp mat for storage: the dark, moist interior is where mould thrives. Health Canada recommends controlling indoor humidity and drying damp items promptly to keep mould and dust mites at bay. Extra Care for Natural Rubber and Cork Mats Natural rubber asks for a gentler protocol. Vinegar, which suits many synthetics, can slowly dry out and degrade rubber over time, so reach for a heavily diluted gentle soap, or an enzymatic cleaner built to break down the proteins in sweat rather than dissolving them chemically. Rubber also drinks water readily: keep soaks brief, because a waterlogged mat can tear under its own weight when lifted. Machine washing is rarely worth the risk, even when a manufacturer calls a thin travel mat washable: agitation can stretch, tear, or delaminate the foam, a soaked mat can knock the washer off balance, and a tumble dryer will melt or warp it instantly. Prevention: Keep the Mat Cleaner Between Washes Personal hygiene does most of the work. Practicing with clean hands and bare feet cuts the oil and dirt that reach the surface, and covering the mat with a microfiber yoga towel absorbs sweat before it touches the foam. Towels go straight into the laundry after class, which turns deep cleaning from a monthly chore into a seasonal one. If a mat still smells after washing, bacteria have reached deep into the foam; a vinegar soak or a night in the freezer helps only temporarily. When the surface pits, flakes, or keeps its smell after a deep clean, the material has degraded past the point of sanitation and replacement is the only option. Frequently Asked Questions About Cleaning Yoga Mats How often should I clean my yoga mat? Wipe it down after every session with the spray, and deep clean it in the tub about once a month. Studio mats used several times a week deserve it even more often. Can I put a yoga mat in the washing machine? It is risky. Agitation can stretch, tear, or delaminate the foam, and a soaked mat is heavy enough to damage the washer during the spin cycle. Hand washing and air drying are

How to Clean a Yoga Mat: The Ultimate Guide for PVC, Rubber, and Cork Read More »

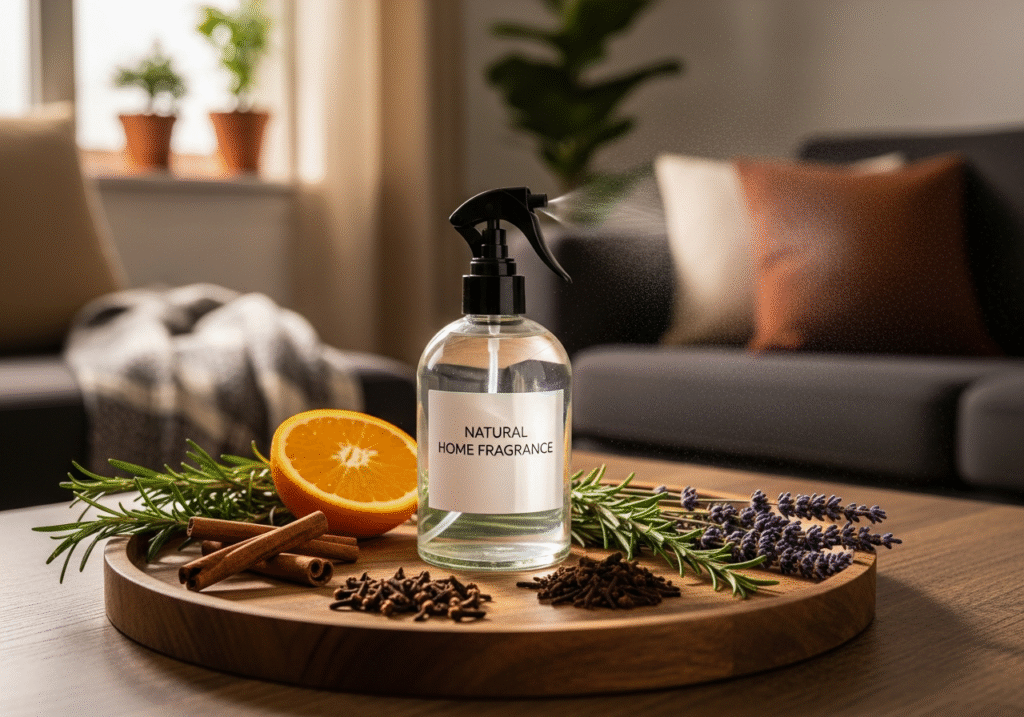
Fragrance with natural products at home

Natural Fragrance: How to Scent Your Home Using Only Natural Products

Why Natural Fragrance Beats Synthetic Air Fresheners The scent of a home is arguably its most defining characteristic. We obsess over wall colors and furniture placement, yet smell is what hits us first and lingers longest in memory. The decades-old answer has been chemical warfare: plug-in warmers promising ocean breeze, aerosols burying odors under heavy perfume, and paraffin candles releasing soot into the air you breathe. Such products coat the nasal passages with volatile organic compounds and read flat and manufactured. Scent plugs straight into the brain: the olfactory bulb links directly to the limbic system, the ancient seat of emotion and memory, so the smell of pine can transport you to a winter forest and lavender can trigger real relaxation. Synthetics mimic pieces of those molecules but miss the nuance: a real lemon holds hundreds of chemical compounds behind its zest where a synthetic stand-in may hold only a handful, and the brain notices the gap. Botanical scent drawn from essential oils, herbs, fruits, and spices evolves as it evaporates, building an atmosphere that feels grounding instead of overpowering. Six Natural Ways to Scent Your Home 1. Simmer Pots The stovetop method rides simple physics: bubbling water carries aromatic plant oils into the air on steam, fixing two winter problems at once: dry air and stale odors. Its genius is that it runs on scraps. Citrus peels headed for the compost are packed with limonene, so simmer them in a small saucepan alongside a broken cinnamon stick, some cloves, and a rosemary sprig. Heat breaks open the plants’ cellular structures, releasing a warm, spicy scent, and steam follows the home’s airflow into corners and up to higher floors, which a candle burning in one spot never manages. Citrus peels with cinnamon and cloves for a warm winter blend Apple cores with fresh ginger for a bright autumn note Pine or fir sprigs with rosemary for a woody clean scent Lemon slices with mint and a splash of vanilla 2. Homemade Reed Diffusers Commercial versions often run on mineral oils and synthetic solvents; a DIY jar puts intensity and purity in your hands. The mechanism is capillary action: porous reeds wick liquid up microscopic channels and release it at the tips. Choose a light, nearly odorless carrier such as safflower or sweet almond oil, blend in a generous load of essential oils (eucalyptus with peppermint for a bathroom, bergamot with cedarwood for a living area), and add a splash of vodka to thin the oil and aid evaporation. The result is a subtle signature scent, not an assault on the nose. 3. Linen Sprays Curtains, sofas, and rugs trap odors that fresheners alone cannot touch, and oil and water refuse to mix, so drops of essential oil in a water bottle just float and clog the nozzle. High-proof alcohol or witch hazel emulsifies the oil into tiny droplets; misted onto fabric, the alcohol evaporates almost instantly, leaving the oil on fibers. Lavender with chamomile turns a pillow mist into a sensory cue for sleep, while lemon with tea tree, both valued for antibacterial properties, neutralizes a pet-worn sofa at the source. 4. Baking Soda for True Deodorizing Adding scent is only half the battle: garbage, compost, and sweat smells are largely acidic, and sodium bicarbonate is a base, so contact neutralizes them into inert, odorless salts. A small jar of baking soda spiked with a few drops of lemon essential oil acts as a continuous odor sponge at the bottom of a trash can or in a musty closet. For carpets, giant filters that hold dust and smells, sprinkle baking soda mixed with dried herbs like rosemary or lavender buds, wait about twenty minutes, then vacuum; the process itself releases the herbal scent and leaves the room earthy and clean. 5. Houseplants and Botanicals Houseplants are the original air fresheners. Beyond their reputation for filtering toxins like formaldehyde and benzene, some are serious perfumers. A blooming jasmine fills the air with a sweet, heady fragrance that intensifies in the evening, and mint, basil, or lemon balm on a windowsill give bursts of scent whenever a leaf is brushed, a tactile fragrance that rewards interaction. In the bathroom, hang a bundle of fresh eucalyptus from the showerhead and let the hot steam activate its oils for a mentholated, clearing lift. 6. Fresh Air First Marketing conditioned us to believe clean smells like bleach, pine chemicals, or heavy florals, but true cleanliness carries no odor at all: it means dust, mold, and decay are simply gone. Natural fragrance should sit as a top note over that neutral base, and the best freshener is the window. Ten minutes of open windows even in midwinter swaps the air volume, flushing built-up carbon dioxide and indoor pollutants, so any scent introduced afterward reads crisp and distinct. Scents That Follow the Seasons Synthetic pumpkin spice in April feels jarring; botanical notes follow the calendar intuitively. Season Natural notes that fit Spring Light florals and greens such as geranium and vetiver Summer Bright citrus and cooling peppermint Autumn Grounding woodsy notes: cedar, sandalwood, patchouli Winter Warming spices like clove, cinnamon, and ginger, plus frankincense or pine Presentation and Honest Safety Notes A plastic plug-in is an eyesore; a ceramic bowl of pinecones and cinnamon sticks works as visual potpourri, an amber glass bottle reads apothecary rather than cleaning-supply aisle, and star anise in a simmer pot turns scenting into intentional, visible beauty. Still, natural does not mean harmless. Essential oils are highly concentrated plant extracts. Tea tree and wintergreen can be toxic to pets if ingested or dispersed in high concentrations, and cinnamon bark or clove can irritate skin on direct contact. Respect the potency: aim for a hint you notice on entry that fades into the background, never a wall of smell. Natural Home Fragrance FAQ Why do sprays and candles stop covering my odors? Because they rarely remove anything; perfume just layers over odors and dust. The CDC’s guide to cleaning and disinfecting your

Natural Fragrance: How to Scent Your Home Using Only Natural Products Read More »

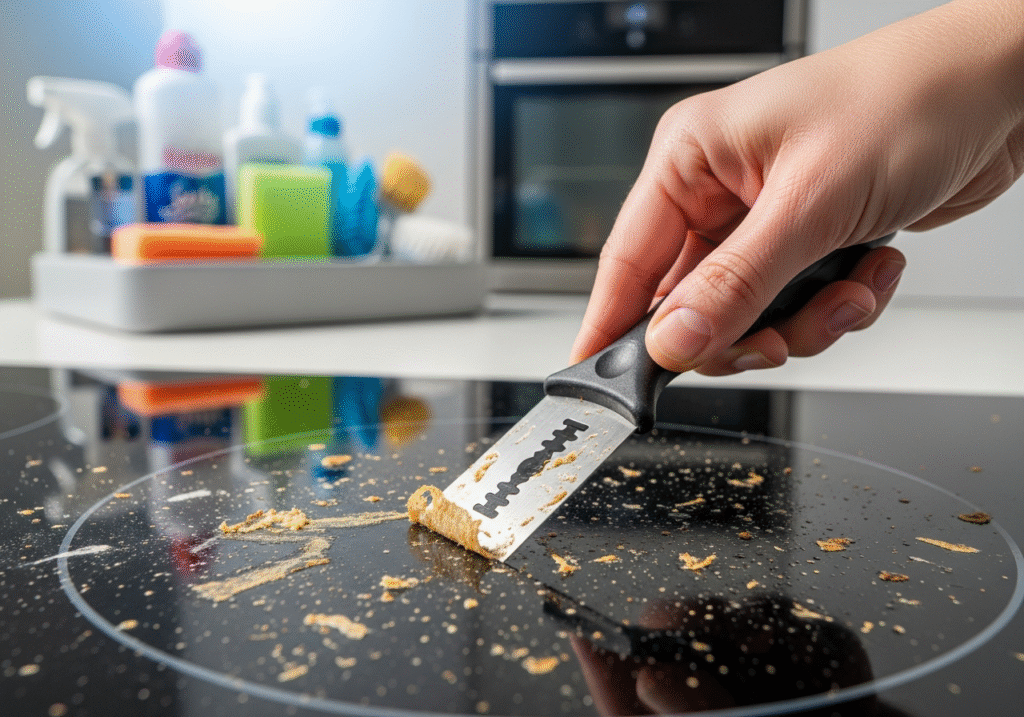
Razor Blade Scraper to Your Cleaning Kit Today

Why You Should Add a Razor Blade Scraper to Your Cleaning Kit Today

The Razor Blade Scraper: Why Pros Trust the Sharpest Tool in the Kit Against bonded messes, the tool seasoned cleaners reach for is not a gadget or a chemical but a thin blade of steel in a handle. A scraper works by mechanical leverage: the edge slips beneath the contaminant and severs its bond to the surface, instead of grinding at the mess the way an abrasive pad does. Learn a few rules and the tool converts an afternoon of furious elbow grease into minutes of precise removal. Why Lifting Beats Polishing the Mess Away Paint flecks, tree sap, burnt sugar, and hardened glue form bonds tougher than any sponge can generate friction against. Pressing a scouring pad into them is sandpaper work: it wears the soil, but it also wears the surface, which is how glass cooktops end up with permanent swirl haze after years of scrubbing. A fresh blade takes the opposite path. Held shallow and kept wet, it enters the microscopic gap under the deposit and shears whole flakes away. Where the Scraper Earns Its Place Glass cooktops. Boil-overs from sugary sauces carbonize on hot glass into something close to concrete. Cream cleaners loosen only the top layer while the blade, at a 45 degree angle and flooded with lubricant, slices through the carbon without effort. Post-renovation windows. Dried latex and oil paint smear angrier when you rub a rag across them, yet snap off in solid chips under steel. Sticker residue behaves the same: solvents dissolve glue into a spreading mess, while the blade pushes adhesive and backing away together. Exterior windows. Bird droppings and insect marks bake onto sun-facing panes and shrug off ordinary soaping; the edge removes them in seconds. Shower doors and tubs. Hard-water minerals and soap residue build rock-like crusts that resist acid, and careful scraping clears fiberglass and porcelain since both generally outclass the blade in hardness. Halt at grout lines and silicone caulk, which slice easily, to keep the shower’s waterproof seal alive. For bathroom mildew beyond deposits, the CDC explains how mold grows in moisture and why the source matters. Oven windows. Smear on a baking soda and water paste to loosen the brown varnish of heat-treated fat, then peel it away in ribbons, faster than fumes and aching arms, and it restores factory clarity. Work only on fully cooled glass: warm panes expand, and blade pressure on an expanded surface invites stress cracks. The Three Rules of Safe Scraping Shallow angle, never dry Hold the blade between roughly 30 and 45 degrees from the surface. Steeper angles turn the scraper from wedge into chisel, driving it into the material rather than across it; too flat and the edge floats above the soil. Glass cleaner, cooktop cream, or hot soapy water lets the edge hydroplane and prevents the skipping that gouges and scratches. Push forward, never drag back These are pushing tools. Drive the edge into the gunk, lift, return, push again. Dragging backward rolls or chips the feather-thin cutting edge, and a razor with nicks behaves like a serrated knife, etching the next pass. Inspect the blade before every use: anything dull, rusted, or uneven belongs in the trash. Beware tempered glass Annealed and heat-strengthened panes scrape happily, but tempered glass, used in shower screens, safety doors, and car side windows, hides a trap. During toughening, microscopic glass dust called fabricating debris gets baked onto the surface, invisible until a blade dislodges the particles and drags them, leaving deep chaotic scratches no matter how careful your technique. Professionals run a sound test in a discreet corner first: if grit registers, they stop. Plastic Blades: The Cautious Cousin When surface hardness is a question, snap in a double-edged polycarbonate blade. Plastic lacks a razor’s absolute shearing power but is far more forgiving on acrylic tubs and showers, where steel can leave permanent marks, and it peels dried candle wax or old chewing gum with less chance of scarring the material. Blade Handling, Storage, and Rust Bites almost always happen during blade changes rather than during work. Handle replacements with dry hands because slick soap makes razors unpredictable, choose a scraper with a retractable mechanism so loose blades do not float around the caddy, and wrap every retired blade in heavy tape or paper so sanitation and waste workers are protected. Carbon steel gives the sharpest edge but corrodes fast in wet, enclosed handles, and a rusty blade turns jagged and scratches. Stainless replacements resist rust but are softer, so they dull sooner and scrape with less authority. The absolute no-list: anything filmed or coated, because a blade finds the seam and lifts it. When unsure, test a hidden spot. Surface Compatibility at a Glance Surface Steel blade Notes Annealed glass, mirrors, cooktops Suitable Keep wet, push only, shallow angle Tempered shower glass High risk Sound-test a corner; grit means stop Porcelain and fiberglass Suitable with care Avoid grout, caulk, and tile edges Stone sealers, acrylic, car paint Plastic blade only Steel marks coatings and soft surfaces Tint, screens, gloss plastic Never No coating survives any blade When to Hand the Blade Over Scraping rewards a practiced, steady hand, and a slip costs you a pane. For post-renovation glass, hopelessly brown oven windows, or whole-home deep cleaning, Toronto Shine Cleaning brings professional tools without the risk: explore our deep cleaning services, keep the routine going with a regular house cleaner, and confirm coverage on our locations page. The CDC’s page on when and how to clean and disinfect your home is a good complement to mechanical work. We are bonded and insured, and paint-spatter rescue is one call away at (647) 424-0355. Frequently Asked Questions What angle should the blade be held at? Roughly 30 to 45 degrees from the surface. Steeper, and the edge chisels instead of sliding; flatter, and it rides over the deposit without catching. With lubrication and light forward pressure, you will feel the moment the tool gets under the soil. Can I scratch a

Why You Should Add a Razor Blade Scraper to Your Cleaning Kit Today Read More »