Hard Water

How to Unclog Your Shower Head: Fixing Weak Water Pressure

A shower head is more than a simple bathroom fixture; it is the source of a daily ritual, a cascade of water that can awaken the senses or wash away the stresses of the day. When it functions properly, the stream is full, consistent, and directed. Over time, however, this reliable flow can diminish into a weak, sputtering, and erratic spray. Jets that once produced a perfect stream may become completely blocked, while others shoot water at odd angles, creating a less than satisfying experience. This decline in performance is not a sign that the fixture needs to be replaced, but rather a clear indication that it is in desperate need of a thorough cleaning. The culprit behind this gradual degradation is almost always an accumulation of mineral deposits, soap scum, and biofilm that clog the tiny nozzles from the inside out. Hard Water The primary cause of this blockage is hard water, a common issue in many municipal water systems. Hard water is characterized by a high concentration of dissolved minerals, predominantly calcium and magnesium. As water passes through the shower head and the residual moisture evaporates, these minerals are left behind. They precipitate out of the solution and form a hard, chalky substance known as limescale, or calcium carbonate. This scale builds up layer by layer, slowly constricting the openings of the nozzles, much like plaque in an artery. The process is slow and often goes unnoticed until the water pressure is significantly impacted. In addition to these mineral deposits, soap scum, which is a reaction between soap and the minerals in hard water, can contribute to the blockage, creating a gummy, resilient film. Compounding this issue is the dark, damp, and warm environment inside the shower head, which is an ideal breeding ground for bacteria and other microorganisms to form a slimy layer called biofilm. This organic matter can further clog the jets and introduce a subtle but persistent hygienic concern. Fortunately, restoring a shower head to its former glory is a straightforward maintenance task that requires minimal tools and common household ingredients. The most effective and widely used method involves using the acidic properties of white distilled vinegar to dissolve the mineral buildup. Acetic acid, the active component in vinegar, reacts with the alkaline calcium carbonate deposits in a chemical process that breaks them down into water-soluble calcium acetate and carbon dioxide gas. This reaction effectively melts away the stubborn scale without the need for harsh, abrasive scrubbing that could damage the fixture’s finish. The simplest way to apply this treatment is the immersion bag method. To do this, you will need a sturdy plastic bag large enough to envelop the shower head, a rubber band or zip tie to secure it, and enough white distilled vinegar to fully submerge the face of the fixture. The process The process begins by carefully pouring the vinegar into the plastic bag. Then, lift the bag up and over the shower head, ensuring that all the nozzles and the faceplate are completely immersed in the liquid. Secure the bag tightly around the shower arm with the rubber band or zip tie, making it snug enough to hold the weight of the vinegar and prevent any leaks. The shower head should then be left to soak. For light buildup, a few hours may be sufficient, but for more heavily calcified fixtures, it is best to leave it overnight. During this time, you may even notice small bubbles forming as the acid reacts with the limescale, a visible sign that the cleaning process is working. After the soaking period is complete, carefully remove the bag and pour the used vinegar down the drain. The next step is to flush out all the loosened debris. Turn on the hot water and let it run through the shower head for a few minutes. You should immediately notice an improvement in the flow and spray pattern. To address any remaining stubborn clogs, an old toothbrush can be used to gently scrub the faceplate and nozzles. For the most persistent blockages within individual jets, a small pin, a paperclip, or even a toothpick can be used to carefully poke into the opening and dislodge the softened mineral plug. For a more comprehensive cleaning, or in cases where the bag method is not sufficient to resolve severe blockages, it may be necessary to remove the shower head completely. This allows for a deeper soak that can clean not just the nozzles, but the internal components as well, including the often-overlooked filter screen. To remove the fixture, you will typically need an adjustable wrench or a pair of pliers. It is crucial to wrap the connecting nut with a cloth or a rag before applying the tool to prevent scratching or marring the finish. Turn the nut counter-clockwise to loosen it from the shower arm. Once it is detached, you can inspect the inside for any large pieces of debris. Pay close attention to the small mesh screen, or washer, located at the connection point, as this is designed to trap sediment and can become heavily clogged, severely restricting water flow. This screen can be removed and scrubbed clean with a toothbrush. Immersion With the shower head removed, it can be fully submerged in a bowl or bucket filled with white vinegar. This ensures the vinegar penetrates all the internal chambers for a truly thorough cleaning. After soaking for several hours or overnight, use a toothbrush to scrub both the exterior nozzles and the interior threads and chambers. Once it is clean, rinse it thoroughly with fresh water. Before reattaching the fixture, it is good practice to clean the threads on the shower arm and apply new plumber’s tape, also known as Teflon tape. Wrap the tape clockwise around the threads three to four times to create a secure, watertight seal that will prevent leaks. Then, screw the shower head back onto the arm, first by hand and then giving it a final quarter-turn with the

How to Unclog Your Shower Head: Fixing Weak Water Pressure Read More »

Cleaning Products for Your Natural Stone

Natural Stone: Choosing the Right Cleaning Products for Your Natural Stone

Natural stone surfaces bring an unparalleled elegance and timeless durability to any space. However, their porous nature demands a mindful approach to cleaning and maintenance. Using the wrong products can lead to irreversible damage, such as dulling, etching, and staining. Understanding the specific needs of your stone, whether it be granite, marble, travertine, or limestone, is paramount to preserving its beauty for years to come. The cornerstone of proper natural stone care is the consistent use of pH-neutral cleaners. Harsh, acidic, or alkaline chemicals can react with the minerals in the stone, compromising its integrity and finish. Simple Mixture For daily cleaning of all-natural stone surfaces, the most recommended and safest solution is a simple mixture of warm water and a few drops of mild, pH-neutral dish soap. This gentle combination is effective at removing everyday dirt, grease, and grime without harming the stone or its sealer. After wiping the surface with this solution using a soft, microfiber cloth, it is crucial to rinse the area thoroughly with clean water and dry it completely with another soft cloth. This prevents soap scum buildup, which can leave a dull film on the surface over time, and averts water spots. When a more potent cleaning is required, particularly for disinfection, a solution of equal parts water and 70% isopropyl alcohol can be used. This mixture is effective at killing bacteria and germs without being abrasive or acidic. Spray the solution onto the surface, let it sit for a few minutes, and then wipe it clean with a damp cloth before drying thoroughly. This is an excellent option for kitchen countertops where food preparation occurs. It is imperative to know which products to avoid. Acidic substances are the primary adversary of natural stone, especially calcareous stones like marble, travertine, and limestone. These stones are primarily composed of calcium carbonate, which reacts vigorously with acids, leading to etching, a chemical burn that appears as a dull spot on the surface. Common household cleaners that contain vinegar, lemon juice, or other citrus-based ingredients should never be used on these stones. Likewise, harsh chemicals such as bleach and ammonia can degrade the sealer and dull the stone’s surface over time. Abrasive powders or creams are also to be avoided as they can scratch the stone. Granite Granite, being a siliceous stone, is generally more resistant to acids than its calcareous counterparts. However, repeated exposure to acidic substances can still weaken the sealer and eventually lead to damage. Therefore, it is best to adhere to pH-neutral cleaning practices for granite as well, ensuring its longevity and lustrous appearance. Marble is particularly susceptible to damage due to its soft and porous nature. Spills, especially from acidic liquids like wine, coffee, or fruit juice, should be blotted up immediately with a soft cloth. Wiping the spill can spread it further. After blotting, clean the area with a mild soap and water solution, rinse, and dry. For tougher organic stains on light-colored marble, a poultice made from hydrogen peroxide and an absorbent material like baking soda can be effective. Travertine Travertine and limestone share a similar composition to marble and thus require comparable care. Their surfaces are often characterized by small pits and fissures, which can trap dirt. Regular dusting with a dry microfiber cloth is beneficial to prevent the accumulation of abrasive particles. When cleaning, use a pH-neutral cleaner and ensure the surface is rinsed and dried thoroughly to prevent water from settling in the pores. For deep cleaning textured travertine, an alkaline-based cleaner may be necessary to lift embedded grime. In cases of efflorescence, a white, powdery deposit that can appear on the surface, it is crucial to use a non-acidic cleaner to remove the salt residue without harming the stone. Beyond daily cleaning, the most critical aspect of natural stone care is sealing. A sealer acts as a protective barrier, penetrating the pores of the stone to inhibit the absorption of liquids and prevent staining. There are two primary types of sealers: impregnating (or penetrating) and topical. Sealants Impregnating sealers are absorbed into the stone, filling the pores from within. They do not alter the appearance of the stone and allow it to “breathe,” meaning water vapor can still escape. This is particularly important for outdoor applications or in wet environments. Topical sealers, on the other hand, form a protective film on the surface of the stone. While they can provide a glossy finish and some protection against scratches, they are more prone to wear and tear and can trap moisture, potentially leading to discoloration. For most residential applications, an impregnating sealer is the preferred choice for its durability and natural look. The frequency of sealing depends on the type of stone and its usage. A simple water test can determine if it’s time to reseal. Place a few drops of water on the surface and observe. If the water beads up, the sealer is still effective. If the water is absorbed into the stone, leaving a dark spot, it’s time to reapply the sealer. As a general guideline, highly porous and frequently used stones like marble in a busy kitchen may need to be sealed every six to twelve months. Denser stones like granite can often go one to two years or even longer between sealing. For stubborn stains that have penetrated the stone, a poultice is an effective remedy. A poultice is a paste-like substance made from an absorbent material and a chemical solvent, which is applied to the stain to draw it out. The type of poultice depends on the nature of the stain. Stains For oil-based stains, a poultice made from baking soda and acetone or a commercial degreaser is effective. Mix the ingredients to a peanut butter-like consistency, apply it to the stain in a thick layer, cover it with plastic wrap, and tape the edges. Allow it to sit for 24 to 48 hours as it dries, which is the mechanism by which it pulls the stain from the stone. For organic stains like coffee

Natural Stone: Choosing the Right Cleaning Products for Your Natural Stone Read More »

5 Reasons Why Hiring a Cleaning Service is the Best Form of Self-Care

Why hire a specialized cleaning service? The modern home is a hub of activity, a place of work, rest, and family life. Yet, maintaining its cleanliness can feel like a relentless, never-ending task. The dust settles almost as soon as it’s wiped away, the floors seem to attract dirt, and the kitchen and bathrooms demand constant attention. For many, the weekend, which should be a time for relaxation and recharging, is instead consumed by a long list of chores. This constant cycle of cleaning can become a significant source of stress and a drain on our most valuable resource: time. It is in this gap between the desire for a clean, peaceful environment and the reality of a busy life that a residential house cleaning service finds its purpose, offering not just a service, but a solution to a pervasive modern problem. 1.Quality of Life Hiring a professional cleaning service is often viewed as a luxury, but it is more accurately described as an investment in your quality of life. Consider the hours spent each week sweeping, mopping, scrubbing, and dusting. For a moderately sized home, this can easily add up to four, five, or even more hours. A professional service reclaims those hours for you, handing them back to be spent on what truly matters. This could mean more time with family, pursuing a hobby, exercising, or simply enjoying a well-deserved rest. The cumulative effect of this reclaimed time is profound, reducing burnout and allowing for a better work-life balance. It transforms the home from a place of constant obligation into a true sanctuary, a space you can enter after a long day and immediately feel at ease, rather than being confronted with a list of tasks that need doing. 2.Quality of Cleanliness Beyond the gift of time, there is the undeniable difference in the quality of the clean itself. A professional cleaner brings a level of expertise and efficiency that is difficult for the average homeowner to replicate. They are trained in the most effective methods and understand the specific needs of different surfaces. They know which products to use on natural stone versus laminate, how to clean stainless steel without leaving streaks, and the best techniques for removing stubborn soap scum from glass shower doors. This knowledge prevents costly damage that can result from using the wrong chemical or an abrasive sponge on a delicate surface. Furthermore, professional services come equipped with commercial-grade tools and supplies that are often more powerful and effective than standard consumer products. Their high-powered vacuums with HEPA filters can capture a significantly higher percentage of dust, allergens, and pet dander, leading to improved indoor air quality. This is particularly beneficial for households with allergy sufferers, asthmatics, children, or pets. The result is not just a home that looks clean, but one that feels and is, on a microscopic level, healthier. The process of a professional clean is systematic and thorough. Cleaners typically work with a detailed checklist, ensuring that no area is overlooked. They employ methodical strategies, such as cleaning from top to bottom to ensure dust and debris fall downwards before the floors are addressed, and working from one side of a room to the other. This structured approach guarantees consistency and completeness. A standard recurring clean will typically involve a comprehensive dusting of all surfaces, including furniture, shelves, and window sills; cleaning and disinfecting kitchen countertops, sinks, and appliance exteriors; scrubbing toilets, showers, tubs, and bathroom vanities; and vacuuming carpets and mopping hard floors. This regular maintenance keeps the home at a consistent level of cleanliness, preventing the deep buildup of grime. 3.Deep Cleaning For homes that have gone some time without a thorough cleaning or for clients new to a service, a deep clean is often recommended. This is a far more intensive and detailed service that addresses the areas often missed in a regular routine. A deep clean will include all the tasks of a standard clean but will go much further. It can involve washing baseboards and trim, cleaning light fixtures and ceiling fans, wiping down doors and door frames, cleaning behind and underneath furniture and appliances, scrubbing grout lines, and cleaning the interior of windows. This is the reset button for your home, tackling the accumulated dirt and dust in every nook and cranny, and establishing a new baseline of clean that makes subsequent maintenance easier. Specialized services like move-in and move-out cleanings are another critical offering. Preparing a home for sale or ensuring a new home is pristine before you unpack is an enormous task on top of the already stressful process of moving. A move-out clean is designed to leave the property in immaculate condition for the next occupants, often a requirement for retrieving a security deposit. This is the most exhaustive clean of all, performed on an empty home. Every interior surface is addressed, including the inside of all cabinets, drawers, closets, the oven, and the refrigerator. It ensures the home is presented in its best possible light, which can be a significant factor for real estate agents and potential buyers. Conversely, a move-in clean provides immense peace of mind, sanitizing the space and ensuring you are starting your new chapter in a fresh, thoroughly cleaned environment. 4.Trust and Security One of the most significant barriers for people considering a cleaning service is the idea of trust and security. Inviting someone into your personal space requires confidence in their professionalism and integrity. This is why reputable cleaning companies place such a high emphasis on their hiring and training processes. They conduct background checks on their employees and ensure they are thoroughly vetted. Furthermore, professional services are bonded and insured. Bonding provides protection against theft, while insurance covers any accidental damage that might occur to your property during the cleaning process. This comprehensive protection offers homeowners the peace of mind that they are working with a trustworthy organization that stands behind its work and its people. The relationship with a cleaning service is

5 Reasons Why Hiring a Cleaning Service is the Best Form of Self-Care Read More »

The Power of Citric Acid

The Power of Citric Acid: Your Solution for Limescale and Grime

In the world of cleaning, there’s citric acid, and countless products that promise miraculous results, often based on complex chemical formulations and strong scents. Yet, hiding in plain sight, often in the baking aisle of the grocery store, is a simple, effective, and remarkably versatile compound: citric acid. This white crystalline powder, derived naturally from citrus fruits like lemons and limes, is a powerhouse cleaner that can tackle some of the most stubborn household problems, particularly those related to mineral deposits and hard water. Its strength lies in its chemical nature as a weak organic acid, which allows it to dissolve grime, limescale, and soap scum without the corrosive intensity of stronger mineral acids. Chelation The primary mechanism that makes citric acid so effective is a process called chelation. In areas with hard water, the water is rich in dissolved minerals, primarily calcium and magnesium. When this water evaporates, it leaves behind a chalky, crusty residue known as limescale. This is the buildup you see inside your kettle, on your showerheads, and as a cloudy film on your glassware. Citric acid works by binding to these mineral ions, forming a compound called a chelate. This new compound is water-soluble, meaning the stubborn, stuck-on mineral deposit is transformed into something that can be easily rinsed away. This is a far more effective approach than simply trying to scrub the deposit off, which is often a losing battle and can damage the surface underneath. Kettle One of the most satisfying applications for citric acid is restoring a kettle caked with mineral deposits. Over time, the inside of a kettle can become layered with a thick, white scale that not only looks unpleasant but can also impair its heating efficiency and flake off into your water. To effortlessly clean it, simply fill the kettle about halfway with water, add one to two tablespoons of citric acid powder, and bring it to a boil. Once it has boiled, turn it off and let the solution sit for twenty to thirty minutes. You will often be able to see the limescale fizzing and dissolving. After the waiting period, pour out the solution and rinse the kettle thoroughly with fresh water a few times. The interior will be left sparkling clean, looking almost new, with no scrubbing required. This same principle applies perfectly to automatic coffee makers, which also suffer from internal mineral buildup that can slow down the brewing process and affect the taste of your coffee. To descale a coffee machine, fill the water reservoir with your normal amount of water and dissolve a tablespoon or two of citric acid into it. Run a full brewing cycle with this solution (without any coffee grounds). Afterwards, run at least two more full cycles with only fresh, plain water to ensure all traces of the acid are rinsed out of the machine’s internal components. Dishwasher This descaling power extends to the workhorse of the kitchen, the dishwasher. A dishwasher in a hard water area can quickly become inefficient as its spray arms, filter, and interior walls get coated in a film of limescale and soap scum. This not only looks grimy but can prevent the machine from cleaning your dishes properly, leaving them spotty and cloudy. To deep clean your dishwasher, ensure it is completely empty. Pour about half a cup of citric acid powder into the bottom of the machine, or place it in the main detergent dispenser. Then, run the dishwasher on its hottest, longest cycle. The hot water will activate the acid, which will circulate throughout the entire system, dissolving mineral deposits from the jets, pipes, and walls, leaving the stainless steel interior gleaming and helping the appliance run more efficiently. Beyond descaling appliances, citric acid makes an excellent all-purpose cleaning spray for various kitchen surfaces. To create a general cleaning solution, dissolve one to two tablespoons of citric acid powder in about a liter of warm water in a spray bottle. Shake it well until the crystals are fully dissolved. This spray is fantastic for cutting through grease and grime on countertops, cleaning sinks, and shining up stainless steel faucets and appliances. It effectively removes water spots and leaves a streak-free shine. It can also be used to disinfect and deodorize cutting boards. Simply sprinkle a small amount of the powder onto a damp board, scrub with a sponge, let it sit for a few minutes, and then rinse thoroughly. However, a critical word of caution is necessary here: because it is an acid, this solution should never be used on natural stone surfaces like marble, granite, or travertine. The acid will react with the calcium carbonate in the stone, causing permanent etching and dulling the finish. Bathroom Moving from the kitchen to the bathroom, citric acid proves its worth against the relentless duo of soap scum and limescale. Soap scum, the grimy film that builds up on shower doors, tiles, and bathtubs, is formed when the fatty acids in soap react with the mineral ions in hard water. Citric acid is uniquely suited to tackle both components of this problem. Using your prepared spray solution, generously coat the affected surfaces. Let it sit for ten to fifteen minutes to allow the acid time to break down the deposits. Then, scrub with a non-abrasive sponge or brush and rinse well with water. For shower doors plagued by cloudy water spots, this method will restore clarity and shine. Showerheads are another common casualty of hard water, becoming clogged with limescale until the water sprays out in uneven, weak jets. To clean a clogged showerhead without removing it, fill a plastic bag with your citric acid and water solution, submerge the showerhead completely in the liquid, and secure the bag in place with a rubber band or twist tie. Leave it to soak for at least an hour, or even overnight for severe buildup. After soaking, remove the bag and run the shower on hot for a minute to flush out any remaining

The Power of Citric Acid: Your Solution for Limescale and Grime Read More »

Hot Tub Cleaning: Get Perfectly Balanced Hot Tub Water Every Time

The hot tub is a unique and cherished feature of a home, a vessel of relaxation and hydrotherapy that promises to melt away the stresses of the day. It is a place of quiet solitude under the stars or a centerpiece for social gatherings with friends and family. But this luxury comes with a non-negotiable responsibility. A hot tub is not a “set it and forget it” appliance like a refrigerator or a dishwasher. It is a small, self-contained, and highly active body of water, a delicate ecosystem that requires consistent, diligent maintenance to remain a source of pleasure and not become a source of murky, unsanitary, and potentially hazardous problems. The Chemistry of Water To own a hot tub is to become a part-time water chemist. The warm, bubbling environment that is so inviting to us is also the perfect breeding ground for bacteria, algae, and other microorganisms. The key to a clean, safe, and enjoyable hot tub experience is not about performing a massive, hours-long cleaning session once a year. It is about a regular, simple, and consistent routine of testing, balancing, and sanitizing. Understanding the fundamentals of this routine is the most important aspect of hot tub ownership. The foundation of hot tub care is water chemistry, and the three most important pillars of that chemistry are alkalinity, pH, and the sanitizer level. These three elements are interconnected, and a problem with one will inevitably affect the others. The first step for any hot tub owner is to get comfortable with testing the water, which should be done at least two or three times a week, or more often with heavy use. The most common method is with test strips, which are simple, color-coded strips of paper that you dip into the water for a few seconds. The first level you should check and adjust is the total alkalinity. Alkalinity is the water’s ability to resist changes in pH. It acts as a buffer, a stabilizing force that prevents the pH level from swinging wildly. The ideal range for total alkalinity in a hot tub is typically between 80 and 120 parts per million (ppm). If your alkalinity is too low, the pH will be unstable and can drop suddenly, making the water corrosive. If it is too high, it can cause the pH to drift upward, leading to cloudy water and scale formation. You can raise the alkalinity with a product often called “Alkalinity Increaser” (sodium bicarbonate) and lower it with a pH decreaser (sodium bisulfate). Always adjust the alkalinity first, before you address the pH. Alkalinity Once your alkalinity is in the correct range, you can adjust the pH. The pH is the measure of how acidic or basic your water is, on a scale of 0 to 14. A pH of 7 is neutral. The ideal range for a hot tub is between 7.4 and 7.6. This is not an arbitrary number; it is slightly alkaline to match the natural pH of the human eye, which is why it is the most comfortable for bathers. If the pH is too low (acidic), the water can be corrosive to the hot tub’s components, like the heater and the pump seals, and it can be irritating to the skin. If the pH is too high (basic), it will cause the sanitizer to become sluggish and ineffective, lead to cloudy water, and promote the formation of scale on the shell and in the plumbing. You can raise the pH with a “pH Increaser” (sodium carbonate) and lower it with a “pH Decreaser” (sodium bisulfate). Only after both the alkalinity and pH are properly balanced can you effectively manage the sanitizer. The sanitizer is the chemical that actively kills bacteria and other harmful microorganisms in the water. The two most common types of sanitizer are chlorine and bromine. Chlorine is fast-acting and a powerful oxidizer, but it can have a stronger chemical smell and is less stable in the hot, high-pH environment of a spa. Bromine is more stable at higher temperatures and has a less noticeable odor, making it a very popular choice for hot tubs. It also has the unique ability to be reactivated by “shocking” the water. The ideal level for chlorine is between 1 and 3 ppm, and for bromine, it is between 3 and 5 ppm. You must maintain these levels at all times to ensure the water is safe for bathing. Hot Tub Filters Even with a perfectly maintained sanitizer level, the water will accumulate other unwanted waste products over time. Soaps, lotions, deodorants, and organic matter from bathers build up in the water, creating a food source for bacteria and making the water cloudy and unpleasant. To combat this, you need to “shock” your hot tub on a regular basis, typically once a week. Shocking is the practice of adding a large dose of an oxidizer to the water. This does several things: it breaks down all the organic waste, it kills any resistant bacteria, and in a bromine spa, it reactivates the used bromine ions, turning them back into effective sanitizer. Always shock the spa with the cover off and the jets running to allow it to circulate properly and to let the gasses vent. Beyond the daily and weekly chemical maintenance, the hot tub has other physical components that require regular attention. The most important of these is the filter. The filter is the kidney of your hot tub, constantly working to remove small particles, hair, and debris from the water. A dirty, clogged filter cannot do its job, which will result in cloudy water and will put a strain on your pump. The filter cartridges should be removed and rinsed with a garden hose at least once a week. The goal is to spray the debris out from between the pleats of the filter. Every few months, the filter needs a deep clean. This involves soaking it overnight in a specialized filter cleaning solution to break down

Hot Tub Cleaning: Get Perfectly Balanced Hot Tub Water Every Time Read More »

Cleaning a Glass Top Stove: The Do’s and Don’ts for a Perfect Shine

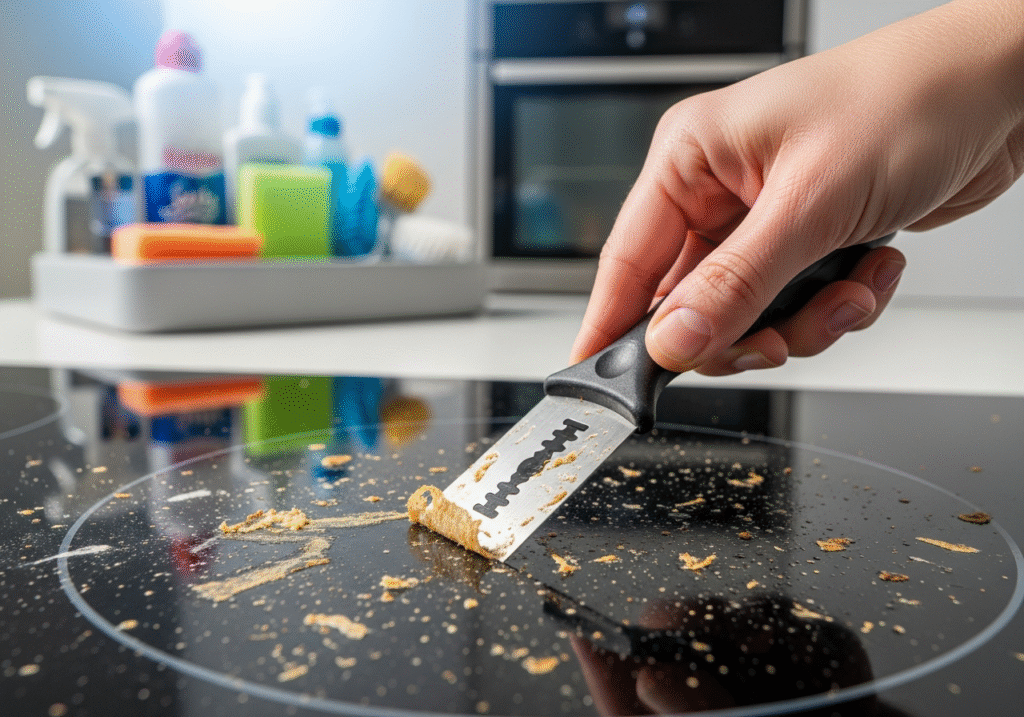
The glass top stove is the centerpiece of the modern kitchen. Its sleek, seamless surface offers a minimalist appeal that is both beautiful and functional. But for all its aesthetic charm, it is an appliance that strikes fear into the hearts of many homeowners. It looks so pristine, so delicate, that the first splatter of grease or boil-over of a sugary sauce can induce a wave of panic. We have all heard the horror stories of permanent stains, unsightly scratches, and a once-glossy surface dulled by the wrong cleaning methods. The truth is, cleaning a glass top stove is not a difficult or dangerous task. It is, however, a precise one. The glass-ceramic surface is a marvel of engineering, designed to withstand incredible temperature fluctuations, but it is not invincible. It is vulnerable to two primary enemies: scratches from improper tools and pitting from certain types of spills. The secret to keeping your glass cooktop looking brand new for years is not about using harsh chemicals or scrubbing for hours; it is about using the right tools, the right techniques, and, most importantly, a consistent routine. Understanding the Do’s and Absolute Don’ts Before we touch on how to clean, we must first establish the ground rules of what to avoid. Most damage to glass cooktops happens when well-intentioned people use the wrong products. To protect your investment, commit these rules to memory. The Absolute Don’ts: Never Use Abrasive Sponges: This is the cardinal sin of glass top stove care. Steel wool, green scouring pads, and any other abrasive sponge will create a web of fine micro-scratches on the surface. These scratches will not only dull the finish permanently but will also create tiny crevices where dirt and grime can become trapped, making future cleaning even more difficult. Never Use Abrasive Cleaners: Powdered cleansers like Comet or Ajax are designed for durable porcelain or stainless steel sinks, not for glass-ceramic. Their gritty particles will scratch the surface just as surely as an abrasive sponge. Never Use Ammonia-Based Cleaners: A standard glass cleaner like Windex might seem like a logical choice, but most contain ammonia. Ammonia is a harsh chemical that can be too strong for the cooktop’s surface, potentially causing discoloration or streaks that are difficult to remove. Never Use a Knife or Sharp Kitchen Utensil to Scrape: When faced with a stubborn, burnt-on piece of food, it is tempting to grab a butter knife to pry it off. This is a fast track to a deep, irreversible scratch. There is only one tool that is safe for scraping, which we will cover later. Never Clean While the Surface is Hot: Aside from the obvious safety risk of getting burned, applying a cool cleaning solution to a hot surface can cause thermal shock, which in extreme cases could crack the glass. Always wait for the indicator light to go off and for the surface to be cool to the touch. Never Let Sugary Spills Sit: If you are boiling jam, making candy, or a pot of sugary sauce boils over, this is the one time you must act quickly. A hot sugar spill can create a chemical bond with the glass-ceramic surface, causing permanent pitting or staining if it is left to cool completely. The Essential Toolkit  You do not need an arsenal of expensive, specialized products. A powerful and safe cleaning kit can be assembled from simple, effective household staples. Microfiber Cloths: You will need at least two—one for cleaning and one for buffing. Microfiber is soft, non-abrasive, and designed to trap dirt and absorb liquid without leaving behind lint. Baking Soda: This is your gentle but effective scrubbing agent. Its mild alkalinity helps to break down grease and food stains, and its fine particles provide just enough abrasion to lift grime without scratching. Distilled White Vinegar: This is your degreaser and polisher. The mild acid in vinegar cuts through grease and, crucially, dissolves the mineral deposits from hard water, which are a primary cause of streaks and hazy films. Keep it in a spray bottle, often diluted 50/50 with water. A Non-Abrasive Sponge or Pad: For scrubbing, you need a sponge that is safe for non-stick pans. A Cooktop Scraper: This is a specialized tool that is essential for any glass stove owner. It is a handle that holds a single-edge razor blade at a safe, low angle. When used correctly, it is the only tool that can safely remove heavy, carbonized food deposits without scratching the glass. Optional – A Commercial Cooktop Cleaner: Products like Weiman or Cerama Bryte are excellent. They are not just cleaners; they are conditioners. They often contain silicones that help to fill in microscopic imperfections and leave behind a protective film that makes future cleaning easier. This is best used as a final polishing step. Daily Maintenance and the Deep Clean Level 1: The Daily Wipe-Down The key to a perpetually clean stove is consistency. A quick, 60-second wipe-down after each use (once the stove is cool) will prevent the buildup that leads to major scrubbing sessions. Wait for it to Cool: Ensure the “Hot Surface” indicator light is off and the cooktop is cool to the touch. Remove Loose Debris: Use a dry paper towel or a microfiber cloth to wipe away any loose crumbs or food particles. Spray and Wipe: Lightly spray the surface with your 50/50 vinegar and water solution. The vinegar will immediately start to break down any light grease splatters from that meal. Buff Dry: Use a second, clean, dry microfiber cloth to wipe the surface dry. Use wide, circular motions to buff the surface to a streak-free shine. This simple routine is your best defense. If you do this every time, you will rarely need to perform a deep clean. Level 2: Burnt-On Messes This is the method for when life happens—a pot boils over, grease splatters and burns on, or the daily wipe-down has been neglected. Start with the Scraper: Once the cooktop is cool, tackle the most severe, raised deposits first. Take your cooktop scraper and, holding it at a low

Cleaning a Glass Top Stove: The Do’s and Don’ts for a Perfect Shine Read More »

woman giving her friend a cleaning gift card

Cleaning Gift: The Most Thoughtful Thanksgiving Gift You Can Give

Thanksgiving is a holiday centered on the beautiful, simple act of gathering. It’s about the warmth of a crowded table, gifts, the familiar comfort of shared recipes, and the expression of gratitude for the people in our lives. We plan menus, we brine turkeys, and we coordinate who will bring which dessert. But beneath this joyful preparation lies a silent, often stressful, and monumental task that almost always falls on the host: the pre-Thanksgiving deep clean. We have all felt it. The week before the guests arrive is a frantic race against the clock. It is a period of scrubbing, dusting, and mopping, driven by the quiet but intense pressure to present a home that is not just tidy, but impeccably clean. It is a labor of love, but it is labor nonetheless. It is hours spent on hands and knees, wiping baseboards and scrubbing floors, when that time could be spent perfecting a pie crust or simply taking a moment to breathe before the happy chaos begins. This year, consider a different kind of contribution. Instead of offering to bring another side dish that will crowd the refrigerator, think about giving a gift that truly serves the person you are thankful for. Consider giving the gift of a clean home. It may sound unconventional, but a pre-Thanksgiving cleaning, whether performed by you or a professional service, is one of the most thoughtful, practical, and profoundly impactful gifts you can possibly give a friend who is hosting. It is a gesture that transcends a simple present; it is a gift of time, of peace of mind, and of genuine, functional support. The Gift of Time In our busy lives, time is the most precious and non-renewable resource we have. During the holiday season, this becomes acutely apparent. The host of a Thanksgiving dinner is not just cooking a single meal; they are orchestrating a major event. Their to-do list is a marathon of planning, shopping, chopping, and baking. The last thing they have is a surplus of free hours. Let’s be honest about what a true guest-ready clean entails. It is not a quick wipe of the counters. It is a comprehensive, top-to-bottom effort. The Dusting: This means getting not just the coffee table, but the tops of the door frames, the ceiling fan blades, the baseboards, and the window sills. It is a detailed, meticulous job that can easily take an hour or more. The Kitchen Deep Clean: The kitchen is the heart of Thanksgiving, and it needs the most intensive work. This involves scrubbing the stovetop, wiping down the fronts of all appliances, cleaning the microwave, disinfecting the countertops, and making sure the sink is sparkling. This is a solid hour of focused work, at minimum. The Bathroom Scrub: The guest bathroom needs to be pristine. This means scrubbing the toilet, cleaning the sink and faucet, wiping down the mirror until it is streak-free, and washing the floor. The Floors: Every hard-surface floor in the main living areas needs to be thoroughly swept and mopped. Every carpet needs to be vacuumed, including moving furniture to get the dust bunnies hiding underneath. This can easily consume another hour or two, depending on the size of the home. The Final Touches: Cleaning entryway glass, tidying up clutter, and giving everything a final polish. When you add it all up, a proper pre-hosting deep clean can easily take five to eight hours of hard, physical work. By giving the gift of a cleaning, you are handing your friend an entire day of their life back. That is a day they can now use to finalize their menu, to bake a dessert without rushing, to spend time with their children who are excited for the holiday, or, most importantly, to simply sit down with a cup of tea and mentally prepare for the joy of hosting, rather than the stress of it. You are not just saving them a chore; you are giving them the space to enjoy the process. The Gift of Peace of Mind The physical labor of cleaning is only half the battle. For any host, the mental load can be even more exhausting. The pressure to have a “perfect” home is a real and often unspoken source of anxiety. Every dust bunny in the corner, every smudge on the window, and every crumb under the dining table can feel like a personal failing when you are about to welcome people into your home. This “hosting anxiety” creates a mental checklist that runs on a constant loop in a host’s mind. Did I remember to dust the lampshades? Is the guest bathroom clean enough? Does the house smell fresh? This internal monologue is a significant source of stress that detracts from the true spirit of the holiday. When you give the gift of a clean home, you are silencing that nagging voice. You are taking a huge, stressful item off their mental checklist and completely erasing it. Imagine the profound sense of relief your friend will feel, walking into their home a day or two before Thanksgiving to find that it is already done. The floors are gleaming. The kitchen is sanitized and ready for the culinary marathon. The bathroom is sparkling. This gift allows your friend to transition their focus from the presentation of their home to the purpose of the gathering. They can channel all their energy into what truly matters: the food, the conversation, and the connection with their loved ones. They can be a present, relaxed, and joyful host, not a frazzled, exhausted one who is secretly worrying about whether a guest noticed the dust on the baseboards. You are not just cleaning their house; you are clearing their mind. A Foundation for the Entire Holiday Season Thanksgiving in many ways is the official kick-off to the entire winter holiday season. The festivities of November flow directly into the preparations for December. A deep clean for Thanksgiving is therefore not just a gift for a single day; it is a foundational gift that keeps on

Cleaning Gift: The Most Thoughtful Thanksgiving Gift You Can Give Read More »

Liquid vs. Powder vs. Pods: A Complete Detergent Breakdown

Detergent is the unsung workhorse of our household chores, a chemical marvel we rely on multiple times a week, yet give very little thought to. It sits in a bottle, a box, or a tub, a wall of promises in the supermarket aisle, each brand claiming brighter whites, bolder colors, and more stain-fighting power than the last. It is laundry detergent, and for most of us, our interaction with it is limited to a ritual of unthinking measurement, a capful, a scoop, a tossed-in pod, followed by the push of a button. But this simple act belies the complex science and crucial choices involved in getting our clothes truly clean. The right detergent, used correctly, can preserve the life of our garments, save us money, and deliver a level of clean we thought was only possible in commercials. The wrong detergent, or the right one used incorrectly, can do the exact opposite, leaving clothes dingy, irritating our skin, and even damaging our washing machines. To master the art of laundry is to first understand the powerful tool at the heart of the process: the detergent itself.  Soap vs. Detergent To appreciate the modern detergent, we must first understand what it is not: it is not soap. For millennia, soap was the world’s primary cleaning agent. Made from natural fats and oils combined with an alkali, soap is a fantastic cleaner in the right conditions. However, it has one major, fatal flaw: it reacts poorly with the minerals present in hard water. When soap molecules encounter the calcium and magnesium ions in hard water, they bind together to form an insoluble, waxy precipitate known as soap scum. This is the same stuff that creates a ring in the bathtub. In laundry, it leaves a dingy, graying film on clothes and can build up inside the washing machine. The modern laundry detergent was invented as a direct solution to this problem. Detergents are synthetic, man-made compounds engineered in a lab to be immune to the effects of hard water. Their molecules are designed not to bind with minerals, allowing them to focus entirely on their primary job: removing dirt. This fundamental difference is why we use detergents for our laundry and not bars of soap. How Detergent Actually Works The magic of detergent lies in a specific type of molecule called a surfactant. The word itself comes from “surface active agent,” and that is precisely what it does. Imagine a surfactant molecule as being shaped like a tadpole, with a distinct head and a tail. The head is hydrophilic, which means it is attracted to water. The tail is hydrophobic (or lipophilic), meaning it repels water but is strongly attracted to oil, grease, and dirt. When you add detergent to your wash, millions of these surfactant molecules get to work. The hydrophobic tails seek out and attach themselves to the oily, greasy dirt on your clothes, burrowing into the grime. Meanwhile, the hydrophilic heads are trying to stay in the water. As the washing machine agitates, the water molecules pull on the hydrophilic heads, and this pulling action, combined with the agitation, literally lifts the dirt and grease right off the fabric fibers. The surfactants then form tiny spheres around the dirt particles, called micelles, with the greasy tails pointing inward, trapping the dirt, and the watery heads pointing outward. This keeps the dirt suspended in the wash water, preventing it from redepositing back onto your clean clothes before it is all rinsed away. But modern detergents are more than just surfactants. They are complex formulas containing several key ingredients: Enzymes: These are biological catalysts, like tiny Pac-Men, designed to break down specific types of stains. Protease targets protein-based stains (like grass and blood), amylase targets starches, and lipase targets fats and oils. This is why enzymatic detergents are so effective at stain removal. Builders: These are agents that soften the water by binding to the hardness minerals, allowing the surfactants to work even more effectively. Optical Brighteners: These are compounds that absorb ultraviolet light and re-emit it as visible blue light. This doesn’t actually remove stains, but it cleverly tricks our eyes into seeing whites as “whiter” and colors as brighter. Polymers: These special ingredients can help trap dirt in the water or create a protective layer on fabrics to help prevent future stains from setting in. Choosing the Right Detergent for You The sheer variety of detergents can be overwhelming. The choice can be simplified by breaking it down into three main categories: form, machine type, and specialty formula. 1. Liquid vs. Powder vs. Pods Liquid Detergent: This is the most popular form in many parts of the world, and for good reason. It is versatile, easy to measure, and dissolves well in all water temperatures, including cold. Liquids are particularly effective on greasy, oily stains, as they can be applied directly to the stain as a pre-treater. The main downsides are the heavy, plastic-intensive packaging and the tendency for users to pour with a heavy hand, leading to overuse. Powder Detergent: This is the classic, budget-friendly champion. On a per-load basis, powder is almost always the cheapest option. It is excellent at lifting mud and ground-in dirt, making it a great choice for families with kids or for work clothes. Its cardboard packaging is also more environmentally friendly. The drawbacks are that it can sometimes fail to dissolve completely in very cold water, leaving a chalky residue, and it can be a bit messy to measure. Pods/Packs: These are the peak of convenience. Perfectly pre-measured, you simply toss one into the drum and you are done. There is no mess and no guesswork. They are fantastic for those who tend to overuse liquid detergent. However, this convenience comes at a premium price; pods are by far the most expensive option per load. Their formulation is also fixed, meaning you cannot adjust the amount for a very small or lightly soiled load. Safety is also a major concern, as their small, colorful appearance can be dangerously appealing to children and pets. 2. High-Efficiency

Liquid vs. Powder vs. Pods: A Complete Detergent Breakdown Read More »

Distilled Water: 5 Simple Secrets on How to Use Distilled Water

The secret to a perfect, streak-free clean is not found in a bottle of expensive, high-tech cleaning solution. It is not achieved through a special microfiber cloth woven with miraculous fibers, nor is it the result of a secret scrubbing technique passed down through generations. The real secret to a flawless, residue-free finish is something far more fundamental and surprisingly simple. It is the water itself. More specifically, it is the absence of minerals in that water. The single most transformative, yet overlooked, tool in any advanced cleaning arsenal is a simple jug of distilled water. We are conditioned to see water as a simple cleaning agent, but the water that flows from our taps is far from pure. It is a complex liquid, carrying a dissolved cargo of minerals and trace elements from its journey through the ground and pipes. The most common of these are calcium and magnesium, the primary culprits behind “hard water.” When you clean a surface with tap water and it evaporates, it leaves these microscopic mineral deposits behind. This is the root cause of nearly every common cleaning frustration: the hazy film on your hardwood floors, the stubborn white spots on your shower door, the frustrating streaks on your windows, and the cloudy residue on your stainless steel appliances. You can scrub and polish for hours, but if you are using tap water, you are fighting a battle against an invisible enemy that you are simultaneously reapplying with every wipe. Distilled water is the elegant solution to this problem. It is water that has been purified back to its most basic, elemental state: pure H₂O. By understanding what it is and how it works, you can elevate your cleaning from a chore of constant frustration to a science of predictable, perfect results. What Exactly Is Distilled Water, and Why Does It Matter? The process of distillation is a simple act of separation. Regular water is boiled into steam. As the water turns into a gas, it leaves behind everything that is not water: minerals, salts, heavy metals, and other contaminants. This pure water vapor is then collected and condensed back into its liquid form. The result is water that is stripped of all its baggage, a true “blank slate.” This purity is precisely what makes it a secret weapon for cleaning. Because distilled water contains no dissolved solids, when it evaporates, it leaves absolutely nothing behind. There are no minerals to create spots, no salts to leave a film. It dries completely clean. This unique property gives it two significant advantages in a cleaning context: It Prevents Residue: As mentioned, it eliminates the source of spots and streaks. This is its most obvious and celebrated benefit. It Is a More Effective Cleaner: Because distilled water is free of dissolved minerals, it is chemically “hungry.” It has a greater capacity to dissolve and absorb other substances, like dirt and soap, making it a more effective solvent than tap water. This means you often need less cleaning solution to achieve the same result. Key Applications for Distilled Water in Your Home Switching to distilled water for specific tasks is a small change that yields disproportionately large results. Here are the most impactful ways to incorporate it into your cleaning routine. 1. The Ultimate Streak-Free Window and Mirror Cleaner This is the classic and most transformative use. For a truly professional, invisible finish on glass, distilled water is non-negotiable. The Problem: The minerals in tap water are the primary cause of streaks on windows and mirrors. No matter how well you squeegee, as the last microscopic droplets of water dry, they leave mineral deposits behind, creating a faint but frustrating haze. The Solution: Create your own professional-grade glass cleaner. In a clean spray bottle, mix a solution of 50% distilled water and 50% distilled white vinegar. The vinegar acts as a powerful cleaning agent, cutting through grease and grime, while the distilled water ensures that once you wipe or squeegee it away, the surface will dry to a perfectly clear, spot-free shine. This simple, cheap solution will outperform almost any commercial glass cleaner on the market. 2. Flawless Stainless Steel and Chrome Stainless steel appliances are notorious for showing every fingerprint and water spot. Distilled water is the key to winning this battle. The Problem: Wiping down stainless steel with a cloth dampened with tap water is a recipe for frustration. As the water dries, it leaves behind a constellation of mineral spots that mar the finish. The Solution: For routine cleaning, simply dampen a clean microfiber cloth with distilled water and wipe the appliance, always following the direction of the grain. For a final polish, use a second, completely dry microfiber cloth to buff the surface. The absence of minerals means no spots will form as it dries. For greasy fingerprints, you can add a single drop of dish soap to your damp cloth, then “rinse” with a separate cloth dampened with only distilled water before buffing dry. The same principle applies to chrome faucets and fixtures in the kitchen and bathroom. 3. A Haze-Free Finish for Hardwood and Laminate Floors If your hard-surface floors look dull and cloudy even after mopping, the culprit is likely a buildup of mineral residue from your tap water. The Problem: Over time, mopping with tap water (even with a floor cleaner) can leave behind a cumulative, hazy film that dulls your floor’s natural shine. The Solution: This is especially effective with a spray mop system. Fill the mop’s reservoir with mostly distilled water and a small splash (a few tablespoons) of white vinegar. The vinegar helps to break down any existing film, while the distilled water ensures no new film is created. The result is a floor that is truly clean, without the dulling residue that compromises its appearance. 4. Spot-Cleaning Carpets and Upholstery Without Leaving a Ring Have you ever cleaned a small spot on your carpet, only to be left with a noticeable ring or outline after it dries? That ring is often caused

Distilled Water: 5 Simple Secrets on How to Use Distilled Water Read More »

cleaning tablets

Cleaning Tablets: The Sustainable Secret to a Spotless Home

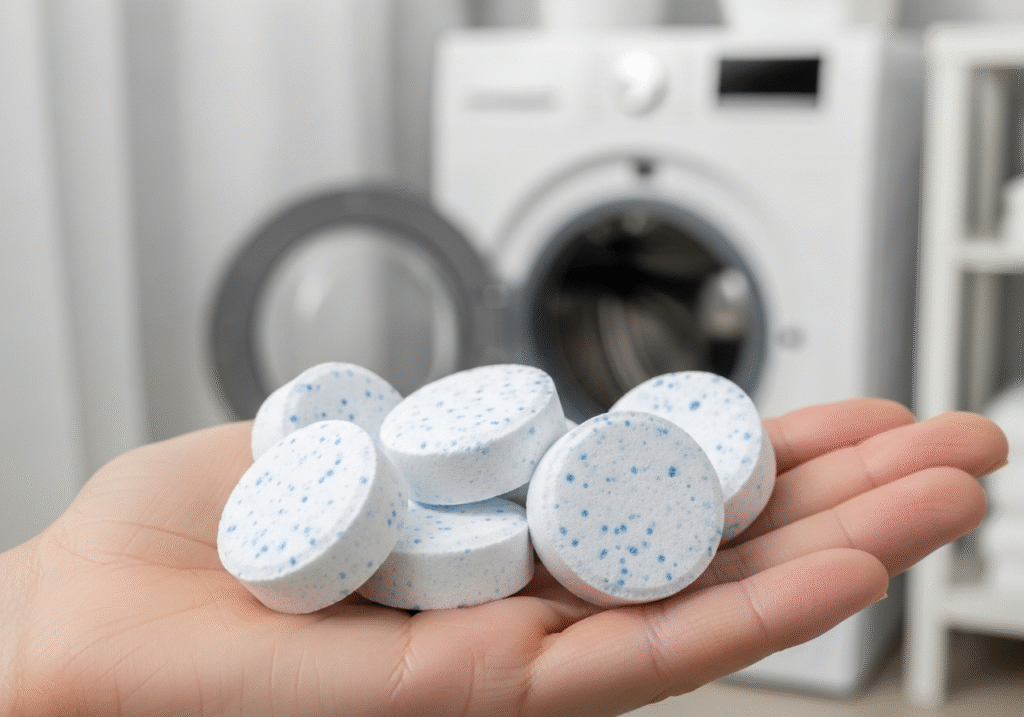
The cleaning aisle of any supermarket is a testament to a long-held, but increasingly outdated, belief: that effective cleaning comes in a large, heavy, liquid-filled plastic bottle. We have been conditioned to equate the heft of a bottle with its power, and the volume of its contents with its value. But this model, built on the practice of selling us mostly water, is undergoing a quiet but profound revolution. The catalyst for this change is a small, unassuming, and brilliantly simple innovation: the cleaning tablet. This is not just a new product; it is a fundamental paradigm shift in how we approach household cleaning. It challenges the very logistics and chemistry we have taken for granted for decades. The rise of the cleaning tablet is a story about efficiency, sustainability, and a return to a more logical way of maintaining our homes. It is about removing the unnecessary, the wasteful, and the cumbersome, and concentrating on what truly matters: the active ingredients that deliver a powerful clean. Why a Change Was Needed To appreciate the elegance of the cleaning tablet, one must first recognize the inherent flaws of the traditional liquid cleaner model. The problems are significant and touch upon environmental impact, household convenience, and simple economics. The most glaring issue is plastic waste. The vast majority of liquid cleaning products are packaged in single-use plastic bottles, typically made from high-density polyethylene (HDPE). While recyclable in theory, the reality is that a staggering percentage of this plastic is never recycled, ending up in landfills where it will persist for centuries, or in our oceans where it breaks down into harmful microplastics. Every time we finish a bottle of all-purpose cleaner and toss it in the bin, we are contributing to this global crisis. Beyond the plastic itself is the absurdity of what we are actually buying and transporting. The average liquid surface cleaner is composed of up to 95% water. This means that we, as consumers, are paying for companies to ship enormous volumes of water across the country, and sometimes across the world. The carbon footprint of this process is immense. The fuel consumed by trucks, trains, and ships to move what is essentially pre-diluted cleaner is a significant and entirely avoidable environmental cost. From a practical household perspective, these bulky bottles are inconvenient. They command a significant amount of valuable cabinet real estate, creating clutter under our sinks. The specialized nature of many product, a cleaner for glass, another for the bathroom, a third for the floor, exacerbates this storage problem. Furthermore, the liquid format can be messy. Spills are common, and measuring out concentrates for mopping or other tasks is often an exercise in guesswork, leading to product waste or a sticky, residue-laden floor. Concentrated Power, Just Add Water The cleaning tablet deconstructs this flawed model and reassembles it in a logical, efficient way. A cleaning tablet is a small, solid, highly concentrated puck of cleaning agents. It contains all the necessary surfactants (the molecules that lift dirt and grease), fresheners, and other active ingredients of a traditional liquid cleaner, but with one critical component removed: the water. The concept is brilliantly simple. Instead of buying a new plastic bottle full of pre-diluted cleaner every time you run out, you keep a single, reusable spray bottle. When it is empty, you simply fill it with warm water from your own tap, drop in a cleaning tablet, and wait a few minutes for it to dissolve completely. The result is a bottle of fresh, effective cleaning solution, ready to use, created on-demand in your own home. This “just add water” approach elegantly solves every problem posed by the traditional model. The small, paper-based packaging of the tablets reduces plastic waste by over 99%. The carbon footprint of shipping is slashed, as a truck can carry millions of cleaning refills in tablet form for the same weight and space as a few thousand bottles of liquid cleaner. The storage issue vanishes; a small box of tablets, the size of a deck of cards, can replace an entire arsenal of bulky bottles under the sink.  Different Forms of Solid Cleaners The “tablet” is a catch-all term for a growing category of concentrated, water-activated cleaners. While the small, dissolvable puck for spray bottles is the most common, this technology has been applied to a wide range of household tasks. All-Purpose and Surface Cleaner Tablets: These are the most versatile. Designed to be dissolved in a spray bottle, they are formulated to tackle everyday grease, grime, and spills on a variety of non-porous surfaces like countertops, sealed stone, tile, and finished wood. Glass Cleaner Tablets: Specifically formulated to be streak-free, these tablets often have a different chemical composition, focusing on agents that evaporate cleanly without leaving behind the films or residues that can cause smudging on mirrors and windows. Bathroom Cleaner Tablets: These tablets are designed to combat the specific challenges of the bathroom. They often contain mild acidic components to help dissolve soap scum and hard water mineral deposits, making them effective on showers, tubs, sinks, and tile. Floor Cleaner Tablets and Sheets: For mopping, these come as either a larger tablet or a dissolvable sheet. You simply fill your mop bucket with water, drop in the product, and it creates a perfectly portioned, no-rinse floor cleaning solution, eliminating the need to measure and pour from a heavy bottle. Appliance-Specific Tablets: This is a separate but related category of cleaning tablets that have been around for longer. These are not for creating spray cleaners but for cleaning the machines themselves. Dishwasher Cleaning Tablets: These are designed to be run in an empty dishwasher. They break down limescale, grease, and food residue that build up in the filter, spray arms, and hidden parts of the machine, deodorizing it and improving its cleaning performance. Washing Machine Cleaning Tablets: Placed in the drum of an empty washing machine and run on a hot cycle, these tablets dissolve the soap scum, mineral buildup, and biofilm that cause musty odors in the

Cleaning Tablets: The Sustainable Secret to a Spotless Home Read More »