Laundry

A woman is at peace while her house is clean and organized during the winter.

Winter Organization: 5 Amazing Daily Habits to Keep Your House Organized During a Snowstorm

Winter Organization: 5 Daily Habits That Keep a Snowstorm Home Tidy When the temperature drops, the way a house works changes overnight. Windows stay shut, everyone spends more hours inside, and every trip outdoors drags in parkas, boots, and slush. Winter clothing takes roughly three times the closet volume of summer gear, so a home that felt spacious in September can feel buried by January. Keeping things organized through a snowstorm is not about occasional purges; it is about small daily habits that stop the mess before it compounds. These five routines take minutes each day and turn the entryway, kitchen, and living room back into calm, usable space. Habit 1: Give Every Winter Item a Landing Zone at the Door The entryway is where the winter battle is won or lost. A standard coat closet fails in daily use because nobody wants to fight hangers while wearing gloves, which is why coats end up draped over chairs. Install a sturdy wall-mounted rack or a heavy-duty coat stand for the gear currently in rotation and keep the closet for storage pieces, separating active items from backup ones. Beneath the coats, a high-walled boot tray is not optional: it catches the melt-off from wet boots and stops salt water from puddling on your floor. Fill the tray with river stones so boots drain and dry instead of soaking in dirty water. Finally, give each family member a labeled bin for hats, mittens, scarves, and neck warmers so the frantic morning search for a matching glove pair disappears. Habit 2: Send Blankets and Cushions Back to Their Station Winter is the season of cocooning, when extra throws, pillows, and cushions pile onto every sofa to make the house feel warm. Comfortable as they are, draped blankets create instant visual chaos. Choose a designated home for soft goods, whether a large wicker basket, a storage ottoman, or a blanket ladder, and adopt the rule that leaving the room means returning the blanket to its station. The same reset applies to slippers, chargers, and books: everything keeps a place, so the living room stays cozy instead of cluttered. Habit 3: Rotate Kitchen Gear for Soup and Stew Season Cold-weather cooking changes which tools you reach for daily. The slow cooker, roasting pan, and Dutch oven take over from the salad spinner and grill tools, so rotate your storage to match: move barbecue equipment, picnic ware, and summer small appliances to high shelves or the basement, and bring the heavy pots and stew-making appliances down to waist level where you can grab them without effort. Stocking up for storms also overloads the pantry, so use tiered risers and clear bins to keep canned goods and comfort foods visible. When you can see what you own, nothing gets pushed to the back of the shelf and forgotten until it expires. Habit 4: Clear Every Flat Surface Before Bed Grey skies and short days make visual clutter feel heavier in winter. Piles of mail, scattered toys, and crowded counters raise stress levels, and unlike summer, you cannot escape them by going outside. A clean-surfaces policy counters the gloom: counters, tables, and desks get cleared every evening so the limited winter light reflects instead of being swallowed by stuff. Rooms instantly feel larger and airier, and mornings start calmer when the kitchen island and dining table are ready for breakfast rather than buried under the previous day’s debris. Habit 5: Audit the Closet and Control Humidity Daily Winter closets reward a ruthless eye. A coat not worn in two winters, or an itchy sweater that pills, is taking space from the pieces you actually wear; donate it. Vacuum-seal bags compress the off-season summer wardrobe so sundresses and beach towels store flat under the bed, freeing the rod for bulky winter layers. Humidity is the invisible half of winter organization: dry furnace air creates static that pulls dust onto walls and electronics, so run a humidifier to settle particles where the vacuum can reach them. The flip side is condensation, since warm indoor air meeting cold glass creates damp sills where mold appears quickly. As Health Canada explains, controlling humidity and fixing moisture problems are the keys to preventing mold, and the CDC adds that mold grows wherever moisture collects, so keep heavy drapes and furniture away from windows and wipe sills down whenever you spot droplets. Your 5-Minute Evening Reset A daily reset takes less time than it sounds and prevents the weekend-long catch-up: Return boots to the tray and coats to their hooks before you take yours off. Drop hats and gloves into each family member’s bin on the way in. Return throws and pillows to the basket or ladder as you leave the living room. Clear the kitchen counters and dining table of the day’s debris. Wipe the entryway floor and window sills that show salt dust or condensation. Zone Daily habit Payoff Entryway Hang coats, tray the boots, bin the accessories No puddles, no salt trails, no lost mittens Living room Return soft goods to their station Cozy without the chaos Kitchen Keep winter cookware at hand, pantry visible Faster meals, less food waste Whole house Clear surfaces and manage humidity Brighter rooms, less dust and mold risk Frequently Asked Questions How do I keep the entryway from becoming a disaster during a snowstorm? Set up a coat rack for daily-use outerwear, a boot tray with river stones for wet footwear, and a labeled bin per person for small accessories. Add a strict no-shoes-past-the-mat rule, then spend five minutes each evening returning everything to those zones. What is the best way to store winter coats and boots in a small home? Store off-season items in vacuum-seal bags under beds or on high shelves, and keep only current-season gear on the main rod. Bulky winter items in active rotation belong on an open rack, not jammed into a closet where they wrinkle and get abandoned on chairs. Should I run a humidifier in winter, and
Winter Organization: 5 Amazing Daily Habits to Keep Your House Organized During a Snowstorm Read More »

Fabric Softener Sheets: 5 Things You Should Never Put in the Dryer with a Softener Sheet

Fabric softener sheets, commonly known as dryer sheets, have become a staple of the modern household, synonymous with the concept of “freshness.” We are conditioned to believe that our clothes are not truly clean unless they emerge from the machine smelling of “Mountain Rain” or “Lavender Fields,” free of static and soft to the touch. However, this convenience product is often the subject of misunderstanding. While they solve specific problems-namely static cling and roughness-they introduce a layer of chemical complexity to our textiles and appliances that can have unintended consequences. To use them effectively, one must look past the marketing and understand the mechanics of how a dryer sheet actually works, what it leaves behind, and when it should be strictly avoided. How Does it Work? To comprehend the function of a dryer sheet, you must visualize it not as a cleaning agent, but as a delivery system. The sheet itself is merely a carrier, usually made of a synthetic non-woven fiber. It is coated in a heat-activated compound, typically comprised of stearic acid (a fatty acid often derived from animal fats), clay fillers, and heavy fragrances. In the cool air of the laundry room, this coating is solid. However, once introduced to the high heat of the dryer cycle, this waxy layer melts. As the wet clothes tumble, the sheet makes repeated contact with the fabrics, transferring this liquefied coating onto the fibers of your clothing. It is, in essence, a process of lubrication. The primary and most functional benefit of this coating is the elimination of static electricity. Static is the bane of the laundry process, particularly in the dry winter months or in climates with low humidity. It occurs when synthetic fabrics like polyester and nylon rub against each other in the dry heat, exchanging electrons and building up an electrical charge. This results in clothes that cling to the body, crackle when separated, and attract dust and hair. The coating provided by the dryer sheet contains positively charged ions. These ions neutralize the negative charge created by the tumbling fabrics, effectively canceling out the static. For households that wear a significant amount of synthetic clothing, this antistatic property is not just a luxury; it is a necessity for wearable garments. Beyond physics, there is the tactile and olfactory appeal. The fatty acids in the coating reduce the friction between individual fibers. This makes rough fabrics, such as denim or air-dried cotton, feel significantly softer and more pliable against the skin. Simultaneously, the heat activates the encapsulated fragrance molecules, embedding them into the weave of the cloth. This scent lingers far longer than detergent fragrance because it is applied at the end of the process and is not rinsed away. For many, this lingering scent is the primary indicator of hygiene, a sensory signal that the laundry chore is complete. Disadvantages However, the mechanism that provides these benefits-the coating of the fiber-is also the source of the product’s significant downsides. The most detrimental effect of dryer sheets is on absorbency. The waxy layer that makes a fabric feel soft is hydrophobic, meaning it repels water. When you use dryer sheets on bath towels, you are essentially waterproofing them. Over time, the buildup of these fatty acids coats the loops of the terry cloth. You end up with a towel that feels plush to the touch but merely pushes water around on your skin rather than soaking it up. To restore a towel’s absorbency, one often has to strip the fabric using vinegar and hot water to melt away the accumulated softener residue. This blocking of the fiber’s pores is even more catastrophic for modern athletic wear. Performance fabrics are engineered with a specific synthetic weave designed to wick moisture away from the body and allow it to evaporate quickly. This is a mechanical function of the textile. When you dry yoga pants or running shirts with a fabric softener sheet, the residue fills the micropores of the fabric. This traps sweat, dead skin cells, and bacteria inside the weave. The result is twofold: first, the garment loses its ability to wick sweat, leaving you clammy during a workout; second, it develops a “perma-stink.” Because the bacteria are trapped under a layer of silicone or wax, the detergent cannot reach them in the next wash. The clothes begin to smell musty even when they are technically clean. Manufacturers of high-end athletic gear almost universally advise against the use of softeners for this reason. Security There is also a safety concern regarding the flammability of textiles. Children’s sleepwear is legally required to be flame-resistant. This is achieved either through the use of specific synthetic fabrics or chemical treatments. The coating left by dryer sheets, being derived from emulsified fats and oils, is inherently flammable. Coating flame-resistant pajamas in a layer of flammable residue reduces their resistance to fire. Most dryer sheet boxes carry a warning label advising against use on children’s sleepwear or garments labeled as flame-resistant, yet many consumers overlook this fine print, unknowingly compromising the safety features of the clothing. The impact on the dryer itself is a “hidden cost” of dryer sheet usage. As the chemical coating melts, it does not only transfer to the clothes; it transfers to the drum and the filtration system of the machine. The most critical area of concern is the lint trap. The screen of the lint trap is designed to catch fine particles while allowing hot, moist air to pass through. Over time, the invisible waxy film from dryer sheets can coat the mesh of the screen. This blockage is often invisible to the naked eye. The screen looks clean, but air cannot pass through it efficiently. This forces the dryer to work harder, increasing energy bills and the risk of the motor overheating. A simple test is to take the lint screen to the sink and run water over it. If the water pools and beads up rather than flowing through the mesh, the screen is clogged

Fabric Softener Sheets: 5 Things You Should Never Put in the Dryer with a Softener Sheet Read More »

winter work

February Checklist: 5 Cleaning Tasks That are Actually Easier and More Efficient in Winter

February Checklist: 5 Cleaning Tasks That Are Easier in Winter February is the shortest month but often the longest feeling one. January motivation has faded, the furnace has run non-stop, and boots have dragged road salt through the door. This calls for defensive cleaning, not spring optimism: a routine that fights winter’s specific damage while the problems are still fresh. These five February tasks protect your floors, your air, and your appliances until the thaw. Stock these supplies before you start: White vinegar for neutralizing entryway salt and descaling the humidifier. A fresh furnace filter and a vacuum hose for vents and ducts. Degreaser and baking soda paste for kitchen grease and the oven. A duct brush for the dryer vent and soapy water for lampshades. 1. Neutralize Road Salt on Entryway Floors By February the doormats are saturated and a chalky white haze coats the hardwood and tile near the door. That residue is not plain dirt: it is rock salt or calcium chloride from plowed streets, alkaline and hygroscopic salts that pull moisture from the air and from wood flooring. Left alone, the brine eats through polyurethane finish and tile grout sealant, leaving permanent stains and pitting. A wet mop only spreads the salt, so neutralize it with warm water and white vinegar applied damp rather than soaking, which dissolves the mineral bonds without waterlogging the wood. Empty the boot trays as well. 2. Refresh the Air: Filters, Vents, and Humidifiers Canadian homes recycle the same dust, pet dander, and cooking particles all winter. The furnace filter is now clogged, so replace it to protect airflow and the motor. Pull vent covers and vacuum the ducts with a hose attachment so dust stops blowing back in when the heat cycles on. The furnace also dries the air, so most homes run a humidifier, and one misting since December may be breeding pink bacterial biofilm that irritates lungs when aerosolized; descale the tank weekly with vinegar and disinfect it so the moisture you add stays clean. Condensation is the flip side: warm air meets freezing glass and black mold appears on window sills. Wipe dark growth with a bleach solution and keep the area dry, because as Health Canada notes, indoor air quality suffers when dust, mold, and other contaminants build up in a closed-up home. The CDC’s home cleaning guidance is clear that you clean first and disinfect when needed. 3. Strip and Reset the Bedroom and Bathroom Valentine’s Day makes mid-February the perfect moment to treat the master suite to guest-level detail. Nobody spends more hours in bed than in deep winter, and the mattress collects sweat and dead skin cells. Strip everything, including the mattress protector and duvet, and wash linens on hot. While they run, vacuum the mattress to pull out dust mites and allergens, and rotate it to prevent sagging. In the ensuite, long hot baths have layered soap scum and oil on the tub while mineral deposits built up around the faucet. A restorative clean now, grout lines included, turns the bathroom into a sanctuary. 4. Degrease the Kitchen and Tackle the Oven Winter menus lean heavy: roasts, stews, and fried comfort food throw airborne grease onto cabinet tops, the refrigerator, and the range hood, where it mixes with dust into a sticky gunk that hardens by spring. Wipe those high surfaces with a degreaser now while the layer is thin. The oven needs the same attention: holiday roasting has left the interior glass opaque with carbonized grease that smells worse in a house that cannot open its windows. Skip the self-clean cycle, since its fumes need ventilation you cannot provide at minus twenty; use a baking soda paste for a manual clean that is safe for indoor air quality. 5. Clear the Dryer Vent and Brighten the Lamps Bulkier winter fabrics, fleece, wool, and heavy cottons shed more lint than summer loads, and dry air adds static, so a clogged dryer vent is a genuine fire hazard. Disconnect the duct and vacuum the lint trap and exhaust pipe now; a blocked vent also extends drying times and wastes electricity. While behind the dryer, clear the dust gathered around the warm motor. Then tackle lighting: in the darkest month of the year, dust on bulbs and shades dims fixtures more than you would think. Wipe cool bulbs, wash glass shades in warm soapy water, and clean the tops of ceiling fan blades so spring’s first use does not rain grey clumps onto your furniture. Task Why February makes it easier Key tool Neutralize entryway salt Residue is fresh instead of baked in Warm water and white vinegar Replace filter, clean vents, descale humidifier Clogged system is working hardest now Vacuum hose and vinegar soak Strip bed and clean tub Valentine’s Day motivation for the master suite Mattress vacuum and descaling cleaner Degrease kitchen and oven Grease layer is still soft, not hardened Degreaser and baking soda paste Vacuum dryer vent and dust lamps Lint and static are at their seasonal peak Duct brush and soapy water Also Clear the Hibernation Zones February is when recycling overflows, the donation pile grows in the bedroom corner, and broken electronics gather on the desk because nobody wants to brave the cold. Since you spend almost all your time indoors, that clutter weighs on your mood more heavily than it would in July. Take the recycling out, drop off donations, and sort the winter gear flung into the closet to open up floor space and restore order while you wait out the cold. Frequently Asked Questions Why is vinegar better than a mop for winter salt on hardwood? Salt is alkaline, so a wet mop only spreads it. A damp mop with warm water and white vinegar neutralizes the salt chemically and lifts it without soaking the wood. Keep the mop damp and dry the floor promptly. How often should I clean my humidifier in winter? Descale and disinfect the tank weekly while the humidifier runs

February Checklist: 5 Cleaning Tasks That are Actually Easier and More Efficient in Winter Read More »

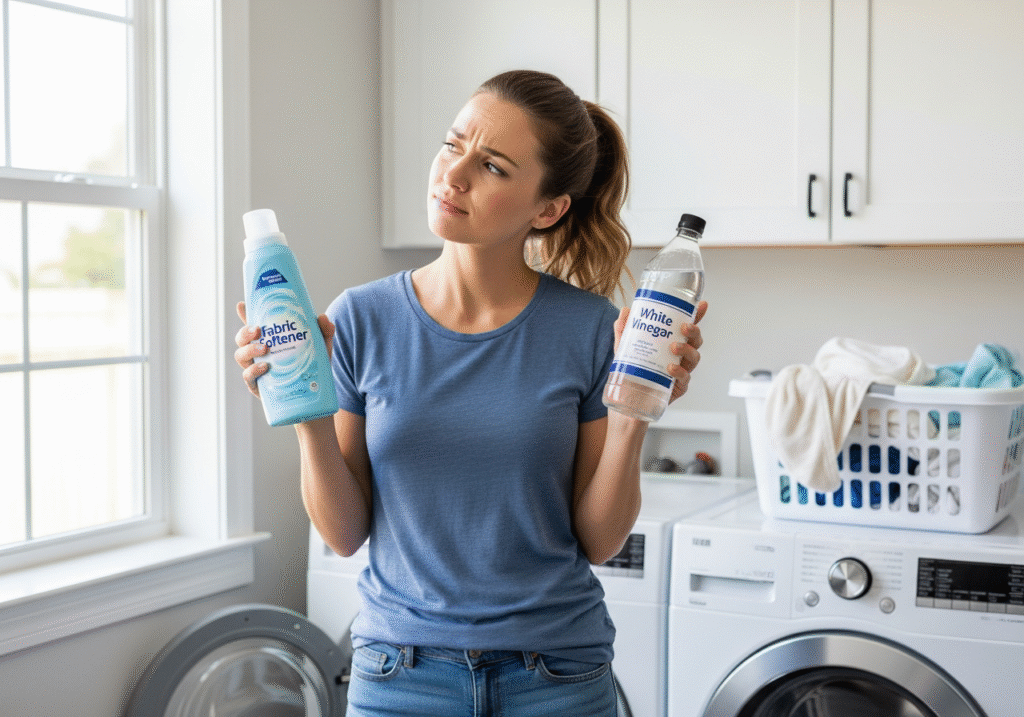
Fabric Softener vs. Vinegar: Which is Better for Your Laundry?

Fabric Softener vs. Vinegar: Which Is Better for Your Laundry? Fabric softener has been sold to us as the final step of clean laundry: the silky feel, the lingering scent, the static-free pull from the dryer. But softener is not a cleaning agent at all. It is a conditioning product that coats every fiber in a thin chemical layer, and that coating has consequences for towels, athletic wear, your washing machine, and sensitive skin. White vinegar, the old-fashioned alternative, takes a completely different approach. Comparing how each one works on your specific loads is the only way to decide which belongs in your laundry routine. How Fabric Softener Works: Softness Comes from a Coating Softeners rely on cationic surfactants, positively charged molecules that cling to the negatively charged surface of wet fabric and leave behind a lubricating film of fatty acids or silicones. Think of it as a thin wax layer that survives the rinse cycle. That film delivers the obvious benefits: cotton and linen feel plush again instead of stiff, the coating conducts away the static that builds up in dry winter air, fragrance is trapped in microscopic capsules that burst as you move, and wrinkles relax enough to cut down on ironing. The trade-off starts when you consider what else that layer touches. The Hidden Costs: Towels, Sportswear, and Kids’ Sleepwear The waxy residue that makes a towel feel soft also makes it repel water. Softener on bath towels waterproofs the terry loops, so the fabric pushes water around your skin instead of absorbing it, and the only fix is stripping the buildup with vinegar and hot water. Athletic wear suffers even more: performance fabrics wick sweat through engineered micropores, and softener residue fills those pores, trapping sweat and bacteria inside the weave. The garment stops wicking, and the trapped bacteria create a musty perma-stink that detergent cannot reach in later washes, which is why sportswear makers universally warn against softeners. There is also a safety angle most people miss: children’s flame-resistant sleepwear loses some of its fire resistance when coated in softener residue, which is why the bottles carry warning labels about sleepwear and flame-resistant fabrics. Microfiber cleaning cloths lose their electrostatic grab and stop picking up dust, and the buildup eventually dulls bright colors and leaves whites looking grey or yellow while attracting extra lint. What Softener Does to Your Washing Machine The washer pays a hidden price. In the cool damp environment of the machine, softener fats and silicones congeal into a sludge that repair technicians call scrud, which coats the outer tub and drain lines and becomes a breeding ground for mold and mildew. It can confuse sensors, restrict the drain pump, and leave black flakes on your next load, and front-loading machines are the most vulnerable. If your laundry room smells sour no matter what you wash, softener buildup is a prime suspect. Using softener means committing to a much more rigorous machine-cleaning schedule to keep that biology in check. Sensitive Skin and the Environment Softener fragrances and preservatives are among the leading triggers of contact dermatitis, and for people with eczema, the residue left on clothing can mean itching and rashes on the very garments meant to feel luxurious. Environmentally, many formulas rely on quaternary ammonium compounds that break down slowly and can harm aquatic life once they reach waterways, while single-use dryer sheets add non-recyclable polyester waste to landfills. Whatever you choose for your laundry, follow label directions and keep products stored safely out of reach, since the Government of Canada stresses that household chemical products need careful handling and storage. What Vinegar Does in the Rinse Cycle White distilled vinegar is the opposite philosophy. Its mild acidity strips away detergent residue and the mineral deposits left by hard water, relaxing fibers back to their natural softness without adding any coating. Towels rinsed with vinegar stay thirsty, sportswear keeps its wicking pores open, and the acetic acid smell evaporates completely as clothes dry, so nothing lingers on the fabric. Vinegar will not deliver the slippery plushness or perfume of commercial softener, but it restores fabric the way the manufacturer intended. In the dryer, wool dryer balls complete the natural routine: the felted balls bounce between garments, physically softening fibers and separating loads for better airflow, which shortens drying time and cuts static with no chemicals at all, and they last for years. Which Load Gets What: A Simple Laundry Strategy The smartest approach is to stop treating softener as an every-load default and match the product to the fabric: Never use softener on towels, microfiber cloths, or any performance or athletic wear. Skip it on children’s sleepwear and anything labeled flame-resistant. Use vinegar in the rinse cycle for towels, sportswear, and everyday cottons. Reserve softener for occasional loads of sheets, blankets, or casual clothing where you value the feel and scent. Laundry load Best choice Why Bath towels Vinegar rinse Keeps terry loops absorbent Athletic and performance wear Vinegar rinse Keeps wicking pores open, prevents perma-stink Microfiber cleaning cloths Vinegar rinse or nothing Preserves electrostatic dust pickup Kids’ sleepwear No softener ever Protects flame resistance Cotton sheets and casual clothes Softener occasionally Softness and scent, low functional cost As Health Canada’s household products guidance explains, even everyday laundry items deserve a look at their risks, so read your softener and detergent labels and match each product to the load. Frequently Asked Questions Does vinegar really make clothes soft? Yes, in a different way than softener. The mild acid strips detergent and mineral buildup that makes fibers stiff, so fabric returns to its natural texture. It will not feel as slippery as a softener-coated garment, but towels stay absorbent and the vinegar smell disappears once the load is dry. Why does my washing machine smell even though I use softener? Softener residue congeals in the tub and drain lines into a sludge called scrud, which breeds mold and mildew, especially in front-loaders. Switch to vinegar rinses for most loads, and run

Fabric Softener vs. Vinegar: Which is Better for Your Laundry? Read More »

Sticker Removal

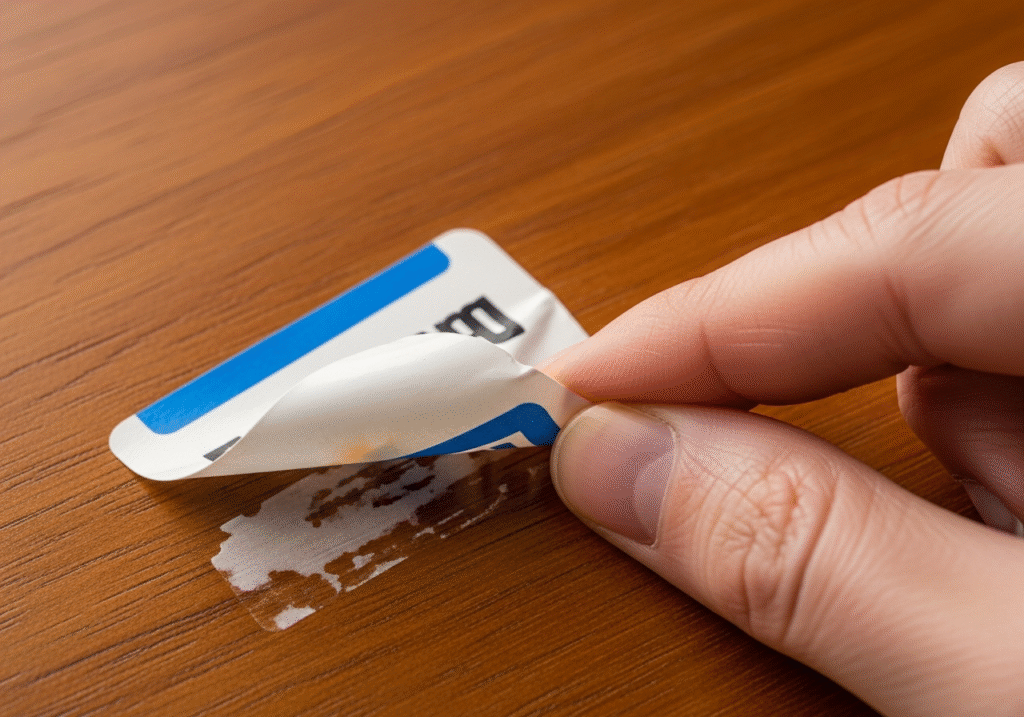
Sticker Removal: 5 Expert Tips For Removing Stickers From Different Types of Surfaces

Sticker Removal: 5 Expert Tips for Every Type of Surface Nothing kills the joy of a new purchase like the price tag glued to its face. Peel it and you get one of two disasters: the paper tears and leaves a fuzzy white layer, or the sticker comes off but deposits gummy residue that turns grey within days. Adhesives are polymers that bond to a surface, so the winning method softens, dissolves, or lifts that bond without harming what sits underneath. Match the technique to the material and any sticker surrenders without a scratch. Assemble your sticker removal kit: Hair dryer for warming labels on glass, ceramic, metal, and car paint. Cooking oil or isopropyl alcohol for dissolving gummy adhesive. Plastic scraper or plastic razor blades for lifting laminated labels. White vinegar for sun-baked paper labels and price tags. Duct tape and a rubber eraser for delicate surfaces like paper and shoe soles. Tip 1: Start with Heat on Glass, Ceramic, and Metal Resist clawing at the corner: picking separates the paper from the adhesive and leaves exposed glue that is harder to shift. Instead, warm the sticker with a hair dryer on medium heat for about a minute. Heat softens the adhesive polymer so it lets go of the surface while clinging to the label backing; lift a corner slowly and the sticker often peels away as one clean sheet. Heat is the safest first move on hard non-porous items like glass and ceramic, and essential for car decals and laptop lids where solvents could damage paint or electronics. Tip 2: Dissolve Stubborn Glue with Oil or Alcohol Most sticker glues are lipid-based, so cooking oil or even peanut butter loosens them: like dissolves like. Score the sticker so oil penetrates, apply a layer, and wait about twenty minutes; the fats dilute the adhesive until it slides off, and soap and water remove the film. Oil is safe for glass and plastics, but never on unsealed wood or porous stone, which soak it up and stain. Isopropyl alcohol breaks adhesive bonds that oil cannot touch and evaporates instantly, so it is safe for electronics when applied to a cloth rather than sprayed. Alcohol is a paint thinner, though, and can strip painted or varnished finishes, so spot-test in a hidden corner first. Tip 3: Bring Out a Plastic Scraper for Laminated Labels Waterproof plastic-coated labels shrug off oil, water, and vinegar from the top, so attack from the edges. A plastic razor blade or scraper is the right tool: harder than the adhesive but softer than the surface beneath, it slips under the rim and lifts without gouging. Metal blades scratch glass and dig into plastic; they belong only on wet glass at a shallow angle, with a steady hand. For many stubborn labels on jars or new appliances, a set of plastic scrapers pays for itself. Tip 4: Use Vinegar, Acetone, and Tape for the Tough Cases White vinegar: soak a paper towel and lay it over the sticker for thirty minutes to rehydrate the paper and soften sun-baked glue, ideal for price tags on glassware and mugs. Acetone, usually sold as nail polish remover, dissolves almost any adhesive in seconds, but treat it as the nuclear option: it melts plastic on contact, so keep it off storage bins and eyeglass frames. Use it only on glass, unpainted metal, or unfinished ceramic. For the thin dark smear on delicate items like book covers, skip liquids: wrap duct tape around your fingers, sticky side out, and dab until the residue transfers off. Tip 5: Match Your Method to Wood, Shoe Soles, and Car Paint On varnished wood, heat can damage the finish, oil stains the grain, alcohol dissolves lacquer, and water raises the grain, so use mineral spirits or a furniture cleaner on a soft cloth; on raw unfinished wood, fine-grit sandpaper may be the only stain-free option. On new shoe soles, skip moisture and roll residue off with a rubber eraser or crepe block: friction balls the adhesive up for easy brushing. On car paint, never touch the clear coat with a razor blade: soften dealership decals with a hair dryer, lift with a plastic tool, and treat residue with a clay bar or an automotive adhesive remover, since household solvents permanently cloud the finish. Sticker Removal Method at a Glance Surface Best method Never use Glass, ceramic, metal Heat, then oil or vinegar soak Metal scrapers on dry glass Plastic and electronics Hair dryer, isopropyl alcohol on a cloth Acetone, which melts plastic Varnished wood Mineral spirits or furniture cleaner Oil, heat, or alcohol on the finish Shoe soles and leather Rubber eraser or crepe block Liquids that stain the upper Car paint Hair dryer, plastic tool, clay bar Razor blades and nail polish remover Paper and book covers Duct tape dabbing Any liquid or heat What about Ghost Marks After the Sticker Is Gone? That ghost is usually sun fade: the area under the sticker stayed protected while the surrounding surface yellowed, and on wood or fabric the difference is often permanent. On glass or plastic, the adhesive may have reacted with the material, and a mild polishing compound or baking soda paste can blend the mark away. Whenever you work with solvents or removers, follow the Government of Canada’s guidance on using household chemicals safely, and in a small room or closed garage, ventilate and take fresh-air breaks the way Health Canada advises for solvent-based products. Frequently Asked Questions What is the safest way to remove a sticker from a laptop? Warm the sticker with a hair dryer for a minute, lift an edge slowly, then rub residue gently with an alcohol-dampened cloth. Never spray liquid on the device or use acetone, which melts plastic shells. How do I get sticker residue off glass without scratching it? Heat the sticker, remove what you can, and soak residue with cooking oil or hot vinegar for twenty to thirty minutes. A plastic scraper lifts what remains,

Sticker Removal: 5 Expert Tips For Removing Stickers From Different Types of Surfaces Read More »

tidying the bedroom in 5 minutes

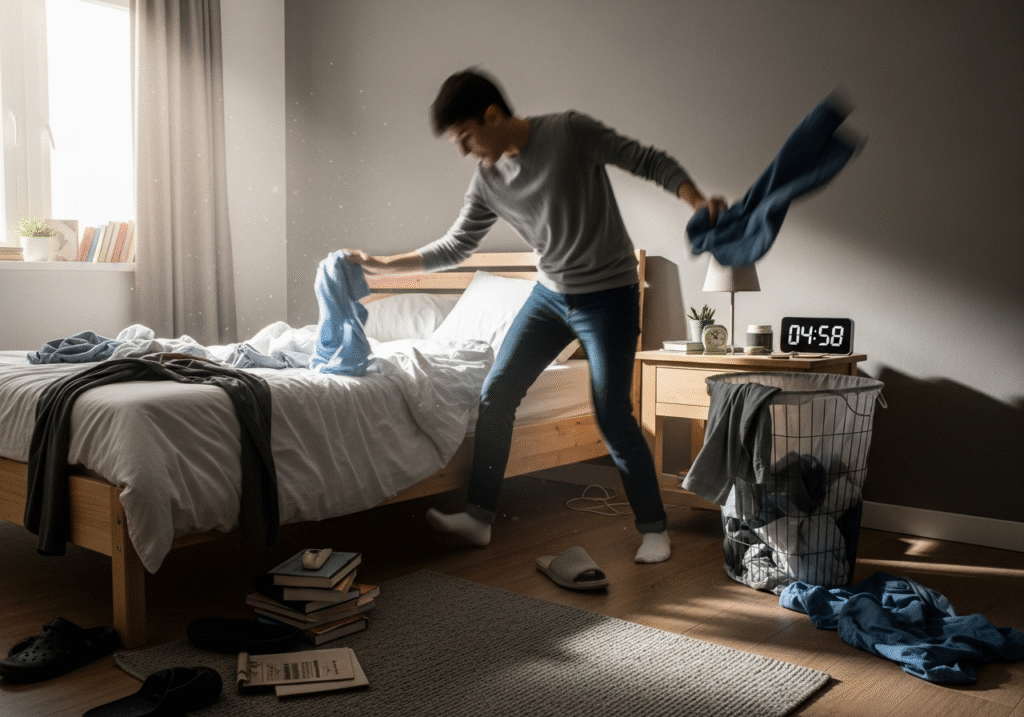
How to Clean Your Room in 5 Minutes: A Step-by-Step Routine for Busy Mornings

Why a Five-Minute Room Clean Works Better Than You Think A messy bedroom is often the first casualty of a busy week. When deadlines pile up and energy runs low, clothes cover the chair, mugs crowd the nightstand, and the bed stays tangled. That visual clutter keeps the brain in work mode, so the room meant for rest starts to feel like unfinished business. Most people assume fixing it demands an entire afternoon of sorting and scrubbing, so they postpone the job until the mess looks impossible. In reality, a focused five-minute reset can turn the room around. It is not a deep clean; it is a quick rescue that clears the floor, calms the surfaces, and restores a feeling of control before you rush out the door. What You Need Before the Timer Starts Speed depends on preparation. Decide in advance where every type of clutter will go so you never pause to make decisions mid-clean. This is not the moment for perfect organization; it is a rescue mission with three simple tools: A large trash bag for wrappers, receipts, empty bottles, and anything broken. A laundry hamper, emptied before you begin, for every piece of clothing sitting on the floor. A relocation basket, any bin or box, for objects that belong in other rooms. Keep the three vessels within reach. The instant you leave the room to return a mug to the kitchen, the plan falls apart: the dishwasher, the television, or a buzzing phone will pull you off course. The Five-Minute Routine, Minute by Minute Follow the order below and resist the urge to skip ahead. Each step prepares the next, and the room looks dramatically different by the end. Minute Task Goal 1 Collect trash Remove everything that signals neglect 2-3 Clear floor textiles into the hamper Expose the floor completely 4 Make the bed Anchor the room in order 5 Tidy surfaces, then open the curtains Leave only essentials in view Minute 1: Trash Only Garbage is the easiest category because nothing sentimental is attached to it. Scan for snack wrappers, used tissues, price tags, empty water bottles, and receipts, and break down stray cardboard boxes on the spot. Sixty seconds of ruthless discarding instantly lifts the room’s hygiene and removes the items that suggest neglect. Minutes 2-3: Attack the Floordrobe The mound of half-worn clothes on the rug is the biggest visual offender in any bedroom. There is no time to sniff shirts and judge freshness; anything resting on the floor goes into the hamper, no exceptions. Seeing the carpet again makes the space feel larger and clears the obstacle course underfoot. If a pile of clean clothes is waiting to be put away, fold it once and set it neatly on the chair or the foot of the bed. A tidy stack reads as deliberate, while a sprawled pile reads as chaos. Minute 4: Smooth the Bed The bed is the focal point of the room, and a made bed signals that everything else is under control. You do not need hospital corners: pull the duvet up over the pillows, smooth out the wrinkles, and prop the pillows upright. In about forty-five seconds you create a large, calm surface that balances the busyness around it. Minute 5: Surface Triage and Fresh Air Nightstands, dressers, and desks attract wandering clutter: coffee mugs that drifted in from the kitchen, mail that never made it out of the hallway, tools that wandered in from the garage. Sweep every foreign object into the relocation basket and set it outside the door to be sorted later. Leave only the essentials: a lamp, a book, a clock. Finish by opening the curtains or blinds; natural light and moving air make a room feel cleaner than any spray can. Why Short Resets Beat Weekend Marathons Brief, frequent resets outperform occasional marathons because they stop the buildup before it starts. A daily sweep keeps the bedroom liveable, lowers the stress of sleeping beside a to-do list, and frees your weekend for the jobs that truly matter. It is the same logic behind our regular maid service: steady upkeep beats heroic catch-up sessions. When the whole home needs attention, our team covers everything from bathrooms to baseboards. Frequently Asked Questions How do I clean my room in 5 minutes when it is very messy? Work in the fixed order: trash first, then floor clothes, then the bed, then surfaces. Do not reorganize, do not leave the room, and do not aim for perfect decisions. Speed and visible results are the only goals. What should I do with clothes that are not dirty? Anything that sat on the floor goes in the hamper to keep the room honest. Clean clothes still waiting for a home can be folded once and stacked on a chair or the foot of the bed until you have time to hang them. Can a 5-minute clean replace a deep clean? No. The quick reset handles visible clutter, while a deep clean removes dust, allergens, and grime from carpets, mattresses, and hidden surfaces. The CDC notes that regular cleaning with soap or detergent removes most germs from surfaces, while disinfection is only needed when someone in the home is sick. How often should I reset my room? Daily is best, ideally first thing in the morning or just before bed. A one-minute nightly sweep of surfaces and floors keeps the room from ever reaching the point where five minutes cannot fix it. When Five Minutes Is Not Enough The five-minute reset has honest limits. It will not lift the dust from a ceiling fan, pull allergens out of a mattress, or refresh window tracks; those jobs take time and proper tools. Damp, poorly aired rooms also invite dust mites and mould, which Health Canada links to moisture problems, so periodic vacuuming, washing, and airing still matter. When the grime has settled in and a quick tidy no longer feels like enough, book a deep cleaning service from Toronto

How to Clean Your Room in 5 Minutes: A Step-by-Step Routine for Busy Mornings Read More »

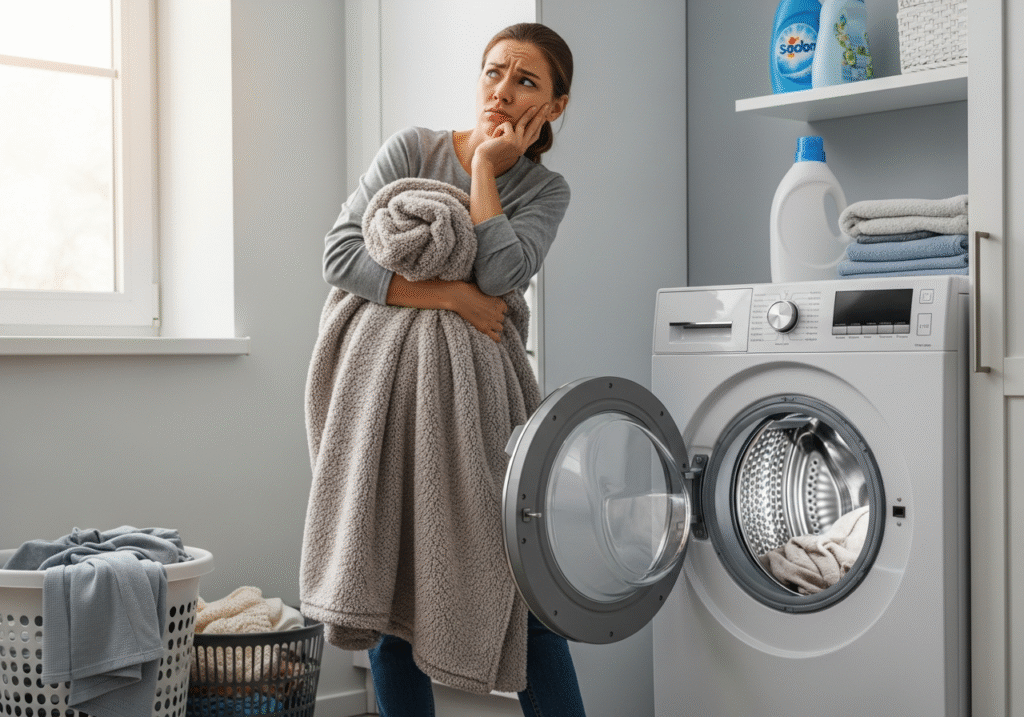
Woman unsure whether to put a blanket in the washing machine.

Blankets Washing: 9 Laundry Mistakes That Destroy Blanket Fibers

Why Blanket Care Deserves More Than a Quick Spin Blankets are the most personal textiles in the house: we sleep under them, drag them to the sofa, and share them with pets. Sheets get washed weekly, yet blankets drift into neglect, collecting dead skin, body oils, dust mites, and pet dander. That buildup mats the fibers, flattens the loft, and cuts warmth. Restoring softness takes a method matched to the material, because treating a wool heirloom like a fleece throw is a recipe for ruin. The 9 Laundry Mistakes That Destroy Blanket Fibers Drying fleece on high heat, which melts the plastic fiber tips into a rough, scratchy texture. Adding fabric softener to fleece, which coats the fibers in waxy buildup that traps dirt. Washing wool with heat and agitation, which felts the fiber scales and shrinks the blanket. Wringing or hanging wet wool, which breaks the fibers or stretches the shape. Drying down without dryer balls, leaving wet clumps that mildew inside the fill. Washing a heavy weighted blanket in a standard machine, risking motor damage. Dry cleaning electric blankets, since solvents can dissolve the wire insulation. Blasting cotton on high heat, which can shrink a king-size blanket to queen size. Storing any blanket damp or sealed in plastic, an open invitation to mould. Fleece and Microfiber: Cold Water, No Softener, No High Heat Most everyday throws are synthetic fleece or microfiber: durable and warm, but magnets for hair, lint, and static. The two classic mistakes are heat and fabric softener. Fleece is essentially plastic; a hot dryer slightly melts and fuses the fiber tips, leaving a rough feel that never recovers. Fabric softener lays a waxy film over the fibers that traps soil and reduces breathability. Wash in cold water with a mild detergent and run an extra rinse so no soap residue remains. Wool and Down: Respect the Fill Wool is a protein fiber, and its surface carries tiny overlapping scales, much like human hair. It shrugs off odours naturally, so it needs fewer washes, but heat, moisture, and churning lock those scales together in a process called felting. One cycle can turn a draping blanket into a stiff mat. Use the wool cycle or hand wash in a tub with a lanolin-based detergent. Never wring: press out the water, roll the blanket in heavy towels, and lay it flat to dry, since hanging wet wool stretches it out of shape. Down comforters and duvet inserts fail for the opposite reason: too little agitation while drying. Wet down collapses into dense clumps, and if the blanket is not tumbled thoroughly it develops mildew inside the fill. Use a down detergent, then dry with tennis balls or wool dryer balls so the clumps get pounded apart. Skipping that step leaves hard lumps and a flat, cold blanket. Weighted and Electric Blankets: Respect the Hardware Weighted blankets are filled with glass beads or plastic pellets stitched into pockets, and a typical adult version weighs fifteen to twenty pounds. Running one through a standard residential washer can throw the drum off balance or strain the motor, so anything over twenty pounds belongs in a commercial laundromat machine. Plastic pellets survive washing but melt in a hot dryer, so air dry instead. If the inner lining rips, escaping beads can damage the machine. Electric blankets are washable on most modern models once the control cord is detached, because the wiring is insulated against water but not against the twisting of a spin cycle. Use the gentlest cycle and warm water, and never dry clean them: the solvents can dissolve the insulation and create a fire hazard. Dry on low, finish by air drying, and confirm the blanket is fully dry before plugging it in. Cotton, Stains, and Storage: The Quiet Killers Cotton blankets and quilts seem low maintenance until they shrink. Wet cotton fibers swell, and high-heat drying locks in the contraction, which is how a king-size blanket becomes a queen-size one. Wash cotton in cool or warm water, dry on low until slightly damp, and air dry the rest of the way. A soaked quilt is heavy, so support its weight when lifting it from the washer. For stains, blot instead of rubbing, since a spill on a thick blanket soaks in rather than passing through. An enzyme cleaner handles organic stains like sweat by digesting the proteins ordinary soap cannot. Storage is where many blankets die: fold them only when bone dry, use breathable cotton bags rather than airtight plastic, and skip mothballs in favour of cedar blocks or lavender sachets. The CDC explains that mould grows on fabric wherever moisture lingers, and Health Canada points to uncontrolled humidity as the main driver of mould and dust mites in the home. Quick Reference Card by Blanket Material Material Wash Dry Key warning Fleece Cold water Low heat only Heat fuses tips; skip softener Wool Cold, wool cycle Lay flat, never wrung Heat and churning felt the blanket Down Warm water Tumble with dryer balls Damp clumps mildew inside the fill Cotton Cool or warm Low, finish air dried Hot drying shrinks king to queen Weighted Cold, if the machine fits Air dry only Over 20 lb needs a commercial washer Frequently Asked Questions About Washing Blankets How often should I wash my blankets? A top sheet protects the bed blanket from skin contact, so it can go several months between washes. Living room throws touch skin, hair, and pets directly, so wash those monthly. Can I put a weighted blanket in my washing machine? Only if the blanket’s weight fits the machine’s rated capacity, usually fifteen to twenty pounds or less at home. Heavier blankets need commercial machines, and the fill must be air dried. Why does my fleece blanket feel rough after drying? High heat fused the synthetic fiber tips. The damage is permanent, so switch to low or no heat and wash in cold water with an extra rinse from now on. Do wool blankets really

Blankets Washing: 9 Laundry Mistakes That Destroy Blanket Fibers Read More »

Woman making a to-do list for January after the holiday season.

The January Reset: 8 Essential Tasks to Recover from the Holidays

The January Reset: 8 Essential Tasks to Recover From the Holidays January in Canada is a stark transition: festive lights down, hosting adrenaline gone, and the coldest, darkest stretch of the year arrived. Your home shifts from hosting mode into defense mode, because dry air, road salt, and wasted heat all attack at once. This reset list is a strategic plan for your home’s most vulnerable season, not just a cleaning schedule. 1. Take Down the Tree and Recover From the Holidays Takedown is the first priority, beyond boxing ornaments. By the first week of January, a real tree is usually a dehydrated fire hazard, dropping debris that embeds in carpets and scratches hardwood. Bag the tree before hauling it out, then vacuum with the hose attachment, never the beater bar, which jams on needles. Pull needles out of baseboards, vents, and deep rug pile, label boxes by room as you pack, and toss any light string that failed this year. 2. Win the War on Road Salt January is when salting trucks are busiest, and your entryway floors suffer most. The white crust on boots is calcium chloride or sodium chloride, highly alkaline and abrasive: on hardwood it eats through the polyurethane finish and stains the fibers grey, and on tile it degrades the grout. Wet mopping just spreads the brine, so neutralize it with one cup of vinegar per gallon of warm water, whose acidity breaks the salt bonds. Rinse boot trays in a utility sink, and enforce a no-shoes-past-the-mat policy, your flooring’s best defense all month. 3. Manage Indoor Air Quality and Humidity The house is sealed tight and the furnace runs around the clock, circulating air that grows drier and dustier by the day. Ideal winter humidity sits between 30% and 40%: any lower, and hardwood shrinks and cracks while static pulls dust onto every surface; any higher, and condensation forms inside windows, inviting mold on the sills. Run a humidifier if needed but clean it weekly so it does not spray bacteria, and change the furnace filter, since a clogged one restricts airflow and recirculates allergens. Health Canada’s guidance on indoor air contaminants and health covers the topic in detail. 4. Cut the Dust: Coils, Fans, and Vents With the furnace blasting, convection piles dust onto door frames, fan blades, and refrigerator coils. Vacuum the coils: coated in dust, the fridge cannot shed heat, so the compressor runs longer, wasting energy and shortening its life. Bathroom fans matter too: ventilation is the only exit for shower moisture in a sealed house, and a grille clogged with fuzz traps humidity, inviting mildew on cold exterior walls. 5. Detox the Kitchen After December The kitchen carries the scars of December excess. Purge the refrigerator ruthlessly: bin anything past its date or looking questionable, then scrub the shelves in hot soapy water until every sticky residue is gone. If the oven skipped its pre-turkey scrub, avoid the high-heat self-clean: with sealed windows the fumes have nowhere to escape, so hand-scrub with a baking soda paste instead. Scrub the dishwasher filter too, since it processed a season of grease and gravy. 6. Check Safety Systems Carbon monoxide kills silently, and the danger peaks each winter as furnaces, water heaters, and gas stoves overwork behind sealed windows. Test every CO detector and smoke alarm now, and clear snow and ice off external vents, including the dryer duct and furnace exhaust; a blocked flue can push deadly CO back indoors. Finally, vacuum the dryer vent hose: dry air breeds static and lint ignites easily. 7. Refresh Winter Gear and Declutter One In, One Out The laundry room needs attention too, since coats, scarves, and mittens sponge up sweat, street grime, and bacteria yet rarely get washed. Launder down coats with tennis balls to re-fluff the fill, wash hats and scarves, and treat cuff salt stains with vinegar before the fibers are damaged. December also left a flood of new gifts, so apply the one-in-one-out rule: for every new sweater, donate an old one; for every new toy, take out a broken one. Clutter gathers dust and blocks heat flow, so take on one closet or drawer weekly. The January Reset Checklist Bag and remove the tree, then vacuum needles with the hose attachment. Neutralize entryway salt with a vinegar and water solution. Keep indoor humidity between 30% and 40%; clean the humidifier weekly. Vacuum fridge coils, bathroom fan grilles, and change the furnace filter. Purge the fridge and clean the oven with a baking soda paste. Test CO detectors and clear snow from exterior vents. Wash winter gear and treat salt stains quickly. Declutter with the one-in-one-out rule, one closet a week. January Home Risks at a Glance Threat Damage If Ignored Fast Fix Dry indoor air Shrinking hardwood, heavy static dust Humidifier, cleaned weekly, aiming for 30-40% Road salt Grey stains in finish, ruined grout Vinegar-water wash and no shoes past the mat Clogged furnace filter Overheating furnace, recirculated allergens Fresh filter early in the month Dusty fridge coils Longer compressor runs, wasted energy Vacuum coils at the back or bottom Blocked vents Carbon monoxide backing into the home Clear snow and ice; vacuum dryer hose lint Humid bathroom Mildew on cold walls Clean exhaust fan grille Frequently Asked Questions Why is 30-40% indoor humidity recommended in a Canadian winter? Below that range, hardwood shrinks and static electricity builds; above it, condensation forms on windows and mold can grow on sills. That band keeps both problems away. Can I vacuum pine needles with a regular upright vacuum? Not with a spinning brush running; the beater bar jams on needles and the motor can overheat. Switch to the hose attachment or a hard-floor setting instead. Is the oven self-clean cycle safe in January? In a tightly sealed winter home it is a poor choice, since the high-heat cycle releases fumes with nowhere to escape. Manual cleaning with a baking soda paste protects your indoor air. How do I remove road

The January Reset: 8 Essential Tasks to Recover from the Holidays Read More »

Enzyme Cleaner

5 Common Mistakes That Render Your Enzyme Cleaner Useless

In the world of cleaning, there is a constant arms race between the mess and the method. For decades, the dominant strategy has been chemical warfare: using harsh solvents, high-alkaline degreasers, and corrosive bleaches to burn, dissolve, or bleach stains into submission. While these methods are effective for many surface-level issues, they often fail when it comes to the most persistent and unpleasant biological messes. The smell of pet urine that returns on a humid day, the grime in the grout lines that never seems to whiten, or the lingering odor in a drain are all symptoms of organic matter that standard chemicals cannot remove. The solution to these problems is not found in a stronger acid or a harsher solvent, but in biology. Enzyme cleaners represent a fundamental shift in how we approach hygiene, utilizing the power of nature to digest dirt rather than simply wiping it away. How Does it Work? To understand why enzyme cleaners are unique, one must understand what they are composed of. These cleaners are bio-enzymatic formulations. They contain beneficial bacteria along with enzymes. The bacteria are the workers, and the enzymes are the tools they produce. When you spray an enzyme cleaner on a stain, the bacteria remain dormant until they hit a food source-the stain. Once activated, they produce enzymes to break down complex molecules into smaller, simpler pieces. For example, a protease enzyme breaks down proteins (like blood or meat), a lipase enzyme breaks down fats and oils (grease), and an amylase enzyme breaks down starches. The bacteria then consume these broken-down particles, converting them into carbon dioxide and water. Essentially, the cleaner literally eats the stain until it is gone. Animal Urine The most famous and arguably most critical application for enzyme cleaners is in the realm of pet ownership. Anyone who has house-trained a puppy or cared for an aging cat knows the nightmare of urine stains. Urine is composed of urea, urochrome, and uric acid. Standard detergents and water can wash away the urea and urochrome, which removes the sticky texture and the yellow color. However, uric acid forms crystals that are nonsoluble in water and bond tightly to surfaces like carpet fibers, wood, and concrete. Traditional cleaners might mask the smell temporarily with perfume, but they leave the uric acid crystals behind. When the humidity rises or the area gets wet again, these crystals re-hydrate and release strong ammonia gas, bringing the smell back. This signals to the pet that this spot is a “bathroom,” encouraging repeat offenses. Enzyme cleaners specifically formulated with uricase are the only way to break down these crystals permanently. The enzymes digest the uric acid structure, eliminating the source of the odor completely rather than just covering it up. Beyond pet messes, enzyme cleaners are the secret weapon for bathrooms. The pink or orange slime that accumulates in shower corners and around drains is a biofilm-a colony of bacteria that feeds on soap scum and body oils. Because grout is porous, this biofilm can root itself deep into the cement, making it reachable only by scrubbing until your knuckles are raw. Enzyme cleaners work differently. When applied to grout and allowed to sit, the enzymes seep into the pores. They break down the protein and fat structures of the soap scum and body oils that bind the dirt to the tile. Over time, this biological action loosens the grime so it can be easily rinsed away. It is a slower process than using bleach, but it is far more effective at removing the root cause of the discoloration without damaging the grout sealant or etching the tile. Grease The kitchen is another arena where enzymes shine, particularly in the battle against grease. Grease traps and kitchen drains are notoriously difficult to maintain because fat hardens as it cools, coating pipes and causing slow drainage. Chemical drain openers rely on heat and caustic reactions to burn a hole through the clog, which can damage old plumbing and is dangerous to handle. Enzyme drain maintainers are a safer, preventative alternative. When poured down the drain, the lipase enzymes coat the inside of the pipe and slowly digest the organic buildup. They turn the hard grease into water-soluble liquid that flushes away. While they won’t clear a solid hair clog instantly like a snake would, regular use keeps the pipes flowing freely and eliminates the rotting food smell that often rises from the sink. Laundry is perhaps the most undervalued use case for these biological cleaners. Many organic stains-blood, sweat, grass, and baby formula-are protein-based. Hot water and standard detergent can actually “cook” these proteins, setting the stain into the fabric permanently. Cold water and an enzyme soak are the antidote. The enzymes locate the protein strands woven into the fabric and snip the chemical bonds holding them to the cloth. This is why many high-end laundry detergents now boast “bio-active” ingredients. For athletic wear that retains the smell of sweat even after washing, an enzyme soak is often the only way to remove the body oils trapped in the tight synthetic weave of modern performance fabrics. Dwell Time However, the effectiveness of enzyme cleaners comes with a specific set of rules that differs from traditional cleaning. The most important variable is time. In the cleaning industry, this is known as “dwell time.” Unlike a spray-and-wipe glass cleaner, enzymes need time to eat. If you spray a urine stain and wipe it up ten seconds later, you have accomplished nothing. The bacteria need hours, sometimes even days, to fully digest a deep stain. For a carpet stain, the instruction is often to saturate the area-soaking it all the way down to the pad-and then cover it with a damp towel to keep the area moist. Enzymes stop working if they dry out. The bacteria need a moist environment to survive and reproduce. By keeping the stain wet and covered, you allow the colony to expand and consume the waste until the food source is

5 Common Mistakes That Render Your Enzyme Cleaner Useless Read More »

flu season

Flu Season: Is Your “Clean” Home Making You Sick? The Hidden Germs You Missed

Why Your “Clean” Home Can Still Spread the Flu Flu season in Canada peaks in December and January, when homes are sealed tight against the cold and filled with guests. Influenza viruses travel in droplets from coughs and sneezes, but they also ride on hands and settle on surfaces, where they can survive on hard materials like stainless steel and plastic for up to 48 hours. A home that looks spotless can still be a transmission hub, because the germs are hiding on the objects everyone touches and almost no one sanitizes. Protecting your household means shifting from cosmetic cleaning to targeted, health-focused cleaning. Clean First, Then Disinfect: the Order Matters Cleaning and disinfecting are two different steps, and skipping the first one makes the second fail. Cleaning physically removes dirt, dust, and germs from a surface using soap or detergent and water. Disinfecting then kills the germs that remain, using a registered chemical product. If you spray disinfectant onto a visibly dirty surface, the organic soil shields the germs and inactivates the product, so the process wastes time and leaves pathogens behind. The CDC home cleaning guidance recommends always cleaning surfaces before disinfecting them, and doing both steps more often during cold and flu season. Respect the Dwell Time The most common mistake is wiping disinfectant off too soon. Registered disinfectants need to stay visibly wet on the surface for a set contact time, usually three to ten minutes depending on the product, before they actually kill viruses. Spray and immediately wipe removes the product before it works. Read the label, apply enough product to keep the surface wet for the full dwell time, and let it air dry. This one habit separates real disinfecting from just moving germs around. The Hidden Germ Hotspots Most Homes Miss We all wipe kitchen counters, but the flu spreads through the objects fingers touch constantly. The handle of the refrigerator, the buttons on the microwave, the flush lever in the bathroom, the light switch plate, and the remote control all pass from hand to hand dozens of times a day, and they rarely see a disinfectant. Door hardware deserves special attention in winter: the entry doorknob, the deadbolt, the storm door handle, and any garage keypad or smart lock are touched by every person entering the house, often right after touching outdoor surfaces. These surfaces turn a family home into a germ relay during a busy holiday week. Room Hidden hotspots Flu-season routine Entryway Doorknobs, deadbolt, keypad, handrails Wipe with disinfectant daily Kitchen Fridge and oven handles, coffee maker, salt and pepper shakers Clean, then disinfect twice weekly Living room Remote controls, game controllers, light switches Sanitize weekly with alcohol wipes Bathroom Flush lever, faucet handles, toothbrush holder Disinfect every day during peak season Home office Keyboard, mouse, phone screen Wipe weekly, never drip liquid inside Electronics, Towels, and the Germs You Carry Daily Smartphones are the ultimate high-touch objects: they go from kitchen counter to bathroom to bed, and they are pressed against the face dozens of times a day. Most modern phone screens handle gentle disinfection well; wipes with 70 percent isopropyl alcohol are generally safe for touchscreens, while bleach, abrasive cleaners, and dripping liquids are not. Apply the wipe, let the surface dry completely, and avoid pooling moisture in ports and speakers. Keyboards and mice need the same attention, especially in households where several people share one workspace. Hand towels are another overlooked link in the chain. A shared bathroom towel can be touched by every member of a household, plus guests, many times a day during the December party season. During flu season, swap bathroom hand towels daily, wash them in hot water, and consider paper towels for gatherings so every guest dries their hands on a fresh sheet. The CDC handwashing guidance reminds us that clean hands stop the spread, but only if the towel that dries them is not itself a shared surface. Pillowcases and bedding deserve more frequent washing too, since flu sufferers shed virus onto linens while they sleep. Air, Humidity, and the Bigger Picture Viruses do not only wait on surfaces. Flu droplets hang in the air and attach to dust particles, which is why heating vents, ceiling fans, and dusty baseboards deserve a vacuum pass before and during flu season. Keeping indoor humidity around 40 to 60 percent also helps: flu viruses survive longer and transmit more easily in dry air, and comfortably moist air keeps the nasal passages that trap viruses working properly. A humidifier, regular ventilation, and thorough dusting work alongside surface disinfection to lower the viral load. Build a Daily Germ-Breaking Routine Disinfect entry door hardware and light switches every morning Wipe down kitchen appliance handles and counter zones after each meal Sanitize the flush lever, faucet handles, and toothbrush holder daily Give remotes, phones, and keyboards an alcohol wipe weekly Switch to fresh hand towels daily or paper towels when guests visit Vacuum vents, baseboards, and under furniture to remove dust that carries particles Consistency beats intensity. A two-minute pass over the high-touch map every day does more to protect a family than a marathon cleaning session once a month, because germs are reintroduced constantly by the people who live there. When someone in the house is already sick, add daily disinfection of everything they touch, wash your own hands after contact, and keep their linens and towels separate until they recover. Frequently Asked Questions About Flu Season Germs What is the difference between cleaning and disinfecting? Cleaning removes dirt and some germs with soap and water; disinfecting uses chemicals to kill the germs that remain. You need both, in that order, because dirt stops disinfectants from working. How long should disinfectant stay on a surface? Read the label: most registered disinfectants need to stay visibly wet for three to ten minutes to kill viruses. Wiping them off early defeats the purpose, so apply enough product and let it air dry. Is it safe to clean my

Flu Season: Is Your “Clean” Home Making You Sick? The Hidden Germs You Missed Read More »