Laundry

Dangerous to Your Health: 5 Common Products That are Dangerous For Your Daily Life

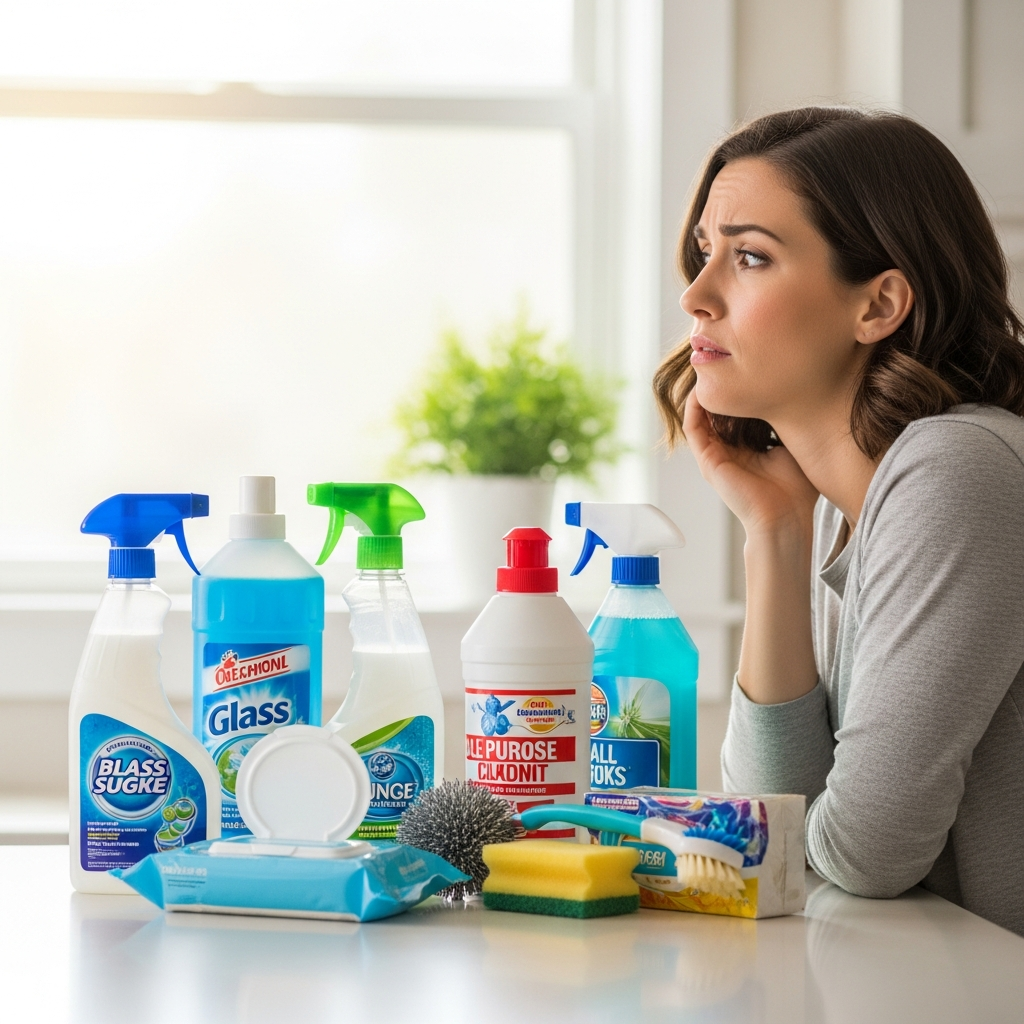
Are Everyday Cleaning Products Dangerous to Your Health? Your home feels like the safe place, sealed off from city pollution. Inside many Toronto houses the opposite is true: the sprays under the sink can make indoor air more toxic than the air outside. Health Canada warns that household chemical products can cause poisonings, burns, fires and explosions when handled unsafely. A strong chemical smell is not proof of clean. Here is what five everyday products actually do, and the simpler habits that keep homes safe. Five Common Products Dangerous to Your Health 1. Bleach Bleach, the sodium hypochlorite default against mold, mildew and bathroom grime, is corrosive enough to burn skin and eyes on contact, and it is highly volatile. In a closed shower stall or small bathroom, its fumes react with organic matter and form chlorinated volatile organic compounds that immediately inflame the mucous membranes of the throat and lungs, especially dangerous with respiratory conditions. The deadliest habit is mixing: bleach plus ammonia, which lives in urine and many glass cleaners, generates chloramine gas, and bleach plus an acidic cleaner releases chlorine gas. Both can lead to hospitalization or worse. 2. Ammonia Glass and Window Cleaners Ammonia is why glass cleaner dries fast without streaks, and why it demands respect. It hunts moisture, so inhaled ammonia attacks the eyes, throat and lungs directly. High concentrations cause chemical burns in the respiratory tract and aggravate chronic conditions like asthma. Trigger-sprays aerosolize it into a fine mist that lingers in your breathing zone. That sharp odor is a warning signal, not evidence the glass needs you. 3. Fragrance, Air Fresheners and Fabric Deodorizers The word fragrance, or parfum, on a label is a regulatory loophole: scents count as trade secrets, so the hundreds of chemicals behind the scent are never listed. The cocktail commonly includes phthalates, added to make scents linger, which are known endocrine disruptors that mimic hormones and can interfere with reproductive development over long-term exposure. Air fresheners and fabric sprays do not clean anything. Some release agents that deaden your nerves or coat nasal passages with oily film; others bury odors under volatile organic compounds tied to headaches, dizziness and fatigue. Aerosol propellants add flammable lung irritants. The Government of Canada’s household products safety hub lists hazards in everyday cleaning items. 4. Oven Cleaners and Drain Openers Oven cleaners are built on lye, or sodium hydroxide, which strips baked-on grease by turning it into soap. That same reaction destroys living tissue: splashes cause severe burns and permanent blindness. Spraying a warm oven vaporizes the lye into a toxic cloud that fills the kitchen. Drain openers burn through hair and grease clogs with concentrated sulfuric acid or lye, generating intense heat that can damage old pipes; if a plumber later snakes a surviving clog, the splash-back is caustic. 5. Disinfectant Wipes and Sprays Quaternary ammonium compounds, the quats behind most disinfectant wipes and sprays, kill germs well, but they are powerful lung irritants. Growing evidence suggests frequent exposure can cause asthma even in otherwise healthy users. Quats also leave a residue, and a child who touches a wiped table then sucks their fingers is ingesting a pesticide. Blanketing whole rooms instead of high-touch points adds chemical load and feeds antibiotic resistance. Two Traps Behind Friendly Labels Carpet cleaners and upholstery shampoos bring their own risks. Many spot removers rely on perchloroethylene, a dry-cleaning solvent that is a neurotoxin and a classified carcinogen, and across a large floor it keeps off-gassing for days or weeks. Naphthalene, the mothball chemical in some carpet cleaners, releases fumes that can cause confusion, nausea and liver damage. Fibers trap all of it and release it back with every step and sit. Green labels deserve the same skepticism. The word natural is largely unregulated in cleaning products, and a green bottle can still carry allergens like limonene, a citrus oil that reacts with ozone in your air to form formaldehyde, a known carcinogen. Concentrated plant-based detergents can still irritate skin and lungs. Read the ingredient list, not the leaf on the label. The Real Risk Is the Daily Total Toxicologists call the running tally your body burden. One spray does little; a weekly ritual of glass cleaner, floor polish, counter spray, toilet cleaner and air freshener becomes a chemical soup the body must filter. When that load stays high, chronic inflammation, skin conditions and respiratory sensitivity can follow. Children and pets pay the most because smaller bodies and faster metabolisms process the same exposure less efficiently. Safer Swaps That Still Clean The most effective cleaner is usually the simplest: mechanical action. Removing dirt beats masking it. Instead of Reach for Why it works Everyday surface sprays Microfiber cloth, water and real scrubbing Fibers trap dirt and pathogens, removing more bacteria than a light chemical wipe, with no residue left behind Bleach on general surfaces Hydrogen peroxide Disinfects without chlorine fumes or toxic residue Commercial limescale removers White vinegar A mild acid that dissolves mineral deposits and soap scum without off-gassing Scouring powders Baking soda Gentle physical abrasion for sinks, tubs and baked-on messes Ventilation and Protection: The Free Upgrades Even safe cleaners need discipline. Health Canada’s page on using household chemicals safely covers the buying, use and storage rules that prevent accidents, and these habits carry it into daily practice: Ventilate. Never clean a sealed room: open a window and run the exhaust fan, especially in small bathrooms where fume levels spike fastest. Protect your skin. It is the body’s largest organ and absorbs chemicals readily, so glove up around degreasers and solvents and wear a mask for concentrated products. Remove, don’t mask. The goal is neutral air and residue-free surfaces, not a perfume cloud that signals a fresh chemical dose. Frequently Asked Questions Is it really dangerous to mix cleaning products? Yes. Bleach plus ammonia releases chloramine gas, and bleach plus any acidic cleaner releases chlorine gas. Both react within seconds in a closed room and can lead to hospitalization. Use one product

Dangerous to Your Health: 5 Common Products That are Dangerous For Your Daily Life Read More »
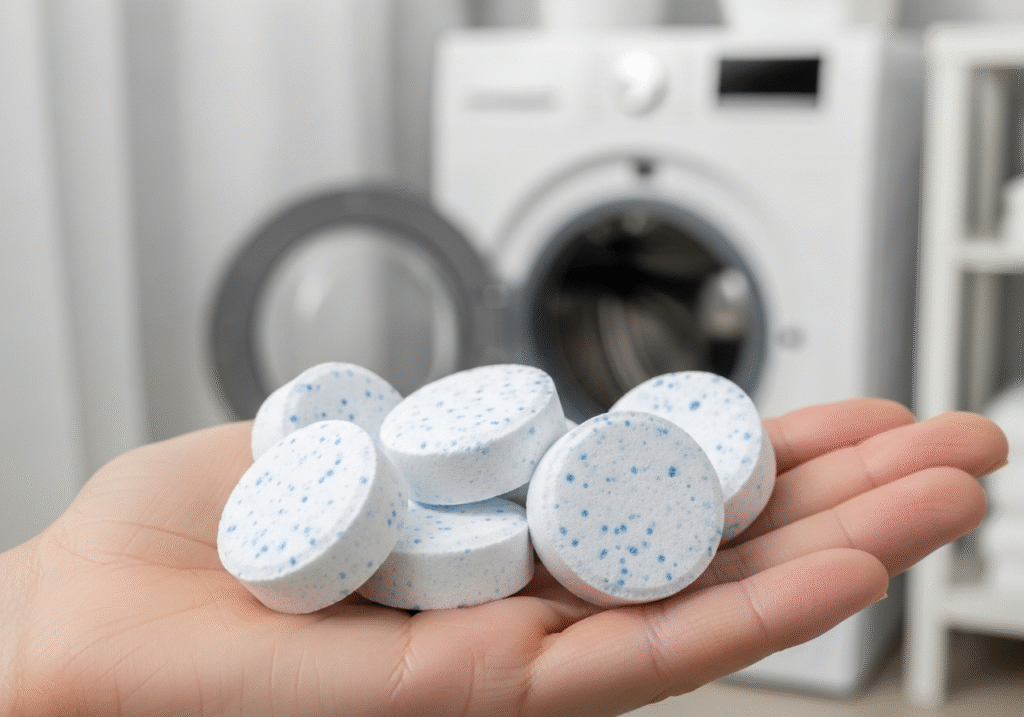
Washing Machine Cleaning Tablets: Are You Wasting Money on Washer Tablets?

Let’s understand how to use washing machine cleaning tablets? The modern laundry room is often viewed as a sanctuary of hygiene, a place where the grime of the outside world is washed away, leaving behind only the scent of fresh linen. Central to this operation is the washing machine, an appliance that we instinctively trust to be the cleanest object in the house. We assume that because gallons of hot water and detergent flow through it daily, it must be self-cleaning. However, this assumption is the primary cause of a domestic crisis that affects millions of households: the slow, invisible accumulation of biological sludge that destroys appliances and ruins clothing. In response to the rise of high-efficiency machines and the foul odors that accompany them, the market has introduced a specific chemical solution: washing machine tablets. These small, effervescent pucks have become a staple in the cleaning aisle, promising to strip away years of neglect with a single cycle. Yet, to truly understand their value and their limitations, one must look past the marketing and understand the chemistry and mechanics of why our machines get dirty in the first place. Sustainability or Disaster? To understand the necessity of washing machine tablets, one must first look at the engineering shift that created the problem. Decades ago, traditional top-loading washers used massive volumes of water. They filled the tub to the brim, allowing clothes to float freely, and the aggressive mechanical agitation flushed soil and residue down the drain effectively. Today, in the name of environmental preservation and energy efficiency, we use front-loading or high-efficiency top-loading machines. These devices use a fraction of the water, relying on the tumbling action of the drum to clean clothes through friction and gravity. While this is a victory for sustainability, it is a disaster for internal hygiene. The dirt, dead skin cells, body oils, and excess detergent that are stripped from your clothing are not always flushed away. Instead, due to the low water volume, they are often cast onto the walls of the outer tub-a stationary drum that surrounds the spinning basket you see. In this dark, warm, and damp crevice, a layer of biofilm begins to grow. This biofilm is a sticky, living matrix of bacteria and mold that feeds on the residual laundry products we leave behind. Washing machine tablets are engineered specifically to target this hidden environment. Unlike laundry detergent, which is chemically formulated to lift soil from fabrics and suspend it in water using surfactants, cleaning tablets are designed to be aggressive against hard surfaces. They are typically composed of concentrated oxidative agents, such as sodium percarbonate, which breaks down into hydrogen peroxide and soda ash when dissolved in water. When a tablet is dropped into the drum and the cycle begins, it effervesces violently. This fizzing action is not merely theatrical; it serves a crucial mechanical purpose. It helps to disperse the active chemical ingredients throughout the entire volume of the drum, splashing the cleaning solution up to the “roof” of the tub and into the crevices of the spider arm-the metal bracket that holds the drum in place and is notorious for corroding and snapping due to chemical buildup. Alkaline Cleaning Products The chemistry of washing machine tablets is typically alkaline, which is essential for their function. Most of the grime inside a washer is acidic in nature-fatty acids from soap scum, body lipids, and grease. By introducing a highly alkaline solution, the tablets can saponify these fats, turning them into a soluble soap that can be rinsed away. Many advanced formulations also include specific enzymes. These enzymes act as biological catalysts that digest the organic matter within the biofilm, effectively eating away the food source that allows mold to thrive in the damp recesses of the pump and drain lines. By breaking down the structural integrity of the sludge, the tablet allows the water to flush it out of the system. However, a dangerous misconception exists regarding what these tablets can actually achieve. Many homeowners treat them as a repair tool rather than a maintenance tool. If a washing machine has been neglected for five years and has developed a thick, black ring of mold on the rubber door gasket, a washing machine tablet will not remove it. Mold has root structures that penetrate the porous rubber of the seal. No amount of splashing chemical water will scrub that physical infestation away. The tablet is designed to maintain the hard, non-porous surfaces-the stainless steel of the drum and the heavy plastic of the outer tub. Relying solely on a tablet while ignoring the physical gaskets is why many frustrated users claim the product “doesn’t work.” It works perfectly for its intended chemical purpose, but it cannot perform miracles on permanent organic staining that requires manual agitation and a mildewcide. Water Temperature The effectiveness of washing machine tablets is also entirely dependent on how they are used, particularly regarding water temperature. This is where user error runs rampant. Almost all cleaning tablets rely on chemical reactions that require heat energy to activate. The oxygen release from the bleaching agents is significantly more vigorous and effective in scalding hot water. If a user throws a tablet in and runs a “Quick Wash” or a cold cycle, they are essentially wasting their money. The tablet may not even fully dissolve, leaving a gritty, chalky residue at the bottom of the drum that adds to the mess rather than resolving it. To get the full benefit, the machine must be set to its hottest possible setting-often labeled “Sanitize” or “Extra Hot.” This heat ensures that the tablet dissolves completely and that the chemical solution is energetic enough to penetrate the layers of calcified grime. A major contributor to the sludge that tablets are fighting is the overuse of fabric softener. Fabric softener is, essentially, liquid fat. It is designed to coat the fibers of your clothing with a thin layer of lipids to make them feel slick and reduce static.

Washing Machine Cleaning Tablets: Are You Wasting Money on Washer Tablets? Read More »

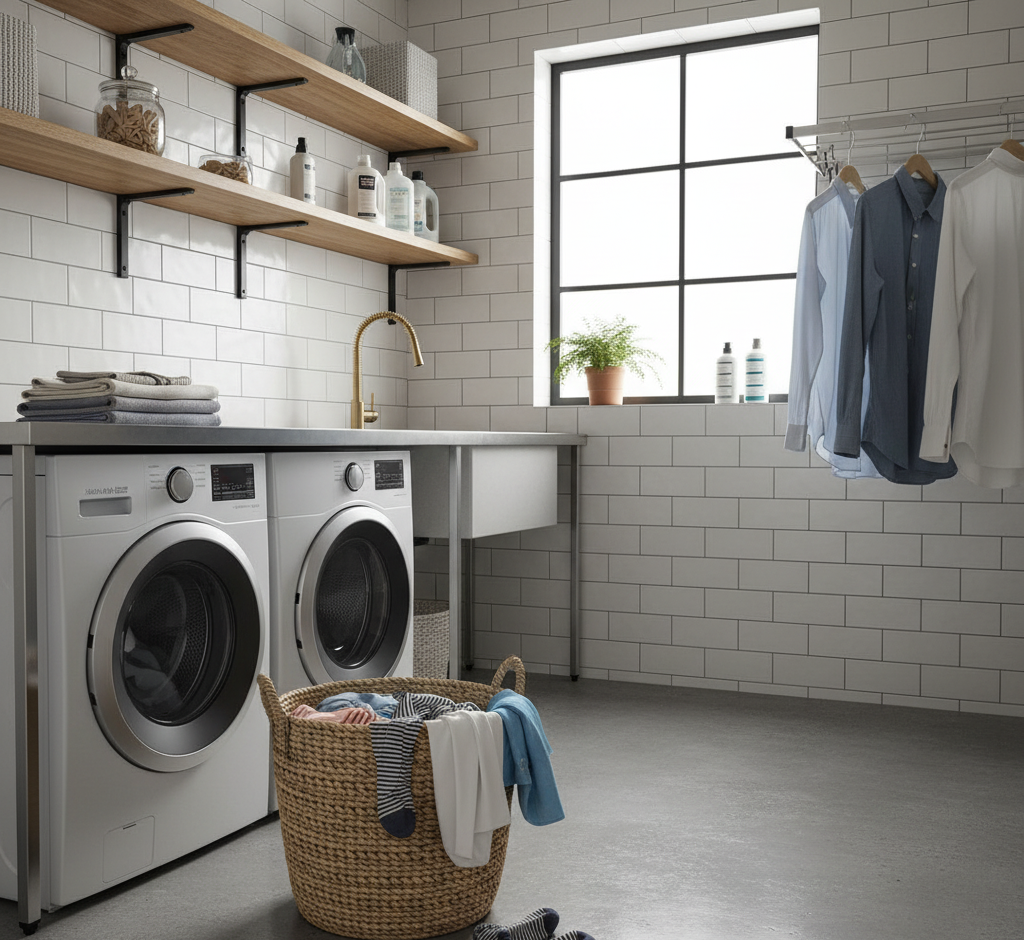
laundry basket in the laundry room

Washing Clothes: 10 Mistakes You Need to Stop Making When Washing Your Clothes

The act of washing clothes is often dismissed as a mundane necessity, a background task that requires little thought beyond separating whites from colors and pressing a button. However, this perceived simplicity is deceptive. Laundry is a chemical and mechanical process that involves a delicate balance of water temperature, agitation, chemical agents, and fabric types. When this balance is disrupted by habitual errors, the consequences are expensive and frustrating. Clothes fade prematurely, fibers break down, elastic snaps, and mysterious holes appear in favorite garments. Furthermore, the appliances themselves, often significant financial investments, suffer from misuse, leading to mechanical failures and mold growth. To truly care for a wardrobe and maintain the efficiency of a household, one must unlearn the common practices that have likely been passed down through generations or assumed out of convenience. 1.First Mistake The first critical error occurs long before the start button is pressed, during the sorting phase. Most people operate under the assumption that sorting is purely a chromatic exercise-keeping red socks away from white shirts to prevent pink underwear. While preventing dye transfer is important, sorting by fabric weight and texture is arguably more critical for the physical preservation of the garments. A washing machine cleans through agitation; clothes rub against each other to dislodge soil. When you mix heavy, abrasive fabrics like denim jeans with delicate materials like silk or fine cotton, you are effectively creating a sandpaper effect. The heavy items thrash against the lighter ones, causing micro-abrasions that manifest as pilling, holes, and a general loss of softness. Furthermore, the texture of fabrics dictates their lint behavior. Washing lint-shedding items, such as heavy cotton towels, with lint-attracting fabrics, like synthetic leggings or corduroy, results in a visual disaster that makes dark clothes look permanently dirty. 2.Individual Preparation Once the piles are sorted, the preparation of individual garments is often neglected. This mechanical oversight leads to tearing and stretching. The rule for hardware is simple yet frequently confused: zippers must be closed, and buttons must be open. A zipper left unzipped is essentially a flexible saw blade loose in the drum. As it spins, the metal teeth can snag on lace, scratch the surface of other fabrics, and even chip the interior paint of the washing machine. Conversely, buttoned shirts suffer from the opposite problem. When a shirt is wet, it is heavy. If it is buttoned up, the centrifugal force of the spin cycle pulls aggressively at the threads holding the buttons, distorting the buttonholes and causing buttons to pop off. Pockets also require vigilant inspection. A stray tissue can disintegrate and cover an entire load in white confetti, while heavier objects like coins can bypass the seal and damage the drain pump. 3.Detergent The application of detergent is the area most rife with misconceptions. Decades of marketing have convinced consumers that more foam equals more cleaning power. In reality, the opposite is true for modern high-efficiency machines. These appliances use very little water, relying on friction to clean. When you use too much detergent, you generate a massive volume of suds that acts as a cushion between the clothes, preventing the necessary friction that scrubs away dirt. The clothes simply float in a bubble bath, emerging with their stains intact. Worse, the rinse cycle cannot remove this excess chemical load. The result is a layer of soap residue left on the fibers, which acts as a magnet for dirt and skin oils, creating a breeding ground for bacteria and leading to the “sour” smell often associated with old towels. 4.Fabric Softener Compound this issue with the habitual use of fabric softener, and you have a recipe for textile ruin. Fabric softener works by coating fibers with a layer of lipid-based chemicals to force them to feel slick. While this feels nice instantly, it functionally destroys the utility of absorbent fabrics. Towels coated in softener lose their ability to wick water; they simply push moisture around the skin. Athletic wear, engineered to breathe and wick sweat, becomes clogged and sealed by these waxy deposits, trapping body odors deep within the weave. A simple substitution of white vinegar in the rinse cycle can soften fabrics by stripping away detergent residue and neutralizing static without leaving a damaging coating behind. 5.Amount The physical loading of the machine also requires a specific balance. There is a tendency to stuff the drum to capacity to minimize the number of loads, but a packed machine is a useless machine. For the chemistry of the detergent to work, it must dissolve and circulate. For the mechanical action to work, clothes must have room to tumble. A solid brick of wet fabric in the center of the drum will never get clean. Conversely, washing a single heavy item is a mechanical hazard. A lone wet blanket creates a severe imbalance during the spin cycle, causing the drum to bang violently against the chassis, wearing out the suspension and bearings. 6.Water Temperature selection is another variable where habit often overrides logic. The default to cold water for everything, driven by eco-consciousness, is noble but insufficient for sanitation. While cold water is excellent for preventing shrinkage and protecting dyes, it often lacks the thermal energy required to activate the enzymes in detergents that target heavy oils. Bed sheets and towels, which are reservoirs for dead skin and dust mites, require hot water to be truly sanitized. A cold wash for these items is merely a rinse. However, using hot water indiscriminately is equally damaging, as it sets protein-based stains like blood and sweat into the fabric permanently. A nuanced understanding of temperature-hot for sanitation, warm for average soil, and cold for delicate protection-is necessary. 7.Stains When stains do occur, the immediate reaction is often the wrong one. The instinct to rub a spill vigorously is a destructive reflex. Rubbing drives the stain deeper into the yarn and abrades the surface of the fabric, often causing color loss that is more noticeable than the stain itself. The correct technique is

Washing Clothes: 10 Mistakes You Need to Stop Making When Washing Your Clothes Read More »

6 Reasons Why Dry Cleaning is The Safest Option For Your Most Important Clothes

The term “dry cleaning” is one of the more misleading phrases in common use, as the process is neither dry nor, strictly speaking, just cleaning. It is a complex and highly specialized method of garment care that involves sophisticated machinery, a deep understanding of fabric science, and the precise application of chemical solvents. The core principle that separates dry cleaning from traditional laundering is the absence of water. Instead of H2O, garments are submerged in and cleaned with a liquid solvent that is specifically chosen for its ability to dissolve oils and greases without damaging delicate, water-sensitive fibers like silk, wool, rayon, or intricately constructed pieces like tailored suits and formal gowns. Water can cause these natural fibers to shrink, distort, or lose their color, but a solvent can lift away stains and soil while leaving the garment’s structure and feel intact. The entire journey of a garment through a dry cleaning facility is a multi-step procedure that combines skilled human touch with advanced technology. 1.Diagnostic The process begins the moment a customer brings a garment to the counter. This initial interaction is a crucial diagnostic step. The customer might point out specific stains, and a knowledgeable cleaner will inquire about the source of the stain, as this information dictates the treatment. Following this, the garment undergoes its first inspection. A trained professional examines it meticulously, not just for the stains pointed out by the customer, but for any others that may be less obvious. They also check the integrity of the garment, noting any loose buttons, open seams, or pre-existing damage. This is also when the care label is read and assessed. The care label is a legal directive from the manufacturer, and the cleaner must adhere to its instructions. Finally, each garment is tagged. This is a critical organizational step. A small, numbered tag or a barcode is affixed to an inconspicuous seam, ensuring that the piece can be tracked throughout the entire process and correctly reassembled with its owner’s order at the end. 2.Stain Removal Before the main cleaning cycle can begin, the garment moves to what is arguably the most artful and skill-intensive stage of the process: pre-treatment, also known as “spotting.” This is where a specialist, the spotter, addresses individual stains. Working at a specialized station called a spotting board, which provides steam, vacuum, and a variety of chemical agents, the spotter acts as a fabric chemist. They must identify both the type of fabric and the nature of the stain to select the correct chemical agent and technique. Stains are broadly categorized; for example, oil-based stains like grease or salad dressing require different solvents than protein-based stains like blood or egg, or tannin-based stains like wine, coffee, or juice. The spotter uses a “steam gun” to apply steam and heat to help loosen the stain, and various chemical solutions are carefully applied, tamped with a small brush, and then flushed out with more steam. A vacuum pedal on the spotting board suctions away the loosened stain and excess moisture, preventing a ring from forming on the fabric. This targeted treatment is essential because the general cleaning cycle might not be sufficient to remove stubborn, set-in stains. 3.Dry Clean Once pre-treated, the garments are ready for the main event: the cleaning machine itself. A modern dry cleaning machine looks very much like an oversized front-loading washing machine, but its internal workings are far more complex. It is a sealed, self-contained system that performs the washing, rinsing, and drying cycles all in one unit. Garments are sorted by color, weight, and fabric type and then loaded into the machine’s drum. The door is sealed, and the machine begins its cycle by filling the drum with the chosen solvent. Historically, the most common solvent was perchlorethylene, or “perc,” a powerful and effective degreaser. However, due to environmental and health concerns, the industry has increasingly shifted towards more eco-friendly alternatives like hydrocarbon solvents, liquid silicone, or even pressurized liquid carbon dioxide. As the drum tumbles the clothes gently, the solvent circulates through the fabric, lifting away body oils, grime, and the loosened stains from the pre-treatment stage. This “wash” cycle is typically much gentler than a water-based wash to protect the delicate garments. After the wash cycle, the machine drains the used solvent and begins an extraction cycle, spinning at high speed to remove the majority of the solvent from the clothes, much like a washing machine’s spin cycle removes water. The used solvent is not discarded; it is pumped through a series of filters to remove the collected dirt and impurities and is then distilled. This purification and recycling process is a key feature of the closed-loop system, allowing the expensive solvent to be reused for many cycles, which is both economically and environmentally necessary. 4.Drying Following the extraction, the machine enters the drying phase. A current of warm air is gently tumbled through the clothes to evaporate any remaining solvent from the fabric. This is not the high heat of a conventional dryer. The temperature is carefully controlled to be just high enough to turn the liquid solvent into a vapor without damaging the clothes. This solvent-laden warm air is then drawn out of the drum and passed over cooling coils. As the air cools, the solvent vapor condenses back into its pure liquid form, is collected, and returned to the main solvent tank for reuse. This vapor recovery system is incredibly efficient, recapturing nearly all of the solvent so that very little escapes into the atmosphere. Once the cycle is complete and the sensors detect no remaining solvent fumes, the machine’s door unlocks, and the garments emerge clean, completely dry, and with only a faint, sterile scent that quickly dissipates. 5.Finishes The journey is not over yet. The clean garments are immediately inspected again. Any stains that were not fully removed during the process are noted. These stubborn spots may require “post-spotting,” where the spotter applies more specialized techniques to the now-clean fabric. Once

6 Reasons Why Dry Cleaning is The Safest Option For Your Most Important Clothes Read More »

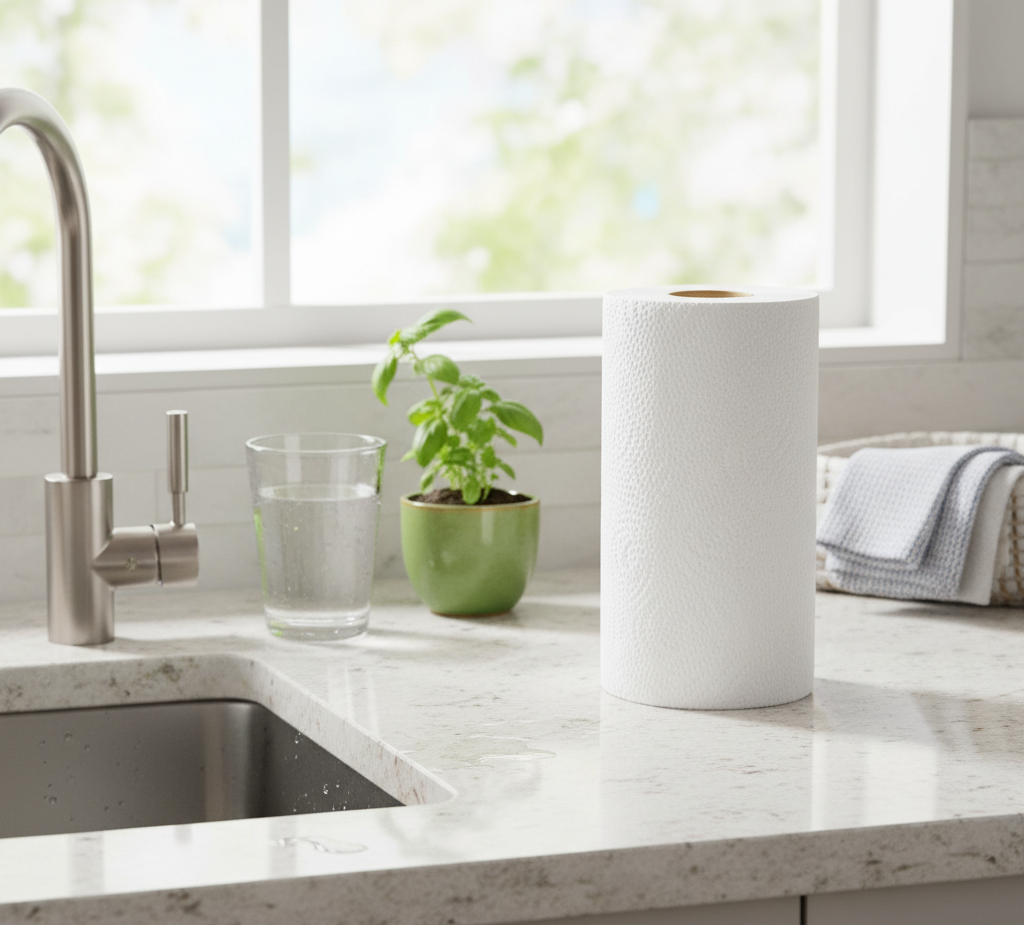
paper towels on a kitchen counter

The Right and Wrong Way to Use Paper Towels for Cleaning – 6 Best Tips

Paper Towels: When the Roll Is Right and When It Is Dead Wrong The paper towel is a cornerstone of modern cleaning, so embedded in daily life that we grab it without thinking: sudden spill on the counter, smudge on the window, greasy stovetop. Its virtues are real. No hunting for a clean cloth, no laundry burden, no hesitation with unpleasant messes before it hits the bin. One fresh sheet guarantees a clean slate and rules out spreading yesterday’s germs on today’s surfaces. But convenience is not the same as correctness, and most homes reach for the roll far too often. These six tips put paper towels back in their proper role. Tip 1: Blot Spills, Never Wipe Them Paper towels are engineered to absorb: cellulose fibers, usually from wood pulp, wick liquid and hold it, while texture, thickness, and quilting add scrubbing grip. That engineering only pays off if you work with it. Lay a sheet over a fresh spill and let capillary action pull the liquid up and out of the surface. An aggressive wiping motion does the opposite, pushing moisture over a wider footprint and driving it into porous wood or grout where it becomes a real stain. For large spills, layer several sheets so the pile soaks through instead of smearing. Tip 2: Use One as a Disposable Applicator Beyond mopping up liquids, the roll is a superb delivery system. Sprayed with glass cleaner, a paper towel polishes windows and mirrors streak-free precisely because it is new: a reusable cloth can carry residual oils or fabric softener from the last wash, and those residues are what leave glass hazing. Sprayed with disinfectant, a fresh sheet spreads the product evenly across counters and sinks, then leaves the house carrying whatever germs it collected. That matters more than it sounds, because a damp sponge or cloth that skips regular sanitizing becomes a breeding ground for bacteria and a vehicle for cross-contamination, the exact risk the CDC’s home cleaning and disinfection guidance warns about. Tip 3: Hit Heavy Grease Dry First Grease and oil are where paper genuinely shines. It wipes greasy cooktops, cleans microwave splatter, and blots excess oil off fried food, trapping grease in fibers destined for the trash. A reusable cloth takes that same oil into your laundry, where it lingers and transfers. For thick, heavy grease, run the dry towel first to pull up the bulk, then follow with your cleaning solution. Two steps stop the smear and make the actual cleaning dramatically shorter. Tip 4: Know the Real Downsides The disposability that makes paper towels lovable creates their two genuine weaknesses. The first is cost in every currency. Making them consumes trees, water, and energy, and seconds later the sheet heads to landfill, while the recurring purchase adds up to far more than one-time reusable alternatives. The second is performance limits: a standard sheet lacks durability for heavy scrubbing. Faced with dried-on food or textured surfaces it shreds, leaving lint and pulp behind, painfully visible on dark surfaces and screens. Any job that needs friction belongs to a scrub brush or a good cloth, not paper. Tip 5: Default to Microfiber Instead For most everyday tasks, microfiber is simply the better tool. These cloths weave extremely fine synthetic fibers, typically a polyester and polyamide blend, split during manufacturing to create huge surface area and a positive electrostatic charge that pulls dust, dirt, and microbes into the cloth instead of shuffling them around. Dry, they are exceptional dusters. Damp, their capillary action absorbs remarkable water and lifts grime with little effort, often with plain water alone. They scrub without falling apart, polish glass without lint, and survive hundreds of washes, which makes them cheaper and greener over any realistic timeline. Care is the catch: wash them apart from other laundry and skip fabric softener, which clogs the fibers and kills both the static cling and the absorbency. Tip 6: Save the Roll for Hazardous Messes Hygienic disposal is the paper towel’s trump card, and some messes should never touch reusable laundry. The list is short and specific: Raw meat juices from poultry or beef packaging Pet accidents, vomit, and illness-related fluids Litter box spills and tracked-in mud bombs Anything you would rather incinerate than launder With biological hazards, containing and discarding immediately is the responsible move against pathogens like salmonella or E. coli, since scrubbing a cloth clean enough to be safe is often impractical mid-crisis. If you finish with a bleach-based sanitizing wipe, handle it per Health Canada’s rules for household chemicals, which stress dilution accuracy and never mixing products. Paper Towel vs Microfiber by Task Task Better tool Why Fresh liquid spill Paper towel Blots and contains, then disappears Windows and mirrors Either Paper never carries softener haze; microfiber must be lint-clean Raw chicken juices Paper towel Single-use stops cross-contamination Dusting shelves Microfiber Static charge traps dust instead of airborne-izing it Stovetop grease film Paper first, cloth after Dry towel pulls bulk; washable cloth finishes Scrubbing dried messes Brush and cloth Paper shreds and leaves pulp Drying hands Cloth or paper, your call Cloth wins cost, paper wins when hands are filthy Paper Towel FAQ Are paper towels more hygienic than reusable cloths? For hazardous messes, yes, because the towel exits with the contamination instead of returning to a laundry pile. For routine wiping, a microfiber cloth washed regularly and used damp is equally sanitary and far cheaper. Why does my paper towel leave lint on dark surfaces? Cheap towels shed pulp and lint, especially when wet or when dragged across texture. Dab instead of dragging, use two layers for wet jobs, or switch to a lint-free microfiber pass for the final polish on screens and dark finishes. Can I compost used paper towels? Only if they absorbed food scraps or water. Towels dirty with cleaning chemicals, grease, or biological waste belong in the trash, since compost is meant for untreated organics. How much does the roll habit really cost? A household

The Right and Wrong Way to Use Paper Towels for Cleaning – 6 Best Tips Read More »

5 Reasons Why Hiring a Cleaning Service is the Best Form of Self-Care

Why hire a specialized cleaning service? The modern home is a hub of activity, a place of work, rest, and family life. Yet, maintaining its cleanliness can feel like a relentless, never-ending task. The dust settles almost as soon as it’s wiped away, the floors seem to attract dirt, and the kitchen and bathrooms demand constant attention. For many, the weekend, which should be a time for relaxation and recharging, is instead consumed by a long list of chores. This constant cycle of cleaning can become a significant source of stress and a drain on our most valuable resource: time. It is in this gap between the desire for a clean, peaceful environment and the reality of a busy life that a residential house cleaning service finds its purpose, offering not just a service, but a solution to a pervasive modern problem. 1.Quality of Life Hiring a professional cleaning service is often viewed as a luxury, but it is more accurately described as an investment in your quality of life. Consider the hours spent each week sweeping, mopping, scrubbing, and dusting. For a moderately sized home, this can easily add up to four, five, or even more hours. A professional service reclaims those hours for you, handing them back to be spent on what truly matters. This could mean more time with family, pursuing a hobby, exercising, or simply enjoying a well-deserved rest. The cumulative effect of this reclaimed time is profound, reducing burnout and allowing for a better work-life balance. It transforms the home from a place of constant obligation into a true sanctuary, a space you can enter after a long day and immediately feel at ease, rather than being confronted with a list of tasks that need doing. 2.Quality of Cleanliness Beyond the gift of time, there is the undeniable difference in the quality of the clean itself. A professional cleaner brings a level of expertise and efficiency that is difficult for the average homeowner to replicate. They are trained in the most effective methods and understand the specific needs of different surfaces. They know which products to use on natural stone versus laminate, how to clean stainless steel without leaving streaks, and the best techniques for removing stubborn soap scum from glass shower doors. This knowledge prevents costly damage that can result from using the wrong chemical or an abrasive sponge on a delicate surface. Furthermore, professional services come equipped with commercial-grade tools and supplies that are often more powerful and effective than standard consumer products. Their high-powered vacuums with HEPA filters can capture a significantly higher percentage of dust, allergens, and pet dander, leading to improved indoor air quality. This is particularly beneficial for households with allergy sufferers, asthmatics, children, or pets. The result is not just a home that looks clean, but one that feels and is, on a microscopic level, healthier. The process of a professional clean is systematic and thorough. Cleaners typically work with a detailed checklist, ensuring that no area is overlooked. They employ methodical strategies, such as cleaning from top to bottom to ensure dust and debris fall downwards before the floors are addressed, and working from one side of a room to the other. This structured approach guarantees consistency and completeness. A standard recurring clean will typically involve a comprehensive dusting of all surfaces, including furniture, shelves, and window sills; cleaning and disinfecting kitchen countertops, sinks, and appliance exteriors; scrubbing toilets, showers, tubs, and bathroom vanities; and vacuuming carpets and mopping hard floors. This regular maintenance keeps the home at a consistent level of cleanliness, preventing the deep buildup of grime. 3.Deep Cleaning For homes that have gone some time without a thorough cleaning or for clients new to a service, a deep clean is often recommended. This is a far more intensive and detailed service that addresses the areas often missed in a regular routine. A deep clean will include all the tasks of a standard clean but will go much further. It can involve washing baseboards and trim, cleaning light fixtures and ceiling fans, wiping down doors and door frames, cleaning behind and underneath furniture and appliances, scrubbing grout lines, and cleaning the interior of windows. This is the reset button for your home, tackling the accumulated dirt and dust in every nook and cranny, and establishing a new baseline of clean that makes subsequent maintenance easier. Specialized services like move-in and move-out cleanings are another critical offering. Preparing a home for sale or ensuring a new home is pristine before you unpack is an enormous task on top of the already stressful process of moving. A move-out clean is designed to leave the property in immaculate condition for the next occupants, often a requirement for retrieving a security deposit. This is the most exhaustive clean of all, performed on an empty home. Every interior surface is addressed, including the inside of all cabinets, drawers, closets, the oven, and the refrigerator. It ensures the home is presented in its best possible light, which can be a significant factor for real estate agents and potential buyers. Conversely, a move-in clean provides immense peace of mind, sanitizing the space and ensuring you are starting your new chapter in a fresh, thoroughly cleaned environment. 4.Trust and Security One of the most significant barriers for people considering a cleaning service is the idea of trust and security. Inviting someone into your personal space requires confidence in their professionalism and integrity. This is why reputable cleaning companies place such a high emphasis on their hiring and training processes. They conduct background checks on their employees and ensure they are thoroughly vetted. Furthermore, professional services are bonded and insured. Bonding provides protection against theft, while insurance covers any accidental damage that might occur to your property during the cleaning process. This comprehensive protection offers homeowners the peace of mind that they are working with a trustworthy organization that stands behind its work and its people. The relationship with a cleaning service is

5 Reasons Why Hiring a Cleaning Service is the Best Form of Self-Care Read More »

The Power of Citric Acid

The Power of Citric Acid: Your Solution for Limescale and Grime

In the world of cleaning, there’s citric acid, and countless products that promise miraculous results, often based on complex chemical formulations and strong scents. Yet, hiding in plain sight, often in the baking aisle of the grocery store, is a simple, effective, and remarkably versatile compound: citric acid. This white crystalline powder, derived naturally from citrus fruits like lemons and limes, is a powerhouse cleaner that can tackle some of the most stubborn household problems, particularly those related to mineral deposits and hard water. Its strength lies in its chemical nature as a weak organic acid, which allows it to dissolve grime, limescale, and soap scum without the corrosive intensity of stronger mineral acids. Chelation The primary mechanism that makes citric acid so effective is a process called chelation. In areas with hard water, the water is rich in dissolved minerals, primarily calcium and magnesium. When this water evaporates, it leaves behind a chalky, crusty residue known as limescale. This is the buildup you see inside your kettle, on your showerheads, and as a cloudy film on your glassware. Citric acid works by binding to these mineral ions, forming a compound called a chelate. This new compound is water-soluble, meaning the stubborn, stuck-on mineral deposit is transformed into something that can be easily rinsed away. This is a far more effective approach than simply trying to scrub the deposit off, which is often a losing battle and can damage the surface underneath. Kettle One of the most satisfying applications for citric acid is restoring a kettle caked with mineral deposits. Over time, the inside of a kettle can become layered with a thick, white scale that not only looks unpleasant but can also impair its heating efficiency and flake off into your water. To effortlessly clean it, simply fill the kettle about halfway with water, add one to two tablespoons of citric acid powder, and bring it to a boil. Once it has boiled, turn it off and let the solution sit for twenty to thirty minutes. You will often be able to see the limescale fizzing and dissolving. After the waiting period, pour out the solution and rinse the kettle thoroughly with fresh water a few times. The interior will be left sparkling clean, looking almost new, with no scrubbing required. This same principle applies perfectly to automatic coffee makers, which also suffer from internal mineral buildup that can slow down the brewing process and affect the taste of your coffee. To descale a coffee machine, fill the water reservoir with your normal amount of water and dissolve a tablespoon or two of citric acid into it. Run a full brewing cycle with this solution (without any coffee grounds). Afterwards, run at least two more full cycles with only fresh, plain water to ensure all traces of the acid are rinsed out of the machine’s internal components. Dishwasher This descaling power extends to the workhorse of the kitchen, the dishwasher. A dishwasher in a hard water area can quickly become inefficient as its spray arms, filter, and interior walls get coated in a film of limescale and soap scum. This not only looks grimy but can prevent the machine from cleaning your dishes properly, leaving them spotty and cloudy. To deep clean your dishwasher, ensure it is completely empty. Pour about half a cup of citric acid powder into the bottom of the machine, or place it in the main detergent dispenser. Then, run the dishwasher on its hottest, longest cycle. The hot water will activate the acid, which will circulate throughout the entire system, dissolving mineral deposits from the jets, pipes, and walls, leaving the stainless steel interior gleaming and helping the appliance run more efficiently. Beyond descaling appliances, citric acid makes an excellent all-purpose cleaning spray for various kitchen surfaces. To create a general cleaning solution, dissolve one to two tablespoons of citric acid powder in about a liter of warm water in a spray bottle. Shake it well until the crystals are fully dissolved. This spray is fantastic for cutting through grease and grime on countertops, cleaning sinks, and shining up stainless steel faucets and appliances. It effectively removes water spots and leaves a streak-free shine. It can also be used to disinfect and deodorize cutting boards. Simply sprinkle a small amount of the powder onto a damp board, scrub with a sponge, let it sit for a few minutes, and then rinse thoroughly. However, a critical word of caution is necessary here: because it is an acid, this solution should never be used on natural stone surfaces like marble, granite, or travertine. The acid will react with the calcium carbonate in the stone, causing permanent etching and dulling the finish. Bathroom Moving from the kitchen to the bathroom, citric acid proves its worth against the relentless duo of soap scum and limescale. Soap scum, the grimy film that builds up on shower doors, tiles, and bathtubs, is formed when the fatty acids in soap react with the mineral ions in hard water. Citric acid is uniquely suited to tackle both components of this problem. Using your prepared spray solution, generously coat the affected surfaces. Let it sit for ten to fifteen minutes to allow the acid time to break down the deposits. Then, scrub with a non-abrasive sponge or brush and rinse well with water. For shower doors plagued by cloudy water spots, this method will restore clarity and shine. Showerheads are another common casualty of hard water, becoming clogged with limescale until the water sprays out in uneven, weak jets. To clean a clogged showerhead without removing it, fill a plastic bag with your citric acid and water solution, submerge the showerhead completely in the liquid, and secure the bag in place with a rubber band or twist tie. Leave it to soak for at least an hour, or even overnight for severe buildup. After soaking, remove the bag and run the shower on hot for a minute to flush out any remaining

The Power of Citric Acid: Your Solution for Limescale and Grime Read More »

Perfect Cleaning Schedule

Cleaning Schedule: A Room-by-Room Guide to Your Perfect Cleaning Schedule

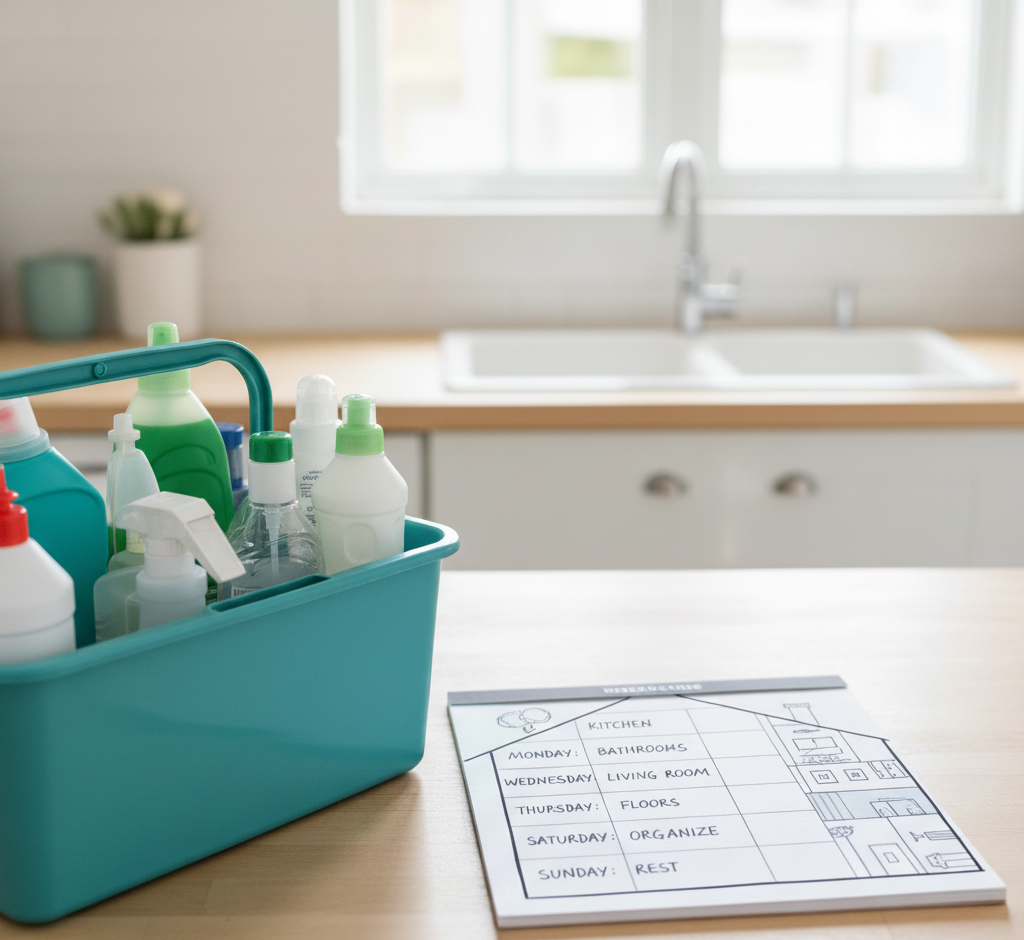
Why a Cleaning Schedule Beats Cleaning Marathons For many households, cleaning swings between two extremes: frantic multi-hour marathons before guests arrive, or weeks of ignoring the dust bunnies and sticky counters until frustration wins. This reactive approach is exhausting and inefficient. The secret to a consistently clean home is not stronger chemicals or more scrubbing; it is a simple cleaning schedule that turns one overwhelming project into small, predictable daily habits. Breaking tasks into daily, weekly, monthly, and seasonal frequencies keeps grime from ever building up to marathon levels, and it frees your weekends. Daily Habits: Fifteen to Twenty Minutes That Work Daily tasks are the foundation of the system. They take little time but have the biggest impact on how your home feels: Make the bed each morning; it takes under two minutes and instantly makes the bedroom look put together. Wipe kitchen counters and the sink after every meal so spills and crumbs never harden. Give the kitchen floor a quick sweep at day’s end so crumbs never get tracked through the house. Follow the one-load rule: wash, dry, fold, and put away a single load of laundry daily so the pile never becomes a mountain. The Weekly Reset: Bathrooms, Kitchen, and Dust The weekly clean is a deeper reset of the main living areas. You can do everything on one cleaning day or spread one or two rooms across the week, an approach called zone cleaning. Bathrooms deserve a full scrub for hygiene as much as appearance: the toilet inside and out, the shower and tub to stop soap scum before it thickens, the sink and countertops scrubbed and disinfected, the mirror polished streak-free, and the floor swept and mopped. In the kitchen, wipe down appliance exteriors including the refrigerator, dishwasher, microwave, and stovetop, clean the microwave interior by heating a bowl of water with vinegar to loosen grime, and mop the floor. Throughout the living areas and bedrooms, dust every surface, then vacuum carpets, rugs, and hard floors; regular vacuuming lifts the dust, dander, and allergens that would otherwise circulate. Monthly Projects for the Details Monthly tasks catch the slow, creeping grime that separates merely tidy homes from deeply clean ones. Wipe down baseboards, which collect dust and scuffs; clean light fixtures and ceiling fans; run an empty cleaning cycle on the washing machine to prevent soap scum and mildew; and clean the dishwasher filter to keep it performing well. Window sills and sliding door tracks also trap dirt and insects, so give them a monthly pass. Seasonal Projects: The Whole-Home Reset Every quarter, set aside time for the big jobs. Empty the refrigerator and freezer, wipe down shelves and drawers, and discard expired food. Wash windows inside and out, deep clean carpets and upholstery with a rented machine or a professional service, and organize closets and pantries while decluttering. Season-specific extras include cleaning the gutters in the fall and pressure washing the deck in the spring. Frequency Typical tasks Time tip Daily Make beds, wipe counters, quick sweep, one load of laundry Batch these into a 20-minute evening routine Weekly Bathroom scrub, appliance wipe-downs, dusting, vacuuming, mopping Assign one or two rooms per day Monthly Baseboards, light fixtures, washing machine cycle, window sills Pair with bill-paying day as a reminder Seasonal Fridge deep clean, windows, carpets, closets, gutters, deck Pick one weekend per season and book help early Make the Schedule Fit Your Life A schedule is a template, not a rigid document. If you live alone and rarely cook, the kitchen needs less attention; if you have kids and pets, daily floor care and weekly vacuuming become non-negotiable. Task batching helps some households: make Monday dusting day and Tuesday floor day so you stay focused with one set of tools. A clear schedule also makes delegation easy, since everyone in the family knows which tasks belong to which day, removing the constant negotiation about who cleans what. Above all, aim for progress, not perfection. Miss a day and simply pick it up tomorrow; because the system prevents buildup, one skipped task never snowballs into a disaster. Cleaning science supports the approach: the CDC explains that regular cleaning and disinfecting of your home removes most germs from surfaces, and that handwashing is one of the best ways to stop germs from spreading between family members. Frequently Asked Questions About Cleaning Schedules How long should daily cleaning take? Fifteen to twenty minutes is enough when you focus on the high-impact habits: making the bed, wiping counters after meals, a quick floor sweep, and one load of laundry. Is it better to clean one room a day or everything weekly? Both work. Zone cleaning, with one or two rooms per day, keeps the workload even, while a single weekly cleaning day suits people who prefer to finish everything at once. What should I clean monthly that people usually forget? Baseboards, ceiling fans and light fixtures, the washing machine drum, dishwasher filter, and window sills and sliding door tracks are the details that quietly collect grime. How do I stay consistent with a cleaning schedule? Keep tasks small and visible, pair them with existing habits such as morning coffee or evening TV, and remember that a missed day is fine as long as you resume the next day. When should I hire professional cleaners instead of doing it myself? Monthly and seasonal projects such as carpet deep cleaning, fridge resets, and whole-home refreshes are ideal to outsource, especially before holidays or when allergies act up. Keep the Schedule on Track With Professional Help The heaviest items on your schedule do not have to be DIY. Toronto Shine Cleaning’s regular cleaning service handles the weekly core clean, while our deep cleaning service covers the monthly and seasonal projects that need extra muscle. We serve homes across Toronto and the GTA, and our reviews show what consistent cleaning looks like. Call (647) 424-0355 or check our pricing to build your routine around a professional team.

Cleaning Schedule: A Room-by-Room Guide to Your Perfect Cleaning Schedule Read More »

clean and sanitized house because of lysol

Lysol 101: A Guide to a Truly Hygienic Home

Lysol 101: Clean First, Disinfect Second, Every Time For more than a century, Lysol has been the name most people associate with killing germs, and its sharp scent is, for many, the very smell of a disinfected home. But the product performs only as well as the person using it understands. Lysol is not an all-purpose cleaner in the traditional sense; its primary job is not to lift dirt but to eradicate the bacteria, viruses, and fungi that live on surfaces. The difference between wiping a counter and truly disinfecting it comes down to a few rules: clean before you disinfect, respect dwell time, and save disinfection for the situations where it matters. This guide walks through the science and the correct technique. What Makes Lysol Work Most Lysol disinfectant formulas, especially the sprays, rely on a class of chemicals called quaternary ammonium compounds, commonly known as quats, with Alkyl Dimethyl Benzyl Ammonium Chloride among the most common. Picture a quat molecule as a tiny positively charged soldier. Bacteria and viruses carry a negatively charged cell wall or envelope, so the quats are drawn to them, lock on, and rupture the wall until the cell’s essential contents leak out and the microorganism dies. Many aerosol formulas also contain ethanol, an alcohol that disinfects by denaturing germ proteins. This combined attack is why the products are effective against a broad spectrum of pathogens, from cold viruses and influenza to E. coli and staphylococcus. Cleaning vs. Sanitizing vs. Disinfecting These three words are used interchangeably, but in professional cleaning they mean different things. Cleaning physically removes visible dirt and debris using soap or detergent, water, and some agitation; it lowers germ numbers but does not necessarily kill them. Sanitizing reduces bacteria on a surface to a level considered safe by public health standards, which lowers infection risk without necessarily killing all viruses and fungi. Disinfecting kills or inactivates nearly 100% of the pathogens named on the product label, and that is the primary purpose of Lysol. The rule that follows is non-negotiable: always clean before you disinfect, because a disinfectant sprayed over a layer of grime cannot reach the germs hiding underneath. The CDC’s home cleaning and disinfecting guidance treats cleaning as the essential first step in any hygiene routine. Dwell Time: The Rule That Decides Whether Disinfection Works Dwell time is the amount of time a disinfectant must stay visibly wet on a surface to kill the pathogens it claims to kill. Spray a countertop and wipe it dry immediately and you have done almost nothing; the chemistry needs minutes to rupture cell walls. The required time is printed on the label and varies by target. Common viruses and bacteria on the label require Lysol Disinfectant Spray to keep the surface wet for 3 minutes, while tougher fungi such as mold and mildew can demand up to 10 minutes. Spray until the surface is thoroughly wet, leave it alone for the full dwell time, and let it air dry completely. How to Use Common Lysol Products Correctly Hard surfaces: wipe away visible dirt first, hold the can 6-8 inches away, spray until the surface is wet rather than misted, honor the dwell time, and air dry. Rinse any food-contact surface with potable water afterward. Soft surfaces: test a small hidden area for colorfastness first, then mist the fabric lightly until it is damp rather than soaked, and let it air dry completely. Disinfecting wipes: pre-clean visibly dirty spots, use a fresh wipe, and keep the surface glistening wet for the stated time, often around 4 minutes for wipes. Use one wipe per surface area to avoid carrying germs from a doorknob to a countertop. All-purpose cleaners: for disinfection these need two passes, one to clean away visible soil and a second to wet the surface for the label’s dwell time. Where Lysol Does Not Belong Unfinished or porous wood can be discolored and damaged by the chemicals and alcohol. Natural stone such as marble, granite, or travertine can develop etching, a permanent dulling of the polished surface, so use a pH-neutral cleaner made for stone instead. Never spray disinfectant on food or directly onto electronics: spray a cloth first, wring it out, then wipe keyboards, phones, and remotes gently. Handle every product with the respect the label demands. Health Canada’s household chemical safety guidance covers safe storage, ventilation, and the rule against mixing cleaning products, which can release toxic gas. Lysol Product Quick Reference Product Best For Non-Negotiable Steps Disinfectant spray Doorknobs, switches, faucets, and fabrics Pre-clean, spray 6-8 inches away, keep wet 3-10 minutes, air dry Disinfecting wipes Quick touch-ups on hard surfaces Fresh wipe per area, keep wet about 4 minutes, air dry All-purpose cleaner Daily cleaning plus disinfection Clean first, then reapply and respect dwell time When Is Disinfecting Actually Necessary? In a healthy household, routine cleaning with soap and water is perfectly sufficient for most daily messes, since it physically removes germs from surfaces. Disinfecting everything every day is unnecessary and may contribute to chemical-resistant bacteria. Save it for the situations where it earns its keep: Frequently touched points such as door handles, light switches, tap handles, remotes, and fridge doors. When someone in the home is sick with a cold, the flu, or another contagious illness. Kitchen and bathroom surfaces prone to contamination from raw meat and bodily fluids, always after cleaning first. Handwashing remains the first line of defense, and the CDC’s handwashing guidance notes that keeping hands clean is one of the main ways to keep germs from spreading in the home. Frequently Asked Questions Can I wipe Lysol off right after spraying? No. Wiping early removes the product before the dwell time is complete, so the disinfection never happens. Spray until the surface is wet, wait the time stated on the label, and let it air dry. Do I need to disinfect my whole house every week? No. Regular cleaning with soap and water handles routine messes. Reserve disinfection for high-touch hotspots,

Lysol 101: A Guide to a Truly Hygienic Home Read More »

woman giving her friend a cleaning gift card

Cleaning Gift: The Most Thoughtful Thanksgiving Gift You Can Give

Thanksgiving is a holiday centered on the beautiful, simple act of gathering. It’s about the warmth of a crowded table, gifts, the familiar comfort of shared recipes, and the expression of gratitude for the people in our lives. We plan menus, we brine turkeys, and we coordinate who will bring which dessert. But beneath this joyful preparation lies a silent, often stressful, and monumental task that almost always falls on the host: the pre-Thanksgiving deep clean. We have all felt it. The week before the guests arrive is a frantic race against the clock. It is a period of scrubbing, dusting, and mopping, driven by the quiet but intense pressure to present a home that is not just tidy, but impeccably clean. It is a labor of love, but it is labor nonetheless. It is hours spent on hands and knees, wiping baseboards and scrubbing floors, when that time could be spent perfecting a pie crust or simply taking a moment to breathe before the happy chaos begins. This year, consider a different kind of contribution. Instead of offering to bring another side dish that will crowd the refrigerator, think about giving a gift that truly serves the person you are thankful for. Consider giving the gift of a clean home. It may sound unconventional, but a pre-Thanksgiving cleaning, whether performed by you or a professional service, is one of the most thoughtful, practical, and profoundly impactful gifts you can possibly give a friend who is hosting. It is a gesture that transcends a simple present; it is a gift of time, of peace of mind, and of genuine, functional support. The Gift of Time In our busy lives, time is the most precious and non-renewable resource we have. During the holiday season, this becomes acutely apparent. The host of a Thanksgiving dinner is not just cooking a single meal; they are orchestrating a major event. Their to-do list is a marathon of planning, shopping, chopping, and baking. The last thing they have is a surplus of free hours. Let’s be honest about what a true guest-ready clean entails. It is not a quick wipe of the counters. It is a comprehensive, top-to-bottom effort. The Dusting: This means getting not just the coffee table, but the tops of the door frames, the ceiling fan blades, the baseboards, and the window sills. It is a detailed, meticulous job that can easily take an hour or more. The Kitchen Deep Clean: The kitchen is the heart of Thanksgiving, and it needs the most intensive work. This involves scrubbing the stovetop, wiping down the fronts of all appliances, cleaning the microwave, disinfecting the countertops, and making sure the sink is sparkling. This is a solid hour of focused work, at minimum. The Bathroom Scrub: The guest bathroom needs to be pristine. This means scrubbing the toilet, cleaning the sink and faucet, wiping down the mirror until it is streak-free, and washing the floor. The Floors: Every hard-surface floor in the main living areas needs to be thoroughly swept and mopped. Every carpet needs to be vacuumed, including moving furniture to get the dust bunnies hiding underneath. This can easily consume another hour or two, depending on the size of the home. The Final Touches: Cleaning entryway glass, tidying up clutter, and giving everything a final polish. When you add it all up, a proper pre-hosting deep clean can easily take five to eight hours of hard, physical work. By giving the gift of a cleaning, you are handing your friend an entire day of their life back. That is a day they can now use to finalize their menu, to bake a dessert without rushing, to spend time with their children who are excited for the holiday, or, most importantly, to simply sit down with a cup of tea and mentally prepare for the joy of hosting, rather than the stress of it. You are not just saving them a chore; you are giving them the space to enjoy the process. The Gift of Peace of Mind The physical labor of cleaning is only half the battle. For any host, the mental load can be even more exhausting. The pressure to have a “perfect” home is a real and often unspoken source of anxiety. Every dust bunny in the corner, every smudge on the window, and every crumb under the dining table can feel like a personal failing when you are about to welcome people into your home. This “hosting anxiety” creates a mental checklist that runs on a constant loop in a host’s mind. Did I remember to dust the lampshades? Is the guest bathroom clean enough? Does the house smell fresh? This internal monologue is a significant source of stress that detracts from the true spirit of the holiday. When you give the gift of a clean home, you are silencing that nagging voice. You are taking a huge, stressful item off their mental checklist and completely erasing it. Imagine the profound sense of relief your friend will feel, walking into their home a day or two before Thanksgiving to find that it is already done. The floors are gleaming. The kitchen is sanitized and ready for the culinary marathon. The bathroom is sparkling. This gift allows your friend to transition their focus from the presentation of their home to the purpose of the gathering. They can channel all their energy into what truly matters: the food, the conversation, and the connection with their loved ones. They can be a present, relaxed, and joyful host, not a frazzled, exhausted one who is secretly worrying about whether a guest noticed the dust on the baseboards. You are not just cleaning their house; you are clearing their mind. A Foundation for the Entire Holiday Season Thanksgiving in many ways is the official kick-off to the entire winter holiday season. The festivities of November flow directly into the preparations for December. A deep clean for Thanksgiving is therefore not just a gift for a single day; it is a foundational gift that keeps on

Cleaning Gift: The Most Thoughtful Thanksgiving Gift You Can Give Read More »