Summer Cleaning

Why Your Shower Glass is Always Hazy (And How to Fix It)

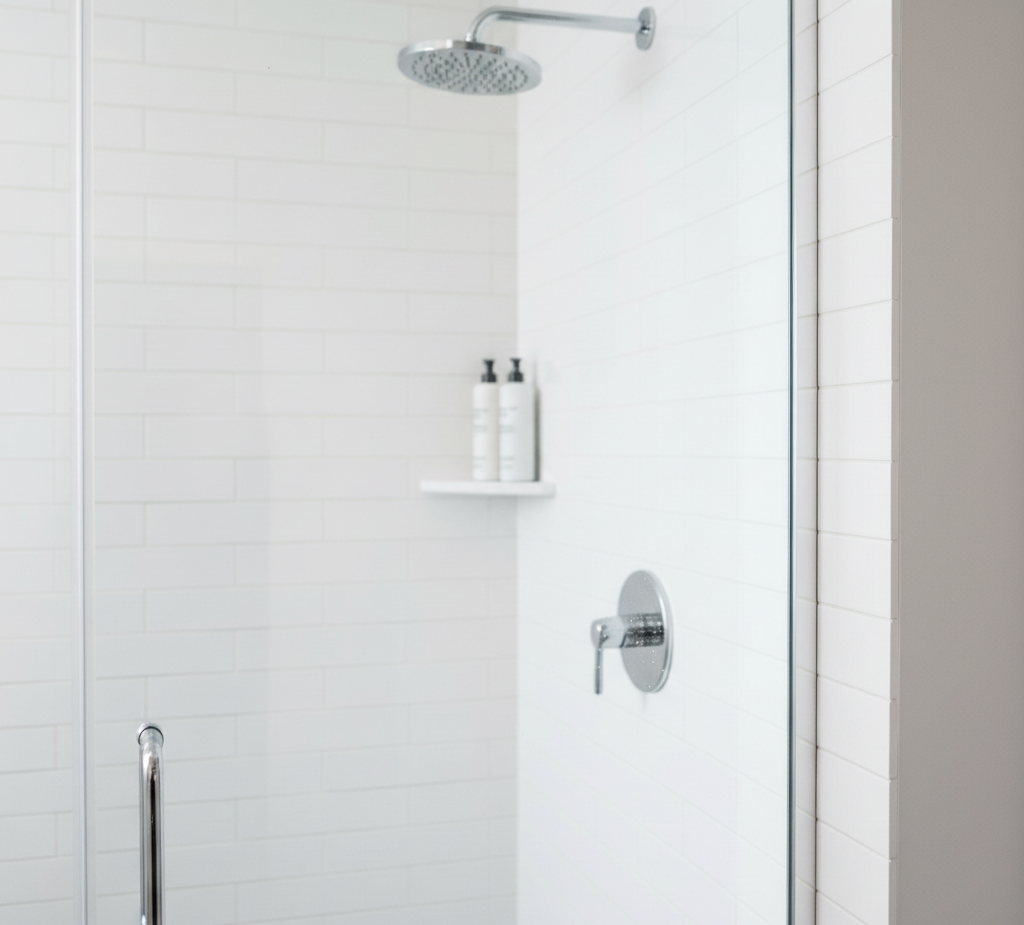
An impeccable shower glass is the centerpiece of a modern bathroom, providing a feeling of spaciousness and cleanliness similar to that of a spa. However, this beautiful feature quickly becomes the focal point for one of the most stubborn and frustrating cleaning challenges in any home. Within weeks of regular use, a cloudy, streaky film begins to build up, obscuring the glass with a milky haze and stubborn white spots. This is not ordinary dirt; it is a resilient combination of hard water minerals and soap scum, a congealed mess that resists standard glass cleaners and requires a specific, methodical approach to conquer. Hard Water The root of the problem lies in the chemistry of your water and soap. Hard water is rich in dissolved minerals, primarily calcium and magnesium. When water droplets evaporate on the glass, these minerals are left behind, forming a chalky, crystalline deposit. Simultaneously, the fatty acids present in most bar soaps and body washes react with these same minerals to create soap scum, a waxy, insoluble substance. This duo forms a tough, layered film that adheres tightly to the glass surface, becoming more difficult to remove with each shower. Prevention 1. Squeegee The most effective strategy for dealing with this persistent issue is, without question, prevention. The goal is to remove the water and soap residue before it has a chance to dry and set. This is accomplished with a simple, 30-second daily ritual: the squeegee. Keeping a good-quality squeegee hanging in your shower and making it a habit for the last person out to quickly wipe down the glass walls is a transformative act. Starting from the top, pull the squeegee down in overlapping vertical strokes. This physically removes the vast majority of the water droplets and soap residue. For an extra layer of protection, you can follow the squeegee with a quick wipe using a clean microfiber cloth to absorb any remaining moisture. This daily maintenance is the single most effective way to keep your shower glass perpetually clean and dramatically reduce the need for intensive deep cleaning. 2. Vinegar When a preventative routine is not enough and you are faced with a light to moderate buildup, the next line of defense is a simple, non-toxic, and incredibly effective cleaning solution made from white vinegar. The mild acetic acid in vinegar is a powerhouse when it comes to dissolving the alkaline mineral deposits from hard water. To create your cleaner, mix equal parts of plain white vinegar and warm water in a spray bottle. For an extra boost of grease-cutting power, you can add a few drops of a high-quality dish soap, which will help to break down the waxy soap scum component. 3. Hot Water Before you begin, it is helpful to run the shower on hot for a few minutes to steam up the bathroom. The warmth and humidity will help to soften the buildup on the glass, making it more receptive to the cleaner. Generously spray your vinegar solution all over the entire surface of the glass, ensuring it is completely saturated. Now, the most crucial step is to let it sit. Do not immediately start scrubbing. The acid needs time to work its magic, to chemically dissolve the mineral deposits. Allow the solution to dwell on the surface for at least fifteen to thirty minutes. 4. Sponge After the waiting period, it is time for some gentle agitation. Using a non-scratch sponge or a soft microfiber cloth, scrub the glass in a circular motion. You should feel the gritty deposits beginning to break down. For areas with particularly thick buildup, you may need to apply more of the solution and scrub a bit more vigorously. Once you are satisfied that the film has been loosened, rinse the glass thoroughly with warm water, using your shower head or a cup to wash away all the vinegar and dislodged grime. The final, critical step to a perfect finish is drying. Use a clean, dry microfiber cloth to buff the glass completely dry. This removes any lingering water droplets and prevents new spots from forming, leaving you with a streak-free shine. 5. Baking Soda For glass that has been neglected for some time and is suffering from a thick, opaque layer of soap scum and hard water stains, a more powerful, abrasive approach is required. This is where baking soda becomes your best friend. Baking soda is a gentle but effective abrasive that provides the physical scrubbing power needed to break through heavy buildup without scratching the glass. The most effective method is to create a thick paste by mixing baking soda with a small amount of water. Using a non-scratch scrub sponge, apply this paste to the glass and begin to scrub in firm, circular motions. You will feel the paste grinding away at the stubborn deposits. Let’s Get to Work! To supercharge this process, you can combine the power of baking soda and vinegar. Apply the baking soda paste first, then spray it with your vinegar solution. The mixture will begin to fizz and bubble, a chemical reaction that helps to lift and dissolve the grime from deep within the buildup. Continue to scrub the entire surface thoroughly. This method requires more elbow grease than the simple spray-and-wait technique, but it is remarkably effective for cutting through years of neglect. Once again, the process must conclude with a meticulous rinse and a complete, streak-free dry. While these DIY methods are incredibly effective, there are also commercial cleaners specifically formulated for this task. Look for products that are designed to remove calcium, lime, and rust. These often contain mild acids and are very effective, but it is important to ensure your bathroom is well-ventilated when using them, as they can produce strong fumes. As you clean the glass panels, do not forget the often-overlooked metal frame and tracks. These areas are magnets for grime and can even develop mold or mildew. Vacuum out any loose debris from the tracks first.

Why Your Shower Glass is Always Hazy (And How to Fix It) Read More »
window track cleaned and sanitized

Window Tracks Cleaning: The Secret to Cleaning Stubborn Dirt from Sliding Window Tracks

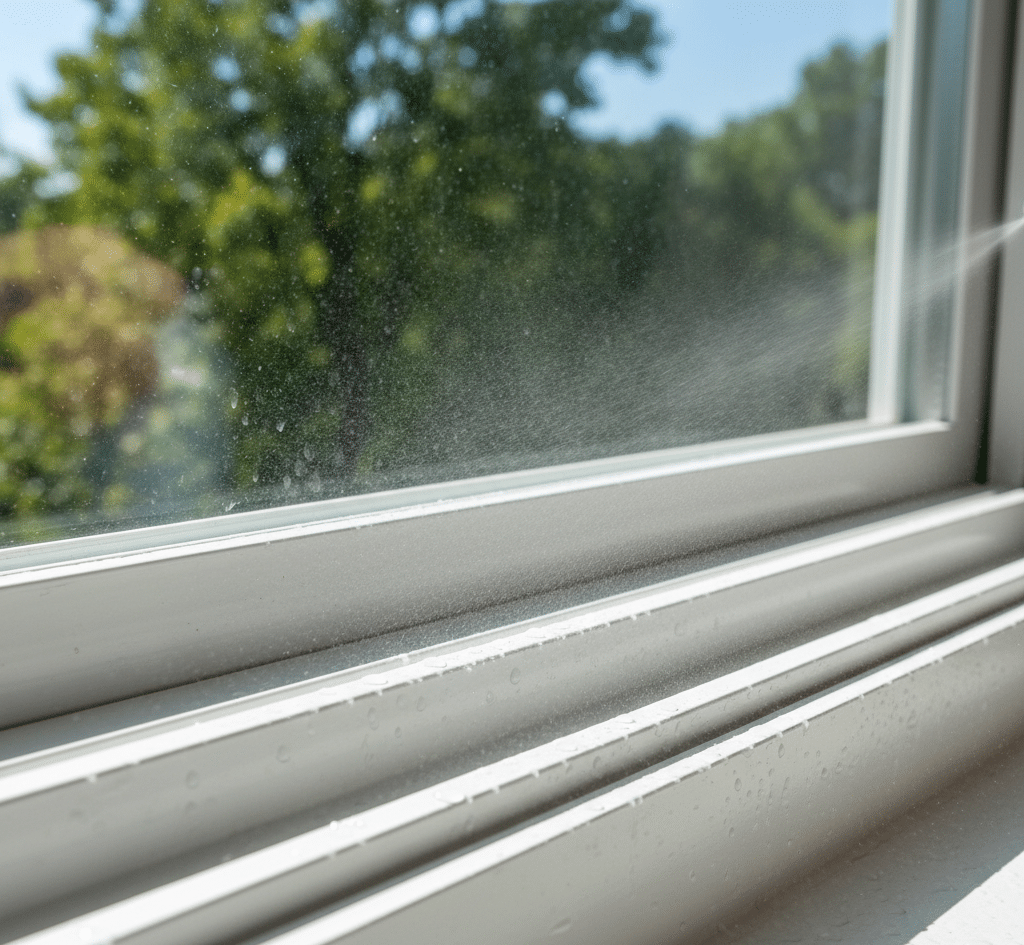
Window Tracks Cleaning: A Step-by-Step Guide to Stubborn Dirt Window tracks do a lot of quiet work: they let heavy glass panels glide, seal out drafts and rain, and lock the weather where it belongs. In return, they get neglected. Tucked at the bottom of the frame, sliding window tracks collect an astonishing blend of dust, pollen, rain-soaked dirt, dead insects and condensation that packs into a thick, stubborn sludge. That buildup is not just ugly: it jams the window, traps allergens and makes a room feel permanently dirty no matter how often you vacuum. Cleaning window tracks is easier than it looks once you follow the right sequence. This guide covers the tools, the dry-cleaning steps and the baking soda and vinegar technique that dissolves even set-in grime. Gather the Right Tools for Window Track Cleaning Vacuum cleaner with a crevice tool and a brush attachment Small stiff-bristled brush or an old toothbrush Spray bottle for precise solution application Baking soda and plain white vinegar Paper towels and clean microfiber cloths Butter knife or flathead screwdriver wrapped in cloth for corners Old towel to lay under the window and catch drips Step 1: Vacuum Out the Loose Debris First Never add liquid to a track full of loose dirt. The moment water hits that dry mix of dust, sand and dead bugs, it becomes a muddy paste that is far harder to remove. Open the window as wide as possible for full access, fit the vacuum with its crevice tool and work methodically along every groove and channel, giving extra attention to the corners where grime piles up deepest. Step 2: Loosen Caked-On Dirt With a Dry Brush Switch to the dry stiff-bristled brush and scrub the whole track vigorously. This agitates compacted, caked-on dirt that suction alone cannot lift, breaking it into fine powder. Vacuum again to pull up everything the brush freed. Finishing this dry phase thoroughly makes the wet cleaning below far more effective. Step 3: Let Baking Soda and Vinegar Fizz Away the Grime With the solids gone, only the sticky film of grime remains, and the classic chemistry of baking soda and vinegar handles it. Sprinkle a generous layer of baking soda over the whole track, filling every channel and corner until a visible white coating forms. Baking soda acts as a gentle abrasive and natural deodorizer. Fill the spray bottle with white vinegar, set it to a direct stream and spray the powder until it hisses and fizzes. That effervescent reaction is actively working, bubbling up and lifting grime off the surface, so leave it for ten to fifteen minutes before the next step. Step 4: Scrub, Dig Out the Corners and Scoop the Slurry Take the toothbrush back and scrub the gritty paste into every part of the track. The vinegar dissolves the grime, the baking soda scours and the brush supplies the muscle, producing a powerful cleaning slurry that lifts even set-in dirt. For the tight corners, wrap the tip of a butter knife or flathead screwdriver in a small piece of microfiber cloth or sturdy paper towel, and use this detail tool to dig out the gunk the brush cannot reach. Then scoop out the dark paste with paper towels, wiping until most of the visible mess is gone. Step 5: Rinse, Dry Completely and Clear the Weep Holes Finish with a clean microfiber cloth dampened with plain warm water and wrung out thoroughly. Wipe the entire track, rinsing the cloth often, to remove leftover dirt and any baking soda or vinegar residue. Then dry every surface completely with a clean, dry microfiber cloth. A bone-dry track resists mold and mildew and picks up far less new dirt, which matters because Health Canada identifies dampness as the main driver of mould growth in the home. Finally, inspect the weep holes, the small slots on the exterior side of the track that let rainwater drain. When they clog, water backs up and can leak into your home. Clear them with a toothpick or a blast of compressed air, then apply a tiny drop of silicone-based lubricant to the track so older windows glide smoothly again. Stage Tool Job Dry removal Vacuum with crevice tool Pull loose dust and debris from channels Compact dirt Stiff brush, then vacuum Break up and lift caked-on buildup Grime film Baking soda plus vinegar Fizz and dissolve sticky residue Tight corners Cloth-wrapped knife or screwdriver Dig out gunk brushes cannot reach Final finish Damp then dry microfiber cloth Rinse residue and dry fully Drainage Toothpick or compressed air Clear weep holes, then lubricate track Why Clean Window Tracks Matter for Your Home Clean tracks are about more than appearances. Sliding windows that glide freely seal better and last longer, and removing the dust, pollen and mold spores that collect in the frame means less of that debris circulates through the room. Household dust is one of the indoor air contaminants Health Canada flags for Canadian homes, so a track that no longer sheds grime with every open and close is a genuine air-quality win. Since mold can cause symptoms such as stuffy noses and wheezing in sensitive people, per the CDC’s mold overview, keeping the frame dry is a health habit, not just a cleaning one. Make Window Tracks Part of Your Cleaning Routine Add this five-step track cleaning to your seasonal routine, and the payoff shows every time you open a window. For homes where the grime has spread far beyond the frames, a professional deep clean restores every surface, from tracks and sills to floors and baseboards. Toronto Shine Cleaning brings that level of detail to deep cleaning visits and regular home cleaning across the city. See our pricing page and service areas, then call (647) 424-0355 to book your clean. Frequently Asked Questions About Cleaning Window Tracks How often should window tracks be cleaned? Include tracks in your seasonal deep cleaning, and clean them more often if you live on a busy

Window Tracks Cleaning: The Secret to Cleaning Stubborn Dirt from Sliding Window Tracks Read More »

pizza stone clean

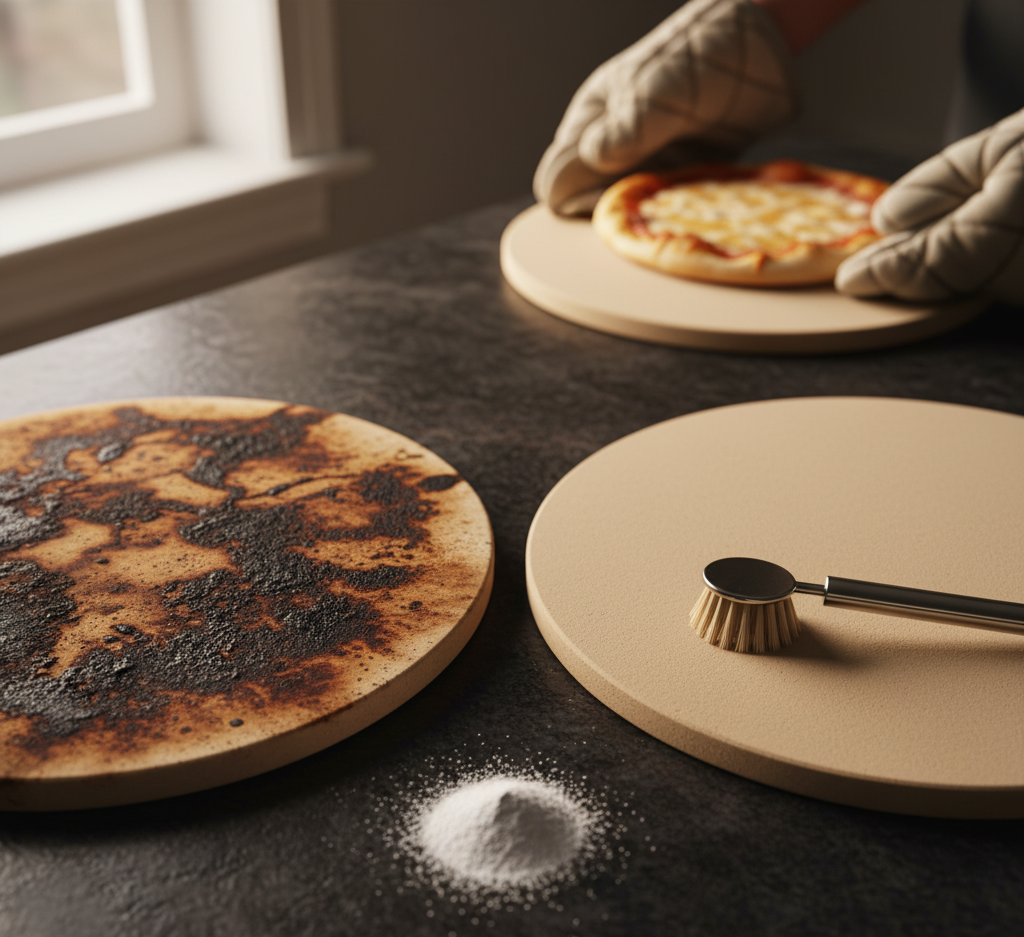
How to Make Your Stained Pizza Stone Look and Cook Like New

Pizza Stone Care: Make a Stained Stone Look and Cook Like New A pizza stone delivers the crisp, pizzeria-quality crust that metal pans cannot match because its porous ceramic, cordierite, or clay body pulls moisture from the dough while spreading heat evenly. That same porosity makes cleaning counterintuitive: the wrong move can leave you with soapy-tasting pizza, a cracked stone, or a sticky, smoky mess. This guide covers what never to do, how to remove baked-on food safely, and why dark stains are a sign of a well-loved stone. If the rest of your kitchen needs the same level of care, Toronto Shine Cleaning offers professional deep cleaning for your home; call (647) 424-0355 to book. Never Use Soap or Detergent on a Pizza Stone The first rule of pizza stone care is absolute: keep soap and detergent away from the surface. The stone acts like a very hard sponge, so liquid soap seeps deep into its structure. The next time the stone reaches pizza temperature, that trapped soap heats up, releases fumes, and bakes an unpleasant chemical taste directly into the bottom of your crust. Rinsing cannot pull soap back out of the ceramic, which means a single wash can permanently ruin the stone. If the stone ever needs more than dry scraping, the gentle methods below are the only safe options. Avoid Thermal Shock at All Costs A pizza stone is one solid piece of ceramic. It expands when heated and contracts when cooled, and a rapid temperature swing creates stress that can crack it in half. Never plunge a hot stone into a sink of cool or lukewarm water, and never place a cold stone into a preheated oven. Always put the stone in a cold oven and let it preheat along with the oven itself. After baking, leave the stone inside, turn the oven off, and let everything cool gradually over several hours before you touch it. How to Clean a Pizza Stone, Step by Step Once the stone is completely cool, cleaning is mostly dry work. The goal is not a pristine beige surface: a well-used stone is supposed to be stained, much like the patina on a cast iron skillet. The goal is a smooth surface free of food debris. Scrape away every bit of burnt cheese, scorched sauce, and fused crust with a flat, rigid tool such as a bench scraper or metal spatula held at a low angle with firm pressure. A stiff-bristled grill brush or dedicated pizza stone brush works too. Then wipe the residue away with a dry cloth; for most cleanings, that is all you need. Routine removal of food debris keeps the stone hygienic between bakes, which mirrors the CDC’s advice that regular cleaning is the first step for surfaces in your home. For stubborn spots, escalate carefully. Dampen a soft cloth or non-abrasive sponge with plain warm water, wring it out thoroughly, and scrub only the problem area. Never soak or submerge the stone, and dry the spot immediately with a clean cloth. For greasy, tacky marks, mix a few tablespoons of baking soda with only enough water to build a thick paste. Spread it over the stain, let it sit for ten to fifteen minutes, and scrub gently with a stiff brush or damp cloth. Wipe the area several times so no baking soda residue remains, since leftover paste can affect the flavor of your next pizza. Your Pizza Stone Cleaning Toolkit Bench scraper or metal spatula: shears off baked-on food when held at a low angle. Grill brush or pizza stone brush: useful for loosening residue across the whole surface. Soft cloth or non-abrasive sponge: for careful spot cleaning with warm water only. Baking soda: makes a gentle paste that lifts greasy, sticky stains without scratching. Dry cloths: for wiping debris away and removing moisture immediately after wet cleaning. Should You Try the Oven Self-Clean Cycle? Some owners run the oven’s self-cleaning cycle with a cool, scraped stone inside. The cycle heats far beyond 900 F (480 C), incinerating every trace of residue into fine white ash that you wipe away with a dry cloth once the oven has fully cooled, which can take many hours. This is a high-risk, high-reward method: the intense heat can crack thinner stones or any stone with hairline fractures. Check with the stone’s manufacturer before attempting it. Dry the Stone Completely Before the Next Bake Moisture trapped inside a pizza stone is dangerous. In a hot oven, water held in the pores turns to steam and expands rapidly, creating internal pressure that can crack the stone or even shatter it. After any wet cleaning, air-dry the stone for at least 24 hours. For extra certainty, set the dry-looking stone in a cold oven, bring it up to about 250 F (120 C) for one hour, and let it cool completely to bake out any hidden moisture. Pizza Stone Do’s and Don’ts at a Glance Do Don’t Scrape residue off a fully cooled stone Use soap, detergent, or the dishwasher Let the stone cool down inside the oven Plunge a hot stone into cold water Spot clean with a well-wrung damp cloth Soak or submerge the stone Air-dry for 24 hours after wet cleaning Heat a stone that may hold moisture Embrace the dark stains of seasoning Scrub with abrasive pads or harsh chemicals Frequently Asked Questions Is a stained pizza stone safe to cook on? Yes. Dark splotches are seasoning, not dirt, and they do not affect performance. What matters is that the surface is smooth and free of food debris after each use. The CDC’s food safety guidance puts keeping kitchen tools and surfaces clean first, which is exactly what scraping the stone after baking accomplishes. Can I wash a pizza stone with dish soap if it smells? No. Soap will be absorbed into the pores and ruin future pizzas. For odors, bake the stone empty at a high temperature in a cold oven, or use the

How to Make Your Stained Pizza Stone Look and Cook Like New Read More »

beatiful wooden floor

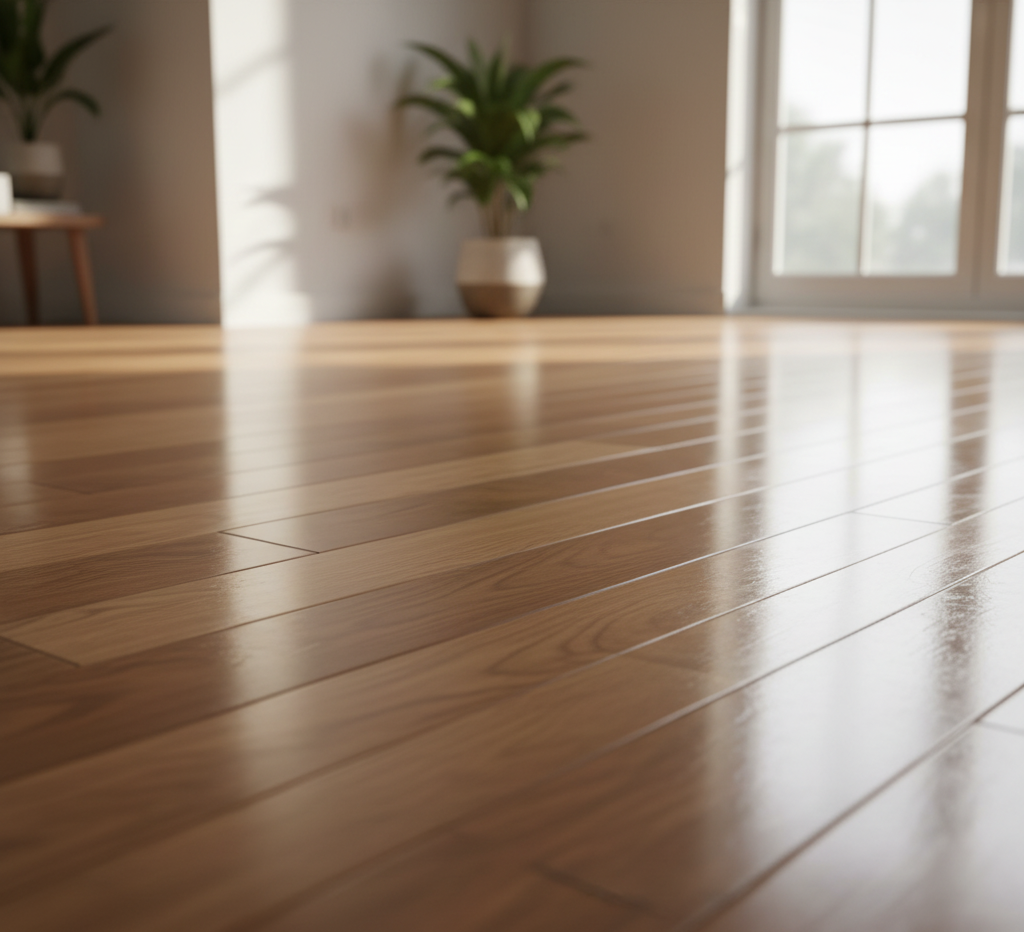
Cleaning Hardwood Floors: Stop Scratching Your Wood Floors with These Essential Cleaning Habits

Cleaning Hardwood Floors: Essential Habits to Stop Scratching Your Wood Floors Hardwood floors are a significant investment that adds warmth and value to a home, but the surface you clean every day is rarely the raw wood. Modern floors are protected by a thin, transparent layer of polyurethane finish that acts as a sacrificial shield against the friction of daily life. Once that finish is compromised, the wood underneath degrades rapidly. The good news is that a few consistent habits, dry dusting, careful moisture control, and the right cleaning products, will keep the finish intact for decades. For professional care, Toronto Shine Cleaning is available at (647) 424-0355. The Real Enemy Is Grit, Not Spills The most persistent threat to a polyurethane finish is not the occasional spill but the invisible accumulation of dry grit. Silica, sand, dirt, and pavement dust ride in on shoes, paws, and drafts. When a foot presses a grain of sand across the floor, it carves a microscopic trench in the finish. Thousands of these micro-abrasions scatter light over time, turning a glossy floor dull and cloudy, especially in high-traffic areas. Remove Grit Daily With the Right Tools Sweeping with a traditional bristle broom is inefficient: stiff bristles flick fine dust into the air so it settles right back down. A vacuum is better, but only with a hard-floor brush attachment and the rotating beater bar switched off, since a spinning beater bar beats grit into the finish. A wide, dry microfiber dust mop worked in a continuous figure-eight pattern is another excellent choice; its fibers trap fine particles with static electricity and lift them safely away. Use Less Water Than You Think Wood is hygroscopic: its cells naturally draw in moisture. The polyurethane finish protects the top face of each plank, but the seams between boards, deep scratches, and unfinished edges remain vulnerable. A traditional saturated string mop is a disaster on hardwood. Excess water seeps into the joints, the wood fibers swell, and the boards buckle upward into a permanent ripple called cupping. Trapped moisture can also break the bond between finish and wood, causing peeling and a milky white haze. The correct tool is a flat microfiber mop system. Microfiber’s split fibers create a huge surface area that traps dirt and absorbs liquid efficiently, so the pad needs only a fraction of the water of a cotton mop. Dampen the pad and wring it until it is practically dry before it touches the floor, and mist the cleaning solution onto a small section of about four square feet rather than pouring it. A simple test: the moisture left behind should evaporate within about sixty seconds. If the floor stays visibly wet, you used too much liquid. Skip Vinegar and Oil Soaps: Use pH-Neutral Cleaners One of the most damaging myths in floor care is the vinegar-and-water mixture. Vinegar is a solution of acetic acid, and repeated exposure chemically degrades polyurethane, stripping its sheen and its ability to repel water and stains. Traditional oil-based soaps, liquid waxes, and acrylic polishes are just as harmful on modern sealed floors: they cannot penetrate the finish, so they cure on top into a sticky, opaque film that traps every particle of dust and dirt. Removing that buildup requires harsh chemical strippers. The only acceptable cleaner for a modern hardwood floor is a pH-neutral formula engineered for polyurethane finishes. These products use mild surfactants that lift dirt and grease without leaving residue or altering the coating. Remember that mopping only removes surface soil: if a floor has lost its shine, no liquid can replace worn-away polyurethane. The real remedy for a dull floor is mechanical refinishing. Protect the Finish Beyond Cleaning Preserving hardwood takes a whole-home strategy. Indoor humidity is one piece: winter heating dries the air and shrinks wood, opening gaps between boards, while humid summer air makes it swell. Keeping relative humidity between 35 and 55 percent year-round with humidifiers and dehumidifiers minimizes that movement. Health Canada also links excess moisture to mould and dust mites and recommends controlling humidity for healthier indoor air. Pets, furniture, and sunlight need attention too: Fit every furniture leg with felt pads and replace them when they compress or pick up grit. Use soft polyurethane wheels or a protective mat under rolling office chairs. Trim pet claws regularly and clean up urine accidents immediately, since the acid can burn the finish and blacken the wood. Place scraping mats outside and absorbent mats inside every exterior door, and take shoes off at the threshold. Close blinds during peak sunlight to slow fading and discoloration from UV rays. Know When the Finish Is Failing Even with perfect care, a polyurethane finish wears out after roughly seven to ten years in a typical household. The clearest warning sign is a change in how water behaves: if droplets no longer bead up and instead soak into the wood and darken it, the protective seal is gone. Catching this early allows a screening and recoating, where only the top layer is lightly abraded and a fresh coat is applied, avoiding the cost and disruption of a full sand-down. Regular, correct cleaning is what delays that day as long as possible. The CDC notes that mould grows on wood wherever moisture collects, another reason to keep spills, humidity, and standing water away from your floors. Hardwood Cleaning Quick Reference Task Right Tool Avoid Daily dusting Dry microfiber dust mop or vacuum with hard-floor brush Bristle brooms and spinning beater bars Weekly cleaning Flat microfiber mop, wrung nearly dry Saturated string mops and steam mops Cleaning product pH-neutral polyurethane-safe cleaner Vinegar, oil soaps, waxes, acrylic polish Moisture control Humidifier or dehumidifier to hold 35-55 percent humidity Leaks, flooding, and standing water Furniture protection Felt pads and soft casters Bare wood or hard plastic feet Frequently Asked Questions Can I use vinegar and water on hardwood floors? No. Vinegar’s acidity gradually degrades polyurethane finish, leaving floors hazy and less water-resistant. Use a pH-neutral cleaner made for

Cleaning Hardwood Floors: Stop Scratching Your Wood Floors with These Essential Cleaning Habits Read More »

Medicine Cabinet: 5 Amazing Organization Tips for Shared Bathrooms and Medicine Cabinets

Medicine Cabinet Organization: 5 Tips for Shared Bathrooms The medicine cabinet is the nerve center of daily hygiene, grooming, and health routines, yet it often becomes a jumble of expired prescriptions, sticky bottles, and half-empty tubes. That chaos is more than an eyesore: it is a daily source of friction and a potential health hazard, especially when you are sick or in a hurry. With a systematic approach, you can turn a cramped cabinet into a streamlined space that works for everyone who shares it. Need a hand with the rest of the bathroom? Toronto Shine Cleaning offers professional deep cleaning for homes across the GTA; call (647) 424-0355. Tip 1: Empty Everything and Clean the Cabinet Interior You cannot organize a cabinet while it is full. Remove every item and lay it out on the bathroom counter or a table so you can see what you actually own. This visual inventory is often shocking: we buy new products before old ones run out and stock remedies for illnesses long past. With the shelves bare, scrub them clean. Glass shelves respond well to glass cleaner or a vinegar solution, and if the shelves are adjustable, take them out to clean the tracks and the back wall so the cabinet is pristine before anything goes back in. Supplies for the Job Glass cleaner or vinegar solution for restoring transparent glass shelves. Microfiber cloths to wipe shelves, tracks, and the mirror without streaks or lint. Clear acrylic trays and small bins to contain products by category and catch leaks. Magnetic strips and adhesive pods to reclaim the inside of the door for small tools. Labels or color-coded tape so every family member can find their own zone instantly. Tip 2: Purge Ruthlessly by Expiration Date The audit is where safety beats thrift. Medications degrade over time: their chemical stability fades, leaving them ineffective or, rarely, unsafe. That bottle of aspirin from years ago will not help today’s headache, expired sunscreen loses its SPF protection, and antibiotic ointments separate and lose potency. Check every bottle and tube, and toss anything expired. Disposal matters: flushing medications pollutes the water supply. Health Canada advises returning unused and expired medications to any pharmacy in Canada, which accepts take-backs year-round. Cosmetics get the same scrutiny: mascara has a shelf life of about three months before it risks eye infections, and anything that smells off, changed color, or separated belongs in the trash. Tip 3: Move Real Medicine Out of the Bathroom The bathroom is actually the worst place to store medication. Every hot shower floods the room with steam, and heat and humidity accelerate the breakdown of pills and capsules; aspirin can even degrade into vinegar-like acetic acid. True medicine, such as antibiotics, heart medication, and pain relievers, belongs in a cool, dry spot such as a kitchen cabinet far from the stove or a sealed box in a bedroom closet. Rebrand the bathroom cabinet as a grooming cabinet for humidity-stable items like toothpaste, mouthwash, and sealed lotions. Tip 4: Zone the Shelves and Use Every Inch Treat each shelf according to its reach. Eye level is prime real estate for daily drivers: toothbrush, deodorant, contacts, and the skincare you use every morning and night. Upper shelves suit occasional items such as first aid supplies, face masks, and backup razors. The highest shelf should hold dangerous products when children are in the home, and the lowest shelf is right for heavy or leak-prone bottles. Adjust shelf spacing to your tallest bottles, and reclaim the cabinet door: magnetic strips hold tweezers, nail clippers, and bobby pins, while small adhesive pods can hold toothbrushes or razors. Group items by function, dental, first aid, skincare, and shaving, and keep small products in clear acrylic trays or bins. Trays contain leaks, prevent the domino effect of falling bottles, and slide out for easy access. For households with kids, Health Canada’s guidance on storing household chemical products safely recommends keeping anything hazardous out of sight and reach. Tip 5: Define Territory and Maintain the System Shared bathrooms need clear rules. Give each person their own shelf, or use color-coded, labeled bins if space is tight. This prevents merged products, cross-contamination, and disputes. Then keep the system honest with two habits: the one-in-one-out rule, so a new tube of toothpaste means the old one is finished or discarded, and a five-minute monthly audit for empty bottles and expired items. Wipe the shelf bottoms during the audit to stop toothpaste rings from building up, and your cabinet will stay organized all year. Medicine Cabinet Zones at a Glance Zone Best For Examples Eye-level shelf Daily drivers Toothbrush, deodorant, daily skincare Upper shelves Occasional use First aid supplies, masks, backup razors Highest shelf Caution items or rarely used refills Anything hazardous to children Lowest shelf Heavy or leak-prone products Large bottles, liquid refills Cabinet door Small metal tools Tweezers, nail clippers, bobby pins Frequently Asked Questions Where should I store prescription medications? In a cool, dry spot outside the bathroom, such as a kitchen cabinet far from the stove or a locked box in a bedroom closet. Bathroom heat and humidity can degrade pills and capsules, so reserve the medicine cabinet for grooming products. How should I dispose of expired medications? Never flush them. Return unused and expired prescription and over-the-counter medications to any pharmacy in Canada through its take-back program, following Health Canada’s safe disposal advice. If no pharmacy is convenient, ask your pharmacist or municipality about other options. How often should I reorganize the medicine cabinet? Do a full purge and reset once or twice a year, and run a five-minute monthly audit for empties and expired items. The one-in-one-out rule keeps the cabinet from filling up again between deep cleans. Is it okay to keep bandages and antiseptics in the bathroom? Yes, for convenience, as long as they are in sealed containers that resist humidity. Remove bulky cardboard packaging, trim blister packs into clear bins, and store cotton swabs and bandages

Medicine Cabinet: 5 Amazing Organization Tips for Shared Bathrooms and Medicine Cabinets Read More »

Coffee Machine Cleaning: 5 Signs Your Coffee Machine Is Clogged with Limescale

The coffee machine is the silent engine of the morning, a device that many regard with a level of reverence usually reserved for religious artifacts. It is the first appliance touched in the day, the vessel that delivers the caffeine required to jumpstart human productivity. However, this reliance often breeds a dangerous complacency regarding hygiene. We assume that because boiling water passes through the system daily, it is inherently self-cleaning. This is a fallacy that leads to bitter coffee, mechanical failure, and the ingestion of mold and bacteria. The internal geography of a coffee maker is a dark, damp, and warm environment, the trifecta for biological growth. Furthermore, the very ingredients used to make the beverage-water and coffee beans-leave behind chemical residues that calcify and oxidize, slowly choking the machine. Cleaning a coffee machine is not merely a matter of rinsing the pot; it is a necessary maintenance protocol involving chemistry and mechanics to preserve the integrity of the brew and the lifespan of the equipment. Distinct Enemies To understand the cleaning process, one must first understand the two distinct enemies of the coffee machine: mineral scale and coffee oils. Water is the solvent of life, but it is rarely pure. Tap water contains dissolved minerals, primarily calcium and magnesium. When water is heated, these minerals precipitate out of the liquid and bond to the heating elements and internal tubing of the machine. This is known as limescale. It acts like cholesterol in an artery, narrowing the passages and insulating the heating coil. A machine suffering from scale buildup will struggle to reach the optimal brewing temperature of 195 to 205 degrees Fahrenheit. It will brew slower, produce lukewarm coffee, and eventually, the pump will fail under the strain of trying to push water through a blocked pipe. The second enemy is the bean itself. Coffee beans are rich in lipids. When roasted and ground, these oils are released to create the flavor and crema we desire. However, once these oils settle on the plastic and metal surfaces of the filter basket, the carafe, and the dispensing showerhead, they begin to degrade. Oxidized coffee oil turns rancid, developing a sharp, acrid flavor profile. If you have ever tasted a cup of coffee that seemed sour or metallic despite using fresh beans, the culprit was likely layers of old, rancid oil coating the machine. This residue is sticky and hydrophobic, meaning a simple water rinse will not remove it; it requires a degreasing agent to break the chemical bond. Descaling For the standard drip coffee maker, the reservoir is the ground zero of biological activity. Because it is often left damp and closed, it frequently harbors coliform bacteria and yeast. The cleaning protocol here requires a descaling solution. While many manufacturers sell proprietary powders, a mixture of white distilled vinegar and water remains a potent and accessible descaler for standard machines. The acid in the vinegar reacts with the alkaline mineral deposits, dissolving them into a liquid state that can be flushed away. The process involves filling the reservoir with a fifty-fifty mixture of vinegar and water, running the brew cycle halfway, and then turning the machine off. This “dwell time” is critical. It allows the acidic solution to sit inside the heating element and the tubing, eating away the scale. After an hour, the cycle is finished, followed by multiple cycles of fresh water to ensure no acetic acid taste remains. However, vinegar has limitations. It can be harsh on the rubber seals and gaskets found in more expensive or complex machines. For high-end espresso machines or pod systems, using a specialized descaling solution based on citric or lactic acid is safer. These acids are odorless and formulated to be gentle on internal components while being ruthless on scale. Using vinegar in a high-pressure espresso pump can sometimes cause the rubber O-rings to degrade, leading to internal leaks. Single-Serve pod Machine The single-serve pod machine presents a unique set of hygiene challenges. These machines rely on a hollow needle to puncture the foil of the coffee capsule. This needle often becomes clogged with coffee grounds and dried oils, restricting flow and causing pressure backups. Cleaning the needle requires a mechanical approach, often using a straightened paper clip or a specialized tool provided by the manufacturer to physically dislodge the blockage. Furthermore, the exit spout of these machines is a trap for coffee splatter. Bacteria known as Serratia marcescens, which manifests as a pinkish slime, loves the drip tray and the nozzle area. Regular wiping with a disinfectant and running a “cleansing brew”-a cycle without a pod-is essential to flush out the internal chamber where the coffee is actually brewed. Espresso Machines Espresso machines are the most complex and require the most rigorous cleaning routine. The group head, the metal component where the portafilter locks in, is subjected to immense pressure and heat. Coffee fines and oils are forced back up into the group head after every shot. If not cleaned, this debris blocks the dispersion screen, causing water to channel unevenly through the puck, resulting in bad espresso. The solution is “backflushing.” This involves inserting a blind filter basket (one with no holes) into the portafilter, adding a specialized detergent powder, and engaging the pump. The pressure forces the soapy water back up into the group head and through the three-way solenoid valve, scrubbing the internal pathways. This should be done daily in commercial settings and at least weekly for home enthusiasts. The steam wand on an espresso machine acts as a direct line to the boiler or thermoblock. When steaming milk, a vacuum effect can occur when the steam knob is closed, sucking a small amount of milk back up into the wand. If this milk residue is allowed to dry, it rots. The bacteria multiply rapidly, and the next time you steam milk, you are injecting that bacteria into your drink. The rule for steam wands is absolute: purge and wipe. Before and after every use, the

Coffee Machine Cleaning: 5 Signs Your Coffee Machine Is Clogged with Limescale Read More »

Best Steam Cleaner: 5 Tips for Choosing the Ideal Steam Cleaner for Your Home

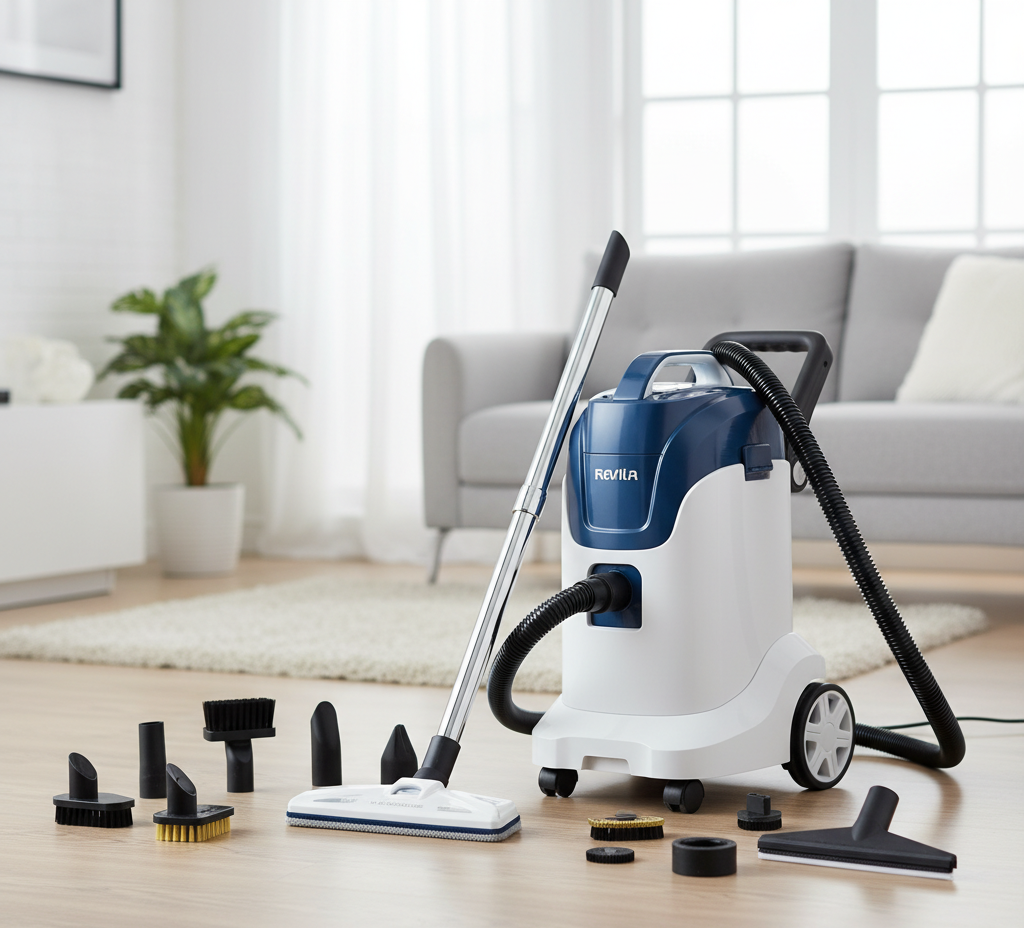
Choosing the Best Steam Cleaner for Your Home Steam cleaning replaces harsh chemicals with superheated, pressurized water that pushes heat into tiny crevices, loosens dirt, and neutralizes bacteria on contact. For households that want fewer chemical residues, a steam cleaner handles everything from kitchen grease to mattress allergens, but only when the right machine is chosen. Cheap units with weak pumps disappoint quickly, so shop with these five tips in mind to find the model that truly earns the title of best steam cleaner for your home. Tip 1: Match the Machine Type to the Job The market splits into three broad categories, and the best machine for a tiled mudroom is rarely the best one for detailed kitchen work. Handheld units are the scalpels of the steam world: portable, quick to heat, and perfect for targeted jobs such as faucet grease, window tracks, and doorknobs, though their small tanks limit run time. Steam mops specialize in sealed hard floors and avoid the cross contamination of a bucket and mop, but they cannot clean vertical surfaces or upholstery. Canister systems separate the boiler from the wand, which allows a bigger water capacity and more power, making them the most versatile choice for whole home cleaning. Machine type Best for Limits to know Handheld steamer Grease spots, grout, small surfaces Short run time, lower pressure Steam mop Sealed tile, stone, and hard floors No vertical or fabric cleaning Canister steamer Whole home, fabrics, kitchens Bigger, heavier, pricier Tip 2: Demand Dry Steam and Real Pressure Dry steam sounds like a contradiction, but it describes vapor superheated well above boiling, often reaching 240-300 F while carrying less than five percent liquid water. That low moisture vapor is what makes steam safe for mattresses, upholstery, and carpets: wet steam soaks fabric and invites mildew, but dry vapor flashes off in seconds. Pressure is the second metric that separates professional grade machines from toys. Look for at least four to five bars of pressure, because low pressure simply billows hot fog that may kill surface bacteria but cannot blast the black gunk out of grout lines. Check the heating system too: flash heating models drip water onto a hot plate and produce sputtering, inconsistent steam, while a pressurized boiler tank holds a steady, powerful stream. Tip 3: Buy the Boiler You Can Refill Mid-Clean A standard pressurized boiler must cool down before it can be refilled, which stops momentum cold. The best machines feature a continuous refill system: a secondary, non pressurized reservoir pumps water into the boiler as needed, so long cleaning sessions never need a pause. Boiler quality also decides how long the machine lasts. Plastic boilers and weak pumps often give out after a year or two of limescale and heat stress, while premium units with stainless steel boilers and replaceable heating elements are built to serve for decades. Treat the purchase as a long term investment in one machine that retires the mop, the chemical caddy, and the scrub brush. Tip 4: Count the Accessories Before You Commit Versatility lives in the attachments, so a truly great steamer should arrive with more than a floor head. Look for a triangular brush for corners, a jet nozzle for blasting stuck on grime, plus compact nylon and brass brushes for detail work. Brass bristles sparkle on oven racks and grill grates, where steam softens burned on food and the stiff wires take over the scrubbing. Add the window squeegee attachment and the steamer delivers a streak free glass finish with no chemical spray. Flimsy bristles that melt under high heat make a machine useless, so inspect attachment quality before buying. Use the kit like a transformer: Floor head for mopping hard floors without detergent residue. Jet nozzle for shower tracks, radiators, and tight crevices. Brass brushes for oven racks, grill grates, and burned on food. Squeegee for streak free windows and mirrors. Tip 5: Verify the Heat for Pests, Allergens, and Delicate Surfaces Dust mites and bed bugs resist many poisons but cannot survive thermal shock, and a steamer that holds a tip temperature above 160 F is lethal to them and their eggs on contact. For allergy sufferers that makes the machine a genuine health tool: pillows, mattresses, and plush toys can be sanitized without the potential allergens found in chemical sprays. Heat this powerful demands respect, however, so use it with care: Never steam unsealed hardwood floors; the moisture can strip the finish, grey the wood, and make it swell. Avoid blasting cold window glass in winter, which can shatter it; warm the pane first. Skip surfaces where heat can melt glue, such as some laminate countertops and luxury vinyl tile. Machines with variable steam control solve this: turn the dial down for silk plants and velvet curtains, and crank it up for barbecue grills. In the kitchen, steam melts the polymerized grease on range hoods and backsplashes so it wipes away with a microfiber cloth, sanitizes the sink drain by melting odor causing biofilm, and even defrosts a freezer in minutes. The CDC’s home cleaning and disinfecting guidance notes that routine cleaning removes most germs from surfaces, with disinfecting reserved for illness situations, which is why steam fits so well into a healthy home routine. And because steam leaves no residue, Health Canada’s household chemical safety advice becomes easier to follow: fewer products in the house means fewer poisoning, burn, and storage risks to manage. Frequently Asked Questions About Steam Cleaners What is dry steam and why does it matter? Dry steam is vapor heated well above boiling, typically 240-300 F with less than five percent liquid water, so it cleans and evaporates quickly instead of leaving fabrics wet and prone to mold. Can a steam cleaner damage hardwood floors? Steam can strip the finish from unsealed hardwood, turning the wood grey and causing it to swell, so use a steamer only on sealed floors and always follow the manufacturer’s guidance for delicate surfaces. Does steam cleaning kill

Best Steam Cleaner: 5 Tips for Choosing the Ideal Steam Cleaner for Your Home Read More »

Shower Cleaning Products: The Ultimate Guide to removing Hard Water Stains from Glass Shower Doors

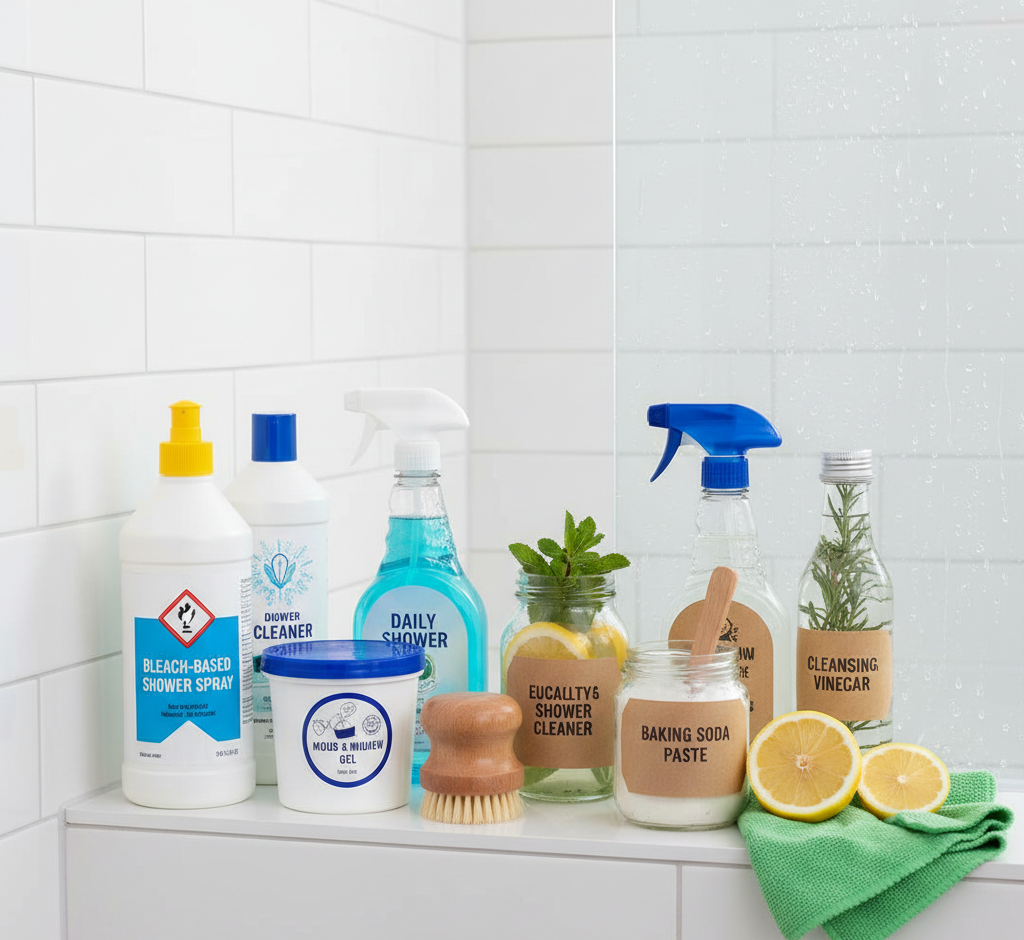
Shower Cleaning Products: How to Beat Hard Water Stains on Glass Doors The shower may look easy to clean, yet it collects some of the toughest grime in the house: steam, skin oils, soap residue, and hard-water mineral film build stubborn layers on glass doors, tile, and fixtures. Soap scum, limescale, pink bacterial film, and dark mold each need different chemistry, so the right shower cleaning products match the formula to your enemy and your surfaces without etching tile or harming your health. Know Your Enemy: Soap Scum, Limescale, Pink Slime, and Mold Two very different deposits create the white haze common in North American showers. Soap scum is a waxy salt called calcium stearate, formed when fatty acids in bar soap bind with the calcium and magnesium ions in hard water. Limescale is strictly mineral: the calcium carbonate that remains once water evaporates. Both are alkaline, so acids dissolve their mineral bonds, the core rule of shower chemistry. Biological threats differ, since the pink or orange slick near the drain is usually Serratia marcescens bacteria while black spotting on caulk and grout is mold. Acidic Descalers: The Workhorses for Glass, Tile, and Chrome Acidic descalers are the first choice for glass doors, ceramic tile, and chrome. Typical formulas rely on citric or lactic acid, while heavy-duty commercial versions use phosphoric or hydrochloric acid. Sprayed on a cloudy door, the acid turns the alkaline minerals into soluble salts that rinse away; the fizzing you see on grout is that reaction at work. The catch: acid eats natural stone. Marble, travertine, limestone, and slate etch into dull, rough patches no polish can reverse, so stone showers need neutral cleaners made for them. Bleach Products: Disinfecting Mold Without Cleaning the Scum Bleach sprays rely on sodium hypochlorite, which oxidizes the cell walls of mold and bacteria and whitens stained grout. They will not dissolve soap scum or limescale: sprayed over a thick waxy layer, the mold underneath survives, and because bleach cannot penetrate porous grout, deeper roots simply regrow within weeks. Use bleach as step two: descale with an acid cleaner, rinse thoroughly, then disinfect. As the CDC explains, properly diluted bleach kills germs on hard surfaces, and it must never be mixed with other cleaning products, since the reaction can release dangerous fumes. Abrasives, Enzymes, and Daily Sprays Three more product families round out a well-stocked shower caddy: Abrasive cleansers: creams and powders with fine particles such as feldspar or silica that grind away buildup. They excel on textured fiberglass or acrylic floors, metal marks on porcelain, and rings around the drain, though coarse grit dulls high-gloss finishes over time. Enzymatic cleaners: biological enzymes that digest body oils, skin cells, and soap residue, ideal for drains and for keeping odors away. They work slowly and need dwell time, but they are gentler on users and safe for plumbing and septic systems. Daily shower sprays: preventive formulas with surfactants and chelating agents that bind minerals so water sheets off walls and glass before it evaporates. They cannot rescue a neglected shower, but used right after every rinse they stretch the time between deep scrubs. Quick Comparison: Which Product for Which Surface Surface Best product type Key caution Glass shower doors Acidic descaler, then rinse Never use coarse abrasives that scratch glass Ceramic tile and grout Acid for scale, bleach for mold, grout brush for scrubbing Clean and rinse before disinfecting so bleach reaches the mold Marble, travertine, slate Stone-safe neutral cleaners only Standard acid products etch natural stone permanently Fiberglass and acrylic pans Mild abrasive cream on textured floors Skip powder grit that dulls glossy finishes Chrome and metal fixtures Acidic descaler for water spots Rinse well so acid does not sit on the metal Dwell Time, Ventilation, and the Never-Mix Rule Chemistry needs minutes, not seconds. Acidic and bleach products should sit for five to ten minutes so they can break molecular bonds; spray and wipe immediately and the product never works. In a small enclosed stall, fumes concentrate quickly, so run the exhaust fan and crack a window. Never mixing products is the bathroom’s deadliest rule: bleach with an ammonia-based cleaner forms chloramine gas, and bleach with vinegar or any acid forms chlorine gas, both of which can be fatal. Rinse the shower fully between products, then check the Government of Canada guidance on using household chemicals safely before you start. Do Natural Cleaners Like Vinegar and Baking Soda Measure Up? White vinegar is genuinely useful as acetic acid on mild limescale, and baking soda works as a gentle abrasive. Their limits matter: vinegar is not a registered disinfectant and will not reliably kill bacteria such as Staph, its acidity can degrade rubber seals over time, and baking soda needs heavy rinsing. For a shower neglected for months, commercial chemistry is usually needed to break bonded scale first. After that, vinegar, baking soda, and a daily squeegee habit maintain the clean, since pulling water off the glass after every use denies limescale a place to form and mold the moisture it needs. Frequently Asked Questions What is the best product for hard water stains on glass shower doors? An acidic descaler containing citric or lactic acid dissolves the calcium carbonate film that hard water stains actually are. Spray it on dry glass, let it sit for five to ten minutes, scrub gently with a non-scratch sponge, and rinse. A squeegee after every shower keeps the film from returning. Can I use the same cleaner on tile, glass, and natural stone? No. Acidic cleaners are safe for glass, ceramic tile, and chrome, but they permanently etch marble, travertine, limestone, and slate. Keep a stone-safe neutral cleaner for natural stone and read the label before spraying anything in a stone shower. Why does black mold keep coming back on my grout and caulk? Bleach whitens surface mold but cannot penetrate porous grout, so the roots survive and regrow quickly. Remove soap scum first so the bleach reaches the mold, then disinfect

Shower Cleaning Products: The Ultimate Guide to removing Hard Water Stains from Glass Shower Doors Read More »

Fabric Softener Sheets: 5 Things You Should Never Put in the Dryer with a Softener Sheet

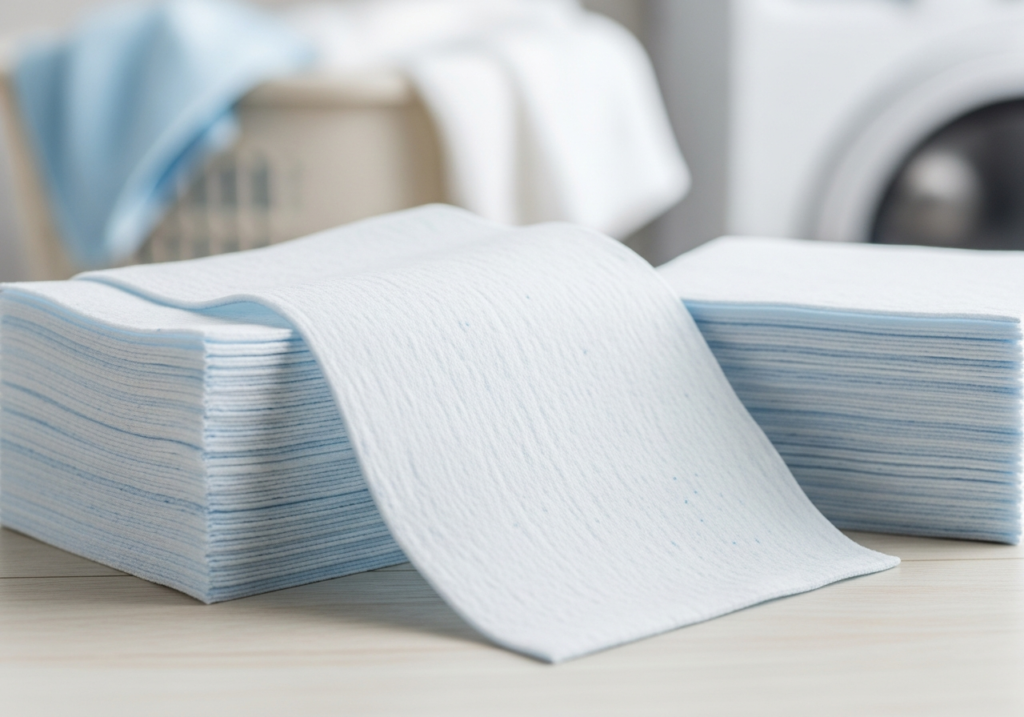
Fabric softener sheets, commonly known as dryer sheets, have become a staple of the modern household, synonymous with the concept of “freshness.” We are conditioned to believe that our clothes are not truly clean unless they emerge from the machine smelling of “Mountain Rain” or “Lavender Fields,” free of static and soft to the touch. However, this convenience product is often the subject of misunderstanding. While they solve specific problems-namely static cling and roughness-they introduce a layer of chemical complexity to our textiles and appliances that can have unintended consequences. To use them effectively, one must look past the marketing and understand the mechanics of how a dryer sheet actually works, what it leaves behind, and when it should be strictly avoided. How Does it Work? To comprehend the function of a dryer sheet, you must visualize it not as a cleaning agent, but as a delivery system. The sheet itself is merely a carrier, usually made of a synthetic non-woven fiber. It is coated in a heat-activated compound, typically comprised of stearic acid (a fatty acid often derived from animal fats), clay fillers, and heavy fragrances. In the cool air of the laundry room, this coating is solid. However, once introduced to the high heat of the dryer cycle, this waxy layer melts. As the wet clothes tumble, the sheet makes repeated contact with the fabrics, transferring this liquefied coating onto the fibers of your clothing. It is, in essence, a process of lubrication. The primary and most functional benefit of this coating is the elimination of static electricity. Static is the bane of the laundry process, particularly in the dry winter months or in climates with low humidity. It occurs when synthetic fabrics like polyester and nylon rub against each other in the dry heat, exchanging electrons and building up an electrical charge. This results in clothes that cling to the body, crackle when separated, and attract dust and hair. The coating provided by the dryer sheet contains positively charged ions. These ions neutralize the negative charge created by the tumbling fabrics, effectively canceling out the static. For households that wear a significant amount of synthetic clothing, this antistatic property is not just a luxury; it is a necessity for wearable garments. Beyond physics, there is the tactile and olfactory appeal. The fatty acids in the coating reduce the friction between individual fibers. This makes rough fabrics, such as denim or air-dried cotton, feel significantly softer and more pliable against the skin. Simultaneously, the heat activates the encapsulated fragrance molecules, embedding them into the weave of the cloth. This scent lingers far longer than detergent fragrance because it is applied at the end of the process and is not rinsed away. For many, this lingering scent is the primary indicator of hygiene, a sensory signal that the laundry chore is complete. Disadvantages However, the mechanism that provides these benefits-the coating of the fiber-is also the source of the product’s significant downsides. The most detrimental effect of dryer sheets is on absorbency. The waxy layer that makes a fabric feel soft is hydrophobic, meaning it repels water. When you use dryer sheets on bath towels, you are essentially waterproofing them. Over time, the buildup of these fatty acids coats the loops of the terry cloth. You end up with a towel that feels plush to the touch but merely pushes water around on your skin rather than soaking it up. To restore a towel’s absorbency, one often has to strip the fabric using vinegar and hot water to melt away the accumulated softener residue. This blocking of the fiber’s pores is even more catastrophic for modern athletic wear. Performance fabrics are engineered with a specific synthetic weave designed to wick moisture away from the body and allow it to evaporate quickly. This is a mechanical function of the textile. When you dry yoga pants or running shirts with a fabric softener sheet, the residue fills the micropores of the fabric. This traps sweat, dead skin cells, and bacteria inside the weave. The result is twofold: first, the garment loses its ability to wick sweat, leaving you clammy during a workout; second, it develops a “perma-stink.” Because the bacteria are trapped under a layer of silicone or wax, the detergent cannot reach them in the next wash. The clothes begin to smell musty even when they are technically clean. Manufacturers of high-end athletic gear almost universally advise against the use of softeners for this reason. Security There is also a safety concern regarding the flammability of textiles. Children’s sleepwear is legally required to be flame-resistant. This is achieved either through the use of specific synthetic fabrics or chemical treatments. The coating left by dryer sheets, being derived from emulsified fats and oils, is inherently flammable. Coating flame-resistant pajamas in a layer of flammable residue reduces their resistance to fire. Most dryer sheet boxes carry a warning label advising against use on children’s sleepwear or garments labeled as flame-resistant, yet many consumers overlook this fine print, unknowingly compromising the safety features of the clothing. The impact on the dryer itself is a “hidden cost” of dryer sheet usage. As the chemical coating melts, it does not only transfer to the clothes; it transfers to the drum and the filtration system of the machine. The most critical area of concern is the lint trap. The screen of the lint trap is designed to catch fine particles while allowing hot, moist air to pass through. Over time, the invisible waxy film from dryer sheets can coat the mesh of the screen. This blockage is often invisible to the naked eye. The screen looks clean, but air cannot pass through it efficiently. This forces the dryer to work harder, increasing energy bills and the risk of the motor overheating. A simple test is to take the lint screen to the sink and run water over it. If the water pools and beads up rather than flowing through the mesh, the screen is clogged

Fabric Softener Sheets: 5 Things You Should Never Put in the Dryer with a Softener Sheet Read More »

several different brooms

Let’s Compare 6 Different Types of Brooms so You Know The Best Ways To Use Them.

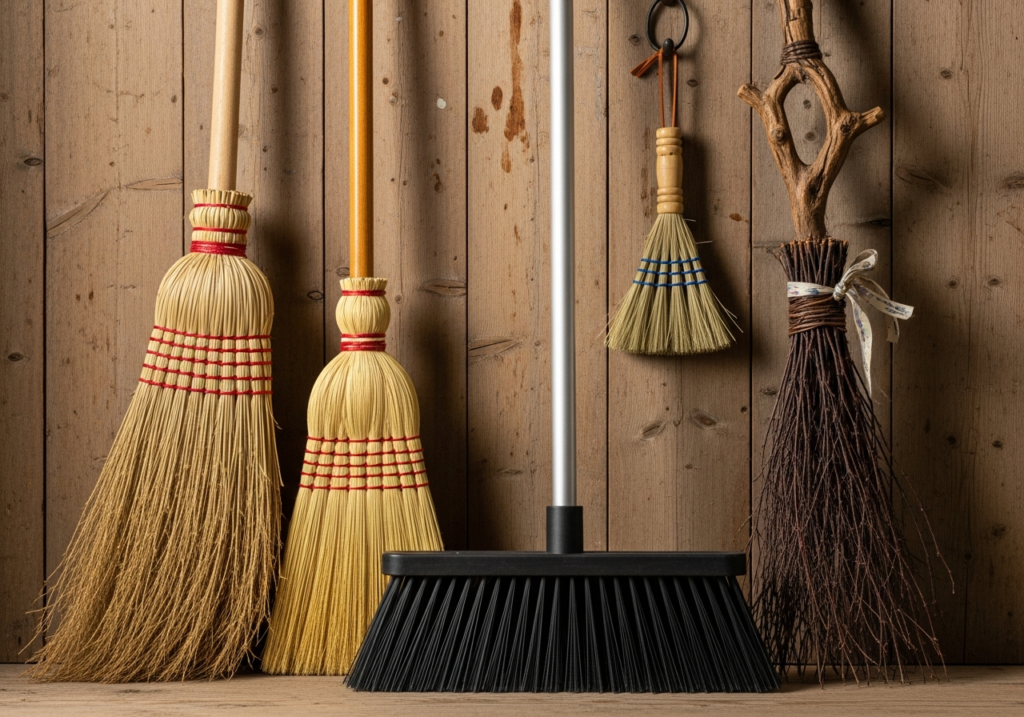
The humble broom is often the most underrated tool in the cleaning arsenal. To the uninitiated, it is simply a bundle of fibers attached to a stick, a primitive device designed to push debris from one location to another. However, this oversimplification is the primary cause of inefficient cleaning, damaged flooring, and unnecessary physical fatigue. The evolution of this implement has diverged into a complex taxonomy of shapes, materials, and specialized functions. Just as a carpenter would not use a sledgehammer to drive a finishing nail, a homeowner should not use a stiff straw sweeper to clean a polished hardwood floor. Understanding the mechanics of these tools-the stiffness of the bristle, the angle of the head, and the composition of the fibers-is essential for mastering the art of the sweep. Using the correct instrument transforms a chore into a seamless maintenance routine, ensuring that dirt is actually removed rather than simply redistributed into the air or the gaps between floorboards. Corn Broom The most recognizable silhouette in the world of sweeping is the traditional corn broom. Crafted from the natural fibers of the sorghum plant, this tool is a relic of agricultural history that has survived into the modern era due to its sheer durability. It is characterized by its stiffness and its rough texture. It is a heavy-duty instrument designed for high-friction environments. Its domain is the outdoors-the concrete patio, the sidewalk, the garage floor, and the barn. The rigid, straw-like bristles are strong enough to move heavy debris like wet leaves, gravel, and snow. They act as a rake and a sweeper combined. However, bringing this natural fiber tool indoors is almost always a mistake. The stiff straws are too abrasive for delicate surfaces like laminate or polished hardwood, potentially leaving micro-scratches in the finish. Furthermore, they are notorious for shedding their own bristles, adding to the mess they are supposed to be cleaning. They lack the fine, split ends required to trap microscopic dust, meaning they push the big rocks while leaving the fine silt behind. Synthetic Angle Broom For the interior of the home, particularly the kitchen and the dining room, the synthetic angle broom is the superior choice. These are typically made from plastic or nylon fibers. The genius of this design lies in its geometry. The head is cut on a diagonal bias, creating a sharp point at one end. This design acknowledges the architectural reality of a room: corners exist. A flat-headed sweeper struggles to reach the dust bunnies trapped where the baseboard meets the cabinet, but an angled head can be maneuvered into tight crevices and under the lips of appliances with precision. The bristles on these tools are usually “flagged.” If you look closely at the tips of the plastic strands, you will see they are frayed or split into tiny hairs. This flagging increases the surface area exponentially, creating a dense web that traps fine flour, pet dander, and dust particles. This implement is designed for the “pull” stroke, gathering light debris gently without kicking it into the air. Push broom When the task involves large, open spaces such as basements, driveways, or warehouses, the standard upright broom becomes inefficient. The biomechanics of the sweeping motion-twisting the waist and pulling the arm across the body-is tiring over large areas. This is where the push brush dominates. This tool features a wide, rectangular block head, ranging from eighteen to thirty-six inches, attached to a handle at an angle. The motion is a forward thrust, utilizing the power of the legs and the body’s weight rather than the lower back. These wide sweepers come in a variety of bristle textures. “Fine” versions have soft, dense fibers for moving dust on smooth concrete. “Coarse” versions have thick, stiff bristles for moving heavy mulch or rocks on asphalt. Many modern iterations utilize a dual-bristle system: a stiff inner core to move heavy objects and a soft outer border to catch the fine dust, providing a comprehensive clean in a single pass. Rubber Broom A relatively modern innovation that addresses a specific biological nuisance is the rubber broom. For households with pets, this device is nothing short of miraculous. Traditional bristle tools are ineffective against pet hair; the static electricity generated by the sweeping motion causes the hair to fly away or float over the bristles. A rubber sweeper features a head made of molded rubber nubbins or thick, flexible fingers. When dragged across a carpet or a hard floor, the rubber creates friction and a static charge that acts as a magnet for fur. It pulls hair out of the weave of a rug that a vacuum cleaner might miss. Furthermore, the head often includes a squeegee edge, making it a dual-purpose tool for cleaning up liquid spills or scrubbing a tile floor with soapy water. It is a hygienic option as well, as the rubber head can be easily washed and sanitized, unlike a straw sweeper which absorbs bacteria. Whisk Broom There is also the specialized category of the whisk broom. This is essentially a handheld version of the traditional corn sweeper or a stiff synthetic brush. It lacks a long handle, forcing the user to get close to the work. Its utility is found in the small, localized mess. It is the tool for the staircase, the upholstery of the car, or the spilled potting soil on a workbench. Because the user is closer to the debris, they can apply more directed pressure to dislodge stubborn dirt. This handheld device often pairs with a dustpan, forming a unit that is essential for “spot cleaning” rather than whole-room maintenance. “Dust Mop” The “dust mop” is technically a cousin of the broom, but it deserves inclusion in the conversation regarding dry floor cleaning. Unlike a sweeper that uses bristles to flick dirt, a dust mop uses a flat head covered in cotton or microfiber loops to glide over the surface. This is the tool of choice for large expanses of gymnasium floors, hospitals, and long hallways. It does not lift heavy

Let’s Compare 6 Different Types of Brooms so You Know The Best Ways To Use Them. Read More »