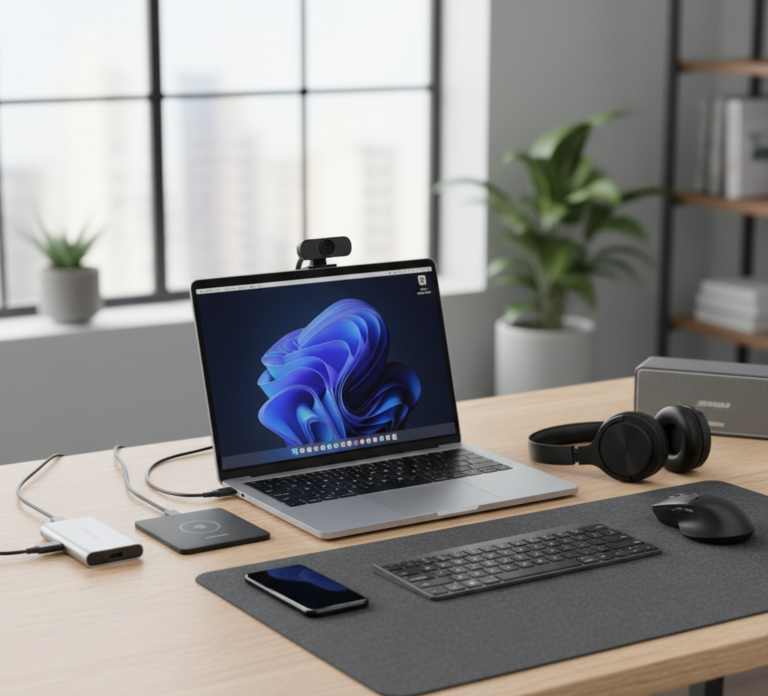
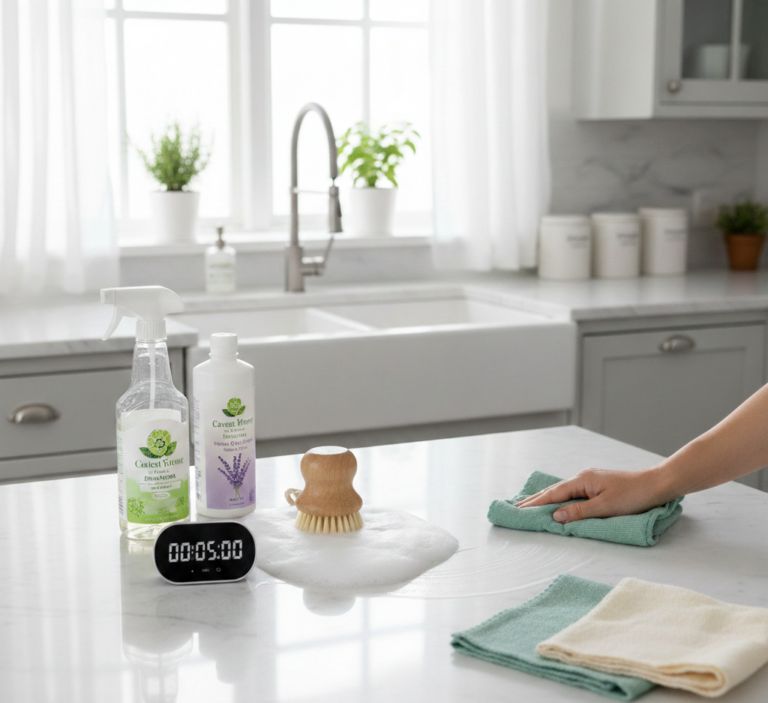
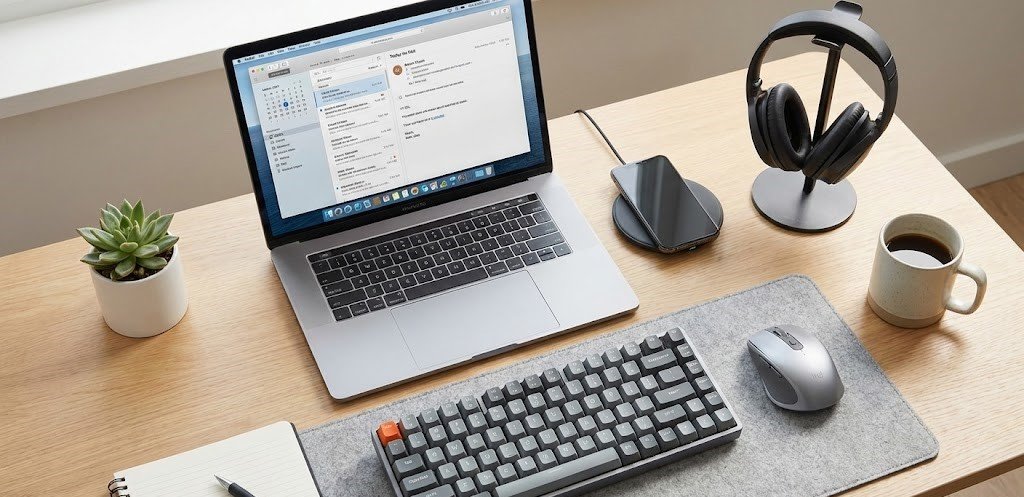
The modern workstation is a paradox of hygiene. We meticulously wash our hands before eating, yet we spend hours every day typing on keyboards and navigating with mice that are statistically dirtier than the average toilet seat. This hardware sits at the intersection of biological residue and environmental debris. Dead skin cells, natural oils from fingertips, crumbs from desk lunches, and dust settling from the air combine to create a sticky, bacterial biofilm that coats our most used tools. The mousepad, specifically, is a sponge for this grime. It absorbs sweat and spills, creating friction that hinders performance and an environment that promotes bacterial growth. Cleaning these items is not merely an aesthetic preference; it is a necessity for hardware longevity and personal health. Yet, the fear of damaging expensive electronics with water often leads to procrastination. Mastering the art of cleaning computer accessories requires a delicate balance of chemical solvency and mechanical gentleness to sanitize without causing a short circuit.
Mousepads
The mousepad is often the most neglected item on the desk, yet it endures the most physical contact. To clean it effectively, one must first identify the material. The standard cloth mousepad with a rubber base is the most common and, fortunately, the easiest to clean. It is essentially a piece of fabric bonded to a non-slip backing. The sink method is the gold standard here. Fill a sink or a basin with warm water—not hot, as heat can melt the adhesive bonding the cloth to the rubber. Add a small amount of mild dish soap or a gentle hand soap. Submerge the mousepad and let it soak. The fabric needs time to release the oils trapped in the weave.
After soaking, mechanical agitation is required. Use a soft sponge or a soft-bristled brush to gently scrub the surface in circular motions. You will likely see the water turn a murky grey, visual confirmation of the skin cells and dust you have been dragging your wrist across. Pay special attention to the areas where your wrist rests, as this is usually where the oil buildup is heaviest. Rinse the pad thoroughly with cool water until no suds remain. Squeezing the pad gently is acceptable, but never wring or twist it, as this can delaminate the fabric from the rubber base. Lay it flat on a towel to dry, away from direct sunlight which can fade the design and degrade the rubber. It must be one hundred percent dry before returning to the desk; a damp mousepad will warp and can damage the mouse sensor or the desk surface.
For “hard” mousepads—those made of plastic, aluminum, or glass—the protocol is different. Submersion is usually unnecessary and potentially damaging if there are electronic components like RGB lighting. For these surfaces, a simple wipe-down with a microfiber cloth dampened with a 50/50 mix of water and isopropyl alcohol is sufficient. The alcohol cuts through the finger oils and sanitizes the surface instantly, evaporating quickly without leaving streaks that could interfere with optical sensors. If the pad has RGB lighting, avoid the edges where the light strip meets the surface; liquid entering this seam can kill the LEDs.
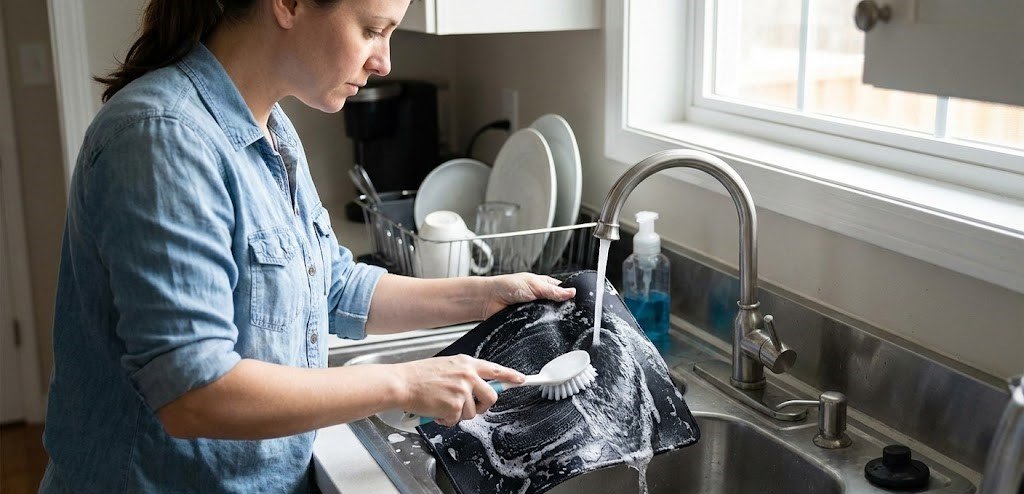
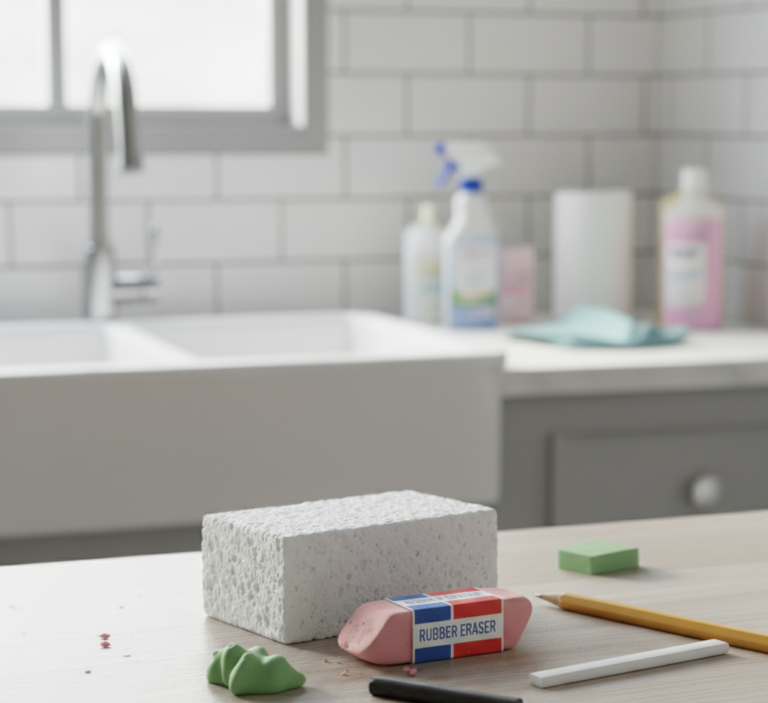
The mouse itself acts as a collector of grime. The primary friction points are the two main buttons and the areas where the thumb and pinky grip the sides. Over time, a crust of dead skin and oil forms here. To clean a mouse, unplug it or remove the batteries. Never spray cleaner directly onto the device. Liquid can seep into the switches, causing them to fail or double-click. Instead, dampen a microfiber cloth with the alcohol solution and wipe the exterior. For the crevices between the buttons and the scroll wheel, a toothpick or a compressed air canister is the tool of choice. Gently run the toothpick along the seams to lift out the impacted gunk. The sensor on the bottom is the eye of the mouse; a quick swipe with a cotton swab dipped in alcohol ensures it remains unobstructed by dust or hair, maintaining precise tracking.
Keyboard
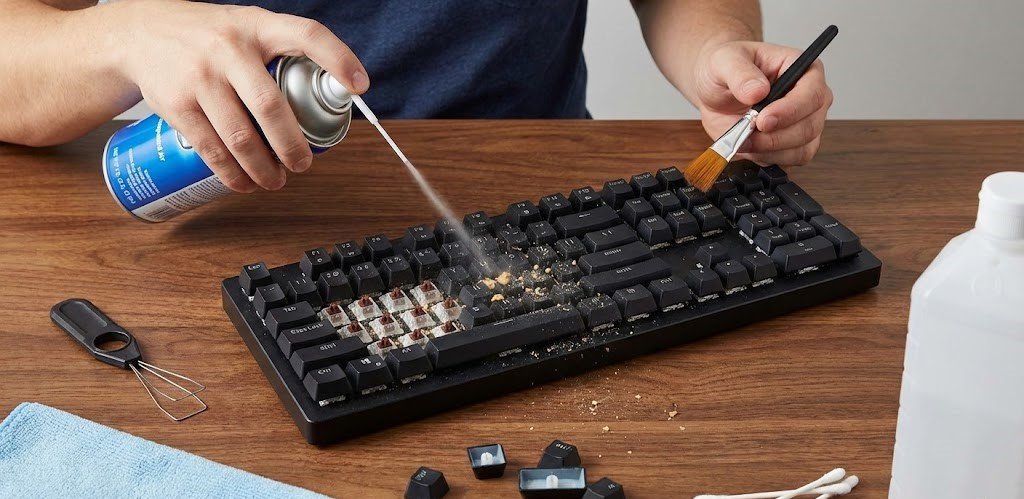
The keyboard is the most complex component to clean due to its intricate geography. It is a landscape of deep valleys and high peaks, perfect for trapping debris. The first step is always gravity. Unplug the keyboard, turn it upside down over a trash bin, and give it a firm shake while tapping the back. This dislodges the loose crumbs and larger particles. Following this, compressed air is essential. Spray the air in short bursts moving across the keys at an angle to blow the dust out from under the keycaps. Do not spray the can upside down, as this releases freezing liquid propellant that can damage the plastic.
For a deeper clean, especially on mechanical keyboards, removing the keycaps is necessary. Using a keycap puller, gently remove the caps and place them in a bowl of warm soapy water to soak. While they are soaking, you have access to the “plate” of the keyboard. Use a brush or a cotton swab to clean the spaces between the switches. This area often accumulates hair and dust bunnies that can affect the feel of the keystrokes. Once the keycaps are washed, they must be dried individually and thoroughly. Even a single drop of water left inside the stem of a keycap can drip down into the switch mechanism and ruin the keyboard. Reassembly is a puzzle, so taking a photo of the layout before you begin is a wise precaution.
For laptop keyboards or low-profile membrane keyboards where keys cannot be removed, the approach must be more superficial but equally diligent. A damp—not wet—microfiber cloth with a small amount of disinfectant is the primary tool. Wipe the keys gently. To disinfect without liquid risk, some users employ “cleaning slime” or gel. This viscous material is pressed onto the keys and peeled back, lifting dust and crumbs from the gaps. It is effective for light maintenance but cannot remove the sticky oil layer on the keytops themselves.
Headphones
Headphones and earbuds are accessories that sit directly against the skin and inside the ear canal, making their hygiene critical for preventing ear infections and acne. Over-ear headphone pads absorb sweat and makeup. If the pads are made of synthetic leather, wiping them with a damp cloth and a mild soap solution is usually safe. Alcohol can dry out and crack certain synthetic leathers, so check the manufacturer’s recommendations. If the pads are velour or fabric, they can often be removed and hand-washed gently. For earbuds, the mesh screen gets clogged with earwax, muffling the sound. A dry, soft toothbrush can be used to gently brush the mesh to dislodge the wax. For the silicone tips, remove them and wash them in soapy water. The charging case for wireless earbuds is a magnet for pocket lint; use a cotton swab to clean the charging contacts to ensure a solid connection.
The Monitor
The monitor screen requires a specific warning: never use window cleaner. Products containing ammonia or alcohol can strip the anti-glare coating found on modern LCD and OLED monitors, leaving permanent clouding or peeling. The only safe cleaner for a monitor is a specialized screen cleaning solution or distilled water applied to a premium optical-grade microfiber cloth. Spray the cloth, never the screen. Wipe in gentle circular motions. Pressing too hard can damage the pixels. The bezel and the back of the monitor also collect dust; wiping these down prevents that dust from eventually migrating onto the screen or into the ventilation ports.
Cable Management
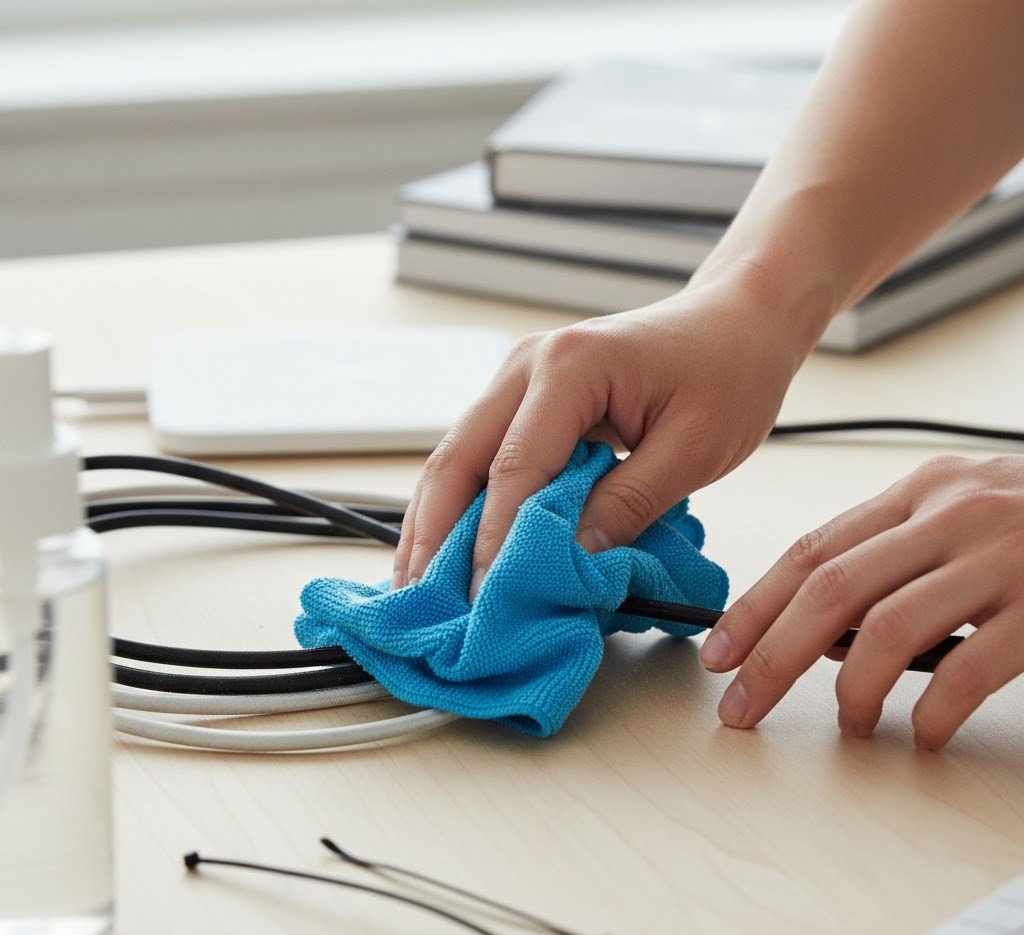
Cable management plays a role in cleanliness as well. A tangle of cables behind the desk acts as a dust trap, creating a “dust bunny farm” that is difficult to vacuum. Organizing cables with velcro ties or sleeves not only looks better but allows for easier cleaning of the floor and the back of the desk. Wiping down the cables themselves is also recommended; the rubber sheathing often becomes sticky with dust over time. A quick pull through a damp cloth restores them to a clean state.
Frequency is key to keeping this task manageable. A quick daily wipe of the mouse and keyboard with a microfiber cloth prevents the buildup of oils. The deep clean—soaking the mousepad and removing keycaps—should be a seasonal ritual. Ignoring these peripherals leads to a degradation of the user experience. A sticky mouse wheel, a gritty keyboard, or a tracking issue on a dirty pad interrupts the flow of work or play.
Ultimately, cleaning computer accessories is about respecting the tools of your trade. Whether you are a writer, a gamer, or a data analyst, these objects facilitate your interaction with the digital world. Keeping them pristine ensures that this interaction is smooth, precise, and hygienic. It turns the desk from a zone of potential contamination into a workspace that feels fresh and professional.
Maintaining the fine details of a home office involves patience and a steady hand. While cleaning a keyboard is a satisfying project for a rainy afternoon, it is just one small part of the overall hygiene of a home. The dust that settles on your monitor comes from the room itself; the crumbs in your keyboard fall from the environment. When the need for a comprehensive clean extends beyond the desk to the carpets, the windows, and the deep corners of the room, professional support can be transformative. Toronto Shine Cleaning offers the detailed, high-quality service necessary to maintain a healthy living and working environment. We understand that a clean office starts with a clean room. Our professional team handles the heavy lifting—the dusting of baseboards, the vacuuming of upholstery, and the sanitization of surfaces—creating a pristine backdrop for your work. By trusting Toronto Shine Cleaning to manage the environment, you can focus on your productivity, knowing that your workspace is clean, safe, and ready for business.