




Toronto Shine Cleaning

Toronto Shine Cleaning Featured on Forbes Vetted
TorontoShineCleaning.ca featured on Real Homes
TorontoShineCleaning.ca featured on Business Insider
TorontoShineCleaning.ca featured on Homes and Gardens (h&g)
TorontoShineCleaning.ca featured on Yahoo
TorontoShineCleaning.ca featured on Apartment Therapy
TorontoShineCleaning.ca featured on The Kitchn
TorontoShineCleaning.ca featured on TomsGuide
TorontoShineCleaning.ca featured on StyleDemocracy
TorontoShineCleaning.ca featured on FamilyHandyman
TorontoShineCleaning.ca featured on TheSpruce
TorontoShineCleaning.ca featured on Curiocity
Edit Template

LinaDaSilva

Writer & Blogger

How to Clean Apartment Before Moving Out: 5 Pro Tips for Renters

Moving? Discover exactly how to clean apartment before moving out with our ultimate step-by-step Canadian guide. Secure your deposit and leave your rental spotless!

How to Clean Apartment Before Moving Out in Canada

Moving to a new home is an exciting milestone, but the process of getting there is undeniably one of life’s most stressful events. Between packing up your life into cardboard boxes, organizing moving trucks, and setting up utilities at your new Canadian residence, your to-do list is likely overflowing. However, there is one crucial task that stands between you and a stress-free departure: the final deep clean.

If you are wondering how to clean apartment before moving out, you are not alone. Whether you are a tenant trying to ensure the full return of your security or damage deposit, or a condo owner preparing the space for a new buyer, leaving your property in pristine condition is a non-negotiable obligation. Property managers and landlords across Canada—from bustling downtown Toronto to the scenic coasts of Vancouver—have high standards for unit turnovers. A simple “broom-swept” finish is rarely enough.

In this comprehensive guide, we will break down exactly how to tackle this massive chore room by room, ensuring you don’t miss a single speck of dust.

How to Clean Apartment Before Moving Out

Move-Out Clean is Crucial

In the Canadian rental market, the condition in which you leave your apartment directly impacts your finances. While landlords expect normal “wear and tear” (like minor scuffs on the floor or slightly faded paint), they do not excuse accumulated dirt, grease, or grime.

Failing to properly clean your unit can result in steep cleaning fees deducted directly from your deposit, or in some provinces, a bill sent to you after you move out. Furthermore, if you are moving out of a commercial space or a corporate apartment, commercial lease agreements often contain strict “make-good” clauses that require the property to be returned to its exact original state.

Learning how to clean apartment before moving out not only protects your wallet but also provides you with the peace of mind to focus entirely on your new home.

Essential Cleaning Supplies

Before you dive into the deep clean, you need to assemble your arsenal. Having the right tools on hand prevents you from losing momentum. Gather these items into a portable cleaning caddy:

1. Microfiber Cloths: Essential for trapping dust and achieving streak-free shines without scratching surfaces.

2.Heavy-Duty Degreaser: A must-have for the kitchen, particularly the stove and range hood.

3.Glass Cleaner: For windows, mirrors, and glass shower doors.

4.Bathroom Cleaner/Descaler: To tackle hard water stains and soap scum.

5.Baking Soda and White Vinegar: The ultimate eco-friendly, DIY cleaning duo for odors and tough stains.

6.Vacuum with Attachments: Crucial for carpets, corners, and window tracks.

7.Mop and Bucket: A microfiber flat mop or spin mop works best.

8.Non-Abrasive Sponges and a Stiff Grout Brush: For scrubbing without damaging finishes.

9. Garbage Bags: You will generate a lot of trash during this final phase.

Essential Cleaning Supplies

How to Clean Apartment Before Moving Out

The golden rule of moving out is to wait until the apartment is completely empty before you begin your deep clean. Cleaning around boxes and furniture is inefficient and guarantees you will miss hidden spots. Once the movers have loaded the truck, follow this room-by-room breakdown.

1. The Kitchen

The kitchen is the hardest-working room in any apartment, and it requires the most intense labor during a move-out clean. Landlords pay hyper-attention to appliances, so this is where you should focus your energy.

The Refrigerator and Freezer:
Start by unplugging the fridge and leaving the freezer door open to defrost if there is ice buildup. Remove every single shelf, crisper drawer, and door bin. Wash these in the sink with warm, soapy water. Spray the interior shell of the fridge with a mixture of water and white vinegar, wiping away any sticky spills, food residue, and neutralizing odors. Dry everything completely before reassembling. Pro Tip: Carefully pull the fridge away from the wall to sweep and mop the dusty, crumb-filled floor beneath it.

The Oven and Stovetop:
This is often the most dreaded task. If your oven has a self-cleaning feature, run it the day before you plan to do the rest of your cleaning, as it takes hours and creates strong odors. Alternatively, make a thick paste of baking soda and water, coat the inside of the oven (avoiding the heating elements), and let it sit overnight. The next day, spray it with vinegar and wipe away the dissolved, carbonized grease. For the stovetop, remove the burner grates and soak them in hot, soapy water. Use a strong degreaser on the cooktop surface to remove grease rings.

Cabinets and Drawers:
Open every cupboard and drawer. Use your vacuum’s crevice tool to suck up stray crumbs. Wipe down the interior shelves with a damp microfiber cloth. Finally, use a degreaser to wipe down the exterior cabinet faces, paying special attention to the sticky areas around the handles and directly above the stove.

The Sink and Dishwasher:
Scrub the kitchen sink with an abrasive-free cleanser like Bar Keepers Friend to polish stainless steel and remove water stains. Clean out the sink strainer. If the apartment has a dishwasher, check the filter at the bottom, remove any trapped food debris, and wipe down the interior edges of the door.

A close-up of hands wearing yellow rubber gloves, using a sponge to scrub the inside of a sparkling clean oven

2. The Bathroom

Bathrooms demand a rigorous, highly hygienic approach. The goal here is to remove all traces of soap scum, mold, and mineral deposits.

The Shower and Bathtub:
Spray a targeted bathroom descaler or a heavy vinegar solution onto the shower walls, tub basin, and glass doors. Let it dwell. Allowing the product to sit for 10-15 minutes breaks down the alkaline mineral deposits from hard Canadian water, saving you from exhausting manual scrubbing. Use a stiff-bristled brush to scrub the grout lines. Rinse thoroughly and dry the glass doors with a squeegee to prevent new water spots.

The Toilet:
Apply a heavy-duty toilet bowl cleaner and let it sit while you clean the rest of the bathroom. Scrub the inside of the bowl with a toilet brush. Then, use an antibacterial spray to wipe down the entire exterior of the toilet: the tank, the handle, the seat (top and bottom), and especially the porcelain base where dust and unsanitary grime settle near the floor.

The Vanity, Sink, and Exhaust Fan:
Wipe out the interior of the vanity drawers. Scrub the sink basin and polish the faucet, ensuring there is no toothpaste residue left behind. Clean the bathroom mirror with glass cleaner for a streak-free finish. Finally, look up: use your vacuum attachment to remove the thick layer of dust that invariably coats the bathroom exhaust fan cover.

Soap Scum and Hard Water

3. Living Areas and Bedrooms

While kitchens and bathrooms hold the most stubborn grime, the living areas and bedrooms make up the bulk of your apartment’s square footage.

Top-to-Bottom Dusting:
Always clean from the top down so dust doesn’t fall on surfaces you’ve already cleaned. Dust ceiling fan blades, wipe down light fixtures (removing any trapped dead insects), and clean the air vents and return registers.

Walls, Doors, and Baseboards:
Remove any nails or screws you used to hang pictures and use a small amount of spackle to fill the holes. Take a slightly damp microfiber cloth and wipe down the walls to remove smudges, fingerprints, and scuff marks, paying close attention to the areas around light switches and door frames. Baseboards are a critical, high-visibility item on any landlord’s checklist. Wipe down every inch of baseboard to remove the settled dust.

Windows and Blinds:
Wipe down horizontal blinds with a damp cloth. Wash the interior window glass until it is streak-free. Crucially, open the windows and use your vacuum’s crevice tool to suck up the dirt, dead bugs, and condensation grime that gets trapped deep within the window tracks.

The Entryway:
If you are moving out in the spring or summer, your entryway likely bears the scars of the Canadian winter. The chalky, white salt stains left by winter boots on tile or vinyl floors require a specific approach. Use a solution of equal parts white vinegar and warm water to break down the alkaline salt residues, then mop with clean water.

Floors and Carpets:
Floor care is the absolute final step in knowing how to clean apartment before moving out. For hard floors (wood, laminate, tile), sweep thoroughly and then mop with a pH-neutral cleaner appropriate for the specific material. Do not leave the floors excessively wet.
For carpets, vacuum methodically in overlapping lines. If you have pets, ensure all pet hair is removed. Note that many standard Canadian lease agreements require professional carpet cleaning upon move-out. If this is in your lease, coordinate the professionals to arrive after your deep clean is finished.
Dog lying on a rug in the living room of an apartment in Canada.

5 Pro Practical Tips for a Flawless End-of-Tenancy Clean

To maximize your efficiency and ensure you pass your landlord’s inspection with flying colors, keep these practical tips in mind:

  1. The Dry-to-Wet Rule: Always complete your dry tasks (dusting, sweeping, vacuuming) before introducing liquid sprays. Spraying a cleaner onto a dusty surface creates a muddy smear that is twice as hard to wipe up.

  2. Don’t Forget the Balcony: If your apartment has outdoor space, sweep the balcony floor, wipe down the railings, and clean the exterior glass of the sliding patio door.

  3. Replace Burnt-Out Bulbs: A dark room looks smaller and dirtier. Replacing dead light bulbs is a cheap way to make the apartment look well-maintained and bright for the final walkthrough.

  4. Check Inside Everything: Open the dishwasher, the washing machine, the dryer, and every single closet to ensure you haven’t left a stray sock or a rogue piece of mail behind.

  5. Use the Landlord’s Checklist: If your property manager provided a specific move-out checklist, use it as your bible. They are giving you the exact answer key to getting your deposit back.

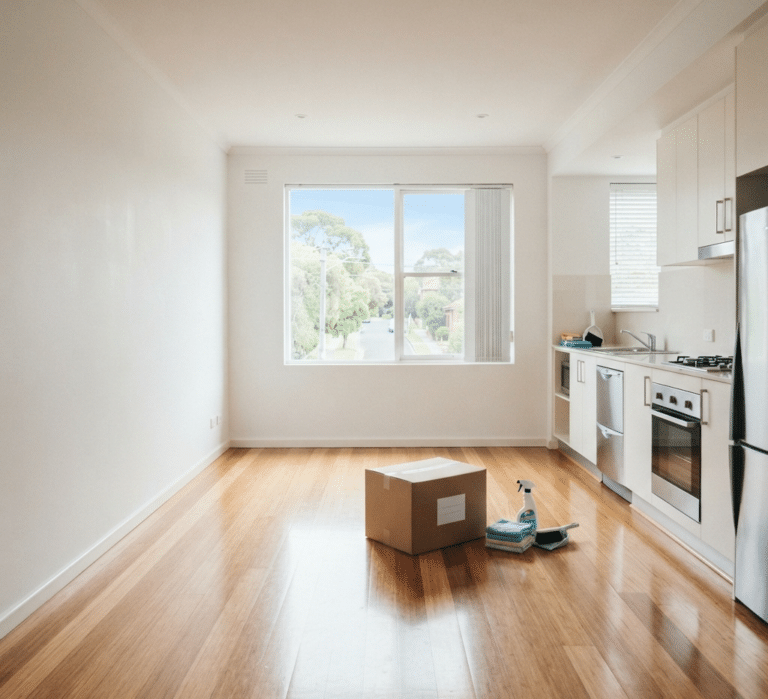
A wide shot of a modern, empty Canadian apartment kitchen, with gleaming countertops and a shiny stainless steel refrigerator

DIY vs. Hiring a Professional Move-Out Cleaning Service

Learning how to clean apartment before moving out is entirely possible to do on your own, but it requires a massive investment of time and physical energy. After days of sorting, packing, and hauling heavy furniture, facing a 6-to-8 hour deep cleaning session is exhausting.

This is the point where many renters and homeowners must weigh the cost of their time against the cost of a professional service. Hiring a professional move-out cleaning service offers several distinct advantages:

  • Guaranteed Standards: Professional cleaners know exactly what picky landlords and real estate agents look for. They possess the commercial-grade equipment and specialized products to remove deep-seated stains that standard household cleaners cannot touch.

  • Time and Stress Savings: Handing the keys over to a cleaning crew allows you to walk away from your old apartment and focus entirely on unpacking and settling into your new home.

  • Protecting Your Deposit: The cost of a professional clean is often significantly less than the amount a landlord will deduct from your security deposit if they deem the apartment insufficiently cleaned.

If you are moving out of a standard residential apartment, a condo, or transitioning your business out of a commercial space, outsourcing this final hurdle is often the smartest move you can make.

Hiring a Professional Move-Out Cleaning Service

Conclusion

Understanding exactly how to clean apartment before moving out is the final, essential chapter of your moving journey. By following a structured, room-by-room approach, utilizing the right tools, and paying attention to the often-neglected details like baseboards and appliances, you can ensure that you leave your property in immaculate condition. This not only fulfills your lease obligations and secures your deposit, but it also leaves a positive lasting impression.

However, if the physical exhaustion of moving has left you with zero energy for scrubbing ovens and wiping down blinds, you do not have to tackle this monumental task alone.

Toronto Shine Cleaning specializes in comprehensive, top-to-bottom move-out cleaning services across the Greater Toronto Area. Our expert teams are equipped to handle the rigorous demands of residential and commercial turnovers, ensuring every inch of your old space is restored to perfection. Don’t let cleaning add to your moving stress. Contact Toronto Shine Cleaning today to book your move-out clean, secure your deposit, and step into your new home with total peace of mind!

How to Clean Apartment Before Moving Out

Get a Quote Now!

Toronto Shine Cleaning is your go-to cleaning service in Ontario, offering top-notch cleans with a side of convenience. We’re all about making your home sparkle, and when we’re not doing that, we’re sharing easy, practical tips to help you keep things tidy. Simple, effective, and hassle-free – that’s cleaning, the Toronto Shine Cleaning way.

Reach Out to Us

Edit Template