Hey there, sink cleaning enthusiasts! If you’ve ever found yourself staring at a sink wondering how to get it sparkling clean, you’re in the right place. Cleaning a sink might seem straightforward, but there are some cool tips and tricks to make your sink shine like new. So, let’s dive into the best way to clean sinks!
Quick and Easy Steps to a Sparkling Sink

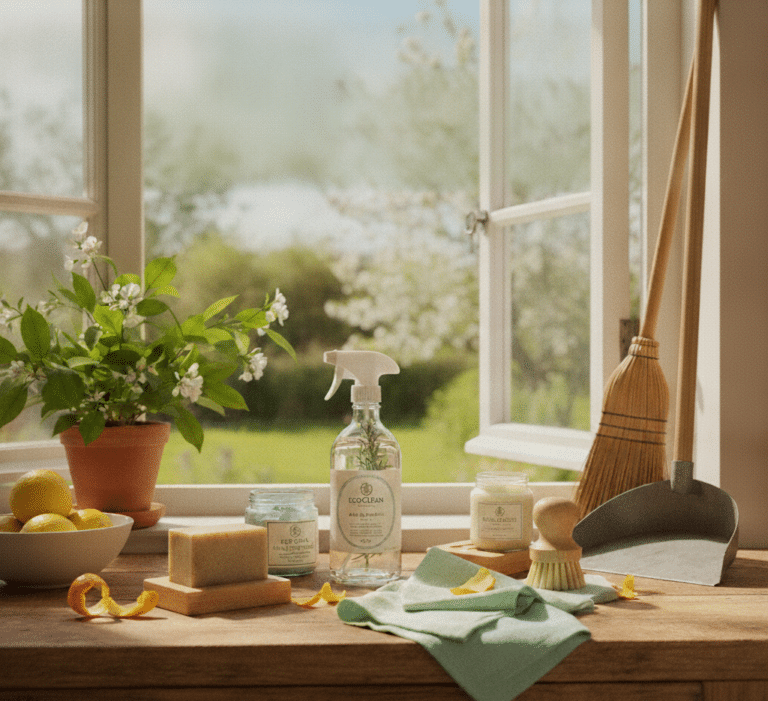
1. Gather Your Supplies
Gathering the right supplies before you start cleaning your sink is crucial for an effective and efficient cleaning process. Each item in your cleaning toolkit has a specific role that contributes to not only making your sink look clean but also ensuring it’s hygienically safe and maintained well.
Starting with mild dish soap, it acts as the cornerstone of your cleaning process. Dish soap is designed to fight grease and grime, which are commonly found in kitchen sinks due to food residue and cooking oils. The mild nature of the soap ensures that while it’s tough on dirt, it’s gentle on your sink’s surface. This balance is important because harsh chemicals can damage the finish of your sink, whether it’s made of stainless steel, porcelain, or other materials. Using a mild dish soap helps preserve the integrity and appearance of your sink over time.
Baking soda comes into play as your go-to for tackling stubborn stains. Its mild abrasiveness allows it to scrub away tough marks without leaving scratches, preserving the sink’s finish. Moreover, baking soda is a natural deodorizer, meaning it doesn’t just clean the surface, but it also neutralizes odors, leaving your sink smelling fresh. This dual action makes baking soda an invaluable part of your cleaning arsenal.
White vinegar, with its natural disinfectant properties, addresses another critical aspect of sink cleaning: hygiene. Its acidity is effective against water spots and mineral deposits, which are particularly problematic in areas with hard water. For stainless steel sinks, vinegar can restore shine by breaking down grime and soap residues, making your sink look almost new. The use of vinegar highlights the importance of using natural, non-toxic cleaning agents, especially in areas where food is prepared.
The tools you use for applying and scrubbing these cleaning agents—such as a sponge or soft cloth, and an old toothbrush—are equally important. A sponge or soft cloth is versatile, suitable for both applying cleaning agents and for the gentle scrubbing of various surfaces. Using a soft cloth for drying and polishing helps avoid water marks, enhancing the sink’s shine. An old toothbrush proves indispensable for detailed cleaning around faucets and sink edges, areas where grime accumulates but is often overlooked.
Rubber gloves protect your hands throughout the cleaning process. Hot water and cleaning agents, even mild ones, can irritate or dry out your skin, especially with prolonged exposure. Gloves keep your hands safe, allowing you to clean more thoroughly without worrying about skin irritation.
Lastly, olive oil serves an unconventional yet effective role in your cleaning process. After cleaning, a small amount of olive oil can be used to polish stainless steel sinks, leaving them shining and resistant to future water spots and fingerprints. This natural polishing agent is safe, effective, and adds a finishing touch to your cleaning routine, emphasizing the role of natural products in maintaining a clean and healthy home.
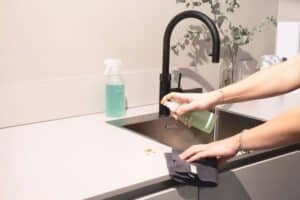
2. Rinse and Scrub
- Rinse the Sink: Turn on the tap and let warm water run all over the sink. Use your hand or a cup to splash water into corners and around the faucet where water might not reach directly.
- Apply Dish Soap: Put a small amount of dish soap onto your sponge or cloth. You don’t need a lot – a little goes a long way!
- How to Scrub: This is where the actual cleaning happens. Scrubbing with soap removes stains, food particles, dusties and unseen bacteria. It’s essential for a thorough clean. Start at the top of the sink and work your way down. Pay special attention to areas where grime accumulates, like around the drain and the edges of the sink. Use circular motions for a more effective scrub. For stainless steel sinks, follow the grain to prevent scratches.
3. Target Those Stains
- Baking Soda: Baking soda is mildly abrasive, making it great for tackling tough stains without scratching your sink’s surface. Mix about three parts baking soda to one part water. You’re aiming for a thick, spreadable paste – not too watery, but not too dry. Use a small bowl to mix the baking soda with water. Stir it until it reaches the right consistency.
- How to Apply: Scoop some of the paste with your fingers, a cloth, or a sponge, and spread it directly onto the stains in your sink. Make sure the paste fully covers the stained areas. You can apply a thick layer if the stains are particularly stubborn.
4. Use Vinegar for Shine
- Why Rinse First: White vinegar is a fantastic natural disinfectant. It kills most bacteria and viruses due to its acetic acid content. After using the baking soda paste, it’s important to thoroughly rinse the sink. This removes any residual baking soda, as mixing it with vinegar can neutralize both their cleaning effects. Use warm water to rinse and ensure that all the baking soda is washed away.
- How to Apply: Soak a soft cloth or sponge in white vinegar. You don’t need to dilute the vinegar unless you’re sensitive to the smell. Wipe down the entire sink with the vinegar-soaked cloth. Make sure to cover all areas, including those around the faucet and the drain. Allow the vinegar to sit on the surface of the sink for a few minutes. This duration helps in disinfecting the surface and enhancing the shine.
5. Clean Around the Faucet
- Accumulation of Grime: The area around the faucet tends to accumulate grime and mineral deposits, especially in hard water areas.
- Using an Old Toothbrush: Its small size and bristles make an old toothbrush ideal for getting into the tight spaces around the faucet and along its edges. Dip the toothbrush in either soapy water (mild dish soap solution) or a vinegar solution, depending on the level of cleaning required. The vinegar solution can be more effective for removing hard water stains and mineral buildup. Use the toothbrush to gently scrub around with circular motions the base of the faucet, under its handles, and in any other tight spots. The bristles can dislodge grime and buildup that cloths or sponges can’t reach.
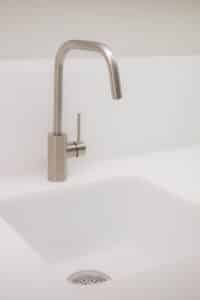
6. Final Rinse
- Give the sink a final rinse with warm water. The primary purpose of the final rinse is to wash away any remaining cleaning agents, like dish soap, vinegar, or baking soda. If these are left on the surface, they can leave residue, streaks, or even contribute to the buildup of grime over time.
7. Dry and Polish
- Why Dry the Sink: After rinsing, water droplets left on the sink can dry out and leave water spots, especially on surfaces like stainless steel. These spots can detract from the overall cleanliness and shine of your sink. Drying the sink helps in achieving a spotless and streak-free finish, making your cleaning efforts more visually rewarding.
- Polishing for Extra Shine: Polishing is the step that elevates your sink from simply being clean to having a mirror-like shine. It enhances the aesthetic appeal of your kitchen and gives a sense of thorough maintenance.
- How to Polish with Olive Oil: Pour a small amount of olive oil onto a soft cloth. You don’t need much – a few drops will do. Gently buff the sink with the cloth in circular motions. Focus on areas that tend to be more visible or where water spots are common.
Pro Tips
- Regular Maintenance: Clean your sink regularly to prevent buildup of grime and bacteria.
- Natural Cleaners: Stick to natural cleaners like baking soda and vinegar to avoid scratching or damaging the sink’s surface.
- Disinfecting: For a thorough disinfect, consider using a disinfectant cleaner, especially after dealing with raw meat or similar contaminants.
Sink Cleaning With Toronto Shine Cleaning
Wrapping up, sink cleaning might seem like a small task, but it has a big impact on the overall feel and hygiene of your kitchen. Following the steps outlined above, you can ensure your sink shines and contributes to a healthier, more inviting kitchen space. But sink cleaning is just one part of keeping your home clean and tidy. From dusting and vacuuming to tackling those tough-to-clean areas, there’s a lot to keep up with.
That’s where Toronto Shine Cleaning comes into play. With a range of services designed to meet all your cleaning needs, whether it’s regular housekeeping to keep things sparkling, a deep clean for those times when your home needs some extra attention, or specialized services like move-in/move-out cleaning, post-construction clean-up, or even making sure your Airbnb is guest-ready, Toronto Shine Cleaning has got you covered. Our team of professional cleaners is dedicated to providing top-notch service, ensuring your home not only looks clean but feels clean too.
So, why not give yourself the gift of a clean home without all the hassle? Whether you’re in Toronto or the surrounding areas, Toronto Shine Cleaning is here to help. Check out our services and let us take the cleaning off your hands, so you can spend more time enjoying your home and less time worrying about keeping it clean. Visit us at Toronto Shine Cleaning Services to find out more and schedule your next cleaning session.