Bathroom Cleaning

Bathroom Cleaning

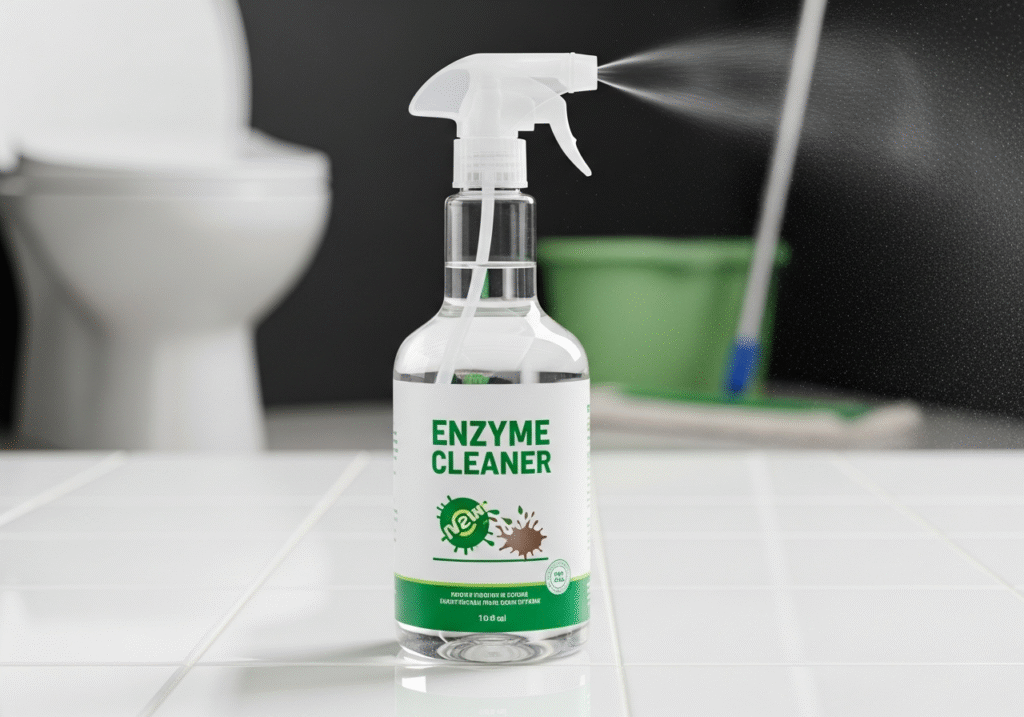
Enzyme Cleaner

5 Common Mistakes That Render Your Enzyme Cleaner Useless

Five Mistakes That Quietly Sabotage Your Enzyme Cleaner Most households fight mess with chemistry: stronger degreasers, harsh solvents, bleach that burns and masks its way to a temporary win. That playbook collapses when the problem is biological. Pet odor that returns on humid days, grout that never brightens, and drains with a rotten smell are leftovers of organic matter ordinary chemicals cannot remove. Enzyme cleaners answer with biology instead, digesting the mess rather than bleaching it. The catch: they follow different rules, and most of us break them within minutes of the first spray. What Enzyme Cleaners Actually Do These are bio-enzymatic products combining beneficial bacteria with the enzymes those bacteria produce. The bacteria are the workers, the enzymes their tools, dormant until they contact a food source: your stain. Proteases dismantle proteins like blood and meat residue, lipases break down fats and oils, and amylases handle starches. The microbes then consume the digested particles, converting them into carbon dioxide and water. The cleaner literally eats the stain until nothing is left, a different outcome from wiping or bleaching. That mechanism explains where enzymatic products beat conventional ones: Pet accidents. Urine holds urea, urochrome, and uric acid. Detergent can lift the first two, but uric acid forms water-insoluble crystals that lock into fibers, wood, and concrete. Humidity rehydrates them, releasing ammonia again and telling the pet the spot is still a bathroom. Formulas containing uricase break the crystals down permanently. Bathroom grout. Pink or orange slime in shower corners is a biofilm of bacteria feeding on soap scum and body oils, rooted deep in porous grout. Enzymes soak into the pores, break the proteins and fats binding the grime, and let it rinse away without etching tile or destroying sealant. Kitchen drains. Fat coats pipe walls as it cools. Instead of caustic openers that burn a channel and age plumbing, lipase-based maintainers turn grease into water-soluble liquid and clear the rotting-food odor rising from the sink. Laundry. Blood, sweat, grass, and baby formula are protein stains that hot water cooks into fabric. A cold-water enzyme soak snips the bonds holding them to fibers, which is why odor-prone workout synthetics usually need them. Septic systems and patios. Septic tanks depend on living bacterial ecosystems that bleach and antibacterial soap destroy; enzyme products feed that ecosystem instead. Outdoors, they clear deck algae and moss without chlorine that harms landscaping. Mistake 1: Wiping Before the Dwell Time Is Over The biggest failure: spray-and-wipe habits trained by glass cleaners do not apply, because bacteria need hours, sometimes days, to digest a deep stain. With a carpet accident, saturate all the way down to the pad, then cover with a damp towel so the treatment stays moist; enzymes stop working once dry. Expect the smell to briefly intensify as trapped ammonia is released from breaking urine crystals. That odor bloom is evidence the product is attacking the deposit, not failing. Mistake 2: Using Water at the Wrong Temperature Enzymes are biological proteins, and extremes kill them. Boiling water denatures the formula, while freezing conditions push the bacteria into dormancy before they start. Lukewarm or room-temperature water keeps activity at its peak, so treat the kettle and the cold tap both as forbidden defaults. Mistake 3: Combining It With Bleach or Expecting Sterilization Bleach kills bacteria indiscriminately, so pairing it with an enzyme cleaner executes the workers you hired. The surface must be free of harsh chemicals first, and CDC guidance on using bleach safely warns never to mix bleach with other cleaners, since the vapors can be dangerous to breathe. A related error is expecting sanitization: enzyme products remove soil but do not reliably kill viruses or pathogens on contact. Because organic gunk can neutralize a disinfectant, follow the CDC order for homes: clean first, disinfect second, with enzymes handling the cleaning. Mistake 4: Using a Dead or Dying Bottle Living cultures degrade with age, so a bottle that has sat under the sink for five years has likely gone quiet. Store products cool, dark, and out of sunlight, and check the manufacturing date when buying so the culture is still active on arrival. Mistake 5: Treating a Slow Process Like a Quick One Patience is the entry fee: you are applying a treatment, not washing a surface, and results arrive as the colony finishes. Realistic timelines prevent the premature scrubbing that causes the other four mistakes. A Reference Table for the Five Jobs Job How to apply What success looks like Urine-soaked carpet Saturate to the pad, cover with a damp towel Odor fades as crystals digest; brief ammonia bloom is normal Shower grout biofilm Coat grout, long dwell, rinse Grime rinses away without scrubbing sealant off Greasy drain odor Lipase maintainer on a schedule Prevention, not rescue: steady flow, no sink smell Protein laundry stains Cold-water enzyme soak Stains lift instead of setting under heat Septic upkeep Use enzymes, skip antibacterials Tank bacteria stay healthy, waste breaks down When the Biology Job Belongs to Professionals Old pet damage and years of bathroom biofilm often need equipment and dwell strategies a drugstore bottle cannot deliver. A booked deep clean handles the heavy biology while a recurring regular house cleaner keeps soil from rebuilding, and every rate is published on our pricing page. Toronto Shine Cleaning is bonded and insured, and we know when steam, solvent, or bio-enzymatics fit the job. For a stain that keeps coming back, call (647) 424-0355 and we will match the method to the mess. Frequently Asked Questions Do enzyme cleaners disinfect surfaces? No. They digest organic soil such as urine, food residue, and biofilm, but they do not reliably kill viruses or harmful bacteria on contact. Use them as the cleaning stage, then disinfect separately once the soil is gone, since leftover organic matter can neutralize a disinfectant. How long should I leave an enzyme cleaner on a stain? Far longer than you think. Light residues may need an hour; urine that reached the pad should stay saturated

5 Common Mistakes That Render Your Enzyme Cleaner Useless Read More »
Razor Blade Scraper to Your Cleaning Kit Today

Why You Should Add a Razor Blade Scraper to Your Cleaning Kit Today

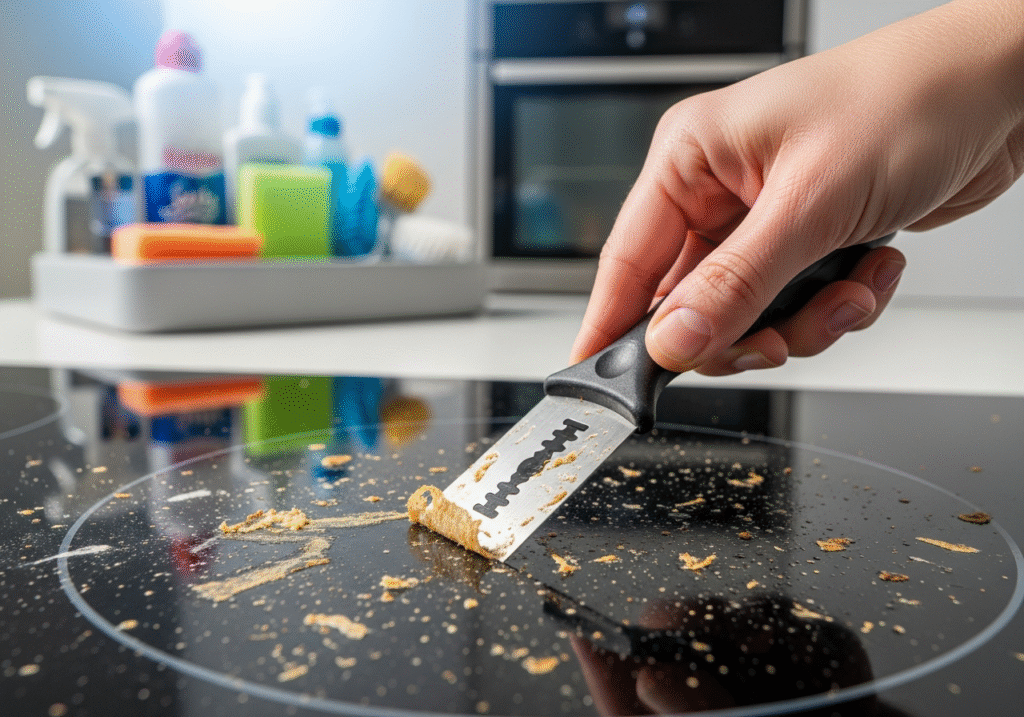
The Razor Blade Scraper: Why Pros Trust the Sharpest Tool in the Kit Against bonded messes, the tool seasoned cleaners reach for is not a gadget or a chemical but a thin blade of steel in a handle. A scraper works by mechanical leverage: the edge slips beneath the contaminant and severs its bond to the surface, instead of grinding at the mess the way an abrasive pad does. Learn a few rules and the tool converts an afternoon of furious elbow grease into minutes of precise removal. Why Lifting Beats Polishing the Mess Away Paint flecks, tree sap, burnt sugar, and hardened glue form bonds tougher than any sponge can generate friction against. Pressing a scouring pad into them is sandpaper work: it wears the soil, but it also wears the surface, which is how glass cooktops end up with permanent swirl haze after years of scrubbing. A fresh blade takes the opposite path. Held shallow and kept wet, it enters the microscopic gap under the deposit and shears whole flakes away. Where the Scraper Earns Its Place Glass cooktops. Boil-overs from sugary sauces carbonize on hot glass into something close to concrete. Cream cleaners loosen only the top layer while the blade, at a 45 degree angle and flooded with lubricant, slices through the carbon without effort. Post-renovation windows. Dried latex and oil paint smear angrier when you rub a rag across them, yet snap off in solid chips under steel. Sticker residue behaves the same: solvents dissolve glue into a spreading mess, while the blade pushes adhesive and backing away together. Exterior windows. Bird droppings and insect marks bake onto sun-facing panes and shrug off ordinary soaping; the edge removes them in seconds. Shower doors and tubs. Hard-water minerals and soap residue build rock-like crusts that resist acid, and careful scraping clears fiberglass and porcelain since both generally outclass the blade in hardness. Halt at grout lines and silicone caulk, which slice easily, to keep the shower’s waterproof seal alive. For bathroom mildew beyond deposits, the CDC explains how mold grows in moisture and why the source matters. Oven windows. Smear on a baking soda and water paste to loosen the brown varnish of heat-treated fat, then peel it away in ribbons, faster than fumes and aching arms, and it restores factory clarity. Work only on fully cooled glass: warm panes expand, and blade pressure on an expanded surface invites stress cracks. The Three Rules of Safe Scraping Shallow angle, never dry Hold the blade between roughly 30 and 45 degrees from the surface. Steeper angles turn the scraper from wedge into chisel, driving it into the material rather than across it; too flat and the edge floats above the soil. Glass cleaner, cooktop cream, or hot soapy water lets the edge hydroplane and prevents the skipping that gouges and scratches. Push forward, never drag back These are pushing tools. Drive the edge into the gunk, lift, return, push again. Dragging backward rolls or chips the feather-thin cutting edge, and a razor with nicks behaves like a serrated knife, etching the next pass. Inspect the blade before every use: anything dull, rusted, or uneven belongs in the trash. Beware tempered glass Annealed and heat-strengthened panes scrape happily, but tempered glass, used in shower screens, safety doors, and car side windows, hides a trap. During toughening, microscopic glass dust called fabricating debris gets baked onto the surface, invisible until a blade dislodges the particles and drags them, leaving deep chaotic scratches no matter how careful your technique. Professionals run a sound test in a discreet corner first: if grit registers, they stop. Plastic Blades: The Cautious Cousin When surface hardness is a question, snap in a double-edged polycarbonate blade. Plastic lacks a razor’s absolute shearing power but is far more forgiving on acrylic tubs and showers, where steel can leave permanent marks, and it peels dried candle wax or old chewing gum with less chance of scarring the material. Blade Handling, Storage, and Rust Bites almost always happen during blade changes rather than during work. Handle replacements with dry hands because slick soap makes razors unpredictable, choose a scraper with a retractable mechanism so loose blades do not float around the caddy, and wrap every retired blade in heavy tape or paper so sanitation and waste workers are protected. Carbon steel gives the sharpest edge but corrodes fast in wet, enclosed handles, and a rusty blade turns jagged and scratches. Stainless replacements resist rust but are softer, so they dull sooner and scrape with less authority. The absolute no-list: anything filmed or coated, because a blade finds the seam and lifts it. When unsure, test a hidden spot. Surface Compatibility at a Glance Surface Steel blade Notes Annealed glass, mirrors, cooktops Suitable Keep wet, push only, shallow angle Tempered shower glass High risk Sound-test a corner; grit means stop Porcelain and fiberglass Suitable with care Avoid grout, caulk, and tile edges Stone sealers, acrylic, car paint Plastic blade only Steel marks coatings and soft surfaces Tint, screens, gloss plastic Never No coating survives any blade When to Hand the Blade Over Scraping rewards a practiced, steady hand, and a slip costs you a pane. For post-renovation glass, hopelessly brown oven windows, or whole-home deep cleaning, Toronto Shine Cleaning brings professional tools without the risk: explore our deep cleaning services, keep the routine going with a regular house cleaner, and confirm coverage on our locations page. The CDC’s page on when and how to clean and disinfect your home is a good complement to mechanical work. We are bonded and insured, and paint-spatter rescue is one call away at (647) 424-0355. Frequently Asked Questions What angle should the blade be held at? Roughly 30 to 45 degrees from the surface. Steeper, and the edge chisels instead of sliding; flatter, and it rides over the deposit without catching. With lubrication and light forward pressure, you will feel the moment the tool gets under the soil. Can I scratch a

Why You Should Add a Razor Blade Scraper to Your Cleaning Kit Today Read More »

woman needing to organize the house for holiday guests

5 Ways to Organize Your Home to Accommodate Extra Guests

Five Ways to Organize Your Home Before Guests Arrive Around the holidays, a house stops being a private space built around daily routines and turns semi-public, arranged for hospitality and celebration. The change creates real logistical problems: occupancy can double or triple, familiar pathways become choke points, and the ordinary visual noise of family life needs to disappear so the home reads as welcoming. Hosting successfully requires structural reorganization, plus the empathy to walk each room the way a guest will. The Five Zones at a Glance Entryway: clear the funnel every coat, bag, and pair of boots passes through. Guest room: take the space back from its overflow-storage role. Bathroom: stock it so nothing has to be hunted for. Kitchen: zone the traffic and reset the refrigerator. Living area: rearrange for conversation, lighting, and fragile-proofing. 1. Clear the Bottleneck: The Entryway Every guest enters through one narrow, high-traffic point. Winter visitors arrive layered in bulky coats, wet boots, scarves, and bags, and the classic error is letting the host family’s own gear fill the rack before anyone arrives. Purge the front closet a week out, moving household cold-weather items to a garage, basement, or bedroom closet so primary storage stands empty for visitors. Swap flimsy wire hangers for sturdy ones, and borrow a garment rack for large groups. A standard mat cannot absorb a party’s worth of snow, mud, and salt, so add generous rubber boot trays to corral slush. Clear the entry table so a guest can set down a purse or gift. 2. Turn the Storage Room Back Into a Guest Room For eleven months, guest rooms quietly mutate into overflow storage for decorations, off-season clothes, and old exercise bikes. That debris must leave entirely before visitors land, not simply be shoved to one corner. Clear the closet fully and empty two dresser drawers plus a section of hanging space; nobody should spend a week in a suitcase. Then stage the bedside: check the outlet behind the nightstand and add a power strip at reachable height. Launder all bedding beforehand, including duvet covers and mattress protectors, because linens stored for a year carry a musty staleness the moment they are unpacked. 3. Make the Bathroom Intuitive Guests cannot casually explore a bathroom the way they breeze through a hallway, so this room must be intuitive and spotless. Stock toilet paper generously so running out never triggers a search. Provide ample towels in a distinct color, ending guesswork about whose is whose. Stash your own toiletries in drawers or the cabinet so the counter offers clear real estate for a visitor’s products, and clear the tub edge of old bottles. Tidiness here reads as hospitality, and it starts with real cleanliness: the CDC’s checklist for when and how to clean and disinfect your home is a handy pre-guest reference for high-touch surfaces. 4. Zone the Kitchen Around Traffic The kitchen becomes the social hub, and guests naturally congregate there, blocking the cook’s triangle between stove, sink, and refrigerator. Head it off with a self-service station far from the work zones: a drinks table with glassware, ice, and beverages on a sideboard, plus a snack zone on the island or in the living area. Then maximize the workspace itself. Clear every counter of appliances not needed for the menu, because counter space becomes the scarcest resource during prep. Treat the refrigerator as a logistics problem: declutter condiment graveyards, old leftovers, and expired items to open voids for the turkey and sides, raise or remove shelves for tall bottles and platters, and group similar items in clear bins so guests serve themselves without excavating the back shelves. 5. Reshape the Living Area for Conversation Most living rooms face a television; a hosting living room should face itself, with seating rearranged into conversational clusters. Then remove the fragile and the superfluous: with small children visiting, lift delicate collectibles and heirlooms to higher shelves, and clear the coffee table of decor so cups and plates have room. Lighting is an organizing tool too: check every lamp for a working bulb and favor soft, layered light rather than harsh overheads that feel clinical. And if the hauling and rearranging feels like a workout, it counts as one: the CDC’s overview of the benefits of physical activity is good permission to move boxes guilt-free. The Organization Table: Room, Fix, Timing Room Core fix Best timing Entryway Empty the closet, add boot trays, clear surfaces Week before arrival Guest room Remove stored items, clear drawers, check outlets Laundry early, staging the day before Bathroom Guest towel color, visible paper, bare counters Scrub mid-week, restock day-of Kitchen Self-serve stations, appliance eviction, fridge reset Reset 48 hours before cooking Living area Conversation layout, valuables high, coasters out Same day as arrival Why a Deep Clean Comes Before the Decor None of these strategies works in a dirty house, because tidying a grimy space is just rearranging clutter. Washing guest-room walls, scrubbing bathrooms, and degreasing the kitchen creates the fresh canvas that makes organization visible, and that labor exceeds the hours most hosts can spare. The fix is dividing the work: Toronto Shine Cleaning provides the professional deep cleaning before the event, and you keep the hosting. Typical deep cleaning rates before HST start from $270.38 for a studio or one-bedroom and $393.75 for a two-bedroom, rising to $441 for three bedrooms and $527.63 for four, itemized on our pricing page. Follow the reset with a recurring regular housekeeping visit so the home settles back into rhythm, or call (647) 424-0355 for a quote sized to your rooms. Frequently Asked Questions How far ahead should guest prep start? Two weeks out: purge the entry closet, empty the guest room, and launder bedding. One week out: the deep clean and kitchen appliance eviction. The last day or two: bathroom restocking, the fridge reset, and seating. What if I have no guest room? Apply the same logic to whatever you have. A cleared bedroom corner or a pull-out sofa

5 Ways to Organize Your Home to Accommodate Extra Guests Read More »

flu season

Flu Season: Is Your “Clean” Home Making You Sick? The Hidden Germs You Missed

Why Your “Clean” Home Can Still Spread the Flu Flu season in Canada peaks in December and January, when homes are sealed tight against the cold and filled with guests. Influenza viruses travel in droplets from coughs and sneezes, but they also ride on hands and settle on surfaces, where they can survive on hard materials like stainless steel and plastic for up to 48 hours. A home that looks spotless can still be a transmission hub, because the germs are hiding on the objects everyone touches and almost no one sanitizes. Protecting your household means shifting from cosmetic cleaning to targeted, health-focused cleaning. Clean First, Then Disinfect: the Order Matters Cleaning and disinfecting are two different steps, and skipping the first one makes the second fail. Cleaning physically removes dirt, dust, and germs from a surface using soap or detergent and water. Disinfecting then kills the germs that remain, using a registered chemical product. If you spray disinfectant onto a visibly dirty surface, the organic soil shields the germs and inactivates the product, so the process wastes time and leaves pathogens behind. The CDC home cleaning guidance recommends always cleaning surfaces before disinfecting them, and doing both steps more often during cold and flu season. Respect the Dwell Time The most common mistake is wiping disinfectant off too soon. Registered disinfectants need to stay visibly wet on the surface for a set contact time, usually three to ten minutes depending on the product, before they actually kill viruses. Spray and immediately wipe removes the product before it works. Read the label, apply enough product to keep the surface wet for the full dwell time, and let it air dry. This one habit separates real disinfecting from just moving germs around. The Hidden Germ Hotspots Most Homes Miss We all wipe kitchen counters, but the flu spreads through the objects fingers touch constantly. The handle of the refrigerator, the buttons on the microwave, the flush lever in the bathroom, the light switch plate, and the remote control all pass from hand to hand dozens of times a day, and they rarely see a disinfectant. Door hardware deserves special attention in winter: the entry doorknob, the deadbolt, the storm door handle, and any garage keypad or smart lock are touched by every person entering the house, often right after touching outdoor surfaces. These surfaces turn a family home into a germ relay during a busy holiday week. Room Hidden hotspots Flu-season routine Entryway Doorknobs, deadbolt, keypad, handrails Wipe with disinfectant daily Kitchen Fridge and oven handles, coffee maker, salt and pepper shakers Clean, then disinfect twice weekly Living room Remote controls, game controllers, light switches Sanitize weekly with alcohol wipes Bathroom Flush lever, faucet handles, toothbrush holder Disinfect every day during peak season Home office Keyboard, mouse, phone screen Wipe weekly, never drip liquid inside Electronics, Towels, and the Germs You Carry Daily Smartphones are the ultimate high-touch objects: they go from kitchen counter to bathroom to bed, and they are pressed against the face dozens of times a day. Most modern phone screens handle gentle disinfection well; wipes with 70 percent isopropyl alcohol are generally safe for touchscreens, while bleach, abrasive cleaners, and dripping liquids are not. Apply the wipe, let the surface dry completely, and avoid pooling moisture in ports and speakers. Keyboards and mice need the same attention, especially in households where several people share one workspace. Hand towels are another overlooked link in the chain. A shared bathroom towel can be touched by every member of a household, plus guests, many times a day during the December party season. During flu season, swap bathroom hand towels daily, wash them in hot water, and consider paper towels for gatherings so every guest dries their hands on a fresh sheet. The CDC handwashing guidance reminds us that clean hands stop the spread, but only if the towel that dries them is not itself a shared surface. Pillowcases and bedding deserve more frequent washing too, since flu sufferers shed virus onto linens while they sleep. Air, Humidity, and the Bigger Picture Viruses do not only wait on surfaces. Flu droplets hang in the air and attach to dust particles, which is why heating vents, ceiling fans, and dusty baseboards deserve a vacuum pass before and during flu season. Keeping indoor humidity around 40 to 60 percent also helps: flu viruses survive longer and transmit more easily in dry air, and comfortably moist air keeps the nasal passages that trap viruses working properly. A humidifier, regular ventilation, and thorough dusting work alongside surface disinfection to lower the viral load. Build a Daily Germ-Breaking Routine Disinfect entry door hardware and light switches every morning Wipe down kitchen appliance handles and counter zones after each meal Sanitize the flush lever, faucet handles, and toothbrush holder daily Give remotes, phones, and keyboards an alcohol wipe weekly Switch to fresh hand towels daily or paper towels when guests visit Vacuum vents, baseboards, and under furniture to remove dust that carries particles Consistency beats intensity. A two-minute pass over the high-touch map every day does more to protect a family than a marathon cleaning session once a month, because germs are reintroduced constantly by the people who live there. When someone in the house is already sick, add daily disinfection of everything they touch, wash your own hands after contact, and keep their linens and towels separate until they recover. Frequently Asked Questions About Flu Season Germs What is the difference between cleaning and disinfecting? Cleaning removes dirt and some germs with soap and water; disinfecting uses chemicals to kill the germs that remain. You need both, in that order, because dirt stops disinfectants from working. How long should disinfectant stay on a surface? Read the label: most registered disinfectants need to stay visibly wet for three to ten minutes to kill viruses. Wiping them off early defeats the purpose, so apply enough product and let it air dry. Is it safe to clean my

Flu Season: Is Your “Clean” Home Making You Sick? The Hidden Germs You Missed Read More »

Dangerous to Your Health: 5 Common Products That are Dangerous For Your Daily Life

Are Everyday Cleaning Products Dangerous to Your Health? Your home feels like the safe place, sealed off from city pollution. Inside many Toronto houses the opposite is true: the sprays under the sink can make indoor air more toxic than the air outside. Health Canada warns that household chemical products can cause poisonings, burns, fires and explosions when handled unsafely. A strong chemical smell is not proof of clean. Here is what five everyday products actually do, and the simpler habits that keep homes safe. Five Common Products Dangerous to Your Health 1. Bleach Bleach, the sodium hypochlorite default against mold, mildew and bathroom grime, is corrosive enough to burn skin and eyes on contact, and it is highly volatile. In a closed shower stall or small bathroom, its fumes react with organic matter and form chlorinated volatile organic compounds that immediately inflame the mucous membranes of the throat and lungs, especially dangerous with respiratory conditions. The deadliest habit is mixing: bleach plus ammonia, which lives in urine and many glass cleaners, generates chloramine gas, and bleach plus an acidic cleaner releases chlorine gas. Both can lead to hospitalization or worse. 2. Ammonia Glass and Window Cleaners Ammonia is why glass cleaner dries fast without streaks, and why it demands respect. It hunts moisture, so inhaled ammonia attacks the eyes, throat and lungs directly. High concentrations cause chemical burns in the respiratory tract and aggravate chronic conditions like asthma. Trigger-sprays aerosolize it into a fine mist that lingers in your breathing zone. That sharp odor is a warning signal, not evidence the glass needs you. 3. Fragrance, Air Fresheners and Fabric Deodorizers The word fragrance, or parfum, on a label is a regulatory loophole: scents count as trade secrets, so the hundreds of chemicals behind the scent are never listed. The cocktail commonly includes phthalates, added to make scents linger, which are known endocrine disruptors that mimic hormones and can interfere with reproductive development over long-term exposure. Air fresheners and fabric sprays do not clean anything. Some release agents that deaden your nerves or coat nasal passages with oily film; others bury odors under volatile organic compounds tied to headaches, dizziness and fatigue. Aerosol propellants add flammable lung irritants. The Government of Canada’s household products safety hub lists hazards in everyday cleaning items. 4. Oven Cleaners and Drain Openers Oven cleaners are built on lye, or sodium hydroxide, which strips baked-on grease by turning it into soap. That same reaction destroys living tissue: splashes cause severe burns and permanent blindness. Spraying a warm oven vaporizes the lye into a toxic cloud that fills the kitchen. Drain openers burn through hair and grease clogs with concentrated sulfuric acid or lye, generating intense heat that can damage old pipes; if a plumber later snakes a surviving clog, the splash-back is caustic. 5. Disinfectant Wipes and Sprays Quaternary ammonium compounds, the quats behind most disinfectant wipes and sprays, kill germs well, but they are powerful lung irritants. Growing evidence suggests frequent exposure can cause asthma even in otherwise healthy users. Quats also leave a residue, and a child who touches a wiped table then sucks their fingers is ingesting a pesticide. Blanketing whole rooms instead of high-touch points adds chemical load and feeds antibiotic resistance. Two Traps Behind Friendly Labels Carpet cleaners and upholstery shampoos bring their own risks. Many spot removers rely on perchloroethylene, a dry-cleaning solvent that is a neurotoxin and a classified carcinogen, and across a large floor it keeps off-gassing for days or weeks. Naphthalene, the mothball chemical in some carpet cleaners, releases fumes that can cause confusion, nausea and liver damage. Fibers trap all of it and release it back with every step and sit. Green labels deserve the same skepticism. The word natural is largely unregulated in cleaning products, and a green bottle can still carry allergens like limonene, a citrus oil that reacts with ozone in your air to form formaldehyde, a known carcinogen. Concentrated plant-based detergents can still irritate skin and lungs. Read the ingredient list, not the leaf on the label. The Real Risk Is the Daily Total Toxicologists call the running tally your body burden. One spray does little; a weekly ritual of glass cleaner, floor polish, counter spray, toilet cleaner and air freshener becomes a chemical soup the body must filter. When that load stays high, chronic inflammation, skin conditions and respiratory sensitivity can follow. Children and pets pay the most because smaller bodies and faster metabolisms process the same exposure less efficiently. Safer Swaps That Still Clean The most effective cleaner is usually the simplest: mechanical action. Removing dirt beats masking it. Instead of Reach for Why it works Everyday surface sprays Microfiber cloth, water and real scrubbing Fibers trap dirt and pathogens, removing more bacteria than a light chemical wipe, with no residue left behind Bleach on general surfaces Hydrogen peroxide Disinfects without chlorine fumes or toxic residue Commercial limescale removers White vinegar A mild acid that dissolves mineral deposits and soap scum without off-gassing Scouring powders Baking soda Gentle physical abrasion for sinks, tubs and baked-on messes Ventilation and Protection: The Free Upgrades Even safe cleaners need discipline. Health Canada’s page on using household chemicals safely covers the buying, use and storage rules that prevent accidents, and these habits carry it into daily practice: Ventilate. Never clean a sealed room: open a window and run the exhaust fan, especially in small bathrooms where fume levels spike fastest. Protect your skin. It is the body’s largest organ and absorbs chemicals readily, so glove up around degreasers and solvents and wear a mask for concentrated products. Remove, don’t mask. The goal is neutral air and residue-free surfaces, not a perfume cloud that signals a fresh chemical dose. Frequently Asked Questions Is it really dangerous to mix cleaning products? Yes. Bleach plus ammonia releases chloramine gas, and bleach plus any acidic cleaner releases chlorine gas. Both react within seconds in a closed room and can lead to hospitalization. Use one product

Dangerous to Your Health: 5 Common Products That are Dangerous For Your Daily Life Read More »

Washroom Cleaning

Beyond the Surface: Why Washroom Cleaning Requires a Different Strategy

Bathroom Cleaning Fails Because Most People Wipe the Wrong Things A washroom is the most demanding room in any home. Living rooms gather dust; bathrooms cycle constantly between soaking wet and bone dry, and every cycle leaves mineral deposits, soap residue, and bacterial colonies clinging to tile, porcelain, and grout. Surface wiping hides the problem for a day, then the film returns. Real bathroom hygiene means identifying what is actually on the surfaces, choosing chemistry that attacks it, and giving products enough contact time to finish the job. Households that get this routine right stop fighting their bathrooms. Soap Scum Is a Mineral Problem, So It Needs an Acid The waxy film on shower walls and tub surrounds is calcium stearate: fatty acids from bar soap bonding with hard-water minerals into an insoluble precipitate. That bond is alkaline, which is why pH-neutral all-purpose sprays glide right over it. Professionals reach for acidic cleaners, typically phosphoric or citric acid, to dissolve the mineral lattice so the film releases. One serious exception: acid etches natural stone permanently, so marble and travertine must never meet these products. Biofilm Versus Mold: Two Different Enemies The pink or orange slime in shower corners is biofilm, a bacterial colony sealed to the surface with a glue-like matrix. It wipes away easily and returns fast, because you removed the outer layer, not the colony. Genuine mold is a fungus that sends roots into porous material, and grout is cement, a sponge for water and organic matter. Once mold establishes in grout, surface scrubbing fails; you need a cleaner that penetrates below the surface to kill the roots, then a sealer that locks moisture out so spores cannot re-establish. The CDC’s mold health overview explains why damp materials drive these growths. The Toilet Is an Aerosol Problem Before It Is a Stain Problem Flushing with the lid up fires a plume of microscopic droplets onto nearby surfaces, so close the lid and clean top down. The two most neglected areas are structural rather than cosmetic. The seam where the porcelain base meets the floor collects condensation, dust, and stray moisture. And the siphon jets, the small holes under the rim that release flush water, silently accumulate minerals and mold, weakening the flush and harboring bacteria. A bent bottle brush is the only tool that reaches inside them. The Aerator, the Overflow Hole, and Other Hidden Traps The faucet aerator is a mesh screen straining sediment from supply water; when flow turns irregular, calcium has choked it. Unscrew the tip and soak it in vinegar. The overflow opening near the top of the basin is a dark, damp cave nobody scrubs. Biofilm grows inside and exhales a musty, sewer-like smell; pour cleaner into the hole and agitate the walls with a small brush. Bathroom glass hates humidity: dust sticks to mirrors and smears into streaks. A glass-grade microfiber cloth lifts oils with tiny hooks instead of heavy detergents, and ammonia-based sprays belong on the cloth, never the mirror, because liquid seeping behind the glass corrodes its edges. Floors and the Exhaust Fan Matter More Than Any Countertop Bathroom dust is damp, so it smears instead of sweeping and packs into corners and grout lines. Mopping mostly redistributes that grey slurry, so the perimeter needs hand work, including the cramped strip behind the toilet where dust bunnies absorb moisture and begin to rot. Up above, the exhaust fan is the room’s invisible cleaner: it pulls out humid air, and with it dust and hairspray, until the blades and grille are caked in sticky grey fuzz that strangles airflow and lets humidity linger on the walls. Vacuum the grille, remove the cover, and wipe the blades. Tool Discipline and Dwell Time: The Two Free Upgrades Cross-contamination is solved with laundry. A cloth that touched the toilet base must never reach the sink, counter, or door handle, so keep dedicated cloths per zone. Then change how you spray: almost every disinfectant needs the surface visibly wet for three to ten minutes before it kills germs, and CDC household cleaning guidance recommends removing soil first and letting products work for their labeled contact time. Spray-and-wipe lifts dirt but leaves pathogens standing, and dwell time also softens soap scum so you scrub less. When Weekly Maintenance Stops Being Enough Heat and moisture accelerate decay, so a washroom degrades faster than any other room, and weekly cleaning only reaches the surface layer. Reversing that takes restorative work: descaling shower glass, sanitizing grout, and reaching behind the toilet by hand. It is bending, scrubbing labor done close to strong cleaners, exactly what our deep cleaning service resets. Tenants heading out face the same hidden zones during move-out cleaning, where inspections look at grout and base seams, not countertops. Zone Main enemy What actually works Shower and tub Soap scum, biofilm Acidic cleaner with dwell time; never on natural stone Grout lines Rooted mold Penetrating treatment, then a moisture sealer Toilet Aerosol, clogged jets Lid-down flush, bent brush under the rim, dried base seam Sink and mirror Aerator scale, smeared dust Vinegar soak on the screen; microfiber sprayed on the cloth Floor and fan Damp slurry, humid air Hand-clean corners; vacuum and wipe the fan grille Frequently Asked Questions What removes soap scum from a bathtub fastest? An acidic product with phosphoric or citric acid, sprayed on and left wet for its labeled dwell time so the chemistry dissolves the mineral bonds. Wipe top to bottom, rinse, and squeegee the surface afterward to slow the next layer. Skip acids on marble or travertine, which they etch permanently. Why does my bathroom smell clean for a day and then musty again? The odor source usually lives where the routine never touches: biofilm inside the sink overflow, the grime ring at the toilet base, or wet dust rotting behind the toilet. Each needs physical scrubbing rather than fragrance. Do I really need separate cloths for the toilet? Yes. Transferring toilet bacteria to a sink or counter where you

Beyond the Surface: Why Washroom Cleaning Requires a Different Strategy Read More »

Woman cleaning the counter with pH-neutral products next to her.

Understanding pH-Neutral Cleaners: The Complete Guide

What pH-Neutral Cleaners Are and Why Your Surfaces Thank You for Them Somewhere between the vinegar bottle and the oven degreaser sits the most important concept in household chemistry: a balanced pH. Master it and you move from aggressive scrubbing that quietly damages finishes to gentle, sustainable maintenance that keeps stone, wood, and tile looking new for decades. This guide explains what a pH-neutral cleaner actually does, exactly where it is essential, where it fails, and how to use one like a professional. The pH Scale in Plain Language The pH scale measures how acidic or alkaline a water-based solution is, running from 0 to 14. Pure water sits at 7, dead center, and is the model of neutral. Below 7 lands acid, with vinegar and lemon juice as the classic household examples. Above 7 is alkaline, also called basic, a club that includes bleach, ammonia, and most oven degreasers. The further a product strays from 7, the more chemically reactive and potentially caustic it becomes. That reactivity is a double-edged sword: it is what lets strong cleaners dissolve hard water stain or cut heavy grease, and it is also what ruins surfaces that never stood a chance against them. Health Canada’s resource on using household products safely makes the same point about reading labels and respecting product strength. What a Neutral Cleaner Actually Does A pH-neutral soap is a surfactant formulated to sit at or very near 7. It lifts dirt, oils, and grime off a surface and suspends them so they can be wiped away, without trying to dissolve, etch, or strip the material underneath. Its action is mechanical, breaking the bond between soil and surface rather than attacking the surface itself. Think of it as the do-no-harm principle of cleaning: the default choice for any material that a strong acid or alkali would permanently damage. Natural Stone: The Strongest Case for pH 7 Marble, limestone, travertine, and onyx bring luxury into a home and extraordinary vulnerability with them. These stones are largely calcium carbonate, which reacts violently with acid. Even a “natural” splash of vinegar on a marble counter sets off a reaction that dissolves a microscopic layer of stone. The result, called etching, looks like a dull whitish stain but is physical damage that no wipe can undo; removing it means professional re-honing and polishing. Alkaline cleaners are less dramatic but still wrong, dulling the finish and working into pores over time. A pH-neutral cleaner is the only recommended routine product for these calcium-based stones. Granite etches far less readily, yet harsh chemicals degrade the sealant that protects it from stains, so neutral soap remains the wisest daily choice. Floors, Leather, and Fabrics The same preservation logic protects your floors. A sealed hardwood floor is defended by its finish, not the wood beneath, and repeated washes with high-alkaline cleaners slowly strip that polyurethane layer. The floor may look clean today while growing duller and thinner with every mop. A properly diluted pH-neutral floor cleaner lifts soil off the finish without eating it. Manufacturers of luxury vinyl tile and laminate almost universally specify neutral cleaners for the same reason: harsh chemistry clouds or embrittles the factory wear layer, permanently marring the look and often voiding the warranty. Leather, a natural skin kept supple by its own oils, reacts the same way to alkaline soaps by drying, cracking, and fading, while delicate upholstery and clothing respond far better to a neutral spot-cleaning solution. Professionals follow that order of force: start with the gentlest method that can work. Where pH-Neutral Cleaners Hit Their Limits Neutral products are masters of maintenance, not miracle workers. Three common jobs need something else: Hard water stains and soap scum. These are alkaline mineral deposits of calcium and magnesium, so an acidic cleaner is required to break the bonds. Baked-on stovetop or oven grease. Polymerized oil needs a moderately alkaline degreaser; a neutral soap simply lacks the power. Disinfecting. Neutral soaps clean but do not inherently kill germs. Countertops touched by raw meat or a bathroom during flu season need a dedicated disinfectant applied after cleaning, as the CDC’s home cleaning and disinfecting guidance describes. Strong chemistry also demands respect: never blend cleaning products, and store them per Health Canada’s household chemical safety rules, since mix-ups like combining bleach with other cleaners can release toxic gas. Smart Technique: Dilute, Two-Bucket, Microfiber Most neutral cleaners ship as concentrates, so dilute exactly to the label. Too much product leaves a sticky film that attracts fresh dirt, the opposite of the goal. For floors, the two-bucket method keeps things honest: one bucket holds cleaning solution, the second holds clean rinse water, so the mop never redistributes what it lifted. On countertops, pair the cleaner with a quality microfiber cloth whose fibers trap soil instead of pushing it around. Lift the dirt, remove it, leave nothing behind but a clean surface. The sensible arsenal is small: a neutral workhorse for the vast majority of daily and weekly tasks, plus acidic and alkaline specialists reserved for the specific problems that truly need them. Which Cleaner for Which Surface Surface or soil Right chemistry Why Marble, limestone, travertine, onyx pH-neutral Acids etch calcium carbonate instantly Granite and sealed stone pH-neutral Protects the stain-blocking sealant Sealed hardwood, LVT, laminate pH-neutral, diluted Spares the wear layer and the warranty Leather, upholstery, delicates pH-neutral Keeps natural oils and dyes intact Hard water and soap scum Mildly acidic Alkaline minerals dissolve in acid Baked-on grease Mildly alkaline degreaser Saponifies polymerized oils Germ-sensitive counters Clean, then disinfect Neutral soap lifts soil, not pathogens pH-Neutral Cleaner FAQ How do I know if a cleaner is truly pH-neutral? The label should say pH neutral or pH 7. If it does not, contact the manufacturer; a generic “all surface” claim is not a promise, since many multi-purpose products lean alkaline. Is a diluted neutral cleaner safe for everyday mopping? Yes, and it is the recommended routine for sealed floors and stone. Use weak solution, a well-rinsed mop

Understanding pH-Neutral Cleaners: The Complete Guide Read More »

How to Unclog Your Shower Head: Fixing Weak Water Pressure

Why Your Shower Pressure Fades Over Time A healthy shower head delivers a full, consistent, well-directed stream. Over months, that flow can degrade into a weak, sputtering spray: jets go silent one by one while others shoot water at odd angles. The fixture is rarely dying. In almost every case it is clogged from the inside by an accumulation of mineral deposits, soap scum, and biofilm. Here is how to diagnose the cause and restore the flow with ingredients you likely already own. What Actually Causes the Clog Hard water, common in many municipal systems, carries a high concentration of dissolved minerals, predominantly calcium and magnesium. As residual moisture evaporates inside the head, those minerals precipitate into a hard, chalky substance called limescale, or calcium carbonate, which builds layer by layer and slowly constricts each nozzle like plaque in an artery. The buildup is gradual enough that many households never notice until pressure collapses. Soap scum, the gummy film that forms when soap reacts with hard-water minerals, adds its own blockage. Meanwhile, the dark, damp, warm interior of the fixture is an ideal breeding ground for bacteria and microorganisms that create a slimy layer known as biofilm, and damp bathroom fixtures can also harbor mold, which the CDC explains in its guidance on mold and your health. So the fix is about hygiene as much as water pressure. The Bag Soak: Easiest First Fix White distilled vinegar is the tool of choice because its active component, acetic acid, reacts with alkaline calcium carbonate and breaks it down into water-soluble calcium acetate and carbon dioxide gas. That reaction dissolves the scale without the harsh abrasive scrubbing that would damage the fixture’s finish. Gather a sturdy plastic bag large enough to envelop the head, a rubber band or zip tie, and enough vinegar to submerge the face fully. Pour the vinegar into the bag, lift it over the shower head so the nozzles and faceplate are completely immersed, and cinch it snugly around the shower arm so it holds the liquid’s weight without leaking. For light buildup, a few hours is sufficient; heavily calcified fixtures do better overnight. Tiny bubbles around the nozzles are a visible sign the chemistry is working. Remove the bag, pour the spent vinegar down the drain, then run hot water through the head for a few minutes. The flow and pattern should improve immediately. If a few jets stay stubborn, scrub the faceplate gently with an old toothbrush and poke individual openings with a small pin, a paperclip, or a toothpick to dislodge softened mineral plugs. Deep Clean by Removing the Head When severe blockages resist the bag method, detach the fixture entirely so the internal components, including the often-overlooked filter screen, get cleaned too. Wrap the connecting nut with a cloth before applying an adjustable wrench or pliers so the jaws cannot scratch the finish, then turn the nut counter-clockwise to free it from the arm. Inspect the small mesh screen or washer at the connection point: it is designed to trap sediment and can become heavily clogged enough to severely restrict flow, so remove and scrub it with a toothbrush. Submerge the whole head in a bowl or bucket of white vinegar for several hours or overnight, scrub the exterior nozzles plus the interior threads and chambers, and rinse thoroughly with fresh water. Before reattaching, wipe the shower arm threads clean and wrap them clockwise three to four times with plumber’s tape, also called Teflon tape, for a secure, watertight seal. Screw the head on by hand, then add a final quarter-turn with the wrench over the protective cloth. Do not overtighten, because that can crack the connecting nut. Vinegar Alternatives and Stronger Chemistry Lemon juice contains citric acid and works on scale in much the same way vinegar does. A paste of baking soda and water serves as a gentle abrasive for surface grime on the exterior only. Do not rely on a baking soda plus vinegar mix for descaling: the fizzing largely neutralizes the acid, leaving mainly mechanical scrubbing value. Commercial calcium, lime, and rust removers are powerful but harsh. Follow the manufacturer’s instructions precisely, wear protective gloves and safety glasses, and ventilate the bathroom against strong fumes. The CDC’s page on cleaning and disinfecting your home is a sensible general reference for product safety habits. Match the Method to the Finish Finish Vinegar tolerance Care notes Standard chrome High; withstands prolonged soaks The most forgiving option Brushed nickel, stainless steel Robust Avoid abrasive pads that scratch Oil-rubbed bronze, brass, gold plating Low; protective lacquer can strip Dilute vinegar, soak briefly, clean often For those coated, delicate fixtures, a quick wipe-down after each shower prevents heavy buildup from ever forming, preserving both function and appearance. What Neglect Costs You Beyond a disappointing shower, restricted flow can increase pressure within the plumbing, and the biofilm inside the head harbors bacteria that become aerosolized with the water you inhale. Risk to healthy individuals is generally low, but consistent cleaning is a simple hygienic practice, in the same spirit as the CDC handwashing guidance. A head caked in limescale and scum is also an eyesore that drags down the whole bathroom. When to Call for Backup Once scale has spread to faucets, glass doors, and grout, a professional deep cleaning of your home resets every fixture at once, and recurring maid visits stop buildup before it starts. Current plans and rates are on the pricing page, with honest client notes under reviews. Call (647) 424-0355 and we will tackle the tough buildup for you. Shower Head Questions, Answered How long should a vinegar soak last? Two to three hours handles light scale, while an overnight soak suits heavily calcified heads. For lacquered specialty finishes, keep it shorter and dilute the vinegar, since prolonged acid exposure can strip the protective coating. Why did some nozzles stay blocked after soaking? Solid plugs inside individual jets sometimes need mechanical help. A pin, paperclip, or toothpick poked carefully into

How to Unclog Your Shower Head: Fixing Weak Water Pressure Read More »

Cleaning Products for Your Natural Stone

Natural Stone: Choosing the Right Cleaning Products for Your Natural Stone

Natural Stone Demands Different Chemistry Granite, marble, travertine, and limestone bring elegance and long service to a home, but their porous nature demands a mindful approach. Using the wrong products can cause irreversible damage: dulling, etching, and staining. The cornerstone of proper care is consistent use of pH-neutral cleaners, because harsh acidic or alkaline chemicals react with the minerals in the stone and compromise both its integrity and its finish. This guide covers what to use, what to banish, and how to handle spills, stains, and sealing. The Safest Daily Cleaner Is Probably Under Your Sink For everyday cleaning of any natural stone surface, the most trusted everyday method is a simple blend of lukewarm water with a few drops of gentle, pH-neutral dish soap. That gentle combination lifts ordinary dirt, grease, and grime without harming the stone or its sealer. Apply it with a soft microfiber cloth, then flush the spot with clean water and towel it fully dry with a second soft cloth. Both follow-up steps matter: leftover soap leaves a dull film over time, and standing water leaves spots. When a more potent clean is required, especially disinfection on countertops where food is prepared, use a solution of equal parts water and 70 percent isopropyl alcohol. It kills bacteria and germs without abrasion or acid. Spray the surface, let it sit for a few minutes, wipe clean with a damp cloth, and dry thoroughly. Products to Keep Away From Stone Anything acidic, including vinegar, lemon juice, and citrus-based cleaners. These are the primary adversary of calcareous stone. Bleach and ammonia, which degrade the sealer and dull the surface over time. Even on tough surfaces, the CDC’s bleach safety guidance makes clear why harsh chemicals deserve caution. Abrasive powders and creams, which scratch the polish. Marble, travertine, and limestone consist largely of calcium carbonate, which reacts vigorously with acids. The result is etching, a chemical burn that shows up as a dull spot no amount of buffing removes. Granite, a siliceous stone, resists acids better, but repeated exposure still weakens its sealer and eventually damages the surface, so pH-neutral habits are the right long-term practice for granite too. For general household routines, the CDC overview of cleaning and disinfecting your home is a useful reminder that gentle consistency beats aggressive one-off scrubbing. Spill Response and Stain Poultices Marble is particularly vulnerable because it is soft and porous. Blot spills, especially wine, coffee, and fruit juice, immediately with a soft cloth rather than wiping, which spreads the liquid wider. Then clean the area with mild soap and water, rinse, and dry. For stubborn organic stains on light-colored marble, a poultice of hydrogen peroxide and an absorbent material such as baking soda draws the discoloration out. For stains that have already penetrated, build the poultice around the stain type: Oil-based stains: baking soda mixed with acetone or a commercial degreaser to a peanut butter-like consistency, applied thick, covered with plastic wrap, and taped at the edges. Organic stains like coffee or wine on light stone: hydrogen peroxide with an absorbent powder such as unscented baby powder or diatomaceous earth. Rust on limestone: a non-acidic rust remover, the safest route for avoiding fresh etching. Let the poultice sit 24 to 48 hours; it works as it dries, pulling the stain from the stone. Scrape it off gently with a plastic or wooden scraper, rinse with clean water, and dry thoroughly. Deep-set marks often need multiple applications. Caring for Textured Stone Travertine and limestone share marble’s composition and need comparable care, with one extra wrinkle: their surfaces carry small pits and fissures that trap dirt. Dust regularly with a dry microfiber cloth so abrasive particles never accumulate. Clean with a pH-neutral product, then rinse and dry so water cannot settle in the pores. For a deep clean of pitted travertine, an alkaline-based product is often the only way to draw out stubborn grime. If you see efflorescence, the white powdery salt deposit that can bloom to the surface, treat it with a non-acidic cleaner so the residue lifts without harming the stone. Sealing: The Real Shield Beyond daily cleaning, sealing is the most critical aspect of stone care. A sealer penetrates the pores to inhibit liquid absorption and prevent staining, and the two families behave very differently. Sealer type How it works Strengths Trade-offs Impregnating (penetrating) Absorbs into the stone, filling pores from within Keeps the natural look; lets water vapor escape, vital outdoors and in wet rooms Must be renewed on schedule Topical Forms a film on the surface Adds gloss and some scratch protection Wears visibly and can trap moisture, causing discoloration For most homes, a penetrating impregnating sealer is the smart pick: it lasts longer and keeps the stone’s natural look. How often? Let a simple water test decide: sprinkle a few drops on the surface. Water that beads means the sealer is still effective; water that absorbs and leaves a dark spot means it is time to reapply. As a general guideline, highly porous, heavily used stone such as marble in a busy kitchen may need sealing every six to twelve months, while denser granite can often go one to two years or longer. Build the Routine That Protects the Investment The formula for pristine stone is unglamorous and reliable: gentle cleaning on a consistent schedule, prompt attention to spills, and regular sealing checked by the water test. Understand your specific stone and match products to it, and these surfaces stay a stunning feature for a lifetime. If you would rather hand the nuance to professionals, Toronto Shine Cleaning works with granite, marble, travertine, and limestone using appropriate products and techniques, whether you book a deep cleaning reset or regular housekeeping. See where we serve or read client reviews, then call (647) 424-0355 for advice on your surface. Natural Stone Questions, Answered Can I use vinegar on granite countertops? Reserve a firm no for marble, travertine, and limestone, and use it sparingly if at all on granite.

Natural Stone: Choosing the Right Cleaning Products for Your Natural Stone Read More »

5 Key Areas to Deep Clean Before Winter Sets In

5 Key Areas to Deep Clean Before Winter Sets In

5 Key Areas to Deep Clean Before Winter Sets In When the temperature drops, your home becomes the center of your world. Windows stay closed, the furnace runs daily, and family time moves indoors. That is why a deep clean before winter is more than a seasonal ritual: it protects your air quality, your fabrics, and your comfort for months. These five areas make the biggest difference, and each one is easy to tackle with the right plan. 1. Improve Indoor Air Quality: Vents and Furnace Filter After months of sitting idle, your heating system collects dust, pollen, pet dander, and fine particles in the ductwork. The first time the furnace kicks on, it can blow that accumulation straight into your living space and aggravate allergies. Start by turning off the HVAC system, then vacuum each vent cover with the brush attachment. For a deeper clean, unscrew the covers and wash them in warm, soapy water, using a small brush to reach into the grilles, then vacuum as far into the duct opening as the crevice tool allows. The single most impactful task is replacing the furnace filter. A clogged filter traps fewer particles, forces the system to work harder, and raises both energy use and the risk of malfunction. A fresh filter is inexpensive, and it pays off in health and efficiency all season. Good indoor air quality supports everyday health, and clean vents and filters are the first line of defense, as the CDC notes about air quality. 2. Maximize Natural Light: Windows and Screens Dirty windows can noticeably dim a room during the darker months. Remove your window screens, lay them flat outside, scrub them with a soft-bristled brush and mild soap and water, then rinse and dry completely. Storing screens in a garage or basement during winter lets in more light and protects them from snow and ice damage. Clean the interior glass with warm water and a few drops of dish soap, finishing with a high-quality squeegee for a streak-free result. Do not skip the tracks and sills: a crevice tool clears loose debris, and a damp cloth with an old toothbrush handles the tight corners. Mold can grow where moisture collects around windows, so the CDC recommends keeping damp areas dry. 3. Sanitize Fabrics and Upholstery Comforters, flannel sheets, wool throws, and decorative blankets that have been stored all year can absorb a stale, musty odor. Launder everything according to its care label before use so your cozy essentials are fresh and free of dust mites. Curtains and drapes collect surprising amounts of dust: vacuum them top to bottom with the upholstery attachment, use a steam cleaner on durable fabrics, or machine wash when the label allows. For sofas and armchairs, remove the cushions and vacuum every seam, crack, and corner where crumbs, dust, and pet hair hide. Following basic hygiene practices keeps high-touch fabrics healthier for the whole family. 4. Prepare the Fireplace and Deep Clean Floors Before the first fire of the season, clear and wipe down the mantel, hearth, and fireplace tools so that first flame does not send a plume of dust into the room. The interior of the chimney still needs a professional sweep for safety. Then turn to the floors: carpets and area rugs become the main surfaces for play and relaxing, and a quick vacuum will not do. Vacuum slowly and methodically, making multiple passes in overlapping, perpendicular directions to agitate the pile and pull embedded grit from the fibers. Move furniture where possible to reach the dustiest corners of the room. 5. Get the Kitchen Ready for the Busy Season Winter brings hearty soups, slow-cooked stews, and holiday baking, so the kitchen deserves attention now. Deep clean the refrigerator inside and out: remove shelves and drawers, wash them in warm, soapy water, and wipe every interior surface. This also forces a useful inventory before you stock up for the holidays. Clean the oven well before the turkey goes in, using the self-cleaning function or a manual baking soda and vinegar method so it heats evenly without smoke or odors. Finally, declutter the pantry and take stock of baking supplies and staples so meal prep runs smoothly. Winter Deep Cleaning Checklist Vacuum vents and wash vent covers; replace the furnace filter. Remove, clean, and store window screens; clean glass, tracks, and sills. Launder stored bedding and throws; vacuum curtains and upholstery seams. Wipe the mantel and hearth; book a professional chimney sweep. Deep vacuum carpets with slow, overlapping passes. Clean the fridge and oven; organize the pantry. Winter Cleaning Priorities at a Glance Area Why It Matters Top Task Vents and filter First furnace run can spread dust and allergens Wash covers, replace the filter Windows and screens Maximizes scarce winter light Clean glass and store screens Fabrics and upholstery Removes dust mites and musty odors Launder bedding, vacuum sofas Fireplace and floors Prevents dust plumes and fiber wear Wipe hearth, deep vacuum carpets Kitchen Ready for holiday cooking and guests Clean fridge, oven, and pantry Frequently Asked Questions How often should I replace my furnace filter before winter? Check it monthly and replace it at least once before the heating season starts. A clogged filter makes the furnace work harder, increases energy use, and lets dust and allergens recirculate, so a fresh filter is the cheapest air quality upgrade you can make. Do I really need to clean window screens in winter? Yes. Screens trap dust and pollen all summer, and cleaning them before storage keeps grime from transferring to your glass. Storing them dry also protects the mesh from snow and ice damage and lets more natural light into the room. Can I clean my own chimney? No. The interior of the chimney should be inspected and swept by a certified professional, because built-up creosote is a fire hazard. What you can do yourself is clean the mantel, hearth, and tools before the first fire of the season. Should I hire a professional for

5 Key Areas to Deep Clean Before Winter Sets In Read More »