Carpet and Rug Cleaning

woman giving her friend a cleaning gift card

Cleaning Gift: The Most Thoughtful Thanksgiving Gift You Can Give

Thanksgiving is a holiday centered on the beautiful, simple act of gathering. It’s about the warmth of a crowded table, gifts, the familiar comfort of shared recipes, and the expression of gratitude for the people in our lives. We plan menus, we brine turkeys, and we coordinate who will bring which dessert. But beneath this joyful preparation lies a silent, often stressful, and monumental task that almost always falls on the host: the pre-Thanksgiving deep clean. We have all felt it. The week before the guests arrive is a frantic race against the clock. It is a period of scrubbing, dusting, and mopping, driven by the quiet but intense pressure to present a home that is not just tidy, but impeccably clean. It is a labor of love, but it is labor nonetheless. It is hours spent on hands and knees, wiping baseboards and scrubbing floors, when that time could be spent perfecting a pie crust or simply taking a moment to breathe before the happy chaos begins. This year, consider a different kind of contribution. Instead of offering to bring another side dish that will crowd the refrigerator, think about giving a gift that truly serves the person you are thankful for. Consider giving the gift of a clean home. It may sound unconventional, but a pre-Thanksgiving cleaning, whether performed by you or a professional service, is one of the most thoughtful, practical, and profoundly impactful gifts you can possibly give a friend who is hosting. It is a gesture that transcends a simple present; it is a gift of time, of peace of mind, and of genuine, functional support. The Gift of Time In our busy lives, time is the most precious and non-renewable resource we have. During the holiday season, this becomes acutely apparent. The host of a Thanksgiving dinner is not just cooking a single meal; they are orchestrating a major event. Their to-do list is a marathon of planning, shopping, chopping, and baking. The last thing they have is a surplus of free hours. Let’s be honest about what a true guest-ready clean entails. It is not a quick wipe of the counters. It is a comprehensive, top-to-bottom effort. The Dusting: This means getting not just the coffee table, but the tops of the door frames, the ceiling fan blades, the baseboards, and the window sills. It is a detailed, meticulous job that can easily take an hour or more. The Kitchen Deep Clean: The kitchen is the heart of Thanksgiving, and it needs the most intensive work. This involves scrubbing the stovetop, wiping down the fronts of all appliances, cleaning the microwave, disinfecting the countertops, and making sure the sink is sparkling. This is a solid hour of focused work, at minimum. The Bathroom Scrub: The guest bathroom needs to be pristine. This means scrubbing the toilet, cleaning the sink and faucet, wiping down the mirror until it is streak-free, and washing the floor. The Floors: Every hard-surface floor in the main living areas needs to be thoroughly swept and mopped. Every carpet needs to be vacuumed, including moving furniture to get the dust bunnies hiding underneath. This can easily consume another hour or two, depending on the size of the home. The Final Touches: Cleaning entryway glass, tidying up clutter, and giving everything a final polish. When you add it all up, a proper pre-hosting deep clean can easily take five to eight hours of hard, physical work. By giving the gift of a cleaning, you are handing your friend an entire day of their life back. That is a day they can now use to finalize their menu, to bake a dessert without rushing, to spend time with their children who are excited for the holiday, or, most importantly, to simply sit down with a cup of tea and mentally prepare for the joy of hosting, rather than the stress of it. You are not just saving them a chore; you are giving them the space to enjoy the process. The Gift of Peace of Mind The physical labor of cleaning is only half the battle. For any host, the mental load can be even more exhausting. The pressure to have a “perfect” home is a real and often unspoken source of anxiety. Every dust bunny in the corner, every smudge on the window, and every crumb under the dining table can feel like a personal failing when you are about to welcome people into your home. This “hosting anxiety” creates a mental checklist that runs on a constant loop in a host’s mind. Did I remember to dust the lampshades? Is the guest bathroom clean enough? Does the house smell fresh? This internal monologue is a significant source of stress that detracts from the true spirit of the holiday. When you give the gift of a clean home, you are silencing that nagging voice. You are taking a huge, stressful item off their mental checklist and completely erasing it. Imagine the profound sense of relief your friend will feel, walking into their home a day or two before Thanksgiving to find that it is already done. The floors are gleaming. The kitchen is sanitized and ready for the culinary marathon. The bathroom is sparkling. This gift allows your friend to transition their focus from the presentation of their home to the purpose of the gathering. They can channel all their energy into what truly matters: the food, the conversation, and the connection with their loved ones. They can be a present, relaxed, and joyful host, not a frazzled, exhausted one who is secretly worrying about whether a guest noticed the dust on the baseboards. You are not just cleaning their house; you are clearing their mind. A Foundation for the Entire Holiday Season Thanksgiving in many ways is the official kick-off to the entire winter holiday season. The festivities of November flow directly into the preparations for December. A deep clean for Thanksgiving is therefore not just a gift for a single day; it is a foundational gift that keeps on

Cleaning Gift: The Most Thoughtful Thanksgiving Gift You Can Give Read More »
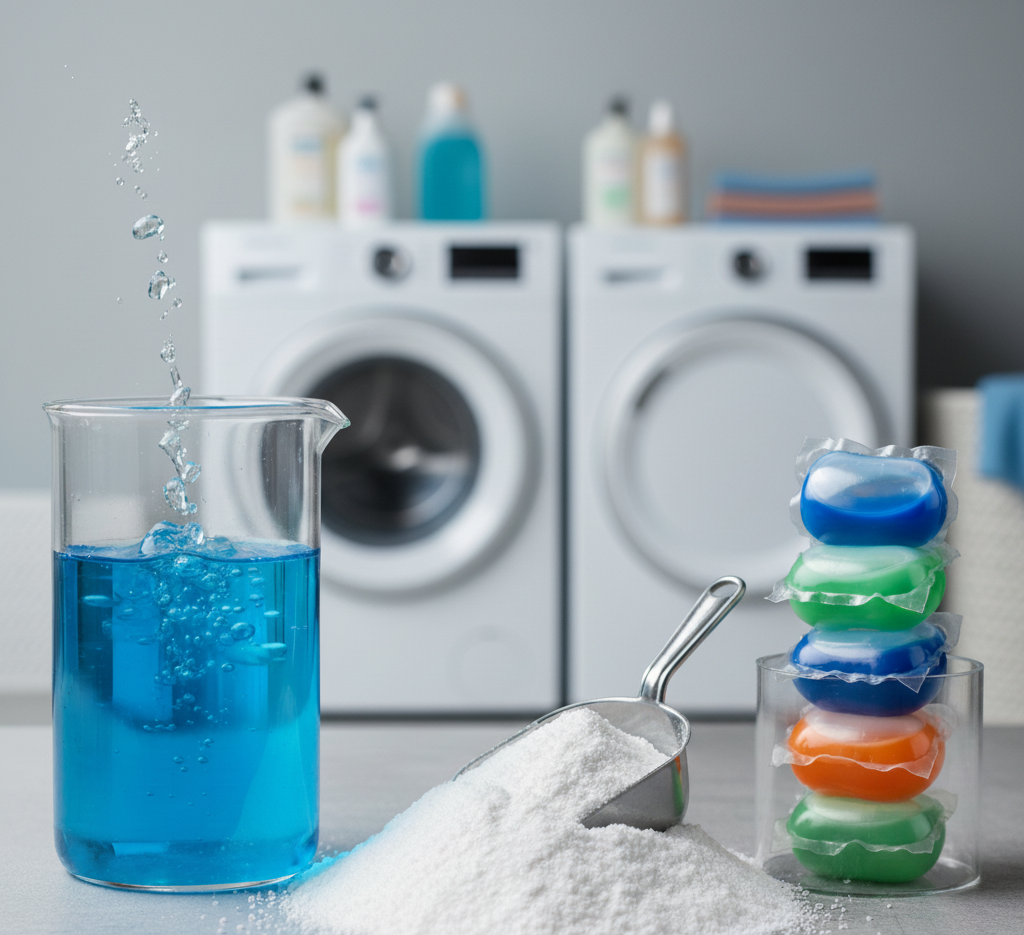
Liquid vs. Powder vs. Pods: A Complete Detergent Breakdown

Detergent is the unsung workhorse of our household chores, a chemical marvel we rely on multiple times a week, yet give very little thought to. It sits in a bottle, a box, or a tub, a wall of promises in the supermarket aisle, each brand claiming brighter whites, bolder colors, and more stain-fighting power than the last. It is laundry detergent, and for most of us, our interaction with it is limited to a ritual of unthinking measurement, a capful, a scoop, a tossed-in pod, followed by the push of a button. But this simple act belies the complex science and crucial choices involved in getting our clothes truly clean. The right detergent, used correctly, can preserve the life of our garments, save us money, and deliver a level of clean we thought was only possible in commercials. The wrong detergent, or the right one used incorrectly, can do the exact opposite, leaving clothes dingy, irritating our skin, and even damaging our washing machines. To master the art of laundry is to first understand the powerful tool at the heart of the process: the detergent itself.  Soap vs. Detergent To appreciate the modern detergent, we must first understand what it is not: it is not soap. For millennia, soap was the world’s primary cleaning agent. Made from natural fats and oils combined with an alkali, soap is a fantastic cleaner in the right conditions. However, it has one major, fatal flaw: it reacts poorly with the minerals present in hard water. When soap molecules encounter the calcium and magnesium ions in hard water, they bind together to form an insoluble, waxy precipitate known as soap scum. This is the same stuff that creates a ring in the bathtub. In laundry, it leaves a dingy, graying film on clothes and can build up inside the washing machine. The modern laundry detergent was invented as a direct solution to this problem. Detergents are synthetic, man-made compounds engineered in a lab to be immune to the effects of hard water. Their molecules are designed not to bind with minerals, allowing them to focus entirely on their primary job: removing dirt. This fundamental difference is why we use detergents for our laundry and not bars of soap. How Detergent Actually Works The magic of detergent lies in a specific type of molecule called a surfactant. The word itself comes from “surface active agent,” and that is precisely what it does. Imagine a surfactant molecule as being shaped like a tadpole, with a distinct head and a tail. The head is hydrophilic, which means it is attracted to water. The tail is hydrophobic (or lipophilic), meaning it repels water but is strongly attracted to oil, grease, and dirt. When you add detergent to your wash, millions of these surfactant molecules get to work. The hydrophobic tails seek out and attach themselves to the oily, greasy dirt on your clothes, burrowing into the grime. Meanwhile, the hydrophilic heads are trying to stay in the water. As the washing machine agitates, the water molecules pull on the hydrophilic heads, and this pulling action, combined with the agitation, literally lifts the dirt and grease right off the fabric fibers. The surfactants then form tiny spheres around the dirt particles, called micelles, with the greasy tails pointing inward, trapping the dirt, and the watery heads pointing outward. This keeps the dirt suspended in the wash water, preventing it from redepositing back onto your clean clothes before it is all rinsed away. But modern detergents are more than just surfactants. They are complex formulas containing several key ingredients: Enzymes: These are biological catalysts, like tiny Pac-Men, designed to break down specific types of stains. Protease targets protein-based stains (like grass and blood), amylase targets starches, and lipase targets fats and oils. This is why enzymatic detergents are so effective at stain removal. Builders: These are agents that soften the water by binding to the hardness minerals, allowing the surfactants to work even more effectively. Optical Brighteners: These are compounds that absorb ultraviolet light and re-emit it as visible blue light. This doesn’t actually remove stains, but it cleverly tricks our eyes into seeing whites as “whiter” and colors as brighter. Polymers: These special ingredients can help trap dirt in the water or create a protective layer on fabrics to help prevent future stains from setting in. Choosing the Right Detergent for You The sheer variety of detergents can be overwhelming. The choice can be simplified by breaking it down into three main categories: form, machine type, and specialty formula. 1. Liquid vs. Powder vs. Pods Liquid Detergent: This is the most popular form in many parts of the world, and for good reason. It is versatile, easy to measure, and dissolves well in all water temperatures, including cold. Liquids are particularly effective on greasy, oily stains, as they can be applied directly to the stain as a pre-treater. The main downsides are the heavy, plastic-intensive packaging and the tendency for users to pour with a heavy hand, leading to overuse. Powder Detergent: This is the classic, budget-friendly champion. On a per-load basis, powder is almost always the cheapest option. It is excellent at lifting mud and ground-in dirt, making it a great choice for families with kids or for work clothes. Its cardboard packaging is also more environmentally friendly. The drawbacks are that it can sometimes fail to dissolve completely in very cold water, leaving a chalky residue, and it can be a bit messy to measure. Pods/Packs: These are the peak of convenience. Perfectly pre-measured, you simply toss one into the drum and you are done. There is no mess and no guesswork. They are fantastic for those who tend to overuse liquid detergent. However, this convenience comes at a premium price; pods are by far the most expensive option per load. Their formulation is also fixed, meaning you cannot adjust the amount for a very small or lightly soiled load. Safety is also a major concern, as their small, colorful appearance can be dangerously appealing to children and pets. 2. High-Efficiency

Liquid vs. Powder vs. Pods: A Complete Detergent Breakdown Read More »

Distilled Water: 5 Simple Secrets on How to Use Distilled Water

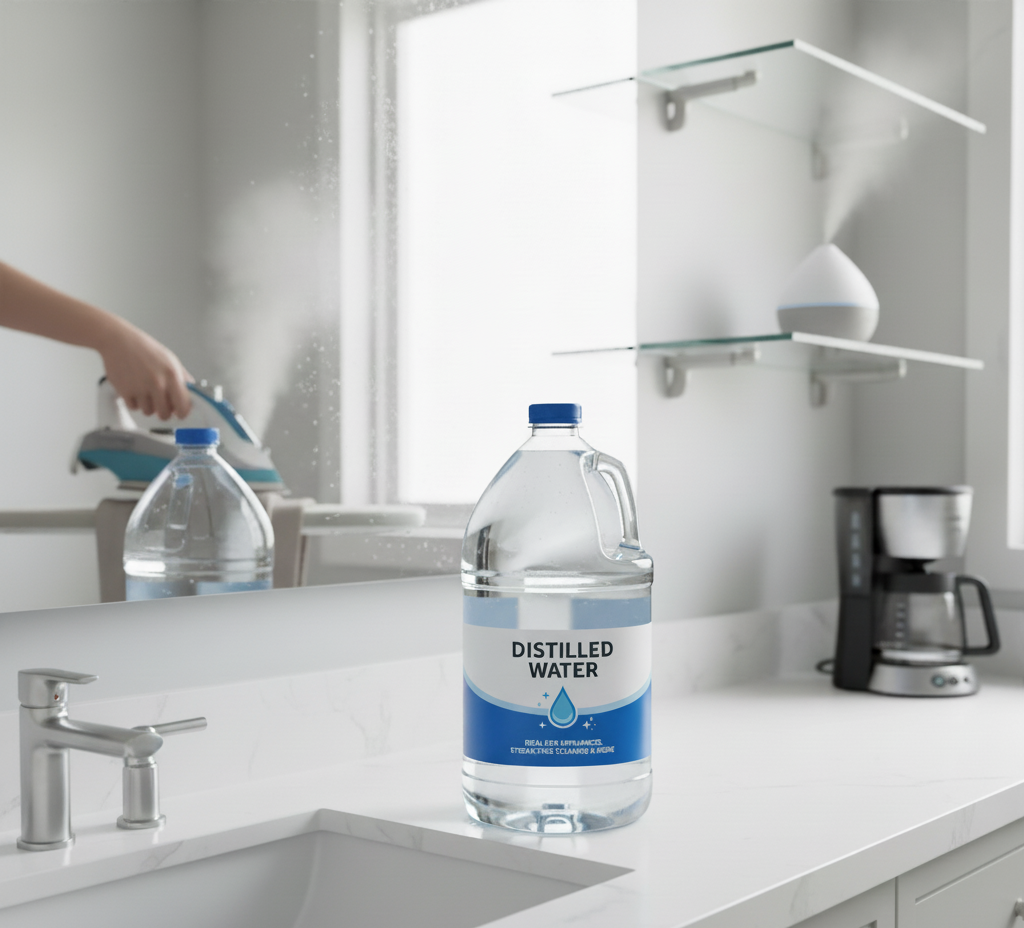
The secret to a perfect, streak-free clean is not found in a bottle of expensive, high-tech cleaning solution. It is not achieved through a special microfiber cloth woven with miraculous fibers, nor is it the result of a secret scrubbing technique passed down through generations. The real secret to a flawless, residue-free finish is something far more fundamental and surprisingly simple. It is the water itself. More specifically, it is the absence of minerals in that water. The single most transformative, yet overlooked, tool in any advanced cleaning arsenal is a simple jug of distilled water. We are conditioned to see water as a simple cleaning agent, but the water that flows from our taps is far from pure. It is a complex liquid, carrying a dissolved cargo of minerals and trace elements from its journey through the ground and pipes. The most common of these are calcium and magnesium, the primary culprits behind “hard water.” When you clean a surface with tap water and it evaporates, it leaves these microscopic mineral deposits behind. This is the root cause of nearly every common cleaning frustration: the hazy film on your hardwood floors, the stubborn white spots on your shower door, the frustrating streaks on your windows, and the cloudy residue on your stainless steel appliances. You can scrub and polish for hours, but if you are using tap water, you are fighting a battle against an invisible enemy that you are simultaneously reapplying with every wipe. Distilled water is the elegant solution to this problem. It is water that has been purified back to its most basic, elemental state: pure H₂O. By understanding what it is and how it works, you can elevate your cleaning from a chore of constant frustration to a science of predictable, perfect results. What Exactly Is Distilled Water, and Why Does It Matter? The process of distillation is a simple act of separation. Regular water is boiled into steam. As the water turns into a gas, it leaves behind everything that is not water: minerals, salts, heavy metals, and other contaminants. This pure water vapor is then collected and condensed back into its liquid form. The result is water that is stripped of all its baggage, a true “blank slate.” This purity is precisely what makes it a secret weapon for cleaning. Because distilled water contains no dissolved solids, when it evaporates, it leaves absolutely nothing behind. There are no minerals to create spots, no salts to leave a film. It dries completely clean. This unique property gives it two significant advantages in a cleaning context: It Prevents Residue: As mentioned, it eliminates the source of spots and streaks. This is its most obvious and celebrated benefit. It Is a More Effective Cleaner: Because distilled water is free of dissolved minerals, it is chemically “hungry.” It has a greater capacity to dissolve and absorb other substances, like dirt and soap, making it a more effective solvent than tap water. This means you often need less cleaning solution to achieve the same result. Key Applications for Distilled Water in Your Home Switching to distilled water for specific tasks is a small change that yields disproportionately large results. Here are the most impactful ways to incorporate it into your cleaning routine. 1. The Ultimate Streak-Free Window and Mirror Cleaner This is the classic and most transformative use. For a truly professional, invisible finish on glass, distilled water is non-negotiable. The Problem: The minerals in tap water are the primary cause of streaks on windows and mirrors. No matter how well you squeegee, as the last microscopic droplets of water dry, they leave mineral deposits behind, creating a faint but frustrating haze. The Solution: Create your own professional-grade glass cleaner. In a clean spray bottle, mix a solution of 50% distilled water and 50% distilled white vinegar. The vinegar acts as a powerful cleaning agent, cutting through grease and grime, while the distilled water ensures that once you wipe or squeegee it away, the surface will dry to a perfectly clear, spot-free shine. This simple, cheap solution will outperform almost any commercial glass cleaner on the market. 2. Flawless Stainless Steel and Chrome Stainless steel appliances are notorious for showing every fingerprint and water spot. Distilled water is the key to winning this battle. The Problem: Wiping down stainless steel with a cloth dampened with tap water is a recipe for frustration. As the water dries, it leaves behind a constellation of mineral spots that mar the finish. The Solution: For routine cleaning, simply dampen a clean microfiber cloth with distilled water and wipe the appliance, always following the direction of the grain. For a final polish, use a second, completely dry microfiber cloth to buff the surface. The absence of minerals means no spots will form as it dries. For greasy fingerprints, you can add a single drop of dish soap to your damp cloth, then “rinse” with a separate cloth dampened with only distilled water before buffing dry. The same principle applies to chrome faucets and fixtures in the kitchen and bathroom. 3. A Haze-Free Finish for Hardwood and Laminate Floors If your hard-surface floors look dull and cloudy even after mopping, the culprit is likely a buildup of mineral residue from your tap water. The Problem: Over time, mopping with tap water (even with a floor cleaner) can leave behind a cumulative, hazy film that dulls your floor’s natural shine. The Solution: This is especially effective with a spray mop system. Fill the mop’s reservoir with mostly distilled water and a small splash (a few tablespoons) of white vinegar. The vinegar helps to break down any existing film, while the distilled water ensures no new film is created. The result is a floor that is truly clean, without the dulling residue that compromises its appearance. 4. Spot-Cleaning Carpets and Upholstery Without Leaving a Ring Have you ever cleaned a small spot on your carpet, only to be left with a noticeable ring or outline after it dries? That ring is often caused

Distilled Water: 5 Simple Secrets on How to Use Distilled Water Read More »

robot vacuum cleaner

Are Robotic Vacuums Worth It? A Deep Dive into Modern Floor Care

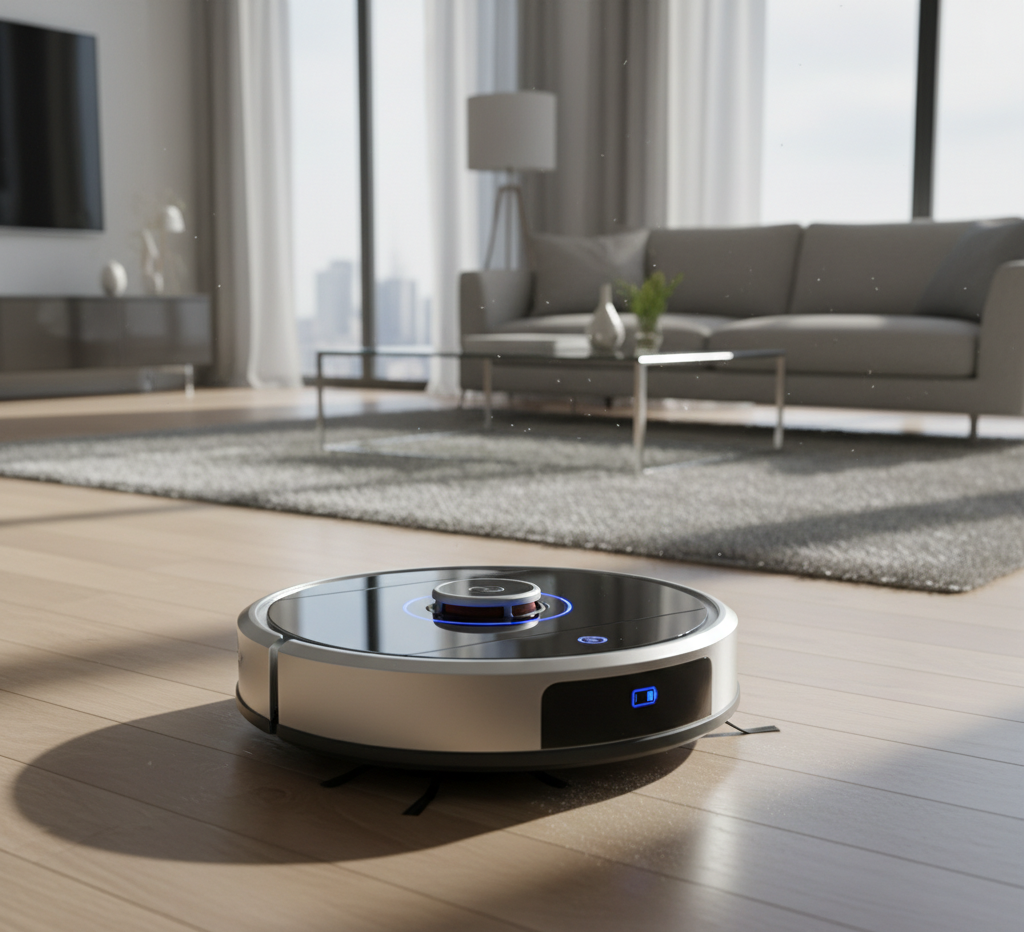
Are Robotic Vacuums Worth the Money in 2026? The first robot vacuums were, kindly put, comical: pinball navigation, wedged under sofas, entire room sections skipped. They were hobbyist gadgets, not cleaning tools. That picture is now almost unrecognizable. Advances in navigation, artificial intelligence, and hardware have turned the robot vacuum into a capable, dependable partner that maps your home, follows methodical paths, dodges obstacles, and on premium models mops and washes its own pads. Whether one deserves your floor space depends on what the technology actually does today. Four Generations of Navigation Navigation is the biggest leap and what separates a frustrating toy from a reliable cleaner. Navigation type How it works Strengths and limits Bump-and-go (random) Drives straight until it hits something, then turns randomly. Covers a simple square room eventually, but slowly and with gaps. Found only on budget models. Gyroscopic A gyroscope and sensors steer deliberate parallel lines. Systematic coverage, but no persistent map, so being picked up or stuck disorients it. LiDAR A spinning laser turret measures distances and builds a highly accurate real-time map, the same core technology behind self-driving cars. The gold standard: precise rows, graceful furniture handling, room-by-room app commands, flawless operation in total darkness. vSLAM (visual) A camera maps landmarks like walls, doorways, and furniture, then compares what it sees against that map. Systematic navigation, and AI versions recognize objects like shoes and power cords, but it needs reasonable light. Supporting sensors round out the system: cliff sensors stop it at stair edges, wall sensors let it hug baseboards without constant bumping, and dirt-detect sensors spot heavy debris and send the robot back for extra passes. The Features That Matter Day to Day Interactive smart maps. Name rooms from the companion app, draw no-go zones around pet bowls and delicate furniture, and target a clean zone at a fresh spill. Suction power. Measured in Pascals, entry models run around 1,500 Pa while high-end machines exceed 4,000 Pa. Strong suction matters most on carpet, where dirt and pet hair hide deep in fibers, and automatic carpet boost raises power the moment the robot rolls onto rug. Recharge and resume. For big homes this beats raw battery size: a low robot returns to its dock, recharges just enough, then finishes exactly where it stopped. AI object avoidance. Premium front cameras identify and route around socks, toys, and the dreaded pet waste. For pet owners that alone can justify the price. Self-emptying docks. The base vacuums the robot’s tiny bin into a sealed bag or canister. Instead of emptying the robot every one or two runs, you touch the dock bag once every 30 to 60 days: a daily chore becomes a monthly one. Mopping Robots: Four Levels of Effectiveness Many hybrids mop, but capability varies wildly. Basic systems drag a damp microfiber cloth, a light dust wipe that does nothing for real spills or grime. Vibrating or sonic pads scrub hundreds or thousands of times per minute and genuinely break up dried-on messes. The most effective design spins two round pads under downward pressure, mimicking a floor polisher for a deep clean. At the top, all-in-one stations self-empty the bin, self-wash and self-dry the pads, and even refill the water tank: the closest thing yet to truly hands-off floor cleaning. In practical terms, a simple dragging cloth is closer to a dust mop between washes, while the sonic and dual-spinning-pad systems are the ones that can actually erase a dried-on spill from hard floors. What a Robot Vacuum Cannot Do Three honest caveats decide whether you will love one. First, treat it as upkeep, not a substitute for a proper deep clean. Robots keep floors constantly fresh by stopping dust, crumbs, and hair before they accumulate, but they cannot replace a powerful upright or canister vacuum for periodic carpet deep cleans, stairs, and tight crevices. Scheduled help from a deep cleaning service or a regular maid service covers what the robot never touches, from baseboards to ceiling fans. Second, your home must be robot-ready. These machines thrive on clear floors: a quick scan for charging cables, shoes, and pet toys before each run beats any obstacle-avoidance camera. Third, maintenance is non-negotiable. Wipe the sensors, clean the filter, and cut wrapped hair off the main and side brushes. A few minutes every week or two keeps the machine efficient for years. The Verdict: Worth It for Most Households For many homes the answer is a resounding yes. Pet owners get a transformative weapon against fur; busy professionals and families buy back hours; people with mobility issues gain automated assistance that can be life-changing. Constant floor upkeep also helps anyone limiting exposure to indoor air contaminants like fine particulate matter and dust, and the CDC recommends cleaning surfaces regularly as the first defense against household germs. A robot makes regularity effortless. If you value consistently clean floors and fewer manual sessions, a modern LiDAR or AI model is one of the best home investments available. The sci-fi dream quietly became an appliance. Robot Vacuum FAQ Is a robot vacuum worth it for pet hair? Yes, arguably its best use. Strong suction above 4,000 Pa with automatic carpet boost pulls hair from fibers daily, and AI avoidance routes around accidents. Pair it with weekly brushing of pets for the best results. Can a robot vacuum replace my regular vacuum? No. It is designed for frequent maintenance cleaning. Keep your full-sized machine for periodic deep carpet passes, stairs, and crevices a disc-shaped robot cannot reach. Do LiDAR models need light to work? No. Unlike camera-based vSLAM robots, the laser turret measures distance directly, so LiDAR models map and clean in complete darkness. How often do I empty a self-emptying dock? Most sealed bags or canisters last 30 to 60 days between changes, versus a standard robot dustbin that needs emptying after one or two runs. Will a robot vacuum damage my baseboards and furniture? Modern units navigate gracefully around obstacles: LiDAR models measure distances instead of crashing,

Are Robotic Vacuums Worth It? A Deep Dive into Modern Floor Care Read More »

doormat

5 Reasons Your Doormat Is Your Most Important Cleaning Tool

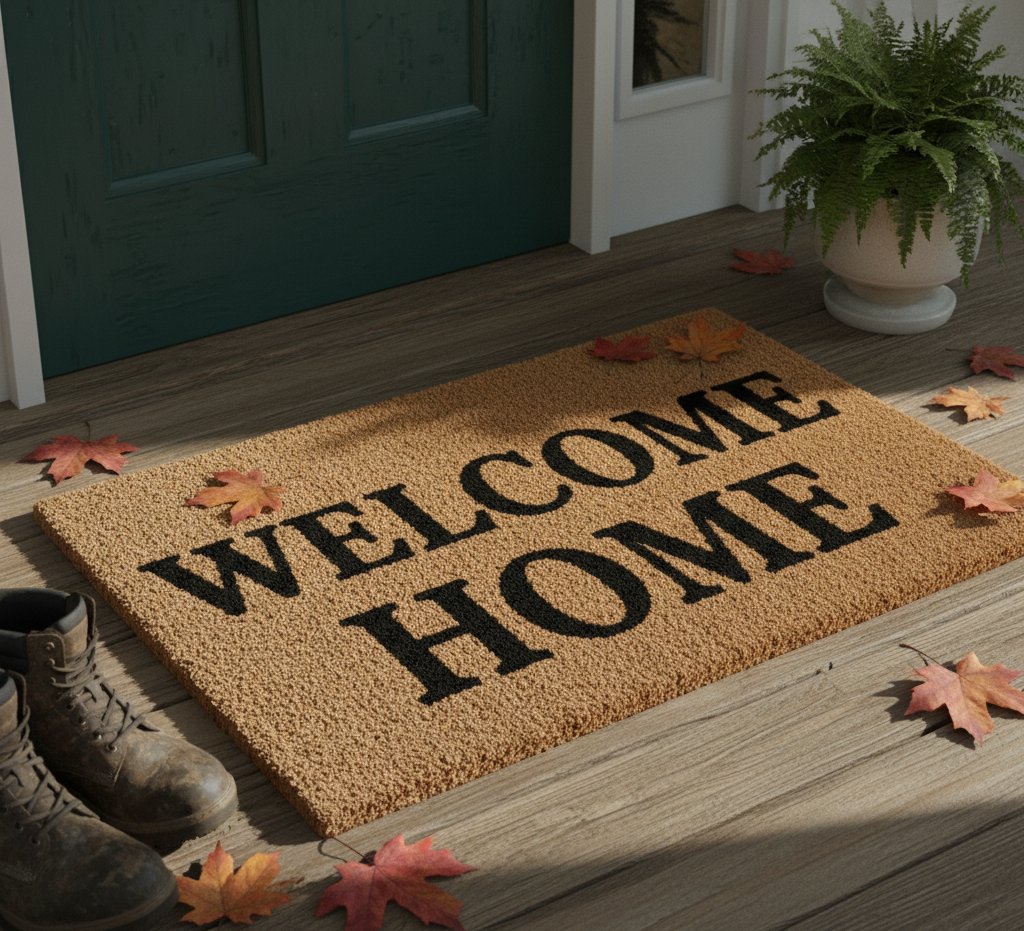
It is the most overlooked and yet one of the most hardworking items in any home. Doormat, it is a humble rectangle, a simple slab of bristly fiber or textured rubber, lying in wait at the threshold. It is the doormat, and its role is far more critical than its modest appearance suggests. The doormat is not a mere decorative accessory; it is the first line of defense in the ceaseless battle to keep a home clean. It is the silent gatekeeper, the unsung hero that single-handedly prevents a significant percentage of the dirt, grime, and pollutants of the outside world from ever crossing into your living space. Understanding the profound importance of a doormat requires an appreciation for what is being carried on the soles of our shoes. A study conducted by the University of Arizona made a startling discovery: the average shoe sole is covered in hundreds of thousands of bacteria per square inch, including E. coli. Beyond the microscopic threats, our shoes pick up everything from lawn chemicals, pesticides, and asphalt residue to common dirt, mud, dust, and pollen. Without a doormat, all of this is tracked directly onto your floors, where it is then circulated throughout your home, embedding itself in carpets and becoming airborne. A good doormat is a simple, passive, yet incredibly effective tool for trapping this unwanted material at the door. 1.Effective Doormat Not all doormats are created equal. An effective doormat is a piece of functional equipment, and its design and material composition are directly related to its performance. A flimsy, decorative mat might offer a cheerful greeting, but it will do little to stop the ingress of dirt. A truly effective doormat excels in two primary functions: scraping and absorbing. Scraping: The first job of a doormat is to physically scrape away solid particles from the bottom of shoes. This includes mud, dirt, sand, gravel, and even snow and ice. To do this, the mat needs a coarse, abrasive texture. The bristles or fibers must be stiff and resilient enough to dig into the treads of a shoe sole and dislodge the debris. Absorbing: The second job is to absorb moisture. Wet shoes are not only a slipping hazard but also track in dirty water that can stain carpets and damage hardwood floors. An effective doormat needs to have absorbent properties to trap rainwater, snowmelt, and moisture from damp ground. For this reason, the most effective entryway strategy often involves a two-mat system: a tough, scraping mat outside the door and a softer, absorbent mat inside the door. 2.Choosing the Right Material The material of a doormat is the most significant factor in its ability to perform its duties. Coir (Coco Fiber): This is the classic, traditional doormat material, and for good reason. Made from the husks of coconuts, coir is a natural, highly durable, and coarse fiber that is exceptional at scraping dirt and mud from shoes. It is also naturally resistant to mold and mildew, making it an excellent choice for an outdoor mat. Its one major weakness is that it can shed fibers and does not absorb a large amount of water, which can lead to it becoming waterlogged in very wet climates if not placed in a covered area. Rubber: Rubber doormats are the heavy-duty workhorses of the mat world. They are extremely durable, weather-resistant, and their weight helps them stay in place. Many rubber mats feature a textured or patterned surface with deep grooves designed to scrape away debris and trap it within the mat. They are excellent for scraping and are very easy to clean-a simple spray with a hose is usually all that is needed. They are not, however, absorbent. This makes them a perfect choice for an outdoor scraping mat, often in combination with an indoor absorbent mat. Synthetic Fibers (Polypropylene, Nylon, Polyester): Doormats made from synthetic fibers are a versatile and popular choice. They can be designed to be both abrasive and absorbent. Polypropylene, in particular, is a fantastic material for an all-around doormat. It is highly resistant to staining, fading, mold, and mildew, and it dries very quickly. This makes it suitable for both indoor and outdoor use. Synthetic mats are often designed with a “bi-level” construction, featuring a coarse scraping surface and deeper channels to trap dirt and water, keeping the top surface cleaner. Cotton and Microfiber: These materials are champions of absorption. A cotton or microfiber mat is the ideal choice for the inside of the entryway. After the outdoor mat has scraped off the solid debris, the indoor mat’s job is to soak up any remaining moisture and trap fine dust particles. They are soft underfoot and are typically machine washable, making them very easy to maintain. They are not, however, suitable for outdoor use, as they would quickly become saturated and take a long time to dry. Wrought Iron: While less common, cast iron or wrought iron doormats are purely functional scraping tools. Their ornate, open-scrollwork designs provide a highly effective surface for scraping mud and snow from boots. They are incredibly durable and last a lifetime. Naturally, they have zero absorbent properties and must be paired with an indoor mat. 3.The Two-Mat System The single best way to maximize the effectiveness of your doormats is to implement a two-mat system. The Outdoor Mat: This is your first line of defense. Its sole purpose is to scrape. It should be coarse, durable, and weather-resistant. Coir, rubber, or a heavy-duty synthetic mat are the best choices here. This is the mat that will take the brunt of the mud, snow, and heavy dirt. The Indoor Mat: This is your second line of defense, located just inside the door. Its primary purpose is to absorb. After the heavy debris has been removed outside, this mat’s job is to trap any remaining moisture and fine dust. Cotton, microfiber, or a softer synthetic mat are ideal for this role. This mat also provides a clean, dry place to stand while removing shoes. This tandem approach ensures that by the time a

5 Reasons Your Doormat Is Your Most Important Cleaning Tool Read More »

The Benefits of Hiring a Professional

Post-Construction Cleaning: 3 The Benefits of Hiring a Professional

Post-Construction Cleaning: The Final Step That Makes a Renovation Livable The day the contractors pack up is not the day your space is ready to live in. Between the finished drywall and the first evening on the new couch sits a layer of fine dust, sticker residue, paint splatter, and debris that no ordinary cleaning routine was built to handle. Post-construction cleaning is a specialized discipline: a top-to-bottom reclamation project that turns a hazardous worksite into a clean, breathable home. Here is what makes the job so demanding, the three-phase process professionals follow, and the equipment it takes to do it right. What Makes Construction Debris Different from Everyday Dirt Construction dust is not the soft fluff that gathers on bookshelves. It is a fine, gritty, abrasive particulate cocktail of drywall compound (gypsum), plaster, sawdust, cement powder, and silica. The particles are light enough to go airborne at the slightest disturbance, travel through HVAC systems, and settle in a uniform, ghostly layer on every surface: inside cabinets, on top of door frames, within light fixtures, on ceiling fan blades, and deep in the fibers of any existing carpet. Because this dust is a significant respiratory irritant, removing it completely is a health matter, not just an aesthetic one. Health Canada’s overview of indoor air contaminants explains why dust and construction-stage chemicals deserve serious removal, not a quick sweep. Beyond the dust, a finished job site holds stray nails, orphaned screws, wood and drywall offcuts, plastic shavings from plumbing work, and hardened blobs of caulk or adhesive. New windows, appliances, and fixtures arrive covered in protective plastic films and manufacturer stickers that leave stubborn, sticky residue. There are almost always errant paint splatters on hinges, glass, or flooring, and ladder scuffs on brand-new baseboards. A household all-purpose cleaner and a roll of paper towels will only smear this grime and risk permanent damage to expensive new surfaces. The Three-Phase Post-Construction Cleaning Process A truly effective post-construction clean is systematic, not one chaotic wipe-down. Each phase builds on the last so no detail is overlooked. Phase When it happens Main focus Rough clean During the final days of construction or right after the contractors leave Bulk debris removal, peeling protective films, first heavy vacuum pass Deep clean Once the space is free of major hazards and clutter Top-to-bottom cleaning of every surface, inside and out Final touch-up 24-48 hours after the deep clean, before furniture arrives Light vacuum, horizontal surfaces, smudge check on glass and fixtures Phase 1: The Rough Clean This stage clears the battlefield. The crew collects, removes, and properly disposes of all large trash and debris, from wood scraps and leftover materials to hardware packaging and cardboard. Large piles of drywall dust and sawdust are scraped and swept from the floors, every protective plastic film is peeled off windows, doors, appliances, and fixtures, and a heavy-duty shop-vac takes a preliminary pass over the thickest dust layers. The space still looks dirty when this phase ends, but it is now safe and accessible for detailed work. Phase 2: The Deep Clean The deep clean is the heart of the process, and it follows one guiding principle: start high and work down, so dislodged dust only ever falls onto surfaces you have not yet cleaned. Ceilings, walls, light fixtures, ceiling fans, and recessed lighting are wiped first, then the tops of door frames, window casings, and molding. Both sides of every window and glass door are cleaned, with paint splatters, caulk, and sticker residue lifted off by a professional razor scraper, while sills and tracks give up their surprising haul of sawdust. Doors are wiped completely, including hinges, knobs, and the often-forgotten top edge. Trim, baseboards, built-in shelving, and every cabinet, cupboard, and drawer are cleaned inside and out, which matters before clean dishes, food, or linens move in. In the kitchen and bathrooms, countertops are cleaned and disinfected following CDC guidance on cleaning and disinfecting your home, sinks and faucets are freed of plumber’s putty, appliances are wiped inside and out, and showers, tubs, toilets, mirrors, and chrome are polished to a shine. Floors come last: edges and corners with a vacuum crevice tool, hard surfaces vacuumed and mopped in multiple passes with fresh water, and carpets gone over with a commercial-grade vacuum in several directions to pull fine dust from the pile. Phase 3: The Final Touch-Up After the intensive deep clean, the space rests for 24-48 hours so any airborne dust stirred up during cleaning settles one last time. The final pass is deliberately light: another quick vacuum of floors and carpets, a wipe of countertops, tables, and window sills, and a close check for smudges on glass, mirrors, and shiny fixtures. The goal is a pristine, move-in-ready space that feels brand new from every angle. The Equipment a True Post-Construction Clean Requires None of this works with standard household supplies. The essential toolkit looks like this: Shop-vac with a HEPA filter: The most crucial piece. Household vacuums clog on fine dust and often exhaust microscopic particles straight back into the air, while a HEPA filter traps them permanently. A large supply of microfiber cloths: Their split fibers trap and hold dust instead of smearing it the way cotton rags and paper towels do. A-frame ladders and extension dusters: For safe, effective reach to high ceilings, fixtures, and cabinet tops. Plastic and razor-blade scrapers: For stubborn stickers, paint, and caulk without damaging new surfaces. Appropriate cleaning solutions: A kitchen degreaser, a pH-neutral floor cleaner safe for your specific new flooring, and a mineral deposit remover for bathroom fixtures. Frequently Asked Questions About Post-Construction Cleaning Can I skip the rough clean and go straight to a deep clean? No. Bulk debris and protective films have to come out first. Scrubbing around piles of nails, cardboard, and thick dust wastes effort and risks scratched or permanently stained surfaces. Why wait 24-48 hours before the final pass? Cleaning agitates fine particles into the air, where they hang for a day

Post-Construction Cleaning: 3 The Benefits of Hiring a Professional Read More »

green cleaning products

4 Incredible Tips On How To Use Non-toxic Cleaning Products

The Case Against Harsh Cleaners in Your Home Modern cleaning is sold as brightly colored liquids promising to disinfect, degrease, and deodorize, and many of us equate that sharp chemical smell with freshness. It is a paradox worth pausing on: we wave potentially hazardous chemicals through the spaces where we eat, sleep, and play in order to make them healthier. A truly clean home is not one sterilized by synthetic compounds but one free of both dirt and harmful residues. Switching to non-toxic cleaning products sacrifices no results. It returns you to simpler, smarter, safer tools that have worked for generations. Tip 1: Understand What Conventional Cleaners Cost You The argument for change runs on three tracks: health, environment, and money. Many commercial cleaners release volatile organic compounds, or VOCs, the moment you spray. Inhaled, VOCs have been linked to headaches, dizziness, respiratory problems, and long-term organ damage, and that vague word “fragrance” on a label often hides dozens of undeclared chemicals. Among them are phthalates, known endocrine disruptors. Anyone with asthma, allergies, or chemical sensitivities can react immediately. Health Canada’s overview of indoor air contaminants details VOCs and their health effects. The environmental damage follows the wipe-down. Rinsed-down-drain chemicals reach waterways, where phosphates can fuel algal blooms that disrupt aquatic ecosystems, and many synthetic compounds are not readily biodegradable, persisting for years. The economic angle is the simplest. The cleaning aisle sells a specialist for glass, another for countertops, another for floors, another for the bathroom, plus a dedicated stove degreaser. That hyper-specialized market is a marketing win, not a cleaning need. A few basic non-toxic staples do all those jobs for a fraction of the cost. Tip 2: Build a Five-Ingredient Toolkit Everything effective in a green closet comes down to ingredients you probably own. Distilled white vinegar. Acetic acid dissolves mineral deposits like hard-water stains and limescale, cuts grease, deodorizes, and disrupts the cell structure of many bacteria and molds. A 50/50 spray handles glass, mirrors, floors, and general surfaces; it also descales coffee pots and shower heads and works as a fabric softener substitute. Never use it on marble, granite, or travertine, since the acid etches and dulls stone, and keep it off waxed floors and cast iron. Baking soda. A mild alkali and gentle abrasive that absorbs and neutralizes odors rather than masking them. Its fine crystals scrub sinks, tubs, and toilets without scratching most surfaces, and paired with an acid, the fizz helps dislodge clogs and lift stubborn dirt. Sprinkle on damp surfaces or paste it with water or dish soap for stovetops and grout, boost your laundry detergent, and deodorize refrigerators, carpets, and drains. Test the paste on high-gloss finishes first. Hydrogen peroxide. A disinfectant and natural bleaching agent that breaks down into nothing but oxygen and water, killing mold, mildew, and bacteria. Spray countertops, cutting boards, or grout straight from the bottle, let it bubble for 5 to 10 minutes, then wipe; it also whitens laundry as a bleach alternative. Light degrades it, so keep the dark bottle, and test colored fabrics because of the mild bleaching effect. Castile soap. A vegetable-based true soap, traditionally from olive oil, that is fully biodegradable. As a surfactant it breaks water’s surface tension so grease and dirt rinse away. A few drops in a spray bottle or a teaspoon per mop bucket covers all-purpose cleaning, dishes, floors, and foaming hand soap. One firm rule: never combine it with vinegar in the same bottle. The acid unsaponifies the soap into a white, filmy residue, though using one after the other is fine. Lemons or citric acid. Citric acid cuts grease, disinfects, shines chrome, and freshens garbage disposals without the vinegar smell. Rub a cut lemon, mix juice with water, or combine citric powder with baking soda for a scouring powder. Like vinegar, it etches natural stone and can bleach. Tip 3: Keep Five Recipes Ready Those five ingredients replace nearly every specialized bottle under the sink. Recipe Mix and method Use it on All-purpose cleaner Equal parts white vinegar and water in a spray bottle; optional castile soap for power (shake first) and 10 to 15 drops of lemon or tea tree essential oil. General surfaces, avoiding natural stone. Glass and mirror cleaner Same 1:1 mix; spray and wipe with microfiber or a squeegee. Glass, streak-free. Heavy-duty soft scrub Baking soda plus enough castile soap for a thick paste. Sinks, tubs, tile, stubborn stovetop spots. Floor cleaner Into a gallon of hot water, stir roughly two tablespoons of castile soap, then add half a cup of vinegar. Tile, vinyl, linoleum. Drain freshener Half a cup baking soda down the drain, then half a cup vinegar; fizz 15 to 20 minutes, flush with boiling water. Kitchen and bathroom drains. Tip 4: Shop Green Cleaners Like a Detective If you prefer ready-made products, the booming “green” aisle demands scrutiny: the space is rife with greenwashing. Labels boasting “natural,” “eco-friendly,” or “botanical” carry no regulated definition, so the claim can be meaningless. Instead, check three things. Demand transparency: reputable brands list every ingredient, not just the active ones. Avoid the key offenders, especially ammonia, chlorine bleach, phthalates hidden under “fragrance,” and parabens. Then look for third-party certification such as the EPA’s Safer Choice program or the EWG Verified seal, which means reviewers examined the formula’s safety and ingredients. If you keep a bleach bottle for occasional disinfecting, follow the CDC’s rules for cleaning and disinfecting with bleach, including never mixing it with any other cleaner, and Health Canada’s guide to household chemical safety covers buying, storing, and disposing of everything in the cabinet. Non-Toxic Cleaning FAQ Are non-toxic products actually effective? When matched to the job, yes. Acid dissolves mineral scale, alkali neutralizes odors, and soap lifts grease and dirt. The catch is contact time: let solutions sit several minutes instead of expecting an instant wipe. Can I mix vinegar and baking soda in one bottle? Not for storage. They fizz into mostly water and carbon dioxide, cancelling

4 Incredible Tips On How To Use Non-toxic Cleaning Products Read More »

5 Mistakes You Need To Stop Making When Using The Duster

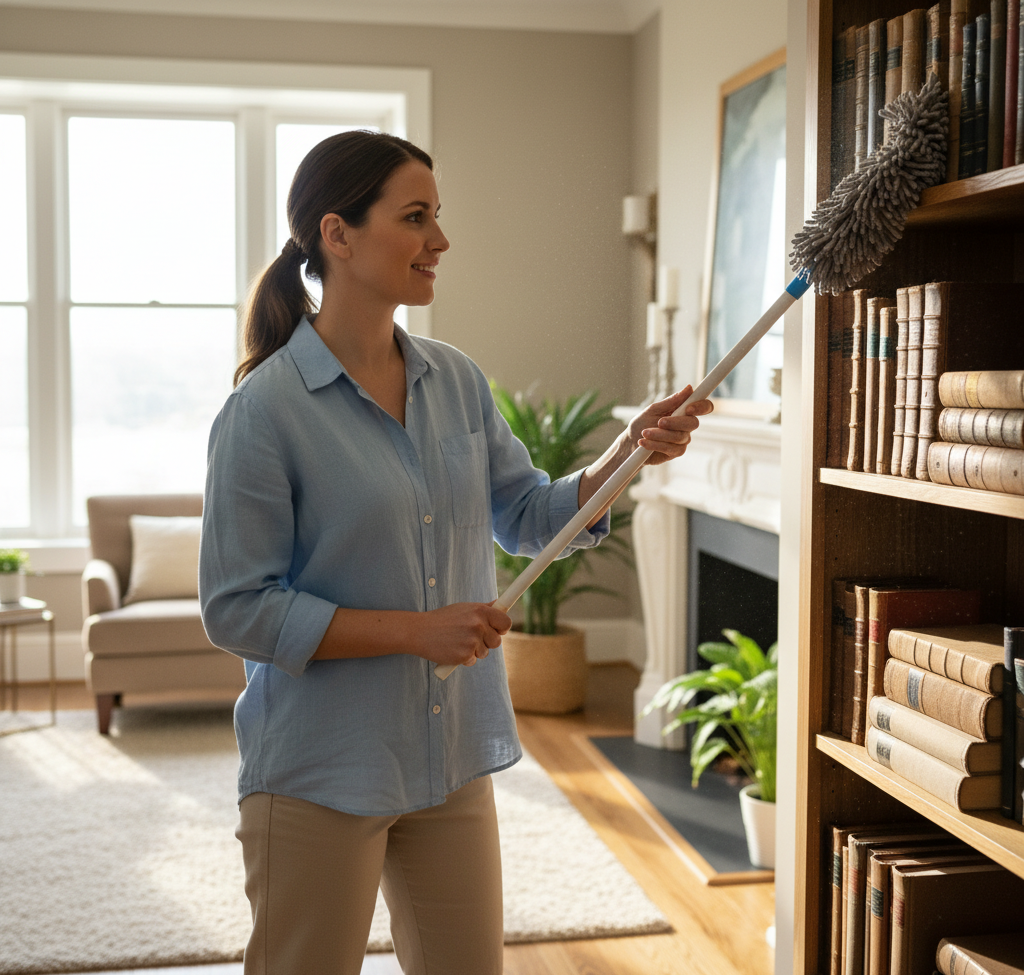
5 Mistakes You Need To Stop Making When Using The Duster Dust is an unavoidable reality of every indoor space: a shifting mix of dead skin cells, fabric fibers, pollen, pet dander, soil tracked in from outside, and even microscopic meteorite debris. It settles on every horizontal surface as a fine gray layer that dulls your home’s look and quietly degrades indoor air quality; for people with allergies or asthma it is a genuine health concern, since it harbors dust mites and other allergens. The duster is your primary weapon, but most people use it badly. The goal of effective dusting is to capture dust and remove it from the environment entirely, not to move it from one surface to another. Here are the five mistakes to stop making. Mistake 1: Trusting a Feather Duster The feather duster, usually made from ostrich, turkey, or chicken feathers on a handle, is the iconic image of dusting and the least effective tool on this list. Its feathers trap little dust; their main action is dislodging particles and sending them airborne to resettle elsewhere minutes or hours later. A high-quality ostrich feather duster performs slightly better because the fine, interlocking barbules create a minor static charge, but it still mostly displaces rather than captures. For a truly clean home, the feather duster is closer to a decorative antique than a working tool. Mistake 2: Using One Duster for Every Surface The real revolution in dusting was microfiber: a synthetic blend of polyester and polyamide (nylon) whose fibers are split into strands many times smaller than a human hair, creating enormous surface area. The split-fiber net physically traps dust, dirt, and even bacteria, and used dry, it generates a positive static charge that pulls in negatively charged dust particles. No chemical sprays are needed. The right lineup covers the whole house: Handheld microfiber dusters: the everyday workhorse for furniture, electronics, picture frames, and general surfaces, with flexible heads that bend under ceiling fan blades and on top of tall bookcases. Extendable dusters: a telescoping pole reaches ceilings, light fixtures, high corners, and cabinet tops, eliminating the stepladder and the neck and shoulder strain of overhead work. Slim or flat dusters: a long, thin profile slides under refrigerators and ovens, between cabinets, and alongside the washer and dryer, where thick layers of unseen dust and lint collect. Microfiber cloths: dry for delicate surfaces, lightly dampened for smudges and stubborn grime without streaks. Lambswool dusters: genuine sheep’s wool contains lanolin, a natural oil that together with the wool’s static charge actively attracts and holds dust instead of pushing it away, making them excellent and gentle on large flat surfaces like tables and shelves. Disposable dusters: a reusable handle with throwaway synthetic heads that trap dust by static; convenient for light, regular dusting, but less environmentally friendly and more expensive over the long term than washable microfiber. Mistake 3: Dusting in the Wrong Order Technique matters as much as the tool, and the single most important principle is to work from top to bottom, because gravity carries any dislodged dust downward. Dusting should come before anything else in a room: wipe lower surfaces and vacuum only after you finish. Start at the highest points: ceiling corners, light fixtures, and fan blades, using an extendable duster. Move down to cabinet tops, bookcases, and wall shelves, then picture frames, window sills, tables, desks, and dressers. Finish at the baseboards and only then vacuum the floor to capture whatever settled. Health Canada’s overview of indoor air contaminants and health is a good reminder that settled dust is tied to the particulates you breathe, so order and method genuinely reduce exposure. Mistake 4: Swiping Aggressively and Ignoring Tricky Surfaces Let the fibers make contact with the surface and lift the dust; aggressive swiping just sends it flying. For heavily dusted surfaces, a slow, single-direction pass works best. Then adjust by surface: Surface What to Do Instead Blinds Use a multi-pronged duster that cleans several slats at once, or close the blinds, dust the whole surface with a handheld duster, reverse the slats, and dust the other side Electronics Turn off and unplug first; TVs and computers build static fields that attract dust. Wipe screens and casings with a clean, dry microfiber cloth, blow dust from keyboards and vents with compressed air, then wipe again Delicate items A very soft, clean paintbrush or new makeup brush works as a precision duster on chandeliers, collectibles, and artificial plants, lifting dust without damage Mistake 5: Never Cleaning the Duster Itself A duster saturated with dust cannot pick up more; it simply spreads the old load around. Cleaning the tool is part of the routine, not an afterthought. The CDC’s guidance on when and how to clean and disinfect your home makes the same point about surfaces: cleaning first is what makes everything else work. Microfiber wins here, since most duster heads are removable and machine washable: wash with regular detergent but no fabric softener, which clogs the microscopic fibers and destroys the static-trapping ability, then air-dry or tumble on low heat. For a lambswool duster, spin it outdoors between your hands to release loose dust, then hand-wash in lukewarm water with mild detergent, rinse thoroughly, and air-dry. How Often Should You Dust? Dusting is continuous maintenance, not a one-time task. For most homes, thorough dusting once a week keeps levels under control. Homes with pets or allergy sufferers, neighborhoods with high pollen counts, and areas near construction need more frequent passes. A consistent routine removes the allergens and particles that affect well-being, not just the visible film. For a comprehensive clean that catches dust from crown corners to the tightest crevices, our regular maid service builds systematic dusting into every visit, and a seasonal deep cleaning clears the accumulated layers. Frequently Asked Questions About Dusting What is the best duster for allergies? A microfiber duster, used dry. Its split fibers and static charge capture dust, dander, and even bacteria rather than displacing them

5 Mistakes You Need To Stop Making When Using The Duster Read More »

Autumn Allergy

Autumn Allergy: 4 Essential Cleaning Plan For a Healthy Home

Autumn Allergy: A Four-Part Cleaning Plan for a Healthier Home September brings a stunning display of autumn colour, but the seasonal shift also kicks off misery for allergy sufferers: sneezing, itchy eyes, and respiratory discomfort. While the fall beauty is enjoyed outdoors, an invisible battle begins inside. The season’s chief offenders are ragweed pollen, which drifts in on winds from hundreds of kilometers away, and mold spores thriving in early fall’s damp, decaying debris. Both infiltrate homes, settle on surfaces, embed in fabrics, and circulate through the air you breathe. Creating a healthy indoor environment is the most effective relief strategy, and that takes a targeted plan, not a simple tidy-up. Here are the four zones to tackle. Zone 1: The Bedroom You spend roughly a third of your life in the bedroom, which makes it the most critical allergy zone in the house. Bedding collects a nightly deposit of dust mites and their waste, pet dander, and pollen carried in on hair and clothes, so wash sheets, pillowcases, and duvet covers weekly in hot water of at least 130 F (54 C), the temperature required to kill dust mites. For delicate fabrics, use a warm wash followed by at least 15 minutes in a hot dryer for a similar result, and launder the pillows and duvets themselves every few months. Allergen-proof covers on the mattress and pillows create an impermeable barrier against triggers. Curtains act like large filters trapping airborne dust and pollen, so take them down and launder them each fall; for non-washable blinds, wipe every slat with a damp microfiber cloth to remove settled pollen that would otherwise aggravate symptoms each time you open or close them. Finally, vacuum the entire mattress surface with your cleaner’s upholstery attachment. Dust mites number in the millions inside the average mattress, a year-round issue that worsens any autumn allergy. Zone 2: Floors and Air Quality Carpets and rugs can trap dust, dirt, and allergens equal to eight times their own weight, so your cleaning method matters. The single most important tool is a vacuum with a genuine HEPA filter. Standard vacuums often stir up fine particles like pollen and make symptoms worse, while a HEPA filter is designed to capture 99.97 percent of tiny particles, trapping allergens and removing them from your home. That is non-negotiable with a severe autumn allergy, and Health Canada’s page on air contaminants and health explains why particles in indoor air deserve this attention. Technique counts too: move slowly and methodically with multiple overlapping passes so the vacuum pulls allergens from deep within the fibers, and vacuum high-traffic areas at least twice a week during peak season. Zone 3: Moisture Control and Mold Elimination Mold is a major autumn allergy trigger, and its growth tracks moisture directly, which makes the cooler, damper weather of early fall ideal conditions for it. In bathrooms, run the exhaust fan during every shower and for at least 20 minutes afterward to vent moisture outside, and clean tile grout regularly with a vinegar and water mixture to kill emerging spores. In basements and crawl spaces, which are naturally prone to dampness, run a dehumidifier to keep humidity below 50 percent; a musty basement smell is a clear sign of a problem that can significantly worsen symptoms. In kitchens, always use the stove’s exhaust fan when cooking and check under the sink and around the dishwasher for leaks. Health Canada’s guidance on reducing humidity, moisture, and mould is the authoritative reference for keeping growth from starting. Zone 4: Whole-Home Habits for Allergy Relief Pollen and dust settle on every surface, so round out the plan with the areas people overlook: Dust with a damp cloth. Dry dusting merely displaces allergens into the air you breathe, so wipe surfaces with a damp microfiber cloth that traps particles, always working from the top of the room downward. Service the HVAC before heating season. Replace the furnace filter before the first run of fall, and consider a high-efficiency filter built to capture small particles like pollen and mold spores. Vacuum upholstery weekly. Sofas and armchairs collect allergens just like carpets do, so go over them with the upholstery attachment. Use this chart to match triggers to tactics: Trigger Where it hides Removal tactic Ragweed pollen Curtains, blinds, windowsills, carpets Launder curtains each fall, damp-wipe slats and sills, HEPA-vacuum high-traffic areas twice weekly Dust mites Mattresses, pillows, bedding, upholstered furniture Weekly hot wash at 130 F (54 C) minimum, allergen-proof covers, vacuum the mattress and sofas Mold spores Bathroom grout, basements, crawl spaces, under-sink leaks Run exhaust fans during showers plus 20 minutes, keep humidity below 50 percent, fix leaks promptly Frequently Asked Questions About Autumn Allergies and Cleaning What temperature kills dust mites in laundry? At least 130 F (54 C). If the fabric cannot take hot water, wash warm and then tumble dry hot for at least 15 minutes, which achieves a similar result for bedding. Is a HEPA vacuum really necessary for allergy relief? Yes, if symptoms are significant. Ordinary vacuums can exhaust fine pollen and dust back into the room air, while a HEPA filter captures 99.97 percent of tiny particles so allergens leave the house instead of recirculating. When should I change my furnace filter for fall? Before the first run of the season, so summer’s dust and pollen are not blown through the house the moment heating starts. A high-efficiency filter rated for pollen and mold spores is worth the upgrade during allergy season. Does feather or dry dusting help allergy sufferers? No. Dry dusting knocks allergens into the air where you inhale them. Wipe with a damp microfiber cloth, working top to bottom, and vacuum or mop the floor last. Allergy-Season Help from Toronto Shine Cleaning If pollen season overwhelms your weekend routine, our team can take over: textile washing, HEPA-quality vacuuming, and moisture-zone scrubbing are core parts of every deep cleaning we perform, and weekly or biweekly visits through our regular maid service keep triggers from

Autumn Allergy: 4 Essential Cleaning Plan For a Healthy Home Read More »

How to Tackle Tough Stains on Clothes: 5 Proven Methods

How to Tackle Tough Stains on Clothes: 5 Proven Methods Coffee on a white shirt, red wine at a dinner party, grass stains after a park afternoon: stains are universal, but panic is optional. The difference between a saved garment and a casualty is rarely luck. It is speed, technique, and knowing which family a stain belongs to. Here is the complete playbook, organized by stain type, with the household tools that do the work. Three Rules Before Any Treatment Act fast: a fresh stain is a temporary problem, while a set-in stain bonds with the fibers and becomes a long-term challenge. Blot, never rub: rubbing grinds particles deeper, spreads the stain wider, and frays the fabric; use a clean white cloth and work from the outside edges inward. Test first: try any solution on an inside seam or hem to rule out discoloration. And the rule that saves the most clothes: never put a stained garment in the dryer, because heat permanently sets most stains. Air dry until the stain is verifiably gone, and repeat treatment if even a faint trace remains. Your Stain Removal Toolkit No cabinet of specialty products required: Cold water, the first response for unknown and protein-based stains Clear dish soap, without bleach, the gentle degreaser for oil-based stains White vinegar, the mild acid that breaks down tannins like coffee, tea, and juice Baking soda, the gentle abrasive and deodorizer that forms a lifting paste 3% hydrogen peroxide, a mild oxygen bleach for blood and grass, test on colors first Rubbing alcohol, the solvent for ink and some dye stains Enzyme cleaner, built for protein stains like blood, sweat, and dairy Whatever you reach for, read the label and keep products in their lane; Health Canada’s household products guidance is the reference for using any cleaner safely, and its chemical safety page explains why products should never be mixed on a whim. Method 1: Tannin Stains, the Plant-Based Family Coffee, tea, red wine, juice, berries, and grass are all plant dyes. For coffee and tea, blot immediately and flush cold water from the back of the fabric to push the stain out, then apply equal parts white vinegar and water for 10 to 15 minutes, followed by a baking soda paste and a soft brush if needed. For red wine, speed is everything: blot thoroughly, cover the stain completely with salt, and let it draw the wine out for at least an hour before scraping and rinsing cold. Treat any residue with a paste of hydrogen peroxide and dish soap for 30 minutes. Grass stains respond to dish soap or enzyme cleaner worked in for 15 minutes, with rubbing alcohol dabbed on stubborn spots before a cold rinse. Method 2: Oil-Based Stains, the Greasy Family Cooking oil, butter, salad dressing, grease, and most makeup will not budge with water alone. Cover the fresh stain with an absorbent powder, baking soda, cornstarch, or talcum, and let it sit at least 30 minutes to draw oil out of the fibers, then scrape it off. Work clear dish soap directly into the spot and let it sit 10 to 15 minutes, then wash in the hottest water the fabric tolerates. For foundation and lipstick, scrape off the excess first, apply dish soap or an oil-free makeup remover, and use a dab of rubbing alcohol to break down waxy components. Method 3: Protein Stains, Always Cold Blood, sweat, dairy, egg, and mud share one non-negotiable rule: cold water only. Hot water cooks the protein and sets it permanently. Flush fresh blood with cold running water from the back of the fabric, soak set-in traces in cold salt water for an hour, then apply 3% hydrogen peroxide directly and watch it bubble as it lifts the stain. Yellow underarm marks come from antiperspirant reacting with body oils; scrub them with one part dish soap to two parts hydrogen peroxide, sprinkle baking soda over, and let it work for an hour. Mud is the counterintuitive one: let it dry completely, brush off the solids, then treat the residue with detergent for 15 minutes and wash cold. Method 4: Dye Stains, the Toughest Family Ink and mustard are pigment problems. For ballpoint ink, place a paper towel under the fabric to absorb what gets lifted, then dab with rubbing alcohol using a clean cloth; the ink should transfer to the cloth in stages, refreshing the cloth section as you go, before a thorough cold rinse. Mustard’s turmeric is a potent dye: scrape, flush cold, apply vinegar, then treat remaining yellowing with dish soap and hydrogen peroxide and, if possible, let the garment sit in direct sunlight, which naturally bleaches the stain. Method 5: The Overnight Rescue for Old Stains Set-in stains reward patience. Soak the garment in an oxygen-based bleach solution, mixed per the product directions in the warmest water the fabric safely tolerates, for several hours or overnight; enzyme cleaners handle old protein stains the same way. After the soak, treat any survivor with the matching method above and launder. Delicates like silk and wool sit outside all of this: no hot water, no harsh scrubbing, mild detergent and gentle hand washing only, or a professional dry cleaner when the item is precious. Stain Family Fastest Fix Coffee or tea Tannin Cold flush, then vinegar and water, 10 to 15 minutes Red wine Tannin Salt blanket for an hour, then peroxide paste Cooking oil Oil-based Absorbent powder, then dish soap, hot wash Blood Protein Cold water only, then 3% hydrogen peroxide Ink Dye Alcohol dabbing over an absorbent towel Stain Removal FAQs Why does the dryer ruin my chances? Heat permanently bonds stains to fibers, which is why the check before drying matters more than any product. If the stain is fully gone, dry normally; if not, re-treat and re-wash, and keep air drying until it disappears. Can hydrogen peroxide go on any fabric? It is safe on most whites and colorfast fabrics but can lift dye, so always test

How to Tackle Tough Stains on Clothes: 5 Proven Methods Read More »