Carpet and Rug Cleaning

entryway for winter dirt and salt

How to Set Up Your Entryway for Winter Muck and Salt – 6 Professional Tips

The Entryway Is Your Home’s First Line of Defense Against Winter Muck When November settles over Canada, the entryway stops being a pretty threshold and becomes a work zone. Wet leaves, mud, melting frost, and the first applications of road salt all arrive on the soles of boots within seconds of every trip outside. Anything you fail to trap at the door gets tracked deeper, staining carpet, scratching hardwood, and leaving a permanent gritty film on every surface. A purpose-built winter entryway is not decoration. It is containment, and it protects the floors you have already paid for. Here are six professional setups that make the muck season manageable. Tip 1: Put a Real Scraping Mat Outside the Door Everything starts with an exterior mat whose one job is aggressive scraping. A thin decorative welcome mat cannot handle clumps of mud, snow, and gravel; a Canadian winter needs a workhorse. Coir coconut fiber, heavy-duty rubber with deep grooves, and synthetic turf designs all shrug off freezing temperatures and moisture without cracking or rotting, and their texture nudges people into a proper shoe wipe. Shake the mat out often, and give it a hard hose-down before the deep freeze so its scraping surface stays sharp rather than cemented with old mud. Tip 2: Let the Interior Mat Absorb What the First Mat Misses Inside, the second mat plays a different role: soaking up moisture and trapping the fine grit and salt dust that slips past the scraper. Size matters. Choose one long enough that a person can step fully onto it, close the door, and kick off shoes without touching clean floor. High-absorbency cotton or microfiber surfaces pull up a surprising volume of water, and a non-slip rubber backing prevents dangerous slips while keeping trapped dampness off your flooring. Vacuum this mat daily through the high-traffic season, then shake it or launder it weekly. A saturated, filthy mat absorbs nothing; it just becomes a launchpad for the mess. Tip 3: Give Soaking Boots a Containment Zone Even a double-mat system loses to truly drenched footwear. A boot tray, a shallow plastic or rubber basin with a raised lip, catches melting snow, mud drips, and salty brine before any of it meets your floor. That single habit saves polyurethane finishes from salt stripping and keeps grout lines from slowly crumbling. Rinse and wipe the tray often: boots left sitting in days-old brine just reabsorb the corrosive water you were trying to keep out. Tip 4: Build a Complete Unloading Station Think through the whole arrival ritual, not just the floor. A small sturdy bench beside the boot tray lets people sit while wrestling stiff winter boots, instead of hopping and stamping slush onto clean boards. Strong hooks mounted above the mat zone catch dripping jackets and scarves so wet outerwear sheds its moisture inside your one easy-to-clean area rather than onto carpets and furniture further in. The essentials of a working station: A low bench or stool rated for repeated sitting Heavy hooks for coats, backpacks, and leashes Baskets for hats, gloves, and mufflers The boot tray, sized to the household’s shoe volume A hook or shelf for the daily bag, keys, and pass Tip 5: Dissolve Salt Film, Then Rinse, in That Order The defensive line will be breached, and how you respond decides whether floors survive the season. Act fast: salt attracts moisture, and once it dissolves into brine it can dull and strip the protective finish on hardwood, then creep into porous grout on tile and slowly crack it. Never mop a gritty floor first; that is like scrubbing with sandpaper, grinding sharp particles into the clear coat. Vacuum with a hard-floor head or sweep with a soft broom to lift dry grit, then work the salt marks with a damp, not wet, mop, because excess water swells and warps hardwood and laminate. For routine mopping of tile and sealed stone, a diluted pH-neutral cleaner lifts grime without attacking grout. For stubborn white haze, dissolve the alkaline deposits with one cup of white vinegar per gallon of warm water, then follow immediately with a second pass using a clean mop head and plain water to rinse. Dissolve, then rinse: skipping the rinse just re-deposits a new film as it dries. Store any vinegar or salt-removal solution carefully and follow the federal guidance on household chemical safety about labels, storage, and never mixing products. Tip 6: Keep Dedicated Cleaning Tools in the Front Closet Cleanup happens when supplies are five seconds away. Park a small dustpan and brush, a roll of paper towels or a designated muck cloth, and a spray bottle of your salt solution right in the entry closet so spills get wiped before they set. Use the same effort to organize the closet itself: room for bulky parkas without bursting doors, a shelf for boots mid-dry, and bins for the endless parade of toques and gloves. A tidy closet keeps the whole zone calm, because a clean entryway is an organized entryway. Your Winter Entryway Kit at a Glance Component Job Best picks Maintenance Outdoor mat Scrape heavy debris Coir, grooved rubber, turf Shake often; hose before freeze Indoor mat Absorb water, trap fine grit Cotton or microfiber, rubber backing Vacuum daily; wash weekly Boot tray Contain meltwater and brine Plastic or rubber with raised lip Wipe and rinse frequently Bench and hooks Safe unloading of people and coats Sturdy, wipeable surfaces Declutter weekly Tool caddy Instant spill response Dustpan, cloths, salt spray Restock as used The CDC’s overview of cleaning and disinfecting household surfaces reinforces the same sequence you need at the door: remove the gross stuff first, then clean the surface itself. Winter Entryway FAQ How big should an indoor winter mat be? Long enough that both feet land fully on it and you still have room to shut the door and remove shoes. A small rug that slides aside when kicked is worse than useless in slush season. Will road salt ruin hardwood

How to Set Up Your Entryway for Winter Muck and Salt – 6 Professional Tips Read More »

6 Reasons Why Dry Cleaning is The Safest Option For Your Most Important Clothes

The term “dry cleaning” is one of the more misleading phrases in common use, as the process is neither dry nor, strictly speaking, just cleaning. It is a complex and highly specialized method of garment care that involves sophisticated machinery, a deep understanding of fabric science, and the precise application of chemical solvents. The core principle that separates dry cleaning from traditional laundering is the absence of water. Instead of H2O, garments are submerged in and cleaned with a liquid solvent that is specifically chosen for its ability to dissolve oils and greases without damaging delicate, water-sensitive fibers like silk, wool, rayon, or intricately constructed pieces like tailored suits and formal gowns. Water can cause these natural fibers to shrink, distort, or lose their color, but a solvent can lift away stains and soil while leaving the garment’s structure and feel intact. The entire journey of a garment through a dry cleaning facility is a multi-step procedure that combines skilled human touch with advanced technology. 1.Diagnostic The process begins the moment a customer brings a garment to the counter. This initial interaction is a crucial diagnostic step. The customer might point out specific stains, and a knowledgeable cleaner will inquire about the source of the stain, as this information dictates the treatment. Following this, the garment undergoes its first inspection. A trained professional examines it meticulously, not just for the stains pointed out by the customer, but for any others that may be less obvious. They also check the integrity of the garment, noting any loose buttons, open seams, or pre-existing damage. This is also when the care label is read and assessed. The care label is a legal directive from the manufacturer, and the cleaner must adhere to its instructions. Finally, each garment is tagged. This is a critical organizational step. A small, numbered tag or a barcode is affixed to an inconspicuous seam, ensuring that the piece can be tracked throughout the entire process and correctly reassembled with its owner’s order at the end. 2.Stain Removal Before the main cleaning cycle can begin, the garment moves to what is arguably the most artful and skill-intensive stage of the process: pre-treatment, also known as “spotting.” This is where a specialist, the spotter, addresses individual stains. Working at a specialized station called a spotting board, which provides steam, vacuum, and a variety of chemical agents, the spotter acts as a fabric chemist. They must identify both the type of fabric and the nature of the stain to select the correct chemical agent and technique. Stains are broadly categorized; for example, oil-based stains like grease or salad dressing require different solvents than protein-based stains like blood or egg, or tannin-based stains like wine, coffee, or juice. The spotter uses a “steam gun” to apply steam and heat to help loosen the stain, and various chemical solutions are carefully applied, tamped with a small brush, and then flushed out with more steam. A vacuum pedal on the spotting board suctions away the loosened stain and excess moisture, preventing a ring from forming on the fabric. This targeted treatment is essential because the general cleaning cycle might not be sufficient to remove stubborn, set-in stains. 3.Dry Clean Once pre-treated, the garments are ready for the main event: the cleaning machine itself. A modern dry cleaning machine looks very much like an oversized front-loading washing machine, but its internal workings are far more complex. It is a sealed, self-contained system that performs the washing, rinsing, and drying cycles all in one unit. Garments are sorted by color, weight, and fabric type and then loaded into the machine’s drum. The door is sealed, and the machine begins its cycle by filling the drum with the chosen solvent. Historically, the most common solvent was perchlorethylene, or “perc,” a powerful and effective degreaser. However, due to environmental and health concerns, the industry has increasingly shifted towards more eco-friendly alternatives like hydrocarbon solvents, liquid silicone, or even pressurized liquid carbon dioxide. As the drum tumbles the clothes gently, the solvent circulates through the fabric, lifting away body oils, grime, and the loosened stains from the pre-treatment stage. This “wash” cycle is typically much gentler than a water-based wash to protect the delicate garments. After the wash cycle, the machine drains the used solvent and begins an extraction cycle, spinning at high speed to remove the majority of the solvent from the clothes, much like a washing machine’s spin cycle removes water. The used solvent is not discarded; it is pumped through a series of filters to remove the collected dirt and impurities and is then distilled. This purification and recycling process is a key feature of the closed-loop system, allowing the expensive solvent to be reused for many cycles, which is both economically and environmentally necessary. 4.Drying Following the extraction, the machine enters the drying phase. A current of warm air is gently tumbled through the clothes to evaporate any remaining solvent from the fabric. This is not the high heat of a conventional dryer. The temperature is carefully controlled to be just high enough to turn the liquid solvent into a vapor without damaging the clothes. This solvent-laden warm air is then drawn out of the drum and passed over cooling coils. As the air cools, the solvent vapor condenses back into its pure liquid form, is collected, and returned to the main solvent tank for reuse. This vapor recovery system is incredibly efficient, recapturing nearly all of the solvent so that very little escapes into the atmosphere. Once the cycle is complete and the sensors detect no remaining solvent fumes, the machine’s door unlocks, and the garments emerge clean, completely dry, and with only a faint, sterile scent that quickly dissipates. 5.Finishes The journey is not over yet. The clean garments are immediately inspected again. Any stains that were not fully removed during the process are noted. These stubborn spots may require “post-spotting,” where the spotter applies more specialized techniques to the now-clean fabric. Once

6 Reasons Why Dry Cleaning is The Safest Option For Your Most Important Clothes Read More »

Air Quality Through Cleaning

Breathe Easy This Winter: Improving Indoor Air Quality Through Cleaning

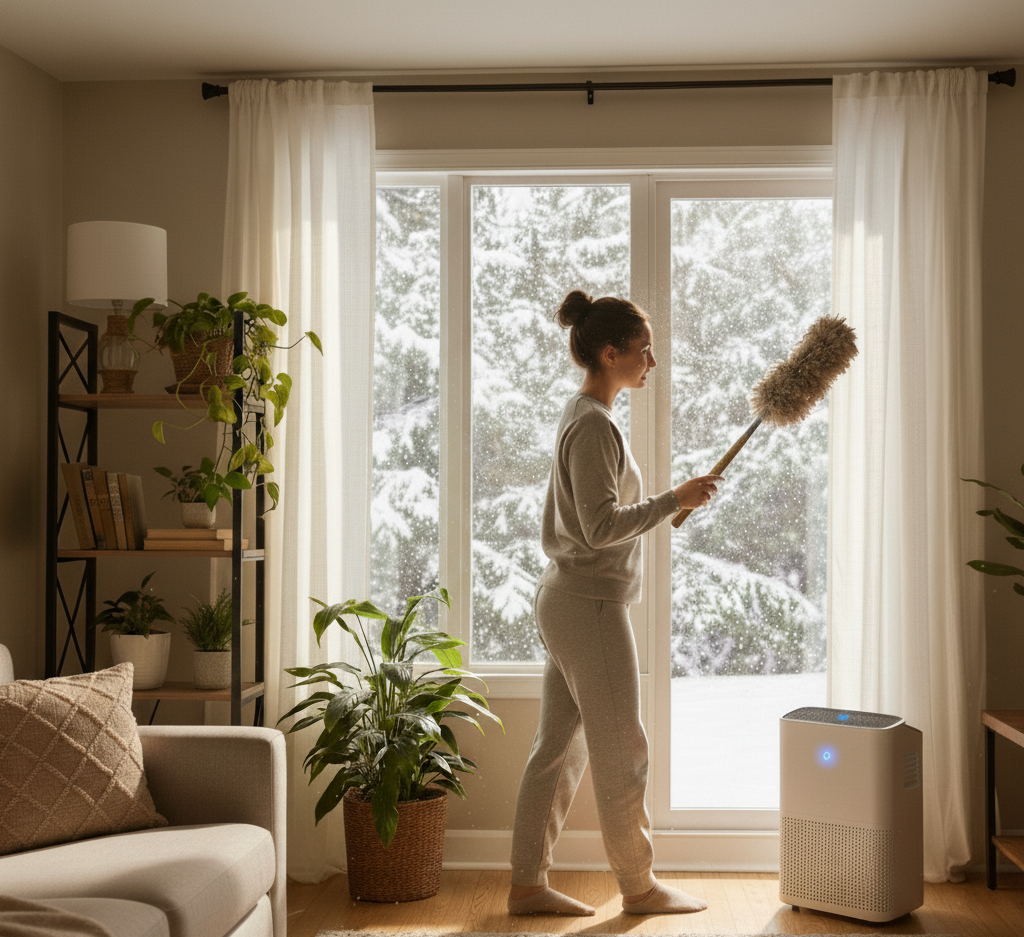
Breathe Easy Indoors: The Winter Cleaning Plan for Better Air Quality As autumn fades and the first hard frost arrives, Canadian homes instinctively seal themselves: windows shut, furnace roars, and the crisp outdoor air gets locked away. Staying warm comes with an invisible cost. With no natural ventilation, dust, allergens, pollutants, and microbes accumulate indoors until the air you breathe all winter is the stalest of the year. Health Canada’s overview of indoor air contaminants documents the range of irritants that build up in closed homes. Poor indoor air can mean dry eyes and scratchy throats at best, and triggered allergies, asthma attacks, or respiratory infections at worst. The fix is not a gadget. It is a cleaning strategy tuned to how winter houses actually work. What Winter Dust Is Really Made Of Dust is not simply dirt. It is a constantly circulating cocktail, and forced-air heating is its delivery service: every blast of warm air stirs settled particles back into your lungs’ reach. A typical winter dust load includes: Microscopic flakes of human skin Pet dander from cats, dogs, and the occasional visitor Textile fibers shed by clothing, bedding, and upholstery Outdoor pollen and pollution that infiltrated before the snow Mold spores and dust mite debris from damp corners Controlling that mix takes systematic, deliberate dusting, performed weekly rather than in heroic quarterly bursts. Dust From the Ceiling Down, Every Week Work top to bottom and gravity does half the job: dust knocked loose from high surfaces settles onto lower ones that have not been cleaned yet, instead of landing on furniture you just finished. Start at ceiling fans, light fixtures, and the tops of bookcases and wardrobes. Move to eye level: window sills, picture frames, mirrors, and television fronts. Finish with tables, desks, coffee tables, baseboards, and floor registers. A quality microfiber cloth, dry for light passes or slightly damp for a deeper grab, traps particles in its fibers rather than launching them back into the air. For electronics, which attract dust through static, use an anti-static duster or a barely damp cloth, and unplug devices first. Vents, Ducts, and the Filter That Runs Everything Your air circulation system is both the dust highway and the easiest checkpoint. Before the furnace enters overtime, vacuum and wipe every return and supply register; the hair and grit you pull off them is usually startling. During the heating season, check the furnace filter monthly and replace it every one to three months depending on filter type, pets, and dust load. A clean filter keeps airflow efficient and captures particulates before they recirculate. If you have moved into an older home with unknown duct history, finished a dusty renovation, or share the house with severe allergy or asthma sufferers or multiple pets, periodic professional air duct cleaning removes years of built-up debris and mold spores from the whole ventilation system, improving both air quality and heating performance. Vacuuming: The Deep Clean Your Floors Secretly Need Carpets and rugs act as passive air filters, trapping dust, dirt, and allergens in their fibers. Neglect them and they saturate, releasing the payload with every footstep. Vacuum all carpeted areas at least weekly, more often in high-traffic zones, homes with kids or heavy-shedding pets, or households where anyone has allergies. A vacuum with a true HEPA filter captures 99.97 percent of particles down to 0.3 microns, including dust mite waste, pollen, dander, mold spores, and some bacteria, instead of exhausting them right back into the room. Do not stop at floors: run the upholstery attachment over sofas, armchairs, and fabric headboards, where skin flakes and dander hide in plain sight. Curtains, Blinds, and the Condensation Problem Window treatments are the most overlooked dust magnets in winter. Where cold glass meets warm indoor air, condensation forms a slightly damp film that grabs airborne particles, and damp fabric can also grow mold. Health Canada’s moisture and mould guidance is blunt about the principle: fix dampness fast or it fixes you. Vacuum curtains with the upholstery attachment, wipe blinds with a damp microfiber cloth, and wash curtain fabrics according to their care labels. The room looks brighter and the air tastes lighter afterward. Humidifiers: Great for Dry Air, Dangerous If Neglected Canadian heating seasons are brutally dry, and humidifiers ease cracked skin, scratchy noses, and irritated airways. The catch is that a reservoir of stagnant water is an ideal nursery for mold and bacteria, which the unit then sprays directly into your air. Clean the humidifier every few days per the manufacturer’s instructions, use distilled water rather than tap to limit mineral deposits that can go airborne, and empty and thoroughly dry the tank whenever the unit sits idle. Health Canada’s page on household product safety flags exactly this cleaning failure with cool-mist units. Done properly, the humidifier helps; done lazily, it harms. A Honest Note About Houseplants Some plants do absorb airborne toxins, but their real-world impact in a home is overstated: the plant volume needed to measurably clean a living room would turn it into a botanical garden. Mechanical filtration and a diligent cleaning routine do more per square foot than any fern. Winter Air Quality Schedule Frequency Task Payoff Weekly Top-down dusting with microfiber Less airborne particulate Weekly (plus) HEPA vacuum carpets, rugs, upholstery Trapped allergens stay trapped Monthly Check furnace filter and registers Efficient, cleaner circulation Every few days Humidifier scrub and rinse Mold never establishes Seasonally Curtains, blinds, and vent wipe-down Resets the dust reservoir Every few years Professional duct cleaning if flagged Whole-system particulate removal Indoor Air Quality FAQ How often should I dust to actually improve air quality? Weekly, at minimum, working high to low with microfiber. Dust that sits becomes a reservoir that your furnace re-suspends on every cycle, so consistency beats intensity. Do HEPA vacuums make a measurable difference? Yes for allergy households: the filter holds 99.97 percent of particles down to 0.3 microns inside the canister instead of venting fine dust out the back of a standard vacuum.

Breathe Easy This Winter: Improving Indoor Air Quality Through Cleaning Read More »

Uses for Coarse Salt

Coarse Salt: 10 Surprising Uses for Coarse Salt in Home Cleaning

In the search for effective and non-toxic cleaning solutions, one of the most powerful tools is often already sitting in the kitchen pantry. Coarse salt, whether it is kosher salt, sea salt, or rock salt, is a remarkably versatile and inexpensive mineral with properties that extend far beyond flavoring food. Its utility as a cleaning agent is rooted in its fundamental physical and chemical characteristics. The crystalline structure of salt makes it an excellent natural abrasive, capable of scouring away grime without being as harsh as many commercial powders. Furthermore, salt is a desiccant, meaning it absorbs water and, by extension, moisture-laden messes. It also has mild antibacterial and deodorizing properties, making it a multi-functional powerhouse for a wide range of household chores. 1.Cast Iron Pans Perhaps the most classic and celebrated use for coarse salt in cleaning is on cast iron cookware. Maintaining the seasoned surface of a cast iron skillet is crucial; harsh soaps and detergents can strip away this protective, non-stick layer that has been built up over time. Salt provides the perfect solution. To clean a warm skillet after cooking, simply pour a generous amount of coarse salt into the pan. Using a folded paper towel or a stiff brush, scrub the salt around the pan. The salt’s abrasive texture will lift away stuck-on food particles and absorb any excess oil without damaging the seasoning. Once the pan is clean, the dirty salt can be discarded, and the pan can be wiped clean with a cloth. A thin layer of oil can then be applied to reinforce the seasoning, leaving the skillet ready for its next use. This method not only cleans but also helps to manage rust spots that may begin to form. 2.Kitchen Utensils This same abrasive quality makes coarse salt an exceptional cleaner for other kitchen items, particularly wooden cutting boards and butcher blocks. These surfaces, being porous, can harbor bacteria and absorb odors from foods like garlic and onion. To deep clean and deodorize a wooden board, sprinkle it liberally with coarse salt. Then, take half a lemon and use it as a scrubber, squeezing slightly as you work the salt into the wood in a circular motion. The salt acts as a scouring agent to lift away fine particles of food and stains, while the citric acid in the lemon juice acts as a natural disinfectant and bleach, brightening the wood and neutralizing odors. Let this salty, lemony paste sit on the board for ten to fifteen minutes before scraping it off and rinsing the board thoroughly with hot water. This process leaves the cutting board sanitized, deodorized, and visually refreshed. 3.Fat Removal Coarse salt is also highly effective at tackling grease. For greasy pots, pans, or baking dishes, sprinkling salt onto the greasy areas can make cleanup significantly easier. The salt absorbs a good portion of the grease, so when you wipe it out with a paper towel, you remove a large amount of the mess before even introducing soap and water. This pre-cleaning step can reduce the amount of grease going down your drain and make the final wash much quicker. This principle also applies to grease spills on fabric. If you get an oily splatter on your clothing or a tablecloth, immediately cover the spot with a pile of coarse salt. Let it sit for an hour or so to draw the oil out of the fibers. Afterwards, brush off the salt and treat any remaining stain before laundering as usual. 4.Red Wine Stain removal is another area where salt’s properties shine. For the dreaded red wine spill on a carpet or upholstery, salt can be a first line of defense. After blotting the spill with a clean cloth to absorb as much liquid as possible, cover the entire stain with a thick layer of coarse salt. The salt will begin to draw the wine out of the fibers, and you may see it turn pink as it works. Leave the salt to dry completely, which may take several hours or even overnight. Once it is dry and caked, you can simply vacuum it all up. While it may not remove a very old or heavily set-in stain completely, it is incredibly effective on fresh spills and can significantly reduce the severity of the stain. 5.Cleaning Inside the kitchen, coarse salt can be used to clean and deodorize in less obvious ways. The inside of a coffee pot or a thermos can develop brown stains from coffee and tea tannins that are difficult to scrub. To remove these, fill the carafe with a handful of coarse salt and about a cup of crushed ice. Swirl the mixture vigorously for a few minutes. The ice provides a hard medium that forces the abrasive salt crystals against the interior walls of the carafe, effectively scouring away the stains. For particularly stubborn stains, adding a bit of lemon juice or vinegar to the mix can provide an acidic boost to the cleaning power. After swirling, let the mixture sit for about half an hour, then rinse thoroughly. This method is a safe and effective way to restore clarity to a glass coffee pot without using harsh chemicals. 6.Deodorizing The power of salt extends to cleaning drains and garbage disposals. To freshen a smelly kitchen drain, pour about half a cup of coarse salt down the drain, followed by a quart of very hot water. The salt helps to dislodge grease and food particles that can get trapped and cause odors. For a garbage disposal, the combination of ice and salt works wonders. Pour a cup of salt and a couple of cups of ice cubes into the disposal and run it until the grinding sound stops. The ice and salt work together to freeze and scour away built-up grime and sludge from the blades and the walls of the disposal, sharpening the blades in the process. Following this with a few lemon or orange peels will leave the disposal and

Coarse Salt: 10 Surprising Uses for Coarse Salt in Home Cleaning Read More »

Understanding Acetone: A Guide to the Powerful Cleaning Solvent

What Makes Acetone a Powerful Cleaning Solvent Acetone is a potent organic solvent that dissolves residues most household cleaners cannot touch: oils, greases, dried paint, varnish, lacquer, permanent ink, and stubborn adhesives. Chemically, it is a polar aprotic solvent, so it attacks both greasy, non-polar materials and many polar substances. It also evaporates very quickly, which means it can do its job and vanish, usually leaving a clean, dry, residue-free surface behind. That speed and strength are exactly why acetone demands respect: it is indiscriminate, so you need to know where it helps and where it will do damage. Top Cleaning Jobs for Acetone Paint and Finish Removal Splatters of dried latex or oil-based paint on hard, non-porous materials such as glass, tile, or bare metal are no match for acetone. It breaks down the polymer binders that hold paint together, liquefying the coating so it can be wiped away. The same chemistry makes acetone the standard choice for cleaning paint brushes, roller covers, and spray gun components used with lacquers and enamels. It can also strip varnish or polyurethane from metal hardware and lift old, yellowed lacquer from brass fixtures. Expect to apply it, give it a few minutes to work, and then scrape or wipe off the softened layers. Adhesive and Residue Removal Most nail polish removers list acetone as their active ingredient because it dissolves the tough acrylic polymers in nail lacquer. The same principle defeats cyanoacrylate, better known as super glue: a small dab, carefully applied, dissolves the bond on skin or countertops. Acetone also penetrates the gummy residue left behind by stickers, labels, and tape, cutting through the stickiness until it wipes clean. Heavier challenges such as contact cement or construction adhesive usually need several applications plus some mechanical scraping. Workshop Degreasing Before welding, painting, or powder-coating a metal part, any trace of oil or wax can ruin the bond or finish. Acetone cuts through petroleum-based grime and flashes off fast, leaving a clean substrate. Mechanics use it on automotive parts, machinery, and tools to dissolve grime and tar that would otherwise require heavy scrubbing. On a concrete garage floor, it can lift deep oil stains, but only when you pull the dissolved oil up with an absorbent material; used carelessly, acetone can drive the stain deeper into the porous concrete. Remove nail polish spills from hard surfaces. Break super glue bonds on skin and countertops. Dissolve sticker, label, and tape residue. Clean brushes and rollers after lacquer or enamel projects. Prep metal parts before painting or welding. Where Acetone Causes Damage Acetone dissolves many common plastics, including polystyrene (styrofoam), ABS found in electronics housings and car interiors, acrylic (Plexiglas), and polycarbonate. Contact can soften, warp, cloud, or fully dissolve these materials, and even brief exposure can cause solvent crazing, a web of fine surface cracks. High-density polyethylene (HDPE) and polypropylene generally resist the solvent, so they are the usual choice for acetone containers. Finished wood is another casualty: acetone strips shellac, varnish, lacquer, and polyurethane, dries out the wood fibers, and can lift veneers or damage laminates, so it should never touch wooden furniture, flooring, or cabinetry unless a full refinishing is planned. Some fabrics are equally vulnerable. Acetate, triacetate, and modacrylic fibers can literally dissolve, creating holes, while cotton, wool, and silk usually survive but may lose dye. Material Acetone reaction Safe to clean? Polystyrene, ABS, acrylic, polycarbonate Softens, warps, clouds, or dissolves No; test a hidden area first HDPE and polypropylene Resists the solvent Yes Finished wood and veneers Strips finish, dries fibers Only for refinishing Acetate, triacetate, modacrylic fabric Dissolves; can create holes No Cotton, wool, silk Usually safe; dye may run Spot-test first Acetone Safety: Flammability, Ventilation, and Gear Acetone is extremely flammable with a very low flash point, so vapors can catch fire at room temperature when they meet a spark or flame some distance away. Ignition sources include pilot lights on water heaters, the spark of a refrigerator motor kicking on, and static electricity. Work with strong ventilation: open windows and doors and use a fan to push fumes outside, or work outdoors whenever possible. Protect your skin with butyl rubber or nitrile gloves; latex gloves break down quickly, and direct contact can defat the skin, causing dryness, irritation, and cracking. Wear splash-proof goggles, and in enclosed spaces or during long sessions use a respirator with an organic vapor cartridge, since concentrated fumes can irritate the respiratory tract and cause dizziness and headaches. Health Canada’s household chemical safety tips cover flammable and corrosive products such as paint thinners, and its household products guidance explains safe use and storage around the home. How to Apply Acetone the Right Way For small stains, pour the acetone onto a clean white cloth or cotton ball instead of directly onto the surface; that controls the amount and stops it from spreading to nearby vulnerable materials. Blot the stain from the outside edge inward so it does not create a larger ring, and avoid rubbing, which can push the stain deeper or damage the surface texture. Afterward, wipe the area with a cloth dampened with water and mild detergent, rinse with a clean, damp cloth, and dry thoroughly. Test any new surface or fabric in an inconspicuous spot first, such as an inner seam. Frequently Asked Questions About Acetone Can I use acetone on plastic surfaces? Only on plastics known to resist it, such as HDPE and polypropylene. Most others, including polystyrene, ABS, acrylic, and polycarbonate, will soften, cloud, or dissolve, so always test an unseen area first. Will acetone ruin wood furniture? Yes. It strips the finish, dries out the wood fibers, and can lift veneers. Reserve it for refinishing projects where removing the old finish is the whole point. Is acetone safe on fabrics and carpets? Fabrics made of acetate, triacetate, or modacrylic fibers can dissolve, and dyes on natural fibers may bleed. Spot-test an inconspicuous area before treating any stain. Is nail polish remover the same as pure acetone?

Understanding Acetone: A Guide to the Powerful Cleaning Solvent Read More »

5 Key Areas to Deep Clean Before Winter Sets In

5 Key Areas to Deep Clean Before Winter Sets In

5 Key Areas to Deep Clean Before Winter Sets In When the temperature drops, your home becomes the center of your world. Windows stay closed, the furnace runs daily, and family time moves indoors. That is why a deep clean before winter is more than a seasonal ritual: it protects your air quality, your fabrics, and your comfort for months. These five areas make the biggest difference, and each one is easy to tackle with the right plan. 1. Improve Indoor Air Quality: Vents and Furnace Filter After months of sitting idle, your heating system collects dust, pollen, pet dander, and fine particles in the ductwork. The first time the furnace kicks on, it can blow that accumulation straight into your living space and aggravate allergies. Start by turning off the HVAC system, then vacuum each vent cover with the brush attachment. For a deeper clean, unscrew the covers and wash them in warm, soapy water, using a small brush to reach into the grilles, then vacuum as far into the duct opening as the crevice tool allows. The single most impactful task is replacing the furnace filter. A clogged filter traps fewer particles, forces the system to work harder, and raises both energy use and the risk of malfunction. A fresh filter is inexpensive, and it pays off in health and efficiency all season. Good indoor air quality supports everyday health, and clean vents and filters are the first line of defense, as the CDC notes about air quality. 2. Maximize Natural Light: Windows and Screens Dirty windows can noticeably dim a room during the darker months. Remove your window screens, lay them flat outside, scrub them with a soft-bristled brush and mild soap and water, then rinse and dry completely. Storing screens in a garage or basement during winter lets in more light and protects them from snow and ice damage. Clean the interior glass with warm water and a few drops of dish soap, finishing with a high-quality squeegee for a streak-free result. Do not skip the tracks and sills: a crevice tool clears loose debris, and a damp cloth with an old toothbrush handles the tight corners. Mold can grow where moisture collects around windows, so the CDC recommends keeping damp areas dry. 3. Sanitize Fabrics and Upholstery Comforters, flannel sheets, wool throws, and decorative blankets that have been stored all year can absorb a stale, musty odor. Launder everything according to its care label before use so your cozy essentials are fresh and free of dust mites. Curtains and drapes collect surprising amounts of dust: vacuum them top to bottom with the upholstery attachment, use a steam cleaner on durable fabrics, or machine wash when the label allows. For sofas and armchairs, remove the cushions and vacuum every seam, crack, and corner where crumbs, dust, and pet hair hide. Following basic hygiene practices keeps high-touch fabrics healthier for the whole family. 4. Prepare the Fireplace and Deep Clean Floors Before the first fire of the season, clear and wipe down the mantel, hearth, and fireplace tools so that first flame does not send a plume of dust into the room. The interior of the chimney still needs a professional sweep for safety. Then turn to the floors: carpets and area rugs become the main surfaces for play and relaxing, and a quick vacuum will not do. Vacuum slowly and methodically, making multiple passes in overlapping, perpendicular directions to agitate the pile and pull embedded grit from the fibers. Move furniture where possible to reach the dustiest corners of the room. 5. Get the Kitchen Ready for the Busy Season Winter brings hearty soups, slow-cooked stews, and holiday baking, so the kitchen deserves attention now. Deep clean the refrigerator inside and out: remove shelves and drawers, wash them in warm, soapy water, and wipe every interior surface. This also forces a useful inventory before you stock up for the holidays. Clean the oven well before the turkey goes in, using the self-cleaning function or a manual baking soda and vinegar method so it heats evenly without smoke or odors. Finally, declutter the pantry and take stock of baking supplies and staples so meal prep runs smoothly. Winter Deep Cleaning Checklist Vacuum vents and wash vent covers; replace the furnace filter. Remove, clean, and store window screens; clean glass, tracks, and sills. Launder stored bedding and throws; vacuum curtains and upholstery seams. Wipe the mantel and hearth; book a professional chimney sweep. Deep vacuum carpets with slow, overlapping passes. Clean the fridge and oven; organize the pantry. Winter Cleaning Priorities at a Glance Area Why It Matters Top Task Vents and filter First furnace run can spread dust and allergens Wash covers, replace the filter Windows and screens Maximizes scarce winter light Clean glass and store screens Fabrics and upholstery Removes dust mites and musty odors Launder bedding, vacuum sofas Fireplace and floors Prevents dust plumes and fiber wear Wipe hearth, deep vacuum carpets Kitchen Ready for holiday cooking and guests Clean fridge, oven, and pantry Frequently Asked Questions How often should I replace my furnace filter before winter? Check it monthly and replace it at least once before the heating season starts. A clogged filter makes the furnace work harder, increases energy use, and lets dust and allergens recirculate, so a fresh filter is the cheapest air quality upgrade you can make. Do I really need to clean window screens in winter? Yes. Screens trap dust and pollen all summer, and cleaning them before storage keeps grime from transferring to your glass. Storing them dry also protects the mesh from snow and ice damage and lets more natural light into the room. Can I clean my own chimney? No. The interior of the chimney should be inspected and swept by a certified professional, because built-up creosote is a fire hazard. What you can do yourself is clean the mantel, hearth, and tools before the first fire of the season. Should I hire a professional for

5 Key Areas to Deep Clean Before Winter Sets In Read More »

5 Reasons Why Hiring a Cleaning Service is the Best Form of Self-Care

Why hire a specialized cleaning service? The modern home is a hub of activity, a place of work, rest, and family life. Yet, maintaining its cleanliness can feel like a relentless, never-ending task. The dust settles almost as soon as it’s wiped away, the floors seem to attract dirt, and the kitchen and bathrooms demand constant attention. For many, the weekend, which should be a time for relaxation and recharging, is instead consumed by a long list of chores. This constant cycle of cleaning can become a significant source of stress and a drain on our most valuable resource: time. It is in this gap between the desire for a clean, peaceful environment and the reality of a busy life that a residential house cleaning service finds its purpose, offering not just a service, but a solution to a pervasive modern problem. 1.Quality of Life Hiring a professional cleaning service is often viewed as a luxury, but it is more accurately described as an investment in your quality of life. Consider the hours spent each week sweeping, mopping, scrubbing, and dusting. For a moderately sized home, this can easily add up to four, five, or even more hours. A professional service reclaims those hours for you, handing them back to be spent on what truly matters. This could mean more time with family, pursuing a hobby, exercising, or simply enjoying a well-deserved rest. The cumulative effect of this reclaimed time is profound, reducing burnout and allowing for a better work-life balance. It transforms the home from a place of constant obligation into a true sanctuary, a space you can enter after a long day and immediately feel at ease, rather than being confronted with a list of tasks that need doing. 2.Quality of Cleanliness Beyond the gift of time, there is the undeniable difference in the quality of the clean itself. A professional cleaner brings a level of expertise and efficiency that is difficult for the average homeowner to replicate. They are trained in the most effective methods and understand the specific needs of different surfaces. They know which products to use on natural stone versus laminate, how to clean stainless steel without leaving streaks, and the best techniques for removing stubborn soap scum from glass shower doors. This knowledge prevents costly damage that can result from using the wrong chemical or an abrasive sponge on a delicate surface. Furthermore, professional services come equipped with commercial-grade tools and supplies that are often more powerful and effective than standard consumer products. Their high-powered vacuums with HEPA filters can capture a significantly higher percentage of dust, allergens, and pet dander, leading to improved indoor air quality. This is particularly beneficial for households with allergy sufferers, asthmatics, children, or pets. The result is not just a home that looks clean, but one that feels and is, on a microscopic level, healthier. The process of a professional clean is systematic and thorough. Cleaners typically work with a detailed checklist, ensuring that no area is overlooked. They employ methodical strategies, such as cleaning from top to bottom to ensure dust and debris fall downwards before the floors are addressed, and working from one side of a room to the other. This structured approach guarantees consistency and completeness. A standard recurring clean will typically involve a comprehensive dusting of all surfaces, including furniture, shelves, and window sills; cleaning and disinfecting kitchen countertops, sinks, and appliance exteriors; scrubbing toilets, showers, tubs, and bathroom vanities; and vacuuming carpets and mopping hard floors. This regular maintenance keeps the home at a consistent level of cleanliness, preventing the deep buildup of grime. 3.Deep Cleaning For homes that have gone some time without a thorough cleaning or for clients new to a service, a deep clean is often recommended. This is a far more intensive and detailed service that addresses the areas often missed in a regular routine. A deep clean will include all the tasks of a standard clean but will go much further. It can involve washing baseboards and trim, cleaning light fixtures and ceiling fans, wiping down doors and door frames, cleaning behind and underneath furniture and appliances, scrubbing grout lines, and cleaning the interior of windows. This is the reset button for your home, tackling the accumulated dirt and dust in every nook and cranny, and establishing a new baseline of clean that makes subsequent maintenance easier. Specialized services like move-in and move-out cleanings are another critical offering. Preparing a home for sale or ensuring a new home is pristine before you unpack is an enormous task on top of the already stressful process of moving. A move-out clean is designed to leave the property in immaculate condition for the next occupants, often a requirement for retrieving a security deposit. This is the most exhaustive clean of all, performed on an empty home. Every interior surface is addressed, including the inside of all cabinets, drawers, closets, the oven, and the refrigerator. It ensures the home is presented in its best possible light, which can be a significant factor for real estate agents and potential buyers. Conversely, a move-in clean provides immense peace of mind, sanitizing the space and ensuring you are starting your new chapter in a fresh, thoroughly cleaned environment. 4.Trust and Security One of the most significant barriers for people considering a cleaning service is the idea of trust and security. Inviting someone into your personal space requires confidence in their professionalism and integrity. This is why reputable cleaning companies place such a high emphasis on their hiring and training processes. They conduct background checks on their employees and ensure they are thoroughly vetted. Furthermore, professional services are bonded and insured. Bonding provides protection against theft, while insurance covers any accidental damage that might occur to your property during the cleaning process. This comprehensive protection offers homeowners the peace of mind that they are working with a trustworthy organization that stands behind its work and its people. The relationship with a cleaning service is

5 Reasons Why Hiring a Cleaning Service is the Best Form of Self-Care Read More »

Perfect Cleaning Schedule

Cleaning Schedule: A Room-by-Room Guide to Your Perfect Cleaning Schedule

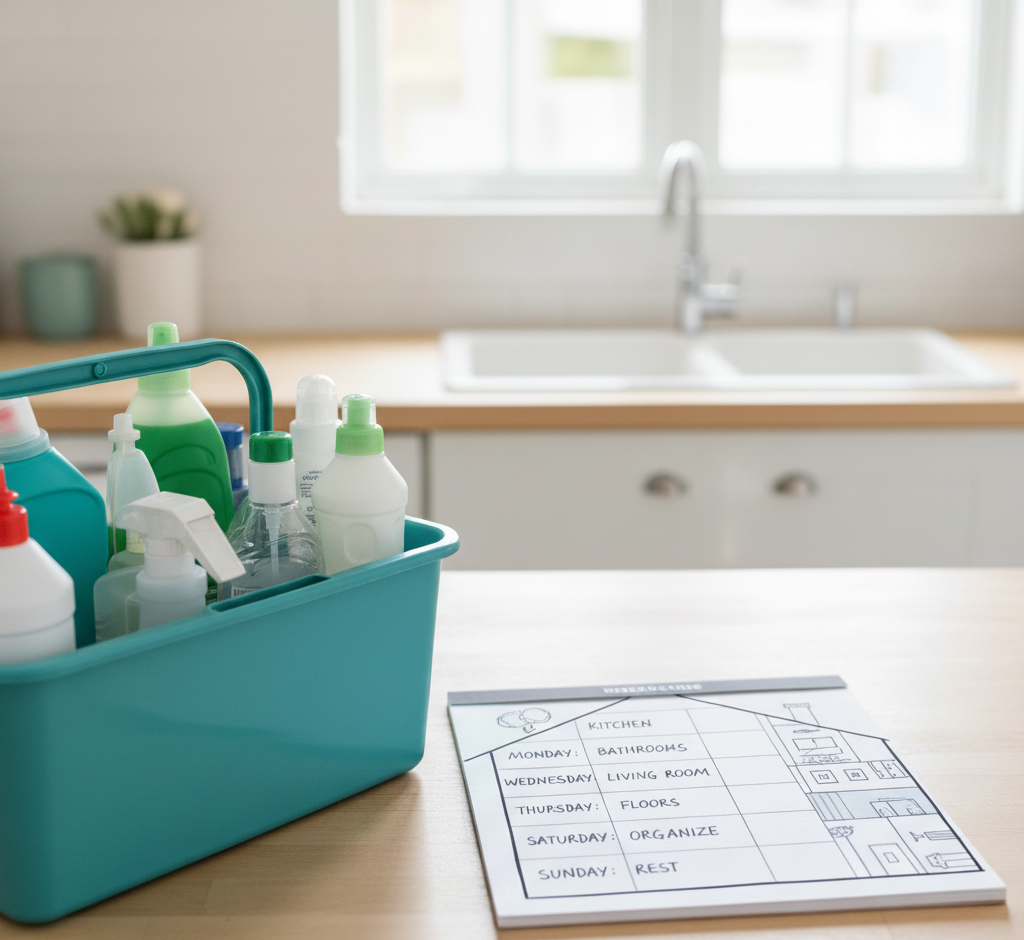
Why a Cleaning Schedule Beats Cleaning Marathons For many households, cleaning swings between two extremes: frantic multi-hour marathons before guests arrive, or weeks of ignoring the dust bunnies and sticky counters until frustration wins. This reactive approach is exhausting and inefficient. The secret to a consistently clean home is not stronger chemicals or more scrubbing; it is a simple cleaning schedule that turns one overwhelming project into small, predictable daily habits. Breaking tasks into daily, weekly, monthly, and seasonal frequencies keeps grime from ever building up to marathon levels, and it frees your weekends. Daily Habits: Fifteen to Twenty Minutes That Work Daily tasks are the foundation of the system. They take little time but have the biggest impact on how your home feels: Make the bed each morning; it takes under two minutes and instantly makes the bedroom look put together. Wipe kitchen counters and the sink after every meal so spills and crumbs never harden. Give the kitchen floor a quick sweep at day’s end so crumbs never get tracked through the house. Follow the one-load rule: wash, dry, fold, and put away a single load of laundry daily so the pile never becomes a mountain. The Weekly Reset: Bathrooms, Kitchen, and Dust The weekly clean is a deeper reset of the main living areas. You can do everything on one cleaning day or spread one or two rooms across the week, an approach called zone cleaning. Bathrooms deserve a full scrub for hygiene as much as appearance: the toilet inside and out, the shower and tub to stop soap scum before it thickens, the sink and countertops scrubbed and disinfected, the mirror polished streak-free, and the floor swept and mopped. In the kitchen, wipe down appliance exteriors including the refrigerator, dishwasher, microwave, and stovetop, clean the microwave interior by heating a bowl of water with vinegar to loosen grime, and mop the floor. Throughout the living areas and bedrooms, dust every surface, then vacuum carpets, rugs, and hard floors; regular vacuuming lifts the dust, dander, and allergens that would otherwise circulate. Monthly Projects for the Details Monthly tasks catch the slow, creeping grime that separates merely tidy homes from deeply clean ones. Wipe down baseboards, which collect dust and scuffs; clean light fixtures and ceiling fans; run an empty cleaning cycle on the washing machine to prevent soap scum and mildew; and clean the dishwasher filter to keep it performing well. Window sills and sliding door tracks also trap dirt and insects, so give them a monthly pass. Seasonal Projects: The Whole-Home Reset Every quarter, set aside time for the big jobs. Empty the refrigerator and freezer, wipe down shelves and drawers, and discard expired food. Wash windows inside and out, deep clean carpets and upholstery with a rented machine or a professional service, and organize closets and pantries while decluttering. Season-specific extras include cleaning the gutters in the fall and pressure washing the deck in the spring. Frequency Typical tasks Time tip Daily Make beds, wipe counters, quick sweep, one load of laundry Batch these into a 20-minute evening routine Weekly Bathroom scrub, appliance wipe-downs, dusting, vacuuming, mopping Assign one or two rooms per day Monthly Baseboards, light fixtures, washing machine cycle, window sills Pair with bill-paying day as a reminder Seasonal Fridge deep clean, windows, carpets, closets, gutters, deck Pick one weekend per season and book help early Make the Schedule Fit Your Life A schedule is a template, not a rigid document. If you live alone and rarely cook, the kitchen needs less attention; if you have kids and pets, daily floor care and weekly vacuuming become non-negotiable. Task batching helps some households: make Monday dusting day and Tuesday floor day so you stay focused with one set of tools. A clear schedule also makes delegation easy, since everyone in the family knows which tasks belong to which day, removing the constant negotiation about who cleans what. Above all, aim for progress, not perfection. Miss a day and simply pick it up tomorrow; because the system prevents buildup, one skipped task never snowballs into a disaster. Cleaning science supports the approach: the CDC explains that regular cleaning and disinfecting of your home removes most germs from surfaces, and that handwashing is one of the best ways to stop germs from spreading between family members. Frequently Asked Questions About Cleaning Schedules How long should daily cleaning take? Fifteen to twenty minutes is enough when you focus on the high-impact habits: making the bed, wiping counters after meals, a quick floor sweep, and one load of laundry. Is it better to clean one room a day or everything weekly? Both work. Zone cleaning, with one or two rooms per day, keeps the workload even, while a single weekly cleaning day suits people who prefer to finish everything at once. What should I clean monthly that people usually forget? Baseboards, ceiling fans and light fixtures, the washing machine drum, dishwasher filter, and window sills and sliding door tracks are the details that quietly collect grime. How do I stay consistent with a cleaning schedule? Keep tasks small and visible, pair them with existing habits such as morning coffee or evening TV, and remember that a missed day is fine as long as you resume the next day. When should I hire professional cleaners instead of doing it myself? Monthly and seasonal projects such as carpet deep cleaning, fridge resets, and whole-home refreshes are ideal to outsource, especially before holidays or when allergies act up. Keep the Schedule on Track With Professional Help The heaviest items on your schedule do not have to be DIY. Toronto Shine Cleaning’s regular cleaning service handles the weekly core clean, while our deep cleaning service covers the monthly and seasonal projects that need extra muscle. We serve homes across Toronto and the GTA, and our reviews show what consistent cleaning looks like. Call (647) 424-0355 or check our pricing to build your routine around a professional team.

Cleaning Schedule: A Room-by-Room Guide to Your Perfect Cleaning Schedule Read More »

woman preparing the house for Halloween

Halloween Cleaning: The Secret to a Stress-Free Halloween? A Pre-Holiday Clean.

Why a Pre-Halloween Clean Makes the Holiday Easier Halloween planning usually centers on costumes, candy, pumpkins, and decorations, but the step that makes everything else work is a pre-holiday clean. A targeted cleaning session that moves from the outside of your home inward prepares your walkway, entryway, and main rooms for trick-or-treaters, guests, and decorations. It is not just about tidiness: clearing wet leaves and clutter prevents slips, a wiped-down kitchen makes treat prep safer, and a dust-free living room shows off your spooky decor instead of hiding it. Start Outside: Walkway, Porch, and Front Door The exterior is where the Halloween experience begins, so it deserves the first pass. The walkway, porch, and front door form the stage for the whole evening and the first point of contact for every visitor. Clear the Walkway and Porch In October, the path to your door is often covered with fallen leaves, twigs, and mud. Damp leaves make the path genuinely slippery, a real risk for small children in bulky costumes moving around in the dark. Sweep the entire walkway from the sidewalk to the front steps, then spray it with a garden hose to wash away residual grime. On the porch, remove leftover summer items such as empty planters, garden tools, and worn-out mats, then sweep the whole surface, paying attention to corners where dust and spiderwebs collect. Real webs usually just look neglected, so clear them away to make room for the fake ones. Wipe Down the Door, Windows, and Lights The front door is the centerpiece of the evening. Wipe it down with a damp cloth and warm water with a few drops of dish soap to remove fingerprints and summer dust, and clean the door handle and hardware while you are at it. Windows beside the entry deserve the same attention, since clean glass makes silhouettes, clings, and lighting effects pop; a half-and-half spray of white vinegar and water, wiped with a microfiber cloth or squeegee, does the job. Wipe railings and handrails too, because parents and kids will grip them in the dark. Finally, dust the exterior light fixtures, where built-up dirt and dead insects can dim the glow, and replace any burned-out bulbs so the path and your best decorations stay visible. Sweep leaves and debris from the whole walkway. Clear summer planters, tools, and worn mats from the porch. Wash the front door, handle, windows, and railings. Dust light fixtures and check every bulb. Clean the doormat and the floor beneath it. Inside: Entryway and Main Living Areas Inside, start with the entryway, which faces a constant parade of opening doors on Halloween night. Clear clutter like shoes, bags, and mail so there is a wide, safe path for groups of excited children. Take the doormat outside and scrub it with soap and water if it is a durable outdoor style, or vacuum it well if it is an indoor mat, and clean the floor underneath, which traps surprising amounts of grit. This is also the moment to place a boot tray by the door for wet footwear in the months ahead. From there, move to the living areas visible from the front door: dust the mantel, bookshelves, and tables where candy bowls will sit, then vacuum floors and upholstery. Removing dust and allergens now means better indoor air quality once the decorations go up and the windows stay closed for winter. Kitchen and Bathroom Prep for Guests and Treats The kitchen becomes the command center for Halloween treats, so clear the countertops and wipe them down with a sanitizing cleaner before any baking or candy prep begins. The CDC’s food safety basics start with keeping hands and surfaces clean, and its cleaning and disinfecting guidance explains when to go beyond a simple wipe. Take the chance to sort through the refrigerator, discarding old leftovers to make room for party platters and drinks. The guest bathroom deserves a quick seasonal refresh: shine the mirror, scrub the sink and toilet, wipe the countertop, and put out fresh hand towels with a full supply of soap and toilet paper. Clean the Decorations and Their Storage Space Before carrying bins up from the basement or garage, sweep the floor and wipe the shelves where they were stored so you do not track old dust into clean rooms. As you unpack, give each item a quick wipe: plastic pumpkins, ceramic figures, and other hard decorations gather a layer of dust in storage, and fabric pieces such as throws and wall hangings freshen up in the dryer on a no-heat air cycle. Area Pre-Halloween focus Why it matters Walkway and porch Sweep leaves, hose off grime Prevents slips in the dark Front door and windows Wipe surfaces, clean glass Clean backdrop for decor Entryway Declutter, clean doormat Safe path, less dirt tracked in Living areas Dust and vacuum Better air quality before winter Kitchen and bathroom Sanitize counters, stock supplies Safe treat prep, happy guests Frequently Asked Questions About Halloween Cleaning How early should I clean before Halloween? Aim for the weekend before, so the house is ready for decorating, costume try-ons, and any early parties, with a quick touch-up on the day itself. Is cleaning the walkway really necessary? Yes. Wet leaves and debris are a slipping hazard for children in bulky costumes moving in the dark, and a clear path also makes your home look inviting. What if I am not hosting a party? The essentials stay the same: safe walkways, a clean entry for trick-or-treaters, a tidy kitchen for candy, and a stocked bathroom. Skip only the extra party prep. How do I clean decorations that sat in storage? Wipe hard items such as plastic pumpkins and ceramic figures with a damp cloth, and freshen fabric pieces in the dryer on an air-only cycle to remove dust. Should I clean before or after decorating? Clean first, then decorate. A dust-free base makes the decorations look better and keeps you from wiping around fragile pieces later. Get

Halloween Cleaning: The Secret to a Stress-Free Halloween? A Pre-Holiday Clean. Read More »

clean carpet

DIY vs. Store-Bought: What’s the Best Carpet Cleaning Solution?

DIY vs. Store-Bought: What’s the Best Carpet Cleaning Solution? Every homeowner asks this question, and the honest answer is that no single product wins for every situation. The cleaner that lifts a pet stain may do nothing for grease, and the mixture that handles a small spill is not what you need for a full-room deep clean. The best carpet cleaning solution is the right solution for the right problem, so the real skill is knowing what each type of cleaner does and when to use it. The Chemistry Behind Carpet Cleaners Commercial and homemade carpet cleaners rely on the same few families of ingredients. Surfactants break the surface tension of water so it can penetrate fibers, latch onto greasy dirt, and hold it in suspension until it is blotted or extracted away; simple dish soap is a basic surfactant. Enzymes are proteins that break down other proteins, starches, and fats, which makes them the only real answer for organic stains like blood, grass, or urine. Solvents dissolve substances that water cannot, such as grease, oil, ink, and tar. Oxidizers release oxygen that breaks the chemical bonds of colored stains; hydrogen peroxide and sodium percarbonate, the active ingredient in OxiClean, are the most common examples. Ingredient What It Breaks Down Common Example Surfactants General dirt and light grease Clear dish soap Enzymes Proteins, starches, fats Protease, amylase, lipase cleaners Solvents Oil, ink, tar, wax Rubbing alcohol, citrus degreasers Oxidizers Colored stains like wine and coffee Hydrogen peroxide, sodium percarbonate DIY Carpet Cleaning Solutions That Work White vinegar and water is the classic first response: mix equal parts distilled white vinegar and water in a spray bottle, mist the area lightly, let it sit for 5 to 10 minutes, and blot with a clean, white cloth. Vinegar is a mild acid that dissolves grime, neutralizes alkaline messes, and deodorizes, but it can set protein-based stains like eggs or blood, so skip it there. Baking soda is a mild alkali that absorbs moisture and odors: sprinkle it dry over the carpet and leave it for several hours or overnight before vacuuming, or pile it onto a wet, greasy spill and let it form a dry crust, then scrape and vacuum. For general dirt, no more than one-quarter teaspoon of clear, simple dish soap in a cup of warm water gives extra lifting power, but overuse or poor rinsing leaves a sticky residue that attracts dirt faster than before. Hydrogen peroxide at 3 percent works on tough organic stains like blood, wine, or coffee: apply a small amount, let it bubble for 10 to 15 minutes, blot, and always test it in a hidden spot first because it can mildly bleach carpet color. When to Choose a Commercial Carpet Cleaner DIY solutions are great for everyday messes, but commercial products bring targeted chemistry for hard jobs. Enzyme-based cleaners labeled for pet stains and odors are the non-negotiable choice for urine, feces, vomit, blood, and food spills, because only enzymes truly break down the odor-causing proteins. Oxidizing cleaners are the go-to for red wine, juice, coffee, and tea. Solvent-based spotters handle grease, oil, and ink. Carpet shampoos for cleaning machines come in high-traffic, pet, and oxy formulas, and it is crucial to buy one designed for your machine so excess foam cannot damage the motor. Dry carpet cleaning powders are useful for natural fiber rugs and quick freshen-ups between deep cleans. Carpets trap dust and allergens, so a thorough clean also supports better indoor air quality. Technique Matters More Than the Product Even the best carpet cleaning solution fails when technique is wrong. Act fast, because fresh spills lift far more easily than set-in ones. Blot, never rub, working from the outside of the stain inward with a clean, white cloth. Always spot test any new product on a hidden area. Do not over-saturate, because soaking can damage the carpet backing and subfloor and invite mold and mildew growth. Rinse thoroughly by blotting with plain water after treatment, since leftover residue attracts dirt and creates dark spots over time. Around pets and children, prompt cleanup is part of everyday hygiene that keeps the whole household healthier. The Best Carpet Cleaner for Every Situation General dirt and light spills: DIY white vinegar and water solution. Pet urine and organic accidents: commercial enzyme-based cleaner. Red wine, coffee, or juice: commercial oxidizing (Oxi) cleaner. Grease or oil: absorb with baking soda, then a solvent-based spotter. Full-room deep clean: machine-compatible carpet shampoo, such as a pet formula. Frequently Asked Questions Is vinegar safe for all carpets? No. Vinegar is acidic, and it can react with and set certain protein-based stains like blood or eggs. Test it in a hidden area first, and never use it on stains you cannot identify. Can I use dish soap on carpet stains? Yes, in very small amounts: no more than one-quarter teaspoon of clear dish soap in a cup of warm water. Too much soap leaves sticky residue that attracts dirt, so rinse by blotting with plain water afterward. What removes pet urine smell from carpet? An enzyme-based cleaner is the only reliable answer. Enzymes break down the uric acid crystals and proteins that cause lingering odors, while vinegar or soap only mask them temporarily. How often should I deep clean my carpets? For a typical household, an annual professional deep cleaning is recommended, with more frequent cleanings for homes with pets, children, or heavy foot traffic. Does hydrogen peroxide bleach carpets? It can. Hydrogen peroxide is an oxidizer with a mild bleaching effect, so always test it in an inconspicuous spot, such as inside a closet, before treating a visible stain. Choosing the right carpet cleaning solution is detective work: identify the stain, understand the chemistry, and match the product to the problem. For a comprehensive professional deep clean that takes the guesswork out of the equation, Toronto Shine Cleaning uses professional-grade solutions and commercial equipment to tackle any stain on any type of carpet. Explore our deep cleaning service,

DIY vs. Store-Bought: What’s the Best Carpet Cleaning Solution? Read More »