Carpet and Rug Cleaning

Enzyme Cleaner

5 Common Mistakes That Render Your Enzyme Cleaner Useless

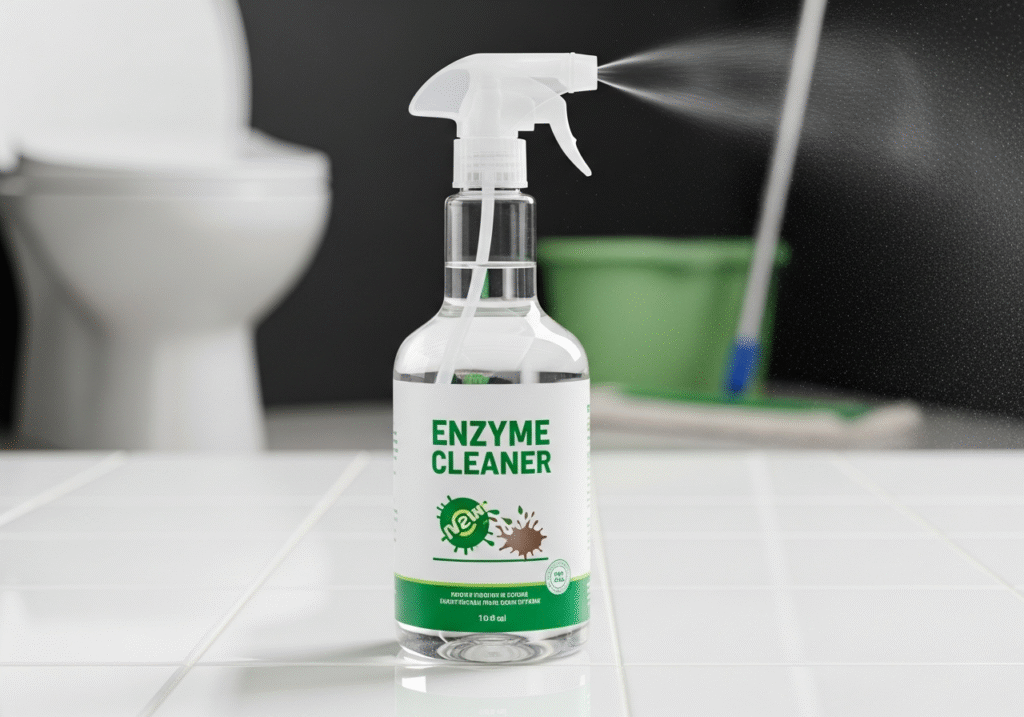
In the world of cleaning, there is a constant arms race between the mess and the method. For decades, the dominant strategy has been chemical warfare: using harsh solvents, high-alkaline degreasers, and corrosive bleaches to burn, dissolve, or bleach stains into submission. While these methods are effective for many surface-level issues, they often fail when it comes to the most persistent and unpleasant biological messes. The smell of pet urine that returns on a humid day, the grime in the grout lines that never seems to whiten, or the lingering odor in a drain are all symptoms of organic matter that standard chemicals cannot remove. The solution to these problems is not found in a stronger acid or a harsher solvent, but in biology. Enzyme cleaners represent a fundamental shift in how we approach hygiene, utilizing the power of nature to digest dirt rather than simply wiping it away. How Does it Work? To understand why enzyme cleaners are unique, one must understand what they are composed of. These cleaners are bio-enzymatic formulations. They contain beneficial bacteria along with enzymes. The bacteria are the workers, and the enzymes are the tools they produce. When you spray an enzyme cleaner on a stain, the bacteria remain dormant until they hit a food source—the stain. Once activated, they produce enzymes to break down complex molecules into smaller, simpler pieces. For example, a protease enzyme breaks down proteins (like blood or meat), a lipase enzyme breaks down fats and oils (grease), and an amylase enzyme breaks down starches. The bacteria then consume these broken-down particles, converting them into carbon dioxide and water. Essentially, the cleaner literally eats the stain until it is gone. Animal Urine The most famous and arguably most critical application for enzyme cleaners is in the realm of pet ownership. Anyone who has house-trained a puppy or cared for an aging cat knows the nightmare of urine stains. Urine is composed of urea, urochrome, and uric acid. Standard detergents and water can wash away the urea and urochrome, which removes the sticky texture and the yellow color. However, uric acid forms crystals that are nonsoluble in water and bond tightly to surfaces like carpet fibers, wood, and concrete. Traditional cleaners might mask the smell temporarily with perfume, but they leave the uric acid crystals behind. When the humidity rises or the area gets wet again, these crystals re-hydrate and release strong ammonia gas, bringing the smell back. This signals to the pet that this spot is a “bathroom,” encouraging repeat offenses. Enzyme cleaners specifically formulated with uricase are the only way to break down these crystals permanently. The enzymes digest the uric acid structure, eliminating the source of the odor completely rather than just covering it up. Beyond pet messes, enzyme cleaners are the secret weapon for bathrooms. The pink or orange slime that accumulates in shower corners and around drains is a biofilm—a colony of bacteria that feeds on soap scum and body oils. Because grout is porous, this biofilm can root itself deep into the cement, making it reachable only by scrubbing until your knuckles are raw. Enzyme cleaners work differently. When applied to grout and allowed to sit, the enzymes seep into the pores. They break down the protein and fat structures of the soap scum and body oils that bind the dirt to the tile. Over time, this biological action loosens the grime so it can be easily rinsed away. It is a slower process than using bleach, but it is far more effective at removing the root cause of the discoloration without damaging the grout sealant or etching the tile. Grease The kitchen is another arena where enzymes shine, particularly in the battle against grease. Grease traps and kitchen drains are notoriously difficult to maintain because fat hardens as it cools, coating pipes and causing slow drainage. Chemical drain openers rely on heat and caustic reactions to burn a hole through the clog, which can damage old plumbing and is dangerous to handle. Enzyme drain maintainers are a safer, preventative alternative. When poured down the drain, the lipase enzymes coat the inside of the pipe and slowly digest the organic buildup. They turn the hard grease into water-soluble liquid that flushes away. While they won’t clear a solid hair clog instantly like a snake would, regular use keeps the pipes flowing freely and eliminates the rotting food smell that often rises from the sink. Laundry is perhaps the most undervalued use case for these biological cleaners. Many organic stains—blood, sweat, grass, and baby formula—are protein-based. Hot water and standard detergent can actually “cook” these proteins, setting the stain into the fabric permanently. Cold water and an enzyme soak are the antidote. The enzymes locate the protein strands woven into the fabric and snip the chemical bonds holding them to the cloth. This is why many high-end laundry detergents now boast “bio-active” ingredients. For athletic wear that retains the smell of sweat even after washing, an enzyme soak is often the only way to remove the body oils trapped in the tight synthetic weave of modern performance fabrics. Dwell Time However, the effectiveness of enzyme cleaners comes with a specific set of rules that differs from traditional cleaning. The most important variable is time. In the cleaning industry, this is known as “dwell time.” Unlike a spray-and-wipe glass cleaner, enzymes need time to eat. If you spray a urine stain and wipe it up ten seconds later, you have accomplished nothing. The bacteria need hours, sometimes even days, to fully digest a deep stain. For a carpet stain, the instruction is often to saturate the area—soaking it all the way down to the pad—and then cover it with a damp towel to keep the area moist. Enzymes stop working if they dry out. The bacteria need a moist environment to survive and reproduce. By keeping the stain wet and covered, you allow the colony to expand and consume the waste until the food source is

5 Common Mistakes That Render Your Enzyme Cleaner Useless Read More »

woman needing to organize the house for holiday guests

5 Ways to Organize Your Home to Accommodate Extra Guests

The end of the year brings a significant change to the atmosphere of a home, and we need to organize for guests; the house transforms from a private sanctuary, used for daily work and study routines, into a semi-public space dedicated to hospitality and celebrations. This metamorphosis brings with it a unique set of logistical challenges. Hosting guests, whether for a single dinner party or an extended stay, requires more than just a surface-level clean; it demands a structural reorganization of the living environment. The house must function differently when occupancy doubles or triples. Pathways need to be clearer, storage needs to be accessible, and the visual noise of daily life needs to be silenced to create a welcoming backdrop for the festivities. Organizing for guests is an exercise in empathy, requiring the host to walk through their own home with the eyes of a stranger to identify the friction points that might go unnoticed during the rest of the year. Entryway The organization process must begin at the threshold. The entryway is the bottleneck of the holiday home. In the winter months, this area is subjected to an onslaught of bulky coats, wet boots, scarves, and bags. A common mistake is failing to clear the family’s personal gear before the guests arrive. If the coat rack is already full of the host’s jackets, guests are left holding their outerwear or piling it on a bed in a distant room. The first step of organization is a ruthless purge of the front hall closet. Move the family’s winter gear to a secondary location, such as a garage, a basement, or a bedroom closet, to leave the prime real estate empty for visitors. Provide ample, sturdy hangers—not the flimsy wire ones that buckle under the weight of a wool peacoat. If the closet is small, setting up a temporary garment rack can prevent the “coat pile” on the sofa, which immediately clutters the living space. Floor space in the entryway is equally critical. In many regions, the end of the year means snow, mud, and salt. A standard doormat is rarely sufficient for a party’s worth of wet boots. Investing in large, rubber boot trays protects the flooring and keeps the slush contained. Organizing this area also means removing the visual clutter of mail, keys, and school permissions forms that tend to accumulate on entry tables. A clear surface at the door allows guests to set down a purse or a gift comfortably without knocking over a stack of bills. It sets the tone for the rest of the home; a chaotic entryway signals a chaotic visit, while a streamlined one suggests order and calm. Guest Room Moving into the guest accommodations, the definition of organization shifts from storage to comfort. If you have a dedicated guest room, it often serves as a storage unit for the other eleven months of the year, housing wrapping paper, out-of-season clothes, or exercise equipment. This debris must be removed, not just pushed into the corner. The guest needs to feel that the room was prepared specifically for them, not that they are invading a storage locker. This means clearing out the closet and the dresser drawers. It is uncomfortable for a guest to live out of a suitcase for a week because the drawers are full of the host’s old sweaters. Empty at least two drawers and provide cleared hanging space. The bedside area requires specific attention to modern needs. In the past, a lamp and a clock were sufficient. Today, the most important amenity is an accessible power outlet. Guests should not have to crawl under the bed or move heavy furniture to charge their phones. Organizing the room means checking the outlet situation and, if necessary, adding a power strip or an extension cord that sits on the nightstand. Bedding should be checked for freshness well in advance. Linens that have sat in a cupboard for a year often develop a stale, musty smell. Washing everything, including the duvet cover and the mattress protector, ensures the bed feels fresh. Adding an extra blanket at the foot of the bed is a functional organizational touch that prevents the guest from having to ask for more heat in the middle of the night. The bathroom is perhaps the most scrutinized room in the house. When organizing for guests, the goal is to make the space intuitive. Guests should never have to search for the essentials. Toilet paper should be stocked visibly, either in a basket or a clear stack, so there is no awkwardness when a roll runs out. Towels need to be distinct and plentiful. A common organizing tactic is to provide a specific color of towel for guests, separating them from the family’s daily linens. This prevents confusion and ensures that the guest always knows which towel is theirs. The countertops must be cleared of the host’s personal clutter. Toothbrushes, makeup bags, and razor stands should be stowed away in drawers or medicine cabinets. A guest needs surface area to place their own toiletries. If the shower is to be shared, clear the rim of the tub of half-empty shampoo bottles. A streamlined shower feels cleaner and more inviting than one crowded with the family’s grooming products. Kitchen The kitchen, usually the hub of the holiday, requires a zoning strategy. The danger in a kitchen during a party is that guests naturally congregate there, often blocking the work triangle (stove, sink, refrigerator) and hindering the cook. Organizing the kitchen for guests involves creating “self-serve” stations that draw people away from the active cooking zones. Set up a drinks station with glasses, ice, and beverages on a sideboard or a separate table. Create a snack zone on the island or a coffee table in the adjacent room. By physically separating the consumption areas from the preparation areas, you manage the flow of traffic. Inside the kitchen, the countertops must be ruthlessly decluttered. Appliances that are not essential for the holiday meal—the toaster,

5 Ways to Organize Your Home to Accommodate Extra Guests Read More »

flu season

Flu Season: Is Your “Clean” Home Making You Sick? The Hidden Germs You Missed

Get ready for flu season, december in Canada is a time of duality. On one hand, it is the season of warmth, celebration, and gathering, where homes are filled with the scent of baking and the sounds of family. On the other hand, it is the undisputed peak of the viral season, a time when the harsh weather forces us indoors, sealing us into environments where air is recirculated and physical proximity is unavoidable. As the temperature drops and the windows are latched tight to preserve heat, our homes transform into perfect incubators for the influenza virus, the common cold, and various other respiratory pathogens. While we often focus on washing our hands, we frequently neglect the environment those hands interact with. We scrub the floors and vacuum the carpets to make the house look presentable for guests, but we often miss the invisible landscape of germs that colonize the small, high-traffic areas of our homes. True sanitation during flu season requires a shift in perspective from cleaning for aesthetics to cleaning for health, focusing intensely on the “high-touch” points that serve as the transit hubs for infection. Cleaning and Disinfecting The first step in fortifying your home against illness is understanding the crucial distinction between cleaning and disinfecting. These terms are often used interchangeably in casual conversation, but in the world of hygiene, they represent two distinct physical processes. Cleaning is the removal of visible soil, dust, and debris using soap, water, and friction. It physically lowers the number of germs by washing them away, but it does not necessarily kill them. Disinfecting, conversely, is a chemical process designed to destroy pathogens on a microscopic level. The mistake most homeowners make is attempting to disinfect a dirty surface. If a doorknob or a countertop has a layer of grease, dust, or sticky residue on it, that organic matter acts as a shield for bacteria and viruses. The disinfectant cannot penetrate the soil to reach the germ underneath. Therefore, the rule for flu season is rigid: clean first, then disinfect. You must remove the barrier of dirt before you can effectively neutralize the threat. Once the surface is clean, the efficacy of your disinfection efforts depends entirely on a concept known as dwell time. We live in a culture of immediacy, conditioned by commercials that show a person spraying a counter and wiping it dry instantly. In reality, this “spray and wipe” technique is almost useless against robust viruses like the flu. Chemical disinfectants require time to break down the cell walls of bacteria or the protein shells of viruses. If you wipe the product away immediately, you are essentially just giving the germs a bath. Most EPA-registered disinfectants require the surface to remain visibly wet for anywhere between three to ten minutes to achieve the kill rate promised on the label. This requires patience. It means spraying the light switch or the faucet handle and walking away, letting the liquid sit and do its work before wiping up any excess. Ignoring dwell time is the primary reason why flu spreads through households even when they claim to be cleaning regularly. Door Handle The entryway of the Canadian home is the primary breach point for pathogens. It is where the outside world makes contact with the sanctuary of the interior. When we come in from the cold, our hands are often the first things to touch the hardware. The exterior and interior doorknobs, the deadbolt turn, and the handle of the storm door are constantly bombarded with bacteria from public transit, grocery carts, and workplace surfaces. Yet, these hardware pieces are rarely scrubbed. The keypad of a garage door opener or a smart lock is even worse, as the textured buttons trap oils and dirt, creating a sticky medium that holds onto viruses for days. Sanitizing these points should be the first ritual of returning home. It is not enough to just wipe the knob; the edge of the door where people grab to pull it shut is often overlooked and heavily contaminated. Kitchen Utensils Moving into the heart of the home, the kitchen acts as the central gathering hub during the holidays, making it a high-risk zone for cross-contamination. While countertops usually get wiped down, the hardware of the kitchen is frequently ignored. Think about the refrigerator handle. It is touched by every member of the family, often while cooking, eating, or snacking. It is grabbed by unwashed hands reaching for milk or leftovers. The same applies to the handle of the microwave, the oven, and the dishwasher. These appliances are touched dozens of times a day, yet they are often only cleaned when there is a visible spill. Small appliances are equally guilty. The handle of the coffee pot, the button on the kettle, and the knobs on the toaster are fomites—objects capable of carrying infection. Even the salt and pepper shakers, passed from person to person during a holiday dinner, can act as vectors for the flu. A nightly routine of wiping these specific handles with a disinfectant can significantly reduce the viral load in the kitchen. Controls The living room offers a different set of challenges, primarily centered around entertainment and relaxation. The remote control is arguably the single filthiest object in the entire house. It is handled by everyone, often while eating popcorn or snacks, and it inevitably falls on the floor or gets stuffed between sofa cushions. The rubber buttons are difficult to clean, trapping debris and moisture that bacteria thrive on. Similarly, video game controllers are held for hours at a time in warm, sweating hands, creating a perfect environment for bacterial growth. These electronics cannot be sprayed directly with liquid, as moisture will damage the circuitry. They require careful cleaning with disinfectant wipes that are damp but not dripping, ensuring that the chemical gets into the crevices between the buttons without seeping into the device. Light switches in the living room and hallways are another universal touchpoint. The toggle switch itself

Flu Season: Is Your “Clean” Home Making You Sick? The Hidden Germs You Missed Read More »

Dangerous to Your Health: 5 Common Products That are Dangerous For Your Daily Life

What would be dangerous to your health? The modern home is often viewed as a sanctuary, a controlled environment where we retreat from the pollution and chaos of the outside world. We scrub, spray, and polish surfaces with the intention of creating a safe, hygienic space for our families. However, there is a profound irony hidden within the cabinets under our sinks. In our aggressive pursuit of cleanliness, we have introduced a chemical arsenal that often makes the air inside our homes significantly more toxic than the air outside. The products we trust to sanitize our countertops and brighten our floors are frequently composed of volatile compounds that are potentially dangerous to your health. Understanding the chemistry of these common household items is the first step in dismantling the dangerous myth that a strong chemical smell equates to a clean home, when in reality, it often signals the presence of toxins. 1.Sodium Hypochlorite The most ubiquitous and perhaps most misunderstood chemical in the cleaning arsenal is sodium hypochlorite, commonly known as bleach. It is the default weapon for many when tackling mold, mildew, or bathroom grime. The risk of bleach lies not just in its corrosive nature, which can burn skin and eyes upon contact, but in its respiratory impact. Bleach is highly volatile. When used in a confined space like a shower or a small bathroom, the fumes react with organic matter to create chlorinated volatile organic compounds that are dangerous to your health, especially if you suffer from respiratory issues. inhaling these fumes causes immediate irritation to the mucous membranes of the throat and lungs. Furthermore, the chemical instability of bleach leads to one of the most common and deadly household accidents: the mixing of cleaners. If bleach is mixed with ammonia—which is found in urine and many glass cleaners—it produces chloramine gas. If mixed with acidic cleaners, it releases chlorine gas. Both of these reactions create an immediate atmospheric condition that is acutely dangerous to your health, leading to hospitalization or worse. 2.Ammonia Ammonia itself is another staple that warrants extreme caution. It is the primary active ingredient in many glass and window cleaners due to its ability to evaporate quickly without streaking. However, ammonia is a powerful irritant. Upon inhalation, it seeks out moisture, meaning it aggressively attacks the eyes, the throat, and the lungs. High concentrations of ammonia are dangerous to your health, causing chemical burns to the respiratory tract and exacerbating chronic conditions like asthma. The risk is compounded by the method of application. Most ammonia products are sold in spray bottles. When the trigger is pulled, the chemical is aerosolized into a fine mist. This mist hangs in the breathing zone, ensuring that the person cleaning inhales a significant dose with every breath. The distinct, sharp odor of ammonia is a warning signal from the body that the environment has become dangerous to your health, yet many push through the discomfort under the false impression that the pain is necessary for cleanliness. 3.Fragrance or Parfum Beyond the obvious corrosives, there is a silent and pervasive threat hiding in almost every bottle: fragrance. The word “fragrance” or “parfum” on an ingredient label represents a regulatory loophole. It is considered a trade secret, meaning manufacturers are not required to list the hundreds of specific chemicals that make up their signature scent. Within this chemical cocktail, one often finds phthalates. Phthalates are a group of chemicals used to make scents last longer, but they are also known endocrine disruptors. They mimic hormones in the body, potentially interfering with reproductive development, making them subtly but profoundly dangerous to your health over the long term. When you spray a lemon-scented counter spray or plug in a floral air freshener, you are releasing these compounds into the air. They settle on surfaces, are absorbed through the skin, and are inhaled into the bloodstream. 4.Air Fresheners and Fabric Deodorizers Air fresheners and fabric deodorizers are particularly egregious offenders in this category. These products do not clean; they coat. Many air fresheners work by releasing a nerve-deadening agent that temporarily interferes with your ability to smell, or by coating the nasal passages with an oily film. Others simply overload the air with volatile organic compounds (VOCs) to mask the underlying odor. These VOCs contribute to poor indoor air quality, leading to headaches, dizziness, and fatigue. The use of aerosol sprays adds another layer of risk, as the propellants themselves can be flammable and irritating to the lungs, making the very act of freshening the room dangerous to your health. Using these products is essentially solving a hygiene problem with a pollution problem, replacing a bad smell with a toxic chemical cloud. 5.Oven Cleaners and Drain Openers The heavy artillery of kitchen cleaning, oven cleaners and drain openers, represents the most immediate physical danger. Oven cleaners are typically formulated with lye (sodium hydroxide), a caustic substance that dissolves baked-on grease by turning it into soap. This chemical is so corrosive that it can cause permanent blindness if it splashes into the eyes and severe chemical burns on the skin. The fumes generated when spraying a cold oven are bad enough, but many people make the mistake of spraying the cleaner onto a warm oven. This vaporizes the lye, creating a toxic cloud that fills the kitchen and is immediately dangerous to your health upon inhalation. Similarly, drain openers rely on concentrated sulfuric acid or lye to burn through hair and grease clogs. These chemicals generate intense heat and can damage old pipes, but the health risk to the user is paramount. If the product fails to clear the clog and a plumber later tries to snake the drain, the splashing backwash creates a scenario that is physically dangerous to your health. 6.Quats In the post-pandemic world, the use of quaternary ammonium compounds, or “quats,” has exploded. These are the active ingredients in most disinfectant wipes and sprays. While effective at killing bacteria and viruses, quats are powerful lung irritants. There is growing evidence to suggest that frequent exposure to quats

Dangerous to Your Health: 5 Common Products That are Dangerous For Your Daily Life Read More »

Baseboard Heaters routine day

Baseboard Heaters: The Step-by-Step Heater Cleaning Routine

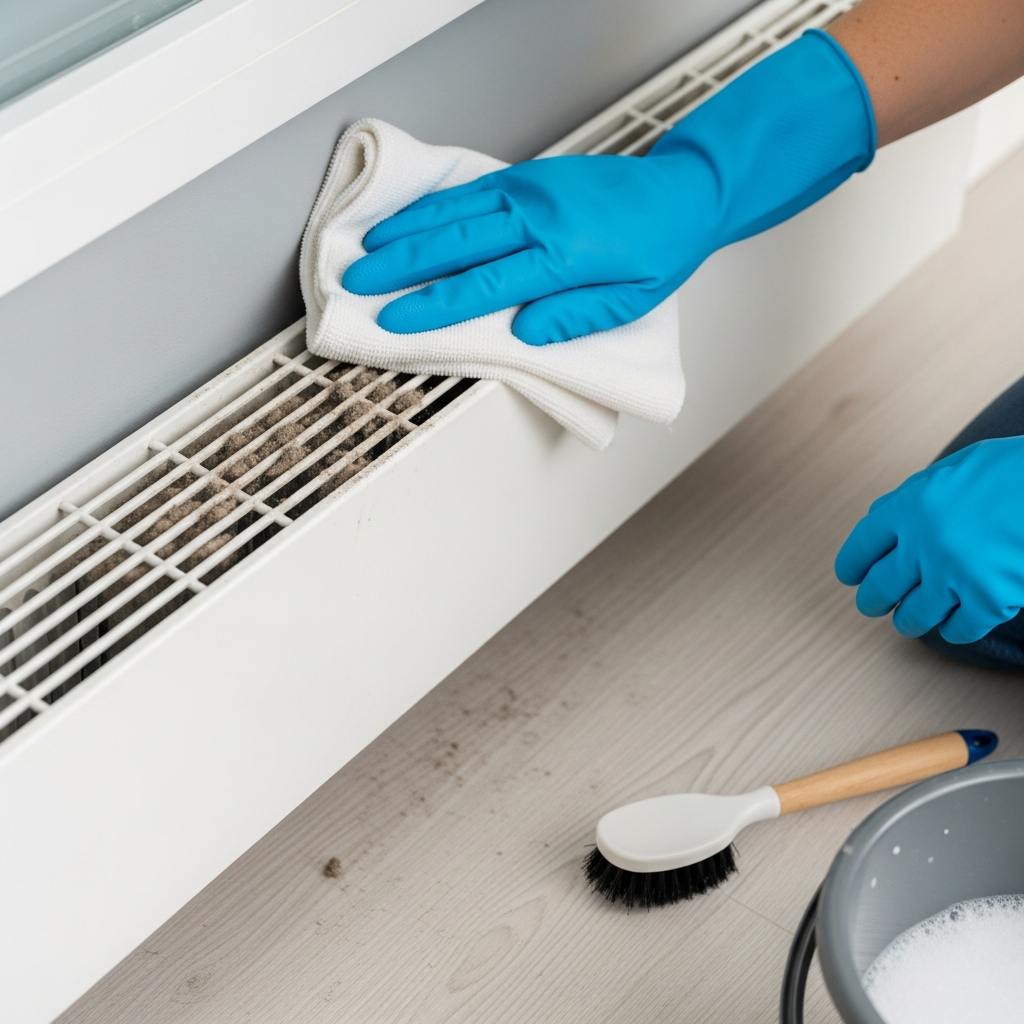
Baseboard heaters are the silent, often ignored workhorses of residential heating. In many regions, particularly in older apartments and homes where retrofitting ductwork for forced air is structurally impossible, these metal units are the primary source of warmth. They sit unobtrusively at the floor level, usually beneath windows, occupying a visual blind spot that allows them to be easily disregarded until the first cold snap of autumn arrives. It is in that moment, when the thermostat is finally turned up, that the distinct, acrid scent of burning dust fills the room, signaling months of neglect. This smell is not merely a nuisance; it is the olfactory evidence of a system that is choked, inefficient, and potentially dangerous. While baseboard heaters are mechanically simple—essentially a heating element inside a metal pipe surrounded by aluminum fins—their placement and design make them magnets for the worst kind of household debris. Maintaining them is not just a matter of cleanliness; it is a critical component of energy efficiency, air quality, and home safety. How Does it Work? To understand why cleaning these units is so vital, one must first understand the physics of how they operate. Baseboard heaters rely on convection. Unlike a furnace that uses a blower fan to force air through vents, a baseboard heater is a passive engine. It utilizes the natural law that hot air rises and cold air sinks. Cold air from the floor creates a vacuum effect as it is drawn into the bottom of the heater. It passes over the heating element, warms up, and then rises out of the top of the unit, displacing the cooler air in the room. This cycle creates a continuous, silent current of air circulation. However, this same current acts as a low-level vacuum cleaner for the home. As the air is drawn into the bottom of the unit, it carries with it everything that settles on the floor: pet hair, human dander, textile fibers, and general dust. Because the heater is located at the lowest point of the room, it inhales the heaviest concentration of particulate matter. Once this debris enters the metal housing, it encounters the heat exchanger. This component consists of a central pipe surrounded by hundreds of thin, sharp aluminum fins. These fins are designed to maximize surface area, allowing the heat from the pipe to transfer to the air as efficiently as possible. However, the tight spacing between these fins makes them a perfect trap for debris. The dust and hair do not simply pass through; they get caught on the jagged edges of the aluminum and wedged between the plates. Over time, this buildup forms a thick, felt-like blanket of grey fuzz. This blanket acts as an insulator. The entire purpose of the fins is to release heat, but the dust layer traps that heat against the metal. The result is a heater that has to work significantly harder and run for longer periods to raise the room temperature, leading to a direct and noticeable spike in electricity bills. You are essentially paying to heat the dust, not the air. Security Beyond the financial cost of inefficiency, there is a legitimate safety concern. The heating element inside an electric baseboard heater gets incredibly hot. While the metal housing remains touchable, the internal components reach temperatures high enough to singe organic matter. The “burning smell” that permeates a home in October is literally the combustion of the dust and hair that has settled on the element during the summer months. While most of this dust simply carbonizes and floats into the air as soot, a heavy accumulation of lint—which is highly flammable—poses a fire risk. If a piece of paper, a curtain, or a thick clump of pet hair falls directly onto the element, it can ignite. This risk is compounded by the fact that baseboard heaters are often hidden behind furniture or drapes, meaning a small smolder could go unnoticed until it becomes a significant problem. The health implications of a dirty baseboard heater are also frequently underestimated. As the unit heats up and burns off the accumulated dust, it releases particulate matter and chemical byproducts of combustion back into the room’s airflow. For individuals with asthma, allergies, or respiratory sensitivities, this creates a toxic environment. The convection current that heats the room also serves to circulate these allergens efficiently, ensuring they remain suspended in the breathing zone. Furthermore, the dark, warm environment inside a heater that is not in use during the spring and summer can become a harbor for mold or pests. Cleaning the unit is the only way to break this cycle of recirculating filth. Cleaning a baseboard heater requires a specific methodology because the internal components are delicate and sharp. The aluminum fins are incredibly pliable; they can be bent by a stray vacuum attachment or a clumsy finger. If the fins are bent flat against each other, the airflow is blocked, and the unit’s efficiency drops to zero in that spot. Therefore, the first step in any cleaning regimen must be safety—both for the user and the machine. The power must be turned off at the main breaker panel. Simply turning the thermostat down is insufficient, as a sudden drop in temperature could trigger the unit to activate while your hands are inside. A voltage detector is a handy tool to confirm the power is truly dead before opening anything. Vacuum Cleaner The exterior cover, or the faceplate, is usually removable, though the difficulty varies by model. Removing this panel provides access to the fins and the element. The initial attack on the dust should always be dry. Introducing water to a caked-on layer of dust creates mud, which is nearly impossible to remove from the tight crevices of the fins. A vacuum cleaner with a strong suction and a crevice tool is the best starting point. The goal is to suck out the loose debris from between the fins without dragging the hard plastic of the vacuum nozzle

Baseboard Heaters: The Step-by-Step Heater Cleaning Routine Read More »

Persian rug being used

Persian Carpet: How to Identify if Your Rug Needs a Professional Wash or Just a Vacuum

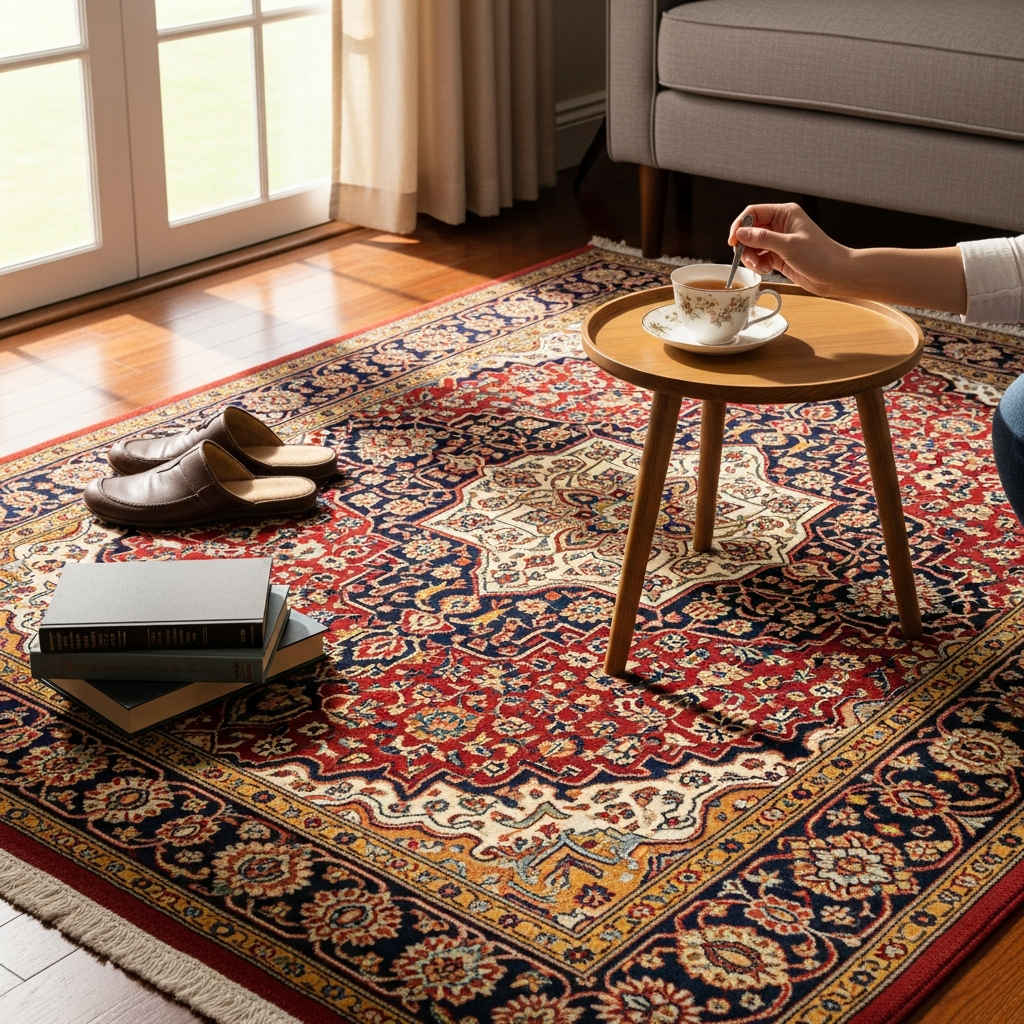
A Persian carpet is far more than a simple floor covering; it is a piece of art, a historical document, and often a family heirloom that carries the weight of generations within its intricate fibers. Unlike the mass-produced, synthetic wall-to-wall carpeting that covers the floors of modern offices, a genuine Persian rug is a living, organic entity. It is composed of natural materials—typically wool, silk, and cotton—and dyed with complex pigments. Because of this intricate biology and craftsmanship, the cleaning and maintenance of these textiles require a philosophy that is fundamentally different from standard household cleaning. Treating a hand-knotted Persian rug with the same chemicals and mechanical aggression used on a polyester rug is the fastest way to destroy its value. Understanding the anatomy of the rug is the first step in stopping the unintentional damage that many owners inflict in the name of cleanliness. Structure The structural integrity of a Persian rug relies on the millions of knots tied by hand around the foundation threads. This density gives the rug its durability, but it also creates a unique problem regarding soil accumulation. In a standard carpet, dirt sits relatively loosely on the backing. In a Persian rug, fine dust and grit migrate down through the pile and settle deep within the foundation of the knots. This debris is not just unsightly; it is mechanically destructive. Under a microscope, these particles look like tiny shards of glass. Every time you walk over the rug, the pressure of your foot grinds these sharp particles against the delicate fibers, acting like a slow-motion guillotine that slices the wool at the base. Standard vacuuming is often insufficient to remove this deep-seated sediment, and using a vacuum with a beater bar—the rotating brush roll found on most upright machines—is a primary cause of damage. The beater bar pulls at the knots, shreds the delicate pile, and can tear the fringes off completely. The correct approach is to use suction only and to vacuum the back of the rug occasionally to vibrate the dirt out of the foundation using gravity. Cleaning Products Beyond the physical removal of dust, the chemical interaction between cleaning agents and the rug’s fibers is a minefield of potential disasters. Wool is a protein fiber, similar to human hair, protected by a layer of scales and natural oils called lanolin, which provide a soft sheen and stain resistance. Most commercial carpet cleaners are highly alkaline, formulated to blast through synthetic grease. When these products touch wool, they strip away the lanolin, leaving the fibers brittle, dry, and dull. High alkalinity can even cause a chemical burn, turning the wool yellow or brown permanently. The cleaning of a Persian rug requires a pH-neutral or slightly acidic solution that respects the protein structure of the wool. This is why traditional methods often utilize vinegar or specialized plant-based shampoos rather than harsh industrial detergents. The stability of the dye is another critical factor. Many older or tribal rugs use vegetable dyes that are not chemically locked into the fiber like modern synthetics. These dyes can bleed when wet. A common tragedy occurs when a homeowner attempts to spot-clean a spill with hot water and a generic cleaner. The heat opens the fiber cuticles, allowing the dye to migrate. Suddenly, deep reds bleed into creamy white areas, creating a muddy, irreversible stain. Furthermore, the use of hot water is almost always a mistake because wool shrinks when exposed to heat and agitation, a process known as felting. A hot steam cleaning session can distort the shape of the rug, causing it to buckle and ruin its ability to lay flat. Scrub Stain removal is the battlefield where most rugs are lost. The panic that sets in after a spill often leads to frantic scrubbing. This mechanical action is disastrous. When wet, wool fibers are swollen and vulnerable. Scrubbing distorts the pile, causing the fibers to untwist and fuzz, creating a texture difference called “blooming” that remains even after the stain is gone. The only correct immediate action is blotting—pressing straight down with a clean, white cotton towel to absorb liquid without lateral movement. Pet Urine Pet urine poses a specific, severe threat that goes beyond simple staining. Urine begins as an acid but creates a highly alkaline reaction as it decomposes. This shift can destabilize dyes, but more insidiously, it rots the cotton foundation of the rug, a condition known as dry rot. The salts left behind pull moisture from the air, keeping the foundation perpetually damp and feeding bacteria. This weakens the structural threads to the point where the rug can crack or tear when moved. Standard enzymatic cleaners often leave sticky residues that attract more dirt. Dealing with pet urine usually requires a full immersion wash by a professional to flush out the salts completely. The Fringe The fringe of the rug is another area of frequent abuse. The fringe is the end of the warp threads that form the rug’s skeleton. If the fringe unravels, the knots slide off, and the structure disintegrates. Homeowners often use bleach to keep the fringe white, but bleach degrades the cotton, causing the threads to become brittle and snap. The fringe should be cleaned gently with the same mild solution as the rest of the rug and never subjected to the vacuum cleaner’s beater bar. Water damage is frequently the result of improper drying after a DIY cleaning attempt. Because a Persian rug is dense, moisture trapped in the center becomes a breeding ground for mold and mildew if not dried rapidly. This can happen in as little as twenty-four hours, resulting in a distinct, permanent odor and fungal growth that eats away at the cellulosic fibers. Professional cleaning facilities use centrifuges and temperature-controlled drying rooms to ensure the rug is bone dry. Washing a rug on a driveway often results in a rug that stays wet for days, inviting rot. Steam Cleaning and True Rug It is also crucial to differentiate between steam cleaning

Persian Carpet: How to Identify if Your Rug Needs a Professional Wash or Just a Vacuum Read More »

december checklist

December Checklist: 11 Things You Must Do Before the First Major Snowfall

December in Canada is not just a month; it is a season unto itself, a period of profound transformation that demands respect and preparation. It is the time when the last vestiges of autumn are buried under a blanket of snow, and the rhythm of daily life shifts to accommodate the cold, the dark, and the festive rush. To navigate this month successfully is to engage in a proactive, methodical preparation that begins long before the first major snowfall. It is about creating a safe, warm, and efficient sanctuary, ensuring that you are ready not just to survive the winter, but to truly enjoy the unique beauty and calm it can offer. This is the essential checklist for preparing your home and life for a Canadian December. 1.The Gutters The first and most critical task begins at the highest point of your home: the gutters. If you have not done so already, this is your final warning. Once the deep freeze sets in, the leaves, twigs, and debris left in your gutters will become a frozen dam. When snow melts, this dam prevents water from draining properly, causing it to back up under your shingles, freeze again, and create destructive ice dams. This can lead to serious and costly damage to your roof, insulation, and interior walls. A thorough cleaning now, after most leaves have fallen but before the ice arrives, is a non-negotiable step in winterizing your home. 2.Water Sources With the high-up tasks complete, your attention must turn to ground level and the tools you will rely on all season. This means preparing your home’s exterior water sources for the freeze. Disconnect all garden hoses, drain them completely, and store them away. Shut off the water supply to all exterior taps from the valve inside your home, then open the outdoor tap to let any remaining water drain out. This simple, five-minute task prevents water from freezing and expanding inside your pipes, a catastrophic event that can lead to a burst pipe and a flooded basement. 3.Equipment Next, you must take stock of your snow and ice removal equipment. Do not wait for the first blizzard warning, when store shelves are bare and a sense of panic sets in. Locate your snow shovels and inspect them for cracks or damage. Ensure you have a supply of ice melt, sand, or environmentally friendly grit on hand and stored in an accessible location. A sturdy, sealed container is best to keep it from getting damp and clumpy. Check the ice scraper in your vehicle; if it is chipped or worn, replace it now. These are the basic tools of Canadian winter, and having them ready and waiting is the first step to a stress-free snow day. 4.Inspection Your home’s defenses against the cold must also be fortified. The drafts that were a minor annoyance in October become major drains on your heating bill and comfort in December. Conduct a thorough inspection of all windows and doors. Feel for drafts and look for visible gaps. Replace any worn or damaged weatherstripping around your doors. For older, drafty windows, applying a plastic window insulation film kit can make a remarkable difference in both your comfort and your energy consumption. It creates an insulating pocket of air that significantly reduces heat loss. 5.Heating System With the exterior secured, the focus shifts inward to the heart of your winter home: the heating system. The furnace, which has sat dormant for months, is about to become the hardest-working appliance in your house. The single most important task you can perform is to replace the furnace filter. A clogged, dirty filter restricts airflow, forcing the system to work harder, consuming more energy, and circulating dust and allergens throughout your home. This is a simple, inexpensive task that pays dividends in both air quality and efficiency. If you have a whole-house humidifier integrated with your furnace, this is the time to turn it on, clean its filter or pad, and set it to a comfortable level to combat the dry winter air. 6.Fireplace For those with a fireplace or wood stove, safety preparations are paramount. If you have not had your chimney professionally cleaned and inspected this season, do so immediately. The buildup of creosote from past fires is a serious fire hazard. Ensure your stock of firewood is dry, seasoned, and stored in a location that is protected from snow and moisture but allows for air circulation. Bringing in a small supply to keep near the hearth ensures you are always ready for a cozy fire on a cold night. 7.Emergency Kit December is also a month known for its powerful storms, which can lead to power outages. Preparing a home emergency kit is a fundamental part of Canadian winter readiness. This kit should be stored in an accessible location and include several reliable flashlights with fresh batteries, warm blankets, a first-aid kit, and a stock of non-perishable food and bottled water that can last your family for at least 72 hours. A battery-powered or hand-crank radio is essential for staying informed, and a fully charged portable power bank can be a lifeline for keeping your phone operational. 8.Supply This same principle of preparedness extends to your kitchen. Before the first major storm makes a trip to the grocery store a treacherous undertaking, take the time to stock your pantry and freezer with essentials. Ensure you have a good supply of staples like pasta, rice, canned goods, and coffee. A well-stocked freezer with easy-to-reheat meals can be a source of great comfort during a blizzard when you are content to be snowed in. 9.Deep Cleaning With the safety and functional preparations handled, you can turn your attention to getting your home ready for the festive season. A deep clean in late November or early December creates a fresh, welcoming canvas for decorations and guests. Focus on the areas that will see the most activity. Deep clean your kitchen, paying special attention to the oven. Running

December Checklist: 11 Things You Must Do Before the First Major Snowfall Read More »

entryway for winter dirt and salt

How to Set Up Your Entryway for Winter Muck and Salt – 6 Professional Tips

The arrival of November in Canada marks a significant shift in the battle to keep a home’s entryway clean. It is the beginning of the great transition, a season of muck and grit where the crisp, dry leaves of autumn give way to a persistent dampness. This is the month where the entryway of a home transforms from a simple threshold into a critical first line of defense against the elements. The challenge is no longer just dirt and dust; it’s a formidable combination of wet leaves, mud, melting frost, and the first insidious appearance of road salt. Failing to contain this mess at the door means it will inevitably be tracked throughout the entire house, staining carpets, scratching hardwood, and creating a constant, gritty film on every surface. Establishing a robust entryway system is not merely a matter of tidiness; it is a strategic necessity for preserving your floors and your sanity throughout the long winter ahead. 1.Outdoor Carpet The absolute foundation of this defensive system is a well-chosen and properly maintained set of mats. This is a two-part strategy that begins before anyone even steps inside. The exterior mat serves a single, crucial purpose: scraping. Its job is to aggressively remove the heaviest and most abrasive debris—clumps of mud, wet leaves, snow, and gravel—from the soles of footwear. A flimsy, decorative welcome mat is insufficient for this task. A proper Canadian winter mat needs to be a workhorse. Look for materials that are durable, bristly, and capable of withstanding freezing temperatures and moisture without cracking or rotting. Coir (coconut fiber), heavy-duty rubber with deep grooves, or synthetic turf designs are excellent choices. This mat should be the first point of contact, and its texture should actively encourage a thorough wipe of the feet. Maintaining this exterior mat is simple but vital. It needs to be shaken out vigorously on a regular basis to dislodge the trapped debris. Before a deep freeze sets in, a good hosing down can remove any caked-on mud, ensuring its scraping surfaces remain effective. 2.Interior Carpet Once inside, the second part of the mat strategy comes into play: the interior mat. Its function is different from its outdoor counterpart. While the exterior mat scrapes, the interior mat absorbs moisture and traps the finer grit and salt particles that the first mat missed. This mat needs to be large enough for someone to comfortably step inside with both feet and still have room to close the door and remove their shoes. A small rug that gets kicked aside is practically useless. The ideal interior mat has a high-absorbency surface, such as cotton or microfiber, which can wick away a surprising amount of water. Crucially, it must have a non-slip rubber backing. This not only prevents dangerous slips on a potentially wet floor but also protects the floor beneath it from trapped moisture that could cause damage, particularly to hardwood. The maintenance of the interior mat is more frequent. It should be vacuumed daily during this high-traffic season to lift the dry grit and salt crystals. Depending on the weather and the amount of traffic, it may need to be taken outside and shaken or even laundered weekly to maintain its absorbency and effectiveness. A saturated, dirty mat no longer absorbs anything; it simply becomes a platform for spreading the mess around. 3.Boot Tray Even the best mat system, however, will be overwhelmed by soaking wet boots or footwear caked in slush. This is where the second layer of defense, the boot tray, becomes indispensable. A boot tray is a simple piece of equipment—typically a shallow tray made of durable plastic or rubber with a raised lip around the edge—but its role is monumental. It is a containment field for the worst of the outdoor wetness. Placing a boot tray near the door provides a designated, waterproof area for wet and snowy footwear to be placed. It contains the puddles of melting snow, the drips of mud, and the corrosive salt brine, preventing them from ever touching your floor. This simple action protects the finish on your hardwood from being stripped by salt and prevents the grout in your tile from slowly deteriorating. Like the mats, the boot tray requires regular maintenance. It should be wiped dry and rinsed out frequently to remove the collected grime and salty residue. Allowing a pool of salty water to sit in the tray for days means that shoes will simply be sitting in the very substance you’re trying to avoid. 4.Sturdy Stool And Set of Hooks Creating a truly functional entryway goes beyond just mats and trays; it involves establishing a complete “unloading station.” This means thinking about the entire process of coming inside. Placing a small, durable bench or stool next to the boot tray provides a place to sit down while removing cumbersome winter boots, making the process easier and reducing the chance of hopping around on one foot and stamping mess onto the clean floor. Above this area, a set of strong hooks should be designated for wet outerwear. Jackets and coats damp from rain or melting snow can drip onto the absorbent mat or directly into the boot tray area, keeping that moisture contained in one easy-to-clean zone. This prevents family members from wearing wet coats further into the house and dripping on carpets or furniture. Inevitably, the defensive line will be breached. Gritty footprints will appear, and the tell-tale hazy white film of salt residue will begin to creep across the floor. How you deal with these incursions is critical to preventing long-term damage. The most important rule is to act quickly. Do not let salt and water sit on your floors. Salt is hydroscopic, meaning it attracts moisture, and when it dissolves into a brine, it becomes a potent chemical that can dull and strip the protective polyurethane finish from hardwood floors. On tile, it can seep into the porous grout lines, causing them to crack and crumble over time. 5.Cleaning The

How to Set Up Your Entryway for Winter Muck and Salt – 6 Professional Tips Read More »

6 Reasons Why Dry Cleaning is The Safest Option For Your Most Important Clothes

The term “dry cleaning” is one of the more misleading phrases in common use, as the process is neither dry nor, strictly speaking, just cleaning. It is a complex and highly specialized method of garment care that involves sophisticated machinery, a deep understanding of fabric science, and the precise application of chemical solvents. The core principle that separates dry cleaning from traditional laundering is the absence of water. Instead of H2O, garments are submerged in and cleaned with a liquid solvent that is specifically chosen for its ability to dissolve oils and greases without damaging delicate, water-sensitive fibers like silk, wool, rayon, or intricately constructed pieces like tailored suits and formal gowns. Water can cause these natural fibers to shrink, distort, or lose their color, but a solvent can lift away stains and soil while leaving the garment’s structure and feel intact. The entire journey of a garment through a dry cleaning facility is a multi-step procedure that combines skilled human touch with advanced technology. 1.Diagnostic The process begins the moment a customer brings a garment to the counter. This initial interaction is a crucial diagnostic step. The customer might point out specific stains, and a knowledgeable cleaner will inquire about the source of the stain, as this information dictates the treatment. Following this, the garment undergoes its first inspection. A trained professional examines it meticulously, not just for the stains pointed out by the customer, but for any others that may be less obvious. They also check the integrity of the garment, noting any loose buttons, open seams, or pre-existing damage. This is also when the care label is read and assessed. The care label is a legal directive from the manufacturer, and the cleaner must adhere to its instructions. Finally, each garment is tagged. This is a critical organizational step. A small, numbered tag or a barcode is affixed to an inconspicuous seam, ensuring that the piece can be tracked throughout the entire process and correctly reassembled with its owner’s order at the end. 2.Stain Removal Before the main cleaning cycle can begin, the garment moves to what is arguably the most artful and skill-intensive stage of the process: pre-treatment, also known as “spotting.” This is where a specialist, the spotter, addresses individual stains. Working at a specialized station called a spotting board, which provides steam, vacuum, and a variety of chemical agents, the spotter acts as a fabric chemist. They must identify both the type of fabric and the nature of the stain to select the correct chemical agent and technique. Stains are broadly categorized; for example, oil-based stains like grease or salad dressing require different solvents than protein-based stains like blood or egg, or tannin-based stains like wine, coffee, or juice. The spotter uses a “steam gun” to apply steam and heat to help loosen the stain, and various chemical solutions are carefully applied, tamped with a small brush, and then flushed out with more steam. A vacuum pedal on the spotting board suctions away the loosened stain and excess moisture, preventing a ring from forming on the fabric. This targeted treatment is essential because the general cleaning cycle might not be sufficient to remove stubborn, set-in stains. 3.Dry Clean Once pre-treated, the garments are ready for the main event: the cleaning machine itself. A modern dry cleaning machine looks very much like an oversized front-loading washing machine, but its internal workings are far more complex. It is a sealed, self-contained system that performs the washing, rinsing, and drying cycles all in one unit. Garments are sorted by color, weight, and fabric type and then loaded into the machine’s drum. The door is sealed, and the machine begins its cycle by filling the drum with the chosen solvent. Historically, the most common solvent was perchlorethylene, or “perc,” a powerful and effective degreaser. However, due to environmental and health concerns, the industry has increasingly shifted towards more eco-friendly alternatives like hydrocarbon solvents, liquid silicone, or even pressurized liquid carbon dioxide. As the drum tumbles the clothes gently, the solvent circulates through the fabric, lifting away body oils, grime, and the loosened stains from the pre-treatment stage. This “wash” cycle is typically much gentler than a water-based wash to protect the delicate garments. After the wash cycle, the machine drains the used solvent and begins an extraction cycle, spinning at high speed to remove the majority of the solvent from the clothes, much like a washing machine’s spin cycle removes water. The used solvent is not discarded; it is pumped through a series of filters to remove the collected dirt and impurities and is then distilled. This purification and recycling process is a key feature of the closed-loop system, allowing the expensive solvent to be reused for many cycles, which is both economically and environmentally necessary. 4.Drying Following the extraction, the machine enters the drying phase. A current of warm air is gently tumbled through the clothes to evaporate any remaining solvent from the fabric. This is not the high heat of a conventional dryer. The temperature is carefully controlled to be just high enough to turn the liquid solvent into a vapor without damaging the clothes. This solvent-laden warm air is then drawn out of the drum and passed over cooling coils. As the air cools, the solvent vapor condenses back into its pure liquid form, is collected, and returned to the main solvent tank for reuse. This vapor recovery system is incredibly efficient, recapturing nearly all of the solvent so that very little escapes into the atmosphere. Once the cycle is complete and the sensors detect no remaining solvent fumes, the machine’s door unlocks, and the garments emerge clean, completely dry, and with only a faint, sterile scent that quickly dissipates. 5.Finishes The journey is not over yet. The clean garments are immediately inspected again. Any stains that were not fully removed during the process are noted. These stubborn spots may require “post-spotting,” where the spotter applies more specialized techniques to the now-clean fabric. Once

6 Reasons Why Dry Cleaning is The Safest Option For Your Most Important Clothes Read More »

Air Quality Through Cleaning

Breathe Easy This Winter: Improving Indoor Air Quality Through Cleaning

As the vibrant colors of autumn fade and the Canadian landscape prepares for its blanket of snow, air quality drops because we instinctively close up our homes. Turning up the heat and closing off the crisp, refreshing outdoor air. This natural response to the impending cold, while keeping us warm, inadvertently brings a significant challenge: maintaining good indoor air quality. When windows remain shut for extended periods, dust, allergens, pollutants, and even microbes can become trapped and accumulate, leading to a less-than-ideal breathing environment. Ensuring the air inside your home remains fresh and clean is not just about comfort; it’s crucial for your health and well-being throughout the long, often isolating, winter months. Poor indoor air quality can contribute to a range of issues, from mild irritation like dry eyes and scratchy throats to more severe health problems such as exacerbatedAs allergies, asthma attacks, and even respiratory infections. Understanding the sources the vibrant hues of autumn fade and the Canadian landscape prepares for its snowy blanket, we instinctively seal our homes, turning up the heat and closing off the crisp, refreshing outdoor air. This natural response to the impending cold, while keeping us warm, inadvertently brings a significant challenge: maintaining good indoor air quality. When windows remain shut for extended periods, preventing natural ventilation, dust, allergens, pollutants, and even microbes can become trapped and accumulate, leading to a less-than-ideal breathing environment. Ensuring the air inside your home remains fresh, clean, and healthy of indoor air pollution and implementing effective cleaning strategies is paramount is not just about comfort; it’ for creating a healthy sanctuary during the cold season. Dust One of, this accumulated dust can be circulated throughout your entire the most pervasive culprits affecting indoor air quality home. Each blast of warm is dust. It’s not just air can stir up settled particles, making them airborne and easily an aesthetic nuisance; dust is a complex inhaled. This continuous circulation affects respiratory health, potentially and often unsettling triggering allergies, asthma attacks, or simply causing general mixture of various particles irritation for those without pre-existing conditions. Its composition includes pet d. The key to effective dust control begins with systematicander, microscopic and deliberate dusting practices. Always flakes of human skin begin your dusting routine from the highest points in a room and meticulously work your way downwards, textile fibers from. This logical approach ensures that any dust disturbed from clothes and furnishings higher surfaces settles onto lower ones, which, outdoor pollen that can then be cleaned efficiently. Start with inevitably finds ceiling fans, light fixtures, and the tops of its way inside, mold spores, and even microscopic particles tall furniture like bookshelves and arm from pollution that infiltroires, paying close attention to intricateates from outside. When your heating system kicks into details or gear, especially forced-air systems, this fine textured surfaces where dust loves particulate matter can be continuously to cling. Next, move to circulated throughout your home eye-level surfaces such as window s, becoming airborne and easilyills, picture frames, mirrors inhaled. This constant, and televisions. Finally, address tables, desks, coffee circulation significantly impacts respiratory health and tables, and baseboards. Using a high can be a major trigger for individuals-quality microfiber cloth is highly recommended for dusting. Its suffering unique microscopic from allergies or asthma. The key fibers are designed to effectively trap and to effective dust control begins with systematic dusting hold dust particles, rather than simply pushing, a ritual them around or sending that should them airborne. Micro be performed regularly and thoughtfullyfiber cloths can be used dry for light dusting or slightly damp. Always start from the highest for a points in a room and work your way down. This ensures that any more thorough dust clean, which helps to further disturbed from higher capture particles surfaces settles on lower ones and prevent them from escaping back into the air. For, which can then be cleaned. Begin delicate with ceiling fans, light fixtures, and the tops of tall furniture electronics, such as computer screens or shelves before moving to eye-level surfaces like tables, keyboards, desks, and window sills. Finally, address baseboards and, and stereo equipment floor registers. Using, use specialized anti-static dusters or a very slightly damp microfiber cloth, always ensuring the devices are unplugged first to prevent any potential damage or safety hazards. Ventilation Grilles Beyond visible surfaces, your a microfiber cloth, either dry or slightly home’s air circulation system plays a damp, is highly effective. The profound role in dust distribution and overall indoor air quality. The air vents, unique structure both return and supply, in your heating and cooling system are magnets for dust and can become significant of microfiber’s tiny, conduits for its spread often static-charged fibers is designed to trap and hold. Before winter fully sets in and your dust particles, preventing furnace is working overtime, take the time them from merely being pushed around to meticulously vacuum and wipe down all air return and supply vents throughout your home. You might be surprised by the sheer or resettling amount of dust, pet hair, and debris that accumulates on elsewhere. For electronics, which are notorious dust magnets due to static electricity, use specialized these gr anti-static dustersates. For a more thorough and impactful approach to improving air quality, consider having your home or a very’s air ducts professionally cleaned periodically. This is particularly advisable if you’ve recently moved into an older home where duct history lightly damp cloth, always ensuring devices are unplugged first for safety. Regular cleaning of hard surfaces, at least weekly, significantly reduces the overall dust load in your home. Beyond visible surfaces, your home’s air circulation system plays a profound role in dust distribution and, consequently, indoor air quality is. The air vents in your unknown, if you’ve completed major renovations that generate heating and cooling system, both return a and supply registers, collect dust over time and can become conduits for its spread throughout your living lot of dust, space. Before winter truly sets in and or

Breathe Easy This Winter: Improving Indoor Air Quality Through Cleaning Read More »