Clothes Cleaning

Woman making a to-do list for January after the holiday season.

The January Reset: 8 Essential Tasks to Recover from the Holidays

The January Reset: 8 Essential Tasks to Recover From the Holidays January in Canada is a stark transition: festive lights down, hosting adrenaline gone, and the coldest, darkest stretch of the year arrived. Your home shifts from hosting mode into defense mode, because dry air, road salt, and wasted heat all attack at once. This reset list is a strategic plan for your home’s most vulnerable season, not just a cleaning schedule. 1. Take Down the Tree and Recover From the Holidays Takedown is the first priority, beyond boxing ornaments. By the first week of January, a real tree is usually a dehydrated fire hazard, dropping debris that embeds in carpets and scratches hardwood. Bag the tree before hauling it out, then vacuum with the hose attachment, never the beater bar, which jams on needles. Pull needles out of baseboards, vents, and deep rug pile, label boxes by room as you pack, and toss any light string that failed this year. 2. Win the War on Road Salt January is when salting trucks are busiest, and your entryway floors suffer most. The white crust on boots is calcium chloride or sodium chloride, highly alkaline and abrasive: on hardwood it eats through the polyurethane finish and stains the fibers grey, and on tile it degrades the grout. Wet mopping just spreads the brine, so neutralize it with one cup of vinegar per gallon of warm water, whose acidity breaks the salt bonds. Rinse boot trays in a utility sink, and enforce a no-shoes-past-the-mat policy, your flooring’s best defense all month. 3. Manage Indoor Air Quality and Humidity The house is sealed tight and the furnace runs around the clock, circulating air that grows drier and dustier by the day. Ideal winter humidity sits between 30% and 40%: any lower, and hardwood shrinks and cracks while static pulls dust onto every surface; any higher, and condensation forms inside windows, inviting mold on the sills. Run a humidifier if needed but clean it weekly so it does not spray bacteria, and change the furnace filter, since a clogged one restricts airflow and recirculates allergens. Health Canada’s guidance on indoor air contaminants and health covers the topic in detail. 4. Cut the Dust: Coils, Fans, and Vents With the furnace blasting, convection piles dust onto door frames, fan blades, and refrigerator coils. Vacuum the coils: coated in dust, the fridge cannot shed heat, so the compressor runs longer, wasting energy and shortening its life. Bathroom fans matter too: ventilation is the only exit for shower moisture in a sealed house, and a grille clogged with fuzz traps humidity, inviting mildew on cold exterior walls. 5. Detox the Kitchen After December The kitchen carries the scars of December excess. Purge the refrigerator ruthlessly: bin anything past its date or looking questionable, then scrub the shelves in hot soapy water until every sticky residue is gone. If the oven skipped its pre-turkey scrub, avoid the high-heat self-clean: with sealed windows the fumes have nowhere to escape, so hand-scrub with a baking soda paste instead. Scrub the dishwasher filter too, since it processed a season of grease and gravy. 6. Check Safety Systems Carbon monoxide kills silently, and the danger peaks each winter as furnaces, water heaters, and gas stoves overwork behind sealed windows. Test every CO detector and smoke alarm now, and clear snow and ice off external vents, including the dryer duct and furnace exhaust; a blocked flue can push deadly CO back indoors. Finally, vacuum the dryer vent hose: dry air breeds static and lint ignites easily. 7. Refresh Winter Gear and Declutter One In, One Out The laundry room needs attention too, since coats, scarves, and mittens sponge up sweat, street grime, and bacteria yet rarely get washed. Launder down coats with tennis balls to re-fluff the fill, wash hats and scarves, and treat cuff salt stains with vinegar before the fibers are damaged. December also left a flood of new gifts, so apply the one-in-one-out rule: for every new sweater, donate an old one; for every new toy, take out a broken one. Clutter gathers dust and blocks heat flow, so take on one closet or drawer weekly. The January Reset Checklist Bag and remove the tree, then vacuum needles with the hose attachment. Neutralize entryway salt with a vinegar and water solution. Keep indoor humidity between 30% and 40%; clean the humidifier weekly. Vacuum fridge coils, bathroom fan grilles, and change the furnace filter. Purge the fridge and clean the oven with a baking soda paste. Test CO detectors and clear snow from exterior vents. Wash winter gear and treat salt stains quickly. Declutter with the one-in-one-out rule, one closet a week. January Home Risks at a Glance Threat Damage If Ignored Fast Fix Dry indoor air Shrinking hardwood, heavy static dust Humidifier, cleaned weekly, aiming for 30-40% Road salt Grey stains in finish, ruined grout Vinegar-water wash and no shoes past the mat Clogged furnace filter Overheating furnace, recirculated allergens Fresh filter early in the month Dusty fridge coils Longer compressor runs, wasted energy Vacuum coils at the back or bottom Blocked vents Carbon monoxide backing into the home Clear snow and ice; vacuum dryer hose lint Humid bathroom Mildew on cold walls Clean exhaust fan grille Frequently Asked Questions Why is 30-40% indoor humidity recommended in a Canadian winter? Below that range, hardwood shrinks and static electricity builds; above it, condensation forms on windows and mold can grow on sills. That band keeps both problems away. Can I vacuum pine needles with a regular upright vacuum? Not with a spinning brush running; the beater bar jams on needles and the motor can overheat. Switch to the hose attachment or a hard-floor setting instead. Is the oven self-clean cycle safe in January? In a tightly sealed winter home it is a poor choice, since the high-heat cycle releases fumes with nowhere to escape. Manual cleaning with a baking soda paste protects your indoor air. How do I remove road

The January Reset: 8 Essential Tasks to Recover from the Holidays Read More »

Enzyme Cleaner

5 Common Mistakes That Render Your Enzyme Cleaner Useless

In the world of cleaning, there is a constant arms race between the mess and the method. For decades, the dominant strategy has been chemical warfare: using harsh solvents, high-alkaline degreasers, and corrosive bleaches to burn, dissolve, or bleach stains into submission. While these methods are effective for many surface-level issues, they often fail when it comes to the most persistent and unpleasant biological messes. The smell of pet urine that returns on a humid day, the grime in the grout lines that never seems to whiten, or the lingering odor in a drain are all symptoms of organic matter that standard chemicals cannot remove. The solution to these problems is not found in a stronger acid or a harsher solvent, but in biology. Enzyme cleaners represent a fundamental shift in how we approach hygiene, utilizing the power of nature to digest dirt rather than simply wiping it away. How Does it Work? To understand why enzyme cleaners are unique, one must understand what they are composed of. These cleaners are bio-enzymatic formulations. They contain beneficial bacteria along with enzymes. The bacteria are the workers, and the enzymes are the tools they produce. When you spray an enzyme cleaner on a stain, the bacteria remain dormant until they hit a food source-the stain. Once activated, they produce enzymes to break down complex molecules into smaller, simpler pieces. For example, a protease enzyme breaks down proteins (like blood or meat), a lipase enzyme breaks down fats and oils (grease), and an amylase enzyme breaks down starches. The bacteria then consume these broken-down particles, converting them into carbon dioxide and water. Essentially, the cleaner literally eats the stain until it is gone. Animal Urine The most famous and arguably most critical application for enzyme cleaners is in the realm of pet ownership. Anyone who has house-trained a puppy or cared for an aging cat knows the nightmare of urine stains. Urine is composed of urea, urochrome, and uric acid. Standard detergents and water can wash away the urea and urochrome, which removes the sticky texture and the yellow color. However, uric acid forms crystals that are nonsoluble in water and bond tightly to surfaces like carpet fibers, wood, and concrete. Traditional cleaners might mask the smell temporarily with perfume, but they leave the uric acid crystals behind. When the humidity rises or the area gets wet again, these crystals re-hydrate and release strong ammonia gas, bringing the smell back. This signals to the pet that this spot is a “bathroom,” encouraging repeat offenses. Enzyme cleaners specifically formulated with uricase are the only way to break down these crystals permanently. The enzymes digest the uric acid structure, eliminating the source of the odor completely rather than just covering it up. Beyond pet messes, enzyme cleaners are the secret weapon for bathrooms. The pink or orange slime that accumulates in shower corners and around drains is a biofilm-a colony of bacteria that feeds on soap scum and body oils. Because grout is porous, this biofilm can root itself deep into the cement, making it reachable only by scrubbing until your knuckles are raw. Enzyme cleaners work differently. When applied to grout and allowed to sit, the enzymes seep into the pores. They break down the protein and fat structures of the soap scum and body oils that bind the dirt to the tile. Over time, this biological action loosens the grime so it can be easily rinsed away. It is a slower process than using bleach, but it is far more effective at removing the root cause of the discoloration without damaging the grout sealant or etching the tile. Grease The kitchen is another arena where enzymes shine, particularly in the battle against grease. Grease traps and kitchen drains are notoriously difficult to maintain because fat hardens as it cools, coating pipes and causing slow drainage. Chemical drain openers rely on heat and caustic reactions to burn a hole through the clog, which can damage old plumbing and is dangerous to handle. Enzyme drain maintainers are a safer, preventative alternative. When poured down the drain, the lipase enzymes coat the inside of the pipe and slowly digest the organic buildup. They turn the hard grease into water-soluble liquid that flushes away. While they won’t clear a solid hair clog instantly like a snake would, regular use keeps the pipes flowing freely and eliminates the rotting food smell that often rises from the sink. Laundry is perhaps the most undervalued use case for these biological cleaners. Many organic stains-blood, sweat, grass, and baby formula-are protein-based. Hot water and standard detergent can actually “cook” these proteins, setting the stain into the fabric permanently. Cold water and an enzyme soak are the antidote. The enzymes locate the protein strands woven into the fabric and snip the chemical bonds holding them to the cloth. This is why many high-end laundry detergents now boast “bio-active” ingredients. For athletic wear that retains the smell of sweat even after washing, an enzyme soak is often the only way to remove the body oils trapped in the tight synthetic weave of modern performance fabrics. Dwell Time However, the effectiveness of enzyme cleaners comes with a specific set of rules that differs from traditional cleaning. The most important variable is time. In the cleaning industry, this is known as “dwell time.” Unlike a spray-and-wipe glass cleaner, enzymes need time to eat. If you spray a urine stain and wipe it up ten seconds later, you have accomplished nothing. The bacteria need hours, sometimes even days, to fully digest a deep stain. For a carpet stain, the instruction is often to saturate the area-soaking it all the way down to the pad-and then cover it with a damp towel to keep the area moist. Enzymes stop working if they dry out. The bacteria need a moist environment to survive and reproduce. By keeping the stain wet and covered, you allow the colony to expand and consume the waste until the food source is

5 Common Mistakes That Render Your Enzyme Cleaner Useless Read More »

woman needing to organize the house for holiday guests

5 Ways to Organize Your Home to Accommodate Extra Guests

The end of the year brings a significant change to the atmosphere of a home, and we need to organize for guests; the house transforms from a private sanctuary, used for daily work and study routines, into a semi-public space dedicated to hospitality and celebrations. This metamorphosis brings with it a unique set of logistical challenges. Hosting guests, whether for a single dinner party or an extended stay, requires more than just a surface-level clean; it demands a structural reorganization of the living environment. The house must function differently when occupancy doubles or triples. Pathways need to be clearer, storage needs to be accessible, and the visual noise of daily life needs to be silenced to create a welcoming backdrop for the festivities. Organizing for guests is an exercise in empathy, requiring the host to walk through their own home with the eyes of a stranger to identify the friction points that might go unnoticed during the rest of the year. Entryway The organization process must begin at the threshold. The entryway is the bottleneck of the holiday home. In the winter months, this area is subjected to an onslaught of bulky coats, wet boots, scarves, and bags. A common mistake is failing to clear the family’s personal gear before the guests arrive. If the coat rack is already full of the host’s jackets, guests are left holding their outerwear or piling it on a bed in a distant room. The first step of organization is a ruthless purge of the front hall closet. Move the family’s winter gear to a secondary location, such as a garage, a basement, or a bedroom closet, to leave the prime real estate empty for visitors. Provide ample, sturdy hangers-not the flimsy wire ones that buckle under the weight of a wool peacoat. If the closet is small, setting up a temporary garment rack can prevent the “coat pile” on the sofa, which immediately clutters the living space. Floor space in the entryway is equally critical. In many regions, the end of the year means snow, mud, and salt. A standard doormat is rarely sufficient for a party’s worth of wet boots. Investing in large, rubber boot trays protects the flooring and keeps the slush contained. Organizing this area also means removing the visual clutter of mail, keys, and school permissions forms that tend to accumulate on entry tables. A clear surface at the door allows guests to set down a purse or a gift comfortably without knocking over a stack of bills. It sets the tone for the rest of the home; a chaotic entryway signals a chaotic visit, while a streamlined one suggests order and calm. Guest Room Moving into the guest accommodations, the definition of organization shifts from storage to comfort. If you have a dedicated guest room, it often serves as a storage unit for the other eleven months of the year, housing wrapping paper, out-of-season clothes, or exercise equipment. This debris must be removed, not just pushed into the corner. The guest needs to feel that the room was prepared specifically for them, not that they are invading a storage locker. This means clearing out the closet and the dresser drawers. It is uncomfortable for a guest to live out of a suitcase for a week because the drawers are full of the host’s old sweaters. Empty at least two drawers and provide cleared hanging space. The bedside area requires specific attention to modern needs. In the past, a lamp and a clock were sufficient. Today, the most important amenity is an accessible power outlet. Guests should not have to crawl under the bed or move heavy furniture to charge their phones. Organizing the room means checking the outlet situation and, if necessary, adding a power strip or an extension cord that sits on the nightstand. Bedding should be checked for freshness well in advance. Linens that have sat in a cupboard for a year often develop a stale, musty smell. Washing everything, including the duvet cover and the mattress protector, ensures the bed feels fresh. Adding an extra blanket at the foot of the bed is a functional organizational touch that prevents the guest from having to ask for more heat in the middle of the night. The bathroom is perhaps the most scrutinized room in the house. When organizing for guests, the goal is to make the space intuitive. Guests should never have to search for the essentials. Toilet paper should be stocked visibly, either in a basket or a clear stack, so there is no awkwardness when a roll runs out. Towels need to be distinct and plentiful. A common organizing tactic is to provide a specific color of towel for guests, separating them from the family’s daily linens. This prevents confusion and ensures that the guest always knows which towel is theirs. The countertops must be cleared of the host’s personal clutter. Toothbrushes, makeup bags, and razor stands should be stowed away in drawers or medicine cabinets. A guest needs surface area to place their own toiletries. If the shower is to be shared, clear the rim of the tub of half-empty shampoo bottles. A streamlined shower feels cleaner and more inviting than one crowded with the family’s grooming products. Kitchen The kitchen, usually the hub of the holiday, requires a zoning strategy. The danger in a kitchen during a party is that guests naturally congregate there, often blocking the work triangle (stove, sink, refrigerator) and hindering the cook. Organizing the kitchen for guests involves creating “self-serve” stations that draw people away from the active cooking zones. Set up a drinks station with glasses, ice, and beverages on a sideboard or a separate table. Create a snack zone on the island or a coffee table in the adjacent room. By physically separating the consumption areas from the preparation areas, you manage the flow of traffic. Inside the kitchen, the countertops must be ruthlessly decluttered. Appliances that are not essential for the holiday meal-the toaster,

5 Ways to Organize Your Home to Accommodate Extra Guests Read More »

Dangerous to Your Health: 5 Common Products That are Dangerous For Your Daily Life

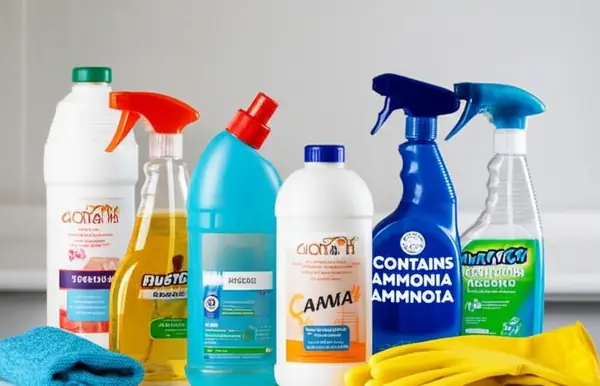
Are Everyday Cleaning Products Dangerous to Your Health? Your home feels like the safe place, sealed off from city pollution. Inside many Toronto houses the opposite is true: the sprays under the sink can make indoor air more toxic than the air outside. Health Canada warns that household chemical products can cause poisonings, burns, fires and explosions when handled unsafely. A strong chemical smell is not proof of clean. Here is what five everyday products actually do, and the simpler habits that keep homes safe. Five Common Products Dangerous to Your Health 1. Bleach Bleach, the sodium hypochlorite default against mold, mildew and bathroom grime, is corrosive enough to burn skin and eyes on contact, and it is highly volatile. In a closed shower stall or small bathroom, its fumes react with organic matter and form chlorinated volatile organic compounds that immediately inflame the mucous membranes of the throat and lungs, especially dangerous with respiratory conditions. The deadliest habit is mixing: bleach plus ammonia, which lives in urine and many glass cleaners, generates chloramine gas, and bleach plus an acidic cleaner releases chlorine gas. Both can lead to hospitalization or worse. 2. Ammonia Glass and Window Cleaners Ammonia is why glass cleaner dries fast without streaks, and why it demands respect. It hunts moisture, so inhaled ammonia attacks the eyes, throat and lungs directly. High concentrations cause chemical burns in the respiratory tract and aggravate chronic conditions like asthma. Trigger-sprays aerosolize it into a fine mist that lingers in your breathing zone. That sharp odor is a warning signal, not evidence the glass needs you. 3. Fragrance, Air Fresheners and Fabric Deodorizers The word fragrance, or parfum, on a label is a regulatory loophole: scents count as trade secrets, so the hundreds of chemicals behind the scent are never listed. The cocktail commonly includes phthalates, added to make scents linger, which are known endocrine disruptors that mimic hormones and can interfere with reproductive development over long-term exposure. Air fresheners and fabric sprays do not clean anything. Some release agents that deaden your nerves or coat nasal passages with oily film; others bury odors under volatile organic compounds tied to headaches, dizziness and fatigue. Aerosol propellants add flammable lung irritants. The Government of Canada’s household products safety hub lists hazards in everyday cleaning items. 4. Oven Cleaners and Drain Openers Oven cleaners are built on lye, or sodium hydroxide, which strips baked-on grease by turning it into soap. That same reaction destroys living tissue: splashes cause severe burns and permanent blindness. Spraying a warm oven vaporizes the lye into a toxic cloud that fills the kitchen. Drain openers burn through hair and grease clogs with concentrated sulfuric acid or lye, generating intense heat that can damage old pipes; if a plumber later snakes a surviving clog, the splash-back is caustic. 5. Disinfectant Wipes and Sprays Quaternary ammonium compounds, the quats behind most disinfectant wipes and sprays, kill germs well, but they are powerful lung irritants. Growing evidence suggests frequent exposure can cause asthma even in otherwise healthy users. Quats also leave a residue, and a child who touches a wiped table then sucks their fingers is ingesting a pesticide. Blanketing whole rooms instead of high-touch points adds chemical load and feeds antibiotic resistance. Two Traps Behind Friendly Labels Carpet cleaners and upholstery shampoos bring their own risks. Many spot removers rely on perchloroethylene, a dry-cleaning solvent that is a neurotoxin and a classified carcinogen, and across a large floor it keeps off-gassing for days or weeks. Naphthalene, the mothball chemical in some carpet cleaners, releases fumes that can cause confusion, nausea and liver damage. Fibers trap all of it and release it back with every step and sit. Green labels deserve the same skepticism. The word natural is largely unregulated in cleaning products, and a green bottle can still carry allergens like limonene, a citrus oil that reacts with ozone in your air to form formaldehyde, a known carcinogen. Concentrated plant-based detergents can still irritate skin and lungs. Read the ingredient list, not the leaf on the label. The Real Risk Is the Daily Total Toxicologists call the running tally your body burden. One spray does little; a weekly ritual of glass cleaner, floor polish, counter spray, toilet cleaner and air freshener becomes a chemical soup the body must filter. When that load stays high, chronic inflammation, skin conditions and respiratory sensitivity can follow. Children and pets pay the most because smaller bodies and faster metabolisms process the same exposure less efficiently. Safer Swaps That Still Clean The most effective cleaner is usually the simplest: mechanical action. Removing dirt beats masking it. Instead of Reach for Why it works Everyday surface sprays Microfiber cloth, water and real scrubbing Fibers trap dirt and pathogens, removing more bacteria than a light chemical wipe, with no residue left behind Bleach on general surfaces Hydrogen peroxide Disinfects without chlorine fumes or toxic residue Commercial limescale removers White vinegar A mild acid that dissolves mineral deposits and soap scum without off-gassing Scouring powders Baking soda Gentle physical abrasion for sinks, tubs and baked-on messes Ventilation and Protection: The Free Upgrades Even safe cleaners need discipline. Health Canada’s page on using household chemicals safely covers the buying, use and storage rules that prevent accidents, and these habits carry it into daily practice: Ventilate. Never clean a sealed room: open a window and run the exhaust fan, especially in small bathrooms where fume levels spike fastest. Protect your skin. It is the body’s largest organ and absorbs chemicals readily, so glove up around degreasers and solvents and wear a mask for concentrated products. Remove, don’t mask. The goal is neutral air and residue-free surfaces, not a perfume cloud that signals a fresh chemical dose. Frequently Asked Questions Is it really dangerous to mix cleaning products? Yes. Bleach plus ammonia releases chloramine gas, and bleach plus any acidic cleaner releases chlorine gas. Both react within seconds in a closed room and can lead to hospitalization. Use one product

Dangerous to Your Health: 5 Common Products That are Dangerous For Your Daily Life Read More »

Washing Machine Cleaning Tablets: Are You Wasting Money on Washer Tablets?

Let’s understand how to use washing machine cleaning tablets? The modern laundry room is often viewed as a sanctuary of hygiene, a place where the grime of the outside world is washed away, leaving behind only the scent of fresh linen. Central to this operation is the washing machine, an appliance that we instinctively trust to be the cleanest object in the house. We assume that because gallons of hot water and detergent flow through it daily, it must be self-cleaning. However, this assumption is the primary cause of a domestic crisis that affects millions of households: the slow, invisible accumulation of biological sludge that destroys appliances and ruins clothing. In response to the rise of high-efficiency machines and the foul odors that accompany them, the market has introduced a specific chemical solution: washing machine tablets. These small, effervescent pucks have become a staple in the cleaning aisle, promising to strip away years of neglect with a single cycle. Yet, to truly understand their value and their limitations, one must look past the marketing and understand the chemistry and mechanics of why our machines get dirty in the first place. Sustainability or Disaster? To understand the necessity of washing machine tablets, one must first look at the engineering shift that created the problem. Decades ago, traditional top-loading washers used massive volumes of water. They filled the tub to the brim, allowing clothes to float freely, and the aggressive mechanical agitation flushed soil and residue down the drain effectively. Today, in the name of environmental preservation and energy efficiency, we use front-loading or high-efficiency top-loading machines. These devices use a fraction of the water, relying on the tumbling action of the drum to clean clothes through friction and gravity. While this is a victory for sustainability, it is a disaster for internal hygiene. The dirt, dead skin cells, body oils, and excess detergent that are stripped from your clothing are not always flushed away. Instead, due to the low water volume, they are often cast onto the walls of the outer tub-a stationary drum that surrounds the spinning basket you see. In this dark, warm, and damp crevice, a layer of biofilm begins to grow. This biofilm is a sticky, living matrix of bacteria and mold that feeds on the residual laundry products we leave behind. Washing machine tablets are engineered specifically to target this hidden environment. Unlike laundry detergent, which is chemically formulated to lift soil from fabrics and suspend it in water using surfactants, cleaning tablets are designed to be aggressive against hard surfaces. They are typically composed of concentrated oxidative agents, such as sodium percarbonate, which breaks down into hydrogen peroxide and soda ash when dissolved in water. When a tablet is dropped into the drum and the cycle begins, it effervesces violently. This fizzing action is not merely theatrical; it serves a crucial mechanical purpose. It helps to disperse the active chemical ingredients throughout the entire volume of the drum, splashing the cleaning solution up to the “roof” of the tub and into the crevices of the spider arm-the metal bracket that holds the drum in place and is notorious for corroding and snapping due to chemical buildup. Alkaline Cleaning Products The chemistry of washing machine tablets is typically alkaline, which is essential for their function. Most of the grime inside a washer is acidic in nature-fatty acids from soap scum, body lipids, and grease. By introducing a highly alkaline solution, the tablets can saponify these fats, turning them into a soluble soap that can be rinsed away. Many advanced formulations also include specific enzymes. These enzymes act as biological catalysts that digest the organic matter within the biofilm, effectively eating away the food source that allows mold to thrive in the damp recesses of the pump and drain lines. By breaking down the structural integrity of the sludge, the tablet allows the water to flush it out of the system. However, a dangerous misconception exists regarding what these tablets can actually achieve. Many homeowners treat them as a repair tool rather than a maintenance tool. If a washing machine has been neglected for five years and has developed a thick, black ring of mold on the rubber door gasket, a washing machine tablet will not remove it. Mold has root structures that penetrate the porous rubber of the seal. No amount of splashing chemical water will scrub that physical infestation away. The tablet is designed to maintain the hard, non-porous surfaces-the stainless steel of the drum and the heavy plastic of the outer tub. Relying solely on a tablet while ignoring the physical gaskets is why many frustrated users claim the product “doesn’t work.” It works perfectly for its intended chemical purpose, but it cannot perform miracles on permanent organic staining that requires manual agitation and a mildewcide. Water Temperature The effectiveness of washing machine tablets is also entirely dependent on how they are used, particularly regarding water temperature. This is where user error runs rampant. Almost all cleaning tablets rely on chemical reactions that require heat energy to activate. The oxygen release from the bleaching agents is significantly more vigorous and effective in scalding hot water. If a user throws a tablet in and runs a “Quick Wash” or a cold cycle, they are essentially wasting their money. The tablet may not even fully dissolve, leaving a gritty, chalky residue at the bottom of the drum that adds to the mess rather than resolving it. To get the full benefit, the machine must be set to its hottest possible setting-often labeled “Sanitize” or “Extra Hot.” This heat ensures that the tablet dissolves completely and that the chemical solution is energetic enough to penetrate the layers of calcified grime. A major contributor to the sludge that tablets are fighting is the overuse of fabric softener. Fabric softener is, essentially, liquid fat. It is designed to coat the fibers of your clothing with a thin layer of lipids to make them feel slick and reduce static.

Washing Machine Cleaning Tablets: Are You Wasting Money on Washer Tablets? Read More »

december checklist

December Checklist: 11 Things You Must Do Before the First Major Snowfall

December Home Prep: The Canadian Checklist That Beats the First Snowfall December in Canada asks for more than patience. The month buries autumn under snow, shortens daylight, and stacks holidays into four busy weeks, so its first half belongs to preparation, not panic. This eleven-task checklist covers the roof, the plumbing, the heating system, the emergency supplies, and the pre-holiday deep clean, ideally before the first major snowfall locks you indoors. 1. Clean the Gutters Before Ice Dams Can Form Work from the top down, starting at the roofline. Leaves, twigs, and sludge left in the gutters overwinter into a frozen dam. When mild days melt roof snow, that dam traps the water, which backs up under shingles, refreezes, and pushes moisture into the roof deck, insulation, and interior walls. One ice dam repair dwarfs the cost of raking out the gutters, and late fall, after leaf drop but before the deep freeze, is the last comfortable moment to clear them. 2. Drain and Shut Down Every Exterior Water Source Disconnect garden hoses, drain them fully, and store them for the season. Then close the interior shut-off valve feeding each outdoor tap and open the tap itself so remaining water drains out. This five-minute chore stops water from freezing, expanding, and bursting a pipe, which is how a mild December night turns into a flooded basement. 3. Stage Shovels, Ice Melt, and Scrapers Before the Blizzard Rush Do not shop for snow gear during a storm warning, when shelves empty fast. Check shovels for cracks, keep ice melt, sand, or grit in a sealed container so it stays dry and free-flowing, and replace a chipped windshield scraper now. Prepared tools turn a snow day from stressful into routine. 4. Chase the Drafts Around Windows and Doors An annoying October draft becomes a heater-taxing problem in December. Walk every window and exterior door, feel for moving air, and look for visible gaps. Swap out worn weatherstripping, and fit plastic insulation film kits over older windows; the film traps a still layer of air that cuts heat loss. 5. Service the Heating System While It Warms Up Replace the furnace filter before the system runs hard every day: a clogged filter restricts airflow, wastes energy, and pushes dust and allergens through the house, one of the effects behind Health Canada’s indoor air contaminants reporting. If your furnace carries a whole-house humidifier, clean its pad or filter, switch it on, and set it against dry winter air. Persistent dampness or a musty smell is a different problem; mould guidance from Health Canada covers moisture control. 6. Sweep the Chimney and Stack Seasoned Wood If nobody has cleaned and inspected your chimney this season, book it now. Creosote from past fires is a genuine fire hazard. Keep your firewood dry, seasoned, and stored under cover with airflow around it, with a small indoor supply ready for cold nights. 7. Build a 72-Hour Emergency Kit for Storm Outages December storms knock power out for hours or days. Assemble a kit you can find in the dark, kept somewhere accessible: Reliable flashlights with spare fresh batteries Warm blankets for every household member A stocked first-aid kit and any daily medications Non-perishable food and bottled water to cover at least 72 hours A battery-operated or hand-crank radio for storm updates A fully charged power bank for your phone 8. Stock the Pantry and Freezer Before the Run Once the first big storm lands, a grocery run becomes a trek. Load staples early: pasta, rice, canned goods, coffee, and enough freezer meals for a comfortable snow day. A full freezer also holds temperature better during an outage than an empty one. 9. Deep Clean the House Before the Decorations Go Up With safety tasks handled, late November or early December is the smart moment for a seasonal deep clean. Run the oven’s self-clean cycle now, well before holiday baking, scrub the kitchen, and give living areas and guest bathrooms a thorough dust and vacuum, the same clean-first approach the CDC recommends for household surfaces. A reset home feels calmer during a chaotic month. Recurring maid service keeps the baseline tidy through the party weeks. 10. Fortify the Entryway and Test the Light Strings The front zone will soon swallow boots, coats, hats, and mittens, so set up a durable mat for wet feet, reachable hooks, and baskets for accessories now. Declutter unused items before gifts arrive to make room for them. Before decorating, plug in every strand of holiday lights and replace dead bulbs early. 11. Winter Proof the Vehicle, Kit Included Winter tires are not only for snow. Their softer rubber compound grips far better and shortens stopping distances in any cold, even on dry pavement, so mount them before the temperature truly turns. Replace streaking wiper blades, top up with winter-rated washer fluid that will not freeze, and store spare bottles away from living space, since washer fluid is a household chemical with real hazards. 11a. Add a Car Emergency Kit Every winter trip deserves a small kit in the trunk: a blanket, a compact shovel, traction sand or kitty litter, a flashlight, jumper leads, and some shelf-stable snacks. December Prep at a Glance Task Best timing What it prevents Gutter clearing Late November Ice dams, roof and wall damage Exterior taps off Before first hard freeze Burst pipes, flooded basements Furnace filter swap Early December High bills, dusty air, strain Chimney inspection Before heavy fireplace use Creosote fires Deep clean Before decorations and guests Holiday chaos on a dirty house Winter tires First sustained cold Longer stopping distances December Checklist FAQ Is it too late to clean gutters in December? Not usually. Clear them on any dry, above-freezing day before the next snowfall. If the debris has already frozen in, wait for a thaw or hire a roof and gutter crew rather than chipping at ice on a ladder. How often should the furnace filter be changed in winter? Check it monthly during the

December Checklist: 11 Things You Must Do Before the First Major Snowfall Read More »

laundry basket in the laundry room

Washing Clothes: 10 Mistakes You Need to Stop Making When Washing Your Clothes

The act of washing clothes is often dismissed as a mundane necessity, a background task that requires little thought beyond separating whites from colors and pressing a button. However, this perceived simplicity is deceptive. Laundry is a chemical and mechanical process that involves a delicate balance of water temperature, agitation, chemical agents, and fabric types. When this balance is disrupted by habitual errors, the consequences are expensive and frustrating. Clothes fade prematurely, fibers break down, elastic snaps, and mysterious holes appear in favorite garments. Furthermore, the appliances themselves, often significant financial investments, suffer from misuse, leading to mechanical failures and mold growth. To truly care for a wardrobe and maintain the efficiency of a household, one must unlearn the common practices that have likely been passed down through generations or assumed out of convenience. 1.First Mistake The first critical error occurs long before the start button is pressed, during the sorting phase. Most people operate under the assumption that sorting is purely a chromatic exercise-keeping red socks away from white shirts to prevent pink underwear. While preventing dye transfer is important, sorting by fabric weight and texture is arguably more critical for the physical preservation of the garments. A washing machine cleans through agitation; clothes rub against each other to dislodge soil. When you mix heavy, abrasive fabrics like denim jeans with delicate materials like silk or fine cotton, you are effectively creating a sandpaper effect. The heavy items thrash against the lighter ones, causing micro-abrasions that manifest as pilling, holes, and a general loss of softness. Furthermore, the texture of fabrics dictates their lint behavior. Washing lint-shedding items, such as heavy cotton towels, with lint-attracting fabrics, like synthetic leggings or corduroy, results in a visual disaster that makes dark clothes look permanently dirty. 2.Individual Preparation Once the piles are sorted, the preparation of individual garments is often neglected. This mechanical oversight leads to tearing and stretching. The rule for hardware is simple yet frequently confused: zippers must be closed, and buttons must be open. A zipper left unzipped is essentially a flexible saw blade loose in the drum. As it spins, the metal teeth can snag on lace, scratch the surface of other fabrics, and even chip the interior paint of the washing machine. Conversely, buttoned shirts suffer from the opposite problem. When a shirt is wet, it is heavy. If it is buttoned up, the centrifugal force of the spin cycle pulls aggressively at the threads holding the buttons, distorting the buttonholes and causing buttons to pop off. Pockets also require vigilant inspection. A stray tissue can disintegrate and cover an entire load in white confetti, while heavier objects like coins can bypass the seal and damage the drain pump. 3.Detergent The application of detergent is the area most rife with misconceptions. Decades of marketing have convinced consumers that more foam equals more cleaning power. In reality, the opposite is true for modern high-efficiency machines. These appliances use very little water, relying on friction to clean. When you use too much detergent, you generate a massive volume of suds that acts as a cushion between the clothes, preventing the necessary friction that scrubs away dirt. The clothes simply float in a bubble bath, emerging with their stains intact. Worse, the rinse cycle cannot remove this excess chemical load. The result is a layer of soap residue left on the fibers, which acts as a magnet for dirt and skin oils, creating a breeding ground for bacteria and leading to the “sour” smell often associated with old towels. 4.Fabric Softener Compound this issue with the habitual use of fabric softener, and you have a recipe for textile ruin. Fabric softener works by coating fibers with a layer of lipid-based chemicals to force them to feel slick. While this feels nice instantly, it functionally destroys the utility of absorbent fabrics. Towels coated in softener lose their ability to wick water; they simply push moisture around the skin. Athletic wear, engineered to breathe and wick sweat, becomes clogged and sealed by these waxy deposits, trapping body odors deep within the weave. A simple substitution of white vinegar in the rinse cycle can soften fabrics by stripping away detergent residue and neutralizing static without leaving a damaging coating behind. 5.Amount The physical loading of the machine also requires a specific balance. There is a tendency to stuff the drum to capacity to minimize the number of loads, but a packed machine is a useless machine. For the chemistry of the detergent to work, it must dissolve and circulate. For the mechanical action to work, clothes must have room to tumble. A solid brick of wet fabric in the center of the drum will never get clean. Conversely, washing a single heavy item is a mechanical hazard. A lone wet blanket creates a severe imbalance during the spin cycle, causing the drum to bang violently against the chassis, wearing out the suspension and bearings. 6.Water Temperature selection is another variable where habit often overrides logic. The default to cold water for everything, driven by eco-consciousness, is noble but insufficient for sanitation. While cold water is excellent for preventing shrinkage and protecting dyes, it often lacks the thermal energy required to activate the enzymes in detergents that target heavy oils. Bed sheets and towels, which are reservoirs for dead skin and dust mites, require hot water to be truly sanitized. A cold wash for these items is merely a rinse. However, using hot water indiscriminately is equally damaging, as it sets protein-based stains like blood and sweat into the fabric permanently. A nuanced understanding of temperature-hot for sanitation, warm for average soil, and cold for delicate protection-is necessary. 7.Stains When stains do occur, the immediate reaction is often the wrong one. The instinct to rub a spill vigorously is a destructive reflex. Rubbing drives the stain deeper into the yarn and abrades the surface of the fabric, often causing color loss that is more noticeable than the stain itself. The correct technique is

Washing Clothes: 10 Mistakes You Need to Stop Making When Washing Your Clothes Read More »

entryway for winter dirt and salt

How to Set Up Your Entryway for Winter Muck and Salt – 6 Professional Tips

The Entryway Is Your Home’s First Line of Defense Against Winter Muck When November settles over Canada, the entryway stops being a pretty threshold and becomes a work zone. Wet leaves, mud, melting frost, and the first applications of road salt all arrive on the soles of boots within seconds of every trip outside. Anything you fail to trap at the door gets tracked deeper, staining carpet, scratching hardwood, and leaving a permanent gritty film on every surface. A purpose-built winter entryway is not decoration. It is containment, and it protects the floors you have already paid for. Here are six professional setups that make the muck season manageable. Tip 1: Put a Real Scraping Mat Outside the Door Everything starts with an exterior mat whose one job is aggressive scraping. A thin decorative welcome mat cannot handle clumps of mud, snow, and gravel; a Canadian winter needs a workhorse. Coir coconut fiber, heavy-duty rubber with deep grooves, and synthetic turf designs all shrug off freezing temperatures and moisture without cracking or rotting, and their texture nudges people into a proper shoe wipe. Shake the mat out often, and give it a hard hose-down before the deep freeze so its scraping surface stays sharp rather than cemented with old mud. Tip 2: Let the Interior Mat Absorb What the First Mat Misses Inside, the second mat plays a different role: soaking up moisture and trapping the fine grit and salt dust that slips past the scraper. Size matters. Choose one long enough that a person can step fully onto it, close the door, and kick off shoes without touching clean floor. High-absorbency cotton or microfiber surfaces pull up a surprising volume of water, and a non-slip rubber backing prevents dangerous slips while keeping trapped dampness off your flooring. Vacuum this mat daily through the high-traffic season, then shake it or launder it weekly. A saturated, filthy mat absorbs nothing; it just becomes a launchpad for the mess. Tip 3: Give Soaking Boots a Containment Zone Even a double-mat system loses to truly drenched footwear. A boot tray, a shallow plastic or rubber basin with a raised lip, catches melting snow, mud drips, and salty brine before any of it meets your floor. That single habit saves polyurethane finishes from salt stripping and keeps grout lines from slowly crumbling. Rinse and wipe the tray often: boots left sitting in days-old brine just reabsorb the corrosive water you were trying to keep out. Tip 4: Build a Complete Unloading Station Think through the whole arrival ritual, not just the floor. A small sturdy bench beside the boot tray lets people sit while wrestling stiff winter boots, instead of hopping and stamping slush onto clean boards. Strong hooks mounted above the mat zone catch dripping jackets and scarves so wet outerwear sheds its moisture inside your one easy-to-clean area rather than onto carpets and furniture further in. The essentials of a working station: A low bench or stool rated for repeated sitting Heavy hooks for coats, backpacks, and leashes Baskets for hats, gloves, and mufflers The boot tray, sized to the household’s shoe volume A hook or shelf for the daily bag, keys, and pass Tip 5: Dissolve Salt Film, Then Rinse, in That Order The defensive line will be breached, and how you respond decides whether floors survive the season. Act fast: salt attracts moisture, and once it dissolves into brine it can dull and strip the protective finish on hardwood, then creep into porous grout on tile and slowly crack it. Never mop a gritty floor first; that is like scrubbing with sandpaper, grinding sharp particles into the clear coat. Vacuum with a hard-floor head or sweep with a soft broom to lift dry grit, then work the salt marks with a damp, not wet, mop, because excess water swells and warps hardwood and laminate. For routine mopping of tile and sealed stone, a diluted pH-neutral cleaner lifts grime without attacking grout. For stubborn white haze, dissolve the alkaline deposits with one cup of white vinegar per gallon of warm water, then follow immediately with a second pass using a clean mop head and plain water to rinse. Dissolve, then rinse: skipping the rinse just re-deposits a new film as it dries. Store any vinegar or salt-removal solution carefully and follow the federal guidance on household chemical safety about labels, storage, and never mixing products. Tip 6: Keep Dedicated Cleaning Tools in the Front Closet Cleanup happens when supplies are five seconds away. Park a small dustpan and brush, a roll of paper towels or a designated muck cloth, and a spray bottle of your salt solution right in the entry closet so spills get wiped before they set. Use the same effort to organize the closet itself: room for bulky parkas without bursting doors, a shelf for boots mid-dry, and bins for the endless parade of toques and gloves. A tidy closet keeps the whole zone calm, because a clean entryway is an organized entryway. Your Winter Entryway Kit at a Glance Component Job Best picks Maintenance Outdoor mat Scrape heavy debris Coir, grooved rubber, turf Shake often; hose before freeze Indoor mat Absorb water, trap fine grit Cotton or microfiber, rubber backing Vacuum daily; wash weekly Boot tray Contain meltwater and brine Plastic or rubber with raised lip Wipe and rinse frequently Bench and hooks Safe unloading of people and coats Sturdy, wipeable surfaces Declutter weekly Tool caddy Instant spill response Dustpan, cloths, salt spray Restock as used The CDC’s overview of cleaning and disinfecting household surfaces reinforces the same sequence you need at the door: remove the gross stuff first, then clean the surface itself. Winter Entryway FAQ How big should an indoor winter mat be? Long enough that both feet land fully on it and you still have room to shut the door and remove shoes. A small rug that slides aside when kicked is worse than useless in slush season. Will road salt ruin hardwood

How to Set Up Your Entryway for Winter Muck and Salt – 6 Professional Tips Read More »

Woman cleaning the counter with pH-neutral products next to her.

Understanding pH-Neutral Cleaners: The Complete Guide

What pH-Neutral Cleaners Are and Why Your Surfaces Thank You for Them Somewhere between the vinegar bottle and the oven degreaser sits the most important concept in household chemistry: a balanced pH. Master it and you move from aggressive scrubbing that quietly damages finishes to gentle, sustainable maintenance that keeps stone, wood, and tile looking new for decades. This guide explains what a pH-neutral cleaner actually does, exactly where it is essential, where it fails, and how to use one like a professional. The pH Scale in Plain Language The pH scale measures how acidic or alkaline a water-based solution is, running from 0 to 14. Pure water sits at 7, dead center, and is the model of neutral. Below 7 lands acid, with vinegar and lemon juice as the classic household examples. Above 7 is alkaline, also called basic, a club that includes bleach, ammonia, and most oven degreasers. The further a product strays from 7, the more chemically reactive and potentially caustic it becomes. That reactivity is a double-edged sword: it is what lets strong cleaners dissolve hard water stain or cut heavy grease, and it is also what ruins surfaces that never stood a chance against them. Health Canada’s resource on using household products safely makes the same point about reading labels and respecting product strength. What a Neutral Cleaner Actually Does A pH-neutral soap is a surfactant formulated to sit at or very near 7. It lifts dirt, oils, and grime off a surface and suspends them so they can be wiped away, without trying to dissolve, etch, or strip the material underneath. Its action is mechanical, breaking the bond between soil and surface rather than attacking the surface itself. Think of it as the do-no-harm principle of cleaning: the default choice for any material that a strong acid or alkali would permanently damage. Natural Stone: The Strongest Case for pH 7 Marble, limestone, travertine, and onyx bring luxury into a home and extraordinary vulnerability with them. These stones are largely calcium carbonate, which reacts violently with acid. Even a “natural” splash of vinegar on a marble counter sets off a reaction that dissolves a microscopic layer of stone. The result, called etching, looks like a dull whitish stain but is physical damage that no wipe can undo; removing it means professional re-honing and polishing. Alkaline cleaners are less dramatic but still wrong, dulling the finish and working into pores over time. A pH-neutral cleaner is the only recommended routine product for these calcium-based stones. Granite etches far less readily, yet harsh chemicals degrade the sealant that protects it from stains, so neutral soap remains the wisest daily choice. Floors, Leather, and Fabrics The same preservation logic protects your floors. A sealed hardwood floor is defended by its finish, not the wood beneath, and repeated washes with high-alkaline cleaners slowly strip that polyurethane layer. The floor may look clean today while growing duller and thinner with every mop. A properly diluted pH-neutral floor cleaner lifts soil off the finish without eating it. Manufacturers of luxury vinyl tile and laminate almost universally specify neutral cleaners for the same reason: harsh chemistry clouds or embrittles the factory wear layer, permanently marring the look and often voiding the warranty. Leather, a natural skin kept supple by its own oils, reacts the same way to alkaline soaps by drying, cracking, and fading, while delicate upholstery and clothing respond far better to a neutral spot-cleaning solution. Professionals follow that order of force: start with the gentlest method that can work. Where pH-Neutral Cleaners Hit Their Limits Neutral products are masters of maintenance, not miracle workers. Three common jobs need something else: Hard water stains and soap scum. These are alkaline mineral deposits of calcium and magnesium, so an acidic cleaner is required to break the bonds. Baked-on stovetop or oven grease. Polymerized oil needs a moderately alkaline degreaser; a neutral soap simply lacks the power. Disinfecting. Neutral soaps clean but do not inherently kill germs. Countertops touched by raw meat or a bathroom during flu season need a dedicated disinfectant applied after cleaning, as the CDC’s home cleaning and disinfecting guidance describes. Strong chemistry also demands respect: never blend cleaning products, and store them per Health Canada’s household chemical safety rules, since mix-ups like combining bleach with other cleaners can release toxic gas. Smart Technique: Dilute, Two-Bucket, Microfiber Most neutral cleaners ship as concentrates, so dilute exactly to the label. Too much product leaves a sticky film that attracts fresh dirt, the opposite of the goal. For floors, the two-bucket method keeps things honest: one bucket holds cleaning solution, the second holds clean rinse water, so the mop never redistributes what it lifted. On countertops, pair the cleaner with a quality microfiber cloth whose fibers trap soil instead of pushing it around. Lift the dirt, remove it, leave nothing behind but a clean surface. The sensible arsenal is small: a neutral workhorse for the vast majority of daily and weekly tasks, plus acidic and alkaline specialists reserved for the specific problems that truly need them. Which Cleaner for Which Surface Surface or soil Right chemistry Why Marble, limestone, travertine, onyx pH-neutral Acids etch calcium carbonate instantly Granite and sealed stone pH-neutral Protects the stain-blocking sealant Sealed hardwood, LVT, laminate pH-neutral, diluted Spares the wear layer and the warranty Leather, upholstery, delicates pH-neutral Keeps natural oils and dyes intact Hard water and soap scum Mildly acidic Alkaline minerals dissolve in acid Baked-on grease Mildly alkaline degreaser Saponifies polymerized oils Germ-sensitive counters Clean, then disinfect Neutral soap lifts soil, not pathogens pH-Neutral Cleaner FAQ How do I know if a cleaner is truly pH-neutral? The label should say pH neutral or pH 7. If it does not, contact the manufacturer; a generic “all surface” claim is not a promise, since many multi-purpose products lean alkaline. Is a diluted neutral cleaner safe for everyday mopping? Yes, and it is the recommended routine for sealed floors and stone. Use weak solution, a well-rinsed mop

Understanding pH-Neutral Cleaners: The Complete Guide Read More »

6 Reasons Why Dry Cleaning is The Safest Option For Your Most Important Clothes

The term “dry cleaning” is one of the more misleading phrases in common use, as the process is neither dry nor, strictly speaking, just cleaning. It is a complex and highly specialized method of garment care that involves sophisticated machinery, a deep understanding of fabric science, and the precise application of chemical solvents. The core principle that separates dry cleaning from traditional laundering is the absence of water. Instead of H2O, garments are submerged in and cleaned with a liquid solvent that is specifically chosen for its ability to dissolve oils and greases without damaging delicate, water-sensitive fibers like silk, wool, rayon, or intricately constructed pieces like tailored suits and formal gowns. Water can cause these natural fibers to shrink, distort, or lose their color, but a solvent can lift away stains and soil while leaving the garment’s structure and feel intact. The entire journey of a garment through a dry cleaning facility is a multi-step procedure that combines skilled human touch with advanced technology. 1.Diagnostic The process begins the moment a customer brings a garment to the counter. This initial interaction is a crucial diagnostic step. The customer might point out specific stains, and a knowledgeable cleaner will inquire about the source of the stain, as this information dictates the treatment. Following this, the garment undergoes its first inspection. A trained professional examines it meticulously, not just for the stains pointed out by the customer, but for any others that may be less obvious. They also check the integrity of the garment, noting any loose buttons, open seams, or pre-existing damage. This is also when the care label is read and assessed. The care label is a legal directive from the manufacturer, and the cleaner must adhere to its instructions. Finally, each garment is tagged. This is a critical organizational step. A small, numbered tag or a barcode is affixed to an inconspicuous seam, ensuring that the piece can be tracked throughout the entire process and correctly reassembled with its owner’s order at the end. 2.Stain Removal Before the main cleaning cycle can begin, the garment moves to what is arguably the most artful and skill-intensive stage of the process: pre-treatment, also known as “spotting.” This is where a specialist, the spotter, addresses individual stains. Working at a specialized station called a spotting board, which provides steam, vacuum, and a variety of chemical agents, the spotter acts as a fabric chemist. They must identify both the type of fabric and the nature of the stain to select the correct chemical agent and technique. Stains are broadly categorized; for example, oil-based stains like grease or salad dressing require different solvents than protein-based stains like blood or egg, or tannin-based stains like wine, coffee, or juice. The spotter uses a “steam gun” to apply steam and heat to help loosen the stain, and various chemical solutions are carefully applied, tamped with a small brush, and then flushed out with more steam. A vacuum pedal on the spotting board suctions away the loosened stain and excess moisture, preventing a ring from forming on the fabric. This targeted treatment is essential because the general cleaning cycle might not be sufficient to remove stubborn, set-in stains. 3.Dry Clean Once pre-treated, the garments are ready for the main event: the cleaning machine itself. A modern dry cleaning machine looks very much like an oversized front-loading washing machine, but its internal workings are far more complex. It is a sealed, self-contained system that performs the washing, rinsing, and drying cycles all in one unit. Garments are sorted by color, weight, and fabric type and then loaded into the machine’s drum. The door is sealed, and the machine begins its cycle by filling the drum with the chosen solvent. Historically, the most common solvent was perchlorethylene, or “perc,” a powerful and effective degreaser. However, due to environmental and health concerns, the industry has increasingly shifted towards more eco-friendly alternatives like hydrocarbon solvents, liquid silicone, or even pressurized liquid carbon dioxide. As the drum tumbles the clothes gently, the solvent circulates through the fabric, lifting away body oils, grime, and the loosened stains from the pre-treatment stage. This “wash” cycle is typically much gentler than a water-based wash to protect the delicate garments. After the wash cycle, the machine drains the used solvent and begins an extraction cycle, spinning at high speed to remove the majority of the solvent from the clothes, much like a washing machine’s spin cycle removes water. The used solvent is not discarded; it is pumped through a series of filters to remove the collected dirt and impurities and is then distilled. This purification and recycling process is a key feature of the closed-loop system, allowing the expensive solvent to be reused for many cycles, which is both economically and environmentally necessary. 4.Drying Following the extraction, the machine enters the drying phase. A current of warm air is gently tumbled through the clothes to evaporate any remaining solvent from the fabric. This is not the high heat of a conventional dryer. The temperature is carefully controlled to be just high enough to turn the liquid solvent into a vapor without damaging the clothes. This solvent-laden warm air is then drawn out of the drum and passed over cooling coils. As the air cools, the solvent vapor condenses back into its pure liquid form, is collected, and returned to the main solvent tank for reuse. This vapor recovery system is incredibly efficient, recapturing nearly all of the solvent so that very little escapes into the atmosphere. Once the cycle is complete and the sensors detect no remaining solvent fumes, the machine’s door unlocks, and the garments emerge clean, completely dry, and with only a faint, sterile scent that quickly dissipates. 5.Finishes The journey is not over yet. The clean garments are immediately inspected again. Any stains that were not fully removed during the process are noted. These stubborn spots may require “post-spotting,” where the spotter applies more specialized techniques to the now-clean fabric. Once

6 Reasons Why Dry Cleaning is The Safest Option For Your Most Important Clothes Read More »