Floor Cleaning

Clear Snow Safely and Effectively

Snow Cleaning: How to Clear Snow Safely and Effectively

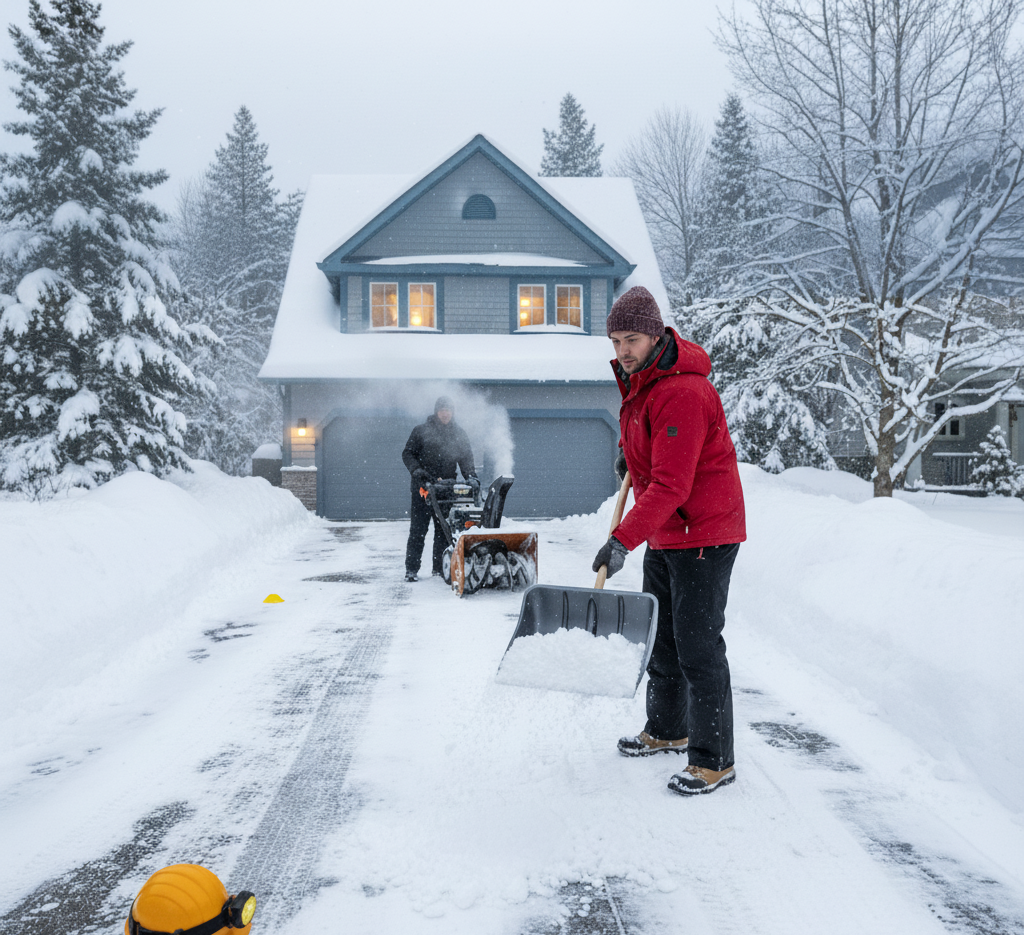
The serene beauty of a fresh snowfall is quickly followed by the practical necessity of snow cleaning. This essential winter chore is not just about maintaining appearances; it is a fundamental task for ensuring safety, accessibility, and the protection of property. A path left uncleared becomes a hazardous sheet of ice, a driveway blocked by a snowbank can trap a vehicle, and the sheer weight of accumulated snow can pose a structural threat. Proper snow cleaning is a proactive engagement with winter weather, requiring the right tools, a sound strategy, and a respect for the physical demands of the job. Without an effective approach to snow cleaning, the winter season can become a period of constant struggle and potential danger. Shovel The cornerstone of any manual snow cleaning operation is the shovel. Yet, the term “shovel” encompasses a range of tools designed for specific purposes, and choosing the correct one is the first step toward efficiency. The classic scoop shovel, with its deep blade, is built for lifting and throwing snow, making it suitable for clearing out tight spaces or moving deep drifts. For larger, flatter areas like driveways and long sidewalks, a snow pusher is a far superior tool. Its wide, curved blade is designed to skim along the surface, pushing a large volume of snow with each pass, which drastically reduces the need for lifting and alleviates strain on the back. Many modern shovels feature ergonomic designs, with bent shafts that encourage a more upright posture, further mitigating the risk of injury during the strenuous task of snow cleaning. The choice of blade material is also significant. Lightweight plastic blades are less likely to damage wooden decks or stone pavers, while heavy-duty metal blades, often fitted with a steel wear strip, excel at breaking through compacted snow and ice. Snow Blower For those who contend with large areas or consistently heavy snowfall, mechanical assistance in the form of a snow blower transforms the nature of snow cleaning. These machines are broadly categorized into single-stage and two-stage models. A single-stage blower employs a fast-spinning auger that makes direct contact with the pavement, scooping up snow and ejecting it through a discharge chute in a single motion. These units are relatively lightweight and easy to maneuver, making them an excellent choice for paved driveways and moderate snowfalls. In contrast, a two-stage snow blower is a more powerful and complex machine designed for heavy-duty snow cleaning. Its auger breaks up heavy, wet, or compacted snow and feeds it into a separate high-speed impeller, which then propels the snow out of the chute. This dual-action process allows two-stage blowers to handle deep snow drifts and throw the snow much farther, a crucial feature for clearing long driveways where snow placement is a key concern. This level of mechanical power makes the challenge of intensive snow cleaning far more manageable. Ice Chopper Even the most thorough snow cleaning effort can leave behind a slick surface of compacted snow or ice. This is where de-icing becomes a critical final step. An ice chopper, with its heavy steel blade, is invaluable for breaking up thick, stubborn ice that other tools cannot dislodge. After the bulk of the material has been removed, applying a de-icing agent can melt the remaining layer and prevent refreezing. Rock salt, or sodium chloride, is the most common and economical choice. It works by creating a brine solution that lowers the freezing point of water, effectively melting the ice. However, its effectiveness diminishes in very cold temperatures, and it can be corrosive to concrete and harmful to plants. Alternatives like calcium chloride and magnesium chloride work at much lower temperatures and are generally considered safer for concrete and vegetation. For households with pets, it is vital to use a specifically formulated pet-safe ice melt, as common de-icers can be toxic to animals. A comprehensive snow cleaning plan must include a strategy for ice management. Injuries The methodology behind snow cleaning is as vital as the equipment. The timing of your efforts can significantly impact the difficulty of the task. It is far less arduous to clear a few inches of snow two or three times during a major storm than it is to confront a single, deep accumulation of heavy, compacted snow afterward. Waiting too long allows the snow to settle and bond to the surface, making the job much harder. An early and frequent approach is the hallmark of an efficient snow cleaning strategy. When the time comes to shovel, proper physical technique is essential for preventing injury. The power for lifting should come from the legs, not the back. This means bending at the knees and hips while keeping the back straight and core muscles engaged. Whenever possible, push the snow rather than lifting it. If lifting is necessary, keep the shovel close to your body and avoid twisting your torso to throw the snow; instead, pivot your entire body by moving your feet. The repetitive nature of snow cleaning makes taking regular breaks essential to prevent overexertion. Garage A systematic approach to the physical layout of the job is also crucial. Before starting, identify where the cleared snow will be piled. It is imperative that these piles do not obstruct sightlines for drivers at the end of a driveway or at street corners. Piling snow against a building’s foundation can introduce moisture and lead to leaks as it melts. Furthermore, ensure that storm drains are not blocked, as this can cause significant flooding during a thaw. For those using a snow blower, working with the wind is a simple but effective tactic, preventing the discharged snow from blowing back onto cleared areas or into your face. A well-executed snow cleaning job is one that is done with foresight. Roof The responsibility of snow cleaning is not limited to ground-level surfaces. The weight of heavy snow on a roof can pose a serious structural risk. A roof rake, which is a wide blade attached to a long, telescoping

Snow Cleaning: How to Clear Snow Safely and Effectively Read More »

Understanding Acetone: A Guide to the Powerful Cleaning Solvent

What Makes Acetone a Powerful Cleaning Solvent Acetone is a potent organic solvent that dissolves residues most household cleaners cannot touch: oils, greases, dried paint, varnish, lacquer, permanent ink, and stubborn adhesives. Chemically, it is a polar aprotic solvent, so it attacks both greasy, non-polar materials and many polar substances. It also evaporates very quickly, which means it can do its job and vanish, usually leaving a clean, dry, residue-free surface behind. That speed and strength are exactly why acetone demands respect: it is indiscriminate, so you need to know where it helps and where it will do damage. Top Cleaning Jobs for Acetone Paint and Finish Removal Splatters of dried latex or oil-based paint on hard, non-porous materials such as glass, tile, or bare metal are no match for acetone. It breaks down the polymer binders that hold paint together, liquefying the coating so it can be wiped away. The same chemistry makes acetone the standard choice for cleaning paint brushes, roller covers, and spray gun components used with lacquers and enamels. It can also strip varnish or polyurethane from metal hardware and lift old, yellowed lacquer from brass fixtures. Expect to apply it, give it a few minutes to work, and then scrape or wipe off the softened layers. Adhesive and Residue Removal Most nail polish removers list acetone as their active ingredient because it dissolves the tough acrylic polymers in nail lacquer. The same principle defeats cyanoacrylate, better known as super glue: a small dab, carefully applied, dissolves the bond on skin or countertops. Acetone also penetrates the gummy residue left behind by stickers, labels, and tape, cutting through the stickiness until it wipes clean. Heavier challenges such as contact cement or construction adhesive usually need several applications plus some mechanical scraping. Workshop Degreasing Before welding, painting, or powder-coating a metal part, any trace of oil or wax can ruin the bond or finish. Acetone cuts through petroleum-based grime and flashes off fast, leaving a clean substrate. Mechanics use it on automotive parts, machinery, and tools to dissolve grime and tar that would otherwise require heavy scrubbing. On a concrete garage floor, it can lift deep oil stains, but only when you pull the dissolved oil up with an absorbent material; used carelessly, acetone can drive the stain deeper into the porous concrete. Remove nail polish spills from hard surfaces. Break super glue bonds on skin and countertops. Dissolve sticker, label, and tape residue. Clean brushes and rollers after lacquer or enamel projects. Prep metal parts before painting or welding. Where Acetone Causes Damage Acetone dissolves many common plastics, including polystyrene (styrofoam), ABS found in electronics housings and car interiors, acrylic (Plexiglas), and polycarbonate. Contact can soften, warp, cloud, or fully dissolve these materials, and even brief exposure can cause solvent crazing, a web of fine surface cracks. High-density polyethylene (HDPE) and polypropylene generally resist the solvent, so they are the usual choice for acetone containers. Finished wood is another casualty: acetone strips shellac, varnish, lacquer, and polyurethane, dries out the wood fibers, and can lift veneers or damage laminates, so it should never touch wooden furniture, flooring, or cabinetry unless a full refinishing is planned. Some fabrics are equally vulnerable. Acetate, triacetate, and modacrylic fibers can literally dissolve, creating holes, while cotton, wool, and silk usually survive but may lose dye. Material Acetone reaction Safe to clean? Polystyrene, ABS, acrylic, polycarbonate Softens, warps, clouds, or dissolves No; test a hidden area first HDPE and polypropylene Resists the solvent Yes Finished wood and veneers Strips finish, dries fibers Only for refinishing Acetate, triacetate, modacrylic fabric Dissolves; can create holes No Cotton, wool, silk Usually safe; dye may run Spot-test first Acetone Safety: Flammability, Ventilation, and Gear Acetone is extremely flammable with a very low flash point, so vapors can catch fire at room temperature when they meet a spark or flame some distance away. Ignition sources include pilot lights on water heaters, the spark of a refrigerator motor kicking on, and static electricity. Work with strong ventilation: open windows and doors and use a fan to push fumes outside, or work outdoors whenever possible. Protect your skin with butyl rubber or nitrile gloves; latex gloves break down quickly, and direct contact can defat the skin, causing dryness, irritation, and cracking. Wear splash-proof goggles, and in enclosed spaces or during long sessions use a respirator with an organic vapor cartridge, since concentrated fumes can irritate the respiratory tract and cause dizziness and headaches. Health Canada’s household chemical safety tips cover flammable and corrosive products such as paint thinners, and its household products guidance explains safe use and storage around the home. How to Apply Acetone the Right Way For small stains, pour the acetone onto a clean white cloth or cotton ball instead of directly onto the surface; that controls the amount and stops it from spreading to nearby vulnerable materials. Blot the stain from the outside edge inward so it does not create a larger ring, and avoid rubbing, which can push the stain deeper or damage the surface texture. Afterward, wipe the area with a cloth dampened with water and mild detergent, rinse with a clean, damp cloth, and dry thoroughly. Test any new surface or fabric in an inconspicuous spot first, such as an inner seam. Frequently Asked Questions About Acetone Can I use acetone on plastic surfaces? Only on plastics known to resist it, such as HDPE and polypropylene. Most others, including polystyrene, ABS, acrylic, and polycarbonate, will soften, cloud, or dissolve, so always test an unseen area first. Will acetone ruin wood furniture? Yes. It strips the finish, dries out the wood fibers, and can lift veneers. Reserve it for refinishing projects where removing the old finish is the whole point. Is acetone safe on fabrics and carpets? Fabrics made of acetate, triacetate, or modacrylic fibers can dissolve, and dyes on natural fibers may bleed. Spot-test an inconspicuous area before treating any stain. Is nail polish remover the same as pure acetone?

Understanding Acetone: A Guide to the Powerful Cleaning Solvent Read More »

5 Key Areas to Deep Clean Before Winter Sets In

5 Key Areas to Deep Clean Before Winter Sets In

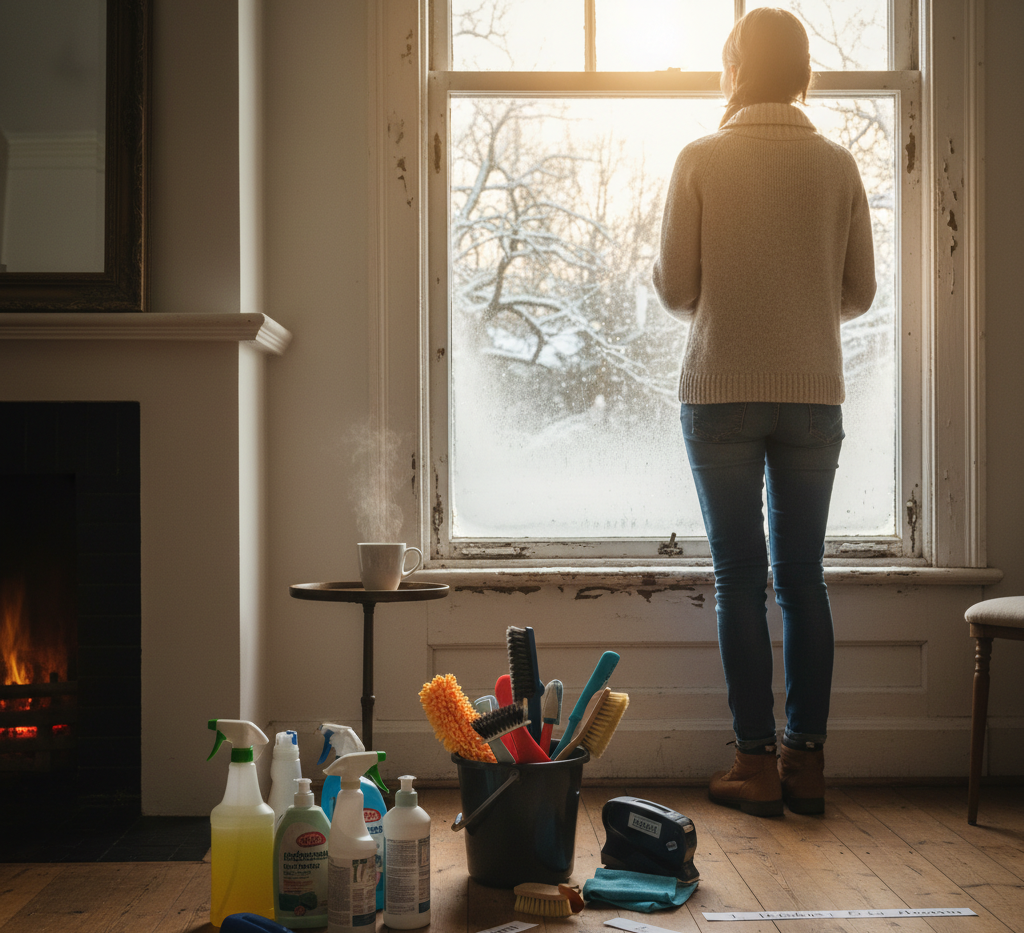
5 Key Areas to Deep Clean Before Winter Sets In When the temperature drops, your home becomes the center of your world. Windows stay closed, the furnace runs daily, and family time moves indoors. That is why a deep clean before winter is more than a seasonal ritual: it protects your air quality, your fabrics, and your comfort for months. These five areas make the biggest difference, and each one is easy to tackle with the right plan. 1. Improve Indoor Air Quality: Vents and Furnace Filter After months of sitting idle, your heating system collects dust, pollen, pet dander, and fine particles in the ductwork. The first time the furnace kicks on, it can blow that accumulation straight into your living space and aggravate allergies. Start by turning off the HVAC system, then vacuum each vent cover with the brush attachment. For a deeper clean, unscrew the covers and wash them in warm, soapy water, using a small brush to reach into the grilles, then vacuum as far into the duct opening as the crevice tool allows. The single most impactful task is replacing the furnace filter. A clogged filter traps fewer particles, forces the system to work harder, and raises both energy use and the risk of malfunction. A fresh filter is inexpensive, and it pays off in health and efficiency all season. Good indoor air quality supports everyday health, and clean vents and filters are the first line of defense, as the CDC notes about air quality. 2. Maximize Natural Light: Windows and Screens Dirty windows can noticeably dim a room during the darker months. Remove your window screens, lay them flat outside, scrub them with a soft-bristled brush and mild soap and water, then rinse and dry completely. Storing screens in a garage or basement during winter lets in more light and protects them from snow and ice damage. Clean the interior glass with warm water and a few drops of dish soap, finishing with a high-quality squeegee for a streak-free result. Do not skip the tracks and sills: a crevice tool clears loose debris, and a damp cloth with an old toothbrush handles the tight corners. Mold can grow where moisture collects around windows, so the CDC recommends keeping damp areas dry. 3. Sanitize Fabrics and Upholstery Comforters, flannel sheets, wool throws, and decorative blankets that have been stored all year can absorb a stale, musty odor. Launder everything according to its care label before use so your cozy essentials are fresh and free of dust mites. Curtains and drapes collect surprising amounts of dust: vacuum them top to bottom with the upholstery attachment, use a steam cleaner on durable fabrics, or machine wash when the label allows. For sofas and armchairs, remove the cushions and vacuum every seam, crack, and corner where crumbs, dust, and pet hair hide. Following basic hygiene practices keeps high-touch fabrics healthier for the whole family. 4. Prepare the Fireplace and Deep Clean Floors Before the first fire of the season, clear and wipe down the mantel, hearth, and fireplace tools so that first flame does not send a plume of dust into the room. The interior of the chimney still needs a professional sweep for safety. Then turn to the floors: carpets and area rugs become the main surfaces for play and relaxing, and a quick vacuum will not do. Vacuum slowly and methodically, making multiple passes in overlapping, perpendicular directions to agitate the pile and pull embedded grit from the fibers. Move furniture where possible to reach the dustiest corners of the room. 5. Get the Kitchen Ready for the Busy Season Winter brings hearty soups, slow-cooked stews, and holiday baking, so the kitchen deserves attention now. Deep clean the refrigerator inside and out: remove shelves and drawers, wash them in warm, soapy water, and wipe every interior surface. This also forces a useful inventory before you stock up for the holidays. Clean the oven well before the turkey goes in, using the self-cleaning function or a manual baking soda and vinegar method so it heats evenly without smoke or odors. Finally, declutter the pantry and take stock of baking supplies and staples so meal prep runs smoothly. Winter Deep Cleaning Checklist Vacuum vents and wash vent covers; replace the furnace filter. Remove, clean, and store window screens; clean glass, tracks, and sills. Launder stored bedding and throws; vacuum curtains and upholstery seams. Wipe the mantel and hearth; book a professional chimney sweep. Deep vacuum carpets with slow, overlapping passes. Clean the fridge and oven; organize the pantry. Winter Cleaning Priorities at a Glance Area Why It Matters Top Task Vents and filter First furnace run can spread dust and allergens Wash covers, replace the filter Windows and screens Maximizes scarce winter light Clean glass and store screens Fabrics and upholstery Removes dust mites and musty odors Launder bedding, vacuum sofas Fireplace and floors Prevents dust plumes and fiber wear Wipe hearth, deep vacuum carpets Kitchen Ready for holiday cooking and guests Clean fridge, oven, and pantry Frequently Asked Questions How often should I replace my furnace filter before winter? Check it monthly and replace it at least once before the heating season starts. A clogged filter makes the furnace work harder, increases energy use, and lets dust and allergens recirculate, so a fresh filter is the cheapest air quality upgrade you can make. Do I really need to clean window screens in winter? Yes. Screens trap dust and pollen all summer, and cleaning them before storage keeps grime from transferring to your glass. Storing them dry also protects the mesh from snow and ice damage and lets more natural light into the room. Can I clean my own chimney? No. The interior of the chimney should be inspected and swept by a certified professional, because built-up creosote is a fire hazard. What you can do yourself is clean the mantel, hearth, and tools before the first fire of the season. Should I hire a professional for

5 Key Areas to Deep Clean Before Winter Sets In Read More »

5 Reasons Why Hiring a Cleaning Service is the Best Form of Self-Care

Why hire a specialized cleaning service? The modern home is a hub of activity, a place of work, rest, and family life. Yet, maintaining its cleanliness can feel like a relentless, never-ending task. The dust settles almost as soon as it’s wiped away, the floors seem to attract dirt, and the kitchen and bathrooms demand constant attention. For many, the weekend, which should be a time for relaxation and recharging, is instead consumed by a long list of chores. This constant cycle of cleaning can become a significant source of stress and a drain on our most valuable resource: time. It is in this gap between the desire for a clean, peaceful environment and the reality of a busy life that a residential house cleaning service finds its purpose, offering not just a service, but a solution to a pervasive modern problem. 1.Quality of Life Hiring a professional cleaning service is often viewed as a luxury, but it is more accurately described as an investment in your quality of life. Consider the hours spent each week sweeping, mopping, scrubbing, and dusting. For a moderately sized home, this can easily add up to four, five, or even more hours. A professional service reclaims those hours for you, handing them back to be spent on what truly matters. This could mean more time with family, pursuing a hobby, exercising, or simply enjoying a well-deserved rest. The cumulative effect of this reclaimed time is profound, reducing burnout and allowing for a better work-life balance. It transforms the home from a place of constant obligation into a true sanctuary, a space you can enter after a long day and immediately feel at ease, rather than being confronted with a list of tasks that need doing. 2.Quality of Cleanliness Beyond the gift of time, there is the undeniable difference in the quality of the clean itself. A professional cleaner brings a level of expertise and efficiency that is difficult for the average homeowner to replicate. They are trained in the most effective methods and understand the specific needs of different surfaces. They know which products to use on natural stone versus laminate, how to clean stainless steel without leaving streaks, and the best techniques for removing stubborn soap scum from glass shower doors. This knowledge prevents costly damage that can result from using the wrong chemical or an abrasive sponge on a delicate surface. Furthermore, professional services come equipped with commercial-grade tools and supplies that are often more powerful and effective than standard consumer products. Their high-powered vacuums with HEPA filters can capture a significantly higher percentage of dust, allergens, and pet dander, leading to improved indoor air quality. This is particularly beneficial for households with allergy sufferers, asthmatics, children, or pets. The result is not just a home that looks clean, but one that feels and is, on a microscopic level, healthier. The process of a professional clean is systematic and thorough. Cleaners typically work with a detailed checklist, ensuring that no area is overlooked. They employ methodical strategies, such as cleaning from top to bottom to ensure dust and debris fall downwards before the floors are addressed, and working from one side of a room to the other. This structured approach guarantees consistency and completeness. A standard recurring clean will typically involve a comprehensive dusting of all surfaces, including furniture, shelves, and window sills; cleaning and disinfecting kitchen countertops, sinks, and appliance exteriors; scrubbing toilets, showers, tubs, and bathroom vanities; and vacuuming carpets and mopping hard floors. This regular maintenance keeps the home at a consistent level of cleanliness, preventing the deep buildup of grime. 3.Deep Cleaning For homes that have gone some time without a thorough cleaning or for clients new to a service, a deep clean is often recommended. This is a far more intensive and detailed service that addresses the areas often missed in a regular routine. A deep clean will include all the tasks of a standard clean but will go much further. It can involve washing baseboards and trim, cleaning light fixtures and ceiling fans, wiping down doors and door frames, cleaning behind and underneath furniture and appliances, scrubbing grout lines, and cleaning the interior of windows. This is the reset button for your home, tackling the accumulated dirt and dust in every nook and cranny, and establishing a new baseline of clean that makes subsequent maintenance easier. Specialized services like move-in and move-out cleanings are another critical offering. Preparing a home for sale or ensuring a new home is pristine before you unpack is an enormous task on top of the already stressful process of moving. A move-out clean is designed to leave the property in immaculate condition for the next occupants, often a requirement for retrieving a security deposit. This is the most exhaustive clean of all, performed on an empty home. Every interior surface is addressed, including the inside of all cabinets, drawers, closets, the oven, and the refrigerator. It ensures the home is presented in its best possible light, which can be a significant factor for real estate agents and potential buyers. Conversely, a move-in clean provides immense peace of mind, sanitizing the space and ensuring you are starting your new chapter in a fresh, thoroughly cleaned environment. 4.Trust and Security One of the most significant barriers for people considering a cleaning service is the idea of trust and security. Inviting someone into your personal space requires confidence in their professionalism and integrity. This is why reputable cleaning companies place such a high emphasis on their hiring and training processes. They conduct background checks on their employees and ensure they are thoroughly vetted. Furthermore, professional services are bonded and insured. Bonding provides protection against theft, while insurance covers any accidental damage that might occur to your property during the cleaning process. This comprehensive protection offers homeowners the peace of mind that they are working with a trustworthy organization that stands behind its work and its people. The relationship with a cleaning service is

5 Reasons Why Hiring a Cleaning Service is the Best Form of Self-Care Read More »

The Power of Citric Acid

The Power of Citric Acid: Your Solution for Limescale and Grime

In the world of cleaning, there’s citric acid, and countless products that promise miraculous results, often based on complex chemical formulations and strong scents. Yet, hiding in plain sight, often in the baking aisle of the grocery store, is a simple, effective, and remarkably versatile compound: citric acid. This white crystalline powder, derived naturally from citrus fruits like lemons and limes, is a powerhouse cleaner that can tackle some of the most stubborn household problems, particularly those related to mineral deposits and hard water. Its strength lies in its chemical nature as a weak organic acid, which allows it to dissolve grime, limescale, and soap scum without the corrosive intensity of stronger mineral acids. Chelation The primary mechanism that makes citric acid so effective is a process called chelation. In areas with hard water, the water is rich in dissolved minerals, primarily calcium and magnesium. When this water evaporates, it leaves behind a chalky, crusty residue known as limescale. This is the buildup you see inside your kettle, on your showerheads, and as a cloudy film on your glassware. Citric acid works by binding to these mineral ions, forming a compound called a chelate. This new compound is water-soluble, meaning the stubborn, stuck-on mineral deposit is transformed into something that can be easily rinsed away. This is a far more effective approach than simply trying to scrub the deposit off, which is often a losing battle and can damage the surface underneath. Kettle One of the most satisfying applications for citric acid is restoring a kettle caked with mineral deposits. Over time, the inside of a kettle can become layered with a thick, white scale that not only looks unpleasant but can also impair its heating efficiency and flake off into your water. To effortlessly clean it, simply fill the kettle about halfway with water, add one to two tablespoons of citric acid powder, and bring it to a boil. Once it has boiled, turn it off and let the solution sit for twenty to thirty minutes. You will often be able to see the limescale fizzing and dissolving. After the waiting period, pour out the solution and rinse the kettle thoroughly with fresh water a few times. The interior will be left sparkling clean, looking almost new, with no scrubbing required. This same principle applies perfectly to automatic coffee makers, which also suffer from internal mineral buildup that can slow down the brewing process and affect the taste of your coffee. To descale a coffee machine, fill the water reservoir with your normal amount of water and dissolve a tablespoon or two of citric acid into it. Run a full brewing cycle with this solution (without any coffee grounds). Afterwards, run at least two more full cycles with only fresh, plain water to ensure all traces of the acid are rinsed out of the machine’s internal components. Dishwasher This descaling power extends to the workhorse of the kitchen, the dishwasher. A dishwasher in a hard water area can quickly become inefficient as its spray arms, filter, and interior walls get coated in a film of limescale and soap scum. This not only looks grimy but can prevent the machine from cleaning your dishes properly, leaving them spotty and cloudy. To deep clean your dishwasher, ensure it is completely empty. Pour about half a cup of citric acid powder into the bottom of the machine, or place it in the main detergent dispenser. Then, run the dishwasher on its hottest, longest cycle. The hot water will activate the acid, which will circulate throughout the entire system, dissolving mineral deposits from the jets, pipes, and walls, leaving the stainless steel interior gleaming and helping the appliance run more efficiently. Beyond descaling appliances, citric acid makes an excellent all-purpose cleaning spray for various kitchen surfaces. To create a general cleaning solution, dissolve one to two tablespoons of citric acid powder in about a liter of warm water in a spray bottle. Shake it well until the crystals are fully dissolved. This spray is fantastic for cutting through grease and grime on countertops, cleaning sinks, and shining up stainless steel faucets and appliances. It effectively removes water spots and leaves a streak-free shine. It can also be used to disinfect and deodorize cutting boards. Simply sprinkle a small amount of the powder onto a damp board, scrub with a sponge, let it sit for a few minutes, and then rinse thoroughly. However, a critical word of caution is necessary here: because it is an acid, this solution should never be used on natural stone surfaces like marble, granite, or travertine. The acid will react with the calcium carbonate in the stone, causing permanent etching and dulling the finish. Bathroom Moving from the kitchen to the bathroom, citric acid proves its worth against the relentless duo of soap scum and limescale. Soap scum, the grimy film that builds up on shower doors, tiles, and bathtubs, is formed when the fatty acids in soap react with the mineral ions in hard water. Citric acid is uniquely suited to tackle both components of this problem. Using your prepared spray solution, generously coat the affected surfaces. Let it sit for ten to fifteen minutes to allow the acid time to break down the deposits. Then, scrub with a non-abrasive sponge or brush and rinse well with water. For shower doors plagued by cloudy water spots, this method will restore clarity and shine. Showerheads are another common casualty of hard water, becoming clogged with limescale until the water sprays out in uneven, weak jets. To clean a clogged showerhead without removing it, fill a plastic bag with your citric acid and water solution, submerge the showerhead completely in the liquid, and secure the bag in place with a rubber band or twist tie. Leave it to soak for at least an hour, or even overnight for severe buildup. After soaking, remove the bag and run the shower on hot for a minute to flush out any remaining

The Power of Citric Acid: Your Solution for Limescale and Grime Read More »

woman preparing the house for Halloween

Halloween Cleaning: The Secret to a Stress-Free Halloween? A Pre-Holiday Clean.

Why a Pre-Halloween Clean Makes the Holiday Easier Halloween planning usually centers on costumes, candy, pumpkins, and decorations, but the step that makes everything else work is a pre-holiday clean. A targeted cleaning session that moves from the outside of your home inward prepares your walkway, entryway, and main rooms for trick-or-treaters, guests, and decorations. It is not just about tidiness: clearing wet leaves and clutter prevents slips, a wiped-down kitchen makes treat prep safer, and a dust-free living room shows off your spooky decor instead of hiding it. Start Outside: Walkway, Porch, and Front Door The exterior is where the Halloween experience begins, so it deserves the first pass. The walkway, porch, and front door form the stage for the whole evening and the first point of contact for every visitor. Clear the Walkway and Porch In October, the path to your door is often covered with fallen leaves, twigs, and mud. Damp leaves make the path genuinely slippery, a real risk for small children in bulky costumes moving around in the dark. Sweep the entire walkway from the sidewalk to the front steps, then spray it with a garden hose to wash away residual grime. On the porch, remove leftover summer items such as empty planters, garden tools, and worn-out mats, then sweep the whole surface, paying attention to corners where dust and spiderwebs collect. Real webs usually just look neglected, so clear them away to make room for the fake ones. Wipe Down the Door, Windows, and Lights The front door is the centerpiece of the evening. Wipe it down with a damp cloth and warm water with a few drops of dish soap to remove fingerprints and summer dust, and clean the door handle and hardware while you are at it. Windows beside the entry deserve the same attention, since clean glass makes silhouettes, clings, and lighting effects pop; a half-and-half spray of white vinegar and water, wiped with a microfiber cloth or squeegee, does the job. Wipe railings and handrails too, because parents and kids will grip them in the dark. Finally, dust the exterior light fixtures, where built-up dirt and dead insects can dim the glow, and replace any burned-out bulbs so the path and your best decorations stay visible. Sweep leaves and debris from the whole walkway. Clear summer planters, tools, and worn mats from the porch. Wash the front door, handle, windows, and railings. Dust light fixtures and check every bulb. Clean the doormat and the floor beneath it. Inside: Entryway and Main Living Areas Inside, start with the entryway, which faces a constant parade of opening doors on Halloween night. Clear clutter like shoes, bags, and mail so there is a wide, safe path for groups of excited children. Take the doormat outside and scrub it with soap and water if it is a durable outdoor style, or vacuum it well if it is an indoor mat, and clean the floor underneath, which traps surprising amounts of grit. This is also the moment to place a boot tray by the door for wet footwear in the months ahead. From there, move to the living areas visible from the front door: dust the mantel, bookshelves, and tables where candy bowls will sit, then vacuum floors and upholstery. Removing dust and allergens now means better indoor air quality once the decorations go up and the windows stay closed for winter. Kitchen and Bathroom Prep for Guests and Treats The kitchen becomes the command center for Halloween treats, so clear the countertops and wipe them down with a sanitizing cleaner before any baking or candy prep begins. The CDC’s food safety basics start with keeping hands and surfaces clean, and its cleaning and disinfecting guidance explains when to go beyond a simple wipe. Take the chance to sort through the refrigerator, discarding old leftovers to make room for party platters and drinks. The guest bathroom deserves a quick seasonal refresh: shine the mirror, scrub the sink and toilet, wipe the countertop, and put out fresh hand towels with a full supply of soap and toilet paper. Clean the Decorations and Their Storage Space Before carrying bins up from the basement or garage, sweep the floor and wipe the shelves where they were stored so you do not track old dust into clean rooms. As you unpack, give each item a quick wipe: plastic pumpkins, ceramic figures, and other hard decorations gather a layer of dust in storage, and fabric pieces such as throws and wall hangings freshen up in the dryer on a no-heat air cycle. Area Pre-Halloween focus Why it matters Walkway and porch Sweep leaves, hose off grime Prevents slips in the dark Front door and windows Wipe surfaces, clean glass Clean backdrop for decor Entryway Declutter, clean doormat Safe path, less dirt tracked in Living areas Dust and vacuum Better air quality before winter Kitchen and bathroom Sanitize counters, stock supplies Safe treat prep, happy guests Frequently Asked Questions About Halloween Cleaning How early should I clean before Halloween? Aim for the weekend before, so the house is ready for decorating, costume try-ons, and any early parties, with a quick touch-up on the day itself. Is cleaning the walkway really necessary? Yes. Wet leaves and debris are a slipping hazard for children in bulky costumes moving in the dark, and a clear path also makes your home look inviting. What if I am not hosting a party? The essentials stay the same: safe walkways, a clean entry for trick-or-treaters, a tidy kitchen for candy, and a stocked bathroom. Skip only the extra party prep. How do I clean decorations that sat in storage? Wipe hard items such as plastic pumpkins and ceramic figures with a damp cloth, and freshen fabric pieces in the dryer on an air-only cycle to remove dust. Should I clean before or after decorating? Clean first, then decorate. A dust-free base makes the decorations look better and keeps you from wiping around fragile pieces later. Get

Halloween Cleaning: The Secret to a Stress-Free Halloween? A Pre-Holiday Clean. Read More »

Clogged Drain? 4 Tips to Fix it Without Harsh Chemicals

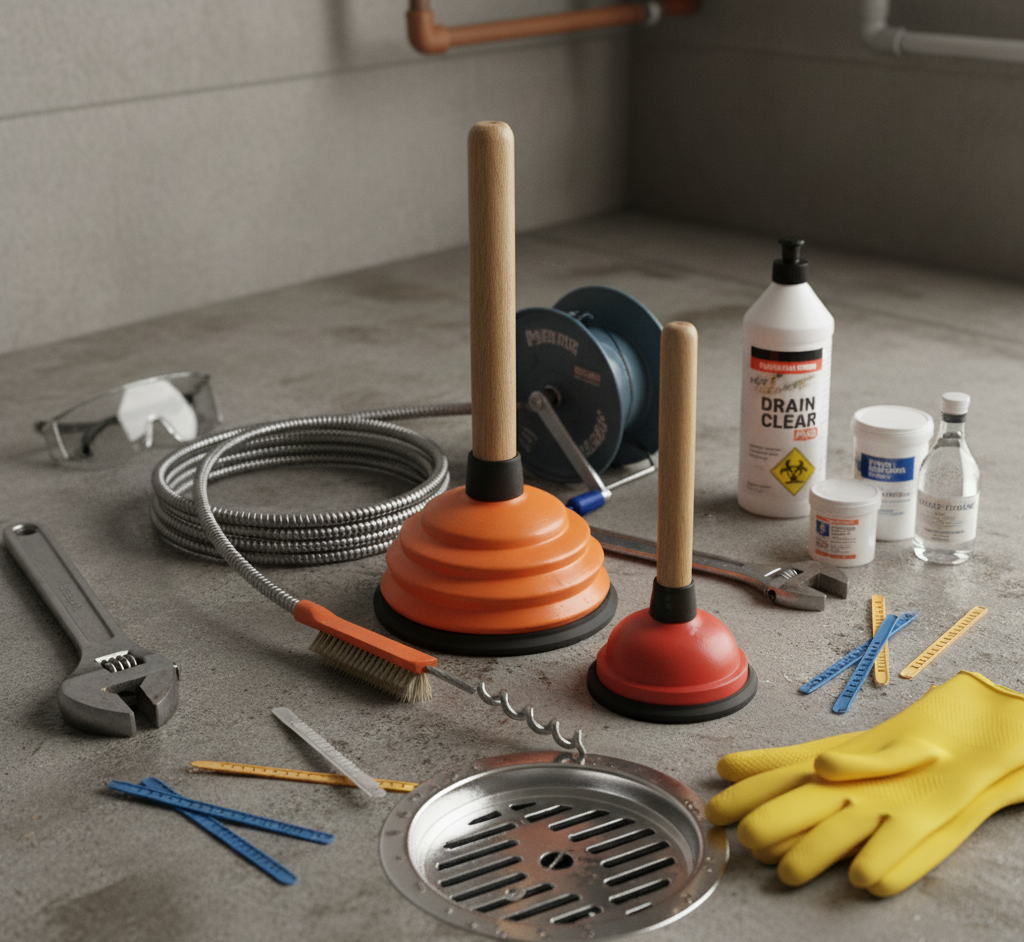
Clear a Clogged Drain the Safe Way, Without Harsh Chemicals A clogged drain rarely announces itself loudly. It starts with a gurgle, then water that takes longer to disappear, and soon you are standing in a shallow pool at the end of a shower or watching the kitchen sink back up. The instinct to grab a liquid chemical cleaner is understandable, yet it is usually the worst first move: caustic products can damage pipes and leave dangerous liquid behind if the clog survives. The smarter play is to escalate from gentle household methods to direct physical removal. Know Your Clog: Kitchen Grease Versus Bathroom Hair Drain blockages behave differently by location. The kitchen sink collects grease, fats, and oils from cooking, plus small food particles and coffee grounds. Hot grease poured down the drain travels a short distance, cools, and solidifies, coating the pipe with a sticky layer that catches debris until the flow is fully blocked. The bathroom drain battles hair: strands wash down and tangle into a net that soap scum, conditioner, and toothpaste residue cement into a dense plug. The right fix depends on which enemy you face. Why Chemical Drain Cleaners Are the Wrong First Step Most chemical uncloggers rely on sodium hydroxide, also known as lye, or sulfuric acid. These caustic substances dissolve blockages through a reaction that generates heat, which can soften PVC pipes and corrode metal pipes in older homes, leading to leaks and expensive repairs. The fumes are toxic in a poorly ventilated bathroom or kitchen, and the products kill the bacteria that septic systems need to break down waste before eventually reaching waterways. Worst of all, if the chemical fails, the pipe now holds corrosive liquid, making a later attempt with a plunger or snake a hazardous job. Health Canada’s household chemical safety guidance spells out the risks of drain cleaners and other caustic products, and its page on using household products safely is a solid reference before you buy anything else. Fix 1: Boiling Water, Then Baking Soda and Vinegar Start with the gentlest weapon, aimed squarely at grease. Boil a full kettle or pot of water and pour it down the drain in two or three stages, letting it work for a few seconds between pours so the heat melts solidified grease and flushes it through. If the water still drains slowly, pour about half a cup of baking soda down the drain, follow it with half a cup of distilled white vinegar, and immediately cover the opening with a plug or cloth so the fizzing reaction stays inside the pipe. Leave the mixture for at least an hour, or overnight for a stubborn clog, then flush with a pot of boiling water. These gentle methods are best for maintenance and slow drains. Fix 2: Plunge With the Right Tool and Technique The plunger is the tool most homes own and few use well. Know your models: the standard cup plunger suits flat surfaces such as a kitchen sink, while the flange plunger, with its smaller extension cup, seals better in a toilet and works well in bathtubs and showers. Plug the second basin of a double sink with a wet rag and block the tub or sink overflow with a damp cloth, then add enough water to cover the plunger cup, because the plunger moves water, not air. Push down gently to expel the air, then work a series of vigorous push-pull motions, emphasizing the pull, which creates the suction that dislodges the clog. After about 20 seconds, lift the plunger and test the drain, repeating as needed. Fix 3: Snake the Drain or Clean the P-Trap If plunging fails, go deeper with a drain snake, also called a hand auger. Feed the flexible cable into the drain until you feel resistance, tighten the thumbscrew, and turn the handle so the corkscrew tip breaks up the clog or latches onto it, then pull the whole mess back out. Cheap plastic zip-it strips, long barbed strips of plastic, are remarkably effective at pulling hair from bathroom drains. Still no results? The clog likely sits in the P-trap, the U-shaped pipe under the sink that holds water against sewer gas. Place a bucket underneath, unscrew the two slip nuts by hand or with channel-lock pliers, empty the trap, and scrub the gunk from inside. Check the horizontal pipe leading into the wall as well, then reassemble with the gaskets seated, hand-tighten the nuts, add a final quarter-turn with your pliers, and run water to check for leaks. Which Fix Matches Your Clog? Situation Best First Tool Escalate When Slow kitchen drain with greasy buildup Boiling water, then baking soda and vinegar Water still pools after two attempts Bathtub or shower drain full of hair Flange plunger or zip-it strip No movement after 20 seconds of plunging Sink that drains, then slowly refills Drain snake fed toward the P-trap The snake pulls nothing back Standing water beneath the sink P-trap removal with bucket and pliers Any leak after reassembly, call a plumber Prevention Is the Real Fix Never pour cooking grease, fats, or oils down the sink; collect them in a jar or can, let them solidify, and toss them in the trash. Use a mesh strainer in the kitchen sink to catch food particles and empty it into the bin. Run hot water down the drain for about a minute after washing greasy dishes. Fit the shower or tub drain with a hair-catching cover and clear it after every shower. Frequently Asked Questions Is it safe to pour boiling water down PVC pipes? For most modern plumbing, yes. The water cools quickly as it travels, and the heat is what melts the grease. If your home has very old or brittle plastic pipes, use hot tap water instead and lean on the baking soda and vinegar step. Why does my drain clog again a few weeks after I clear it? The blockage was probably pushed further down the pipe

Clogged Drain? 4 Tips to Fix it Without Harsh Chemicals Read More »

clean carpet

DIY vs. Store-Bought: What’s the Best Carpet Cleaning Solution?

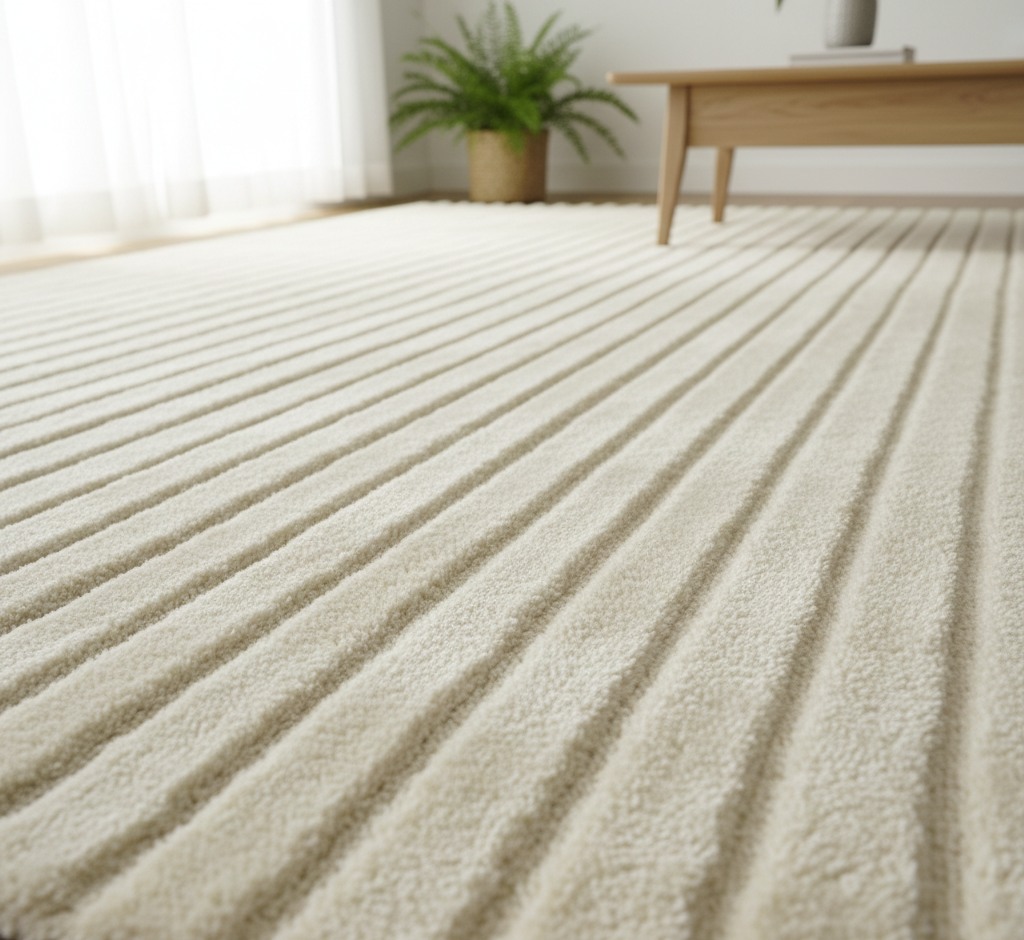
DIY vs. Store-Bought: What’s the Best Carpet Cleaning Solution? Every homeowner asks this question, and the honest answer is that no single product wins for every situation. The cleaner that lifts a pet stain may do nothing for grease, and the mixture that handles a small spill is not what you need for a full-room deep clean. The best carpet cleaning solution is the right solution for the right problem, so the real skill is knowing what each type of cleaner does and when to use it. The Chemistry Behind Carpet Cleaners Commercial and homemade carpet cleaners rely on the same few families of ingredients. Surfactants break the surface tension of water so it can penetrate fibers, latch onto greasy dirt, and hold it in suspension until it is blotted or extracted away; simple dish soap is a basic surfactant. Enzymes are proteins that break down other proteins, starches, and fats, which makes them the only real answer for organic stains like blood, grass, or urine. Solvents dissolve substances that water cannot, such as grease, oil, ink, and tar. Oxidizers release oxygen that breaks the chemical bonds of colored stains; hydrogen peroxide and sodium percarbonate, the active ingredient in OxiClean, are the most common examples. Ingredient What It Breaks Down Common Example Surfactants General dirt and light grease Clear dish soap Enzymes Proteins, starches, fats Protease, amylase, lipase cleaners Solvents Oil, ink, tar, wax Rubbing alcohol, citrus degreasers Oxidizers Colored stains like wine and coffee Hydrogen peroxide, sodium percarbonate DIY Carpet Cleaning Solutions That Work White vinegar and water is the classic first response: mix equal parts distilled white vinegar and water in a spray bottle, mist the area lightly, let it sit for 5 to 10 minutes, and blot with a clean, white cloth. Vinegar is a mild acid that dissolves grime, neutralizes alkaline messes, and deodorizes, but it can set protein-based stains like eggs or blood, so skip it there. Baking soda is a mild alkali that absorbs moisture and odors: sprinkle it dry over the carpet and leave it for several hours or overnight before vacuuming, or pile it onto a wet, greasy spill and let it form a dry crust, then scrape and vacuum. For general dirt, no more than one-quarter teaspoon of clear, simple dish soap in a cup of warm water gives extra lifting power, but overuse or poor rinsing leaves a sticky residue that attracts dirt faster than before. Hydrogen peroxide at 3 percent works on tough organic stains like blood, wine, or coffee: apply a small amount, let it bubble for 10 to 15 minutes, blot, and always test it in a hidden spot first because it can mildly bleach carpet color. When to Choose a Commercial Carpet Cleaner DIY solutions are great for everyday messes, but commercial products bring targeted chemistry for hard jobs. Enzyme-based cleaners labeled for pet stains and odors are the non-negotiable choice for urine, feces, vomit, blood, and food spills, because only enzymes truly break down the odor-causing proteins. Oxidizing cleaners are the go-to for red wine, juice, coffee, and tea. Solvent-based spotters handle grease, oil, and ink. Carpet shampoos for cleaning machines come in high-traffic, pet, and oxy formulas, and it is crucial to buy one designed for your machine so excess foam cannot damage the motor. Dry carpet cleaning powders are useful for natural fiber rugs and quick freshen-ups between deep cleans. Carpets trap dust and allergens, so a thorough clean also supports better indoor air quality. Technique Matters More Than the Product Even the best carpet cleaning solution fails when technique is wrong. Act fast, because fresh spills lift far more easily than set-in ones. Blot, never rub, working from the outside of the stain inward with a clean, white cloth. Always spot test any new product on a hidden area. Do not over-saturate, because soaking can damage the carpet backing and subfloor and invite mold and mildew growth. Rinse thoroughly by blotting with plain water after treatment, since leftover residue attracts dirt and creates dark spots over time. Around pets and children, prompt cleanup is part of everyday hygiene that keeps the whole household healthier. The Best Carpet Cleaner for Every Situation General dirt and light spills: DIY white vinegar and water solution. Pet urine and organic accidents: commercial enzyme-based cleaner. Red wine, coffee, or juice: commercial oxidizing (Oxi) cleaner. Grease or oil: absorb with baking soda, then a solvent-based spotter. Full-room deep clean: machine-compatible carpet shampoo, such as a pet formula. Frequently Asked Questions Is vinegar safe for all carpets? No. Vinegar is acidic, and it can react with and set certain protein-based stains like blood or eggs. Test it in a hidden area first, and never use it on stains you cannot identify. Can I use dish soap on carpet stains? Yes, in very small amounts: no more than one-quarter teaspoon of clear dish soap in a cup of warm water. Too much soap leaves sticky residue that attracts dirt, so rinse by blotting with plain water afterward. What removes pet urine smell from carpet? An enzyme-based cleaner is the only reliable answer. Enzymes break down the uric acid crystals and proteins that cause lingering odors, while vinegar or soap only mask them temporarily. How often should I deep clean my carpets? For a typical household, an annual professional deep cleaning is recommended, with more frequent cleanings for homes with pets, children, or heavy foot traffic. Does hydrogen peroxide bleach carpets? It can. Hydrogen peroxide is an oxidizer with a mild bleaching effect, so always test it in an inconspicuous spot, such as inside a closet, before treating a visible stain. Choosing the right carpet cleaning solution is detective work: identify the stain, understand the chemistry, and match the product to the problem. For a comprehensive professional deep clean that takes the guesswork out of the equation, Toronto Shine Cleaning uses professional-grade solutions and commercial equipment to tackle any stain on any type of carpet. Explore our deep cleaning service,

DIY vs. Store-Bought: What’s the Best Carpet Cleaning Solution? Read More »

Cleaning Patios and Decks: 5 Essential Tips for Cleaning Your Patio Before the Snow

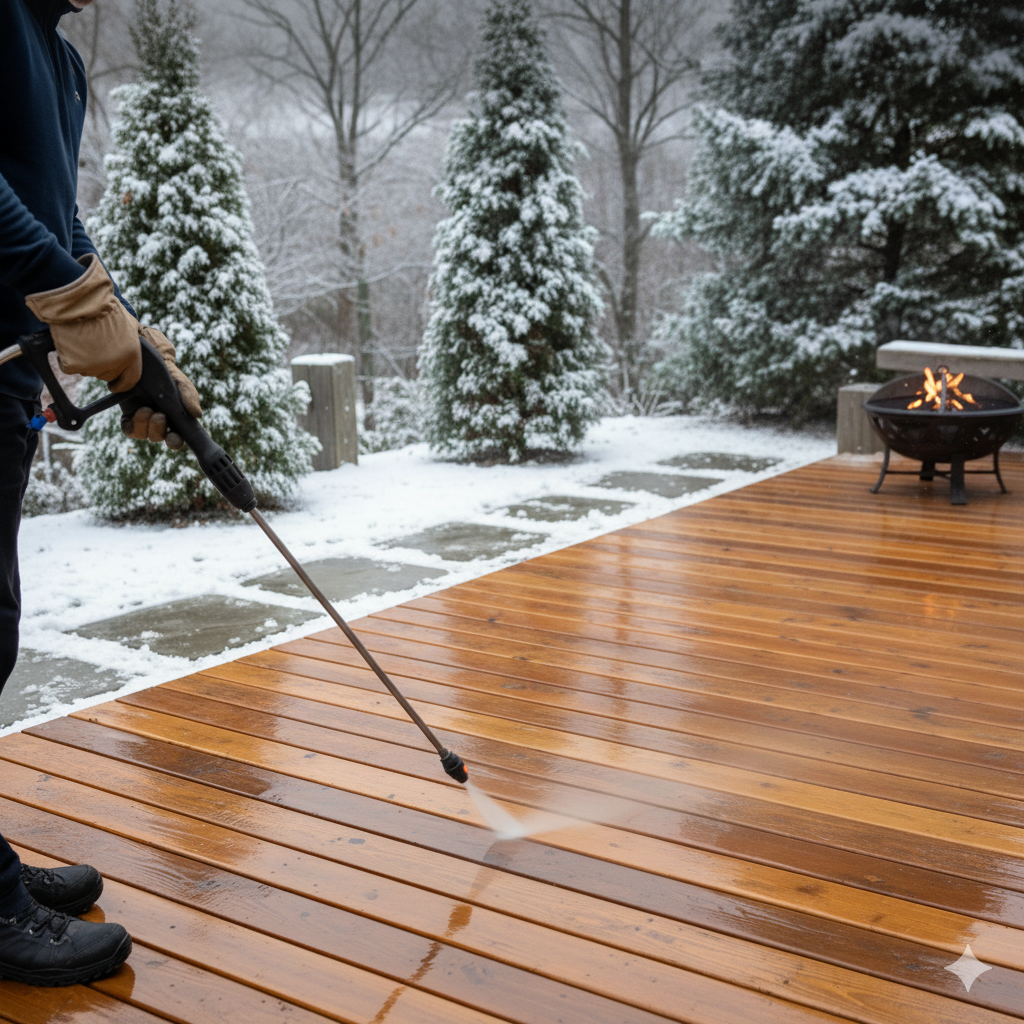
Why Patio and Deck Cleaning Is a Pre-Winter Must Your patio or deck is an outdoor living room used all summer, but unlike indoor rooms it fights the elements all season: rain, sun, falling leaves, bird droppings, and the slow creep of mold, mildew, and algae. By late fall that exposure leaves a welcoming space grimy, stained, and sometimes slippery enough to be hazardous. Cleaning it before the snow arrives protects the surface through winter and prepares it for spring. The approach is systematic: clear, assess, clean with the right product for the material, rinse properly, and protect. Tip 1: Clear Everything, Then Sweep Before a single drop of cleaner lands, evacuate the space: move the furniture, grill, planters, umbrellas, and outdoor rugs off the deck or patio. Clearing the area is not just about access: it reveals the algae patch under a planter, the grease splatters near the grill, and the true scale of the job. With the space bare, sweep thoroughly with a stiff-bristled push broom, paying special attention to the corners and the gaps between deck boards where leaves and grit hide. Loose debris is abrasive, so this sweep prevents scratching later. Tip 2: Identify the Surface and the Problem Now that the deck is bare and swept, look closely. Is it wood, composite, or a hardscape of concrete, pavers, or natural stone, and what exactly are you fighting? Dark, blackish spots usually mean mold. Green, slimy patches are algae, a genuine slipping hazard. Dark circular stains mark where planters sat for months. Sticky, greasy film collects around the barbecue. Mold and algae thrive wherever moisture lingers, and the CDC’s overview of mold explains why damp spots around the home should be cleaned up and their cause fixed. Your surface type and stain type decide which cleaner you need, so match the product to the material instead of reaching for the first spray on the shelf. Tip 3: Match the Cleaner to the Material Wooden decks need cleaning power balanced with protection. Start with the gentlest option: a mild pH-neutral soap such as dish soap in a bucket of warm water, scrubbed with a soft-bristle brush and rinsed thoroughly. For embedded dirt, algae, and mold, oxygen bleach, also sold as sodium percarbonate, is the right call: unlike chlorine bleach, which is harsh on wood fibers and harmful to surrounding plants, it releases oxygen ions that break down grime without damaging the wood. Wet the whole deck with plain water first so the solution is not absorbed unevenly, apply it with a mop or garden sprayer, let it dwell for 10-15 minutes without drying, then scrub with the grain and rinse. Composite decks are marketed as low-maintenance, not no-maintenance: mold can feed on the organic fillers inside the material. A soft-bristle brush with mild soap handles routine dirt, and one part white vinegar mixed with two parts water treats mold. Skip abrasive pads and metal brushes, which scratch and dull the finish. Concrete, pavers, and stone tolerate more aggressive methods. A degreaser handles oil and grease spots from the grill or car on concrete: apply it, let it penetrate, scrub, and rinse or pressure wash away. Pull weeds and moss from paver joints before you clean. Natural stone such as flagstone or slate demands the most caution: never use acid-based cleaners such as muriatic acid, which etch the surface permanently. Test any product on a hidden spot first and use a pH-neutral cleaner designed for natural stone. Surface by Surface Cleaner Guide Surface Recommended Cleaner Avoid Wooden deck pH-neutral soap, then oxygen bleach for mold and algae Chlorine bleach and aggressive blasting Composite deck Mild soap; one part vinegar to two parts water for mold Abrasive pads and metal brushes Concrete patio Degreaser for oil spots, pressure washer for grime Nothing in particular, it is durable Brick and stone pavers Degreaser plus hand-pulled weeds from joints A jet stream that washes out jointing sand Natural stone pH-neutral cleaner made for stone Any acid-based cleaner, including muriatic acid Tip 4: Treat the Pressure Washer as a Rinse, Not a Weapon Used carelessly, a pressure washer does real damage: a stream set too powerful or held too close gouges wood, raises the grain, and leaves a fuzzy, splintered surface. If you use one, keep the pressure at no more than 1200 PSI for softwoods such as pine, fit a wide 40-degree fan tip, hold the nozzle at least a foot away, and keep moving in long sweeps. The cleaner lifts the grime; the washer only washes it away. On pavers, aim carefully so the stream does not blast the jointing sand out from between the stones. Tip 5: Dry, Inspect, and Protect Before Winter After rinsing, let the entire area dry completely, which can take a full day or more. Then inspect your work for missed spots and needed repairs, such as popped nails on a deck or a cracked paver. A clean wooden deck is a vulnerable deck, so fall is the time to stain or seal it: a quality sealer keeps moisture from penetrating and causing rot and blocks the sun’s UV rays, which turn wood gray and brittle. Some natural stone and paver installations also benefit from a sealer that resists stains. Moisture management matters indoors just as much, and Health Canada’s guidance on humidity and mould explains why fixing moisture problems promptly prevents growth. Frequently Asked Questions Can I clean my deck with bleach? Chlorine bleach is harsh on wood fibers and harmful to nearby plants, so oxygen bleach is the safer choice for mold and algae on a wooden deck. Reserve chlorine bleach for indoor jobs where the label permits it. Is power washing bad for wood decks? Only when it is misused. Keep the pressure at about 1200 PSI or less for softwoods, use a wide 40-degree fan tip, stay at least a foot away, and keep the nozzle moving. Use the washer to rinse after a chemical cleaner, not to blast dirt

Cleaning Patios and Decks: 5 Essential Tips for Cleaning Your Patio Before the Snow Read More »

clean and sanitized house because of lysol

Lysol 101: A Guide to a Truly Hygienic Home

Lysol 101: Clean First, Disinfect Second, Every Time For more than a century, Lysol has been the name most people associate with killing germs, and its sharp scent is, for many, the very smell of a disinfected home. But the product performs only as well as the person using it understands. Lysol is not an all-purpose cleaner in the traditional sense; its primary job is not to lift dirt but to eradicate the bacteria, viruses, and fungi that live on surfaces. The difference between wiping a counter and truly disinfecting it comes down to a few rules: clean before you disinfect, respect dwell time, and save disinfection for the situations where it matters. This guide walks through the science and the correct technique. What Makes Lysol Work Most Lysol disinfectant formulas, especially the sprays, rely on a class of chemicals called quaternary ammonium compounds, commonly known as quats, with Alkyl Dimethyl Benzyl Ammonium Chloride among the most common. Picture a quat molecule as a tiny positively charged soldier. Bacteria and viruses carry a negatively charged cell wall or envelope, so the quats are drawn to them, lock on, and rupture the wall until the cell’s essential contents leak out and the microorganism dies. Many aerosol formulas also contain ethanol, an alcohol that disinfects by denaturing germ proteins. This combined attack is why the products are effective against a broad spectrum of pathogens, from cold viruses and influenza to E. coli and staphylococcus. Cleaning vs. Sanitizing vs. Disinfecting These three words are used interchangeably, but in professional cleaning they mean different things. Cleaning physically removes visible dirt and debris using soap or detergent, water, and some agitation; it lowers germ numbers but does not necessarily kill them. Sanitizing reduces bacteria on a surface to a level considered safe by public health standards, which lowers infection risk without necessarily killing all viruses and fungi. Disinfecting kills or inactivates nearly 100% of the pathogens named on the product label, and that is the primary purpose of Lysol. The rule that follows is non-negotiable: always clean before you disinfect, because a disinfectant sprayed over a layer of grime cannot reach the germs hiding underneath. The CDC’s home cleaning and disinfecting guidance treats cleaning as the essential first step in any hygiene routine. Dwell Time: The Rule That Decides Whether Disinfection Works Dwell time is the amount of time a disinfectant must stay visibly wet on a surface to kill the pathogens it claims to kill. Spray a countertop and wipe it dry immediately and you have done almost nothing; the chemistry needs minutes to rupture cell walls. The required time is printed on the label and varies by target. Common viruses and bacteria on the label require Lysol Disinfectant Spray to keep the surface wet for 3 minutes, while tougher fungi such as mold and mildew can demand up to 10 minutes. Spray until the surface is thoroughly wet, leave it alone for the full dwell time, and let it air dry completely. How to Use Common Lysol Products Correctly Hard surfaces: wipe away visible dirt first, hold the can 6-8 inches away, spray until the surface is wet rather than misted, honor the dwell time, and air dry. Rinse any food-contact surface with potable water afterward. Soft surfaces: test a small hidden area for colorfastness first, then mist the fabric lightly until it is damp rather than soaked, and let it air dry completely. Disinfecting wipes: pre-clean visibly dirty spots, use a fresh wipe, and keep the surface glistening wet for the stated time, often around 4 minutes for wipes. Use one wipe per surface area to avoid carrying germs from a doorknob to a countertop. All-purpose cleaners: for disinfection these need two passes, one to clean away visible soil and a second to wet the surface for the label’s dwell time. Where Lysol Does Not Belong Unfinished or porous wood can be discolored and damaged by the chemicals and alcohol. Natural stone such as marble, granite, or travertine can develop etching, a permanent dulling of the polished surface, so use a pH-neutral cleaner made for stone instead. Never spray disinfectant on food or directly onto electronics: spray a cloth first, wring it out, then wipe keyboards, phones, and remotes gently. Handle every product with the respect the label demands. Health Canada’s household chemical safety guidance covers safe storage, ventilation, and the rule against mixing cleaning products, which can release toxic gas. Lysol Product Quick Reference Product Best For Non-Negotiable Steps Disinfectant spray Doorknobs, switches, faucets, and fabrics Pre-clean, spray 6-8 inches away, keep wet 3-10 minutes, air dry Disinfecting wipes Quick touch-ups on hard surfaces Fresh wipe per area, keep wet about 4 minutes, air dry All-purpose cleaner Daily cleaning plus disinfection Clean first, then reapply and respect dwell time When Is Disinfecting Actually Necessary? In a healthy household, routine cleaning with soap and water is perfectly sufficient for most daily messes, since it physically removes germs from surfaces. Disinfecting everything every day is unnecessary and may contribute to chemical-resistant bacteria. Save it for the situations where it earns its keep: Frequently touched points such as door handles, light switches, tap handles, remotes, and fridge doors. When someone in the home is sick with a cold, the flu, or another contagious illness. Kitchen and bathroom surfaces prone to contamination from raw meat and bodily fluids, always after cleaning first. Handwashing remains the first line of defense, and the CDC’s handwashing guidance notes that keeping hands clean is one of the main ways to keep germs from spreading in the home. Frequently Asked Questions Can I wipe Lysol off right after spraying? No. Wiping early removes the product before the dwell time is complete, so the disinfection never happens. Spray until the surface is wet, wait the time stated on the label, and let it air dry. Do I need to disinfect my whole house every week? No. Regular cleaning with soap and water handles routine messes. Reserve disinfection for high-touch hotspots,

Lysol 101: A Guide to a Truly Hygienic Home Read More »