Winter Cleaning

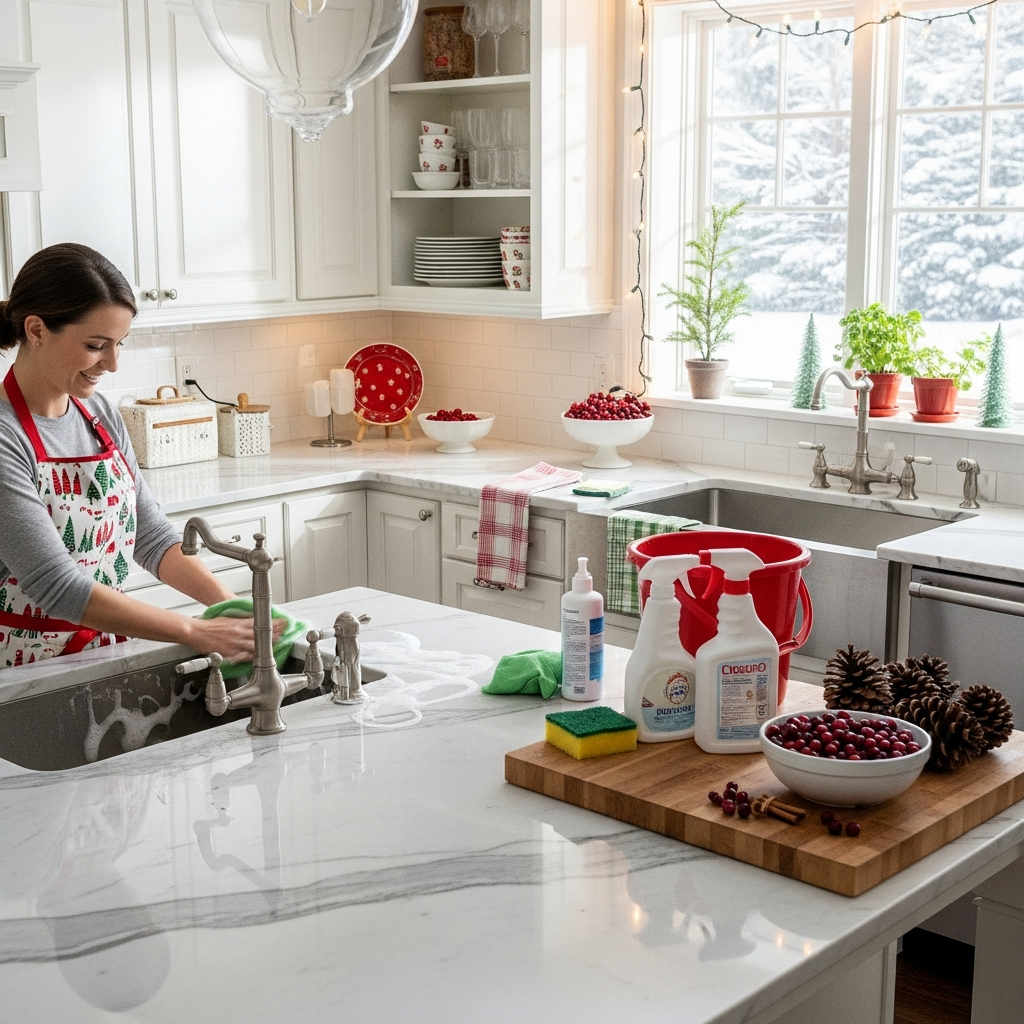
woman needing to organize the house for holiday guests

5 Ways to Organize Your Home to Accommodate Extra Guests

The end of the year brings a significant change to the atmosphere of a home, and we need to organize for guests; the house transforms from a private sanctuary, used for daily work and study routines, into a semi-public space dedicated to hospitality and celebrations. This metamorphosis brings with it a unique set of logistical challenges. Hosting guests, whether for a single dinner party or an extended stay, requires more than just a surface-level clean; it demands a structural reorganization of the living environment. The house must function differently when occupancy doubles or triples. Pathways need to be clearer, storage needs to be accessible, and the visual noise of daily life needs to be silenced to create a welcoming backdrop for the festivities. Organizing for guests is an exercise in empathy, requiring the host to walk through their own home with the eyes of a stranger to identify the friction points that might go unnoticed during the rest of the year. Entryway The organization process must begin at the threshold. The entryway is the bottleneck of the holiday home. In the winter months, this area is subjected to an onslaught of bulky coats, wet boots, scarves, and bags. A common mistake is failing to clear the family’s personal gear before the guests arrive. If the coat rack is already full of the host’s jackets, guests are left holding their outerwear or piling it on a bed in a distant room. The first step of organization is a ruthless purge of the front hall closet. Move the family’s winter gear to a secondary location, such as a garage, a basement, or a bedroom closet, to leave the prime real estate empty for visitors. Provide ample, sturdy hangers-not the flimsy wire ones that buckle under the weight of a wool peacoat. If the closet is small, setting up a temporary garment rack can prevent the “coat pile” on the sofa, which immediately clutters the living space. Floor space in the entryway is equally critical. In many regions, the end of the year means snow, mud, and salt. A standard doormat is rarely sufficient for a party’s worth of wet boots. Investing in large, rubber boot trays protects the flooring and keeps the slush contained. Organizing this area also means removing the visual clutter of mail, keys, and school permissions forms that tend to accumulate on entry tables. A clear surface at the door allows guests to set down a purse or a gift comfortably without knocking over a stack of bills. It sets the tone for the rest of the home; a chaotic entryway signals a chaotic visit, while a streamlined one suggests order and calm. Guest Room Moving into the guest accommodations, the definition of organization shifts from storage to comfort. If you have a dedicated guest room, it often serves as a storage unit for the other eleven months of the year, housing wrapping paper, out-of-season clothes, or exercise equipment. This debris must be removed, not just pushed into the corner. The guest needs to feel that the room was prepared specifically for them, not that they are invading a storage locker. This means clearing out the closet and the dresser drawers. It is uncomfortable for a guest to live out of a suitcase for a week because the drawers are full of the host’s old sweaters. Empty at least two drawers and provide cleared hanging space. The bedside area requires specific attention to modern needs. In the past, a lamp and a clock were sufficient. Today, the most important amenity is an accessible power outlet. Guests should not have to crawl under the bed or move heavy furniture to charge their phones. Organizing the room means checking the outlet situation and, if necessary, adding a power strip or an extension cord that sits on the nightstand. Bedding should be checked for freshness well in advance. Linens that have sat in a cupboard for a year often develop a stale, musty smell. Washing everything, including the duvet cover and the mattress protector, ensures the bed feels fresh. Adding an extra blanket at the foot of the bed is a functional organizational touch that prevents the guest from having to ask for more heat in the middle of the night. The bathroom is perhaps the most scrutinized room in the house. When organizing for guests, the goal is to make the space intuitive. Guests should never have to search for the essentials. Toilet paper should be stocked visibly, either in a basket or a clear stack, so there is no awkwardness when a roll runs out. Towels need to be distinct and plentiful. A common organizing tactic is to provide a specific color of towel for guests, separating them from the family’s daily linens. This prevents confusion and ensures that the guest always knows which towel is theirs. The countertops must be cleared of the host’s personal clutter. Toothbrushes, makeup bags, and razor stands should be stowed away in drawers or medicine cabinets. A guest needs surface area to place their own toiletries. If the shower is to be shared, clear the rim of the tub of half-empty shampoo bottles. A streamlined shower feels cleaner and more inviting than one crowded with the family’s grooming products. Kitchen The kitchen, usually the hub of the holiday, requires a zoning strategy. The danger in a kitchen during a party is that guests naturally congregate there, often blocking the work triangle (stove, sink, refrigerator) and hindering the cook. Organizing the kitchen for guests involves creating “self-serve” stations that draw people away from the active cooking zones. Set up a drinks station with glasses, ice, and beverages on a sideboard or a separate table. Create a snack zone on the island or a coffee table in the adjacent room. By physically separating the consumption areas from the preparation areas, you manage the flow of traffic. Inside the kitchen, the countertops must be ruthlessly decluttered. Appliances that are not essential for the holiday meal-the toaster,

5 Ways to Organize Your Home to Accommodate Extra Guests Read More »
Grill Cleaning A Masterclass in Barbecue Grill Maintenance

Grill Cleaning: A Masterclass in Barbecue Grill Maintenance

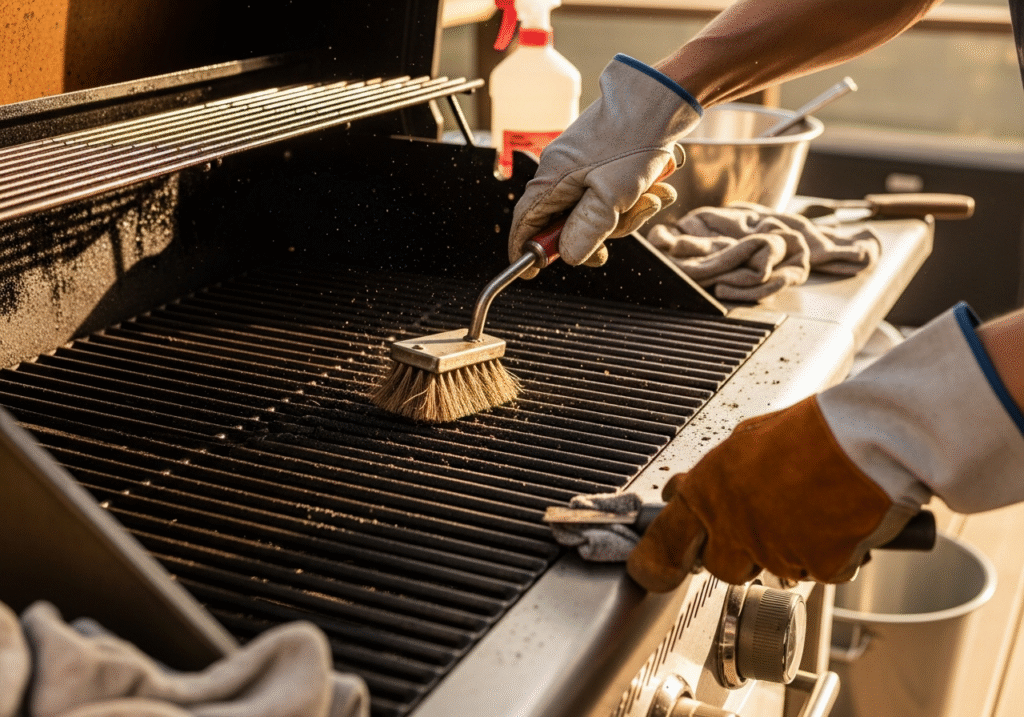
Cleaning the grill is important and the barbecue is undoubtedly the centerpiece of the outdoor culinary experience, a symbol of leisure, summer evenings, and the primal joy of cooking over an open fire. It’s a meeting point for friends and family, where the aroma of grilled meat and caramelized vegetables creates a festive atmosphere.However, once the last burger is flipped and the guests have departed, the grill is often abandoned to cool in the darkness, coated in a layer of rendered fat, charred marinades, and ash. This cycle of use and neglect is the primary cause of equipment failure and culinary disappointment. A grill is a cooking appliance just like a stove or an oven, yet it is exposed to the elements and subjected to intense, direct heat that carbonizes food residue into a stubborn, cement-like substance. Mastering the art of Barbecue Grill Cleaning is not merely a chore to be endured; it is a fundamental requirement for food safety, fire prevention, and the preservation of the flavor profiles you work so hard to create. A Dirty Grill Enhances The Flavor To understand the necessity of Barbecue Grill Cleaning, one must first dispel the persistent myth that a dirty grill adds flavor. There is a common misconception among amateur pitmasters that the black crust accumulated on the grates and the flavorizer bars is “seasoning,” similar to what one might find on a cast-iron skillet. This is false. A cast-iron skillet is seasoned with polymerized oil that creates a non-stick surface. The buildup on a grill is simply carbonized food waste, rancid grease, and soot. When this material heats up, it does not release a pleasant smoky aroma; it emits acrid, bitter smoke that coats fresh food with the taste of old, burnt meals. Furthermore, this buildup contains polycyclic aromatic hydrocarbons (PAHs) and heterocyclic amines (HCAs), chemical compounds formed when fat burns at high temperatures, which are known carcinogens. Regular Barbecue Grill Cleaning removes this toxic residue, ensuring that the smoke flavoring your food comes from your wood chips or charcoal, not from the decaying remnants of last month’s chicken wings. The process of Barbecue Grill Cleaning must begin with a focus on safety, particularly regarding the fuel source. If you are working with a gas grill, the tank should be turned off and disconnected. If it is a charcoal grill, all old ash must be cold and removed. The most critical safety hazard in a neglected grill is the grease fire. Every time you cook fatty foods, the rendered liquid drips down past the burners and collects in a tray or cup at the bottom of the unit. Over time, this grease creates a thick, flammable sludge. If a flare-up from the burners reaches this reservoir, the entire bottom of the grill can become an inferno that is difficult to extinguish with water. Routine Barbecue Grill Cleaning involves locating this grease management system-often hidden behind the doors of the cart-and scraping out the tray or replacing the disposable liner. Neglecting this hidden area is the leading cause of grill-related property damage. How to Clean Properly The grates are the primary point of contact for your food and naturally receive the most attention during Barbecue Grill Cleaning. The method of cleaning depends entirely on the material. Porcelain-coated cast-iron grates are fragile; if the porcelain chips, water enters the iron and causes rust, which eventually destroys the grate. For these, a soft brass brush or a nylon scrubber is preferred over harsh steel. Stainless steel grates are more durable and can withstand aggressive scrubbing with a stainless steel wire brush or a scraper. However, a significant safety concern has arisen in recent years regarding wire brushes. Loose bristles can snap off, adhere to the sticky grill surface, and eventually become embedded in food, leading to severe medical emergencies if ingested. As a result, many experts now recommend using coil brushes, wooden scrapers that form-fit to the bars over time, or even a ball of crumpled aluminum foil held with tongs for safe Barbecue Grill Cleaning. Beneath the grates lie the heat deflectors, often called flavorizer bars or heat tents. These metal angles protect the burners from direct dripping and help distribute heat evenly. They are also the first line of defense against grease and are subjected to extreme thermal shock. During Barbecue Grill Cleaning, these bars should be removed and scraped clean. They are often coated in a thick layer of white and black ash. If this ash is allowed to build up, it acts as an insulator, preventing the grill from reaching high searing temperatures. If these bars are crumbling or have holes rusted through them, cleaning is futile, and they must be replaced to protect the delicate burners underneath. The Burner Tubes The burner tubes themselves are the engine of a gas grill, and maintaining them is a delicate part of Barbecue Grill Cleaning. Over time, the tiny ports-the holes where the gas exits-can become clogged with drippings or corrosion. This results in uneven heating, where one side of the grill is hot while the other is tepid. Worse, insects such as spiders are attracted to the smell of propane and the shelter of the tubes. They often spin webs inside the venturi tubes (the mix point for air and gas), which creates a blockage. This blockage forces gas back toward the control knobs, leading to a “flashback” fire behind the control panel. Cleaning the burners involves using a venturi brush to clear the tubes and a small pin or paperclip to poke out any clogged ports, ensuring a consistent blue flame across the entire length of the tube. The interior of the lid and the cookbox is an area that often causes alarm for grill owners. Over time, the inside of the lid develops what looks like peeling black paint. This is rarely paint; it is a deposit of carbonized grease and smoke that has built up in layers and is now flaking off due to heat expansion. While not toxic, these flakes can fall onto your food, looking like

Grill Cleaning: A Masterclass in Barbecue Grill Maintenance Read More »

A family cleaning the kitchen for the end-of-year holidays.

Kitchen To-Do List Before The Holidays: 9 Essential Tips For a Worry-Free End of The Year

Kitchen To-Do List Before the Holidays: Get Ready for a Worry-Free Season The kitchen is the command center of the holiday season, running at full tilt in December: the oven on for hours, the fridge packed, the dishwasher cycling all day. If that equipment fails mid-meal, the whole celebration stalls. These nine tasks will have your kitchen set before the big day. 1. Purge and Sanitize the Refrigerator Start with the refrigerator about two weeks before guests arrive. A packed fridge cannot move cold air: blocked vents freeze the back while the door stays too warm for milk and eggs. Toss expired items and wash shelves and drawers in hot soapy water, since meat juice and sticky spills feed bacteria like Listeria even in the cold. 2. Clean the Oven by Hand, Skip the Self-Clean Cycle The oven does the heaviest work of the holiday, and a grimy one is a real risk. Skip the self-clean cycle in the days before Christmas: it pushes the appliance past 900 degrees Fahrenheit, and that blast of heat can trip fuses, kill electronic controls, or burn out the heating element. Clean it by hand with a commercial degreaser or a baking soda and water paste to dissolve carbonized grease on the walls and floor. Wipe the glass door and scrub the racks too. 3. Refresh the Range Hood Filters The range hood keeps the kitchen breathable, but filters caked with months of grease stop the fan from pulling smoke out, so it recirculates indoors or drips oily residue onto the stove. Remove the metal mesh and soak it in boiling water with a heavy-duty degreaser or baking soda, and a surprising amount of grease lifts off. 4. Prep the Dishwasher The dishwasher saves you from hours at the sink, but a clogged one will not clean your plates. A filter basket beneath the lower spray arm catches bones, seeds, and scraps. Remove it and scrub beneath hot running water with a stiff brush, then check the spray jets for blockages. Run an empty cycle with dishwasher cleaner or vinegar to clear scale. 5. Declutter the Counters and Build Prep Zones Counter space is prime real estate once holiday cooking begins. Clear the counters in the weeks ahead and put away anything you will not use for the big meal, then set up zones: one for chopping, one for mixing, one for plating. Scrub the corner where the backsplash meets the counter, which collects crumbs and dust, and wipe the underside of upper cabinets so greasy film cannot drip later. 6. Service the Small Appliances The supporting cast needs a once-over too. Steam a bowl of water with lemon in the microwave to loosen baked-on splatter, then wipe it down. Empty the toaster and toaster oven crumb trays, since loose crumbs can ignite during heavy use, and descale the coffee maker so mineral buildup does not slow brewing. 7. Protect the Sink and Drains A backed-up sink can derail the big meal. Pour a cup of baking soda and a cup of vinegar down the disposal and the main drain, then flush with a kettle of boiling water to clear soap scum and grease. Scrub under the black rubber splash guard, which traps food slime and odors, then grind ice cubes to hone the disposal blades. Keep grease, eggshells, and potato peels out of the sink all season. 8. Brighten the Lighting Bright, even lighting makes cooking safer and the kitchen look cleaner. Dust fixtures and bulbs, since greasy film dims them fast, and make sure recessed bulbs all match the same color temperature. 9. Deep Clean the Kitchen Floor Finish with the floor, which takes the heaviest traffic of the season. Clean grout lines and baseboards before the party so spills stay easy to wipe up. A kitchen prepped this way removes the stress points of hosting: no smoking oven, no slow drain, no overflowing fridge. Your Pre-Holiday Kitchen Checklist Purge and sanitize the fridge two weeks out. Clean the oven by hand; never self-clean right before guests arrive. Soak the range hood filters in boiling water and degreaser. Scrub the dishwasher filter and spray arm jets. Clear counters and set up chopping, mixing, and plating zones. Steam-clean the microwave, empty toaster trays, descale the coffee maker. Flush drains with baking soda, vinegar, and boiling water. Ban grease, eggshells, and potato peels from the sink. Dust bulbs and deep clean the floor, grout, and baseboards. Kitchen Prep Quick Reference Area Task Why It Matters Refrigerator Purge expired food, wash shelves hot and soapy Airflow keeps temperatures safe for meat and dairy Oven Manual clean with degreaser or baking soda paste Self-clean heat can damage electronics and elements Range hood Soak mesh filters in boiling water and degreaser Clogged filters recirculate smoke and drip grease Dishwasher Scrub filter basket, clear spray jets, run empty cycle Clogs leave gritty water on your dishes Counters Declutter and wipe backsplash corners Clear zones speed up meal assembly Small appliances Lemon-steam microwave, empty crumb tray, descale Old residue drops into fresh food; crumbs are a fire risk Sink and drains Baking soda, vinegar, boiling water flush Prevents holiday grease clogs Lighting Dust bulbs and fixtures Brighter light means safer food prep Floor Clean grout and baseboards Pristine floors make spot cleaning easy Frequently Asked Questions Why should I avoid the oven self-clean cycle before the holidays? The cycle exceeds 900 degrees Fahrenheit, and the thermal shock can blow fuses, damage control boards, or burn out the heating element right when you need the oven most. Clean by hand instead. When should I clean out the refrigerator before the holidays? About two weeks ahead: purge expired items, wash shelves and drawers in hot soapy water, and keep vents clear for safe temperatures once the roast goes in. What should never go down the kitchen drain during the holidays? Grease, eggshells, and potato peels top the list of holiday plumbing emergencies. Collect them in a slop bowl or compost

Kitchen To-Do List Before The Holidays: 9 Essential Tips For a Worry-Free End of The Year Read More »

cleaning an air fryer

5 Signs Your Air Fryer Needs a Deep Clean Immediately

Your Air Fryer Needs a Deep Clean More Often Than You Think The air fryer promised deep-fried crunch on a fraction of the oil, and it delivers. But the mechanism that makes it work, high-speed circulation of superheated air, is also what coats the walls, fan blades, and heating element with a film of grease, crumbs, and spices. That debris polymerizes into a sticky, tar-like coating that smokes, ruins the flavor of your food, and can become a fire hazard. Most owners rinse the basket and stop, while the heart of the machine slowly suffocates. Here are the signs and the clean that fixes them. Five Signs Your Air Fryer Needs a Deep Clean Now Smoke from the vents means old residue burning off. An acrid smell at startup means the element is cooking last week’s dinner again. Food that tastes like its predecessors means airborne grease is redepositing. Visible brown spots or greasy film on the heating coil, which sits inches from the food and bakes fat almost instantly. A drawer that sticks or will not close fully, usually from crumbs packed in the basket channel. Left alone, the buildup insulates the element, forces the fan motor to work harder, and sets off fire alarms. Here is how to clean it safely. Part Method Never Basket and pan Hot water and grease-fighting soap, 20 minute soak, non-abrasive sponge Steel wool or green scouring pads on the coating Heating element Damp brush with baking soda paste on tough patches Spraying water or cleaner toward the motor cavity Fan blades Long-handled brush or cotton swabs for surface grease Disassembling the unit, which voids the warranty Interior walls Microfiber cloth dampened with vinegar and water Leaving a soapy film that burns on the next cook Step One: The Basket and Pan Unplug the machine and let it cool completely. Most baskets are dishwasher safe, but the harsh detergents and high heat degrade the fragile non-stick coating over time. Wash by hand: fill the basket with hot water and grease-fighting dish soap and soak for 20 minutes. Never use a green scouring pad or steel wool, which destroy the coating in seconds. Use a non-abrasive sponge or soft-bristled brush, and for stubborn spots apply a paste of baking soda and water, a mild alkali that dissolves grease with only gentle abrasion. Step Two: The Heating Element and Fan Remove the basket, lay the unit on its back, and look up at the cavity where the spiral heating element and fan are likely coated in dark, baked-on grease. Never spray water or cleaner into this area, which runs directly toward the motor and electronics. Dip a soft toothbrush or bottle brush in warm soapy water, shake it out until just damp, and gently scrub the coil. Bending the element can ruin the machine. For tough patches, apply baking soda paste with the brush, let it dry, then scrub it off. The fan blades matter most for airflow: a long-handled brush or cotton swabs clear the surface grease. Do not disassemble the unit, which voids the warranty. Step Three: Walls, the Steam Hack, and the Exterior Wipe the interior walls with a microfiber cloth dampened in vinegar and water, well wrung out, to cut grease and neutralize odors without leaving a soapy film that burns on the next cook. For lingering stale smells, microscopic grease is trapped in the fan assembly: place a small oven-safe dish of water with lemon slices in the basket and run the fryer at moderate heat for 10 to 15 minutes, then cool and wipe. The steam loosens grime and the lemon deodorizes. The handle and control panel are germ hotspots because air fryers get handled with greasy hands; CDC clean hands guidance stresses hand washing during food prep for this reason. Damp cloth cleans the panel, but never spray liquid directly at a digital display where moisture can seep behind the screen. Run a dry cloth over the rear vents, which attract dust that sticks to warm plastic. For kitchen hygiene overall, CDC advice on cleaning and disinfecting your home provides a useful baseline on where germs live. Prevent the Grime Before It Bakes On Use perforated parchment liners or silicone inserts designed for air fryers to catch grease; blocked airflow cooks unevenly. Never put an empty paper liner in the machine; the air current lifts it into the heating element where it can catch fire. Once every few uses, wipe the cooled but still slightly warm element with a damp cloth to prevent grease from baking on repeatedly. Inspect the power cord regularly; the cord can get crushed against the hot exhaust vent behind the appliance. Air Fryer Cleaning FAQ Why is my air fryer smoking after I cleaned it? Residue remains on the element or cleaning liquid seeped toward the electronics. Unplug it, wipe everything damp rather than wet, and run it empty for a few minutes to confirm the smoke is gone. How often should I deep clean the air fryer? The basket needs attention after every use, but the full element, fan, and chamber clean described above is due roughly once a month with regular cooking, or sooner if any of the five warning signs appear. Can I use oven cleaner on the heating element? No. Aggressive caustic sprays damage coatings, drip into the motor, and leave fumes that coat your next meal. Warm soapy water, baking soda paste, and diluted vinegar handle everything safely. The non-stick coating is flaking. Can I still cook with it? Stop once coating lifts past a light scratch; flaking means food and metal contact. Replacement baskets are cheap next to the risk of eating coating flakes. A Clean Appliance in a Healthy Kitchen A clean air fryer heats faster, smells better, and produces food that tastes like itself, and the full clean is no five-minute task: awkward angles, delicate parts, stubborn grease. When appliance maintenance piles up alongside everything else, hand the whole kitchen to professionals who apply

5 Signs Your Air Fryer Needs a Deep Clean Immediately Read More »

a clean gutter in winter

Gutter Cleaning: Why Gutter Cleaning is the Most Critical Winter Prep Task

The structural integrity of a house is often determined by how effectively it manages water. Gutter cleaning and preventative maintenance are essential. While the roof acts as the primary protection against precipitation, the gutter system functions as the fundamental drainage network that directs this water away from vulnerable parts of the building. However, this critical system is frequently neglected until a visible problem arises, such as a waterfall cascading over the front door or a damp spot appearing in the basement. This negligence creates a cascade of mechanical and structural failures that can cost thousands of dollars to repair. The simple, periodic act of gutter cleaning is the single most effective maintenance task a homeowner can perform to prevent water damage, yet it remains one of the most procrastinated chores due to the difficulty and danger involved in reaching the roofline. Blockage To understand why gutter cleaning is non-negotiable, one must understand the physics of a clogged trough. When leaves, twigs, and organic debris accumulate in a gutter, they create a dam. During a rainstorm, the water running off the roof carries granules from the shingles and fine dust, which mixes with the decomposing leaves to form a heavy, dense sludge. This muck does not dry out easily. It sits in the metal channel, adding immense weight to the fascia boards that hold the gutters in place. Over time, this weight causes the gutters to pull away from the house, ruining the pitch-the slight angle necessary for water to flow toward the downspout. Once the pitch is ruined, water pools even when the debris is removed, creating a permanent mosquito breeding ground and a rust accelerant for steel gutters. Regular gutter cleaning removes this weight before it can alter the geometry of the drainage system. The most severe consequence of failing to perform gutter cleaning occurs at the foundation of the home. The primary purpose of a gutter is to transport roof water at least six to ten feet away from the perimeter of the house. When gutters are clogged, water overflows the sides and falls directly down against the foundation walls. This soil saturation creates hydrostatic pressure, a force where the weight of the water pushes against the concrete or stone of the basement walls. Eventually, this water finds a crack or a porous section and enters the home. A wet basement is rarely caused by a rising water table; it is almost always caused by surface water that was not properly diverted. The cost of waterproofing a basement is astronomical compared to the cost of routine gutter cleaning, making the latter an essential investment in the longevity of the concrete footing and slab. Furthermore, the damage extends upward to the roof itself. In colder climates, a clogged gutter is the primary architect of the ice dam. When snow melts on the upper, warmer parts of the roof, it runs down toward the eaves. If the gutter is full of frozen debris, the meltwater cannot escape. It freezes, building a wall of ice. Subsequent meltwater pools behind this ice wall and backs up under the shingles. As this water sits against the roof deck, it seeps through nail holes and seams, destroying the insulation in the attic and rotting the plywood sheathing. This can lead to interior leaks that ruin drywall and paint inside the living quarters. Performing gutter cleaning in the late autumn, after the leaves have fallen but before the first freeze, is the only way to ensure the channel remains clear for meltwater to pass through safely. Compost Bin Biology also plays a significant role in the necessity of this chore. A gutter filled with rotting organic matter is essentially a compost bin elevated twenty feet in the air. This environment is attractive to a host of pests. Carpenter ants, mosquitoes, and even rodents find shelter and moisture in the debris. Birds often build nests in the corners of gutters, which completely block water flow. As these animals establish themselves, they often look for ways to enter the attic warmth, chewing through fascia boards or soffit vents. Regular gutter cleaning disrupts these habitats and removes the food sources and nesting materials that invite vermin into the structure of the house. It turns the gutter back into a cold, metal channel rather than a warm, organic ecosystem. The timing of gutter cleaning is dictated by the flora surrounding the property. For most homes, a twice-yearly schedule is the minimum requirement. The spring clean is necessary to remove the seeds, buds, and “helicopters” (maple keys) that fall as trees wake up. These small particles are particularly dangerous because they pack tightly into the downspouts, creating dense plugs that are difficult to dislodge. The autumn clean is the heavy lifting phase, dealing with the bulk volume of deciduous leaves. However, homes surrounded by pine trees face a year-round battle. Pine needles are insidious; they mat together and resist the flow of water, often bypassing gutter guards. For these properties, gutter cleaning may be required quarterly to prevent the needles from turning into a hardened acidic mat that corrodes aluminum and copper. Protection The process of gutter cleaning itself is physically demanding and fraught with risk. Ladder safety is the most critical component. Thousands of emergency room visits every year are attributed to falls from ladders during home maintenance. The ladder must be placed on firm, level ground, often difficult to find in garden beds or on sloped driveways. It must be set at the correct angle-the one-to-four rule-to prevent it from sliding out at the base or tipping backward. Furthermore, leaning a ladder against a metal gutter can dent the thin aluminum, compromising the aesthetic and function of the system. Professionals use standoff arms or stabilizers that rest on the roof surface or the wall, protecting the gutter lip. For the average homeowner, the physical act of climbing up and down, moving the ladder every four feet, creates fatigue that increases the likelihood of an accident. This danger is a primary reason why gutter cleaning is often outsourced to experts who have the equipment and training to work

Gutter Cleaning: Why Gutter Cleaning is the Most Critical Winter Prep Task Read More »

flu season

Flu Season: Is Your “Clean” Home Making You Sick? The Hidden Germs You Missed

Get ready for flu season, december in Canada is a time of duality. On one hand, it is the season of warmth, celebration, and gathering, where homes are filled with the scent of baking and the sounds of family. On the other hand, it is the undisputed peak of the viral season, a time when the harsh weather forces us indoors, sealing us into environments where air is recirculated and physical proximity is unavoidable. As the temperature drops and the windows are latched tight to preserve heat, our homes transform into perfect incubators for the influenza virus, the common cold, and various other respiratory pathogens. While we often focus on washing our hands, we frequently neglect the environment those hands interact with. We scrub the floors and vacuum the carpets to make the house look presentable for guests, but we often miss the invisible landscape of germs that colonize the small, high-traffic areas of our homes. True sanitation during flu season requires a shift in perspective from cleaning for aesthetics to cleaning for health, focusing intensely on the “high-touch” points that serve as the transit hubs for infection. Cleaning and Disinfecting The first step in fortifying your home against illness is understanding the crucial distinction between cleaning and disinfecting. These terms are often used interchangeably in casual conversation, but in the world of hygiene, they represent two distinct physical processes. Cleaning is the removal of visible soil, dust, and debris using soap, water, and friction. It physically lowers the number of germs by washing them away, but it does not necessarily kill them. Disinfecting, conversely, is a chemical process designed to destroy pathogens on a microscopic level. The mistake most homeowners make is attempting to disinfect a dirty surface. If a doorknob or a countertop has a layer of grease, dust, or sticky residue on it, that organic matter acts as a shield for bacteria and viruses. The disinfectant cannot penetrate the soil to reach the germ underneath. Therefore, the rule for flu season is rigid: clean first, then disinfect. You must remove the barrier of dirt before you can effectively neutralize the threat. Once the surface is clean, the efficacy of your disinfection efforts depends entirely on a concept known as dwell time. We live in a culture of immediacy, conditioned by commercials that show a person spraying a counter and wiping it dry instantly. In reality, this “spray and wipe” technique is almost useless against robust viruses like the flu. Chemical disinfectants require time to break down the cell walls of bacteria or the protein shells of viruses. If you wipe the product away immediately, you are essentially just giving the germs a bath. Most EPA-registered disinfectants require the surface to remain visibly wet for anywhere between three to ten minutes to achieve the kill rate promised on the label. This requires patience. It means spraying the light switch or the faucet handle and walking away, letting the liquid sit and do its work before wiping up any excess. Ignoring dwell time is the primary reason why flu spreads through households even when they claim to be cleaning regularly. Door Handle The entryway of the Canadian home is the primary breach point for pathogens. It is where the outside world makes contact with the sanctuary of the interior. When we come in from the cold, our hands are often the first things to touch the hardware. The exterior and interior doorknobs, the deadbolt turn, and the handle of the storm door are constantly bombarded with bacteria from public transit, grocery carts, and workplace surfaces. Yet, these hardware pieces are rarely scrubbed. The keypad of a garage door opener or a smart lock is even worse, as the textured buttons trap oils and dirt, creating a sticky medium that holds onto viruses for days. Sanitizing these points should be the first ritual of returning home. It is not enough to just wipe the knob; the edge of the door where people grab to pull it shut is often overlooked and heavily contaminated. Kitchen Utensils Moving into the heart of the home, the kitchen acts as the central gathering hub during the holidays, making it a high-risk zone for cross-contamination. While countertops usually get wiped down, the hardware of the kitchen is frequently ignored. Think about the refrigerator handle. It is touched by every member of the family, often while cooking, eating, or snacking. It is grabbed by unwashed hands reaching for milk or leftovers. The same applies to the handle of the microwave, the oven, and the dishwasher. These appliances are touched dozens of times a day, yet they are often only cleaned when there is a visible spill. Small appliances are equally guilty. The handle of the coffee pot, the button on the kettle, and the knobs on the toaster are fomites-objects capable of carrying infection. Even the salt and pepper shakers, passed from person to person during a holiday dinner, can act as vectors for the flu. A nightly routine of wiping these specific handles with a disinfectant can significantly reduce the viral load in the kitchen. Controls The living room offers a different set of challenges, primarily centered around entertainment and relaxation. The remote control is arguably the single filthiest object in the entire house. It is handled by everyone, often while eating popcorn or snacks, and it inevitably falls on the floor or gets stuffed between sofa cushions. The rubber buttons are difficult to clean, trapping debris and moisture that bacteria thrive on. Similarly, video game controllers are held for hours at a time in warm, sweating hands, creating a perfect environment for bacterial growth. These electronics cannot be sprayed directly with liquid, as moisture will damage the circuitry. They require careful cleaning with disinfectant wipes that are damp but not dripping, ensuring that the chemical gets into the crevices between the buttons without seeping into the device. Light switches in the living room and hallways are another universal touchpoint. The toggle switch itself

Flu Season: Is Your “Clean” Home Making You Sick? The Hidden Germs You Missed Read More »

Dangerous to Your Health: 5 Common Products That are Dangerous For Your Daily Life

What would be dangerous to your health? The modern home is often viewed as a sanctuary, a controlled environment where we retreat from the pollution and chaos of the outside world. We scrub, spray, and polish surfaces with the intention of creating a safe, hygienic space for our families. However, there is a profound irony hidden within the cabinets under our sinks. In our aggressive pursuit of cleanliness, we have introduced a chemical arsenal that often makes the air inside our homes significantly more toxic than the air outside. The products we trust to sanitize our countertops and brighten our floors are frequently composed of volatile compounds that are potentially dangerous to your health. Understanding the chemistry of these common household items is the first step in dismantling the dangerous myth that a strong chemical smell equates to a clean home, when in reality, it often signals the presence of toxins. 1.Sodium Hypochlorite The most ubiquitous and perhaps most misunderstood chemical in the cleaning arsenal is sodium hypochlorite, commonly known as bleach. It is the default weapon for many when tackling mold, mildew, or bathroom grime. The risk of bleach lies not just in its corrosive nature, which can burn skin and eyes upon contact, but in its respiratory impact. Bleach is highly volatile. When used in a confined space like a shower or a small bathroom, the fumes react with organic matter to create chlorinated volatile organic compounds that are dangerous to your health, especially if you suffer from respiratory issues. inhaling these fumes causes immediate irritation to the mucous membranes of the throat and lungs. Furthermore, the chemical instability of bleach leads to one of the most common and deadly household accidents: the mixing of cleaners. If bleach is mixed with ammonia-which is found in urine and many glass cleaners-it produces chloramine gas. If mixed with acidic cleaners, it releases chlorine gas. Both of these reactions create an immediate atmospheric condition that is acutely dangerous to your health, leading to hospitalization or worse. 2.Ammonia Ammonia itself is another staple that warrants extreme caution. It is the primary active ingredient in many glass and window cleaners due to its ability to evaporate quickly without streaking. However, ammonia is a powerful irritant. Upon inhalation, it seeks out moisture, meaning it aggressively attacks the eyes, the throat, and the lungs. High concentrations of ammonia are dangerous to your health, causing chemical burns to the respiratory tract and exacerbating chronic conditions like asthma. The risk is compounded by the method of application. Most ammonia products are sold in spray bottles. When the trigger is pulled, the chemical is aerosolized into a fine mist. This mist hangs in the breathing zone, ensuring that the person cleaning inhales a significant dose with every breath. The distinct, sharp odor of ammonia is a warning signal from the body that the environment has become dangerous to your health, yet many push through the discomfort under the false impression that the pain is necessary for cleanliness. 3.Fragrance or Parfum Beyond the obvious corrosives, there is a silent and pervasive threat hiding in almost every bottle: fragrance. The word “fragrance” or “parfum” on an ingredient label represents a regulatory loophole. It is considered a trade secret, meaning manufacturers are not required to list the hundreds of specific chemicals that make up their signature scent. Within this chemical cocktail, one often finds phthalates. Phthalates are a group of chemicals used to make scents last longer, but they are also known endocrine disruptors. They mimic hormones in the body, potentially interfering with reproductive development, making them subtly but profoundly dangerous to your health over the long term. When you spray a lemon-scented counter spray or plug in a floral air freshener, you are releasing these compounds into the air. They settle on surfaces, are absorbed through the skin, and are inhaled into the bloodstream. 4.Air Fresheners and Fabric Deodorizers Air fresheners and fabric deodorizers are particularly egregious offenders in this category. These products do not clean; they coat. Many air fresheners work by releasing a nerve-deadening agent that temporarily interferes with your ability to smell, or by coating the nasal passages with an oily film. Others simply overload the air with volatile organic compounds (VOCs) to mask the underlying odor. These VOCs contribute to poor indoor air quality, leading to headaches, dizziness, and fatigue. The use of aerosol sprays adds another layer of risk, as the propellants themselves can be flammable and irritating to the lungs, making the very act of freshening the room dangerous to your health. Using these products is essentially solving a hygiene problem with a pollution problem, replacing a bad smell with a toxic chemical cloud. 5.Oven Cleaners and Drain Openers The heavy artillery of kitchen cleaning, oven cleaners and drain openers, represents the most immediate physical danger. Oven cleaners are typically formulated with lye (sodium hydroxide), a caustic substance that dissolves baked-on grease by turning it into soap. This chemical is so corrosive that it can cause permanent blindness if it splashes into the eyes and severe chemical burns on the skin. The fumes generated when spraying a cold oven are bad enough, but many people make the mistake of spraying the cleaner onto a warm oven. This vaporizes the lye, creating a toxic cloud that fills the kitchen and is immediately dangerous to your health upon inhalation. Similarly, drain openers rely on concentrated sulfuric acid or lye to burn through hair and grease clogs. These chemicals generate intense heat and can damage old pipes, but the health risk to the user is paramount. If the product fails to clear the clog and a plumber later tries to snake the drain, the splashing backwash creates a scenario that is physically dangerous to your health. 6.Quats In the post-pandemic world, the use of quaternary ammonium compounds, or “quats,” has exploded. These are the active ingredients in most disinfectant wipes and sprays. While effective at killing bacteria and viruses, quats are powerful lung irritants. There is growing evidence to suggest that frequent exposure to quats

Dangerous to Your Health: 5 Common Products That are Dangerous For Your Daily Life Read More »

Washroom Cleaning

Beyond the Surface: Why Washroom Cleaning Requires a Different Strategy

The washroom is undeniably the most functionally demanding environment within any architectural structure. It is a dedicated zone where the biological realities of human life intersect with the rigid requirements of sanitation. Unlike a living room or a bedroom, where cleaning is largely a matter of aesthetics and dust management, washroom cleaning is a constant battle against microbiology and chemistry. Every surface in a bathroom is subjected to a relentless cycle of wetting and drying, a process that creates distinct layers of mineral deposits, soap scum, and bacterial colonies known as biofilm. To clean a washroom effectively, one must move beyond the superficial act of wiping surfaces and understand the microscopic warfare taking place on the tile, the porcelain, and the grout. 1.Soap Residue The foundation of effective washroom hygiene lies in understanding the nature of the dirt you are fighting. In the shower and bathtub, the primary enemy is calcium stearate, commonly known as soap scum. This substance acts as a binding agent for filth, formed when the fatty acids in bar soap react with the minerals in hard water. This reaction creates a waxy, insoluble precipitate that clings tenaciously to fiberglass, glass, and tile. Trying to remove this substance with a standard all-purpose cleaner is often an exercise in futility because most general cleaners are pH-neutral. To break down the alkaline mineral bonds of soap scum, you need an acidic cleaner. This is why professional cleaners often rely on products containing phosphoric or citric acid. However, this chemical warfare requires caution; acid can etch natural stone like marble or travertine, destroying the finish permanently. 2.Mold Biofilm presents a different, more insidious challenge than simple dirt. This slime layer is a complex colony of bacteria that adheres to surfaces and secretes a protective, glue-like substance. In the washroom, this often manifests as the pink or orange discoloration seen in the corners of the shower. While it wipes away easily, it returns rapidly because the colony is resilient. True mold, typically black or dark green, is a fungus that roots into porous surfaces. The grout lines between your tiles are the most vulnerable points in the room. Grout is essentially cement, a porous material that absorbs water and organic matter like a sponge. When mold establishes itself in grout, surface scrubbing is often insufficient because the root structure lies deep within the pores. Effective remediation requires penetrating cleaners that can reach the sub-surface level to kill the root, followed by a sealer to lock moisture out. 3.Toilet The toilet, often viewed as the centerpiece of washroom cleaning, is frequently cleaned incorrectly due to a focus on the visible bowl rather than the invisible hygiene hazards. The mechanics of the flush create what is known as an aerosol plume. When a toilet is flushed with the lid up, microscopic droplets of water mixed with waste are ejected into the air, settling on nearby surfaces. Cleaning the toilet requires a top-down approach that addresses this spread. The most neglected area is the intersection between the toilet base and the floor. This area often accumulates a mix of condensation, dust, and stray urine, creating a persistent odor that no amount of air freshener can mask. Furthermore, the siphon jets-the small holes under the rim where water enters the bowl-often become clogged with mineral deposits and mold, reducing flush power and harboring bacteria. A bent brush is necessary to physically dislodge this buildup. 4.Faucet Aerator The sink and vanity area suffer from a unique cocktail of toothpaste splatters, hair, and makeup residues. The faucet aerator, the small mesh screen at the tip of the spout, is a hidden trap. It filters sediment from the water lines, but it also creates a damp environment where bacteria can grow. If the water flow seems irregular, it is likely because the aerator is calcified. Unscrewing this piece and soaking it in vinegar is a maintenance step that ensures the water you use to brush your teeth is actually clean. The sink drain, specifically the overflow hole near the top of the basin, is a dark, damp cave that rarely gets cleaned. It creates a perfect breeding ground for biofilm, which releases a musty, sewer-like odor. Pouring a cleaning solution down the overflow and using a small brush to agitate the interior walls is necessary to eliminate this phantom smell. 5.Mirrors and Glass Surfaces Mirrors and glass surfaces in the washroom are unforgiving of poor technique. The high humidity of the room often causes dust to stick to the glass, creating a muddy streak when wiped with a damp cloth. The secret to streak-free glass is not the chemical, but the tool. Traditional cotton cloths often leave lint or residues that cause streaking. A high-quality microfiber cloth, specifically woven for glass, uses microscopic hooks to lift oils and dust without the need for heavy detergents. Furthermore, the edges of the mirror, where the glass meets the frame, are often prone to corrosion caused by harsh ammonia-based cleaners seeping behind the glass. Cleaners should always be sprayed onto the cloth, never directly onto the mirror. 6.Floor The floor of the washroom is the final resting place for everything that falls or settles in the room. Because of the high moisture levels, dust on a bathroom floor does not sweep up easily; it smears. This mud-like dust packs into the corners and the grout lines. Mopping is often ineffective because it simply pushes this dirty water around, filling the low-lying grout lines with a slurry of gray filth. True floor hygiene in a washroom requires hand-cleaning the perimeter and the corners where the mop cannot reach. The area behind the toilet, often cramped and difficult to access, is a prime location for dust bunnies to collect moisture and begin to rot. This area should always be cleaned by hand to ensure that the source of potential odors is physically removed. 7. Exhaust Fan Ventilation is the invisible cleaner of the washroom. The exhaust fan is the single most important

Beyond the Surface: Why Washroom Cleaning Requires a Different Strategy Read More »

Baseboard Heaters routine day

Baseboard Heaters: The Step-by-Step Heater Cleaning Routine

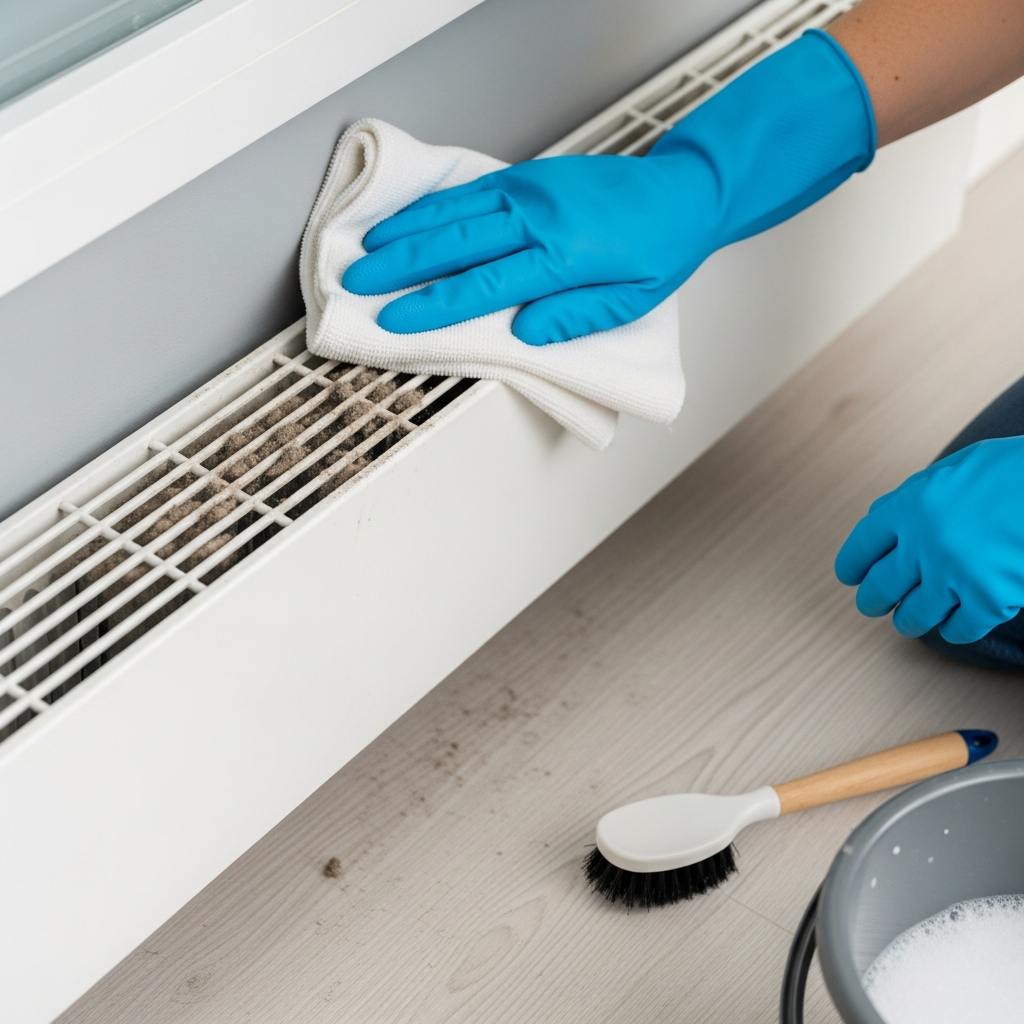
Baseboard heaters are the silent, often ignored workhorses of residential heating. In many regions, particularly in older apartments and homes where retrofitting ductwork for forced air is structurally impossible, these metal units are the primary source of warmth. They sit unobtrusively at the floor level, usually beneath windows, occupying a visual blind spot that allows them to be easily disregarded until the first cold snap of autumn arrives. It is in that moment, when the thermostat is finally turned up, that the distinct, acrid scent of burning dust fills the room, signaling months of neglect. This smell is not merely a nuisance; it is the olfactory evidence of a system that is choked, inefficient, and potentially dangerous. While baseboard heaters are mechanically simple-essentially a heating element inside a metal pipe surrounded by aluminum fins-their placement and design make them magnets for the worst kind of household debris. Maintaining them is not just a matter of cleanliness; it is a critical component of energy efficiency, air quality, and home safety. How Does it Work? To understand why cleaning these units is so vital, one must first understand the physics of how they operate. Baseboard heaters rely on convection. Unlike a furnace that uses a blower fan to force air through vents, a baseboard heater is a passive engine. It utilizes the natural law that hot air rises and cold air sinks. Cold air from the floor creates a vacuum effect as it is drawn into the bottom of the heater. It passes over the heating element, warms up, and then rises out of the top of the unit, displacing the cooler air in the room. This cycle creates a continuous, silent current of air circulation. However, this same current acts as a low-level vacuum cleaner for the home. As the air is drawn into the bottom of the unit, it carries with it everything that settles on the floor: pet hair, human dander, textile fibers, and general dust. Because the heater is located at the lowest point of the room, it inhales the heaviest concentration of particulate matter. Once this debris enters the metal housing, it encounters the heat exchanger. This component consists of a central pipe surrounded by hundreds of thin, sharp aluminum fins. These fins are designed to maximize surface area, allowing the heat from the pipe to transfer to the air as efficiently as possible. However, the tight spacing between these fins makes them a perfect trap for debris. The dust and hair do not simply pass through; they get caught on the jagged edges of the aluminum and wedged between the plates. Over time, this buildup forms a thick, felt-like blanket of grey fuzz. This blanket acts as an insulator. The entire purpose of the fins is to release heat, but the dust layer traps that heat against the metal. The result is a heater that has to work significantly harder and run for longer periods to raise the room temperature, leading to a direct and noticeable spike in electricity bills. You are essentially paying to heat the dust, not the air. Security Beyond the financial cost of inefficiency, there is a legitimate safety concern. The heating element inside an electric baseboard heater gets incredibly hot. While the metal housing remains touchable, the internal components reach temperatures high enough to singe organic matter. The “burning smell” that permeates a home in October is literally the combustion of the dust and hair that has settled on the element during the summer months. While most of this dust simply carbonizes and floats into the air as soot, a heavy accumulation of lint-which is highly flammable-poses a fire risk. If a piece of paper, a curtain, or a thick clump of pet hair falls directly onto the element, it can ignite. This risk is compounded by the fact that baseboard heaters are often hidden behind furniture or drapes, meaning a small smolder could go unnoticed until it becomes a significant problem. The health implications of a dirty baseboard heater are also frequently underestimated. As the unit heats up and burns off the accumulated dust, it releases particulate matter and chemical byproducts of combustion back into the room’s airflow. For individuals with asthma, allergies, or respiratory sensitivities, this creates a toxic environment. The convection current that heats the room also serves to circulate these allergens efficiently, ensuring they remain suspended in the breathing zone. Furthermore, the dark, warm environment inside a heater that is not in use during the spring and summer can become a harbor for mold or pests. Cleaning the unit is the only way to break this cycle of recirculating filth. Cleaning a baseboard heater requires a specific methodology because the internal components are delicate and sharp. The aluminum fins are incredibly pliable; they can be bent by a stray vacuum attachment or a clumsy finger. If the fins are bent flat against each other, the airflow is blocked, and the unit’s efficiency drops to zero in that spot. Therefore, the first step in any cleaning regimen must be safety-both for the user and the machine. The power must be turned off at the main breaker panel. Simply turning the thermostat down is insufficient, as a sudden drop in temperature could trigger the unit to activate while your hands are inside. A voltage detector is a handy tool to confirm the power is truly dead before opening anything. Vacuum Cleaner The exterior cover, or the faceplate, is usually removable, though the difficulty varies by model. Removing this panel provides access to the fins and the element. The initial attack on the dust should always be dry. Introducing water to a caked-on layer of dust creates mud, which is nearly impossible to remove from the tight crevices of the fins. A vacuum cleaner with a strong suction and a crevice tool is the best starting point. The goal is to suck out the loose debris from between the fins without dragging the hard plastic of the vacuum nozzle

Baseboard Heaters: The Step-by-Step Heater Cleaning Routine Read More »

Persian rug being used

Persian Carpet: How to Identify if Your Rug Needs a Professional Wash or Just a Vacuum

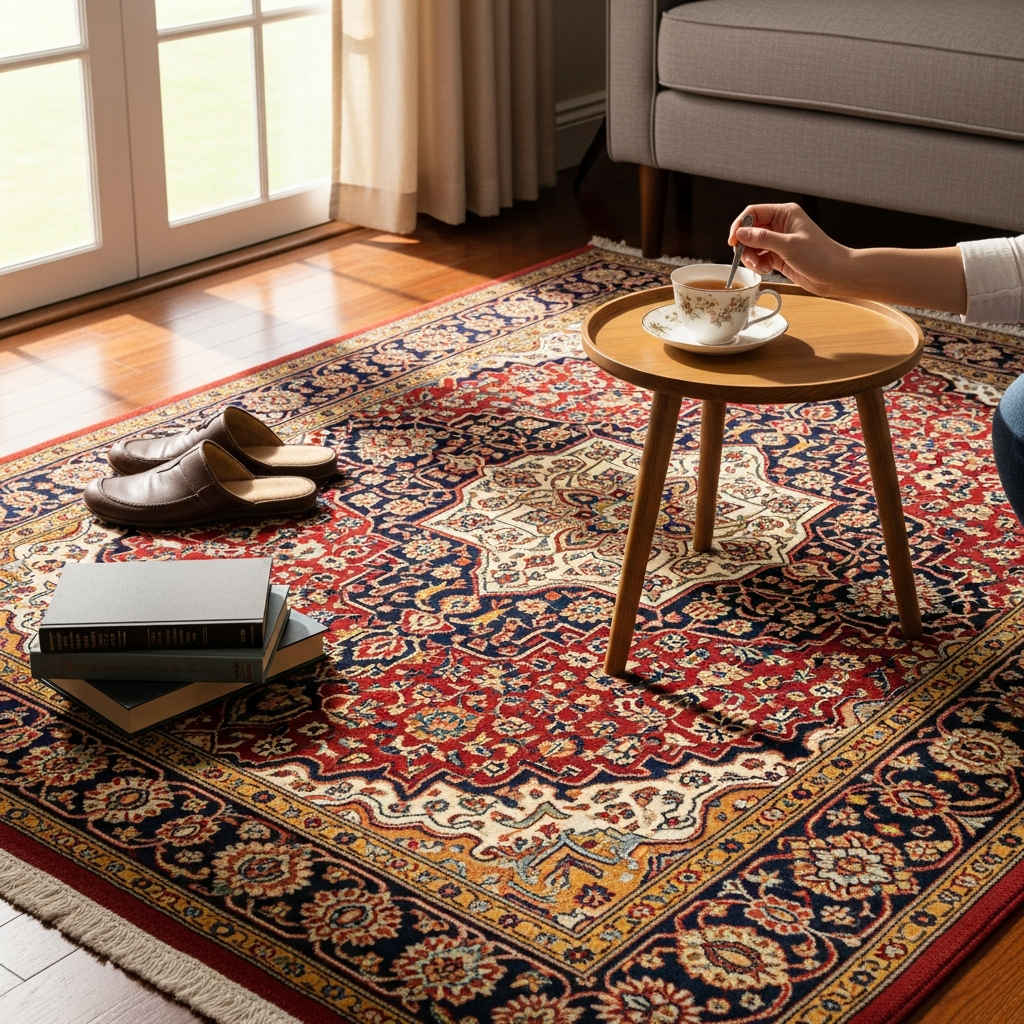
Persian Carpet Care: Professional Wash or Just a Vacuum? A Persian carpet is far more than a floor covering. It is a piece of art, a family heirloom, and a historical document woven from wool, silk, and cotton with complex natural pigments. Because it is an organic textile, its care follows a different philosophy from synthetic wall-to-wall carpeting. Treating a hand-knotted Persian rug with the same chemicals and mechanical aggression used on a polyester rug is the fastest way to destroy its value. The Anatomy of a Hand-Knotted Rug: Why Grit Is Destructive A Persian rug is held together by millions of hand-tied knots, and that density creates a unique soiling problem. Fine dust and grit migrate down through the pile and settle deep in the foundation, where they act like tiny shards of glass. Every footstep grinds those particles against the wool, slicing fibers at the base like a guillotine. Standard vacuuming cannot remove this deep sediment, and the beater bar on most upright machines is a primary cause of damage: it pulls at the knots, shreds the pile, and can tear the fringes. The correct approach is suction only, plus the occasional vacuum of the back of the rug so gravity helps vibrate grit out of the foundation. Alkaline Cleaners and the Chemistry of Wool Wool is a protein fiber protected by a layer of scales and natural oils called lanolin, which give the rug its sheen and stain resistance. Most commercial carpet cleaners are highly alkaline, formulated for synthetic grease, and they strip the lanolin, leaving wool brittle, dry, and dull. High alkalinity can even cause a chemical burn that turns the wool yellow or brown permanently. Persian rugs need a pH-neutral or slightly acidic solution that respects the protein structure, which is why traditional methods favor vinegar or plant-based shampoos. Dyes, Heat, and the Risks of DIY Spot Cleaning Many older and tribal rugs use vegetable dyes that are not chemically locked into the fiber. These dyes bleed when wet, and a common tragedy happens when a homeowner spot-cleans a spill with hot water and a generic cleaner. The heat opens the fiber cuticles, the dye migrates, and deep reds bleed into creamy white areas, creating a muddy, irreversible stain. Hot water is almost always a mistake: heat and agitation cause felting, so the fibers shrink and the rug distorts, buckles, and no longer lies flat. Stain response is where most rugs are lost. Panic leads to frantic scrubbing, but wet wool fibers are swollen and vulnerable. Scrubbing distorts the pile, untwists the fibers, and creates a texture difference called blooming that remains even after the stain is gone. The only correct immediate action is blotting: pressing straight down with a clean white cotton towel to absorb liquid without lateral movement. Pet Urine, the Fringe, and Water Damage Pet urine is a severe threat that goes beyond staining. It starts as an acid but becomes highly alkaline as it decomposes, which destabilizes dyes and, more insidiously, rots the cotton foundation in a condition known as dry rot. The salts left behind pull moisture from the air, keep the foundation damp, and feed bacteria until the threads crack or tear when the rug is moved. Standard enzymatic cleaners often leave sticky residues that attract more dirt, so pet urine usually requires a full immersion wash by a professional to flush the salts out completely. The fringe is the end of the warp threads that form the rug’s skeleton, and if it unravels the knots slide off. Never bleach it, because bleach degrades cotton and makes the threads brittle. Clean it gently with the same mild solution as the rest of the rug, and never let a beater bar touch it. Water damage is usually the result of improper drying after a DIY wash. A dense Persian rug traps moisture in its center, and mold and mildew can develop in as little as 24 hours, leaving a permanent odor and fungal growth that eats the cellulosic fibers. Professional facilities use centrifuges and temperature-controlled drying rooms to get the rug bone dry; washing it on a driveway leaves it wet for days, inviting rot. Steam Cleaning vs True Rug Washing Treatment What it does Safe for Persian rugs? Suction-only vacuuming Lifts surface dust without agitation Yes, as routine maintenance Spot blotting Absorbs fresh spills straight down Yes, with a clean white towel Hot water extraction Injects hot detergent into the pile No, heat and alkalinity damage wool Immersion rug wash Dusting, dye test, cool water, controlled drying Yes, at a dedicated facility Most in-home carpet cleaners use hot water extraction, which is catastrophic for Persian rugs: the heat and high alkalinity are wrong for wool, and cleaning on the floor means the back is never rinsed properly. A true wash happens at a dedicated facility where the rug is dusted, tested for dye stability, submerged in cool flowing water, and dried under controlled conditions. The CDC notes that mold grows on carpet and fabric wherever moisture lingers, and Health Canada’s mould guidance is the same message: damp textiles need rapid, thorough drying. For routine upkeep, follow the CDC’s soft surface cleaning guidance for carpet and rugs. Deep grit that suction cannot lift from the knot foundation. Any dye bleed, color migration, or bloomed pile after a spill. Pet urine accidents, which leave salts and may cause dry rot. Fringe damage, musty odor, or a rug that stayed wet more than a day. When these signs appear, a professional wash is the safe answer. Toronto Shine Cleaning applies the same rigorous, knowledgeable approach to your whole home, with a $1,000,000 insurance policy and $10,000 breakage and surety bond behind every visit. Call (647) 424-0355, see our cleaning prices, or book a deep home cleaning for the rest of your residence. A regular maid service keeps everyday dust from settling into fine textiles, and we serve locations across the GTA. Frequently Asked Questions Can I steam clean a Persian rug?

Persian Carpet: How to Identify if Your Rug Needs a Professional Wash or Just a Vacuum Read More »