Floor Cleaning

Best Steam Cleaner: 5 Tips for Choosing the Ideal Steam Cleaner for Your Home

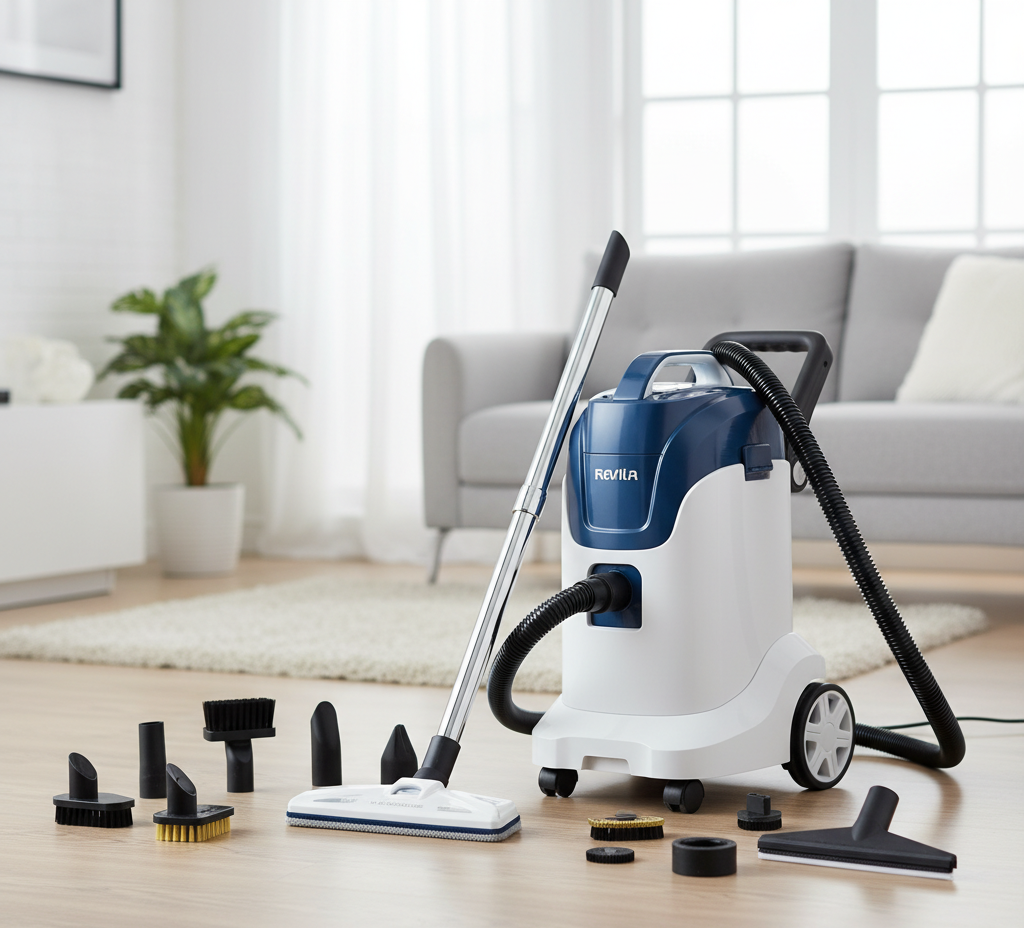
Choosing the Best Steam Cleaner for Your Home Steam cleaning replaces harsh chemicals with superheated, pressurized water that pushes heat into tiny crevices, loosens dirt, and neutralizes bacteria on contact. For households that want fewer chemical residues, a steam cleaner handles everything from kitchen grease to mattress allergens, but only when the right machine is chosen. Cheap units with weak pumps disappoint quickly, so shop with these five tips in mind to find the model that truly earns the title of best steam cleaner for your home. Tip 1: Match the Machine Type to the Job The market splits into three broad categories, and the best machine for a tiled mudroom is rarely the best one for detailed kitchen work. Handheld units are the scalpels of the steam world: portable, quick to heat, and perfect for targeted jobs such as faucet grease, window tracks, and doorknobs, though their small tanks limit run time. Steam mops specialize in sealed hard floors and avoid the cross contamination of a bucket and mop, but they cannot clean vertical surfaces or upholstery. Canister systems separate the boiler from the wand, which allows a bigger water capacity and more power, making them the most versatile choice for whole home cleaning. Machine type Best for Limits to know Handheld steamer Grease spots, grout, small surfaces Short run time, lower pressure Steam mop Sealed tile, stone, and hard floors No vertical or fabric cleaning Canister steamer Whole home, fabrics, kitchens Bigger, heavier, pricier Tip 2: Demand Dry Steam and Real Pressure Dry steam sounds like a contradiction, but it describes vapor superheated well above boiling, often reaching 240-300 F while carrying less than five percent liquid water. That low moisture vapor is what makes steam safe for mattresses, upholstery, and carpets: wet steam soaks fabric and invites mildew, but dry vapor flashes off in seconds. Pressure is the second metric that separates professional grade machines from toys. Look for at least four to five bars of pressure, because low pressure simply billows hot fog that may kill surface bacteria but cannot blast the black gunk out of grout lines. Check the heating system too: flash heating models drip water onto a hot plate and produce sputtering, inconsistent steam, while a pressurized boiler tank holds a steady, powerful stream. Tip 3: Buy the Boiler You Can Refill Mid-Clean A standard pressurized boiler must cool down before it can be refilled, which stops momentum cold. The best machines feature a continuous refill system: a secondary, non pressurized reservoir pumps water into the boiler as needed, so long cleaning sessions never need a pause. Boiler quality also decides how long the machine lasts. Plastic boilers and weak pumps often give out after a year or two of limescale and heat stress, while premium units with stainless steel boilers and replaceable heating elements are built to serve for decades. Treat the purchase as a long term investment in one machine that retires the mop, the chemical caddy, and the scrub brush. Tip 4: Count the Accessories Before You Commit Versatility lives in the attachments, so a truly great steamer should arrive with more than a floor head. Look for a triangular brush for corners, a jet nozzle for blasting stuck on grime, plus compact nylon and brass brushes for detail work. Brass bristles sparkle on oven racks and grill grates, where steam softens burned on food and the stiff wires take over the scrubbing. Add the window squeegee attachment and the steamer delivers a streak free glass finish with no chemical spray. Flimsy bristles that melt under high heat make a machine useless, so inspect attachment quality before buying. Use the kit like a transformer: Floor head for mopping hard floors without detergent residue. Jet nozzle for shower tracks, radiators, and tight crevices. Brass brushes for oven racks, grill grates, and burned on food. Squeegee for streak free windows and mirrors. Tip 5: Verify the Heat for Pests, Allergens, and Delicate Surfaces Dust mites and bed bugs resist many poisons but cannot survive thermal shock, and a steamer that holds a tip temperature above 160 F is lethal to them and their eggs on contact. For allergy sufferers that makes the machine a genuine health tool: pillows, mattresses, and plush toys can be sanitized without the potential allergens found in chemical sprays. Heat this powerful demands respect, however, so use it with care: Never steam unsealed hardwood floors; the moisture can strip the finish, grey the wood, and make it swell. Avoid blasting cold window glass in winter, which can shatter it; warm the pane first. Skip surfaces where heat can melt glue, such as some laminate countertops and luxury vinyl tile. Machines with variable steam control solve this: turn the dial down for silk plants and velvet curtains, and crank it up for barbecue grills. In the kitchen, steam melts the polymerized grease on range hoods and backsplashes so it wipes away with a microfiber cloth, sanitizes the sink drain by melting odor causing biofilm, and even defrosts a freezer in minutes. The CDC’s home cleaning and disinfecting guidance notes that routine cleaning removes most germs from surfaces, with disinfecting reserved for illness situations, which is why steam fits so well into a healthy home routine. And because steam leaves no residue, Health Canada’s household chemical safety advice becomes easier to follow: fewer products in the house means fewer poisoning, burn, and storage risks to manage. Frequently Asked Questions About Steam Cleaners What is dry steam and why does it matter? Dry steam is vapor heated well above boiling, typically 240-300 F with less than five percent liquid water, so it cleans and evaporates quickly instead of leaving fabrics wet and prone to mold. Can a steam cleaner damage hardwood floors? Steam can strip the finish from unsealed hardwood, turning the wood grey and causing it to swell, so use a steamer only on sealed floors and always follow the manufacturer’s guidance for delicate surfaces. Does steam cleaning kill

Best Steam Cleaner: 5 Tips for Choosing the Ideal Steam Cleaner for Your Home Read More »
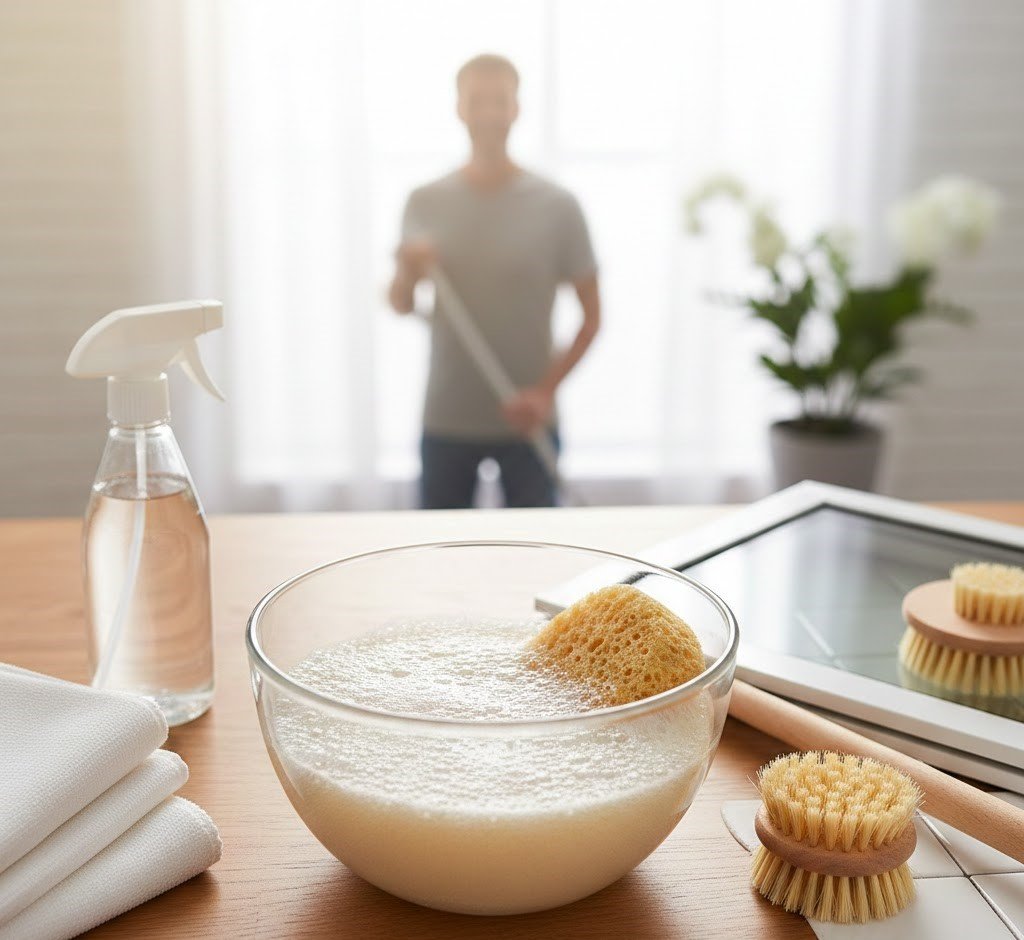
Detergent and Warm Water: 3 Amazing Tips on how to Clean Your Entire House With this Simple Mixture

Detergent and Warm Water: The Cleaning Duo That Does It All Shelves full of specialty sprays make it easy to forget that the most reliable cleaner in any home costs pennies per bucket. Detergent and warm water tackle an astonishing range of household grime through simple chemistry, and understanding how the pair works turns a habit into a deliberate tool. Warm water provides the energy to loosen dirt while detergent provides the mechanism to lift and trap grease, which makes the solution stronger than the sum of its parts. Here are three ways to put the mixture to work across the whole house. Why the Chemistry Works So Well Heat gives water an edge. Warm water molecules move faster than cold ones, so they agitate and break down sugar crystals, salt rings, and other common messes, and warmth melts fats and oils that cold water only smears around. Picture a greasy plate under the tap: cold water makes the fat congeal and slide, while warm water melts it off in seconds. The detergent brings the real genius: dish soap contains surfactants, two sided molecules with a hydrophilic head that loves water and a lipophilic tail that loves oil. When soap meets greasy water, the tails latch onto the oil droplets while the heads face outward, forming tiny spheres called micelles that trap the grease and rinse it away down the drain. Surfactants also break the surface tension that makes water bead up, so the solution spreads, penetrates tiny crevices, and lifts dirt that plain water simply flows over. Tip 1: Clean Counters, Cabinets, and Walls the Gentle Way For daily kitchen duty, a cloth barely damp with diluted dish soap in warm water often beats stronger sprays. It lifts food residue, light grease spatters, and sticky fingerprints from laminate, quartz, and sealed stone with no chemical smell or streaky film. The same solution is a hero on cabinet fronts, where aerosolized cooking grease builds a sticky film that resists all purpose cleaners: wipe with a warm, soapy cloth that has been wrung out well and the grime dissolves. Walls, baseboards, and door frames also respond beautifully to the mixture, which lifts scuffs, fingerprints, and accumulated dust without harming the paint finish. Tip 2: Mop Floors Without the Sticky Residue Vinyl, linoleum, and ceramic tile floors respond well to a bucket of warm water with just a little detergent. Restraint is the rule: use the detergent sparingly, because too much requires endless rinsing, and wring the mop out thoroughly so excess water never seeps into grout or floor seams. Done right, the method lifts dirt and footprints while leaving none of the dull, sticky film that some specialized floor cleaners deposit. In entryways and kitchens, where winter salt and cooking splatter land daily, a quick warm water mop keeps the finish from dulling and cuts down the buildup that heavy scrubbing has to fight later. It is an economical routine that keeps high traffic flooring looking fresh between deeper professional treatments. Tip 3: Blot Out Carpet and Upholstery Stains Many fresh food and drink spills on carpets or upholstery respond to a first line of defense made from a highly diluted solution of clear dish soap and warm water. Dip a clean cloth into the soapy water and gently blot the stain, working from the outside in to avoid spreading it. Always test the method on an inconspicuous area first, then blot the spot afterward with a cloth wet with clean water to rinse and lift out soap residue. This gentle approach often lifts the spill completely without resorting to aggressive carpet stain removers, though CDC guidance on cleaning your home is a useful reminder that surfaces should always be cleaned before any sanitizing or disinfecting step is considered. Where This Simple Mixture Does Not Belong Knowing the limits of detergent and warm water is as important as understanding its strengths. Keep the bucket away from these surfaces: Unsealed wood floors and furniture, where water causes swelling, warping, and staining. Natural unsealed stone such as marble or travertine, where soapy water can seep into the porous surface and darken it. Delicate fabrics like silk and velvet, which can spot permanently and need professional care. Electronics and wiring of any kind; water and electricity never mix. For everything else, the duo is safe, effective, and economical. Handling any cleaning product responsibly still matters, and Health Canada’s tips for using household chemicals safely cover buying, storing, and disposing of cleaners, which keeps the whole household protected. Detergent and Warm Water by the Job Household job Right mixture Why it works Counters and cabinet fronts Weak dish soap solution, well wrung cloth Surfactants trap grease, no chemical smell Vinyl, linoleum, tile floors Small amount of detergent per bucket Lifts dirt without sticky residue Walls, baseboards, door frames Mild soapy water, damp cloth Removes scuffs and dust, paint stays safe Carpet and upholstery spills Diluted clear dish soap, blotting Breaks the stain, rinse blot clears soap Frequently Asked Questions About Cleaning With Soap and Water Why does warm water clean better than cold? Warm water molecules carry more kinetic energy, which helps break down sugar and salt messes, and the warmth melts fats and oils so they release from surfaces instead of congealing and smearing. What makes dish soap dissolve grease? Dish soap contains surfactants with water loving heads and oil loving tails; the tails grab the grease, the heads face the water, and the resulting micelles hold the oil suspended until it rinses away. Can I use detergent and warm water on hardwood floors? No, unsealed wood should never be cleaned with water because it can swell, warp, and stain; use products made for wood floors or ask a professional for advice. Is soapy water safe for marble countertops? Natural stone is porous, and soap and water can seep in and darken or stain marble and travertine, so stick to stone specific cleaners for those surfaces. When is a professional clean better than

Detergent and Warm Water: 3 Amazing Tips on how to Clean Your Entire House With this Simple Mixture Read More »

cleaning walls

Don’t Ruin Your Walls: 5 Common Mistakes Homeowners Make When Washing Walls

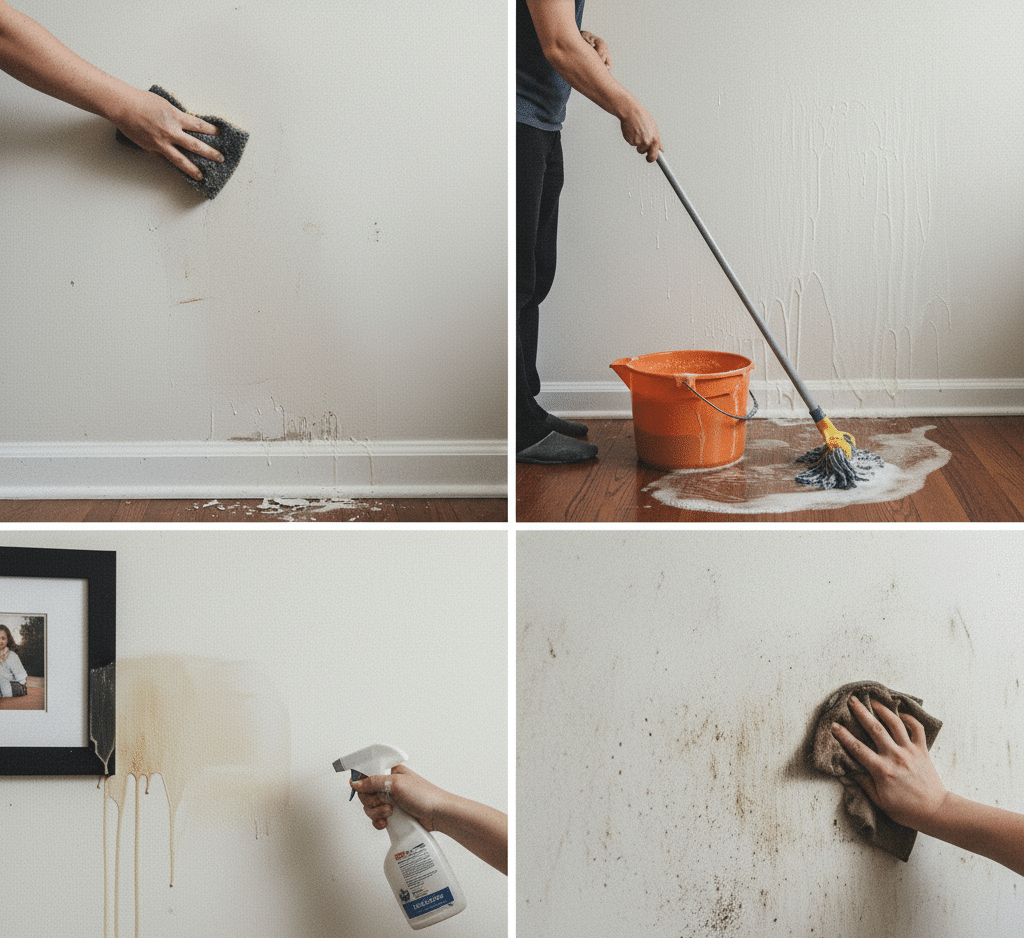
Why Washing Walls Is the Missing Step in Your Spring Clean Most cleaning routines look down: floors, carpets, and grout get all the attention, while the largest surface area in every room stays ignored. Walls, doors, and baseboards escape foot traffic, but they suffer their own assault during a sealed winter. Dry furnace air creates static charges on painted drywall, and convection currents carry dust, pet dander, cooking oils, and soot past those charged surfaces, where the particles bond into a grey film that dulls paint and absorbs light. Faint dark streaks above baseboard heaters and vents, sometimes called thermal tracking or ghosting, are this buildup made visible. Worse, the walls become a reservoir for allergens that drift back into the breathing zone every time a door slams. Washing them is a real health task, but five common mistakes turn the job into a disaster. Mistake 1: Washing From the Top Down Intuition says start at the top and let gravity help, but on painted walls gravity is the enemy. A wet sponge squeezed against a dry, dirty upper wall releases water that trickles down in rivulets, cutting clean streaks through the dust and soot layer. Dry porous paint absorbs that dirty water instantly, and the streaks become permanent stains; you have essentially stained the wall with cleanliness. Use the professional bottom up technique instead: start at the baseboard and work toward the ceiling. Drips from the sponge land on an already wet, clean surface below, where they float on the film of water and wipe away without marking, leaving a uniform finish with no crying lines. Mistake 2: Reaching for Harsh Cleaners Strong chemicals do not equal clean walls. Painted walls need nothing harsher than warm water with a little dish soap or a pH neutral wall cleaner. Aggressive products strip the sheen from eggshell and satin paints, leaving dull patches that look as bad as the dirt they removed. Match the cleaner to the surface and test any product on a hidden corner first. Gentle and consistent beats strong and patchy every time. Mistake 3: Wetting Dusty Baseboards First Baseboards collect everything gravity drops, and in winter that dust mixes with bathroom and kitchen humidity into a grey, paste like sludge that clings to the molding profiles. The classic error is grabbing a wet rag immediately, which turns the dust into mud that gets pushed into corners and caulking lines, where it dries into dark, hard grout. Clean baseboards in two stages: Remove the loose dust first with a vacuum brush attachment or a dry microfiber duster. Follow with a damp cloth only once the dry debris is gone, to lift the adhered grime. Use extension handles, like a flat microfiber mop turned on its side, to save your back and knees. Mistake 4: Skipping Doors and Switch Plates While walls collect environmental dust, doors and switch plates collect biological evidence. Look closely at the halo around a light switch or door handle: it is a buildup of skin oils, hand lotion, and microscopic dirt transferred by fingertips thousands of times. That oily residue is sticky, traps dust, and forms the dark smudges that signal poor hygiene, and as flu and cold season winds down these touchpoints remain prime vectors for cross contamination. Clean them with a mild degreaser to break down the lipid bonds without damaging paint or hardware, then apply a disinfectant and respect its dwell time to neutralize lingering pathogens. Give extra attention to the front door handle and bathroom switches, which see the most traffic from the outside world. The CDC’s home cleaning guidance lists light switches among the hard surfaces that benefit from regular cleaning, with disinfecting recommended when someone in the home is sick. Mistake 5: Waiting Until the Grime Is Visible The winter film on walls is largely invisible until the low spring sun rakes across it, and by then the dust has had months to bond with the paint. Waiting costs more than looks: every draft and slammed door flicks allergen laden particles off the walls and back into the air you breathe. A seasonal wash, done before the sun exposes the damage, keeps the paint vibrant and resets the room’s air quality for allergy season. If the walls feel fine but condensation has left damp patches near windows or behind furniture, deal with the moisture quickly, because Health Canada advises controlling humidity and fixing moisture problems to keep mold from taking hold on walls and fabrics. Wall Washing Mistakes and the Fixes Mistake What goes wrong Correct approach Top down washing Dirty drips stain the paint permanently Wash bottom up so drips land on wet surface Harsh cleaners Sheen stripped from eggshell and satin Mild dish soap or pH neutral wall cleaner Wet rag on dusty baseboards Dust turns to mud that cakes in corners Vacuum dry first, then damp cloth Ignoring doors and switches Oily germs spread from high touch spots Degrease, then disinfect with dwell time Waiting for visible grime Allergen film bonds and dulls the paint Seasonal bottom up wash before spring sun Frequently Asked Questions About Washing Walls Why should walls be washed from the bottom up? Drips from the sponge land on an already wet, clean lower surface and wipe away without marking, while top down washing lets dirty water soak into dry paint and leave permanent streaks. What is the safest cleaner for painted walls? Warm water with a scant amount of dish soap or a pH neutral wall cleaner; harsh chemicals strip the sheen from eggshell and satin paint and leave dull patches. Can washing walls really help with allergies? Yes, winter dust, dander, and soot bond to statically charged walls and re enter the air when disturbed, so a seasonal wash removes the reservoir and lowers the particles you breathe. What are the dark streaks above baseboard heaters? Called thermal tracking or ghosting, they are dust patterns created by temperature differences between wall studs and insulation; washing bottom up with

Don’t Ruin Your Walls: 5 Common Mistakes Homeowners Make When Washing Walls Read More »

boot tray idea

Boot Tray Cleaning: 4 Surprising Uses for a Boot Tray Beyond the Entryway

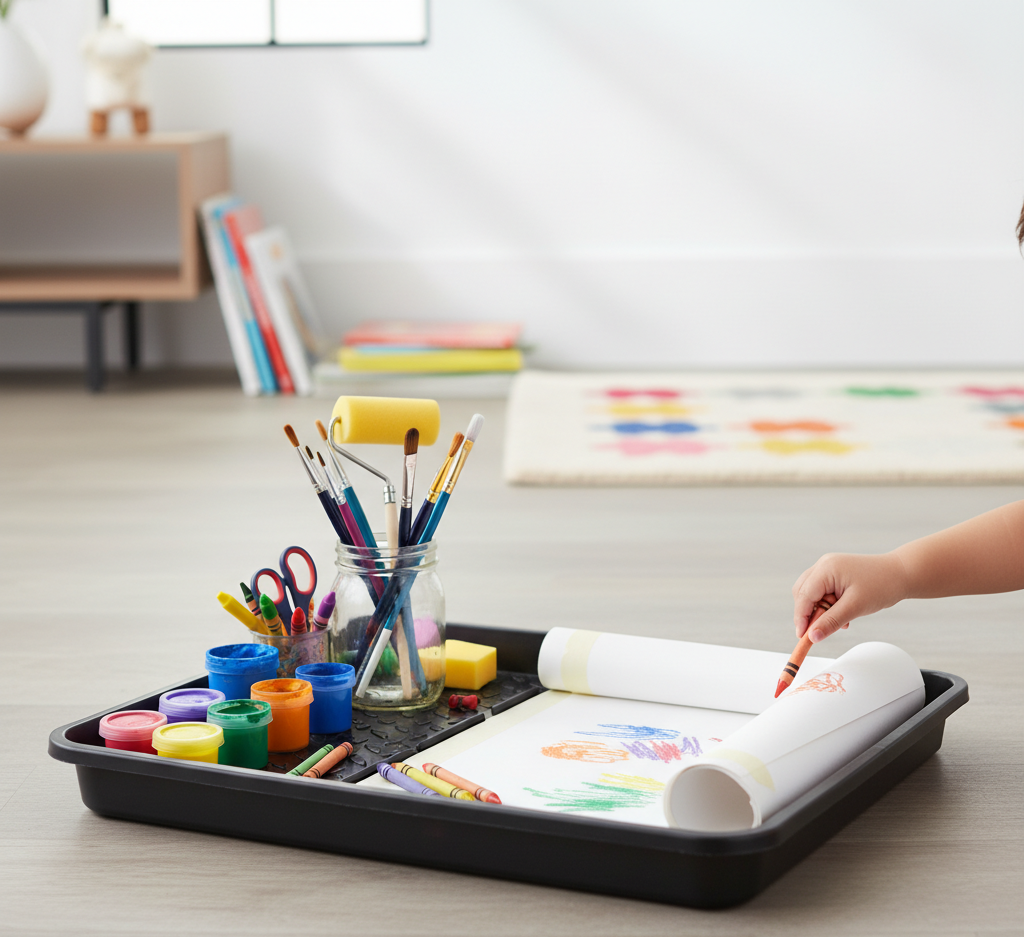
The entryway of a home is a transitional space. It is the architectural threshold where the controlled, comfortable environment of the interior meets the chaotic, elemental reality of the outdoors. In regions subject to distinct seasons-particularly the wet springs, muddy autumns, and salt-laden winters of the north-this threshold is under constant siege. Every person who steps through the door acts as a carrier, transporting water, grit, chemical de-icers, and organic decay on the soles of their footwear. If left unchecked, this debris migrates. It moves from the foyer to the living room rug, scratching hardwood finishes and embedding allergens into carpets. In this battle for household hygiene, the single most effective line of defense is often the most overlooked: the boot tray. Road Salt While often dismissed as a utilitarian slab of black plastic, the boot tray is, in reality, a piece of critical home infrastructure. It serves a specific physical function: containment. To understand the necessity of a high-quality boot tray, one must first understand the chemistry of the mess it is designed to hold. Winter slush is not merely melted snow. It is a brine solution containing calcium chloride or sodium chloride (road salt), sand, oil residues from asphalt, and dirt. This mixture is highly corrosive. If allowed to drip onto a hardwood floor, the water can seep between the boards, causing cupping and warping. As the water evaporates, it leaves behind the salt, which crystallizes into a white, alkaline crust. This crust eats into the polyurethane finish of the wood and degrades the sealants used on stone or tile grout. A boot tray acts as a moat, physically isolating this corrosive slurry from the vulnerable surfaces of the home. Tray Not all boot trays are created equal, and selecting the right vessel is key to its efficacy. The market is flooded with flimsy, low-walled plastic mats that crack under the weight of heavy winter boots or warp when exposed to temperature fluctuations. A functional tray requires rigidity and depth. The walls of the tray must be high enough-typically at least an inch-to contain a significant volume of meltwater without spilling over when the tray is nudged. The material must be impervious to salt and water. Heavy-duty rubber is the gold standard for high-traffic utility. It provides friction, preventing the tray from sliding across the floor, and it is durable enough to withstand the abrasive grit of boot soles. However, aesthetics play a significant role in the entryway. A rubber mat can look industrial and uninviting in a formal foyer. This has led to the rise of metal boot trays, typically crafted from galvanized steel, copper, or antique brass. These trays offer the same containment properties but elevate the visual tone of the space. Copper, in particular, develops a living patina over time, turning the storage of dirty shoes into a design statement. The trade-off with metal is noise (boots clanking on the surface) and the potential for corrosion if the metal is not properly sealed against the salt. River Rock One of the most persistent issues with a standard boot tray is the “soggy sole” phenomenon. When snow melts off a boot, it pools in the bottom of the tray. The boot then sits in this puddle of dirty water. This prevents the leather or fabric of the boot from drying effectively and can lead to the growth of mold or mildew on the footwear. Furthermore, if the boot is not waterproof, the water can soak back into the interior, resulting in wet socks the next morning. The solution to this is a design intervention often referred to as the river rock hack. By filling the boot tray with smooth, polished stones or river rocks, you create a drainage layer. The boots sit on top of the stones, elevated above the base of the tray. As the snow melts, the water trickles down through the gaps in the rocks and pools at the bottom, physically separated from the sole of the shoe. This allows air to circulate around the boot, speeding up the drying process. Visually, the rocks add a spa-like, organic texture to the entryway, masking the dirty water that collects beneath them. It turns a messy necessity into a decorative feature. Maintenance A common misconception is that a boot tray is a “set it and forget it” item. In reality, a neglected boot tray becomes a hazard in itself. As the water evaporates from the tray, the salt concentration increases. Eventually, you are left with a tray coated in a thick layer of toxic sludge. If this dries, it becomes airborne dust. If it overflows, it releases a concentrated brine onto the floor. Cleaning the boot tray should be a regular part of the monthly cleaning cycle, particularly in winter. This is not a task for a paper towel. The tray needs to be carefully carried to a utility sink, a bathtub, or outdoors (weather permitting). It should be emptied and scrubbed. If there is heavy salt buildup, a solution of white vinegar and warm water is required to dissolve the white mineral crust. If river rocks are used, the maintenance load increases, as the rocks themselves must be rinsed periodically to remove the slime and silt that accumulates on them. Neglecting this maintenance turns the entryway into a source of odors and humidity. Placement and Organization The effectiveness of a boot tray is entirely dependent on its placement and the behavior of the household. A tray placed three feet away from the door is useless because the user must step onto the unprotected floor to reach it. The tray must be positioned immediately adjacent to the swing of the door, creating a landing pad. Furthermore, capacity is a critical logistical calculation. A standard tray holds perhaps three pairs of adult boots. If a household has four members, or if guests frequent the home, a single tray leads to overflow. Shoes get placed on the edge of the tray or directly on the floor

Boot Tray Cleaning: 4 Surprising Uses for a Boot Tray Beyond the Entryway Read More »

Shower Cleaning Products: The Ultimate Guide to removing Hard Water Stains from Glass Shower Doors

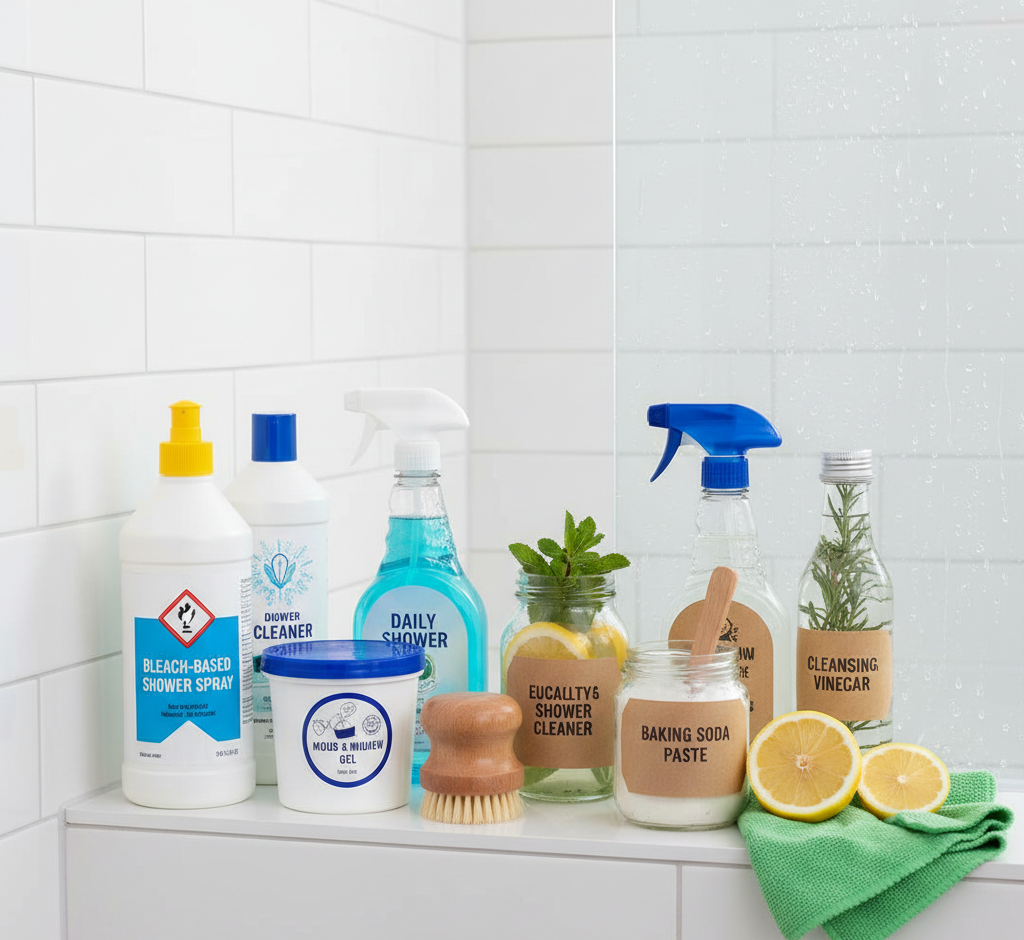
Shower Cleaning Products: How to Beat Hard Water Stains on Glass Doors The shower may look easy to clean, yet it collects some of the toughest grime in the house: steam, skin oils, soap residue, and hard-water mineral film build stubborn layers on glass doors, tile, and fixtures. Soap scum, limescale, pink bacterial film, and dark mold each need different chemistry, so the right shower cleaning products match the formula to your enemy and your surfaces without etching tile or harming your health. Know Your Enemy: Soap Scum, Limescale, Pink Slime, and Mold Two very different deposits create the white haze common in North American showers. Soap scum is a waxy salt called calcium stearate, formed when fatty acids in bar soap bind with the calcium and magnesium ions in hard water. Limescale is strictly mineral: the calcium carbonate that remains once water evaporates. Both are alkaline, so acids dissolve their mineral bonds, the core rule of shower chemistry. Biological threats differ, since the pink or orange slick near the drain is usually Serratia marcescens bacteria while black spotting on caulk and grout is mold. Acidic Descalers: The Workhorses for Glass, Tile, and Chrome Acidic descalers are the first choice for glass doors, ceramic tile, and chrome. Typical formulas rely on citric or lactic acid, while heavy-duty commercial versions use phosphoric or hydrochloric acid. Sprayed on a cloudy door, the acid turns the alkaline minerals into soluble salts that rinse away; the fizzing you see on grout is that reaction at work. The catch: acid eats natural stone. Marble, travertine, limestone, and slate etch into dull, rough patches no polish can reverse, so stone showers need neutral cleaners made for them. Bleach Products: Disinfecting Mold Without Cleaning the Scum Bleach sprays rely on sodium hypochlorite, which oxidizes the cell walls of mold and bacteria and whitens stained grout. They will not dissolve soap scum or limescale: sprayed over a thick waxy layer, the mold underneath survives, and because bleach cannot penetrate porous grout, deeper roots simply regrow within weeks. Use bleach as step two: descale with an acid cleaner, rinse thoroughly, then disinfect. As the CDC explains, properly diluted bleach kills germs on hard surfaces, and it must never be mixed with other cleaning products, since the reaction can release dangerous fumes. Abrasives, Enzymes, and Daily Sprays Three more product families round out a well-stocked shower caddy: Abrasive cleansers: creams and powders with fine particles such as feldspar or silica that grind away buildup. They excel on textured fiberglass or acrylic floors, metal marks on porcelain, and rings around the drain, though coarse grit dulls high-gloss finishes over time. Enzymatic cleaners: biological enzymes that digest body oils, skin cells, and soap residue, ideal for drains and for keeping odors away. They work slowly and need dwell time, but they are gentler on users and safe for plumbing and septic systems. Daily shower sprays: preventive formulas with surfactants and chelating agents that bind minerals so water sheets off walls and glass before it evaporates. They cannot rescue a neglected shower, but used right after every rinse they stretch the time between deep scrubs. Quick Comparison: Which Product for Which Surface Surface Best product type Key caution Glass shower doors Acidic descaler, then rinse Never use coarse abrasives that scratch glass Ceramic tile and grout Acid for scale, bleach for mold, grout brush for scrubbing Clean and rinse before disinfecting so bleach reaches the mold Marble, travertine, slate Stone-safe neutral cleaners only Standard acid products etch natural stone permanently Fiberglass and acrylic pans Mild abrasive cream on textured floors Skip powder grit that dulls glossy finishes Chrome and metal fixtures Acidic descaler for water spots Rinse well so acid does not sit on the metal Dwell Time, Ventilation, and the Never-Mix Rule Chemistry needs minutes, not seconds. Acidic and bleach products should sit for five to ten minutes so they can break molecular bonds; spray and wipe immediately and the product never works. In a small enclosed stall, fumes concentrate quickly, so run the exhaust fan and crack a window. Never mixing products is the bathroom’s deadliest rule: bleach with an ammonia-based cleaner forms chloramine gas, and bleach with vinegar or any acid forms chlorine gas, both of which can be fatal. Rinse the shower fully between products, then check the Government of Canada guidance on using household chemicals safely before you start. Do Natural Cleaners Like Vinegar and Baking Soda Measure Up? White vinegar is genuinely useful as acetic acid on mild limescale, and baking soda works as a gentle abrasive. Their limits matter: vinegar is not a registered disinfectant and will not reliably kill bacteria such as Staph, its acidity can degrade rubber seals over time, and baking soda needs heavy rinsing. For a shower neglected for months, commercial chemistry is usually needed to break bonded scale first. After that, vinegar, baking soda, and a daily squeegee habit maintain the clean, since pulling water off the glass after every use denies limescale a place to form and mold the moisture it needs. Frequently Asked Questions What is the best product for hard water stains on glass shower doors? An acidic descaler containing citric or lactic acid dissolves the calcium carbonate film that hard water stains actually are. Spray it on dry glass, let it sit for five to ten minutes, scrub gently with a non-scratch sponge, and rinse. A squeegee after every shower keeps the film from returning. Can I use the same cleaner on tile, glass, and natural stone? No. Acidic cleaners are safe for glass, ceramic tile, and chrome, but they permanently etch marble, travertine, limestone, and slate. Keep a stone-safe neutral cleaner for natural stone and read the label before spraying anything in a stone shower. Why does black mold keep coming back on my grout and caulk? Bleach whitens surface mold but cannot penetrate porous grout, so the roots survive and regrow quickly. Remove soap scum first so the bleach reaches the mold, then disinfect

Shower Cleaning Products: The Ultimate Guide to removing Hard Water Stains from Glass Shower Doors Read More »

A woman is at peace while her house is clean and organized during the winter.

Winter Organization: 5 Amazing Daily Habits to Keep Your House Organized During a Snowstorm

Winter Organization: 5 Daily Habits That Keep a Snowstorm Home Tidy When the temperature drops, the way a house works changes overnight. Windows stay shut, everyone spends more hours inside, and every trip outdoors drags in parkas, boots, and slush. Winter clothing takes roughly three times the closet volume of summer gear, so a home that felt spacious in September can feel buried by January. Keeping things organized through a snowstorm is not about occasional purges; it is about small daily habits that stop the mess before it compounds. These five routines take minutes each day and turn the entryway, kitchen, and living room back into calm, usable space. Habit 1: Give Every Winter Item a Landing Zone at the Door The entryway is where the winter battle is won or lost. A standard coat closet fails in daily use because nobody wants to fight hangers while wearing gloves, which is why coats end up draped over chairs. Install a sturdy wall-mounted rack or a heavy-duty coat stand for the gear currently in rotation and keep the closet for storage pieces, separating active items from backup ones. Beneath the coats, a high-walled boot tray is not optional: it catches the melt-off from wet boots and stops salt water from puddling on your floor. Fill the tray with river stones so boots drain and dry instead of soaking in dirty water. Finally, give each family member a labeled bin for hats, mittens, scarves, and neck warmers so the frantic morning search for a matching glove pair disappears. Habit 2: Send Blankets and Cushions Back to Their Station Winter is the season of cocooning, when extra throws, pillows, and cushions pile onto every sofa to make the house feel warm. Comfortable as they are, draped blankets create instant visual chaos. Choose a designated home for soft goods, whether a large wicker basket, a storage ottoman, or a blanket ladder, and adopt the rule that leaving the room means returning the blanket to its station. The same reset applies to slippers, chargers, and books: everything keeps a place, so the living room stays cozy instead of cluttered. Habit 3: Rotate Kitchen Gear for Soup and Stew Season Cold-weather cooking changes which tools you reach for daily. The slow cooker, roasting pan, and Dutch oven take over from the salad spinner and grill tools, so rotate your storage to match: move barbecue equipment, picnic ware, and summer small appliances to high shelves or the basement, and bring the heavy pots and stew-making appliances down to waist level where you can grab them without effort. Stocking up for storms also overloads the pantry, so use tiered risers and clear bins to keep canned goods and comfort foods visible. When you can see what you own, nothing gets pushed to the back of the shelf and forgotten until it expires. Habit 4: Clear Every Flat Surface Before Bed Grey skies and short days make visual clutter feel heavier in winter. Piles of mail, scattered toys, and crowded counters raise stress levels, and unlike summer, you cannot escape them by going outside. A clean-surfaces policy counters the gloom: counters, tables, and desks get cleared every evening so the limited winter light reflects instead of being swallowed by stuff. Rooms instantly feel larger and airier, and mornings start calmer when the kitchen island and dining table are ready for breakfast rather than buried under the previous day’s debris. Habit 5: Audit the Closet and Control Humidity Daily Winter closets reward a ruthless eye. A coat not worn in two winters, or an itchy sweater that pills, is taking space from the pieces you actually wear; donate it. Vacuum-seal bags compress the off-season summer wardrobe so sundresses and beach towels store flat under the bed, freeing the rod for bulky winter layers. Humidity is the invisible half of winter organization: dry furnace air creates static that pulls dust onto walls and electronics, so run a humidifier to settle particles where the vacuum can reach them. The flip side is condensation, since warm indoor air meeting cold glass creates damp sills where mold appears quickly. As Health Canada explains, controlling humidity and fixing moisture problems are the keys to preventing mold, and the CDC adds that mold grows wherever moisture collects, so keep heavy drapes and furniture away from windows and wipe sills down whenever you spot droplets. Your 5-Minute Evening Reset A daily reset takes less time than it sounds and prevents the weekend-long catch-up: Return boots to the tray and coats to their hooks before you take yours off. Drop hats and gloves into each family member’s bin on the way in. Return throws and pillows to the basket or ladder as you leave the living room. Clear the kitchen counters and dining table of the day’s debris. Wipe the entryway floor and window sills that show salt dust or condensation. Zone Daily habit Payoff Entryway Hang coats, tray the boots, bin the accessories No puddles, no salt trails, no lost mittens Living room Return soft goods to their station Cozy without the chaos Kitchen Keep winter cookware at hand, pantry visible Faster meals, less food waste Whole house Clear surfaces and manage humidity Brighter rooms, less dust and mold risk Frequently Asked Questions How do I keep the entryway from becoming a disaster during a snowstorm? Set up a coat rack for daily-use outerwear, a boot tray with river stones for wet footwear, and a labeled bin per person for small accessories. Add a strict no-shoes-past-the-mat rule, then spend five minutes each evening returning everything to those zones. What is the best way to store winter coats and boots in a small home? Store off-season items in vacuum-seal bags under beds or on high shelves, and keep only current-season gear on the main rod. Bulky winter items in active rotation belong on an open rack, not jammed into a closet where they wrinkle and get abandoned on chairs. Should I run a humidifier in winter, and

Winter Organization: 5 Amazing Daily Habits to Keep Your House Organized During a Snowstorm Read More »

several different brooms

Let’s Compare 6 Different Types of Brooms so You Know The Best Ways To Use Them.

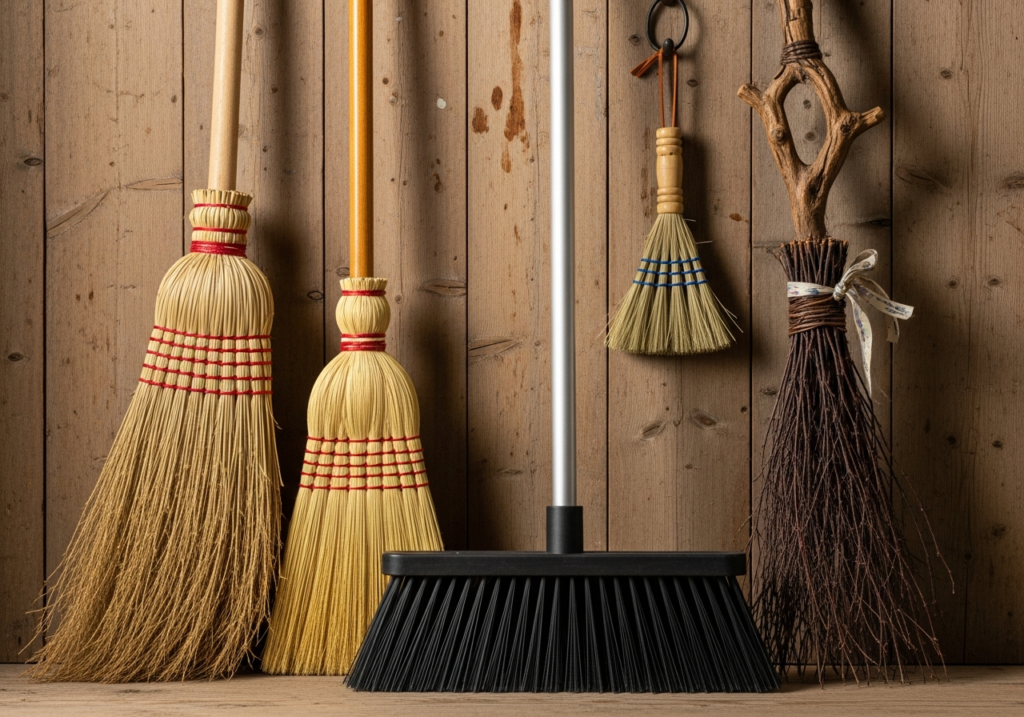
The humble broom is often the most underrated tool in the cleaning arsenal. To the uninitiated, it is simply a bundle of fibers attached to a stick, a primitive device designed to push debris from one location to another. However, this oversimplification is the primary cause of inefficient cleaning, damaged flooring, and unnecessary physical fatigue. The evolution of this implement has diverged into a complex taxonomy of shapes, materials, and specialized functions. Just as a carpenter would not use a sledgehammer to drive a finishing nail, a homeowner should not use a stiff straw sweeper to clean a polished hardwood floor. Understanding the mechanics of these tools-the stiffness of the bristle, the angle of the head, and the composition of the fibers-is essential for mastering the art of the sweep. Using the correct instrument transforms a chore into a seamless maintenance routine, ensuring that dirt is actually removed rather than simply redistributed into the air or the gaps between floorboards. Corn Broom The most recognizable silhouette in the world of sweeping is the traditional corn broom. Crafted from the natural fibers of the sorghum plant, this tool is a relic of agricultural history that has survived into the modern era due to its sheer durability. It is characterized by its stiffness and its rough texture. It is a heavy-duty instrument designed for high-friction environments. Its domain is the outdoors-the concrete patio, the sidewalk, the garage floor, and the barn. The rigid, straw-like bristles are strong enough to move heavy debris like wet leaves, gravel, and snow. They act as a rake and a sweeper combined. However, bringing this natural fiber tool indoors is almost always a mistake. The stiff straws are too abrasive for delicate surfaces like laminate or polished hardwood, potentially leaving micro-scratches in the finish. Furthermore, they are notorious for shedding their own bristles, adding to the mess they are supposed to be cleaning. They lack the fine, split ends required to trap microscopic dust, meaning they push the big rocks while leaving the fine silt behind. Synthetic Angle Broom For the interior of the home, particularly the kitchen and the dining room, the synthetic angle broom is the superior choice. These are typically made from plastic or nylon fibers. The genius of this design lies in its geometry. The head is cut on a diagonal bias, creating a sharp point at one end. This design acknowledges the architectural reality of a room: corners exist. A flat-headed sweeper struggles to reach the dust bunnies trapped where the baseboard meets the cabinet, but an angled head can be maneuvered into tight crevices and under the lips of appliances with precision. The bristles on these tools are usually “flagged.” If you look closely at the tips of the plastic strands, you will see they are frayed or split into tiny hairs. This flagging increases the surface area exponentially, creating a dense web that traps fine flour, pet dander, and dust particles. This implement is designed for the “pull” stroke, gathering light debris gently without kicking it into the air. Push broom When the task involves large, open spaces such as basements, driveways, or warehouses, the standard upright broom becomes inefficient. The biomechanics of the sweeping motion-twisting the waist and pulling the arm across the body-is tiring over large areas. This is where the push brush dominates. This tool features a wide, rectangular block head, ranging from eighteen to thirty-six inches, attached to a handle at an angle. The motion is a forward thrust, utilizing the power of the legs and the body’s weight rather than the lower back. These wide sweepers come in a variety of bristle textures. “Fine” versions have soft, dense fibers for moving dust on smooth concrete. “Coarse” versions have thick, stiff bristles for moving heavy mulch or rocks on asphalt. Many modern iterations utilize a dual-bristle system: a stiff inner core to move heavy objects and a soft outer border to catch the fine dust, providing a comprehensive clean in a single pass. Rubber Broom A relatively modern innovation that addresses a specific biological nuisance is the rubber broom. For households with pets, this device is nothing short of miraculous. Traditional bristle tools are ineffective against pet hair; the static electricity generated by the sweeping motion causes the hair to fly away or float over the bristles. A rubber sweeper features a head made of molded rubber nubbins or thick, flexible fingers. When dragged across a carpet or a hard floor, the rubber creates friction and a static charge that acts as a magnet for fur. It pulls hair out of the weave of a rug that a vacuum cleaner might miss. Furthermore, the head often includes a squeegee edge, making it a dual-purpose tool for cleaning up liquid spills or scrubbing a tile floor with soapy water. It is a hygienic option as well, as the rubber head can be easily washed and sanitized, unlike a straw sweeper which absorbs bacteria. Whisk Broom There is also the specialized category of the whisk broom. This is essentially a handheld version of the traditional corn sweeper or a stiff synthetic brush. It lacks a long handle, forcing the user to get close to the work. Its utility is found in the small, localized mess. It is the tool for the staircase, the upholstery of the car, or the spilled potting soil on a workbench. Because the user is closer to the debris, they can apply more directed pressure to dislodge stubborn dirt. This handheld device often pairs with a dustpan, forming a unit that is essential for “spot cleaning” rather than whole-room maintenance. “Dust Mop” The “dust mop” is technically a cousin of the broom, but it deserves inclusion in the conversation regarding dry floor cleaning. Unlike a sweeper that uses bristles to flick dirt, a dust mop uses a flat head covered in cotton or microfiber loops to glide over the surface. This is the tool of choice for large expanses of gymnasium floors, hospitals, and long hallways. It does not lift heavy

Let’s Compare 6 Different Types of Brooms so You Know The Best Ways To Use Them. Read More »

Valentine's Day and cleaning home

Valentine’s Day: 5 Essential Cleaning Tasks You Should do Before February 14th

Valentine’s Day is a holiday that carries a heavy weight of expectation. We are culturally conditioned to view February 14th as a litmus test for our relationships, a day defined by grand gestures, expensive dinners, and tangible gifts. The traditional narrative involves escaping the home-fleeing to a high-end restaurant or a boutique hotel-to find romance. However, there is a shifting trend toward “staying in.” Whether driven by a desire for privacy, the comfort of home, or simply the exhaustion of navigating crowded venues, many couples are choosing to celebrate within their own four walls. This shift changes the dynamic of the holiday entirely. When the home becomes the venue, the state of the home becomes the atmosphere. You cannot create a romantic, intimate vibe in a space that is cluttered, dusty, or chaotic. In this context, cleanliness is not just a chore; it is the foundation of romance. It is the invisible architecture that allows connection to happen without distraction. Peace of Mind To understand why a clean home is the ultimate aphrodisiac, one must look at the psychology of relaxation. It is biologically difficult to be intimate or relaxed when the brain is processing “visual noise.” Clutter, dirty dishes, and laundry piles serve as visual cues for work. They remind us of the to-do list. When you sit on the sofa to enjoy a glass of wine with your partner, but your eye catches a dust bunny rolling across the floor or a stack of bills on the coffee table, your cortisol levels spike. You are pulled out of the moment and back into the grind of daily management. A pristine home silences this noise. It creates a neutral, serene canvas where the only focus is on the person sitting next to you. It signals that the “work” of the household is paused, granting permission for the “play” of the relationship to begin. 1.Bedroom The bedroom is the sanctuary of Valentine’s Day, yet it is often the room that suffers the most from “lived-in” syndrome. We tend to let the master bedroom become a catch-all for the things we don’t want guests to see in the living room. Piles of clothes on the chair, a nightstand crowded with charging cables and water glasses, and bedding that has lost its crispness all conspire to kill the mood. Transforming this space requires a hotel-level approach to detail. It starts with the bed itself. Laundering the sheets, duvet cover, and pillowcases is non-negotiable. There is a tactile luxury to sliding into a bed that smells fresh and feels crisp. Beyond the linens, the floors need to be cleared. Vacuuming under the bed-a place where dust accumulates undisturbed for months-improves the air quality of the room, removing that subtle, stale scent that often lingers in bedrooms. Clearing the surfaces of the dresser and nightstands allows for the addition of mood lighting, such as candles or a dimmer lamp, without creating a fire hazard or looking cluttered. 2.Bathroom The bathroom creates a different set of challenges. If you are planning a romantic bath or simply want to get ready for the evening in a pleasant environment, the bathroom must be impeccable. Nothing destroys a romantic illusion faster than a ring around the tub, a toothpaste-splattered mirror, or a trash can that hasn’t been emptied. A “spa-level” clean involves scrubbing the grout to remove any mildew, polishing the chrome fixtures until they gleam, and ensuring that the towels are fluffy and fresh. It is about removing the evidence of daily biological maintenance to create a space of pampering. The sensory experience of the bathroom-the smell of soap rather than damp towels, the shine of the tiles-sets the tone for self-care and mutual appreciation. 3. Kitchen and Dining Area For those planning a romantic dinner at home, the kitchen and dining area become the stage. Cooking a meal together can be incredibly romantic, but cooking in a dirty kitchen is stressful. If the sink is full of the morning’s coffee mugs and the stove is covered in last night’s grease splatters, the cooking process becomes a battle against the mess. A pre-Valentine’s deep clean of the kitchen ensures that you have a clean slate. It involves degreasing the stovetop, wiping down the cabinet fronts, and ensuring the dishwasher is empty and ready to receive the dirty dishes as you cook. This logistical preparation allows the evening to flow smoothly. Furthermore, the dining table needs to be reclaimed. In many homes, the table serves as a desk, a mail sorting station, or a laundry folding area. Clearing it completely and polishing the surface allows you to set the table properly, perhaps with a tablecloth, candles, and the “good” china. It signals that this meal is different; it is an occasion. 4.Lighting and Scent Lighting and scent are the final touches of a romantic atmosphere, but they rely heavily on cleanliness to be effective. You cannot light a room beautifully if the light bulbs are coated in dust or if the glass shades are filmy. Dust diffuses light, making a room feel dimmer and dingier. Wiping down light fixtures and cleaning windows allows for a sparkle that mimics a high-end venue. Similarly, scent is powerful. Many people try to mask household odors with heavy perfumes or scented candles. However, the smell of “Vanilla Cupcake” layered over the smell of a full garbage bin or a musty carpet creates a cloying, unpleasant aroma. True freshness comes from removing the source of the odor first. Deep cleaning the carpets, taking out the trash, and scrubbing the sink drains ensures that the air is neutral. Once the air is clean, the subtle scent of fresh flowers or a high-quality candle can actually shine without competing with the funk of the house. Acts of Service There is also the concept of “Acts of Service” as a love language. For many people, seeing their partner scrubbing the floor or taking the initiative to deep clean the bathroom is a profound expression of

Valentine’s Day: 5 Essential Cleaning Tasks You Should do Before February 14th Read More »

winter work

February Checklist: 5 Cleaning Tasks That are Actually Easier and More Efficient in Winter

February Checklist: 5 Cleaning Tasks That Are Easier in Winter February is the shortest month but often the longest feeling one. January motivation has faded, the furnace has run non-stop, and boots have dragged road salt through the door. This calls for defensive cleaning, not spring optimism: a routine that fights winter’s specific damage while the problems are still fresh. These five February tasks protect your floors, your air, and your appliances until the thaw. Stock these supplies before you start: White vinegar for neutralizing entryway salt and descaling the humidifier. A fresh furnace filter and a vacuum hose for vents and ducts. Degreaser and baking soda paste for kitchen grease and the oven. A duct brush for the dryer vent and soapy water for lampshades. 1. Neutralize Road Salt on Entryway Floors By February the doormats are saturated and a chalky white haze coats the hardwood and tile near the door. That residue is not plain dirt: it is rock salt or calcium chloride from plowed streets, alkaline and hygroscopic salts that pull moisture from the air and from wood flooring. Left alone, the brine eats through polyurethane finish and tile grout sealant, leaving permanent stains and pitting. A wet mop only spreads the salt, so neutralize it with warm water and white vinegar applied damp rather than soaking, which dissolves the mineral bonds without waterlogging the wood. Empty the boot trays as well. 2. Refresh the Air: Filters, Vents, and Humidifiers Canadian homes recycle the same dust, pet dander, and cooking particles all winter. The furnace filter is now clogged, so replace it to protect airflow and the motor. Pull vent covers and vacuum the ducts with a hose attachment so dust stops blowing back in when the heat cycles on. The furnace also dries the air, so most homes run a humidifier, and one misting since December may be breeding pink bacterial biofilm that irritates lungs when aerosolized; descale the tank weekly with vinegar and disinfect it so the moisture you add stays clean. Condensation is the flip side: warm air meets freezing glass and black mold appears on window sills. Wipe dark growth with a bleach solution and keep the area dry, because as Health Canada notes, indoor air quality suffers when dust, mold, and other contaminants build up in a closed-up home. The CDC’s home cleaning guidance is clear that you clean first and disinfect when needed. 3. Strip and Reset the Bedroom and Bathroom Valentine’s Day makes mid-February the perfect moment to treat the master suite to guest-level detail. Nobody spends more hours in bed than in deep winter, and the mattress collects sweat and dead skin cells. Strip everything, including the mattress protector and duvet, and wash linens on hot. While they run, vacuum the mattress to pull out dust mites and allergens, and rotate it to prevent sagging. In the ensuite, long hot baths have layered soap scum and oil on the tub while mineral deposits built up around the faucet. A restorative clean now, grout lines included, turns the bathroom into a sanctuary. 4. Degrease the Kitchen and Tackle the Oven Winter menus lean heavy: roasts, stews, and fried comfort food throw airborne grease onto cabinet tops, the refrigerator, and the range hood, where it mixes with dust into a sticky gunk that hardens by spring. Wipe those high surfaces with a degreaser now while the layer is thin. The oven needs the same attention: holiday roasting has left the interior glass opaque with carbonized grease that smells worse in a house that cannot open its windows. Skip the self-clean cycle, since its fumes need ventilation you cannot provide at minus twenty; use a baking soda paste for a manual clean that is safe for indoor air quality. 5. Clear the Dryer Vent and Brighten the Lamps Bulkier winter fabrics, fleece, wool, and heavy cottons shed more lint than summer loads, and dry air adds static, so a clogged dryer vent is a genuine fire hazard. Disconnect the duct and vacuum the lint trap and exhaust pipe now; a blocked vent also extends drying times and wastes electricity. While behind the dryer, clear the dust gathered around the warm motor. Then tackle lighting: in the darkest month of the year, dust on bulbs and shades dims fixtures more than you would think. Wipe cool bulbs, wash glass shades in warm soapy water, and clean the tops of ceiling fan blades so spring’s first use does not rain grey clumps onto your furniture. Task Why February makes it easier Key tool Neutralize entryway salt Residue is fresh instead of baked in Warm water and white vinegar Replace filter, clean vents, descale humidifier Clogged system is working hardest now Vacuum hose and vinegar soak Strip bed and clean tub Valentine’s Day motivation for the master suite Mattress vacuum and descaling cleaner Degrease kitchen and oven Grease layer is still soft, not hardened Degreaser and baking soda paste Vacuum dryer vent and dust lamps Lint and static are at their seasonal peak Duct brush and soapy water Also Clear the Hibernation Zones February is when recycling overflows, the donation pile grows in the bedroom corner, and broken electronics gather on the desk because nobody wants to brave the cold. Since you spend almost all your time indoors, that clutter weighs on your mood more heavily than it would in July. Take the recycling out, drop off donations, and sort the winter gear flung into the closet to open up floor space and restore order while you wait out the cold. Frequently Asked Questions Why is vinegar better than a mop for winter salt on hardwood? Salt is alkaline, so a wet mop only spreads it. A damp mop with warm water and white vinegar neutralizes the salt chemically and lifts it without soaking the wood. Keep the mop damp and dry the floor promptly. How often should I clean my humidifier in winter? Descale and disinfect the tank weekly while the humidifier runs

February Checklist: 5 Cleaning Tasks That are Actually Easier and More Efficient in Winter Read More »

Sticker Removal

Sticker Removal: 5 Expert Tips For Removing Stickers From Different Types of Surfaces

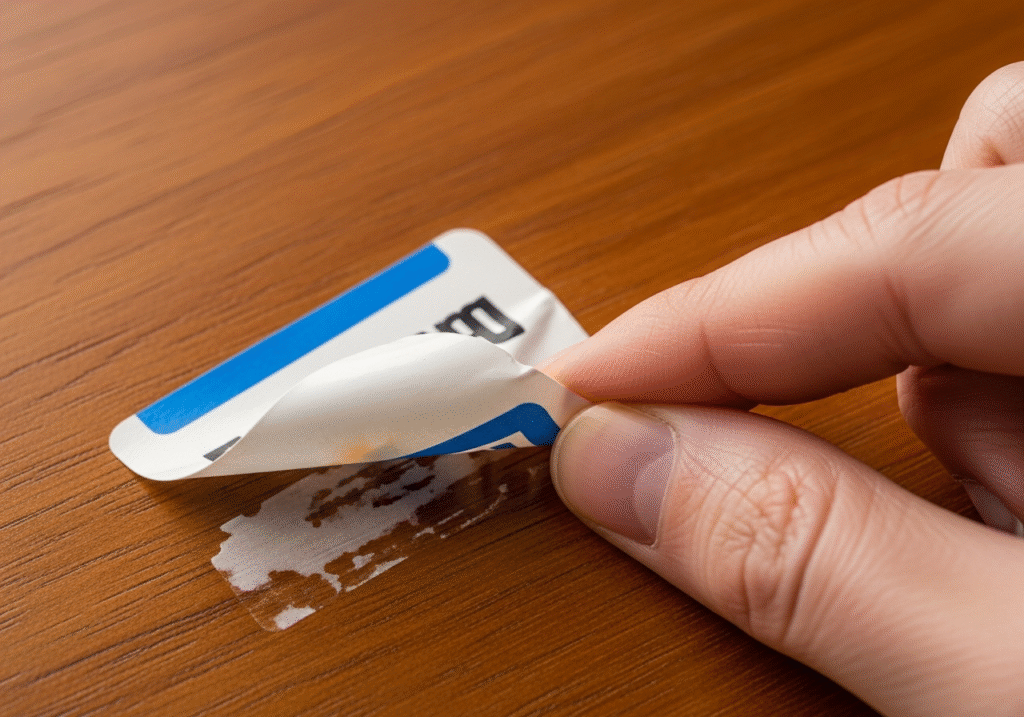
Sticker Removal: 5 Expert Tips for Every Type of Surface Nothing kills the joy of a new purchase like the price tag glued to its face. Peel it and you get one of two disasters: the paper tears and leaves a fuzzy white layer, or the sticker comes off but deposits gummy residue that turns grey within days. Adhesives are polymers that bond to a surface, so the winning method softens, dissolves, or lifts that bond without harming what sits underneath. Match the technique to the material and any sticker surrenders without a scratch. Assemble your sticker removal kit: Hair dryer for warming labels on glass, ceramic, metal, and car paint. Cooking oil or isopropyl alcohol for dissolving gummy adhesive. Plastic scraper or plastic razor blades for lifting laminated labels. White vinegar for sun-baked paper labels and price tags. Duct tape and a rubber eraser for delicate surfaces like paper and shoe soles. Tip 1: Start with Heat on Glass, Ceramic, and Metal Resist clawing at the corner: picking separates the paper from the adhesive and leaves exposed glue that is harder to shift. Instead, warm the sticker with a hair dryer on medium heat for about a minute. Heat softens the adhesive polymer so it lets go of the surface while clinging to the label backing; lift a corner slowly and the sticker often peels away as one clean sheet. Heat is the safest first move on hard non-porous items like glass and ceramic, and essential for car decals and laptop lids where solvents could damage paint or electronics. Tip 2: Dissolve Stubborn Glue with Oil or Alcohol Most sticker glues are lipid-based, so cooking oil or even peanut butter loosens them: like dissolves like. Score the sticker so oil penetrates, apply a layer, and wait about twenty minutes; the fats dilute the adhesive until it slides off, and soap and water remove the film. Oil is safe for glass and plastics, but never on unsealed wood or porous stone, which soak it up and stain. Isopropyl alcohol breaks adhesive bonds that oil cannot touch and evaporates instantly, so it is safe for electronics when applied to a cloth rather than sprayed. Alcohol is a paint thinner, though, and can strip painted or varnished finishes, so spot-test in a hidden corner first. Tip 3: Bring Out a Plastic Scraper for Laminated Labels Waterproof plastic-coated labels shrug off oil, water, and vinegar from the top, so attack from the edges. A plastic razor blade or scraper is the right tool: harder than the adhesive but softer than the surface beneath, it slips under the rim and lifts without gouging. Metal blades scratch glass and dig into plastic; they belong only on wet glass at a shallow angle, with a steady hand. For many stubborn labels on jars or new appliances, a set of plastic scrapers pays for itself. Tip 4: Use Vinegar, Acetone, and Tape for the Tough Cases White vinegar: soak a paper towel and lay it over the sticker for thirty minutes to rehydrate the paper and soften sun-baked glue, ideal for price tags on glassware and mugs. Acetone, usually sold as nail polish remover, dissolves almost any adhesive in seconds, but treat it as the nuclear option: it melts plastic on contact, so keep it off storage bins and eyeglass frames. Use it only on glass, unpainted metal, or unfinished ceramic. For the thin dark smear on delicate items like book covers, skip liquids: wrap duct tape around your fingers, sticky side out, and dab until the residue transfers off. Tip 5: Match Your Method to Wood, Shoe Soles, and Car Paint On varnished wood, heat can damage the finish, oil stains the grain, alcohol dissolves lacquer, and water raises the grain, so use mineral spirits or a furniture cleaner on a soft cloth; on raw unfinished wood, fine-grit sandpaper may be the only stain-free option. On new shoe soles, skip moisture and roll residue off with a rubber eraser or crepe block: friction balls the adhesive up for easy brushing. On car paint, never touch the clear coat with a razor blade: soften dealership decals with a hair dryer, lift with a plastic tool, and treat residue with a clay bar or an automotive adhesive remover, since household solvents permanently cloud the finish. Sticker Removal Method at a Glance Surface Best method Never use Glass, ceramic, metal Heat, then oil or vinegar soak Metal scrapers on dry glass Plastic and electronics Hair dryer, isopropyl alcohol on a cloth Acetone, which melts plastic Varnished wood Mineral spirits or furniture cleaner Oil, heat, or alcohol on the finish Shoe soles and leather Rubber eraser or crepe block Liquids that stain the upper Car paint Hair dryer, plastic tool, clay bar Razor blades and nail polish remover Paper and book covers Duct tape dabbing Any liquid or heat What about Ghost Marks After the Sticker Is Gone? That ghost is usually sun fade: the area under the sticker stayed protected while the surrounding surface yellowed, and on wood or fabric the difference is often permanent. On glass or plastic, the adhesive may have reacted with the material, and a mild polishing compound or baking soda paste can blend the mark away. Whenever you work with solvents or removers, follow the Government of Canada’s guidance on using household chemicals safely, and in a small room or closed garage, ventilate and take fresh-air breaks the way Health Canada advises for solvent-based products. Frequently Asked Questions What is the safest way to remove a sticker from a laptop? Warm the sticker with a hair dryer for a minute, lift an edge slowly, then rub residue gently with an alcohol-dampened cloth. Never spray liquid on the device or use acetone, which melts plastic shells. How do I get sticker residue off glass without scratching it? Heat the sticker, remove what you can, and soak residue with cooking oil or hot vinegar for twenty to thirty minutes. A plastic scraper lifts what remains,

Sticker Removal: 5 Expert Tips For Removing Stickers From Different Types of Surfaces Read More »